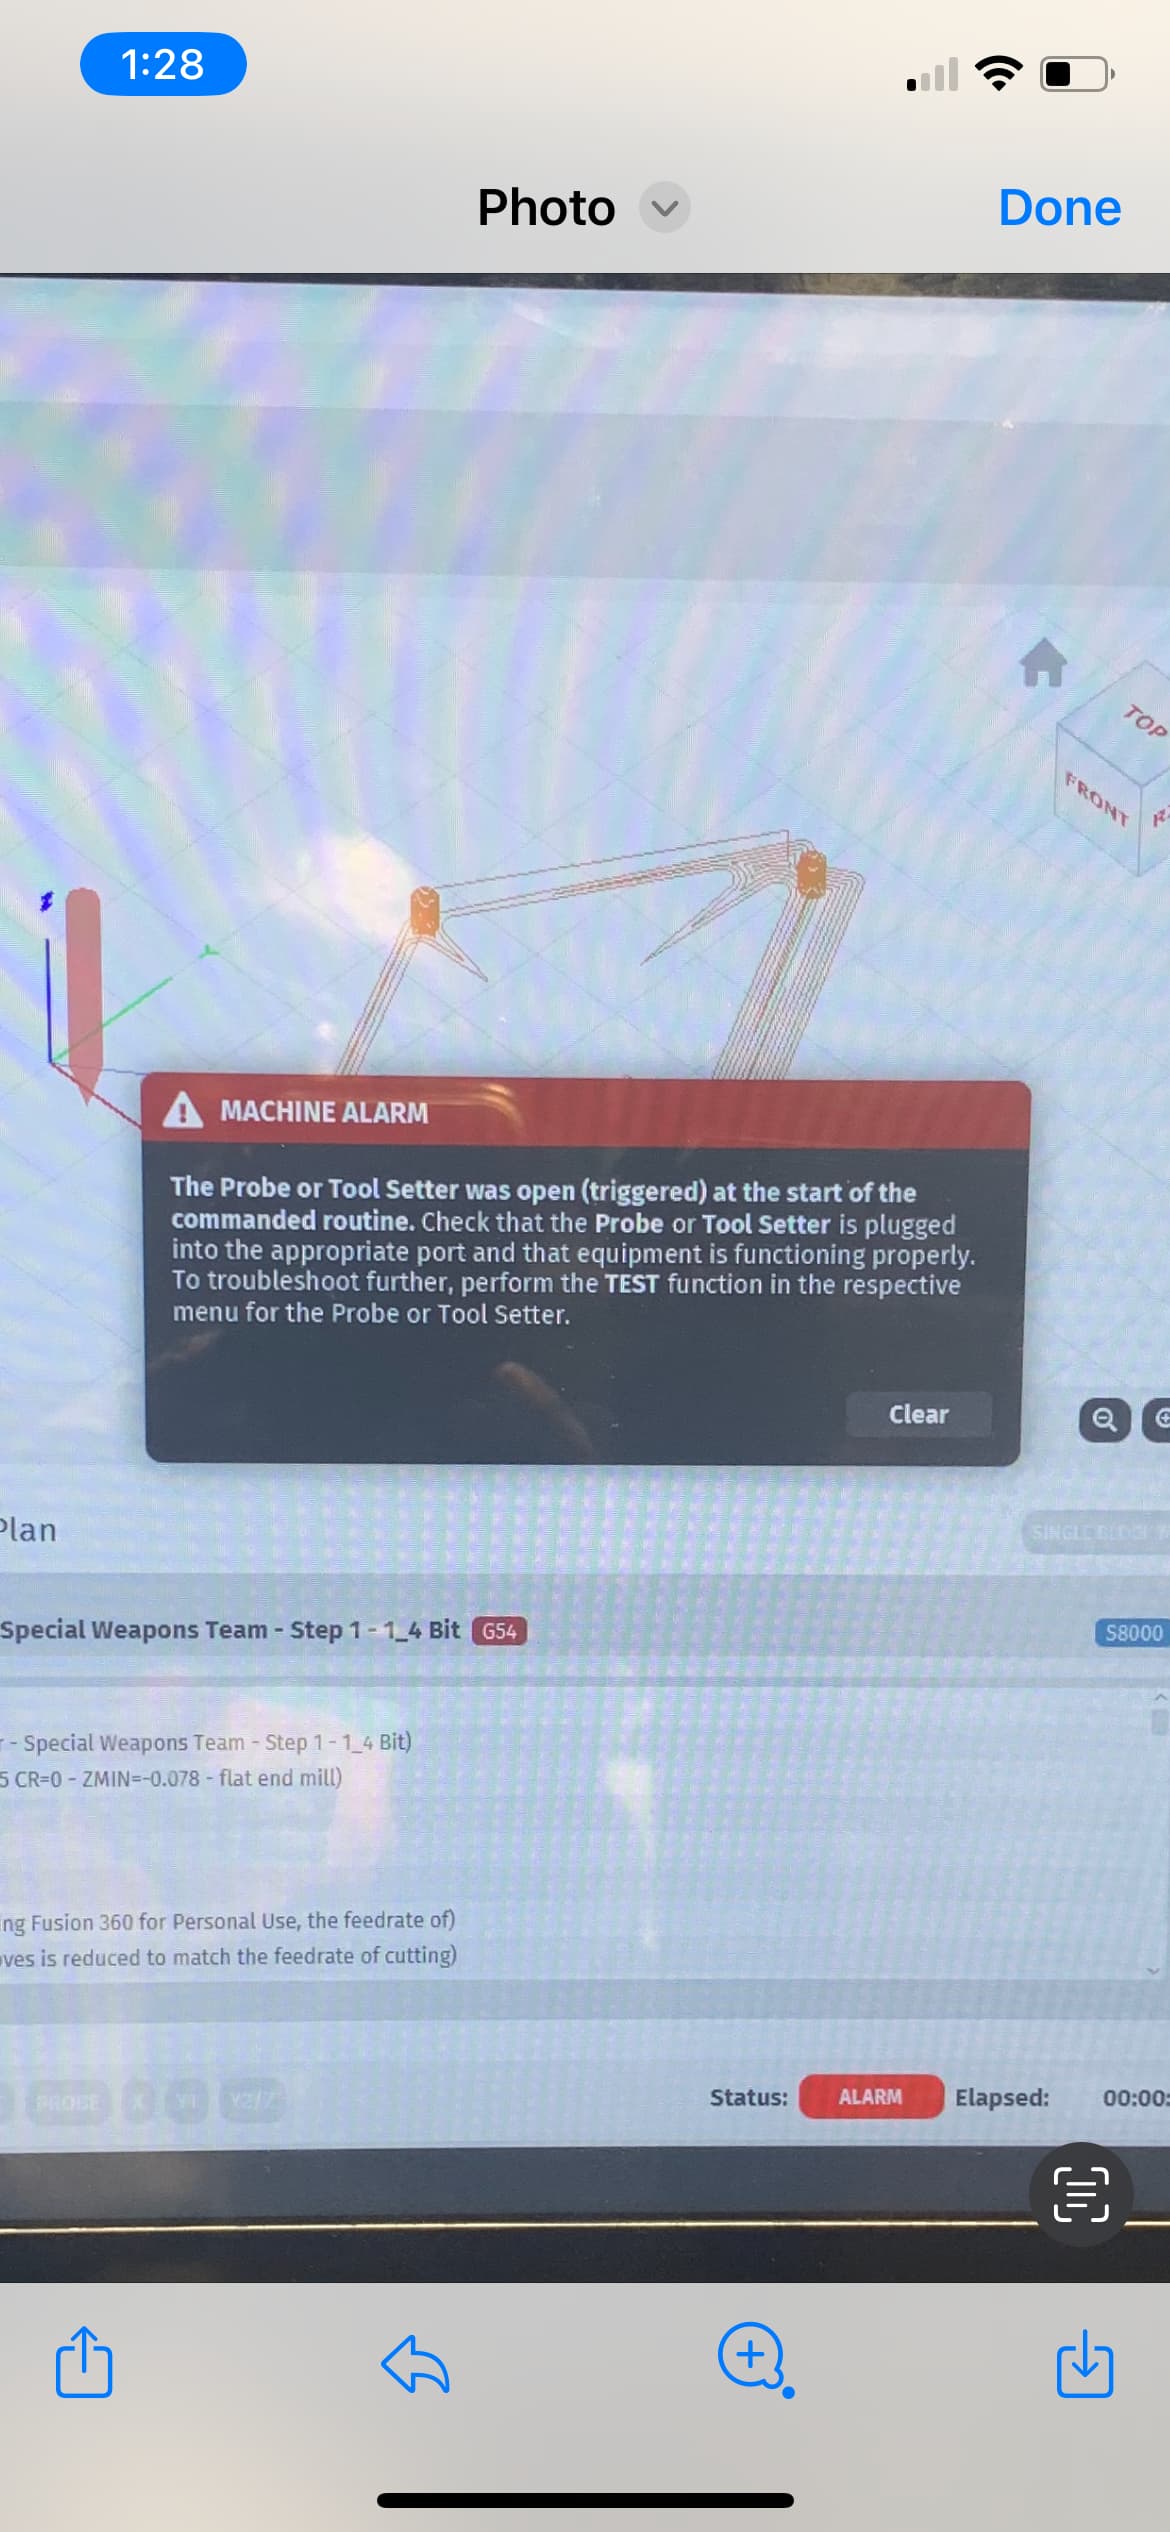
Have been having issues with the touch probe and tool setter. When doing the material probing we are getting the error “the probe or tool setter was open at the start of the command routine”. Also, when doing the tool touch off it seems like sporadically it will go up too much after doing the initial touch off and when it tries to come down it errors out with “the probe or tool setter was not triggered within the programmed travel limit. Both routines have been working for us and know have been really buggy

Responded on the Facebook support group but I will post here as well.
It’s looking like 2 separate issues. The first with your tool setter is that after the initial height sense the switch in the tool setter is staying open for a split second causing the tool to raise up unnecessarily high. Usually this is caused by the black waterproof rubber boot that sits around the platen. If it counteracts the internal spring pressure inside the tool setter it can stay open. I’d recommend removing this boot and putting it back on and cycle the tool setter by hand and just make sure it opens and latches properly as evidenced by the indicator light. For your probing issue, what I would recommend is locating the 3 slotted nuts on the bottom of the probe. Using a flat blade screw driver, loosing these 3 nuts. Then push the stylus from side to side to visually center the stylus in the center of the hole. Next, one by one very lightly snug the 3 nuts up until you meet a slight resistance in the threads without overtightening them. This should center the probe and remove any lash that could cause your issue. You can push and pull on the stylus tip and make sure that you don’t feel any lash by hand. You will need to readjust the stainless radial set screws in the probe to set the run out again but I would do a couple routines and make sure it’s working properly!
1 Like
My probe has now done the same thing so after spending hours dial indicating the stylus I get to remove these screws and destroy everything that I did to indicate this in.
Can anyone tell me why the test light comes on after each probe action you do?
You spent hours dialing in the probe runout?! I’d hate to see your reaction when you break a stylus.
The light is an indication that the probe (touch or tool setter) is actuated. The first touch is a roughing detection and the second is a fine measurement.
2 Likes
Well once I figured out that the tip was over .200" out of center from the factory I started to try and adjust it but then figured out that the adjusting screws were never sent from the factory so I had to go buy some. Then once I go them installed I determined that I could not make any huge adjustments so I had to read through and hours worth of threads because there just isn’t enough instruction how to do it. Then once I figured out all the top screws had to be loosened I got it with in a tenth and started to tighten the top screws and that through it back out around .010" so yeah a few hours would probably be an understatement.
Just out of curiosity why would one break a stylus unless this high tech Chinese probe stopped working right in the middle of a probing action?
I should have been more clear on my question, Why does the light “Test” in cutcontrol come on after each probing action. Not the light on the actual probe.
1 Like
I have a had similar issues without being able to fix it. My touch probe light will come on when I jog in the y directions too.
Has anyone here found a halfway decent probe and tool setter that is fairly repeatable and wont break the bank?
1 Like