Not sure where to post this!

I’m new to all of this!
Can anyone help with a question about fusion 360?

I have googled and can not come up with the answer.

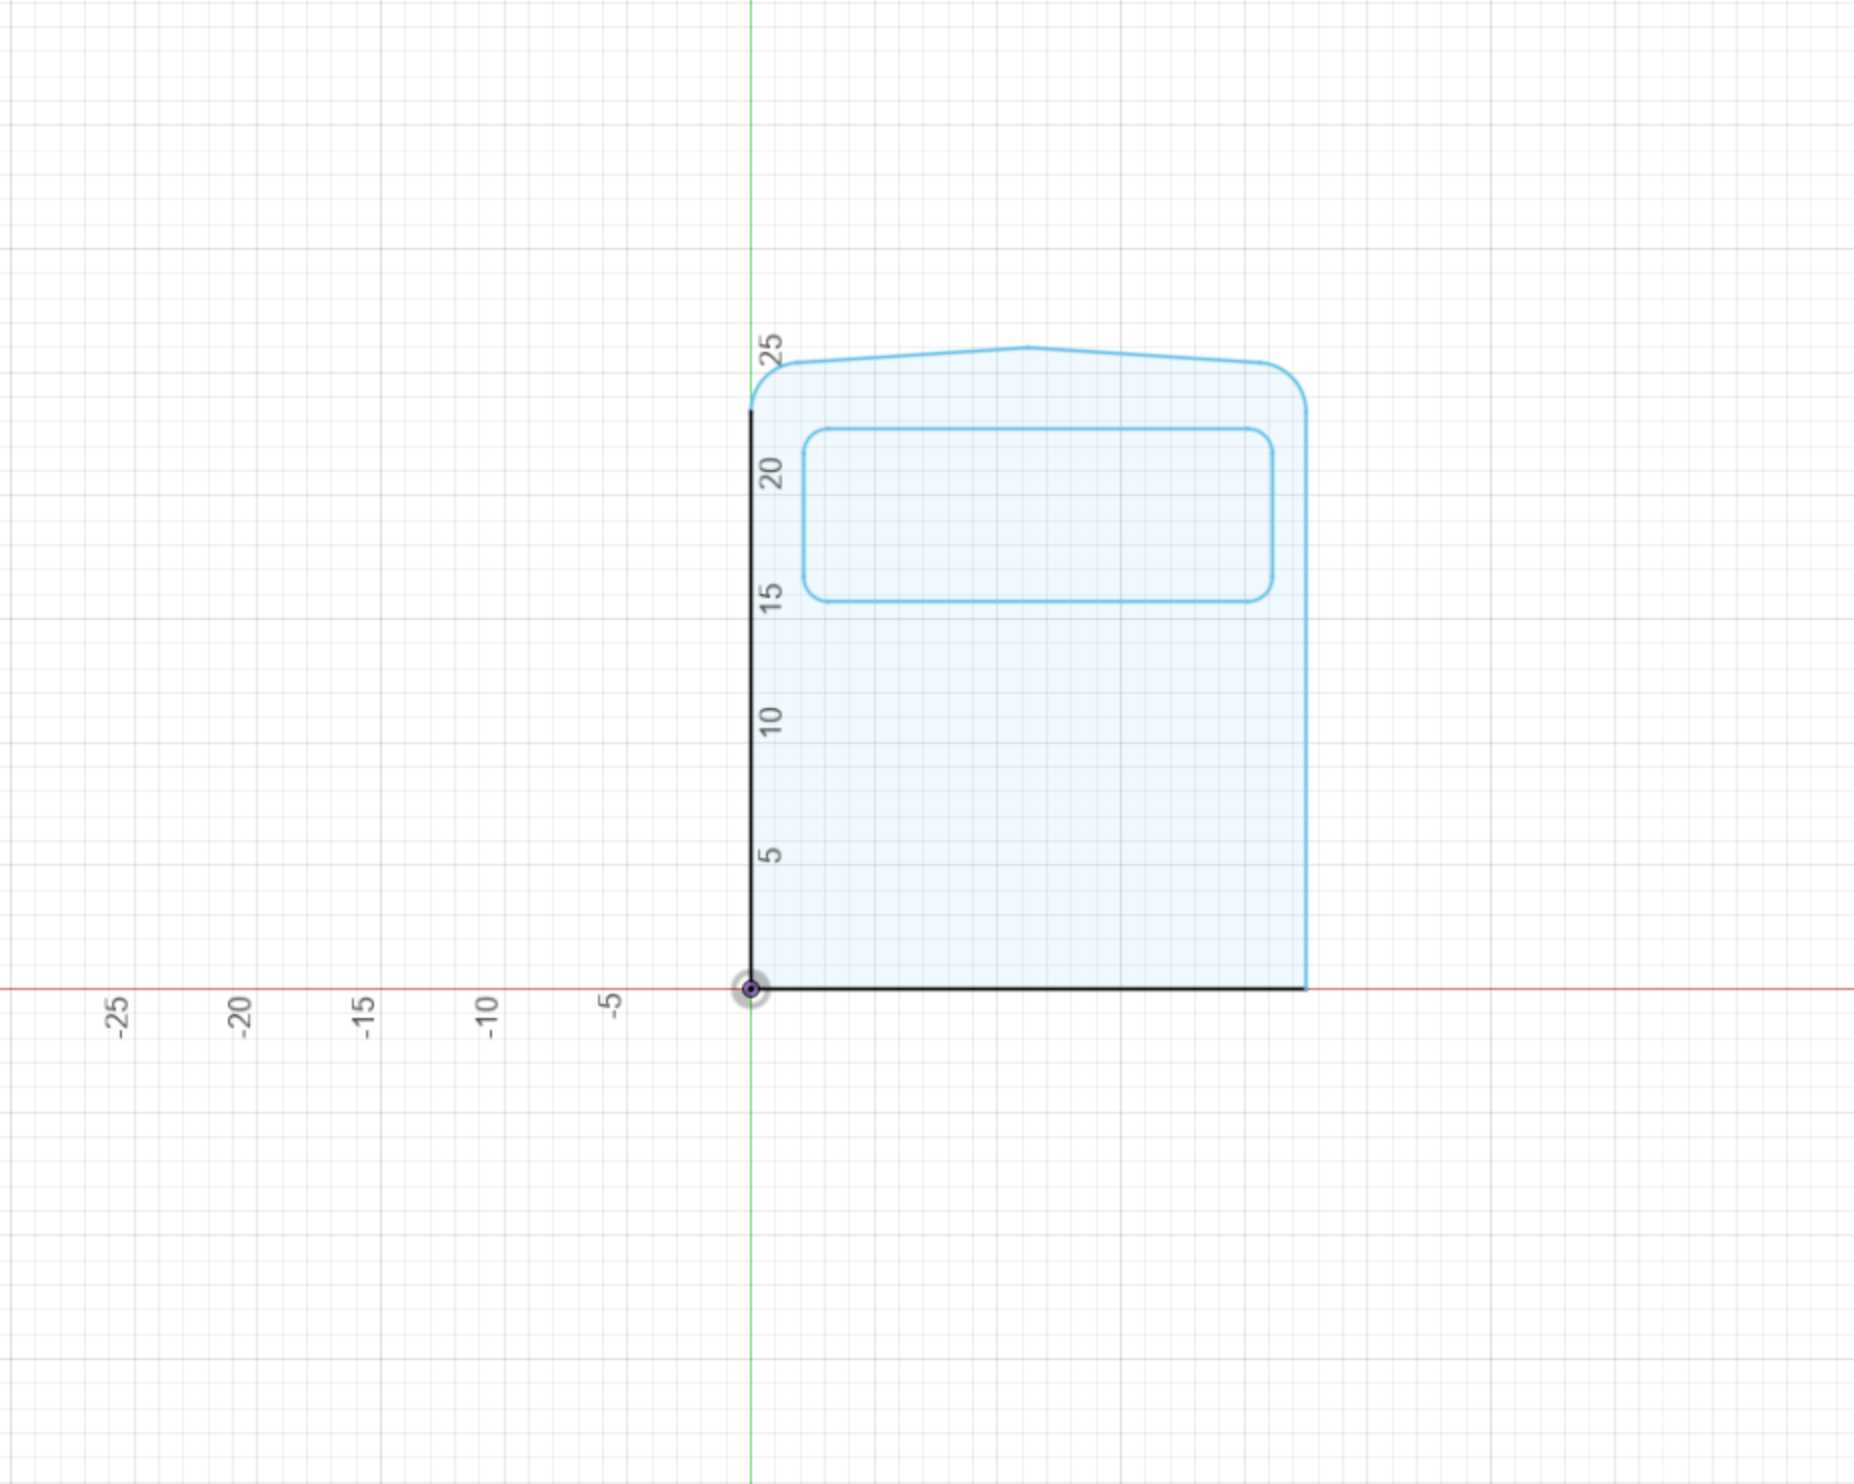
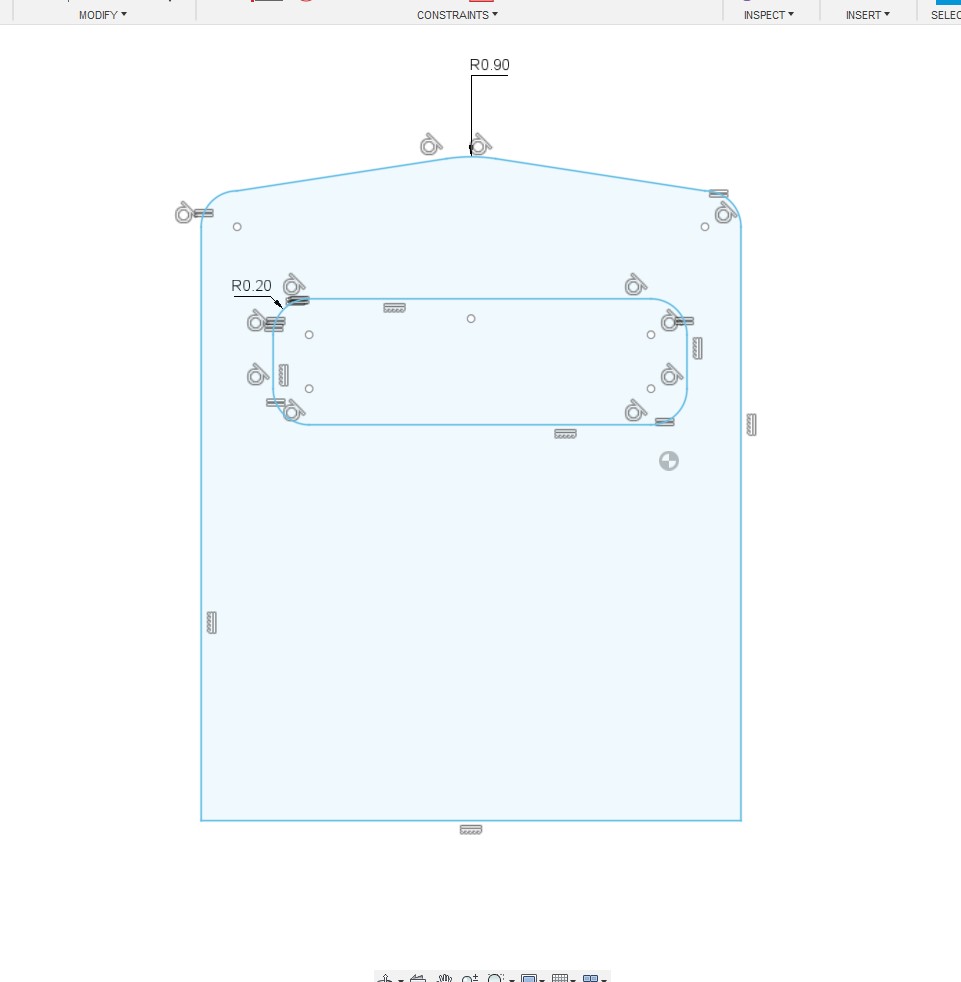
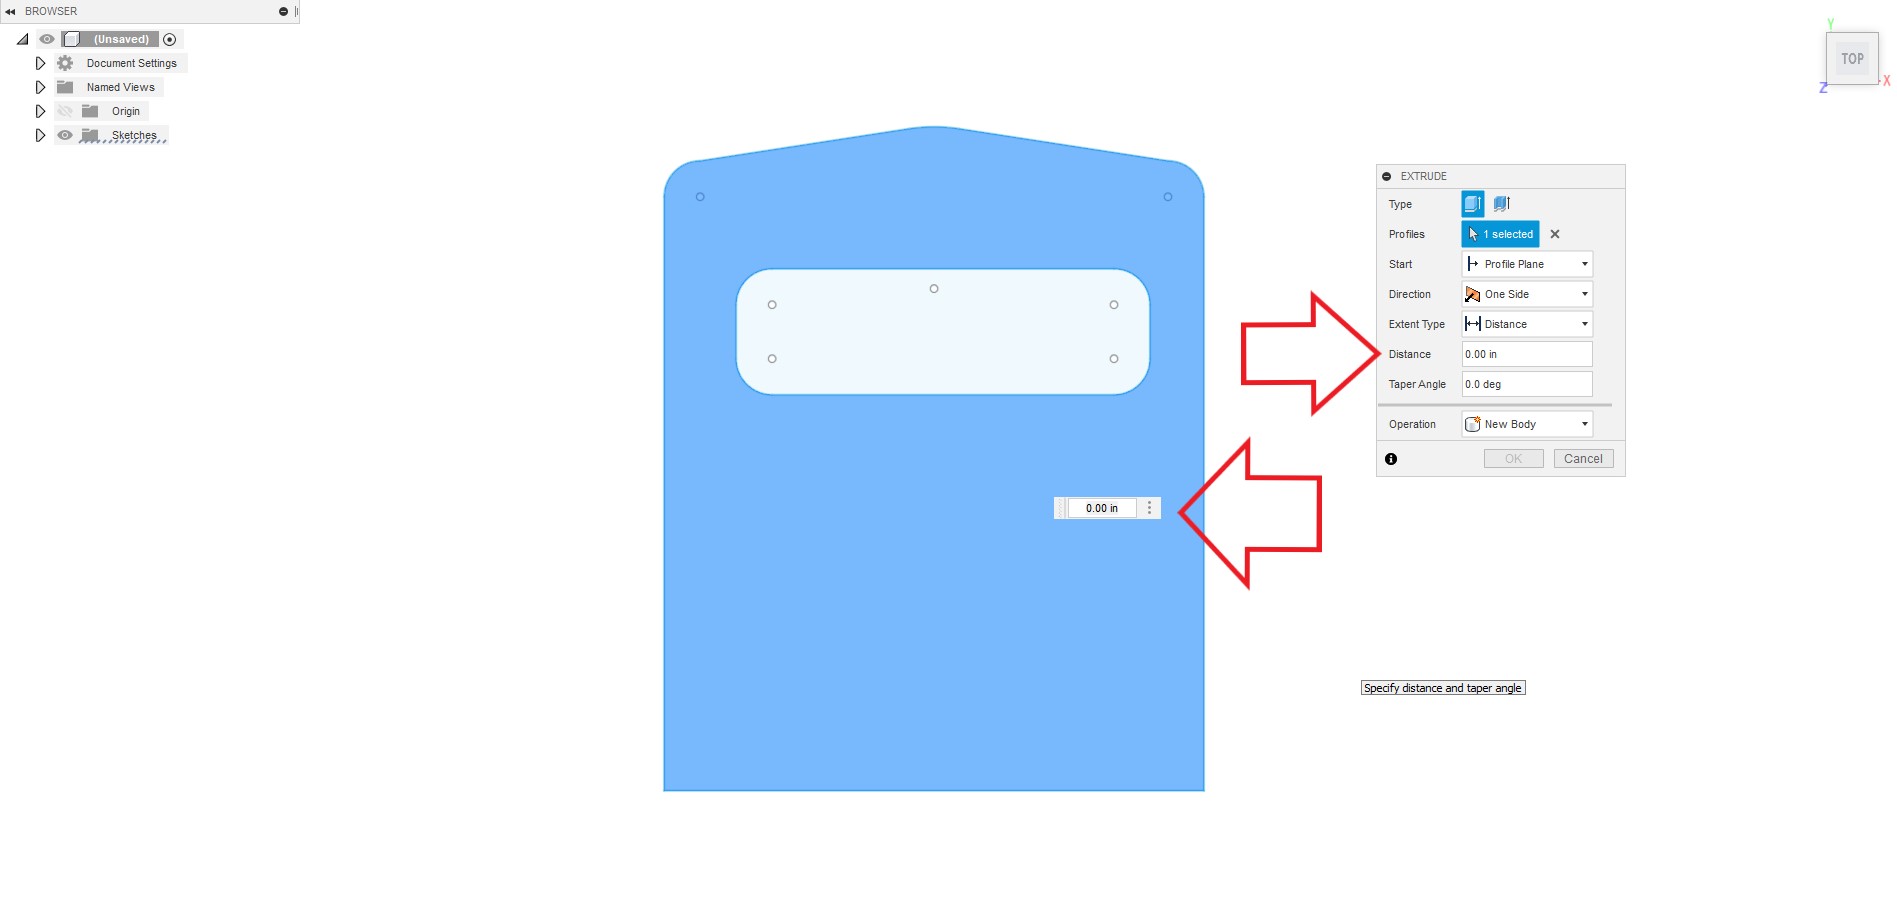
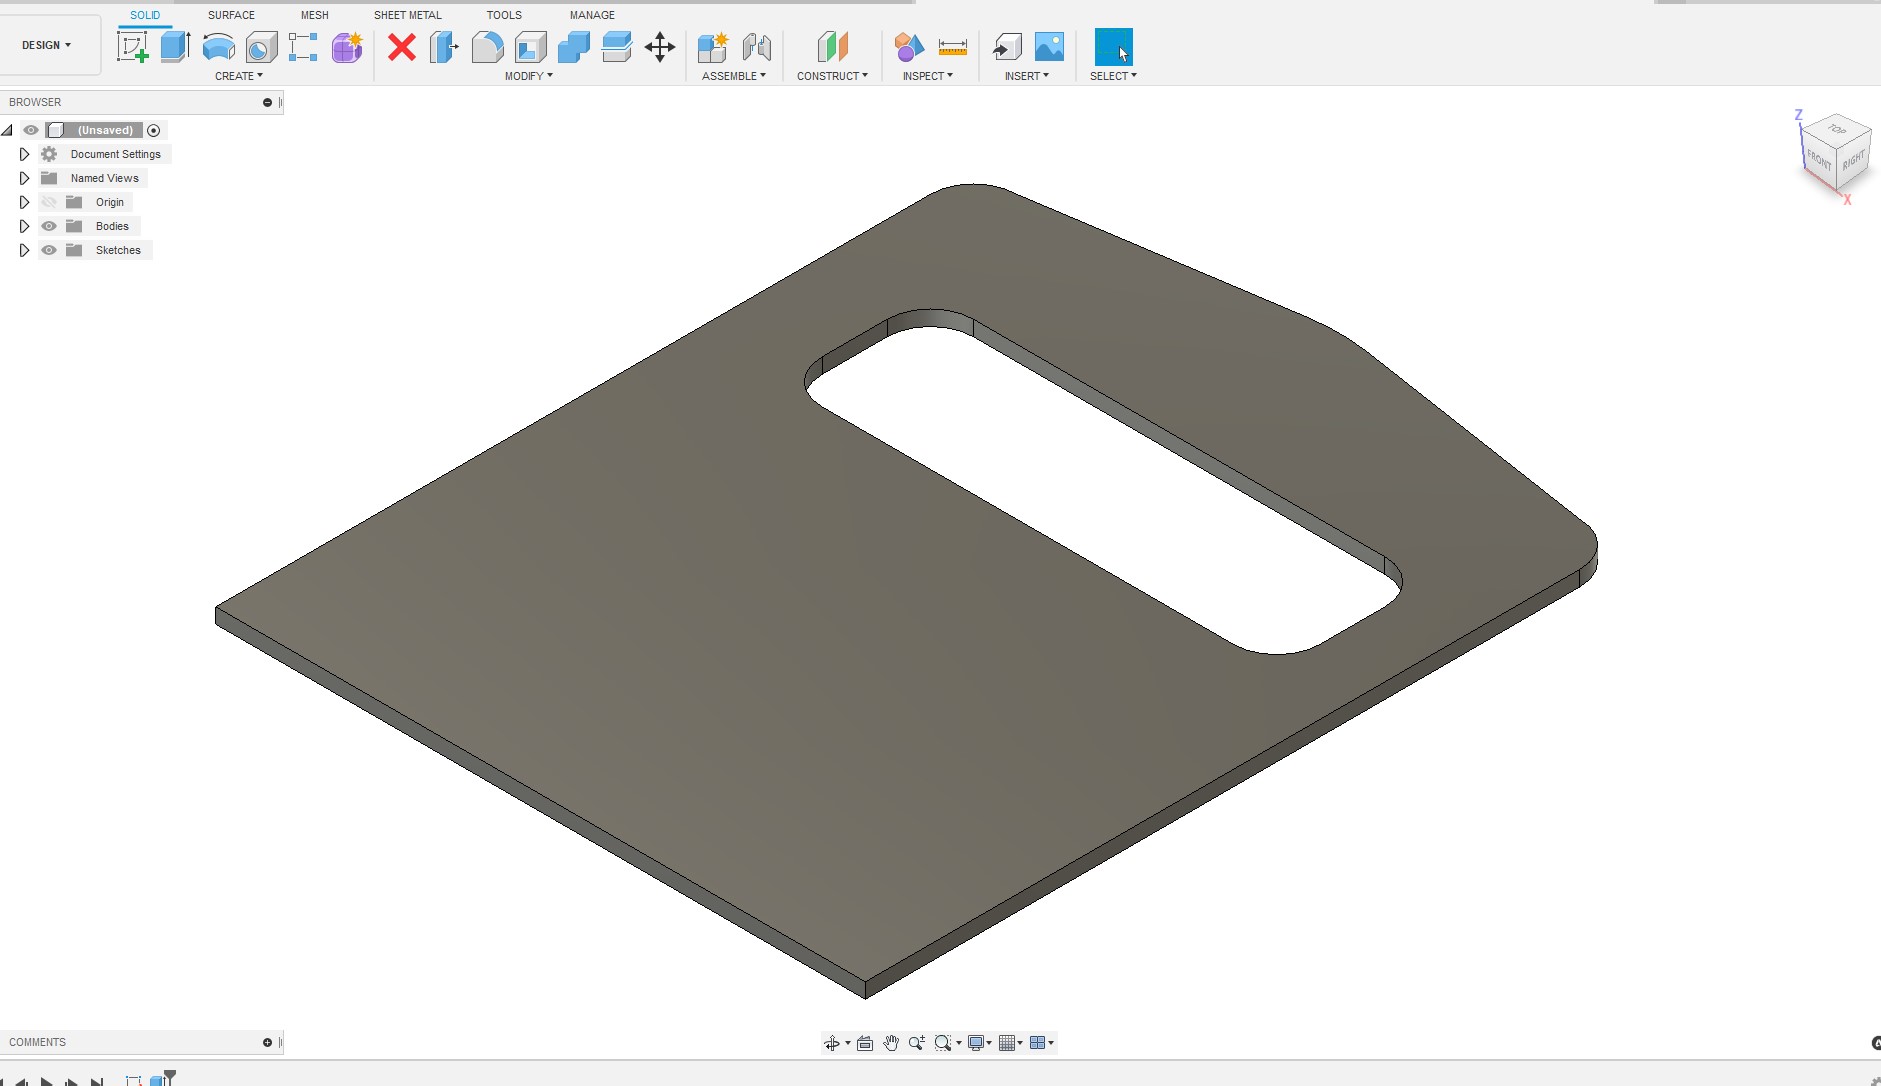
What I need to do is cut out material inside a shape. I’m using sheet metal, I drew a door, then a rectangle inside of it for a window opening and need to remove the material inside of it. it still shows it as blue color and I assume that it is not going to be cut out???

I did watch the video here where he makes the bottle opener and draws a circle then the circle turns white and I assume that will be cut out. I cant get mine to turn white.

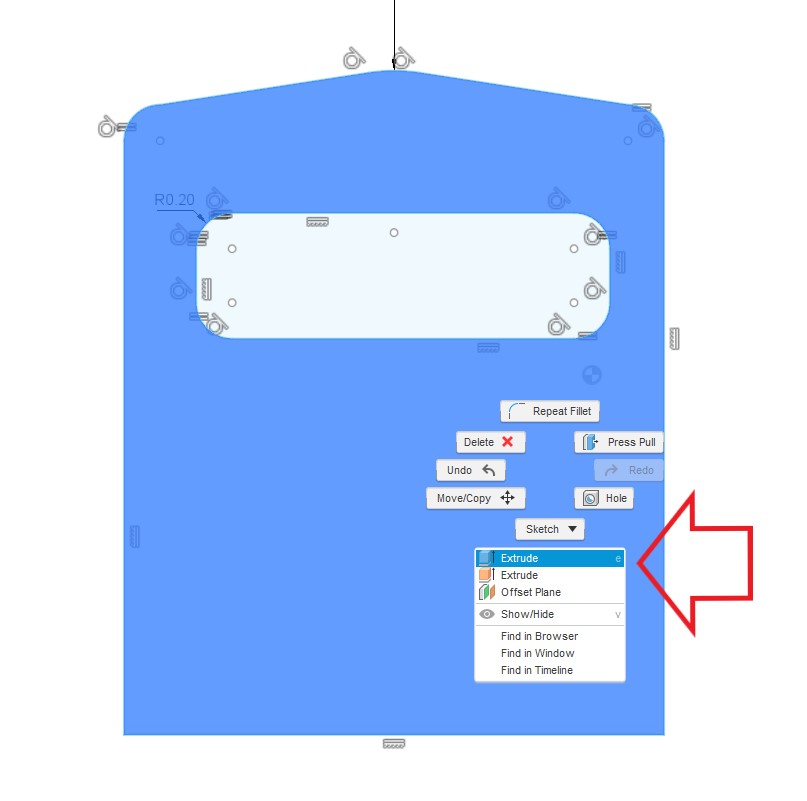
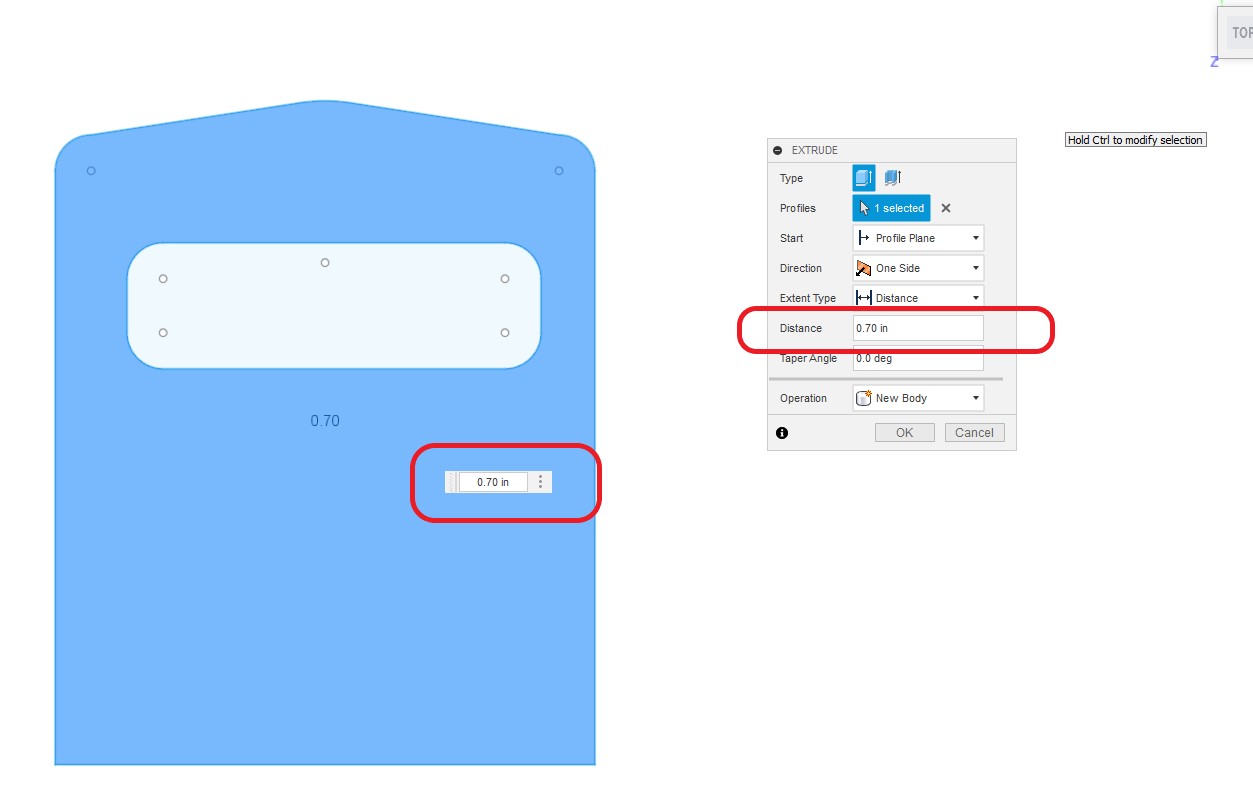
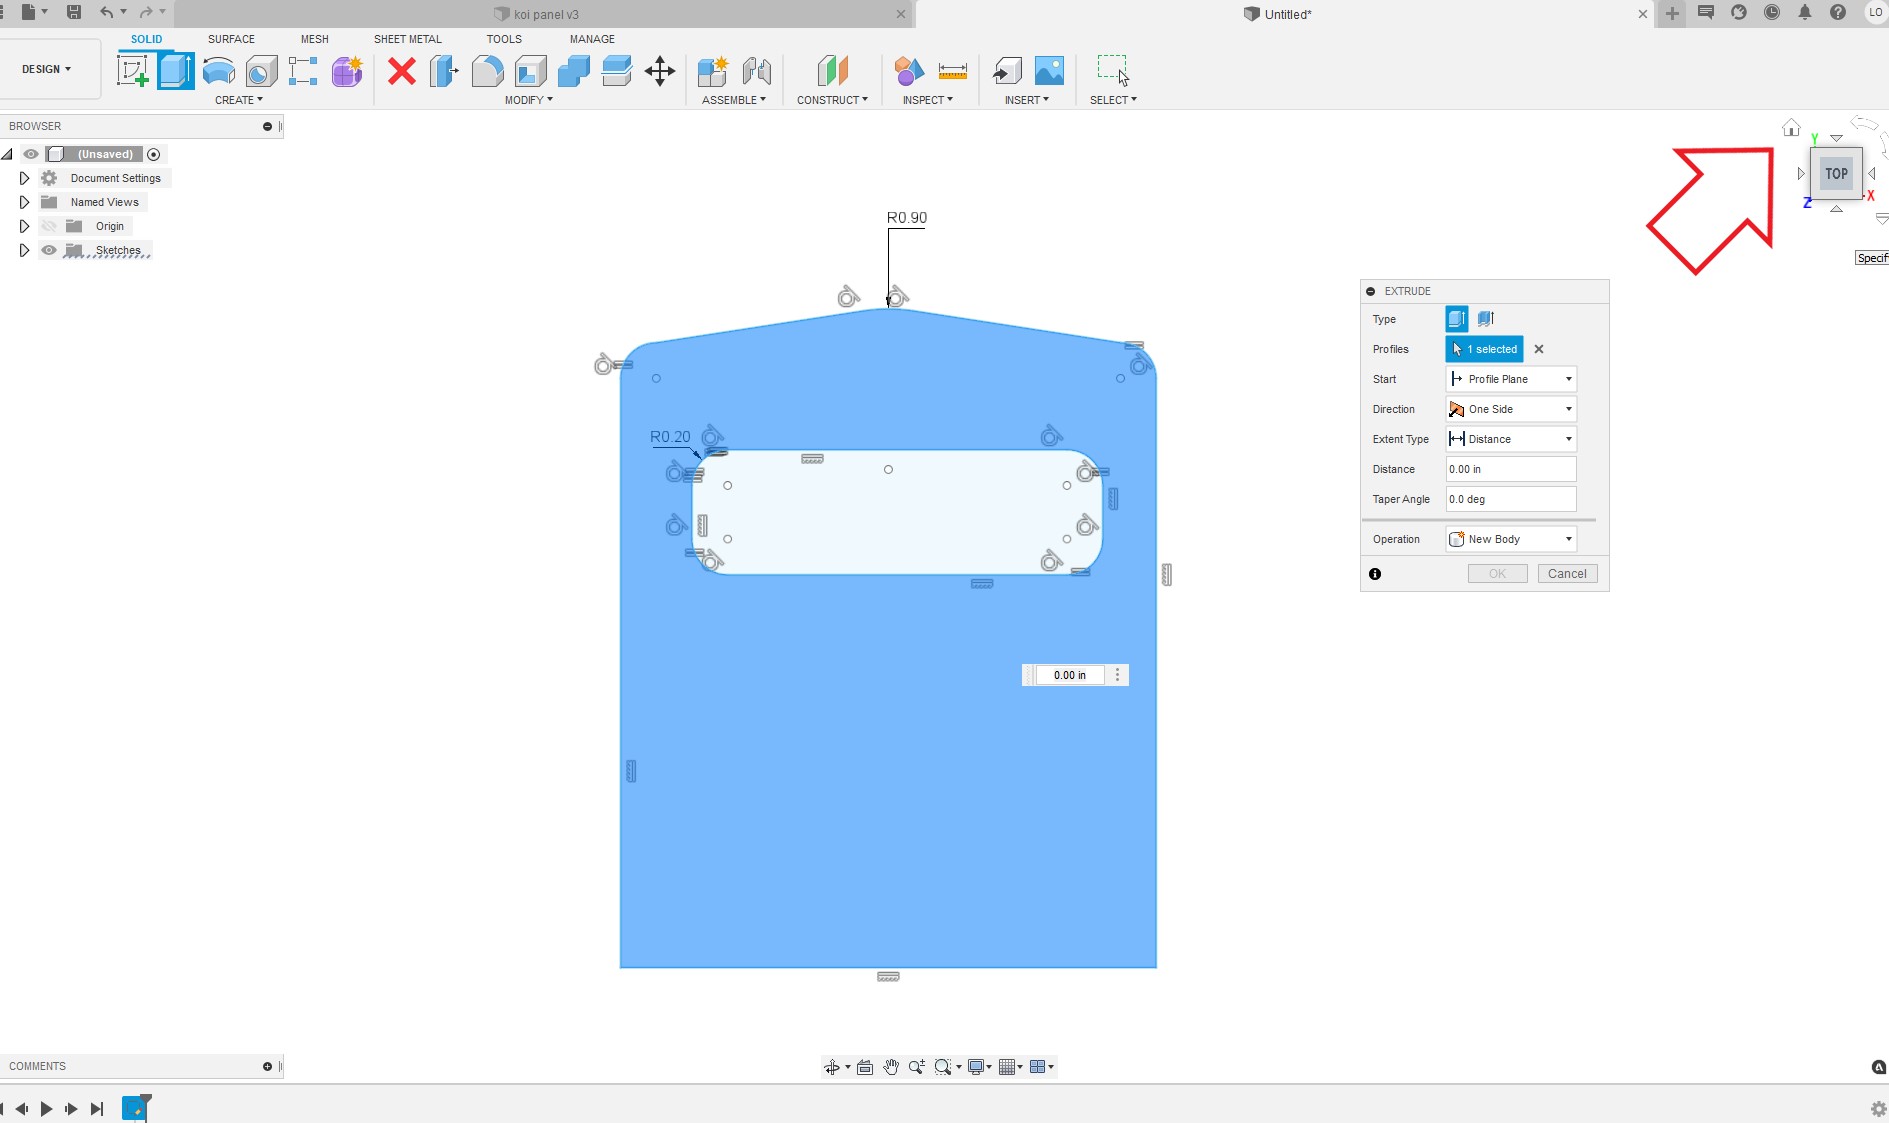
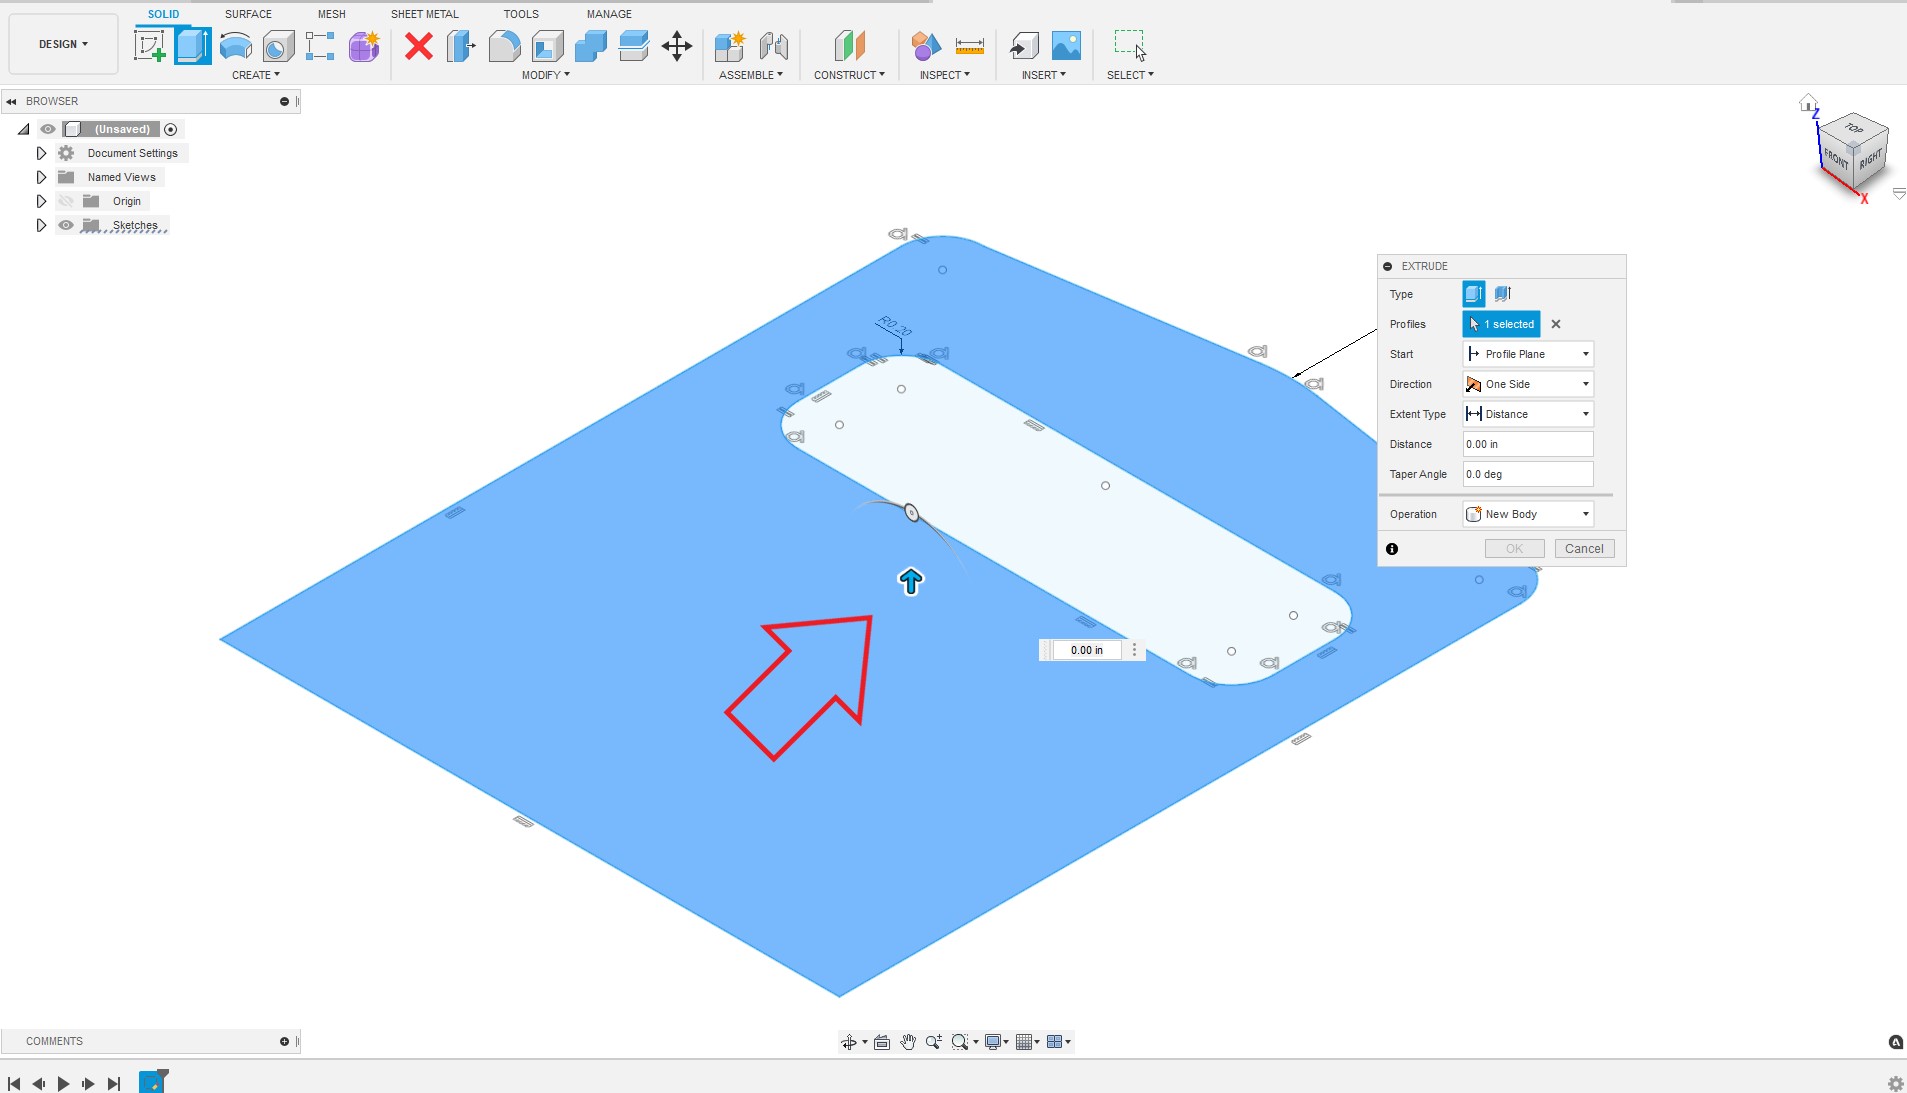
I beleive if when in design, extrude it and it should do it. Then after manufacture run simulater. Or If you dont extrude you can click the arrow where you manually chose the tool path and it will switch from inside to outside . I think you will want inside cut on the window and outside on the door. Either way run the simulater and you will see which side its cutting on. If its not what you want change it.

Thank you so much! I will try that. this looks to be a great place to get help, I have read some of the info and learned a lot!

I have been trying to do this for a couple hours and I’m unable to have the window cut out of the door.
I have watched a few YouTube videos also but they are on 3D objects. this is flat sheet metal.

If anyone could help with the correct steps I would be most appreciated . One other thing I did not find a place to set the thickness of the sheet metal, do I need to do that?

when you select extrude/ push pull and hover the mouse over the scetch does it turn blue?

Are you in the sketch workspace?

1 Like

Right click on the surface that you want to be solid.

Then click extrude. It will be available in the menu that pops up when you right click.

Sometimes it’s helpful on the top right hand corner in the navigation area to click home and extrude from that isometric view

Right in measurement of desired thickness hit enter.

As soon as you extrude a sketch you will go from the sketching workspace to the design workspace.

in the sketch workspace


hoover over the area to be extruded. it will highlight in a darker blue

right click and this menu will pop up.

here is a alternate way to select the extrude tool.


once selected this menu will pop up fill out thickness in either of these two spots


some find it useful to be in a isometric view for this

in the isometric view you will also get the option to pull your extrusion.

once extruded will will be in the design workspace with for new 3D model

1 Like

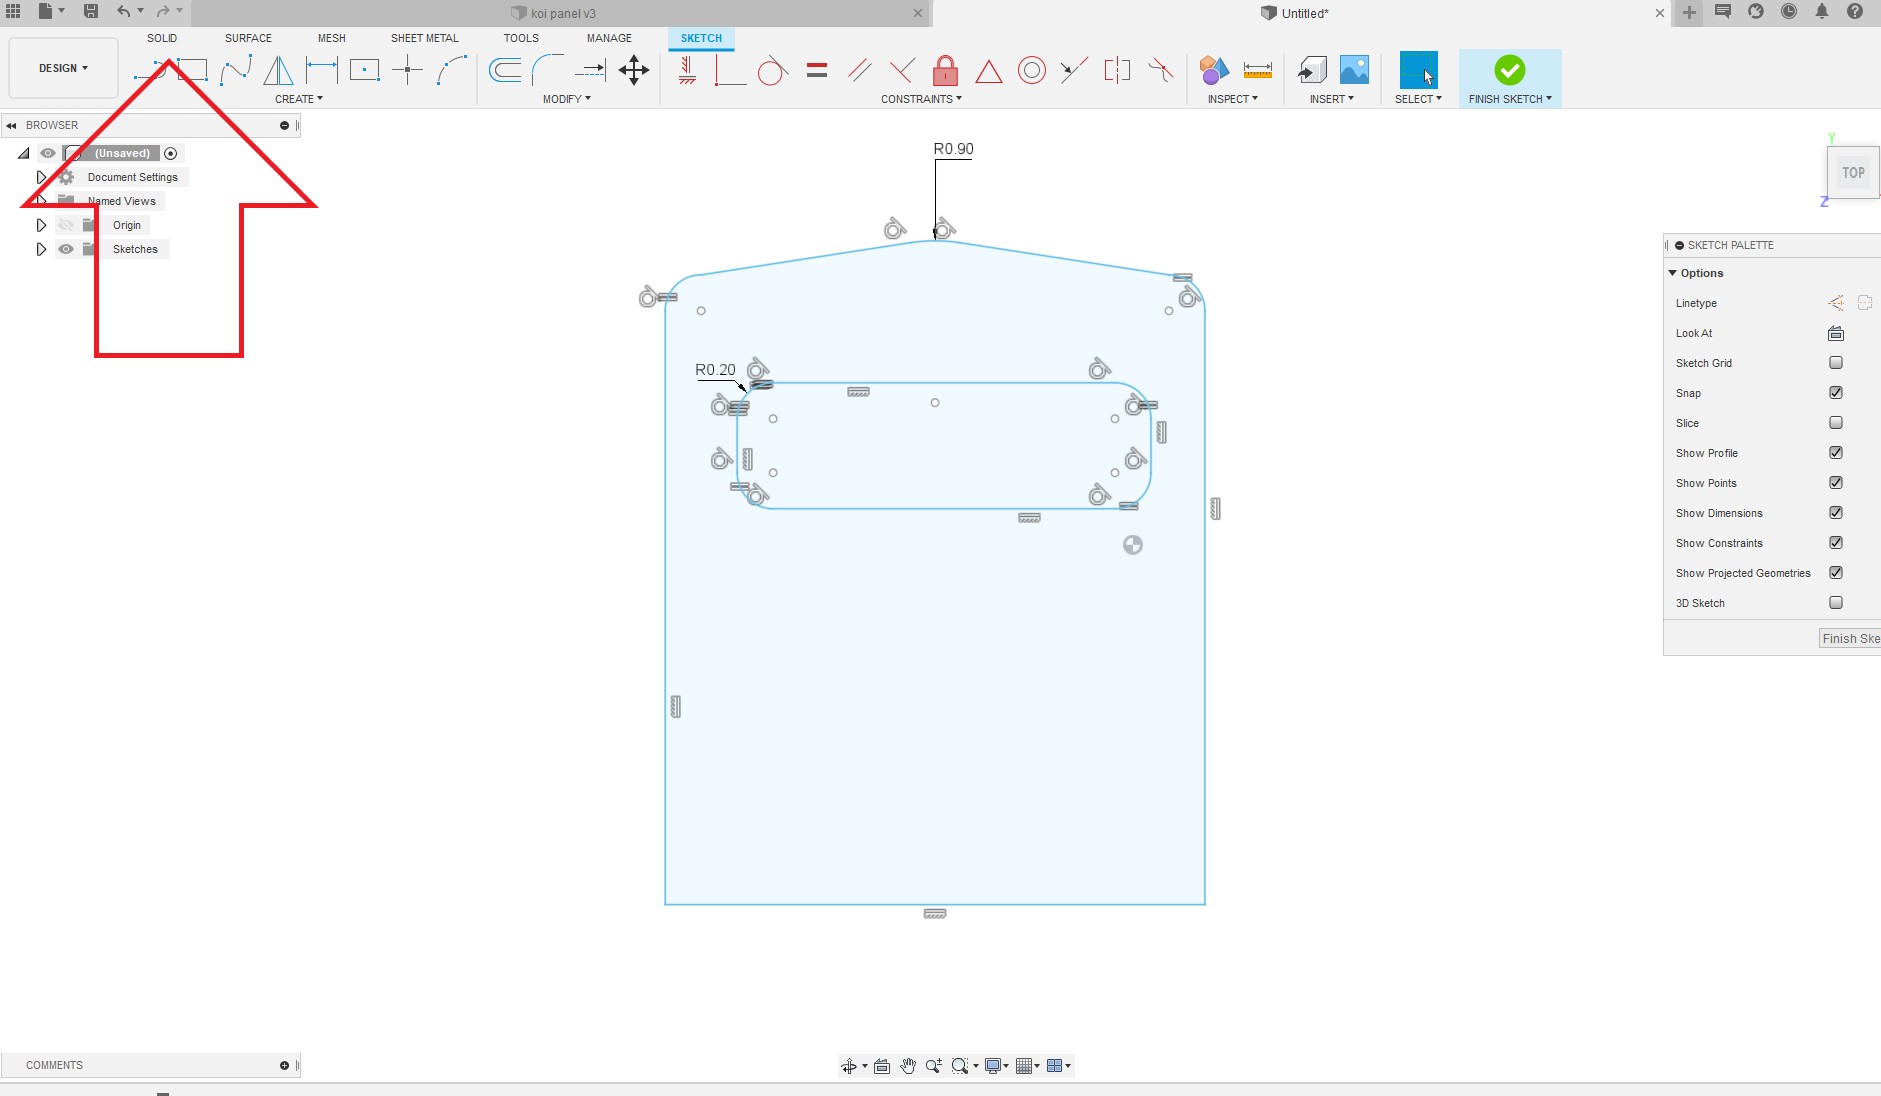
this is fantastic, thank you! for taking the time to make me a tutorial! I had watched the training video several times but this step just was not clear to me.
going forward from here I have to set up how/direction and where it cuts and run simulation, correct?

you are very welcome.

I’m just trying to be the guy that I wish was around when I was learning fusion 360.

Once your tool is complete and selected.

This is when you’ll continue through the

cutting -2D profile menu.

This is the same menu where you accessed edit tool from.

Start on the first tab where you selected edit tool from.

Work through each tab left to right.

Once you’re done that section it will attempt to generate a toolpath based on your info.

I’m at work right now so I’m not in a very good position to screenshot anything for a few hours.

2 Likes

no problem at all, im going to try this with the steps you mentioned. Thank you so much.

1 Like