I recently started actually assembling my Crossfir Pro. It’s only been “staged” now for a couple weeks at most, waiting on me to finish getting my shop re-done first, so not a ton of delay. I figured I’d add my version and input in case it matters or helps anyone.
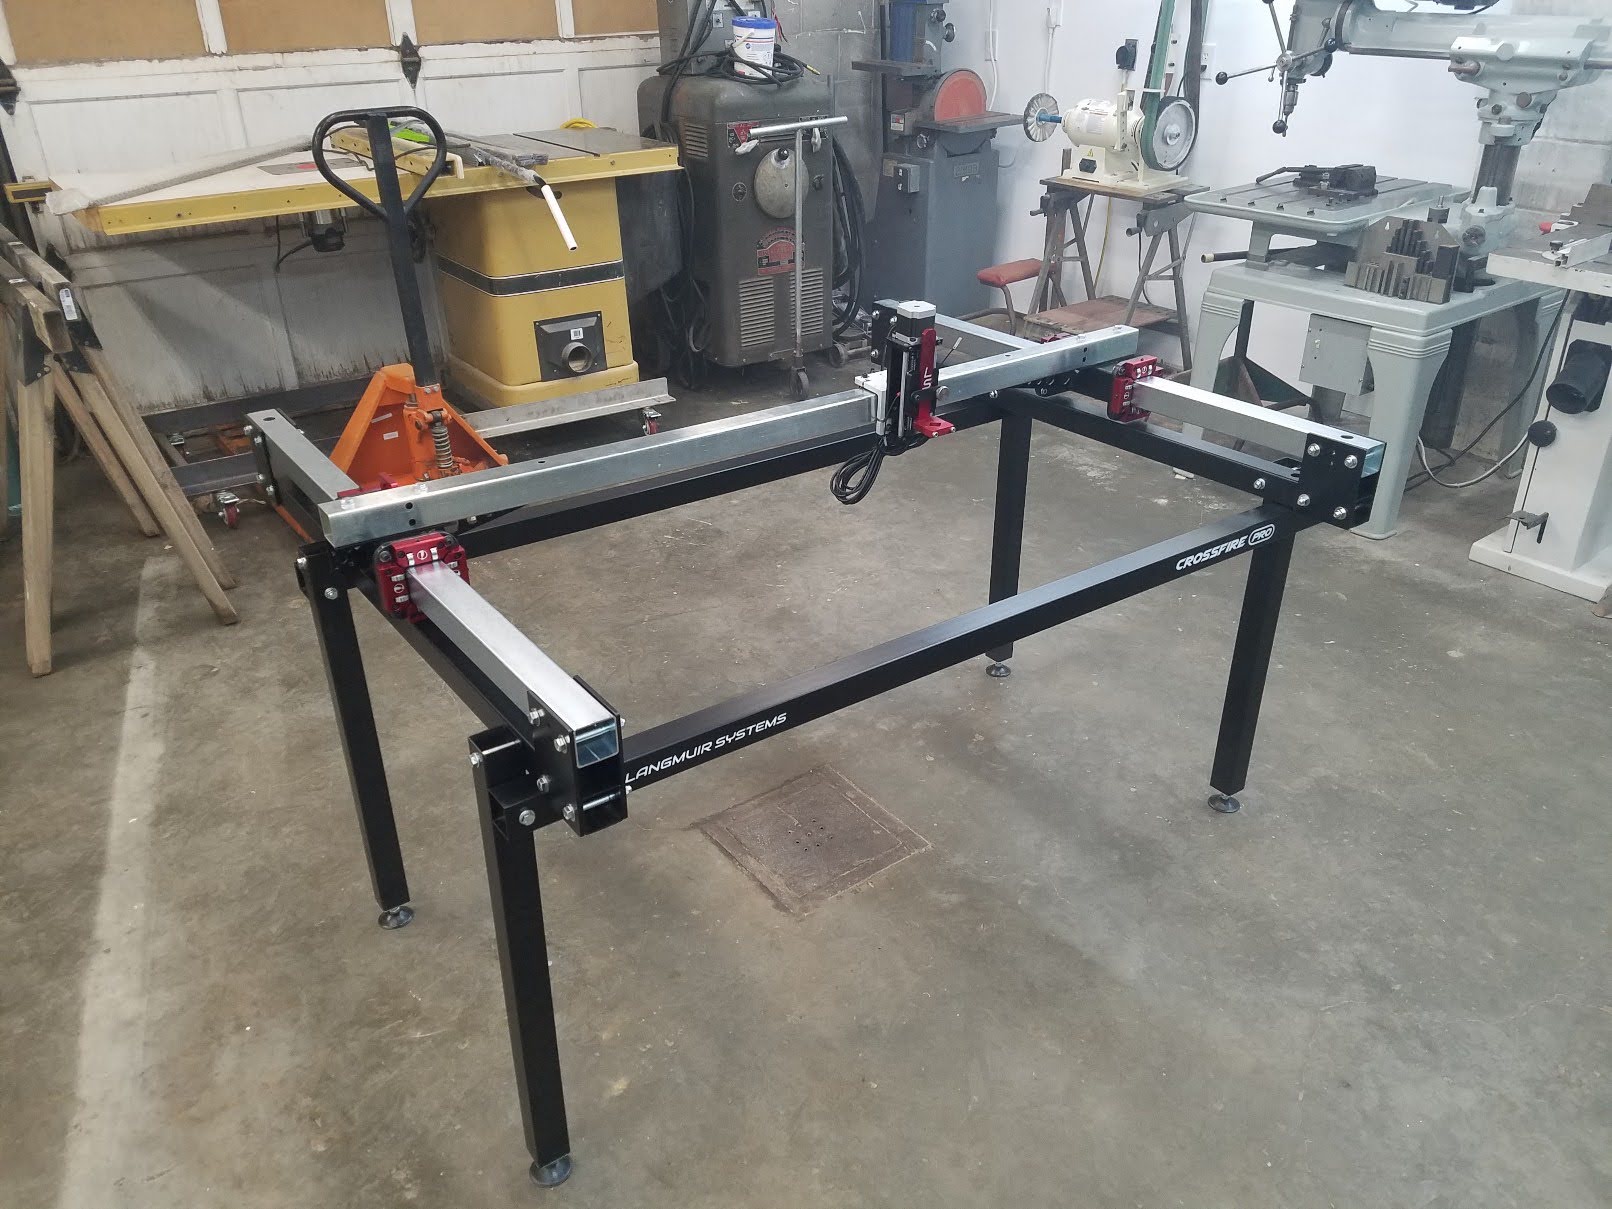
First a pic. I got this far on the first evening. Up to this point, everything went very well and I didn’t really have any complaints. The whole thing is, in my opinion, well thought-out and engineered to be easy to put together and work well once a guy does it right.
So next steps were to square things up, adjust bearings and install water pan and leg gussets. That’s where the hiccups reared up.
the tubing isn’t particularly square, so once you assemble it, the thing doesn’t exactly fall into place correctly (to say the least). This really only has significance when adjusting the bearings for the carriage bearing block flange assemblies since they are built to bear on 4 square surfaces. You either need to shim the tubes to end up more square than they naturally fall, tweak pretty hard on some connection points or just settle for 3 out of 4 opposing bearing points to function well enough. I opted for the latter and it should be fine. It’s an issue worth LS’s time, but I’m not worried about the machine having significant function issues from this.
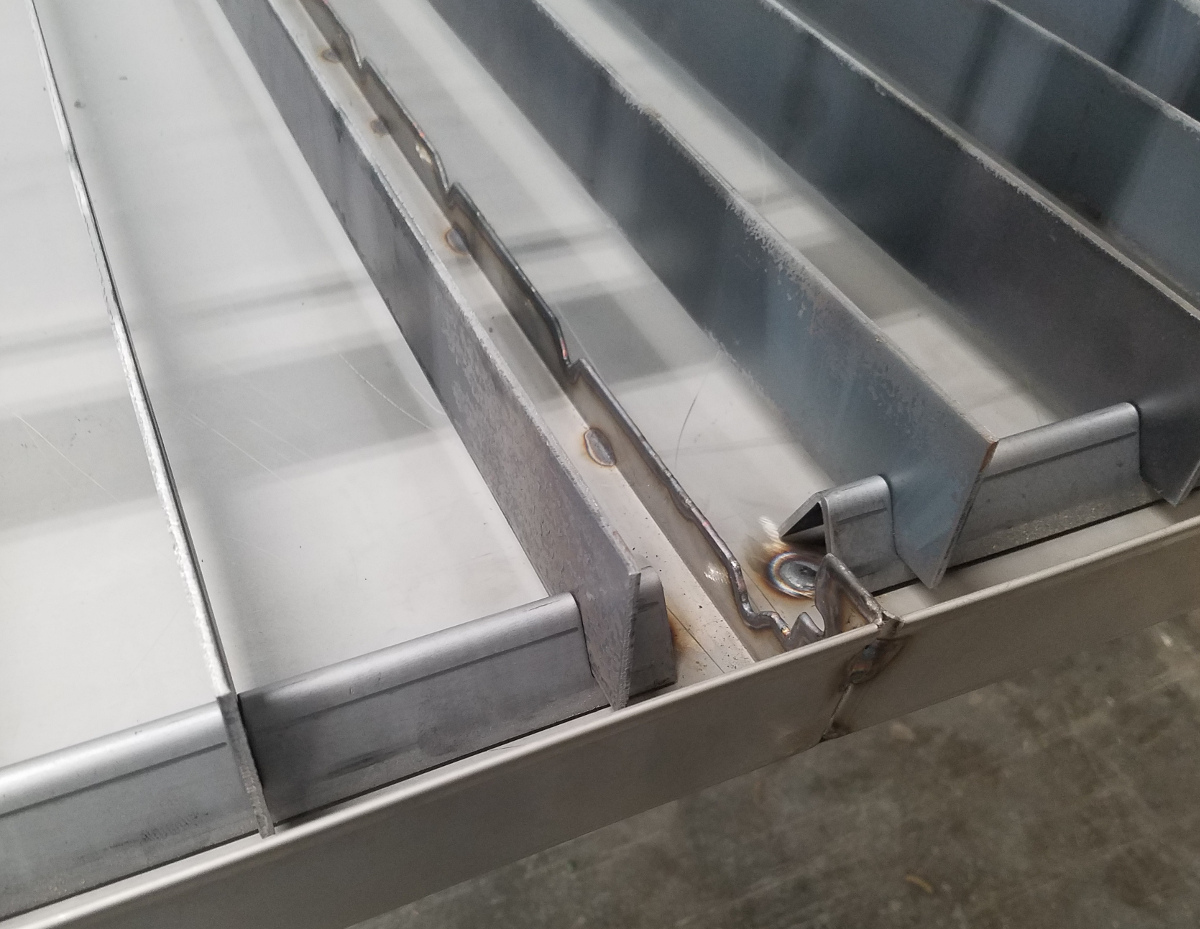
The water pan is obviously designed to be inexpensive and easy to ship. It will work, but there are at least 3 major annoyances with the assembly. a) the two faces that need to mate came to me bowed pretty bad so I’ll have to do some minor bodywork (careful hammer & dolly work) so the thing doesn’t want to naturally pull the seam apart. This seems pretty clear that it’s a quality control issue and not a packaging/shipping thing that LS probably ought to check into. b) the drain(s) is just clunky. The hole is so small I can imagine chunks of debris easily and frequently clogging the hole up and a source of wasted time dealing with it. I made two new drain fittings from brass stock to replace the ones they sent which will take 3/4 pipe for the drain tubing. Even if you weren’t going to plumb in anything fancy, the drain hole ought to be larger than 1/4" in my opinion. 1/2" would even probably be much less problematic. I just went with 3/4" because… why not? c) If it weren’t made to go together the way it was with the divider between the two, the thing would only need one drain in the first place. I could think of maybe a joining strap to couple the two halves together being better maybe, and a guy could either screw that together or TIG it if he had the capability. Bam! one long pan and a single drain. Oh well.
The lack of depression at the drain points for the fitting to sit below flush is pretty cheezy. Of course others are dealing with this on their own and I will do the same, but I can think of no reason this didn’t come already done other than cost savings. It would take 30 seconds at most in a press to dimple that, but whatever. Approaching a fail on that water pan IMO, but in the end it’s all minor stuff.
When installing the leg gussets, I gave up on the “self-drilling” screws 5 seconds in. It was just TONS easier to simply pre-drill with a real drill bit and screw those together. The self-drilling idea is not great. Again, it went fine with my own method, so it’s just something to notice rather than an actual problem.
these are all great observations…something I think we all have talked about at one time or another.
this is where the table beats the other ones…instead of making things look great and all fancy…they leave it up to the customer to work on.
this allows the customer to modify the table to their own needs and wants…and saves the company lots of money with building something if you save $100 per unit and ship out 10,000 units…that is $1,000,000 saved…pretty substantial.
OK a couple pictures.
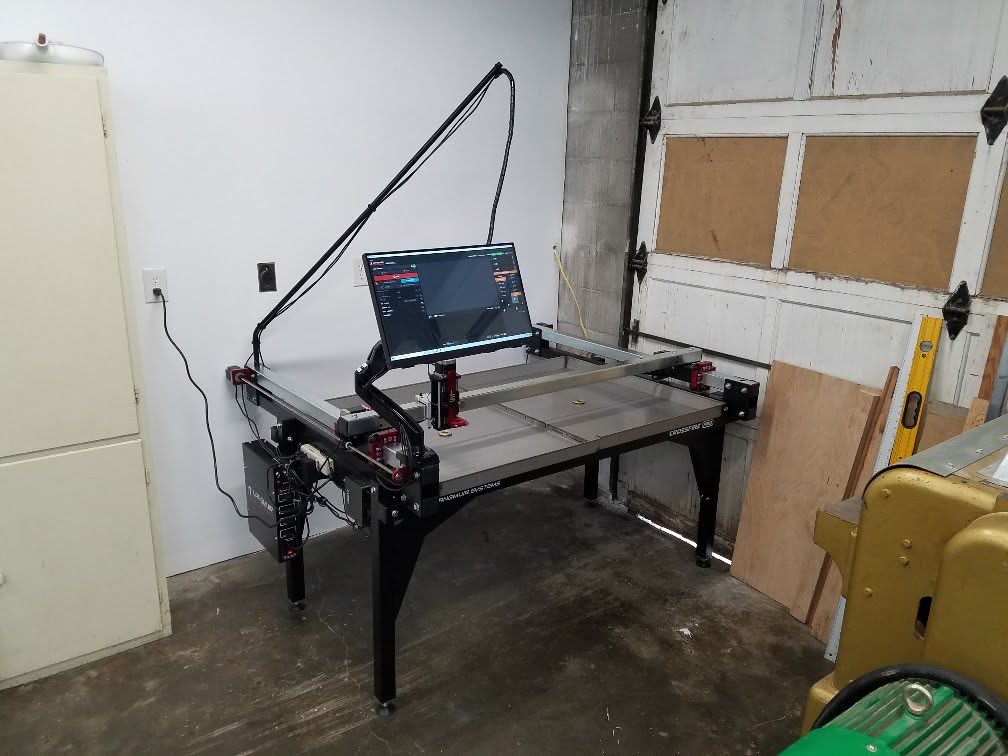
Machine in current state. I need to tidy up wires and such, and I’ll need to make some simple cover plate out of thin sheet metal to shield the electricals from splashing water. Should be easy.
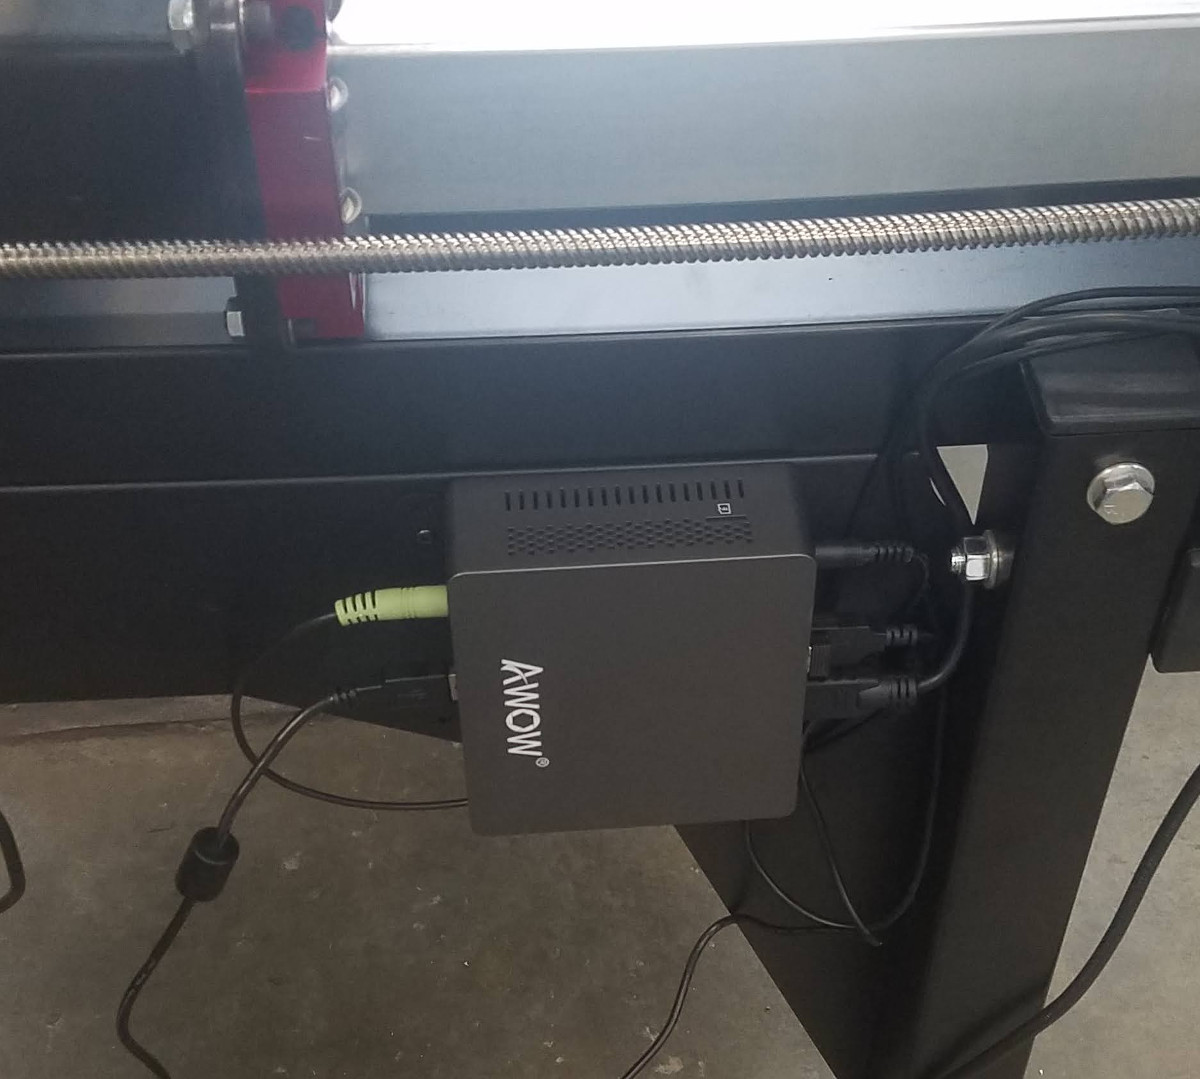
I really like the touch screen, and even the mount for it. The mini PC is supposedly overkill for Fire Control according to some others, so I went ahead and loaded Sheetcam on it for occasional use. The PC has a slot for SD card as well as spare USB for file swappage. I coulda gone cheaper, yes. But lately I’ve regretted every single time I cheaped out so I don’t mind a little extra investment if it’s gonna work better.
Excuse the foggy pictures. I forgot to give my lens that quick wipe before snapping them.
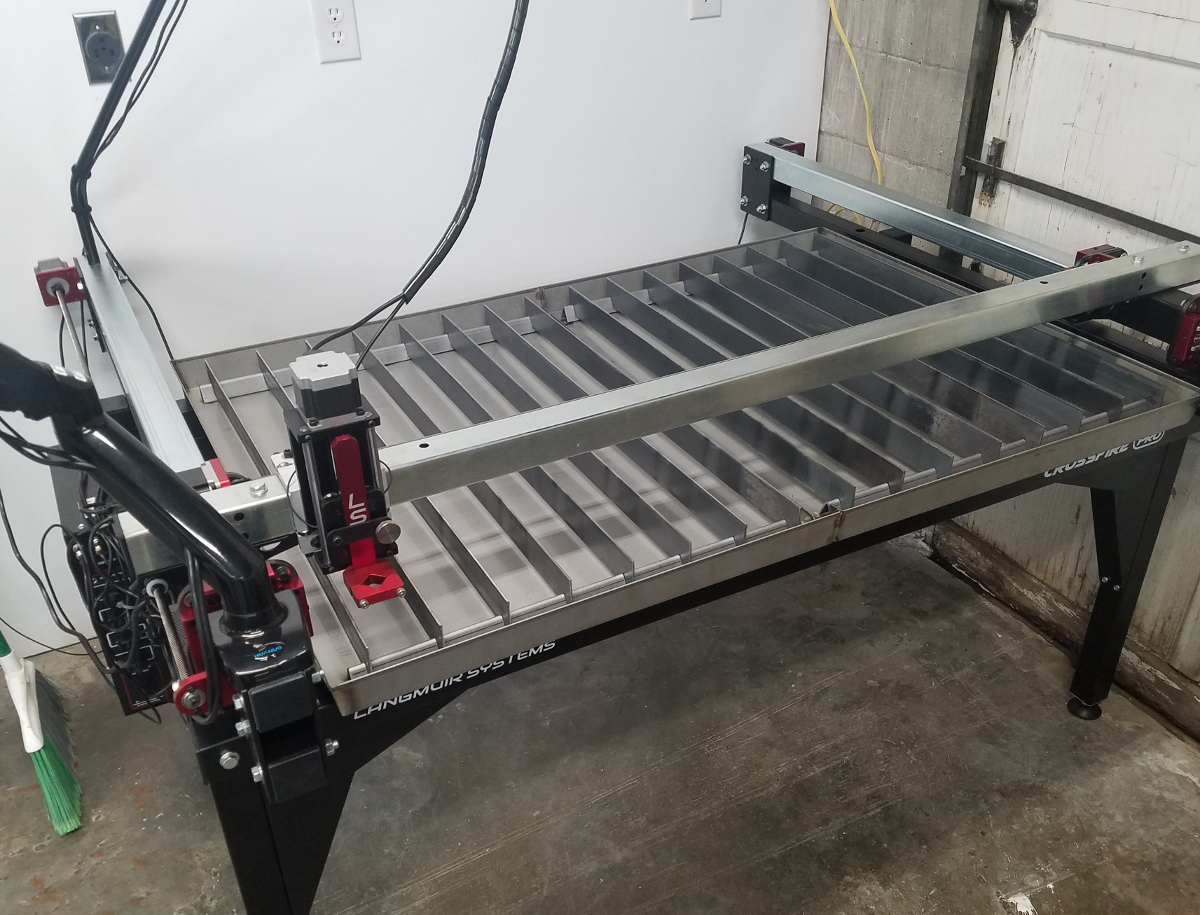
So lead screws & nuts are now aligned and snugged. I’m holding off on finishing up the water table because I want to dimple the drain spots before I put any of it together. My plasma is still a week off, so I guess there’s no burning rush anyway. That’ll give me time to soak it in from a few feet away and dream up various things I can add or change in the meantime. Also need to hook up the THC I guess. No huge stuff remaining that I can think of.
A tiny bit further.
I ran the “break-in” program. Ain’t much to that and ain’t much of a break-in, but whatever I guess. Maybe it’s more of a test that there’s no bumps in the tube or something.
I decided I’m going to punt on the water tray design and cut it all up to make something much better out of it. I figured I’d just cut away all that center joint crap and make it butt together well enough, then TIG the whole seam. While I’m at it I’ll cut a disc out and plug one of the drains and also plug up all the bolt holes and just make a few L-bracket saddle things so the whole tray can just slip in & out and drop into place. I’m certain that I just will not like the tray as it’s been designed. Nothing big, but enough to make it a pain, and a little TIG welding will solve all its problems Meh.
It’s in the corner where it will live (that overhead door never gets opened). I’ll want to put some sheet metal up on those walls I guess to deflect sparks maybe. I dunno though, maybe somebody will chime in on their experience on that.
Nice that it’s up & running though. There will be a little figuring out to do once the plasma shows up and there’s just a tiny bit of wire tidying left.
I think sheet metal on the walls is a great idea.
FWIW---->
We had some fire treated plywood left over on a job and I used that… also caulked the plywood to the floor with fire caulk. Just couldn’t live with the idea of one of those sparks sneaking under there and doing it’s thing… I only went up 4’ from the floor with it… Haven’t really seen a spark go more than an inch or two over the height of the table…
Well yeah, perty so far. My luck has been uncharacteristically good all the way through this, so I suspect it’s all going to get fugly as soon as I hook up the Hypertherm. I hope I’m wrong and I’m just being paranoid. I guess some of you guys have got this thing going without big problems, right?
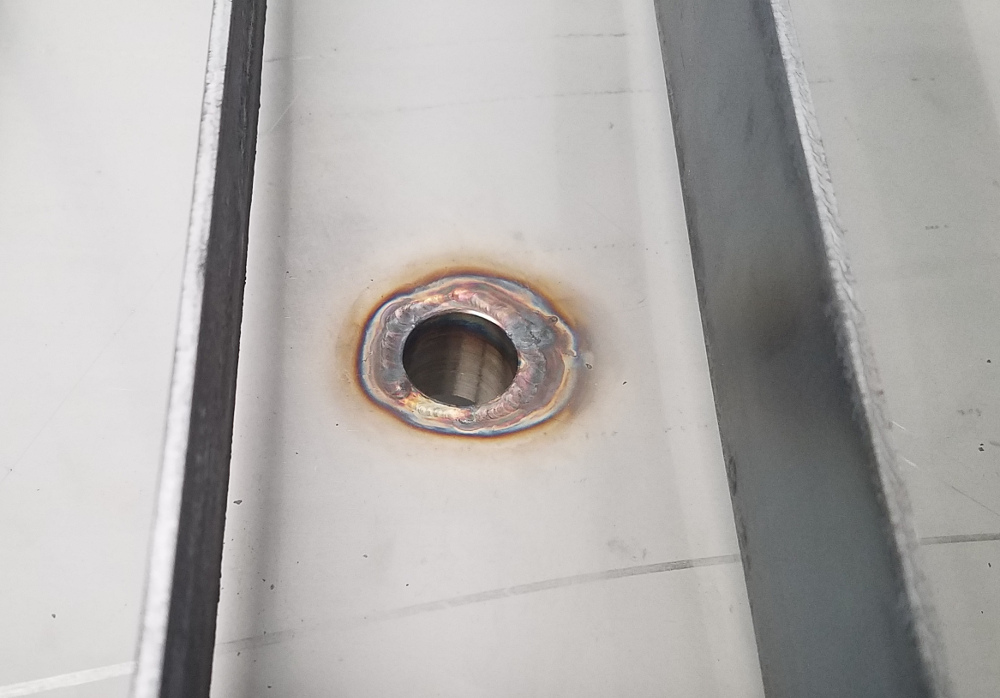
Finally got the water pan worked out. I stopped short of going all fancy with a complete re-do of the seam and drain design because it was a lot less time and just as functional to simply TIG the two halves together, machine and weld some stainless nipples for drains and plug up the screw mounting holes and make some L-brackets to hold the pan in place. I was leaning toward totally eliminating the divider and one of the drains to simplify the plumbing, but that was a lot more time & effort for not a lot of gain. Basically I welded it all together to eliminate likely leak points and increased the size of the drains to 3/4 NPT.
So still waiting on the plasma cutter, but at least I’m finally almost ready for it. Going to connect the drain stuff up this weekend and… well I think that’s about it. I’m pretty sure I can smell the better end of assembling a Crossfire Pro !
A guy can obviously pay less for similar I’d guess, but I looked around for a bit and decided on this collection of stuff after deliberation.
The monitor arm was designed for clamping to a desk or the like, but came with a plate and carriage bolt I was able to use (welded the head of the carriage bolt to the plate). Attaching it to the machine took drilling a simple hole through the top side of the end of the Y-axis tubing and mounting it there. Because of the side plates, mounting it where I did preserved 100% of the motion of the carriage.
This isn’t specifically Crossfire related, but in case anybody wants to know:
I ordered a Hypertherm Powermax 65 on Feb. 24. I wasn’t in any big rush so having to wait didn’t bother me none, but it just arrived this afternoon, June 10
Appears to work just fine. Cut some little 1/8 stock with the hand torch and it DO seem very nice. Then tried some 3/4 plate and it also seemed to do fine if I fed slow enough. It even pierced the 3/4, though that was rather spectacular for longer than I expected. Pierces 3/4 though? Awesome. Nice edge finish, some slaggy stuff on the back of the 3/4 but I’m sure I can do a lot to minimize that and it’s my first dang try anyway.
No big update other than personally having it in my shop now. Just thought others who might be waiting on one would want to hear a story saying one has arrived in good condition.
Yeah, hope you don’t have to wait as long as I did if you’re anxious for it.
I hooked it all up. The THC was so much simpler than the other ways to hook it up that I had trouble figuring it out! I kept thinking I must be missing a step, but no. I did have to load the driver as prescribed elsewhere on this forum, but once that was done it instantly came alive and it tests out OK regarding function, at least remote test fires work fine.
So I still need to plumb the drains so I can fill it up and I also need to machine a little part to grab the machine torch better (in lieu of buying the Langmuir one). I also need to do some kind of guards but I’m not sure what I’m gonna do on that yet. I’ll probably just prop up some kind of panels (maybe even cardboard) just temporarily so I can protect things a bit and then I can see what it really needs in operation. I think that’s about all I need to do before starting up the testing phase.
Whoohoo though! I’m pretty stoked that it’s almost there.
I just now got all my have-to’s finished and I can now try to actually test the Crossfire Pro… but I’m scared!
I wish I knew what a correctly-running G-code looked like. Maybe I can find some on here somewhere?
I used to read and write g-code all day long for mills & lathes so I can read it OK. But of course all machines are different and this one being plasma I’m sure I’d see a couple things that are new to me.
I guess I’d just feel more comfortable briefly studying some verified working CF Pro G-code with the THC commands all there so I can have something to go by. Just something simple like a square or some kind of speed test or something.
I’ll try a little searching and see what I can find.