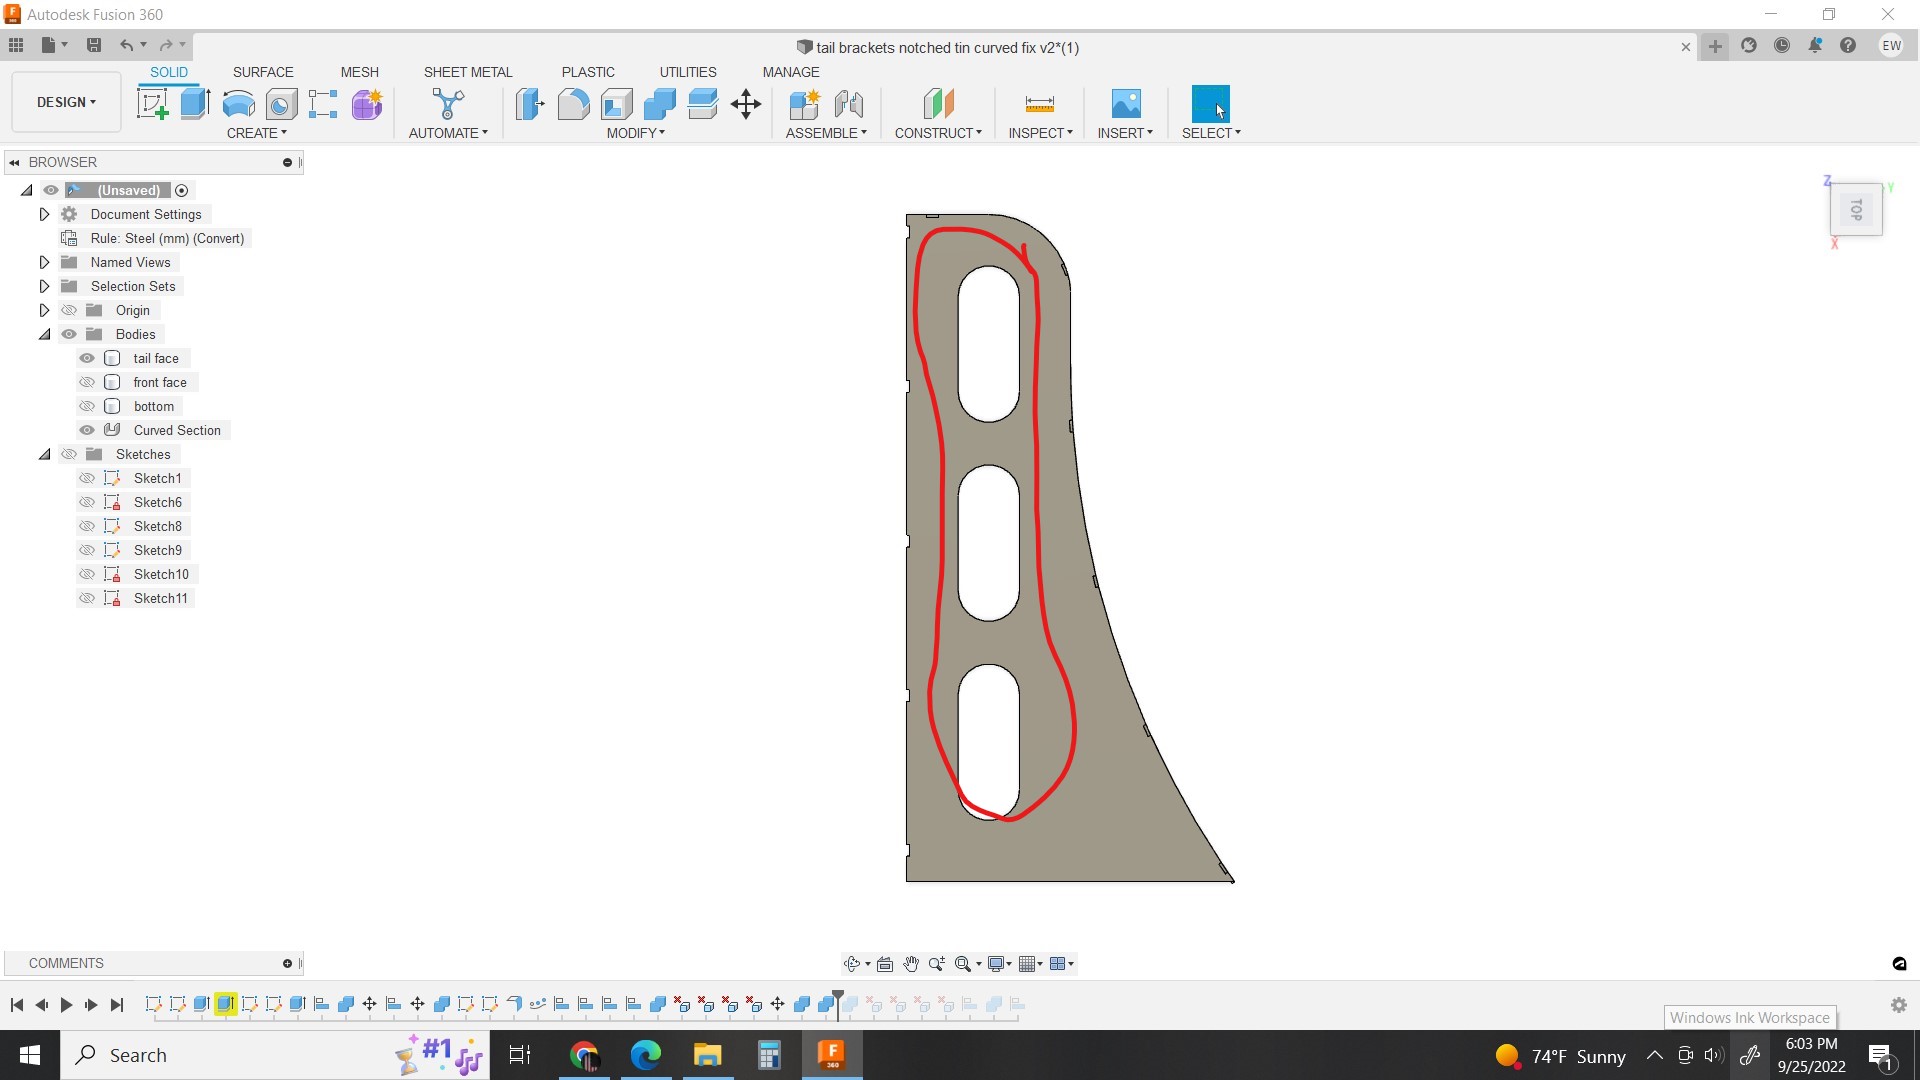
I’m very new to fusion, I’m trying to design this part and make a flat pattern.
However because of the multiple arcs on the same body, i get numerous errors or it only flattens half of the body.
Can anyone help?
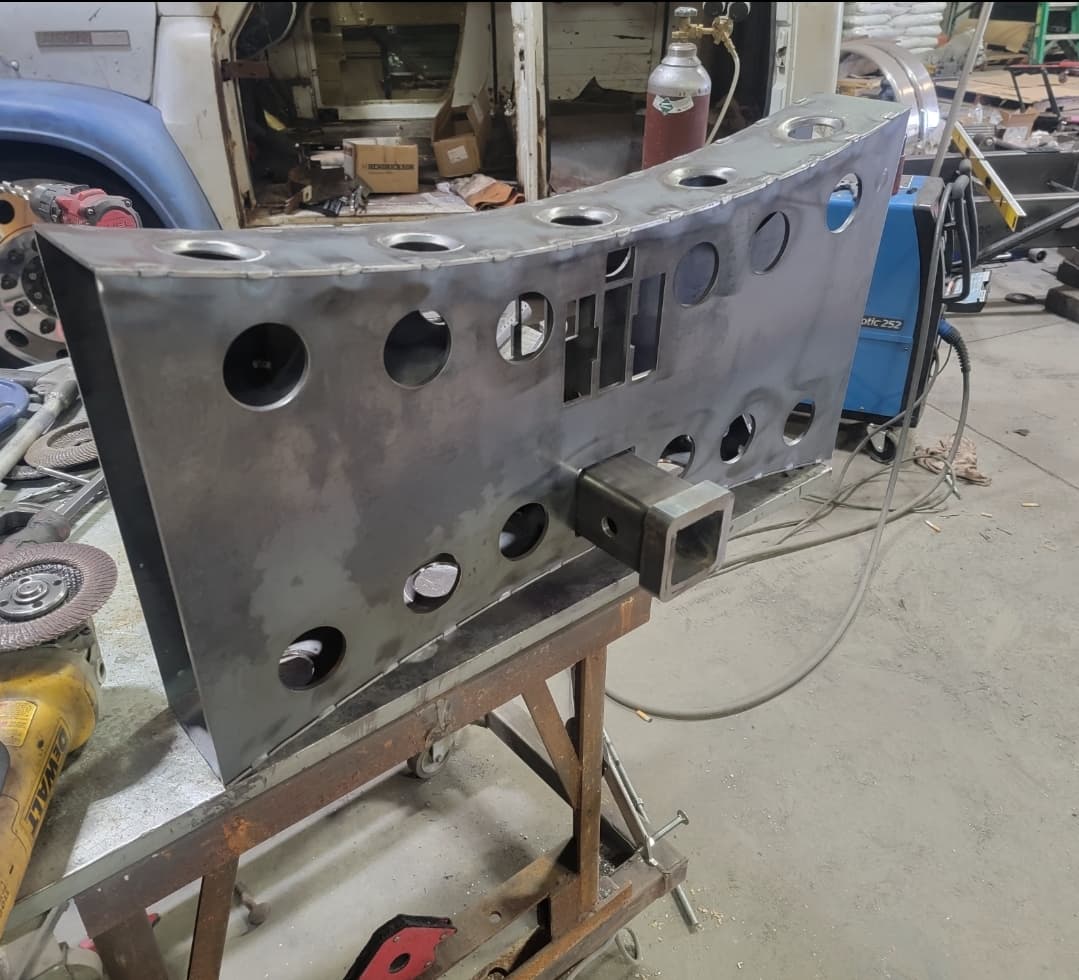
im specifically talking about body “curved top”
thank you in advance.
I don’t have Fusion handy right now, but the clues will be in those three little yellowed icons near the beginning of your timeline. Right click on them for more info.
I’m sure someone who has fusion handy will be along soon…
Well, I’ve tried a ton of different sketches, bodies. Made changes to the original bodies, deleted bodies etc, so the time line is probably messed up.
I saw a video where the user made a flat pattern out of a cone (lampshade) he explained that in order for it to project a flat pattern it must have a flat surface so he put a flange on the end. Perhaps that’s worth a shot?
I think so. the body that sweep creates does not translate well when converted to a sheet metal body.
I like to enter the sheet metal tab as soon as possible when building sheet metal bodies. Then the sheetmetal rule gets applied early on and it limits the chance of it ending up with data it can not reckon.
okay that makes sense.
question, if i add notches into the top of the body like i have at the bottom of the body, will i still be able to use assemble to cut the notches in the corresponding peice?
You could add notches to it. Think I would use the unfold tool in the sheet metal space ,make my notches and then figure out my tabs on the faces to fit it those notches. You’re going to want a lot of clearance depending on how the radius are formed it could be one way or another quite a bit.
My advice would have been start a new sketch on the face of that body and then extrude> join the profile that those three holes make.
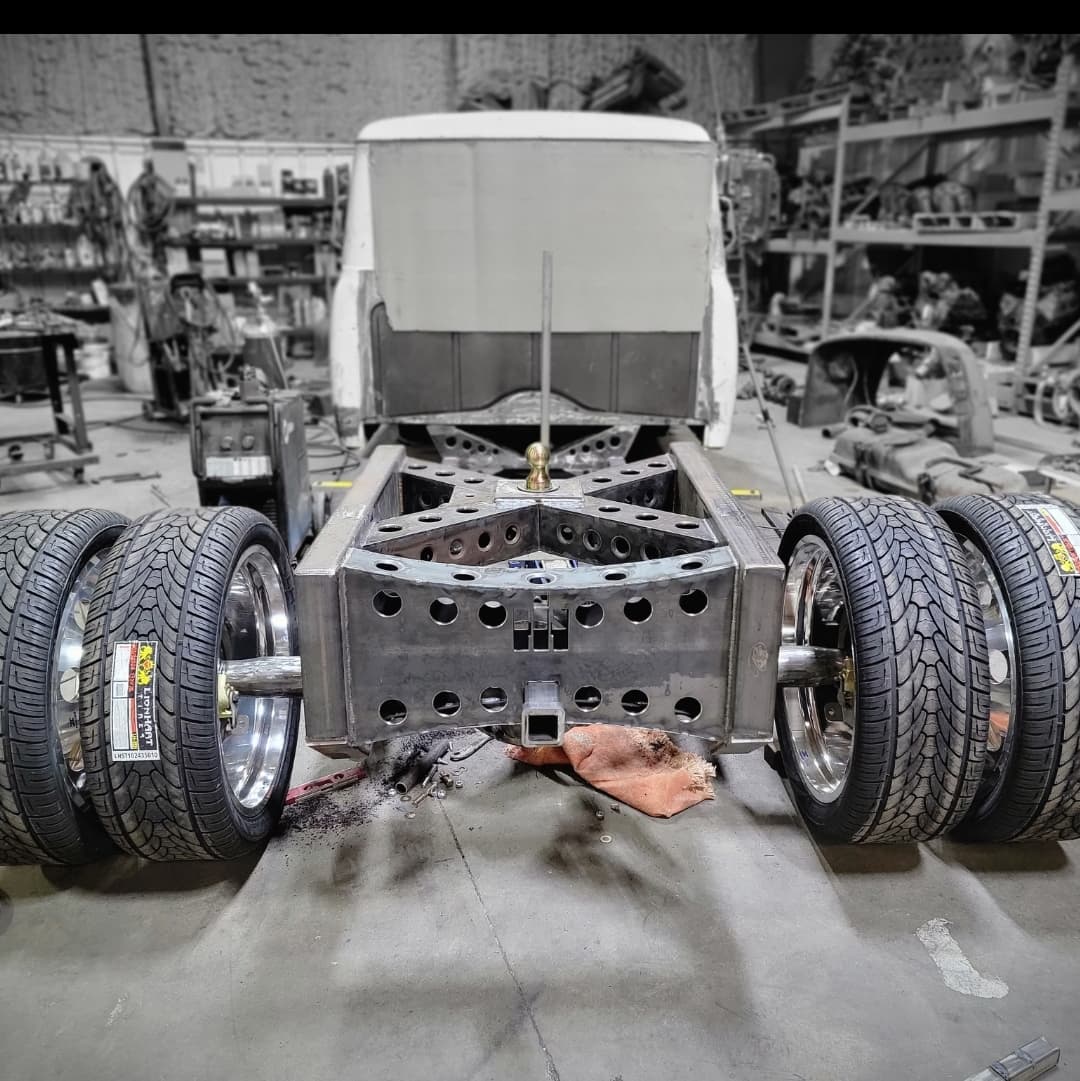
Awesome you got it working I’m just putting the answer here for the next guy.
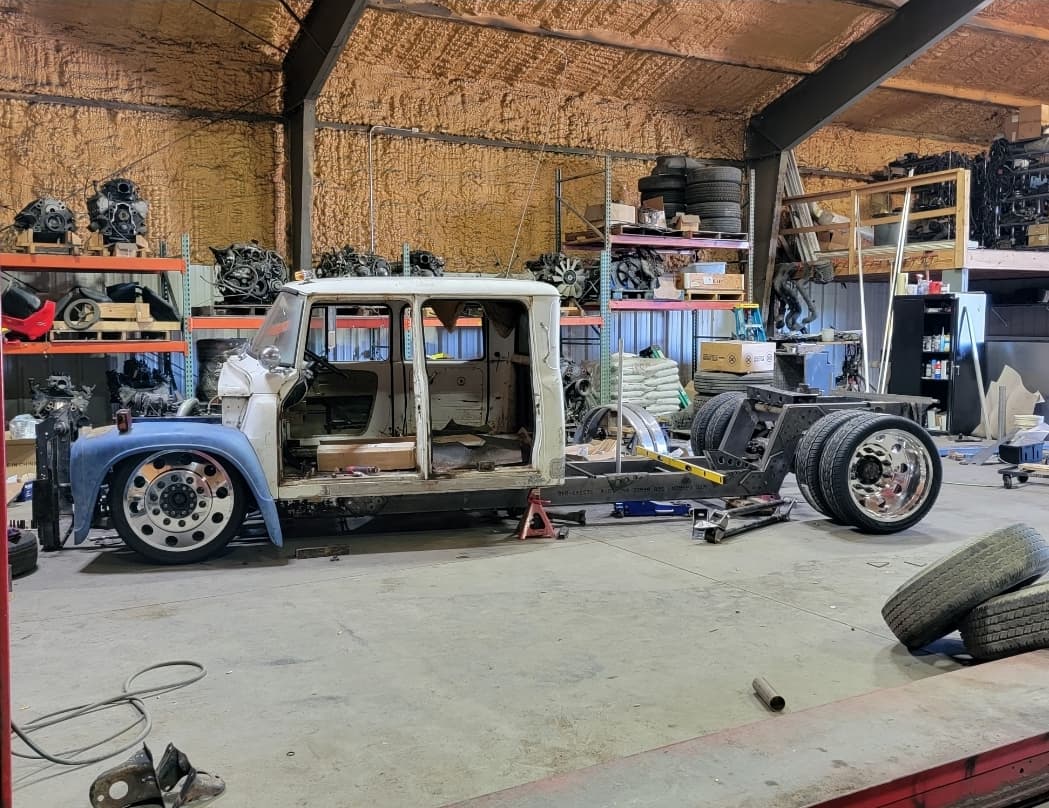
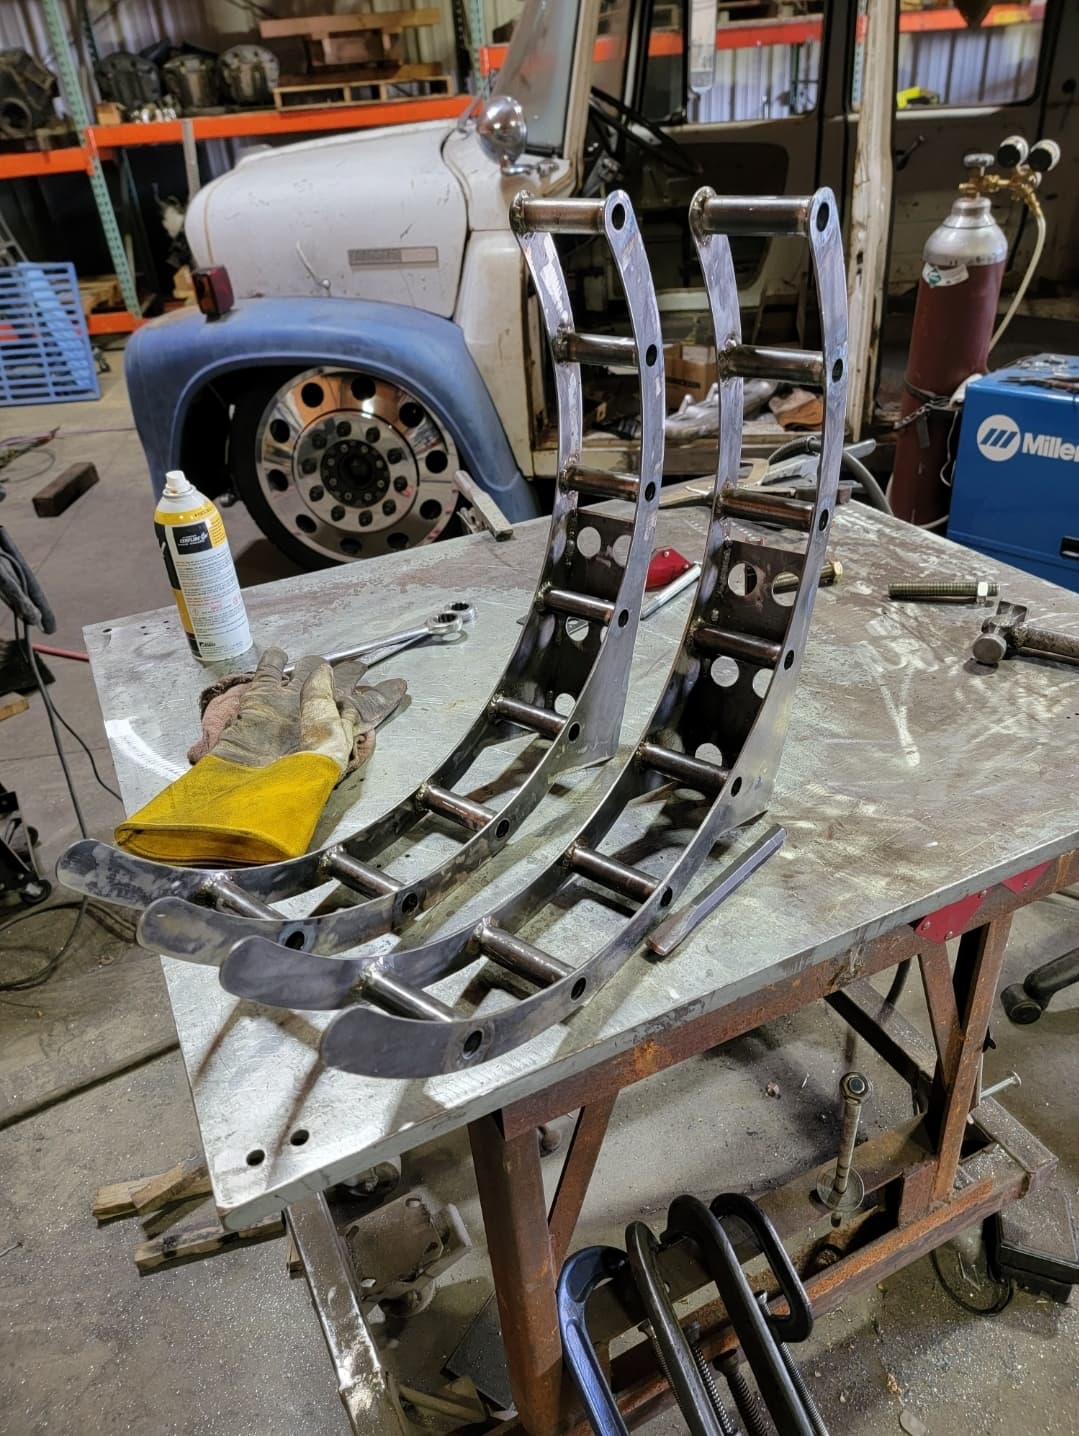
Make sure you post those brackets once you make them should be pretty cool I love the OG curve. I made a somewhat similar set of brackets for a boat that I have posted in the community topic.
Lol thanks man!
No, I’m definitely hoping this never goes offroad. But it is on air ride front and rear. 24 valve cummins, manual transmission, Dana 80.
Long way to go still.