Glad y’all are having fun with your Bambu printers.
1 Like
ProTip…put your buildplate and printed item in the Freezer. It will pop of the board almost on its own in about 10 minutes. Do not try to do when hot!
2 Likes
I have ran dozens of spools of pla-cf through my ams with no issues. I wouldn’t be concerned about that, I found some glow in the dark filaments to be a little fussy though but they always seemed a bit oversized. I would also recommend printing the desiccant dryers that go under the spools and the three that go in the front. Go with one of the front options that allows you to monitor temp and humidity. Dry filament really does make a difference and my ams maintains sub 30% humidity with those.
I always used the emgineering plate but since I got the Textured plate it has made life easier. 0 glue used, no adhesion issues, and I printed about 300 storage bins for within my hardware rack without cleaning it once.
For TPU get a filament dryer that allows you to print right out of it and feed that into the printer. It made TPU print fantastic and some of the more exotic filament’s also benefit from it.
I personally don’t enjoy 3d printing but it is a very useful prototype tool for me to verify before making out of metal and has been useful for increasing shop organization and solving random issues I needed to solve quick. But that’s exactly why I got an x1, hit send and walk away.
2 Likes
I’m out of practice with block quoting another post. the methods that I used to use don’t work here.
Yes, some sort of external spool holder like the one shown above or as mentioned a standalone dryer type unit that has a feed hole out the top.
The quality exceeded my expectations
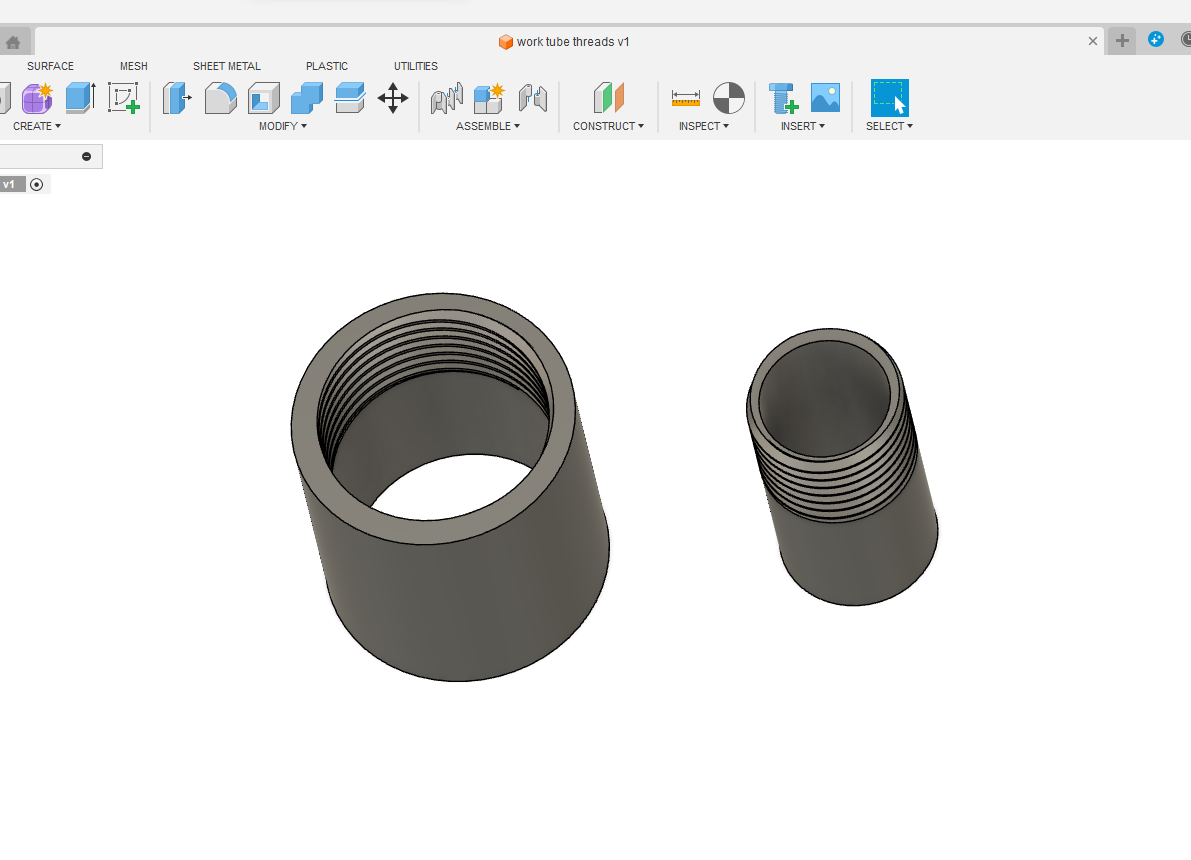
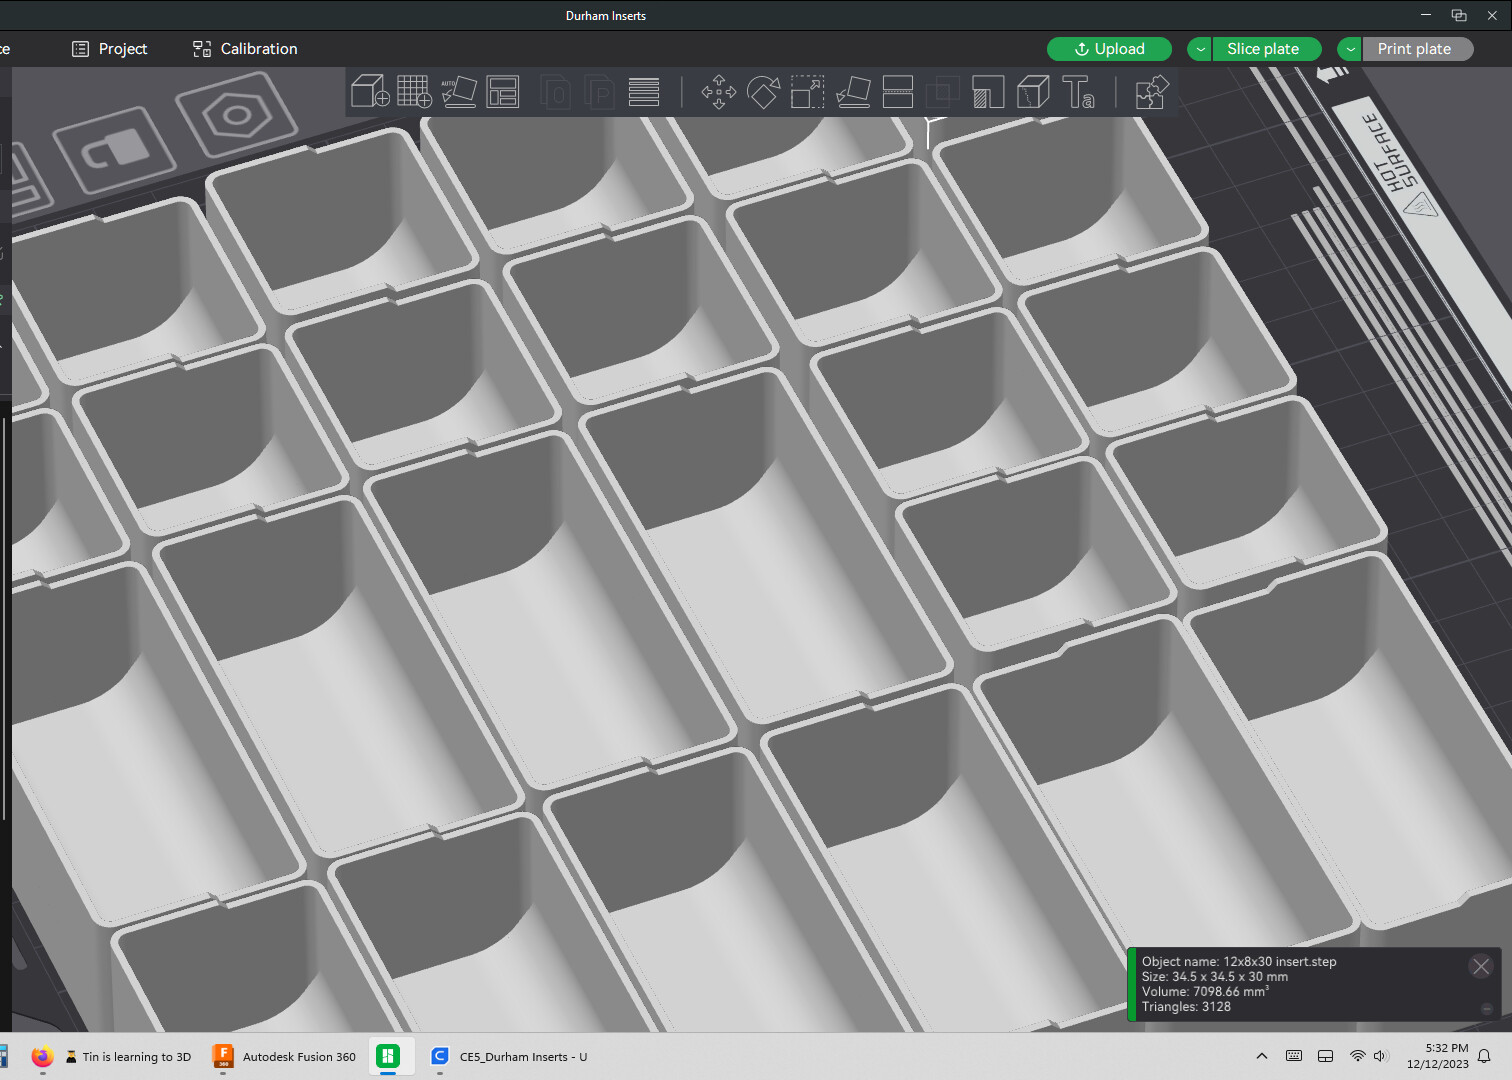
I can’t find the one where I put the rib on the top of one edge for the nesting ones (I hope I did not delete it), then I remembered that I also put a generous fillet on the bottom to make it easier to get little things out that would otherwise stick in the corner when reaching in.
I keep the base model in F360, and modify the sizes according to how many and what size I want.
@gregmanz - I am glad that you have been able to run CF through your AMS. However there is a lot of independent documented users who trashed their bowden tubes inside the AMS, and wore out the feed rollers after just a few spools. Some get worn out faster than others, likely just a matter of bends both natural and feeding the tubes inside and higher content CF filament. BL advises not using it in the AMS since kickstarter, and they hold to it still to this day. Argue with mfg recommendations at your own peril.
4 Likes
Right on their site it says ams comaptible, but it is not compatible with 0.2 nozzles though. I also only run their filament except for when the wife wants something in a specific color she finds.
Bowden tubing is very cheap and takes 10 minutes to take the ams apart and get it back together when you need to clean it out or remove a broken piece of filament which is usually the reason for taking it apart. Small price to pay and you’re probably saving money still with the ability to fully use a spool up since they aren’t the cheapest.
Bowden tubing is very cheap and takes 10 minutes to take the ams apart and get it back together when you need to clean it out or remove a broken piece of filament which is usually the reason for taking it apart. Small price to pay and you’re probably saving money still with the ability to fully use a spool up since they aren’t the cheapest.
You might want to clarify that. It may take you 10 mins to replace the bowden tubing inside now, but I’ll wager the first time you did it was likely a bit longer, and the average person is going to have a difficult time with it. Why put yourself through the hassle of knowingly wearing out a part unnecessarily?
You can use an entire spool fed from any external spool holder as the filament sensor is located at the printhead.
1 Like

1 Like
So my new A1 mini is arriving soon and just found out about the new A1 full size coming out tomorrow…
There is talk already about them doing a A1 XL which would be a little bigger but that might be few months out. I think I’m going to stick with my mini and just play around until the XL comes out. There hitting all the price points it seems.
1 Like
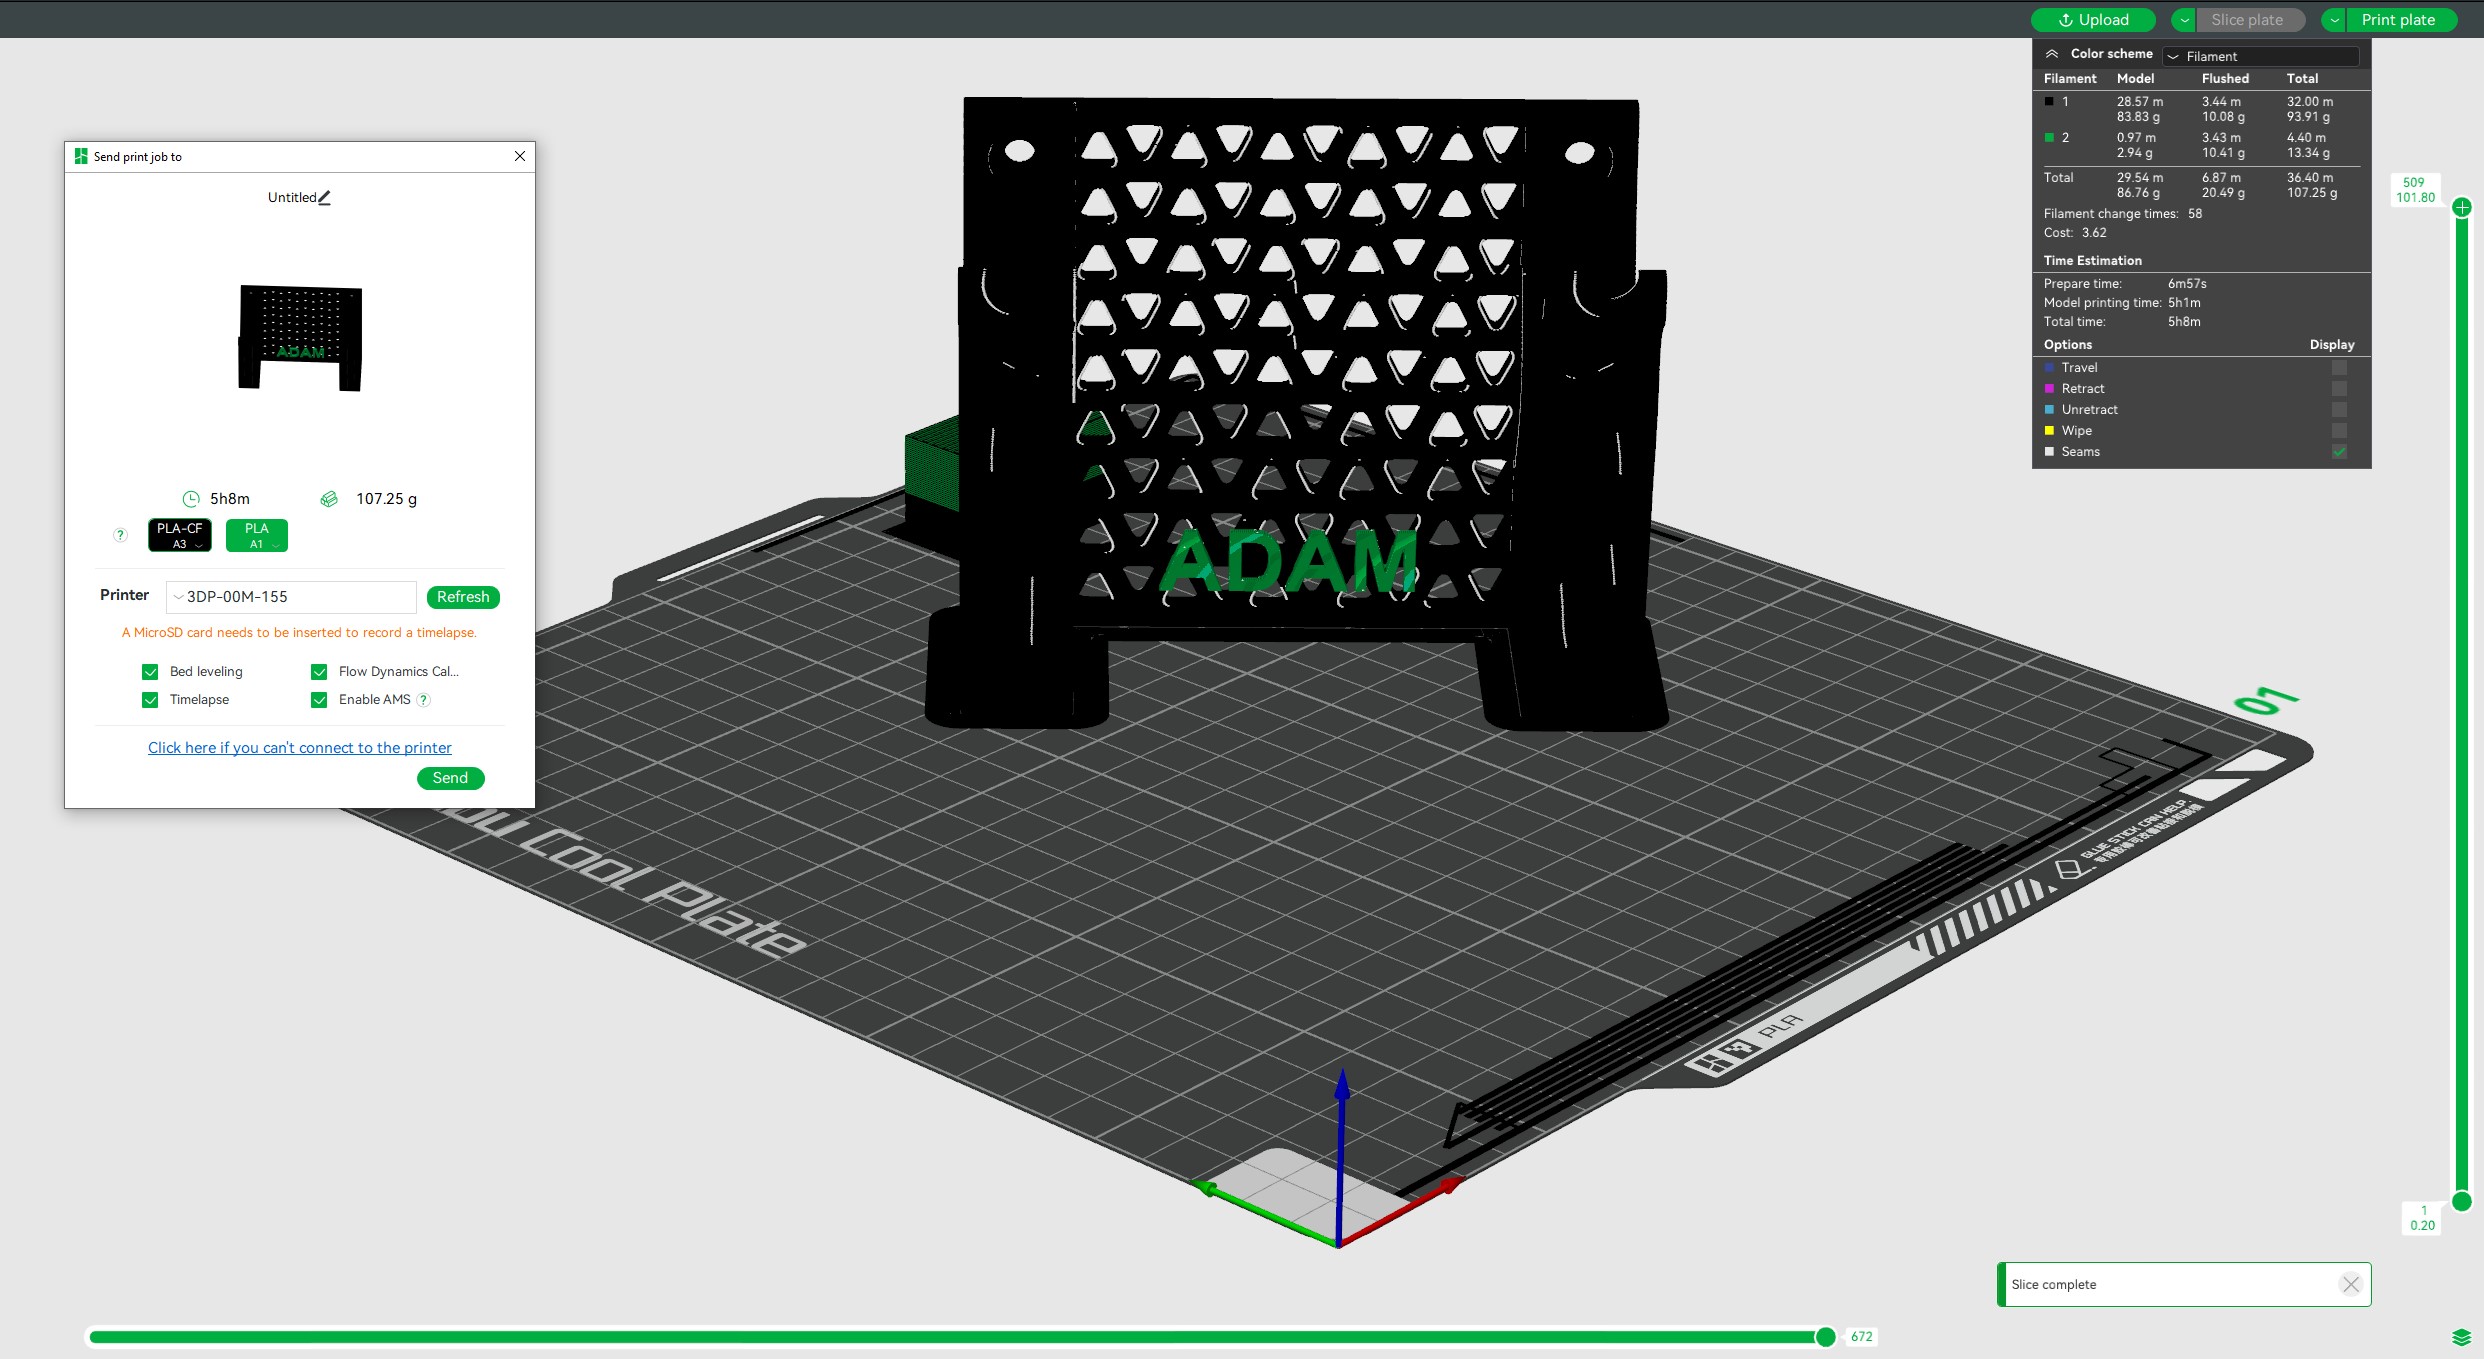
I have concerns about the lack of support at the bridge at the bottom. The smaller triangles may go well.
1 Like
You are right to be concerned.
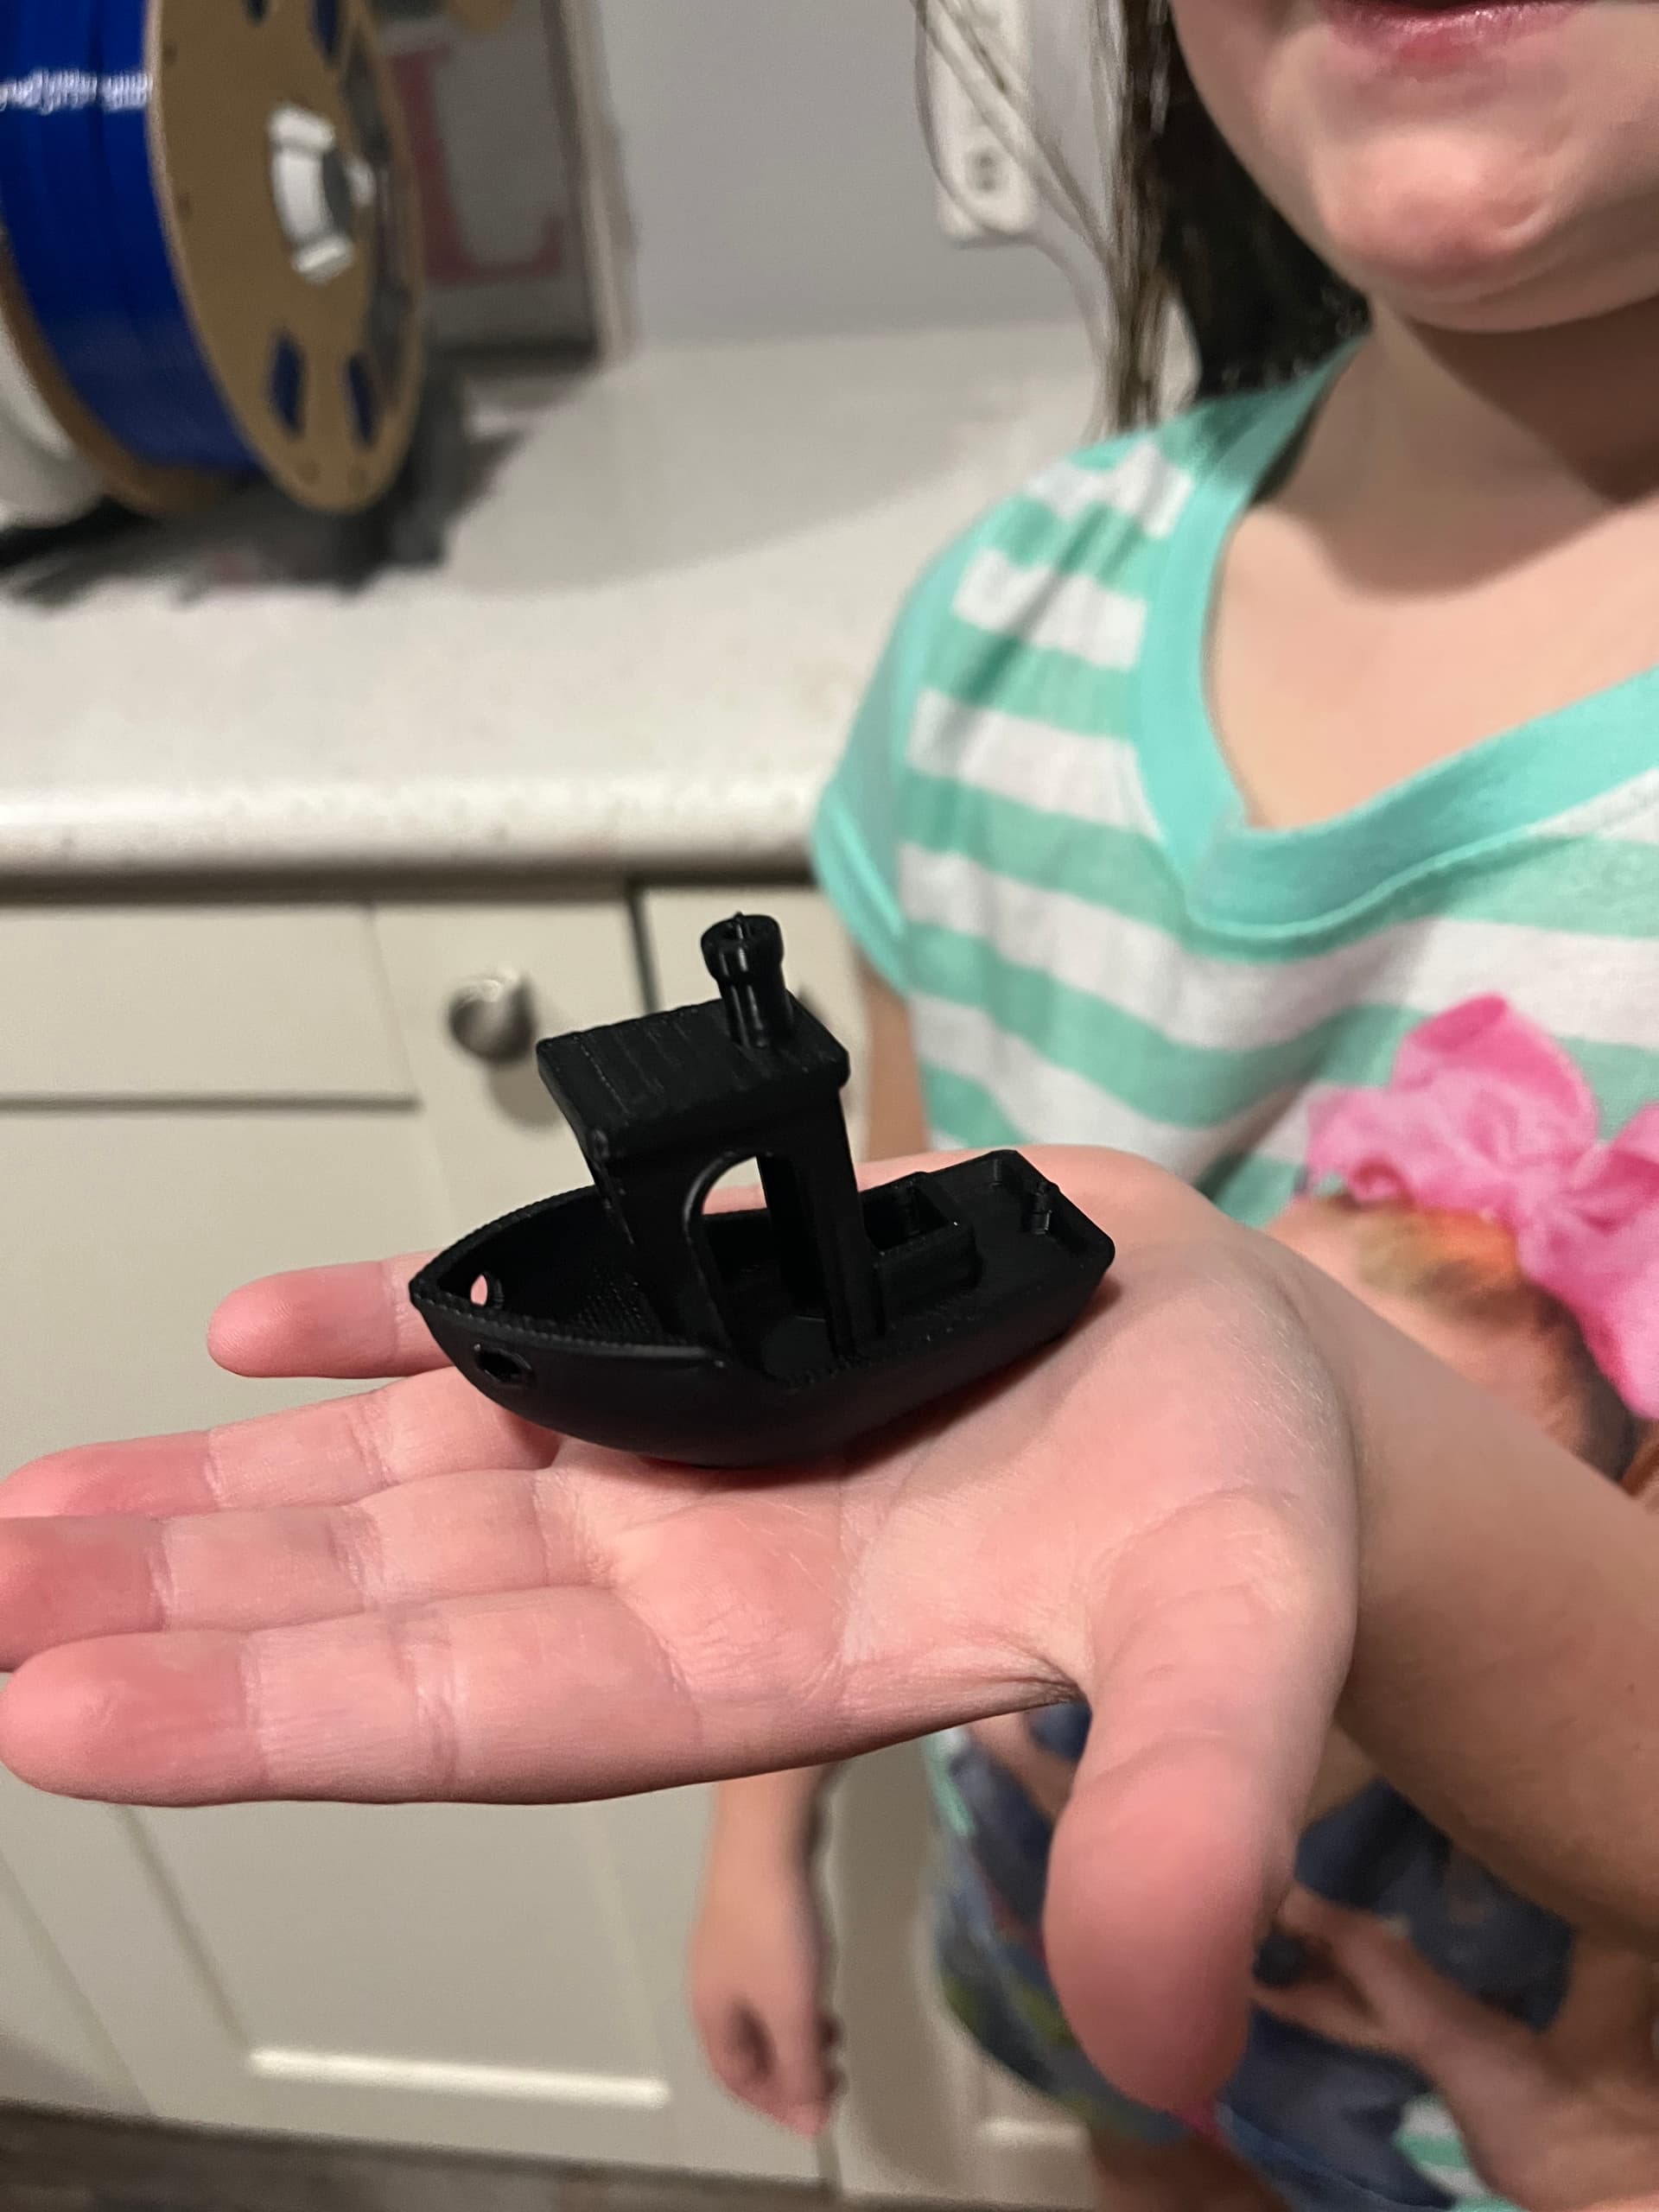
The photos are after I picked the stringy bits away with a knife.
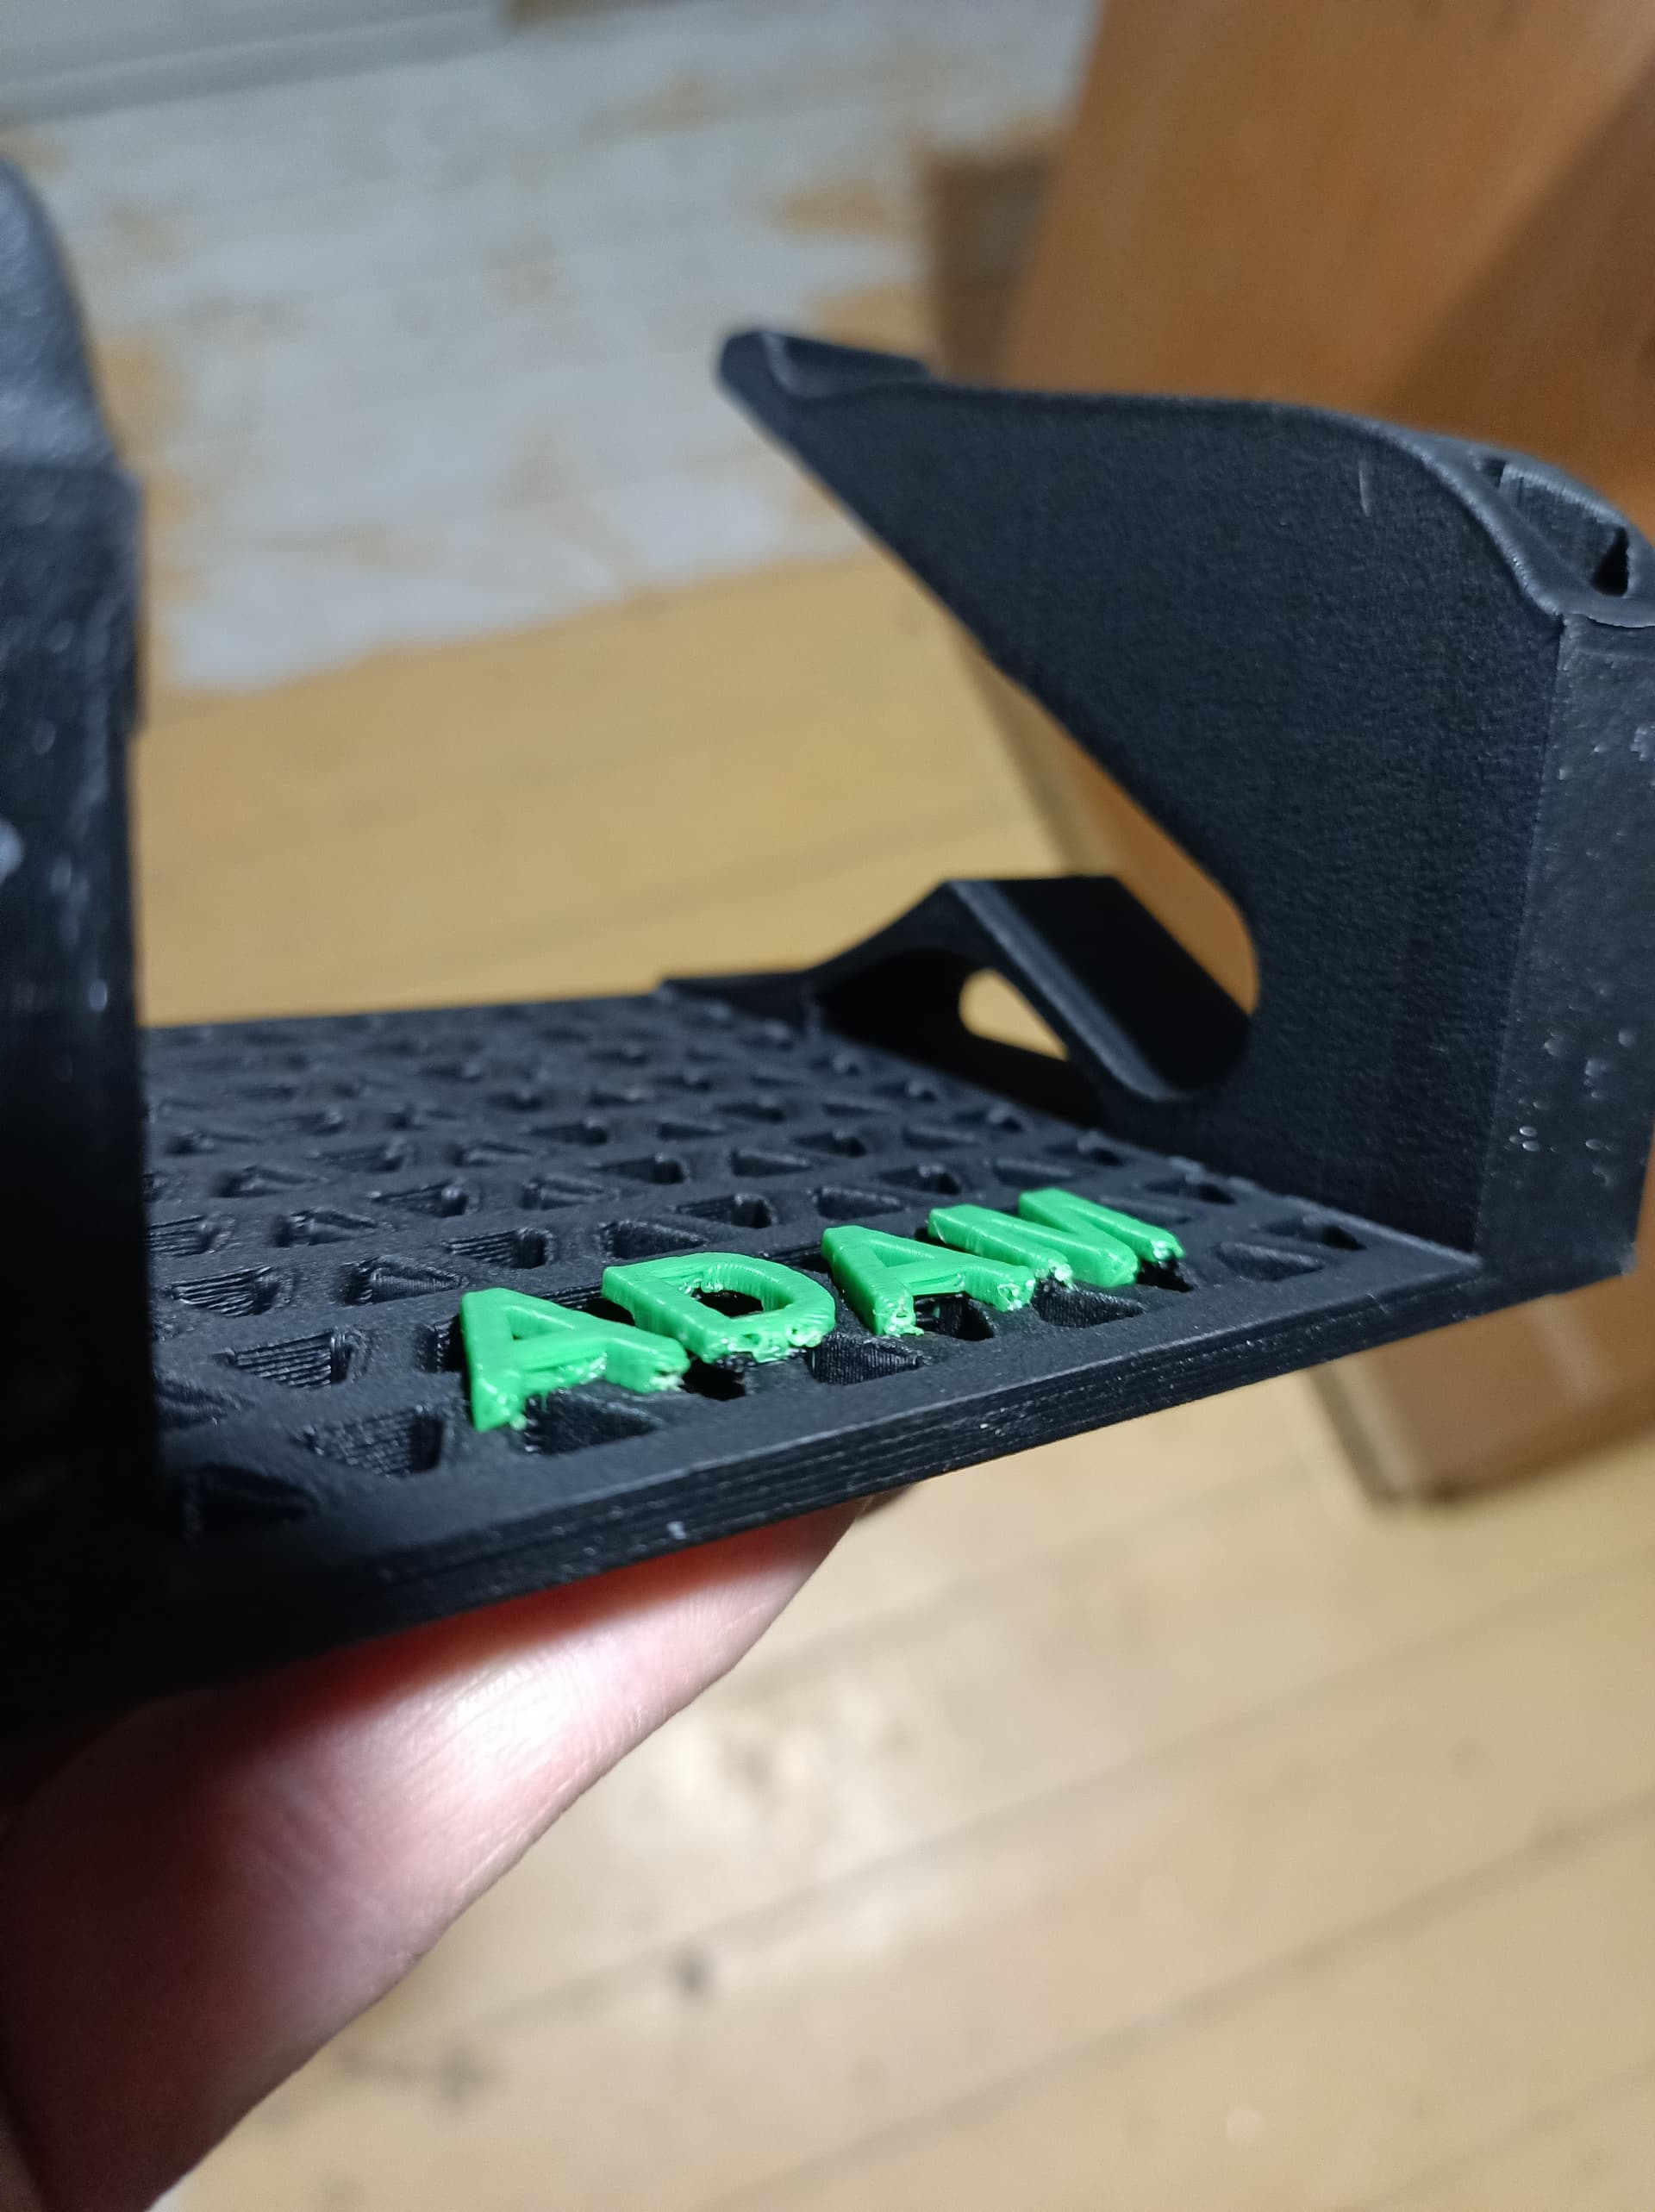

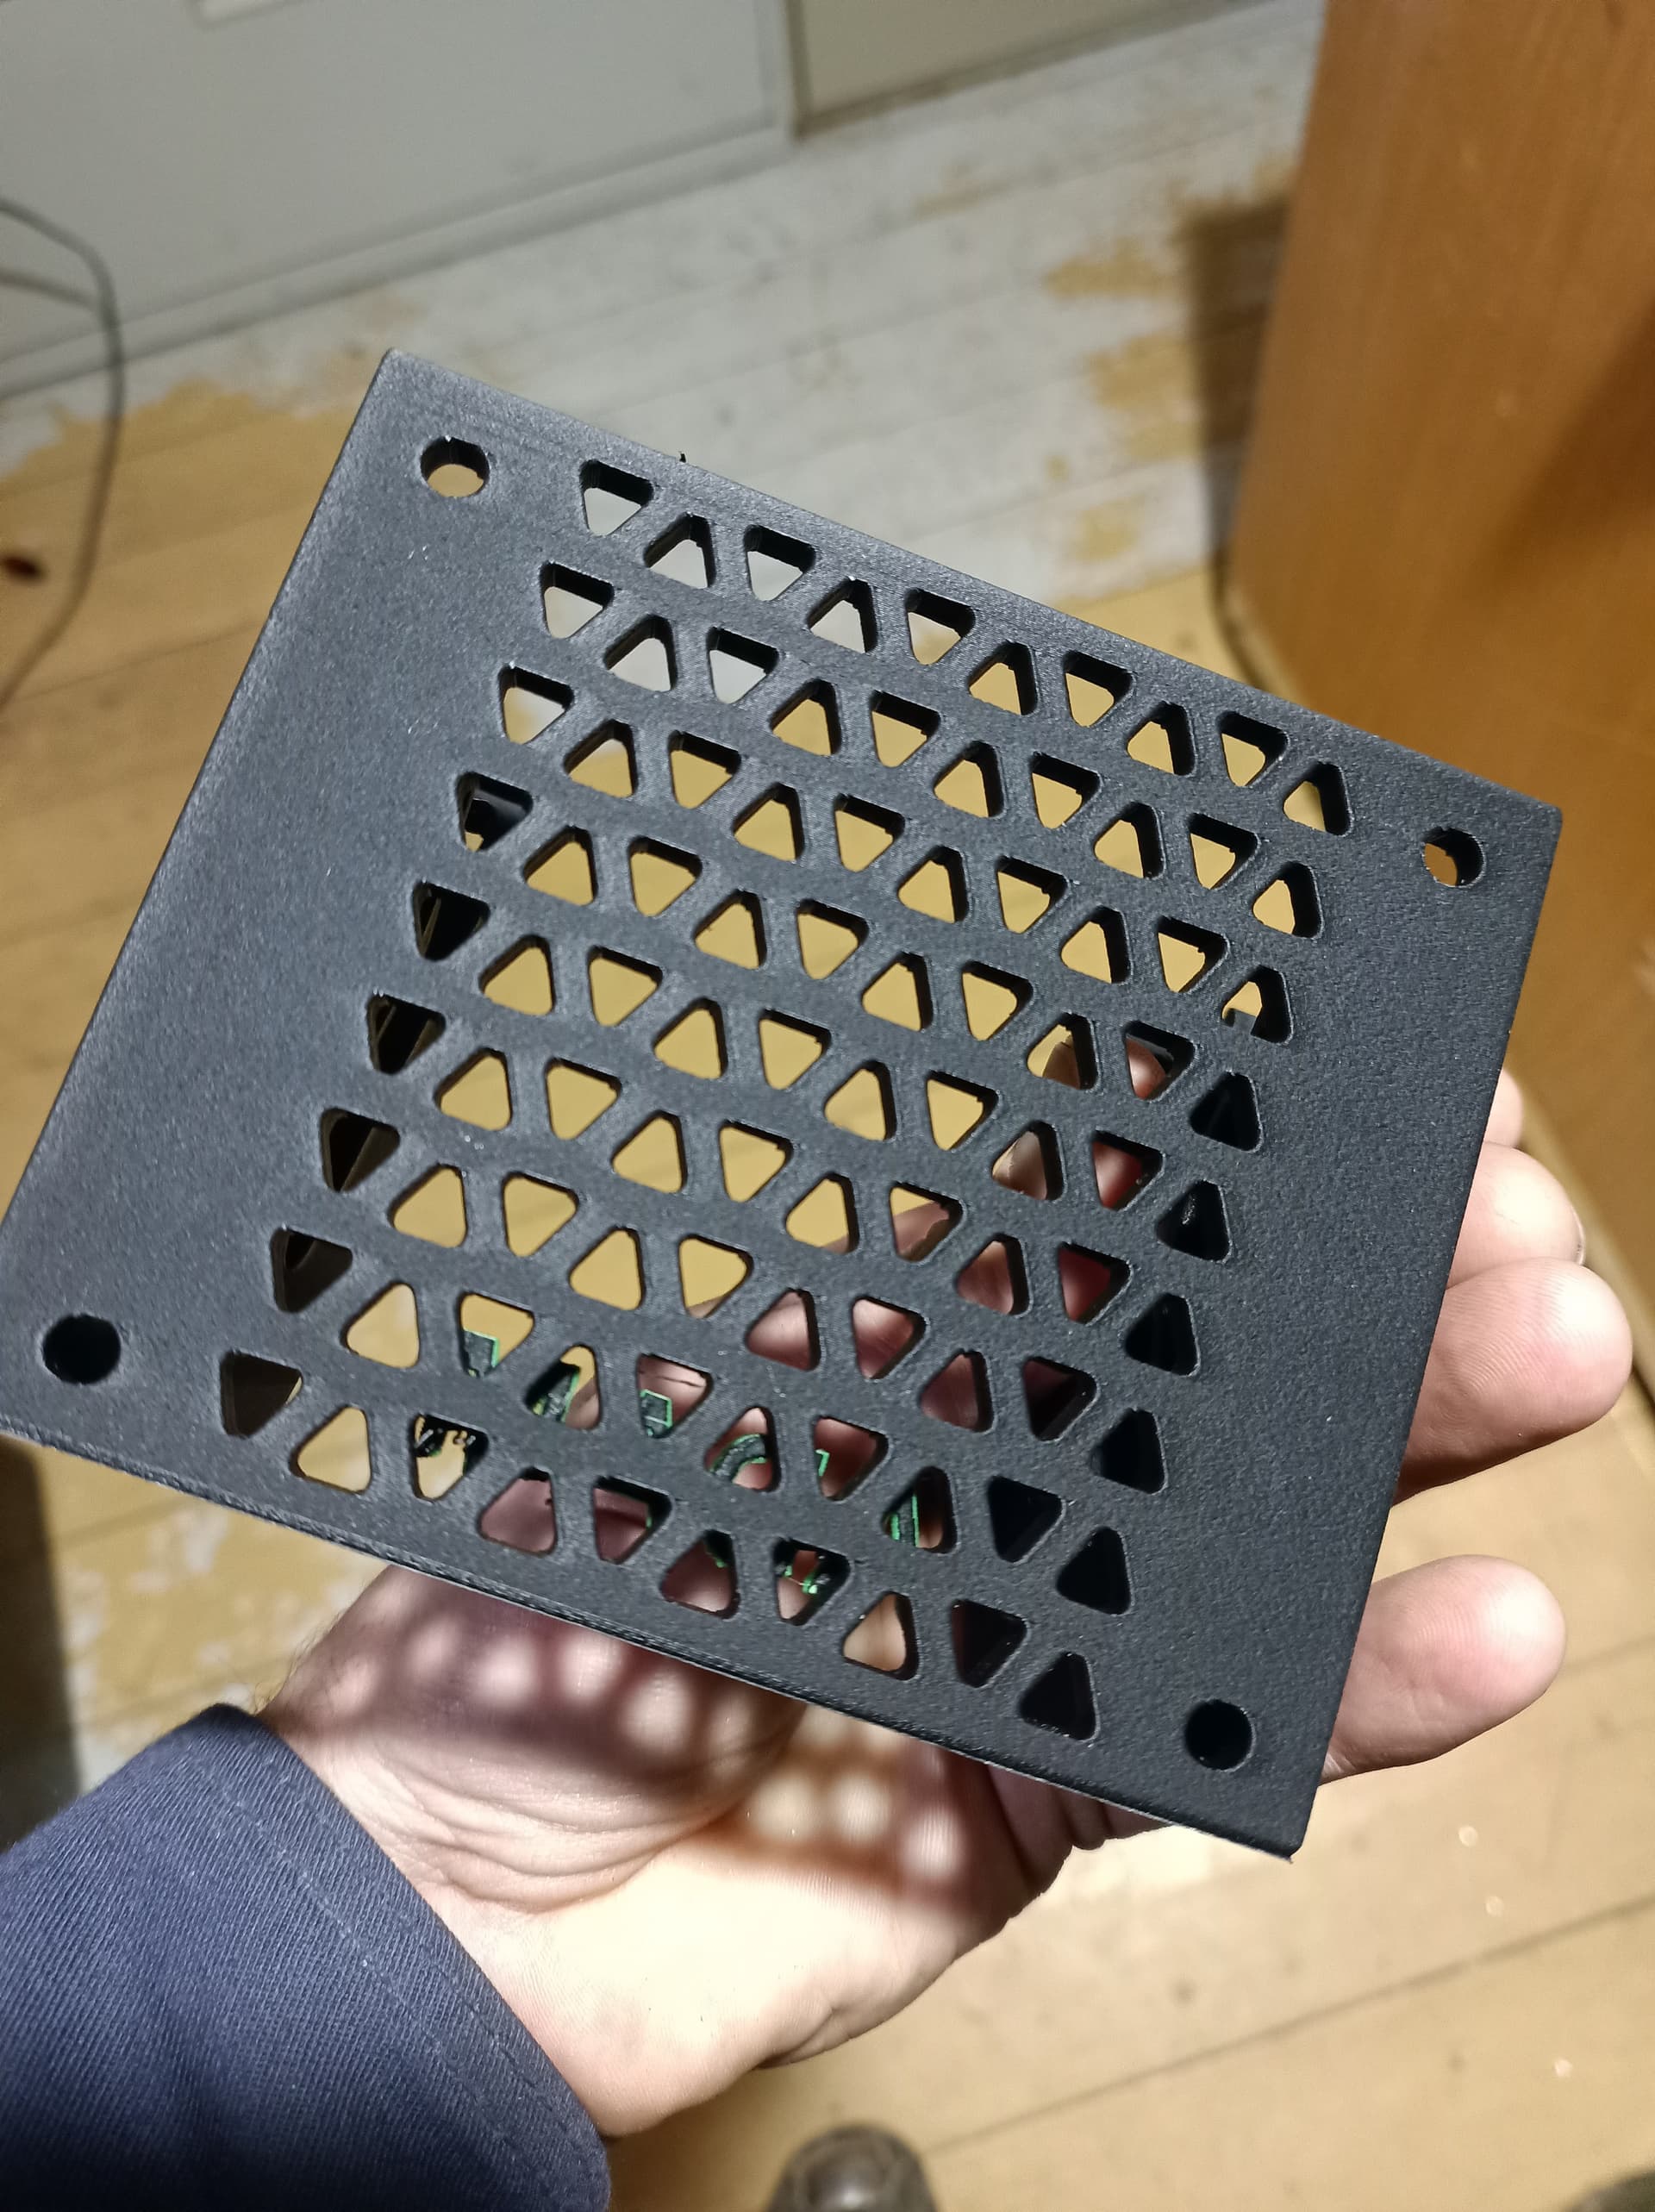
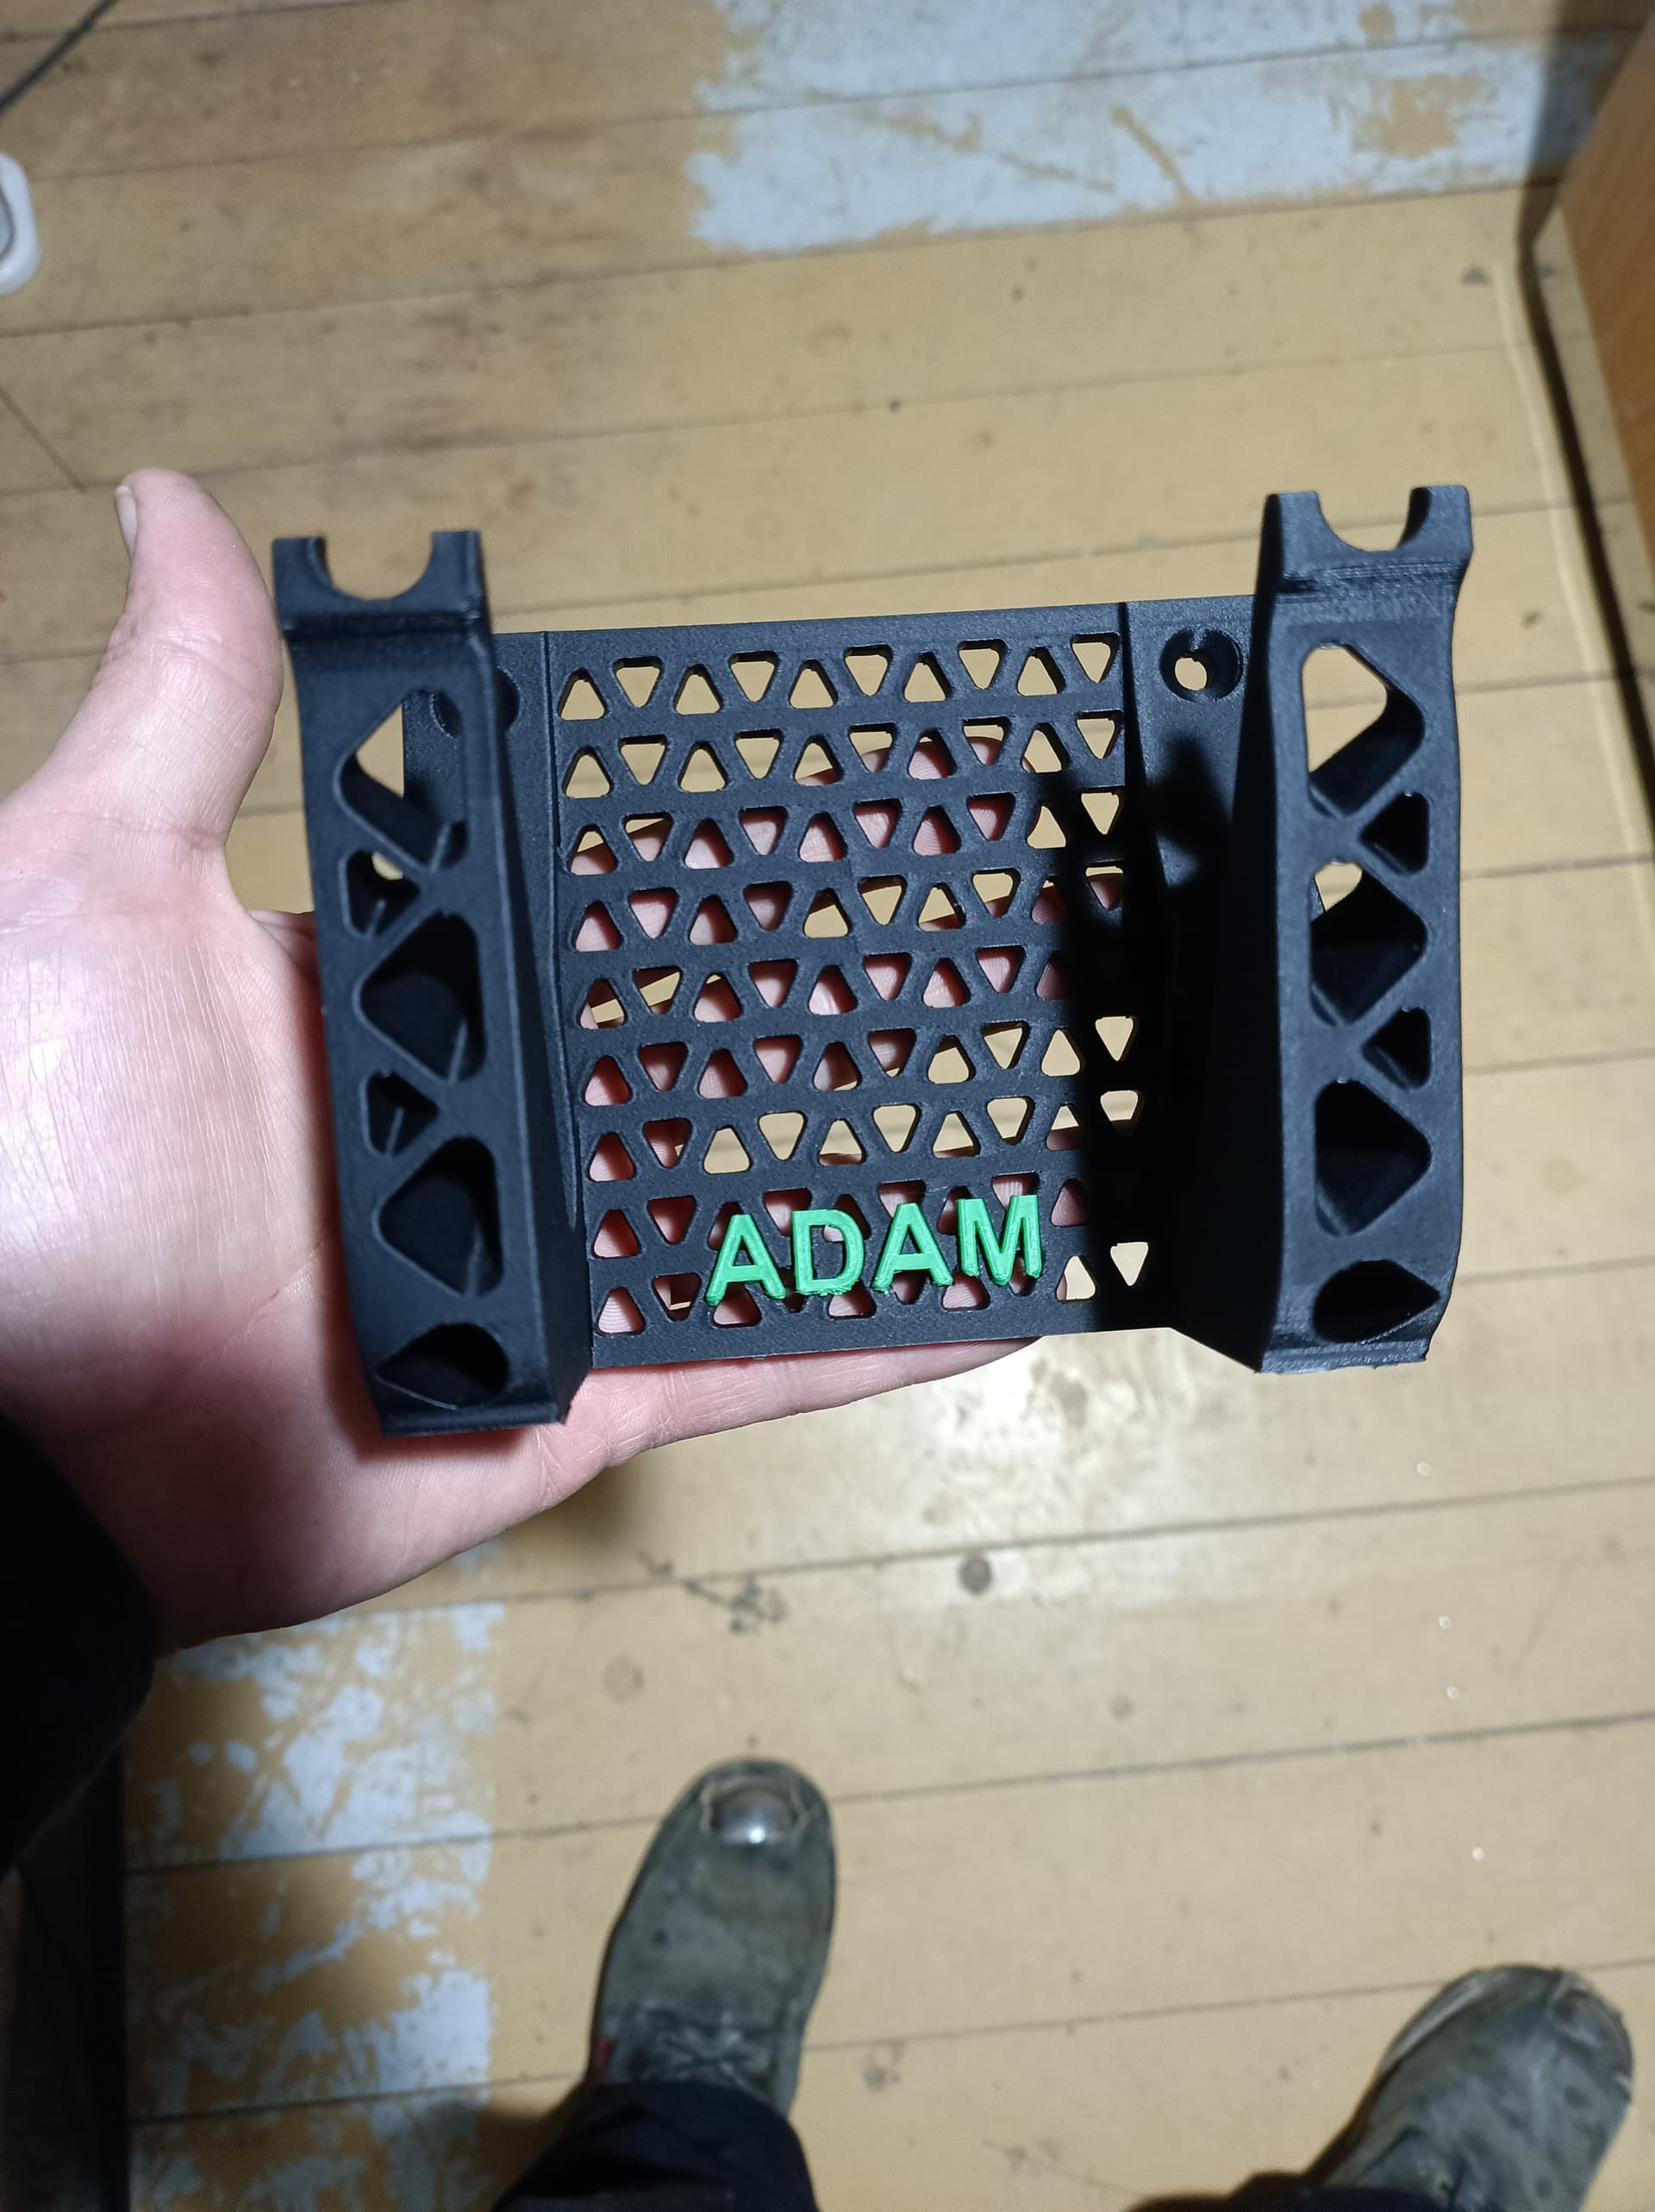
It turned out okay but the bottom few layers of green definitely didn’t like being printed into thin air. I’m going to do one more later today and just see if I can put pla support material underneath the letters somehow or maybe design the letters as a separate piece that snaps into the triangles. I haven’t dove into the slicer muchyet. Fumbled around enough though to get the text and color done in Bambu studio…
Getting low on materials I only had the partial starter rolls that they give you with the combo kit. Hoping my order will be here soon.
3 Likes
I have a serious case of FOMO followimg this thread.
Looks like you like to extend the mileage on your boots as well… I have started to use strips of duct tape to hold the soles on mine. It’s a good upgrade! ![]()
I think my Christmas present was delivered Monday… I was home with the kids and a box from redline showed up at my door with my wife’s name on it… so unless my wife is thinking of getting into powder coating. I may have to wait a little longer for a 3d printer. ![]()
![]()
5 Likes
Thanks for tip!
1 Like
Your CAD skills should make short work of making the letters seporate.
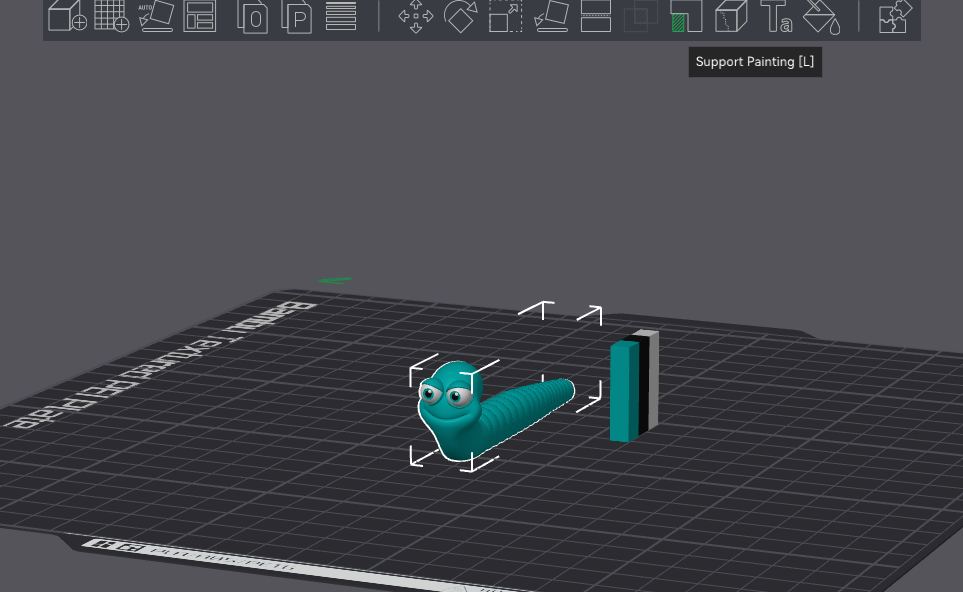
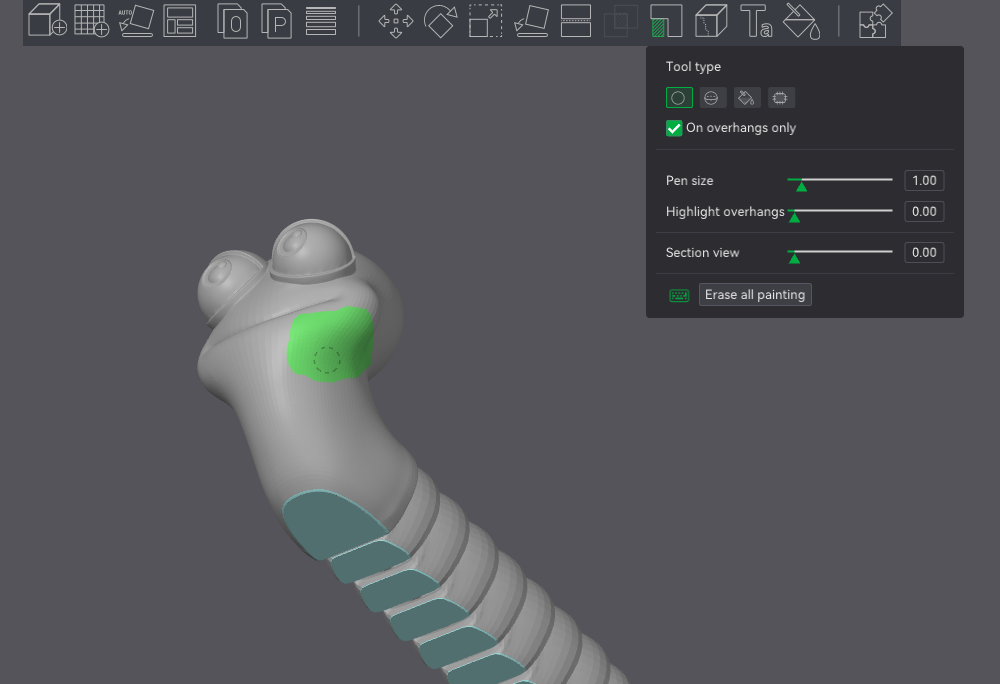
However…You can use the slicer to put supports only where you want them, which would be under the letters - Support Painting
See now if I had the TW skills and video editing/streaming/and other majik stuff I would do a tutorial for you on these little things
3 Likes
Maybe I should start making a few videos on making videos. I’m a visual learner by nature so doing so might be a little selfish but for a common good.
I’ll try painting supports on the next one I do.
And thanks again for all the tips everyone!
4 Likes
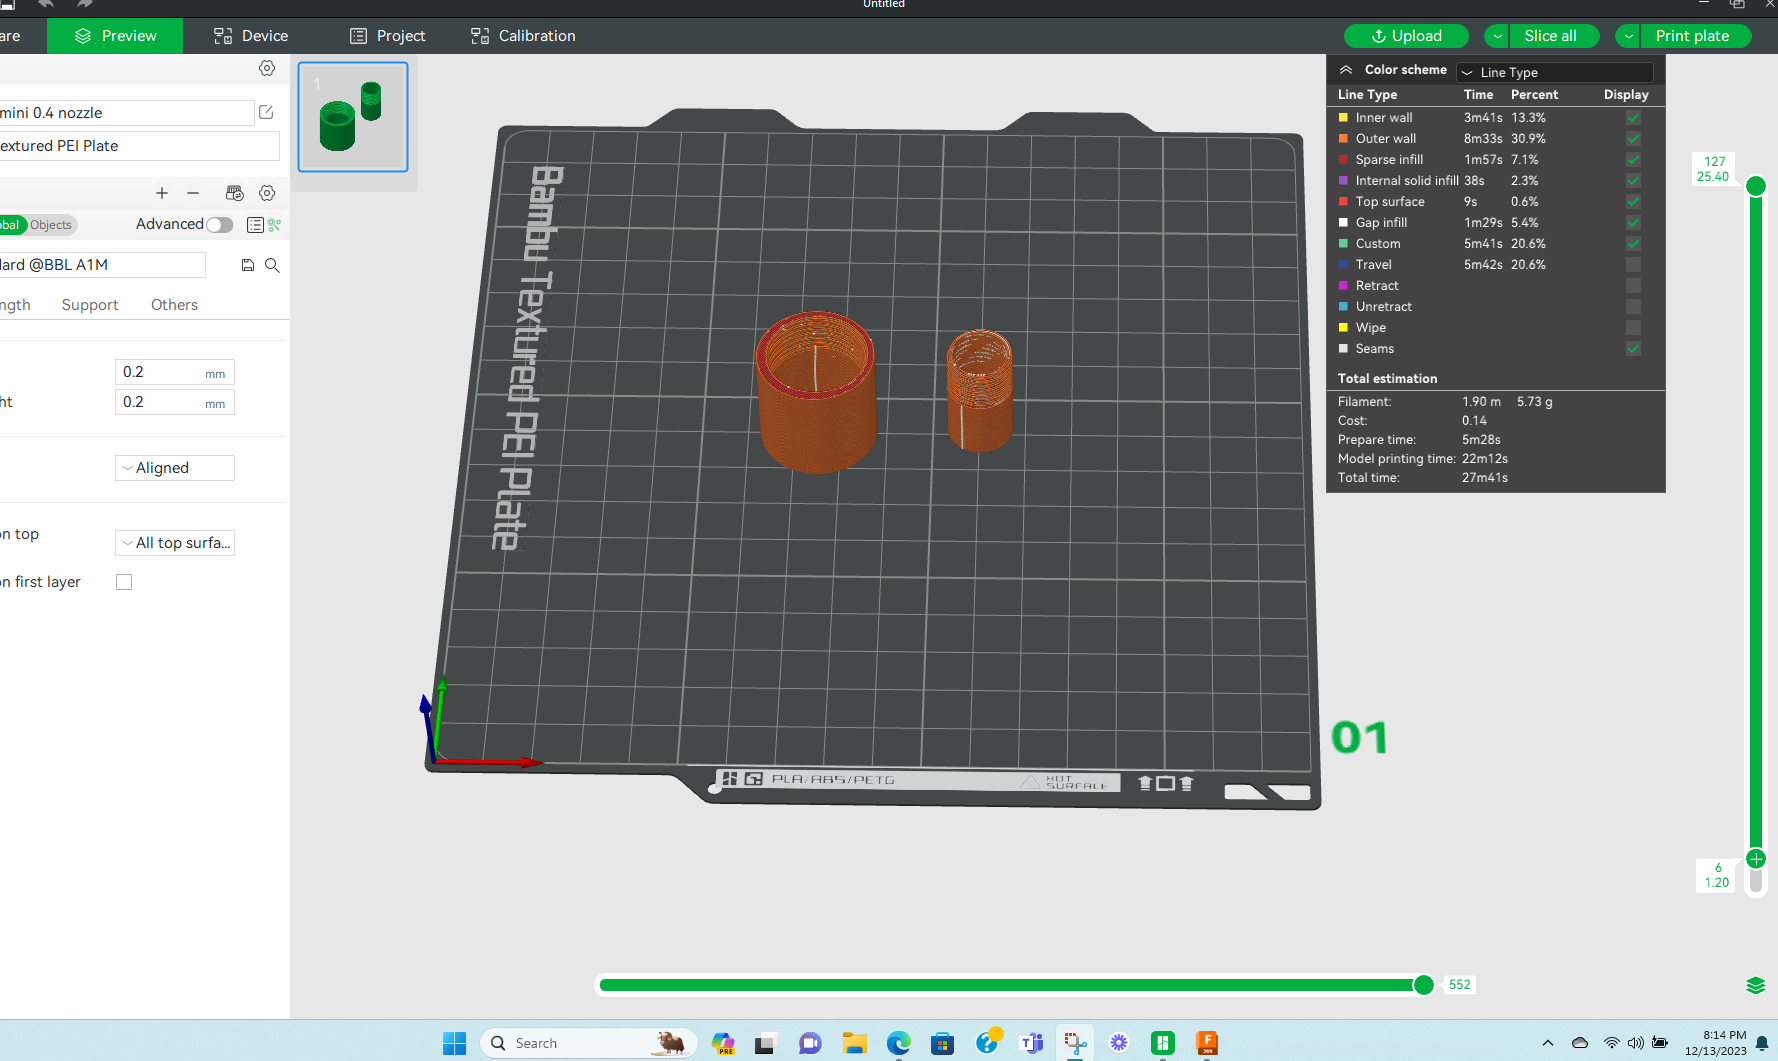
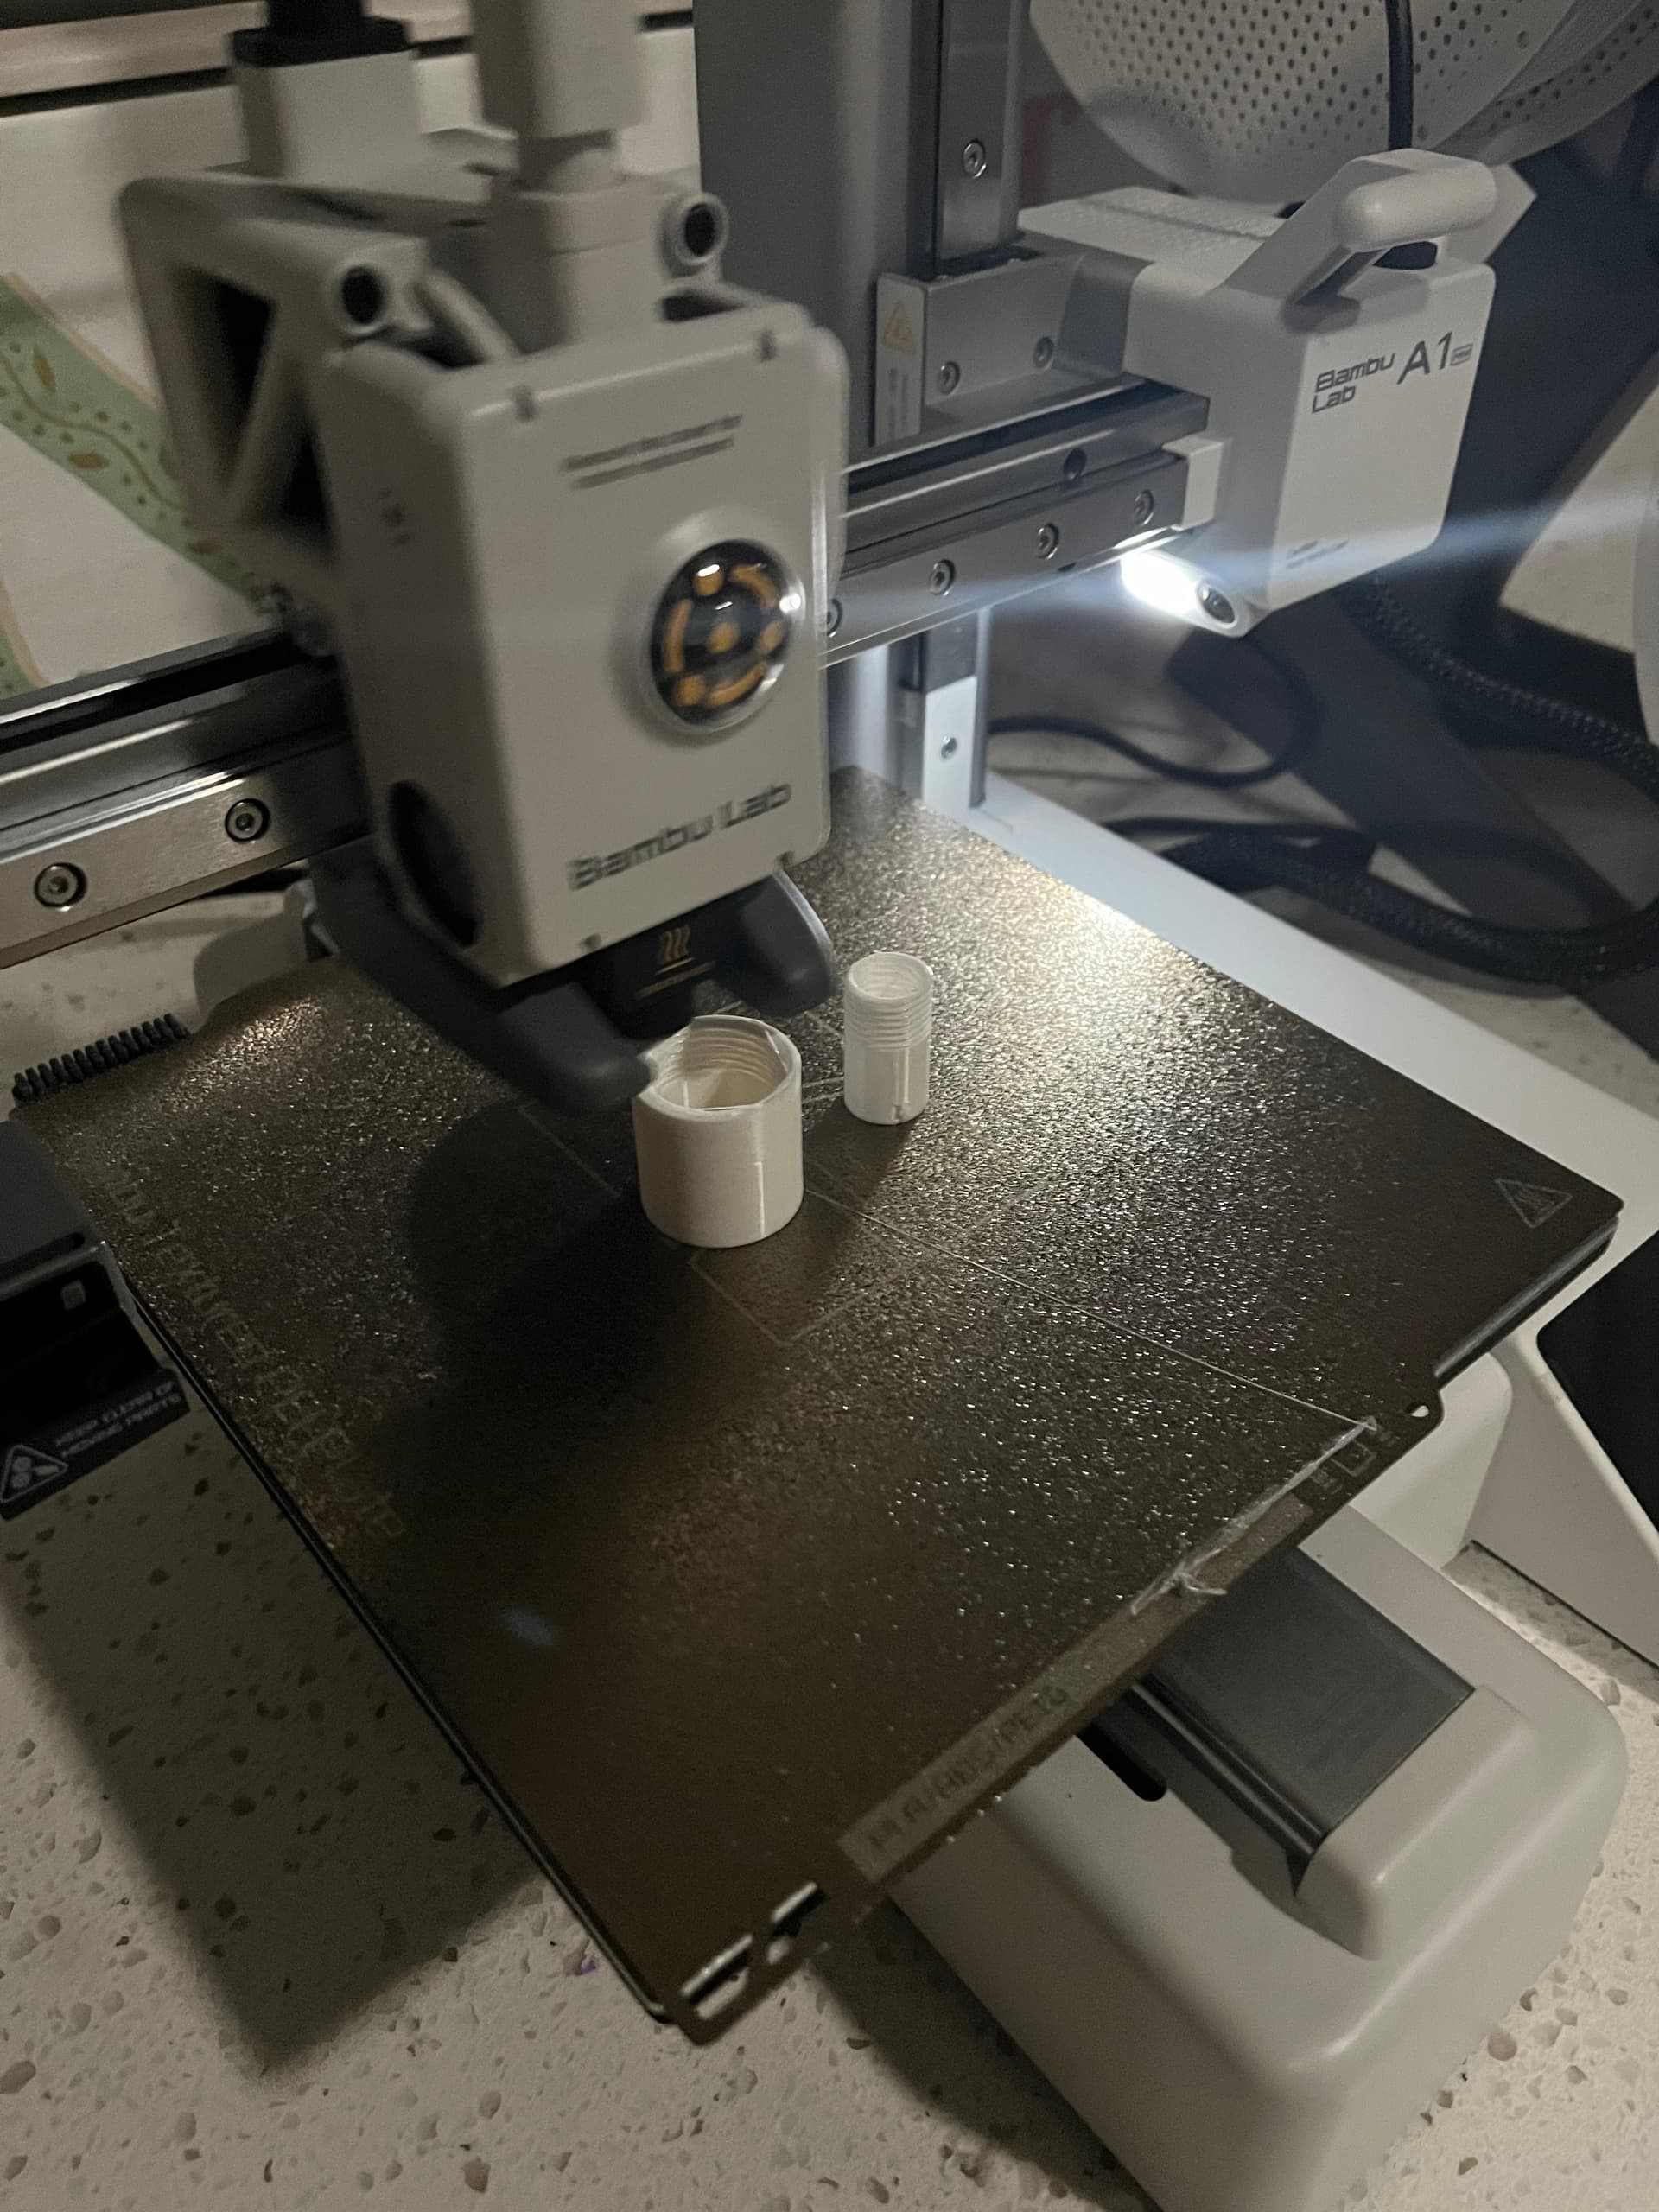
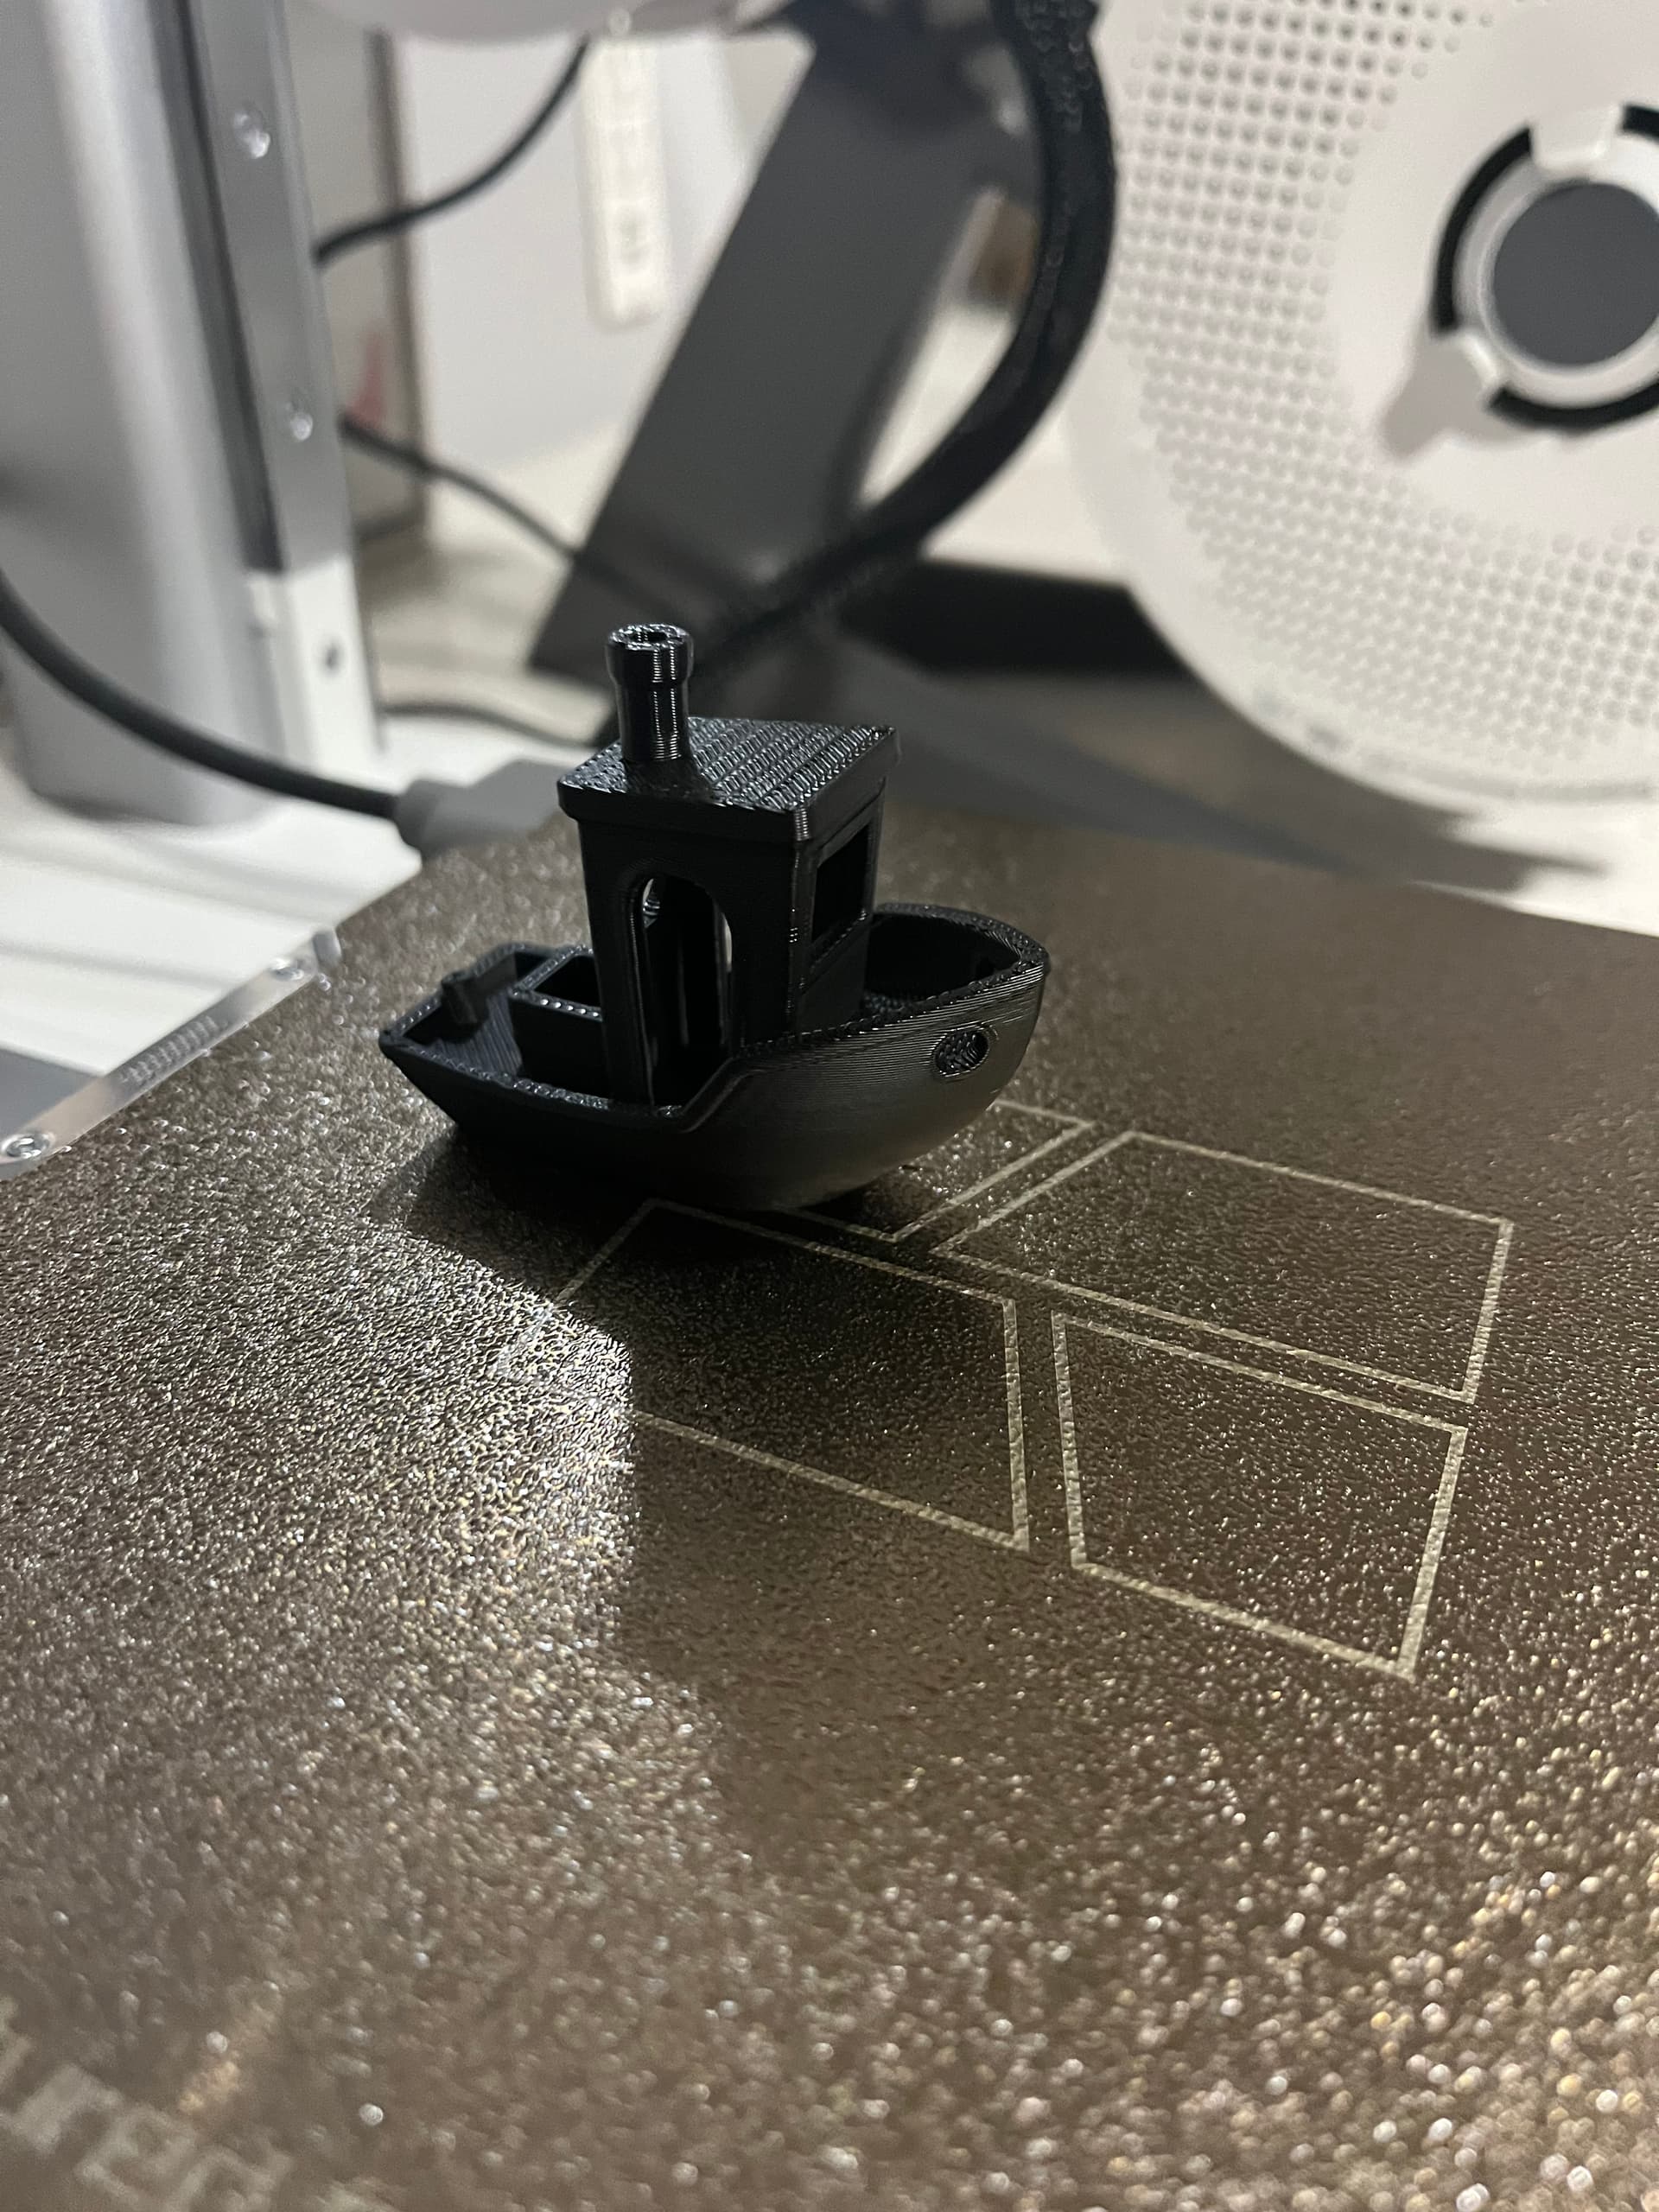
Got my Bambu A1 mini and took 10 mins to get it all setup. Did calibration and everything was good. I figured I would make a benchy boat so selected a roll of PETG and the mini comes with the textured plate. It didn’t stick and came off on first layer. I selected a black PLA roll, and it worked great. My question is…Should I raise the bed temp to 80C instead of standard 60C if using PETG?
5 Likes
I’ve had good luck with the generic PETG profile in Bambu Studio, which has a bed temp of 80C for the Textured PEI plate.
I’ve also had good luck with the Bambu PETG filament and their profile, which has a bed temp of 70C.
3 Likes
Make sure the build plate is CLEAN…wipe off with IPA. Fingerprint will cause bad first layer.
ALSO - PETG is hotter and slower. Some people get lucky with it. Others it’s a fight.
This long arse thread has a lot of tips and fixes.
4 Likes
ALSO - no part cooling with PETG