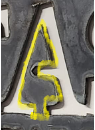
Hey guys let me know if this doesn’t belong here. This is like the 6th or 7th thing I’ve cut since I completed setting up my pro about a week ago. Wondering if anyone has any ideas on how to fix an interior letter that fell out - the “A” in guitars fell out because I didn’t leave enough of a bridge. Tried cutting out another little triangle to put in there and weld it on but all I have is a flux core welder and it’s too delicate a job for it. Is this something I could possibly solder or braze? It doesn’t look terrible but I’m really just wondering for future reference if anyone has a good way of fixing something like this. Thanks in advance!

2 Likes
Might try JB weld but I’ve never tried it myself.
2 Likes
What gauge is this? You should be able to tack a couple welds with your machine turned way down. Just quick tack in front and back. Then dremel. You may need to cut the rest of the A out and weld in an entire new piece.
1 Like
14ga. I’ll try to back off on the settings, thanks!
I would try Don’s suggestion with JB Weld. I have used that product for other projects. There is a reason it is still around: good stuff.
But, whether you use JB Weld, welding or brazing, I would cut out numerous samples of the entire interior element of the “A” and sever the bottom of the guitar “A” so you have a larger base to bond. (As suggested by Marty).
This brazing rod may work:
https://a.co/d/8D7gqBi
2 Likes
So TIG welding might be your best rapair option…
I applaude you for attempting to take on a large detailed cut early on in learning.
BUT
Please do not take this the wrong way but here is some advice on cutting…
I never suggest people take on bigger cuts until they have fine tuned thier settings with a few test trials before.
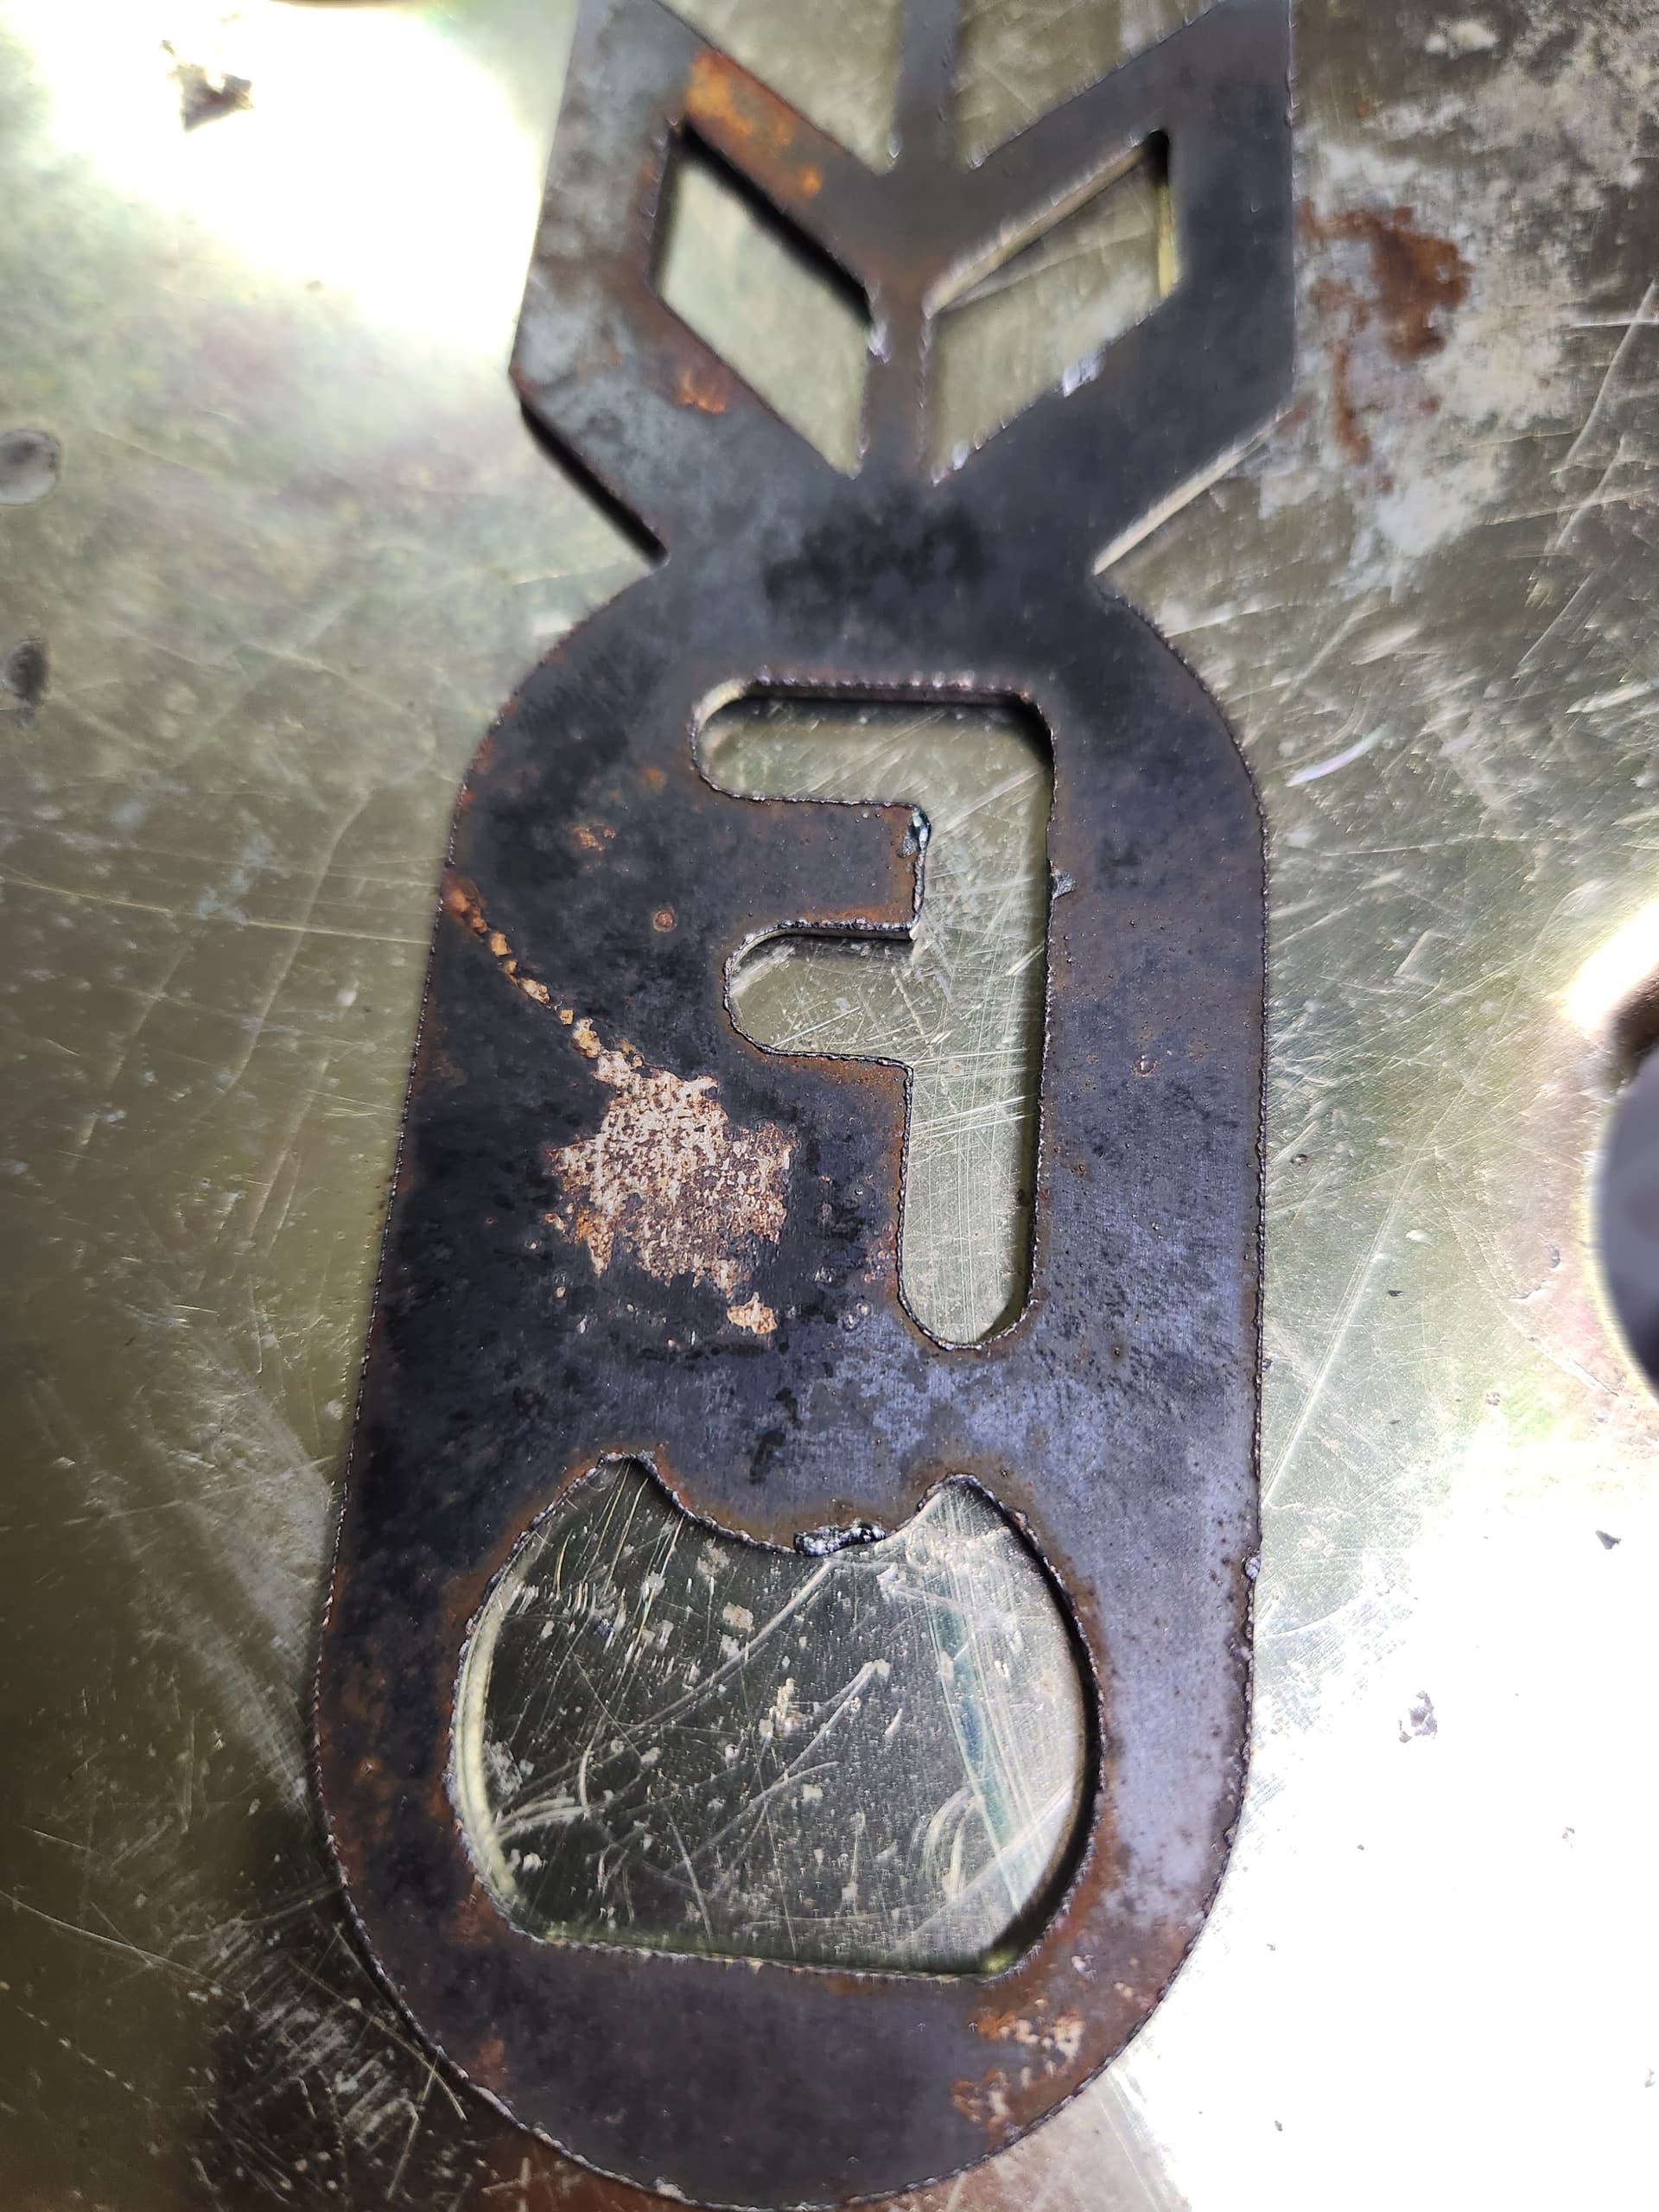
I always suggest taking the F-bomb from FireShare and using that as a test cut. It has inside and outside details that truly help you tune in the settings.
by looking t your cuts I can see that you are possibly too high on the torch…and just because you set the program to 0.06 does not make it that…you need to use feeler gauges to actually measure the height and than make adjustments in your software to make it as close to the height.
Also measure your actual cut width…book is estimayed values in perfect settings on a perfect system.
As you have not posted your plasma and the settings used it is hard to provide additional advice for better results with less work on clean up…
again…great work…but now time to tune it in…
2 Likes
Thanks Toolboy always appreciate the feedback. I was thinking tig would be best but unfortunately although my welder can do it, I don’t have experience with the process.
You’re probably right about the settings. I have a primeweld cut60 and I set up the machine according to the feeds and speeds chart in the manual but I know that’s just a rough outline. Currently for the 14ga I’m at 100 ipm (which seems a bit high compared to speeds others have mentioned in this forum) and I’m at 35 amps.
As far as the height goes, I’m using THC and I assumed it just dialed in the appropriate height. I don’t remember changing height settings in fusion when I initially set it up like a week ago. Unfortunately my wife and I left town at noon so I’m not at home to have a look. Will check as soon as I get back in a couple days.
1 Like
If you TIG, something that works for me are flash tacks. Something I use for small pieces that I don’t want alot of heat. I usually double the required amps needed. No filler needed, just a quick burst should hold the metal together.
2 Likes

You are right! I think I would leave it. The “cure could be worse than the cold,” so to speak. I really think your fix will draw more attention to the area. Everyone knows it’s an “A.”
3 Likes
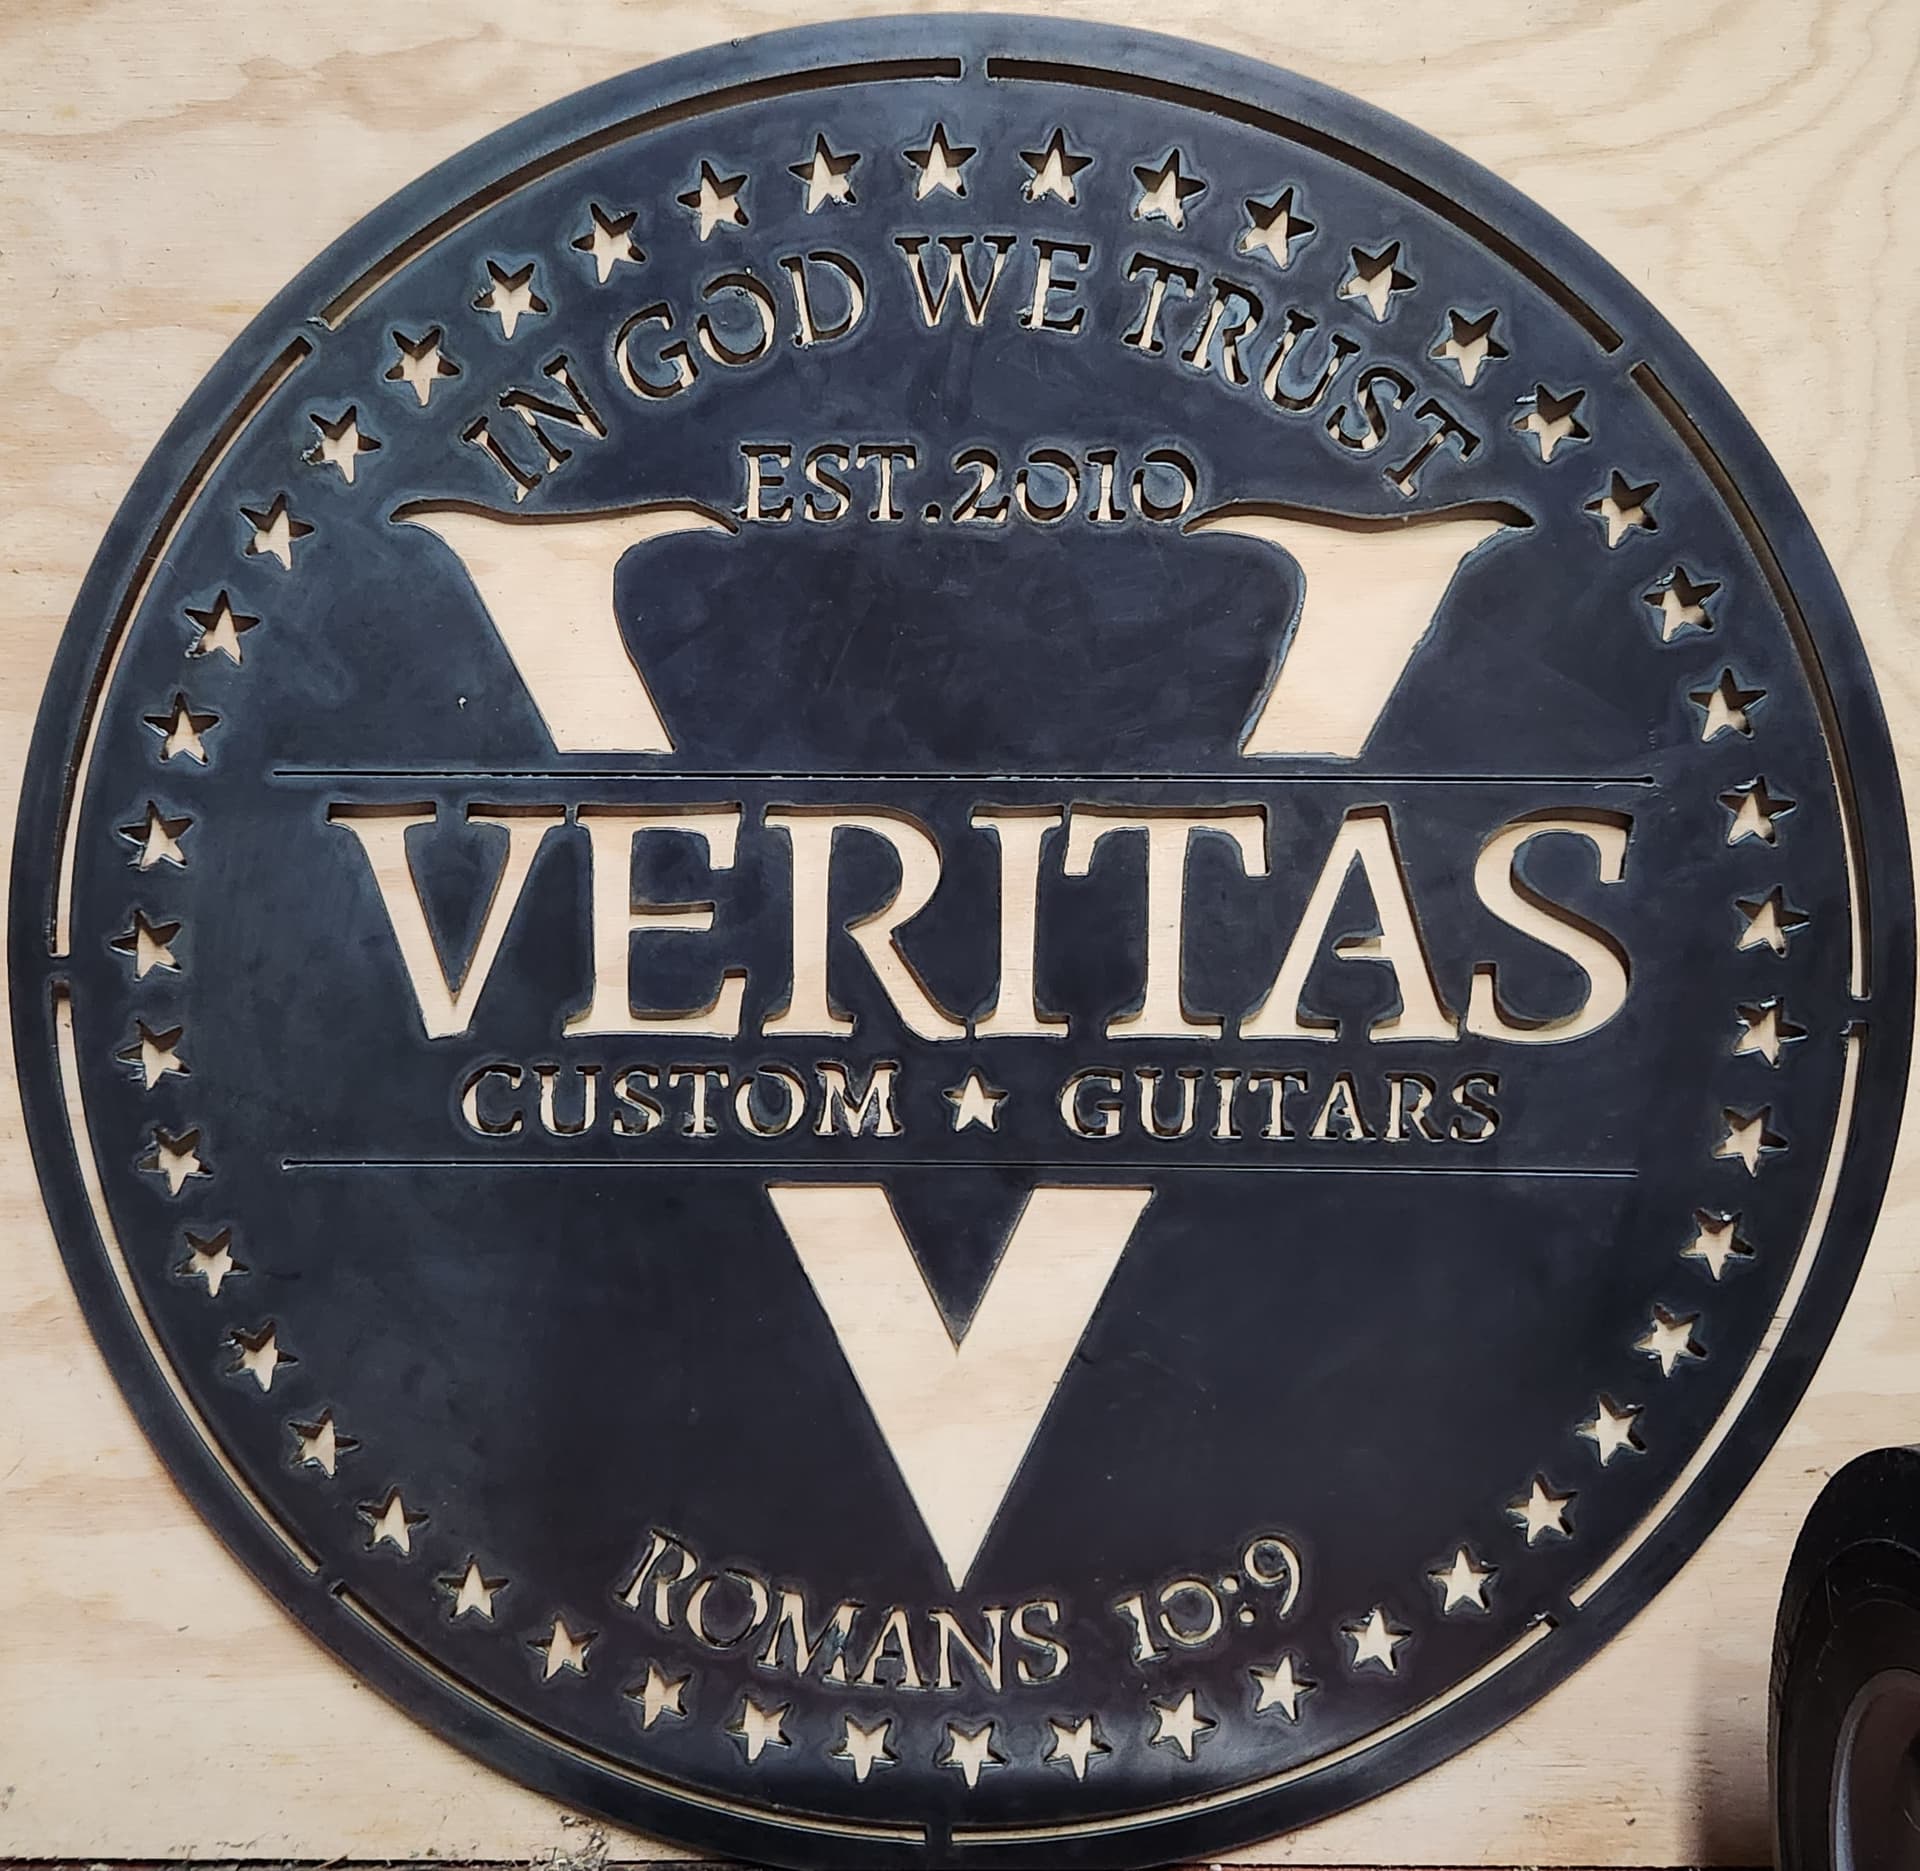
To me it seems the drawing needed work before cutting. There are numerous risky areas like the “0” in 2010 vs the “V”, the “10:9” spacing (see burn through on upper colon dot), numerous areas near the bottom of the letters in “VERITAS” and the top where the “I” and “T” meet.
It may also be the file is not so clean if it was a conversion of an image vs something someone drew in CAD. I guess my point is it may not all be in you CAM settings. Could in part just be a messy file.
This was a very good attempt for only your 6th or 7th cut. I was still taking baby steps at that time.
3 Likes
The text for this drawing began it’s life in Canva, was converted to svg and imported into my fusion sketch. While I’m new to fusion 360, I’ve worked in other Autodesk products both professionally and as a hobbyist for the last 20 years. In many ways this project was an experiment in bridging. I took the time to separate out a couple of the letters into their own cut file to test them before running the whole composition. Even after that, I was still anxious about running the whole thing. My other projects thus far have taken max like 3 minutes to run. This was an 18 minute cut. Which was good - one thing I wanted to test was how my compressor would hold up on a longer cut - it did great. Most everything went according to plan but if I learned one thing, it’s to err on the side of caution. As you’ve pointed out, even if the A stayed in place, the final product would still have its issues. Learned a lot on this one though!
4 Likes
to follow up…
the settings are setting…not actual conditions…there is some calibration needed to get more precise cutting…so look inot the torch height…for example…I have my settings at 0.043 to ge a cut height of 0.06…works great…
2 Likes
So I just bit the bullet and made the cut again. Even at 2’ in diameter, were only talking about $10 worth of steel. I took your advice and ran the F bomb first - I was happy enough with the results although I still need to get a feeler gauge to check my height. Maybe you could tell me why there’s so much more dross on the back of the sign vs the back of the bottle opener. There was hardly any on the back of the f bomb. It’s a gloopy mess on the back of the sign.


1 Like
are the bomb and sign the same gauge of metal?
did you drain your tank of water?
but what a huge differance to you large sign…nice!
2 Likes
The bottle opener had fairly straight cuts and no small radius that had the torch slow down. When the torch slows, the plasma will leave more backside dross. You need it to slow to allow the plasma stream to catch up to the torch. This happens on the turns and quick changes of directions (stars and letters) otherwise you will have a sloped cut, which is not desired. You can look at the CAM set-up and see different colors of the cut path. In Fusion 360 you will see blue is your stated cut speed, green is lead-in/lead-out (so naturally slower) and yellow is the slower speeds for small radius and change of directions. That is where most of the extra bottom-side dross will be expected.
Another reason is that there is more opportunity for your air supply to become moist. This moisture will cause issues with the cut. The bottle opener cut doubtfully required your air compressor to cycle.
Larger plate of steel gives more opportunity for there to be some highs and lows and warping. Even with THC, it will have issues trying to react to all of the changes so if the torch encounters a high area, there will be so additional dross while THC adjusts.
I will say that yesterday I cut out 125 plant markers out of aluminum and was amazed that 40% had no dross of either side, 55% had no top dross but a little bottom side dross, and 5% had some pretty ugly bottom side dross. Go figure. I know the aluminum sheet was warping. I will know to hold it down next time.
4 Likes
Thanks! They are the same gauge, yes. Didn’t drain the table. Thank you for the article, lots of good info.
1 Like
Thanks for the detailed response! I’ll keep that in mind.
You don’t need to drain the table. I believe @toolboy was inquiring if you had drained the compressor tank to remove an additional source of water in your air stream.
2 Likes
Ahhh ok that makes sense. I have an air dryer.