For those that have a Powermax45 XP, and do not have a pendant, CPC port, etc., here is how you can wire it internally. I saw some instructions for the 30 XP, but the 45 XP looks to be quite different, although the wire colors are the same.
Obviously, remove all power to the machine before beginning any work.
Remove the bottom two screws on each end of the machine. They are a T15 Torx.
Pull the front cover forward, and the rear cover backward, to spread them far enough to remove the handle. Once handle is out, pull metal cover off to expose internal parts of the machine. Note that this cover is also within channels of the front an rear covers, so you may have to spread them further.
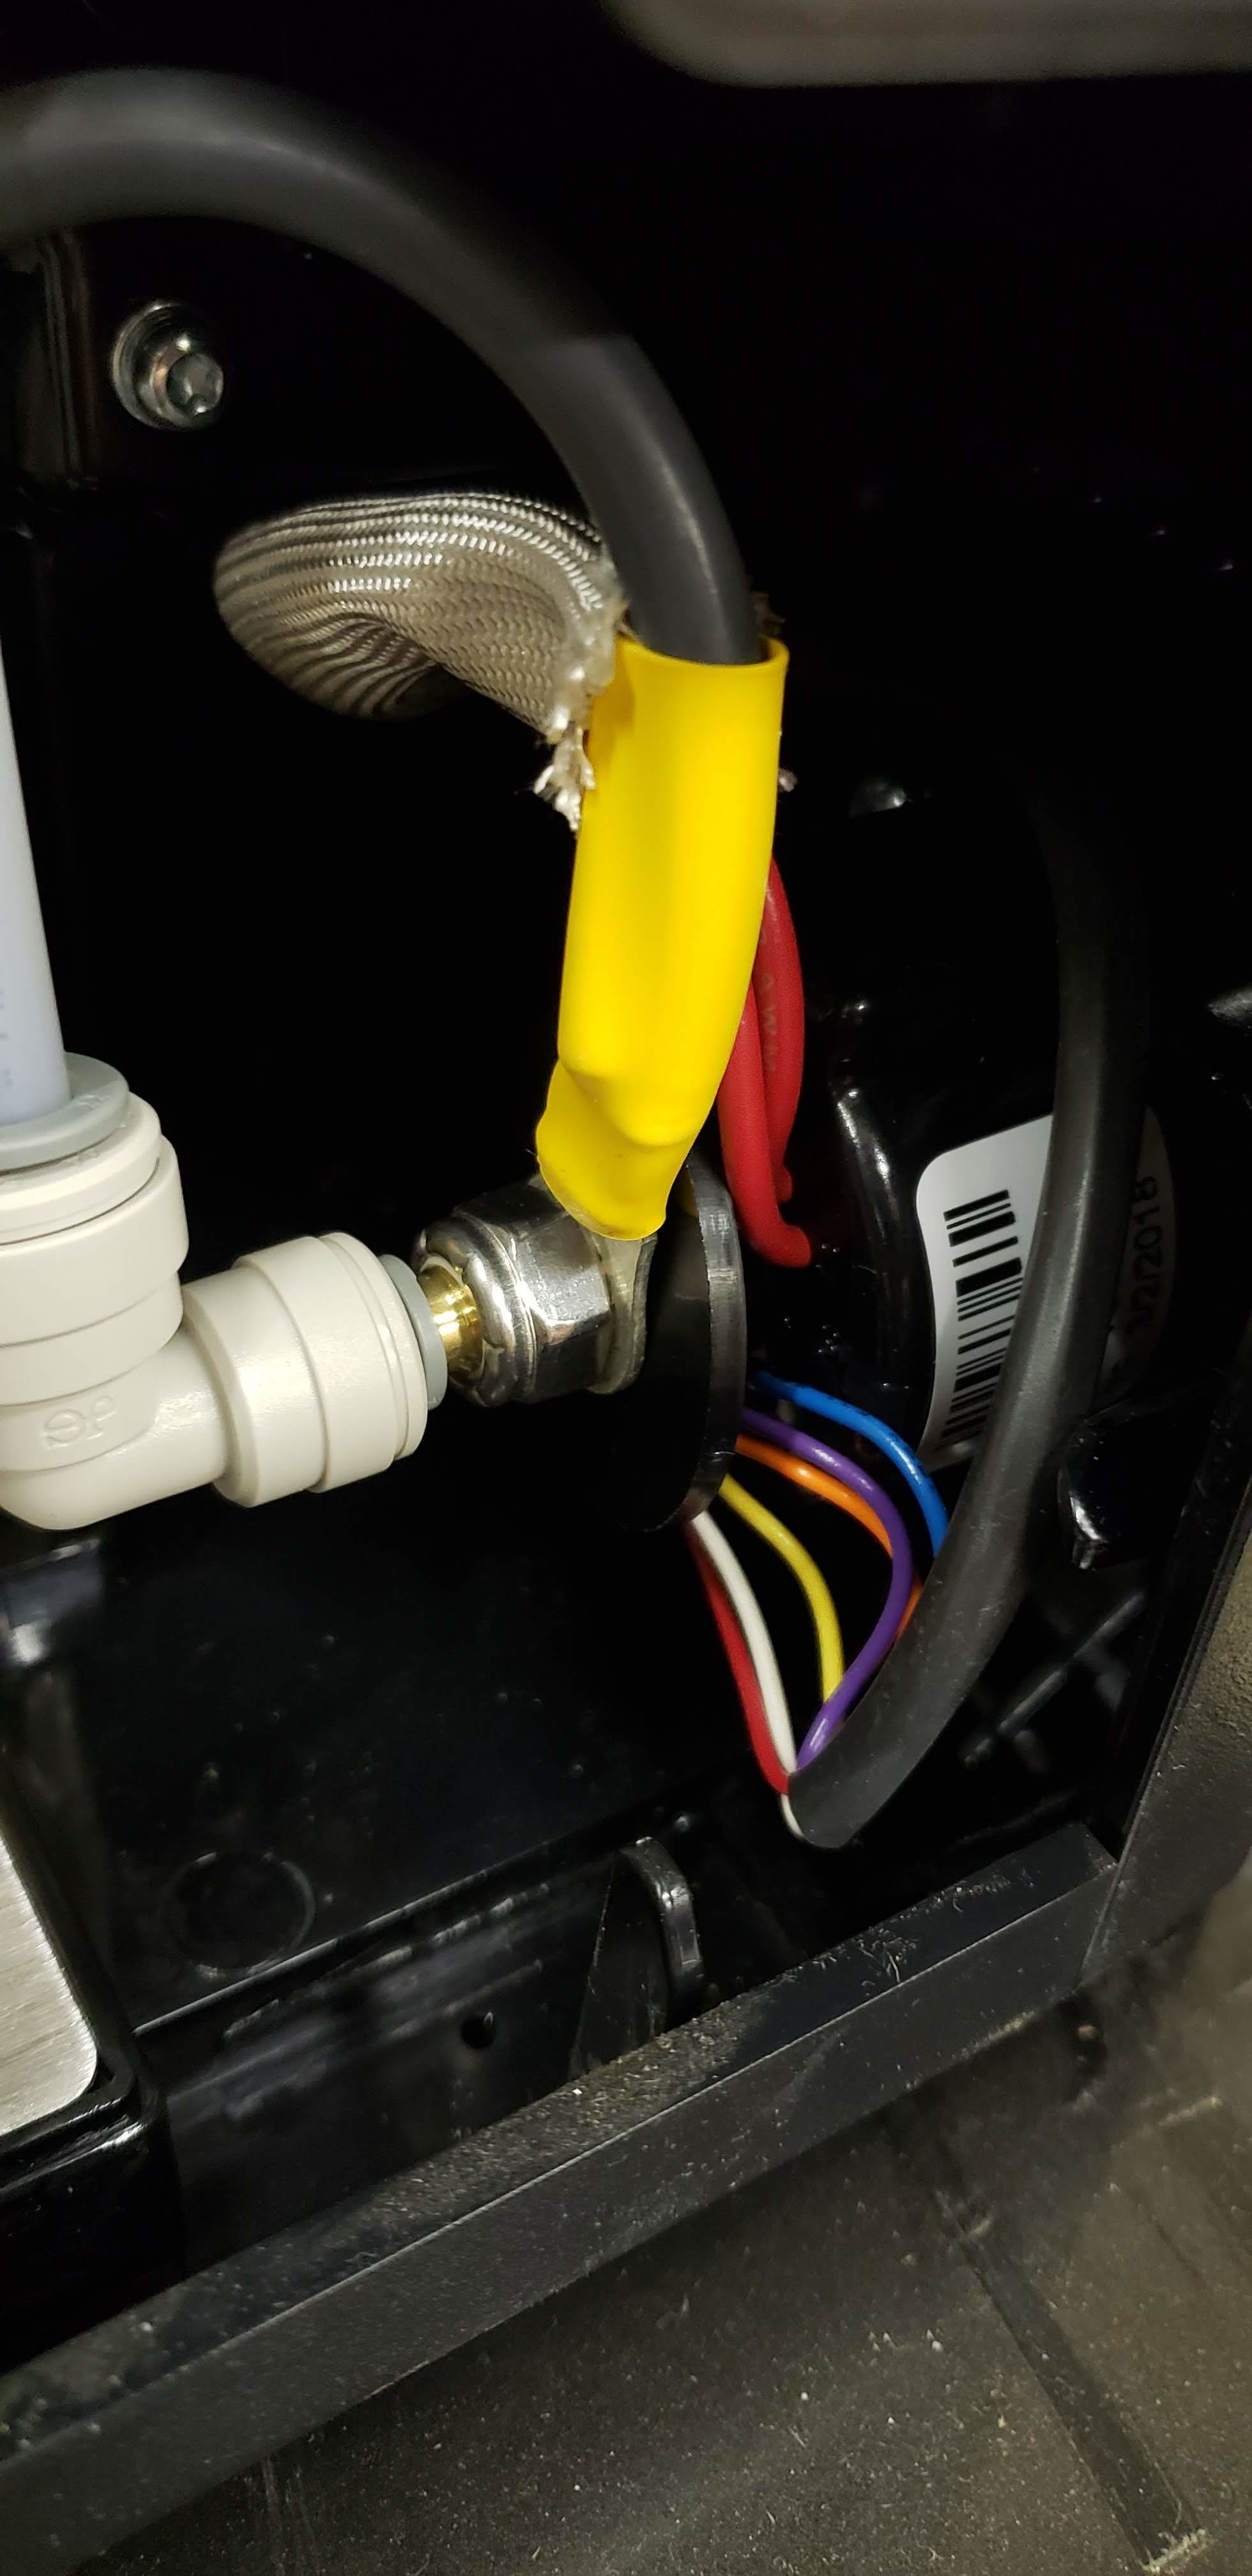
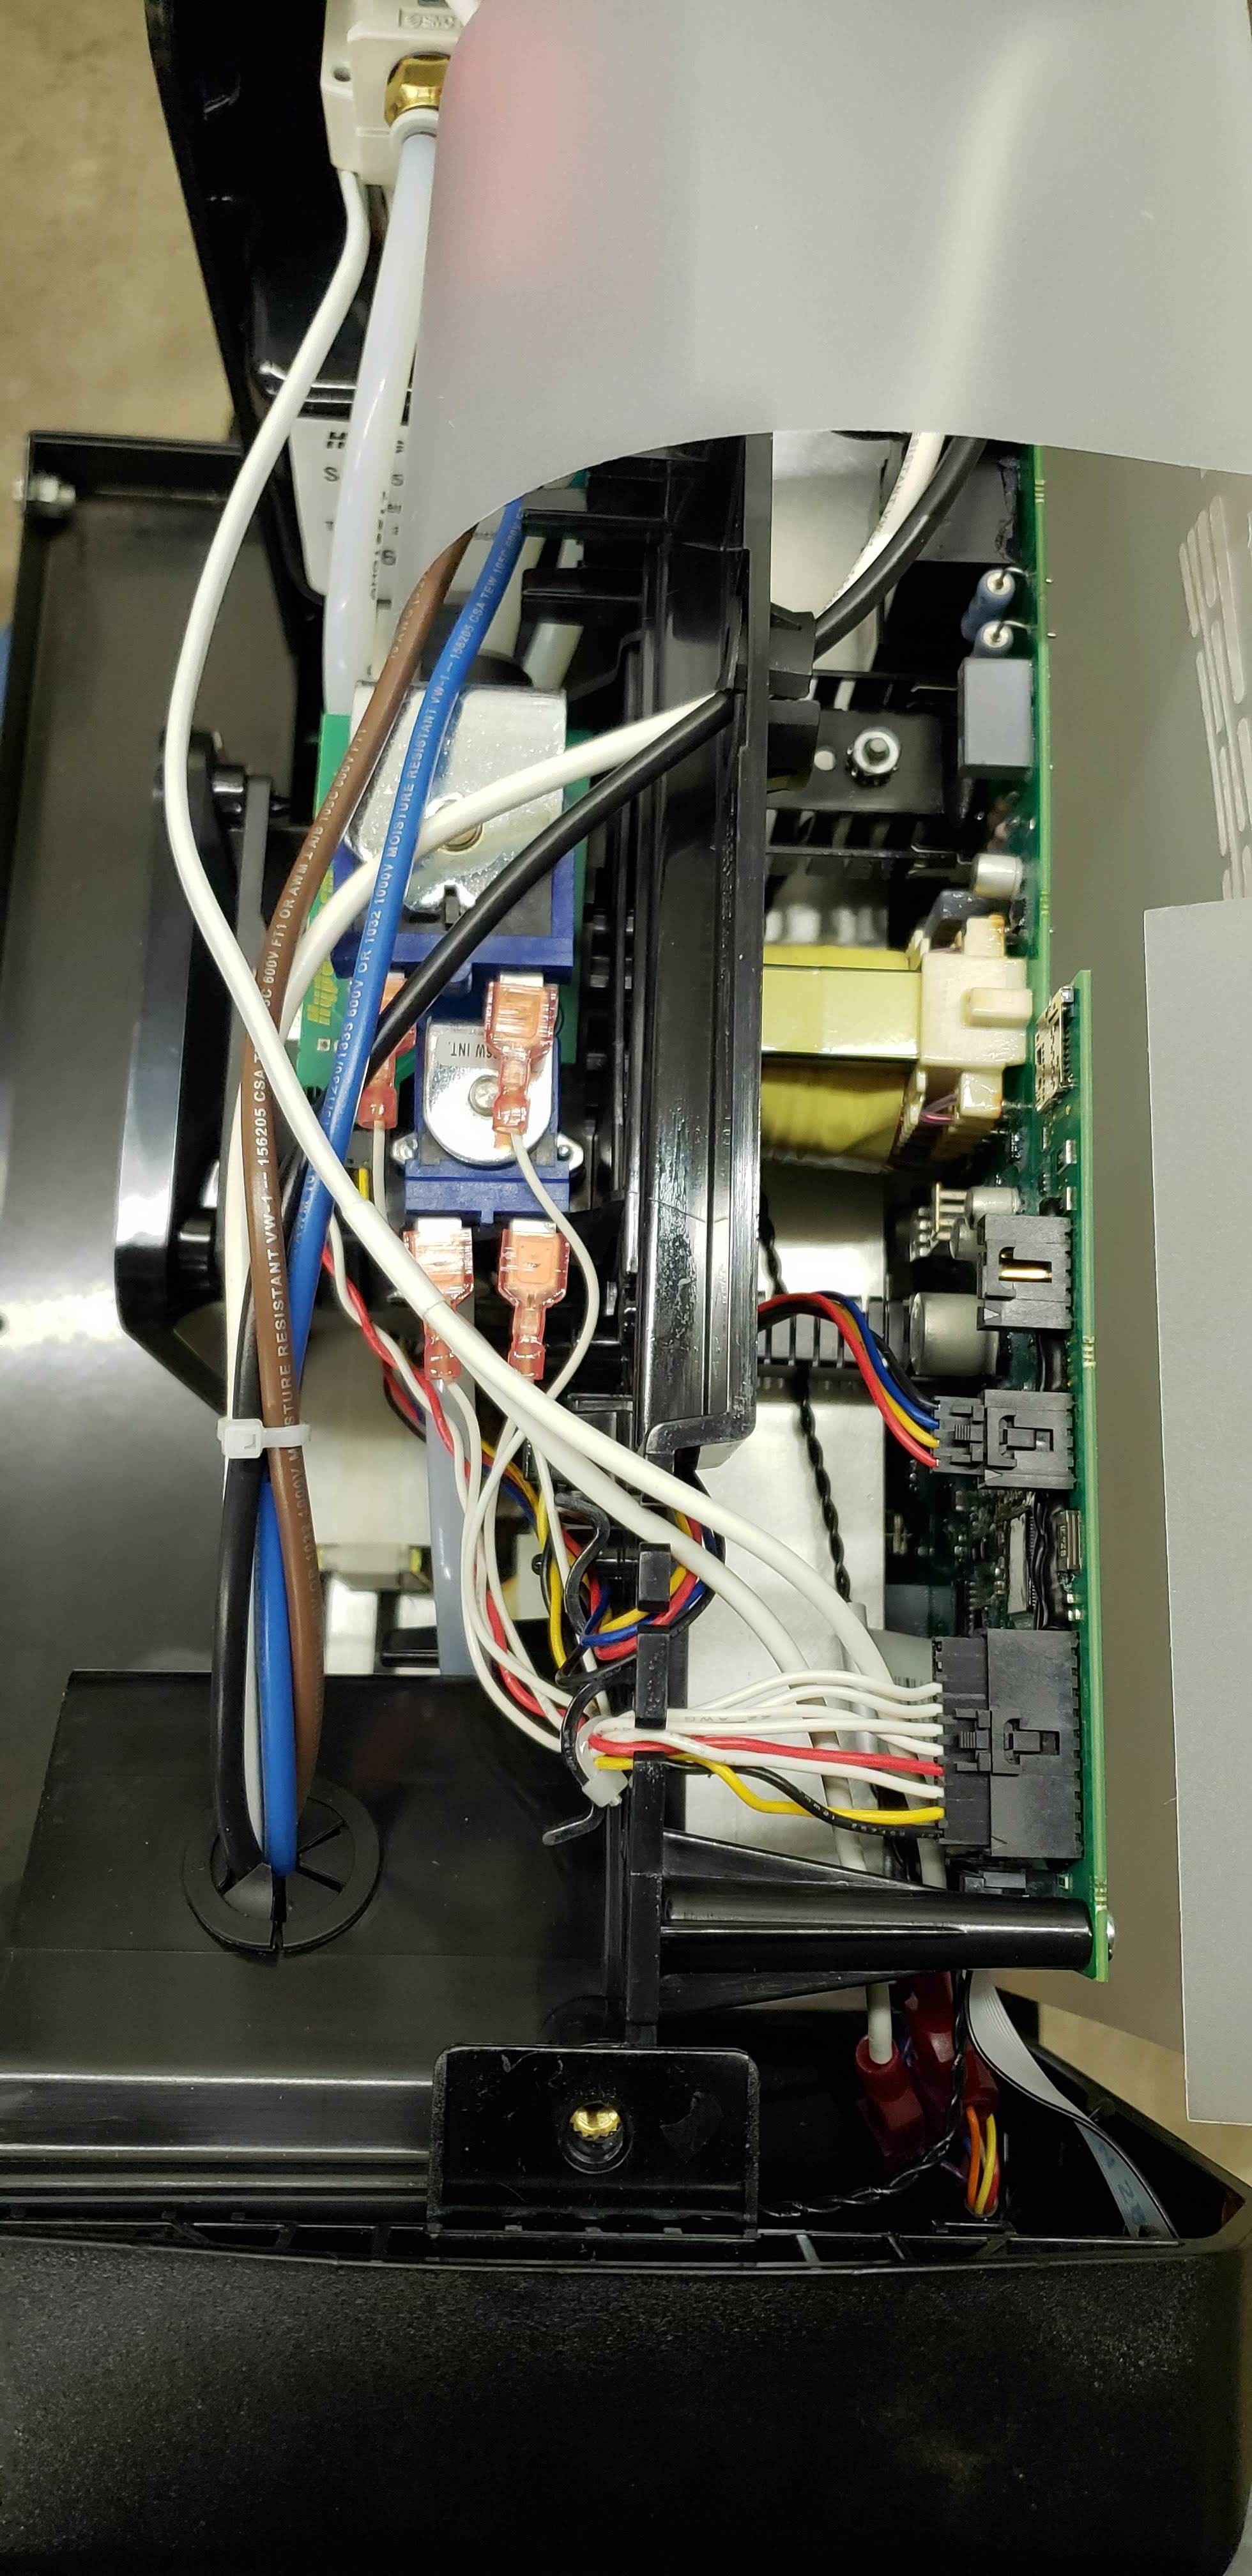
Find the wires coming out of the rear side of the port where the torch attaches.
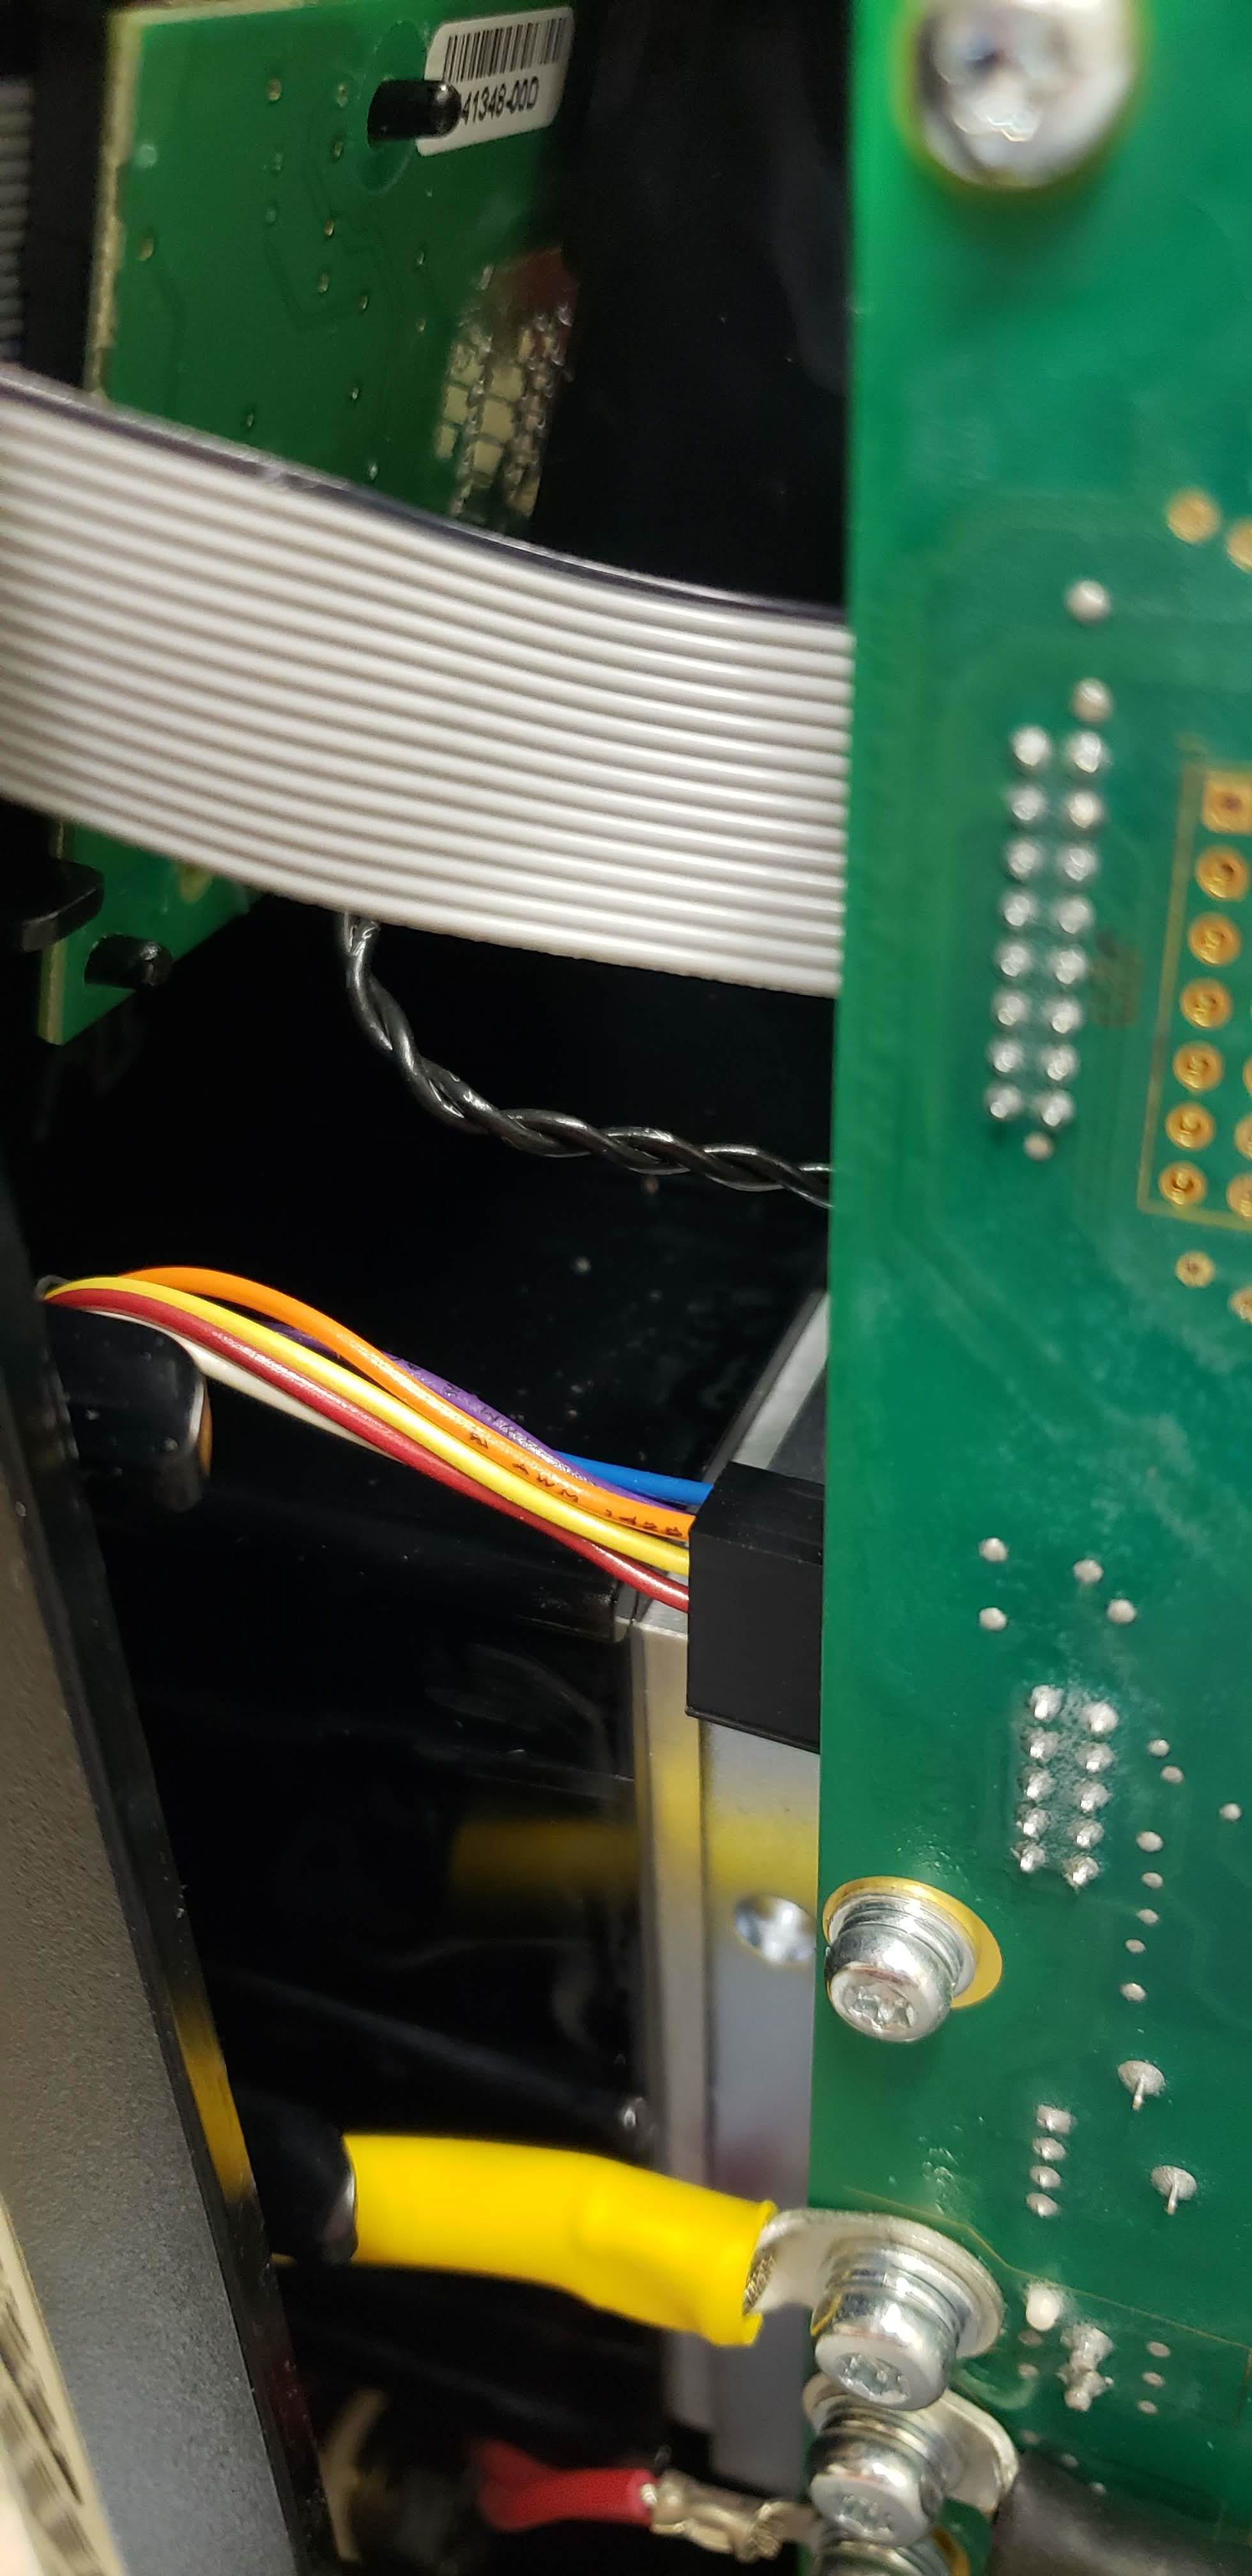
Follow the small colored wires and harness coming from the port, to the opposite side of the machine. They attach to the PC board via a plug near the top. Note there is a flexible plastic shield that may be in your way, but can be flexed out of the way.
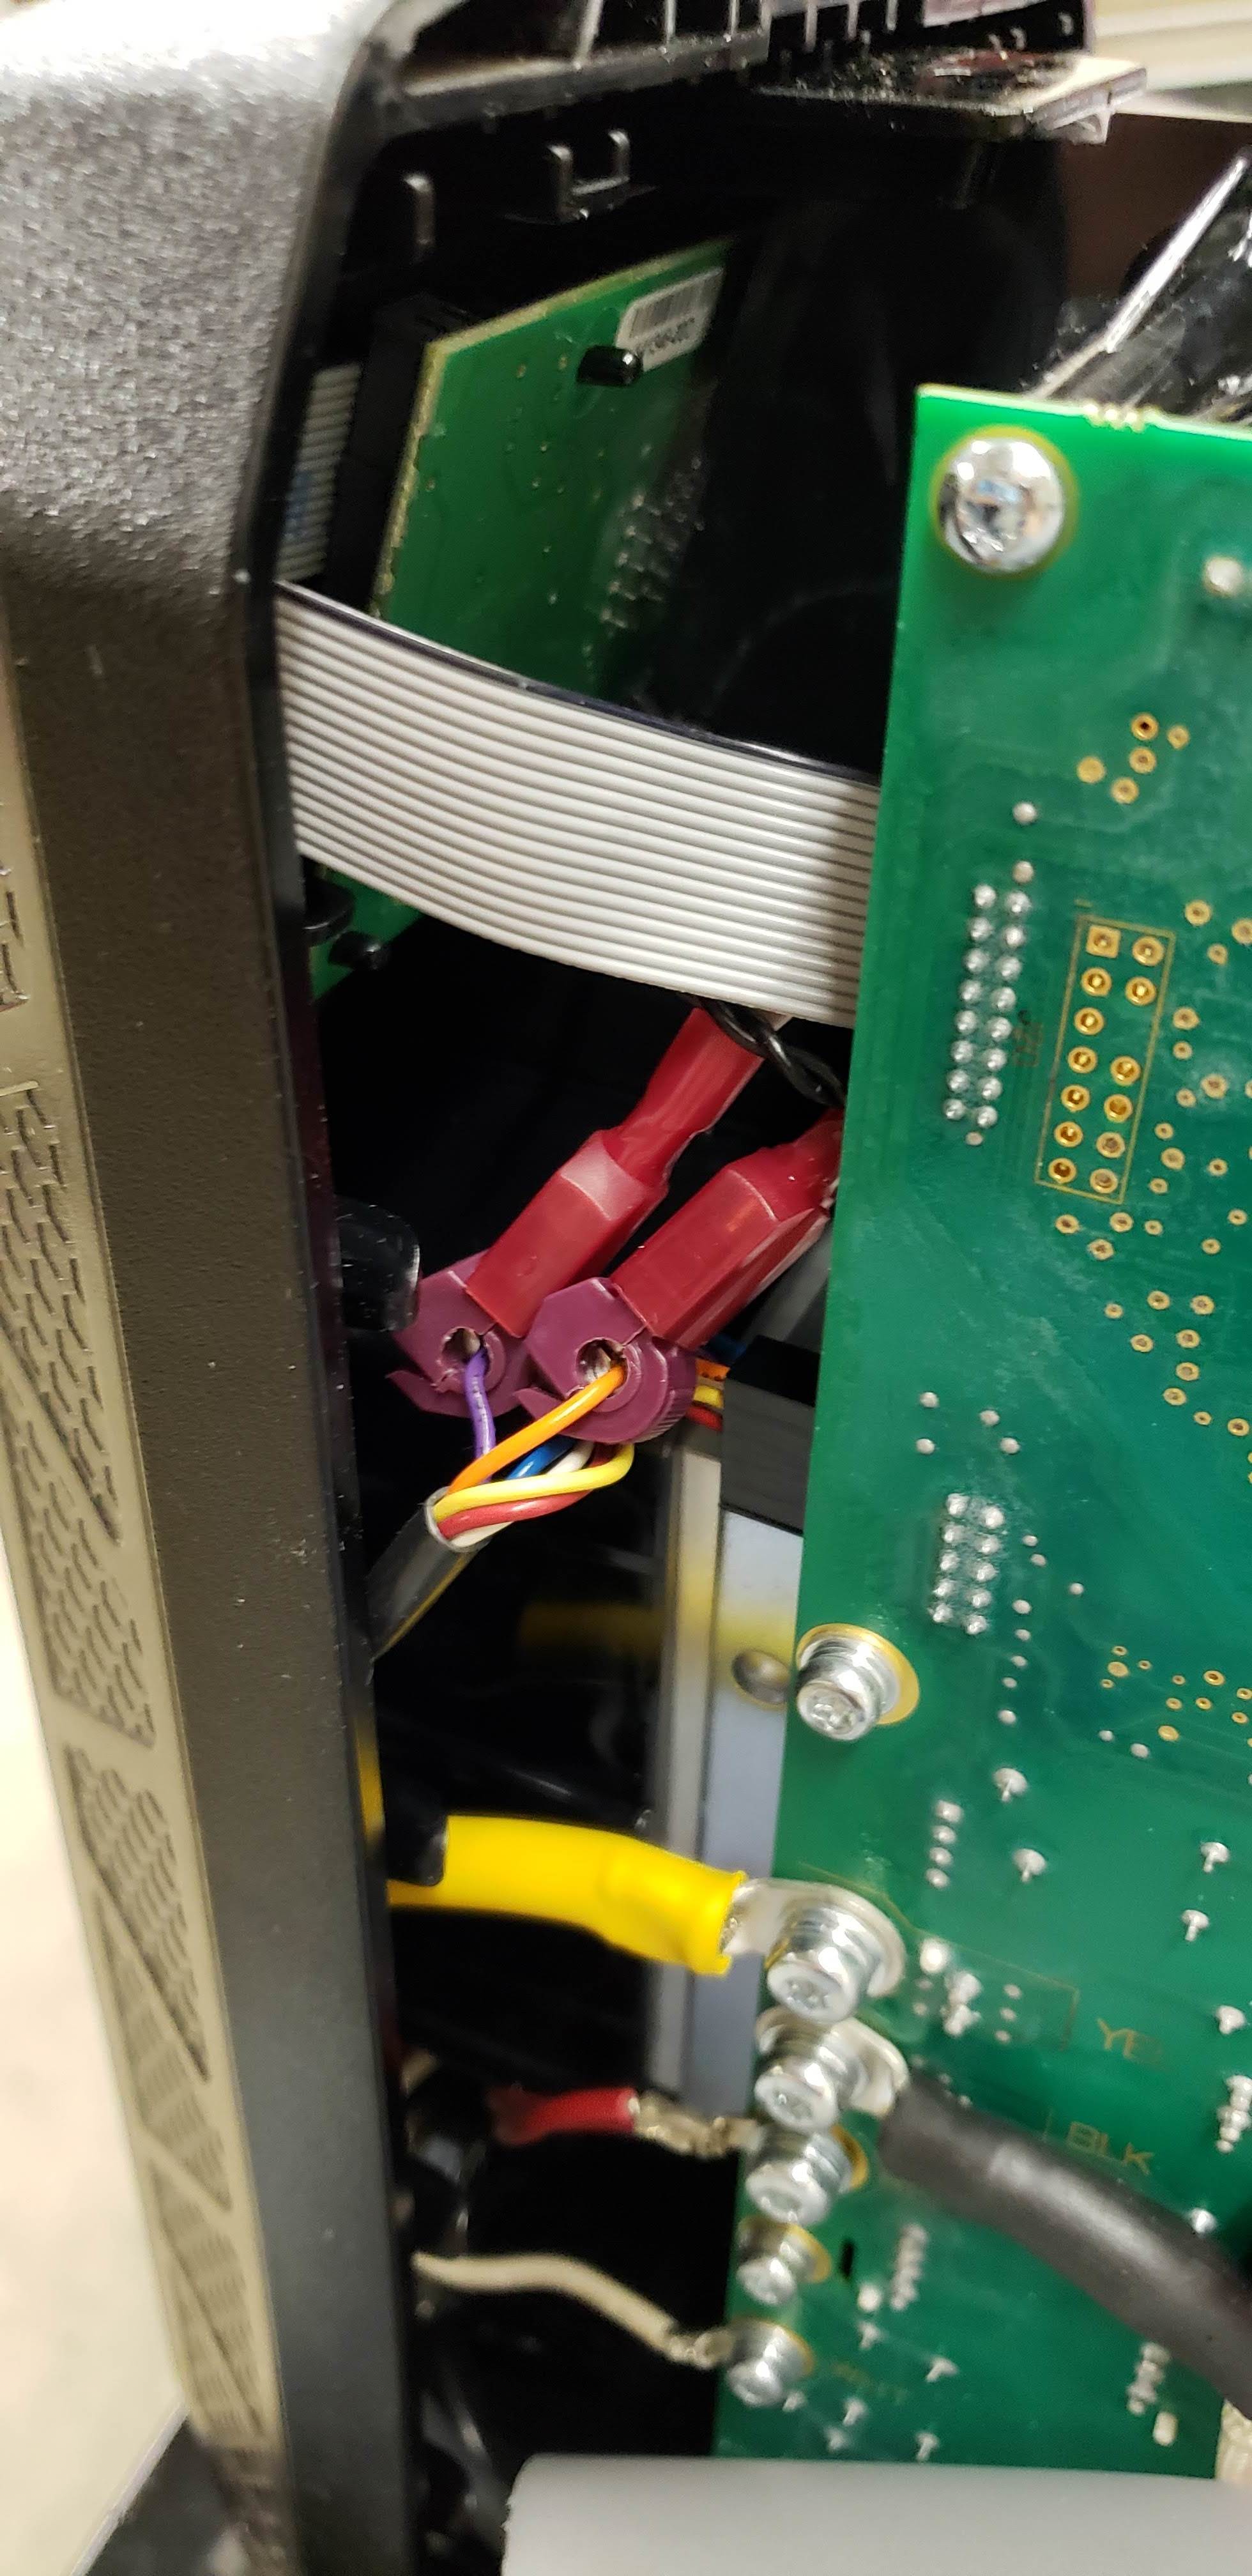
The wires to trigger the torch are violet and orange. (I used a multi-meter to verify that these were indeed the trigger wires). Apply the splice taps included with your machine to each of your wires. There was enough extra wire available in the harness, to partially pull it out of the machine to do this. I used the violet splices as the wires are pretty small.
Route trigger harness through machine, taking care not to interfere with anything. I routed them behind the PC board, and over the middle plane separator through one of the spare wire routing slots, then toward the rear of the machine where the filter is.
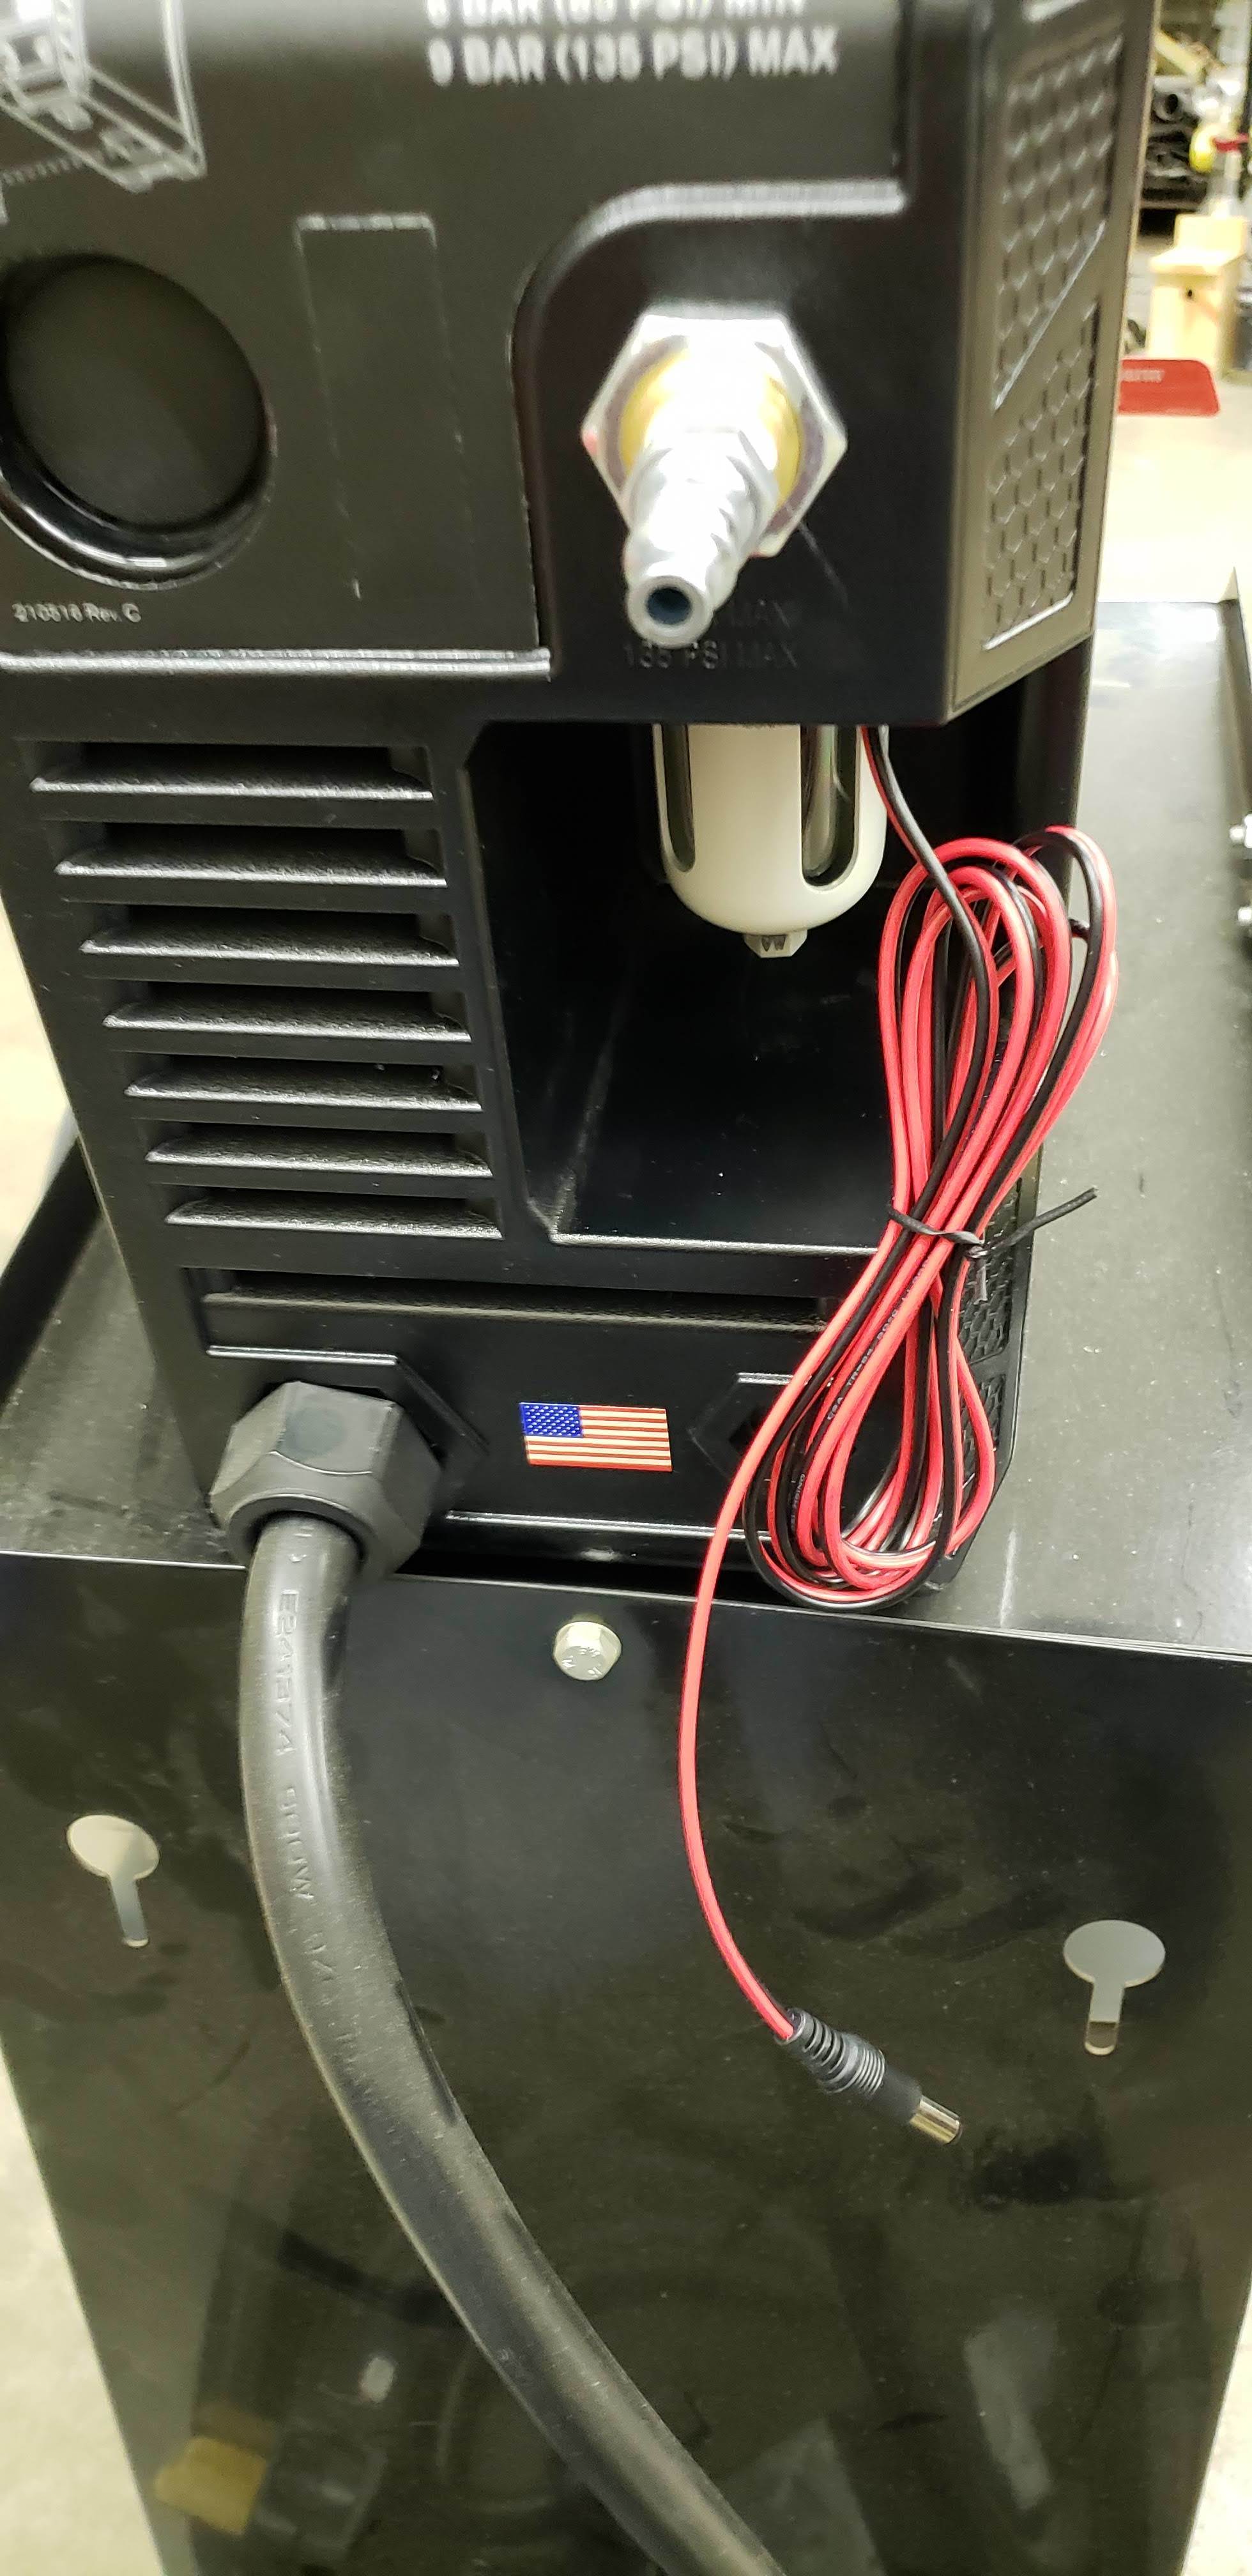
Route the wires outside the machine as you wish. I chose to remove the filter, and pass them through the extra space around the filter, so no drilling was needed. There are no sharp edges to worry about.
Next, tuck everything back in place if it was moved, and reinstall top cover, handle, handle screws, and bottom screws.
Repower the plasma cutter, attach the torch to your table, attach the trigger wire to the control box when ready, and verify that it fires via the manual control option in Mach 3.
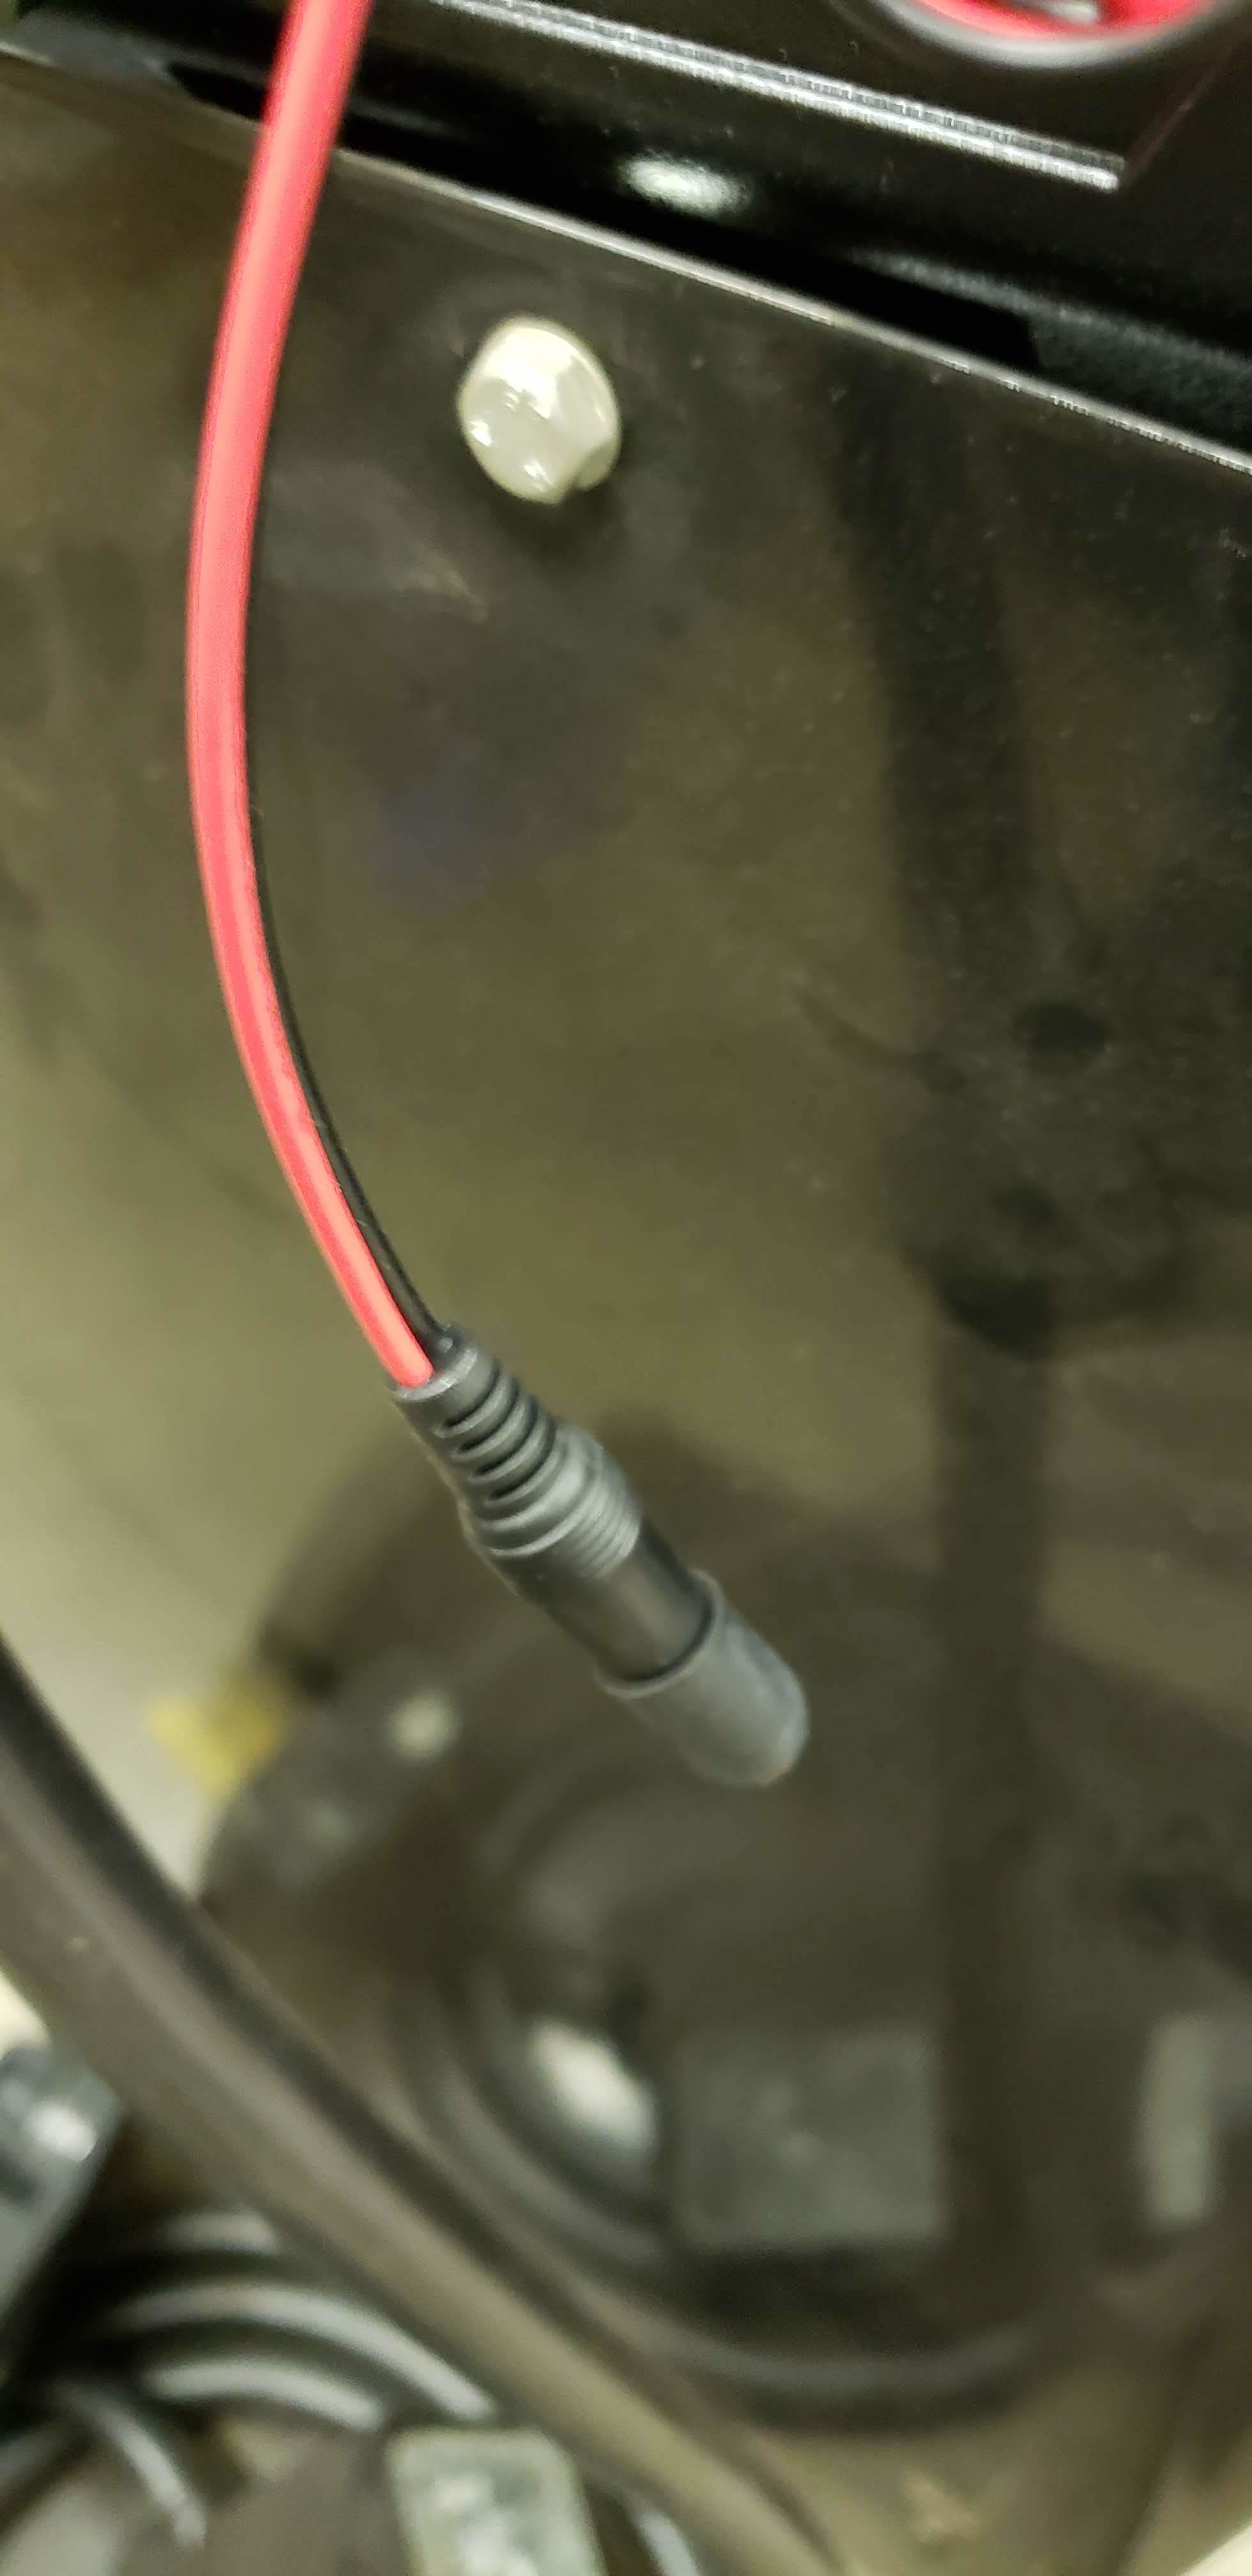
For safety, when the machine is not connected to the table, I place a rubber vacuum cap over the end of the trigger wire.
Hopefully this helps someone out. Everything works for me with this setup, and I didn’t have to spend anything on additional parts for the cutter, or anything else.
Great job! We get a lot of emails asking how to wire this exact plasma cutter. Happy to be able to send them to this thread to get a great pictorial set of instructions.
Are you actually using the 45XP with a hand torch, or a machine torch? I’ve tried and tried your splice trick with my hand torch attached and can’t get it to fire with Mach3. This is so frustrating!!!
Those scotch locks a tricky…i had a hard time with them.I would bet they are not on correctly. I zip tied the trigger and connected the suppled cable to the scotch locks after i attached them and kept checking for continuity at the round plug at the end of the cable.The first few tries the scotch lock didnt push the wire down enough to cut though to make a connection.
Thanks, Heath. I went back to make sure that the clips were indeed cutting through the wire insulation and making contact with the wires. It still doesn’t seem to work with this torch. Are you using the 45XP and finding that it works for you with the hand torch and the instructions in this thread?
I just assembled my table and tried the torch fire test with my Hypertherm 45xp. It fired with air. When I turned the torch off, the fire shut down but the air did not. It kept blowing. Any idea what is wrong?
Thanks.
does anyone know how to put a “double tap” into the torch trigger signal in the post processor. Hypertherm says thats how to defeat the post flow air. I have a powermax600 cutter and it cuts fine but it wont retrigger while the post flow air is on. Hypertherm says all of their machines post flow but you can defeat it and retrigger the torch if you double tap the trigger signal?
I really don’t know what they mean, but if you stop cutting and then trigger the torch it will stop the post flow for a split second and refire the torch. Unhook it from the table and try it manually it should work every time.
If it won’t retrigger on the table then you are not getting a good signal from the controller to let it refire.
I just purchased a Hypertherm 45XP with a hand torch. After wiring up the torch trigger wires (violet/orange) it will not fire. Evidently there has been a safety circuit added since the method posted previously on the thread. Any ideas on making this work?
i followed your steps on connecting to the orange and violet wire and i do have continuity but in the langmuir instructions it says when you let go of the trigger its no longer supposed to have continuity but mine does i have the same machine you have, do you know if i did something wrong?

 Just what I was looking for!! And I Believe all hypertherms are the same with the trigger wire colors!