That electrode looks normal there is still a lot of Hafnium left, as its used it will get a pit in the middle. When the pit gets to be about .065" deep its time to change it out.
2 Likes
Well I must have looked at it crosseyed!! It looked at first glance that the center blew out completely.
Ok, I did the cut height test again. This time I used .25" instead of 16 ga in order to eliminate spring back. Did it a few times in the center of the table, all .046". So, at least it was consistent.
But the movement in the X axis rail still bugged me (from video ealier), so I did the test again, but this time I leaned a little body weight on the end of the rail. (The torch was about in the middle of travel for both axes.) After doing so the .06 shim slid under no problem.
Then I did the test again, normally, no weight, and now it was consistently .048" away from the work piece, so it moved up .002".
This got me thinking: if the X axis rail is a giant lever, I wonder if my feeler gauge readings have been dependent on how far out the torch is along the X axis.
So I did the test at home and at full travel (already had mid table).
Home = .054"
Mid table = .046-.048"
End of travel = .015"
So, yeah, something is def moving when the torch hits the work piece. Is it possible that I did not tighten the bearing blocks on the Y axis rail enough? Or might it be something else?
Good observation. I don’t think it should move that much. Maybe someone with the same table can confirm for you … The way fire control works it doesn’t zero z until it lifts back off the plate.
We also run an OG Crossfire w/ XL and Z / THC. That amount of flex is too much. I would move the torch to X 0 (Home) and inspect your bearings on the Y axis gantry. I suspect you’ll find a couple that are loose. (There’s an assembly document that walks thru adjusting the bearing tension.) Remember - You still need to have free travel on the Y axis after tightening the bearings.
2 Likes
10-4, this is where I’m heading next. As I gently pull up and puah down on the end of the X axis rail there is a metal popping sound from near the bearings on the Y axis, like metal catching and then slipping against metal. I’m gonna reset the beqrings preload as well as realign the X rail for parallelism. Tha k you for the post!
First, thanks to all who have helped. I feel like I’m 90% of the way there. Maybe I’m not, lol, but the support is encouraging!
I tightened the bearing blocks. There was a fair amount of slop compared to what it is now, which is in spec according to the assembly manual. I also realigned the gantry for parallelism just to be sure.
Next I ran the cut height test at machine Home and at end of gantry. Still not at cut height of G-Code. Gantry still moves up when the torch touches off, but nothing like it used to. It’s basically just the flex in the gantry tube now.
So here are my questions:
-
I have THC, so does the torch height from this program (without THC or spring back in the code) matter? Shouldn’t it still cut at the programmed cut height based on voltage readings?
-
If so, how would I verify the voltage readings? Do I watch fire control and then pause a program during an actual cut and go check with the shim?
-
Also, if THC finds the cut height automatically, do I still need to program in spring back? I’m assuming that I do and it has something to do with the order of operations of how THC works.
-
I found some interesting reading on THC for the Crossfire Pro; does THC work the same for the Crossfire?
-
What else am I missing (other than a drain for the hole I cut in my water table


 )?
)?
1 Like
1 if the THC is off in theory yes it will cut at program height. Spring back in programmed in the code and are to much. That’s why the height test tap exists. We compensate in cam for the difference.
2. Using smart voltage it picks up a test number very quick when you start a cut and maintains that. If your cut height isn’t right you can be to high or low. You can write a voltage in and it will maintain that. Hypertherm gives recommend voltages for their machines.
3. Some change spring back to compensate for height difference. Even a negative.
4.yes should be the same.
5 add water.
2 Likes
For THC, keep the following in mind -
For Smart Voltage, a voltage sample is taken during the 1st .250" of cut (more / less). Smart Voltage will then attempt to hold this value for the remainder of the cut. If your Pierce Height / Delay or Cut Height are off, your initial height could be higher or lower than the programmed height. However, as @Phillipw mentioned, there are alternatives. Entering a target voltage into THC will maintain a given height throughout the cut. Getting said voltage may take trial and error. (I typically use Smart Voltage. I needed to enter a target voltage when cutting a lot of 18ga with small detail. During the perimeter cut, long / straight, I was able to watch the voltage display with minimal changes. I used that value, with minor tweaks.)
As far as changing Springback values - looks like you’re using Fusion. With the default Langmuir post processor, Fusion will add .020" to any springback value you enter. (So the default of .020" results in .040" of additional Z height.) Some will enter a negative spring back value to compensate. Others will adjust the cut / pierce heights. You still want your target pierce and cut heights to be in line even when using THC.
4 Likes
After doing some more reading, I think I was able to get my cut height dialed in. Apparently my machine likes .03" for the IHS springback number. That gave an actual springback number in the G-code of .05". The .063" shim lightly dragged the torch shield.
Finally got the chance to run some more tests, too Results are here.

After chipping away the dross, I found that the 100ipm/30A and 110ipm/30A were the easiest to clean with a chisel, and their edges felt the best. The dross cam off in long, thin pieces that resembled toothpicks. All of these samples were cut @ 75 PSI on the RazorCut.
Don’t really have any questions, at least none come to mind, but I thought I’d post this in case it helps somebody else.
6 Likes
What thickness material?
This is 1/16".
Well, I cut the following at 110ipm and 30A. Took 3:40, not sure how many pierces. 16 Ga.

There was a continuous bead of dross on the back, but it came off no problem with a wire wheel.
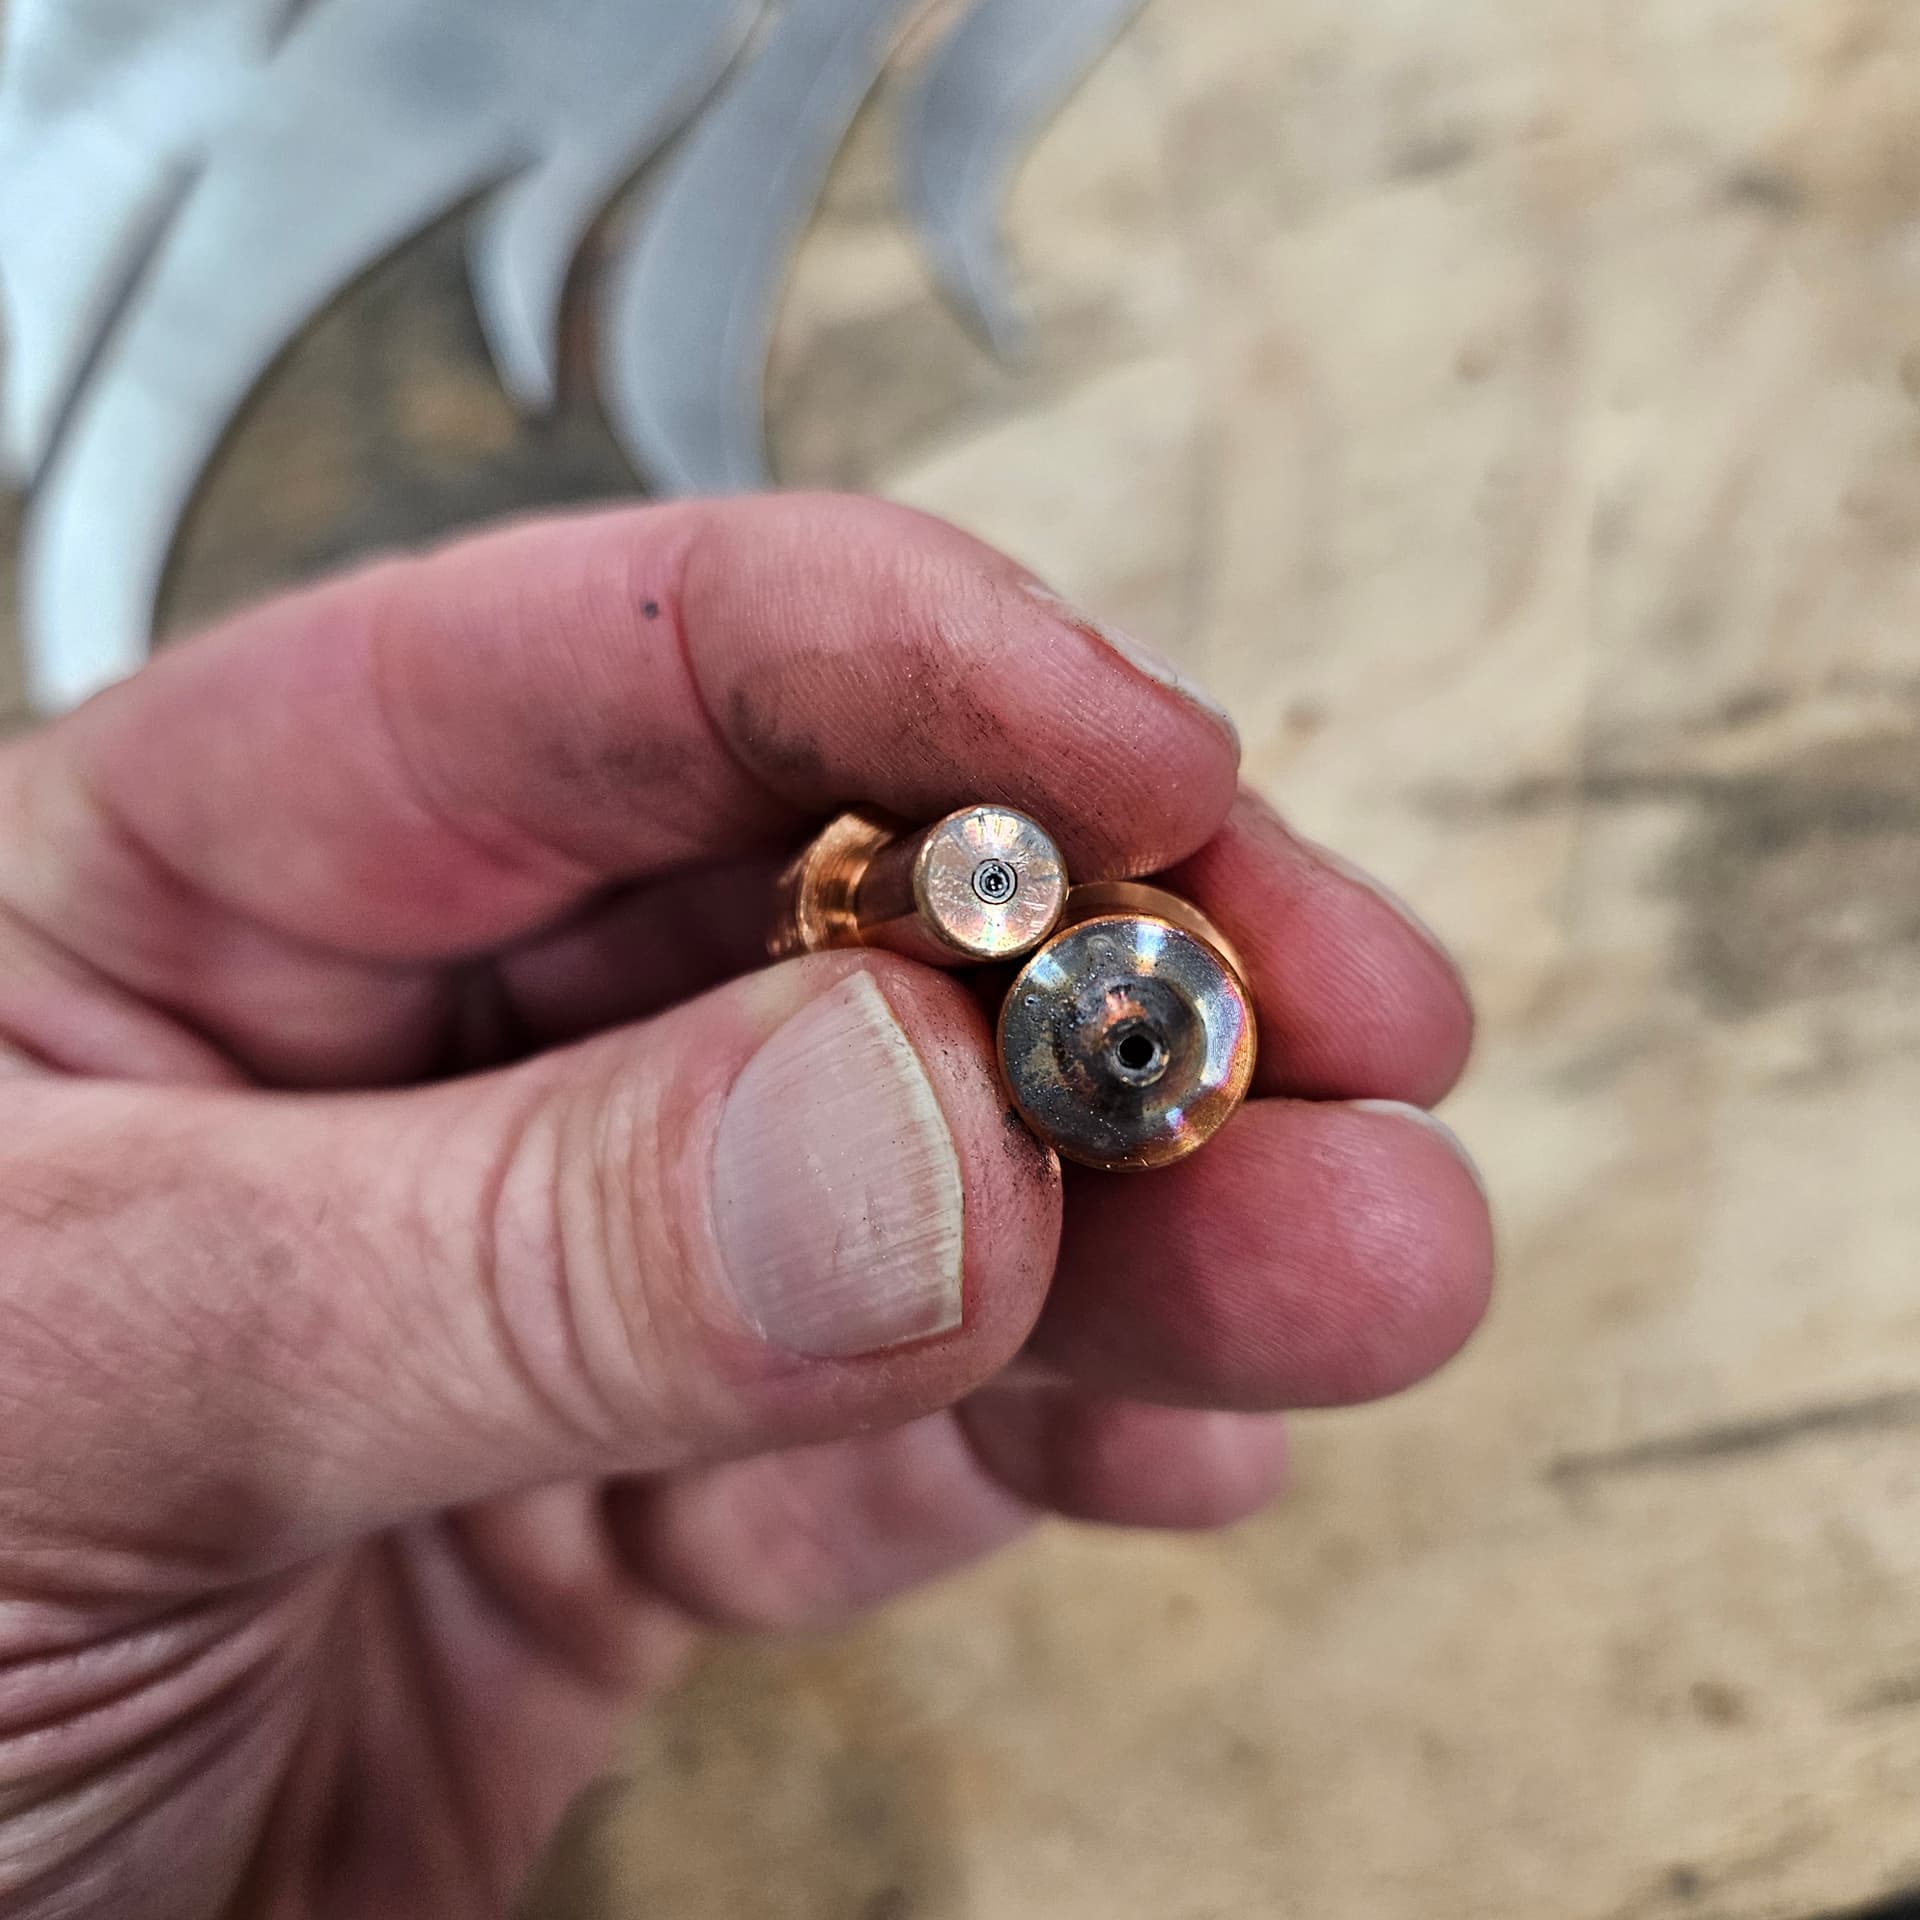
Also took a pic of the electrode and tip. They probably have about 5 min of run time on them.
I’m pretty happy with this. Will keep dialing it in, but thanks again to all for the help!
6 Likes