CrossFire Pro with THC
Hypertherm 45xp running on 40 amps
48 IPM
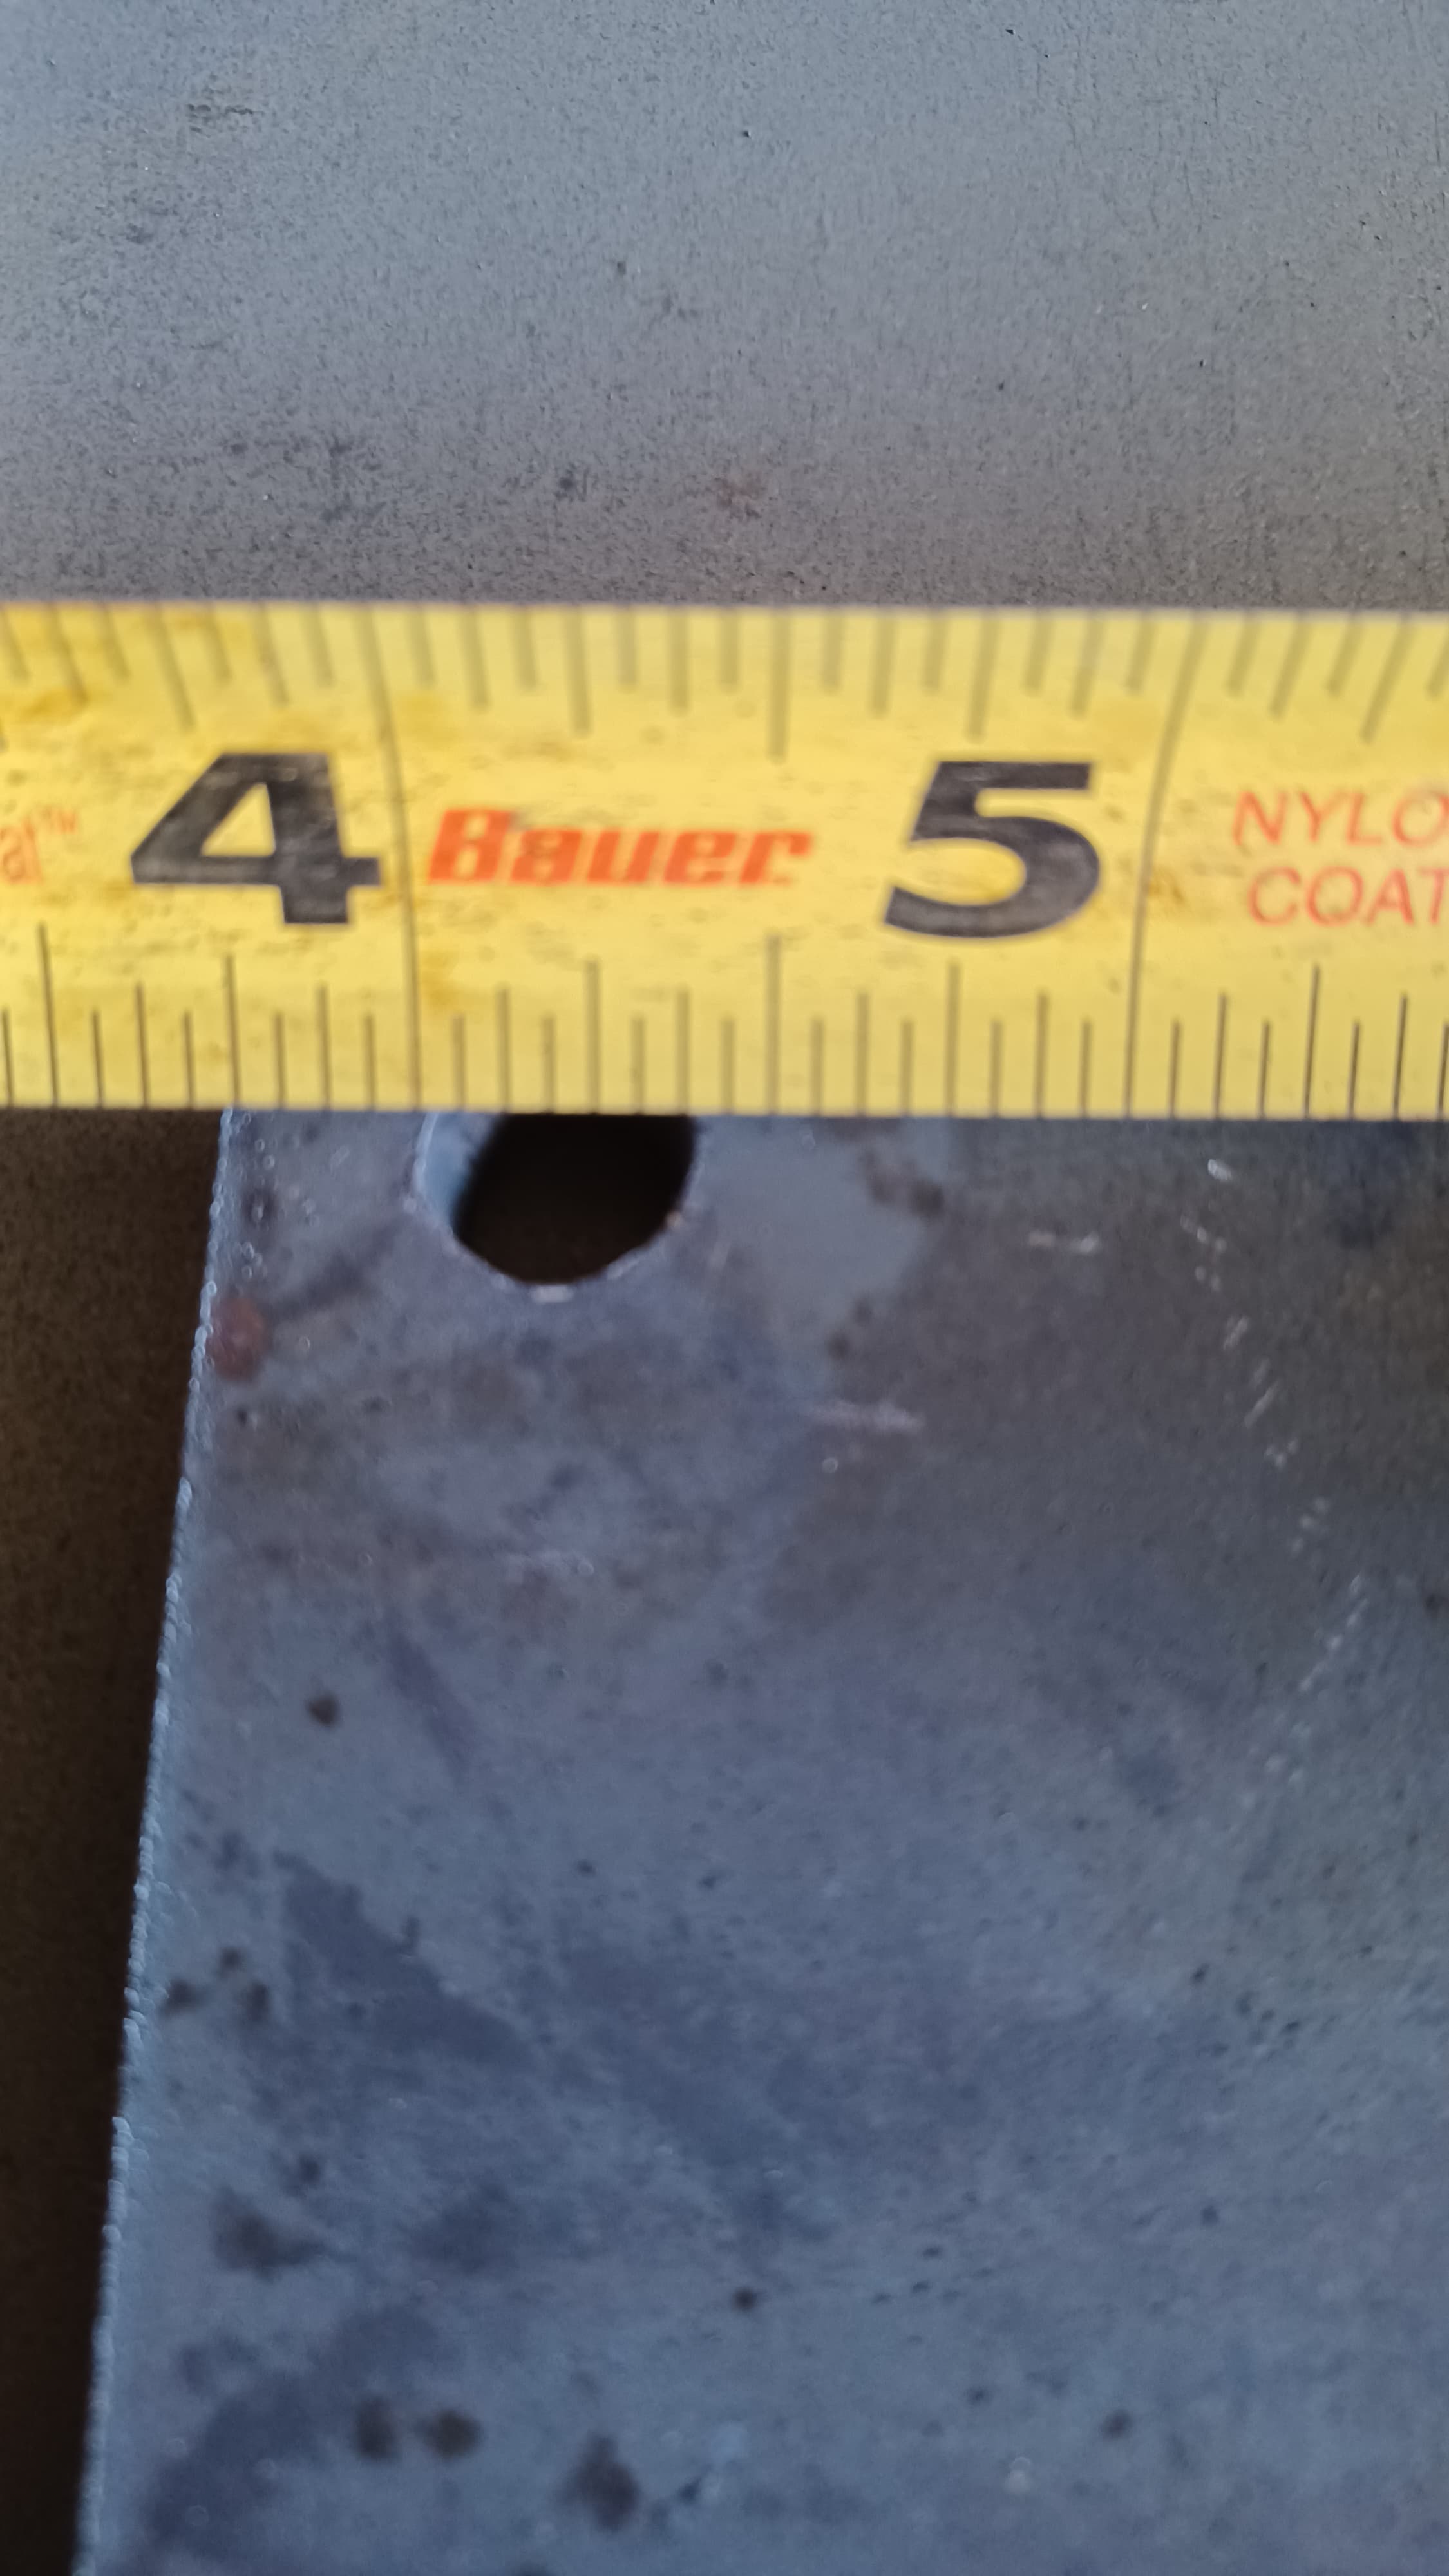
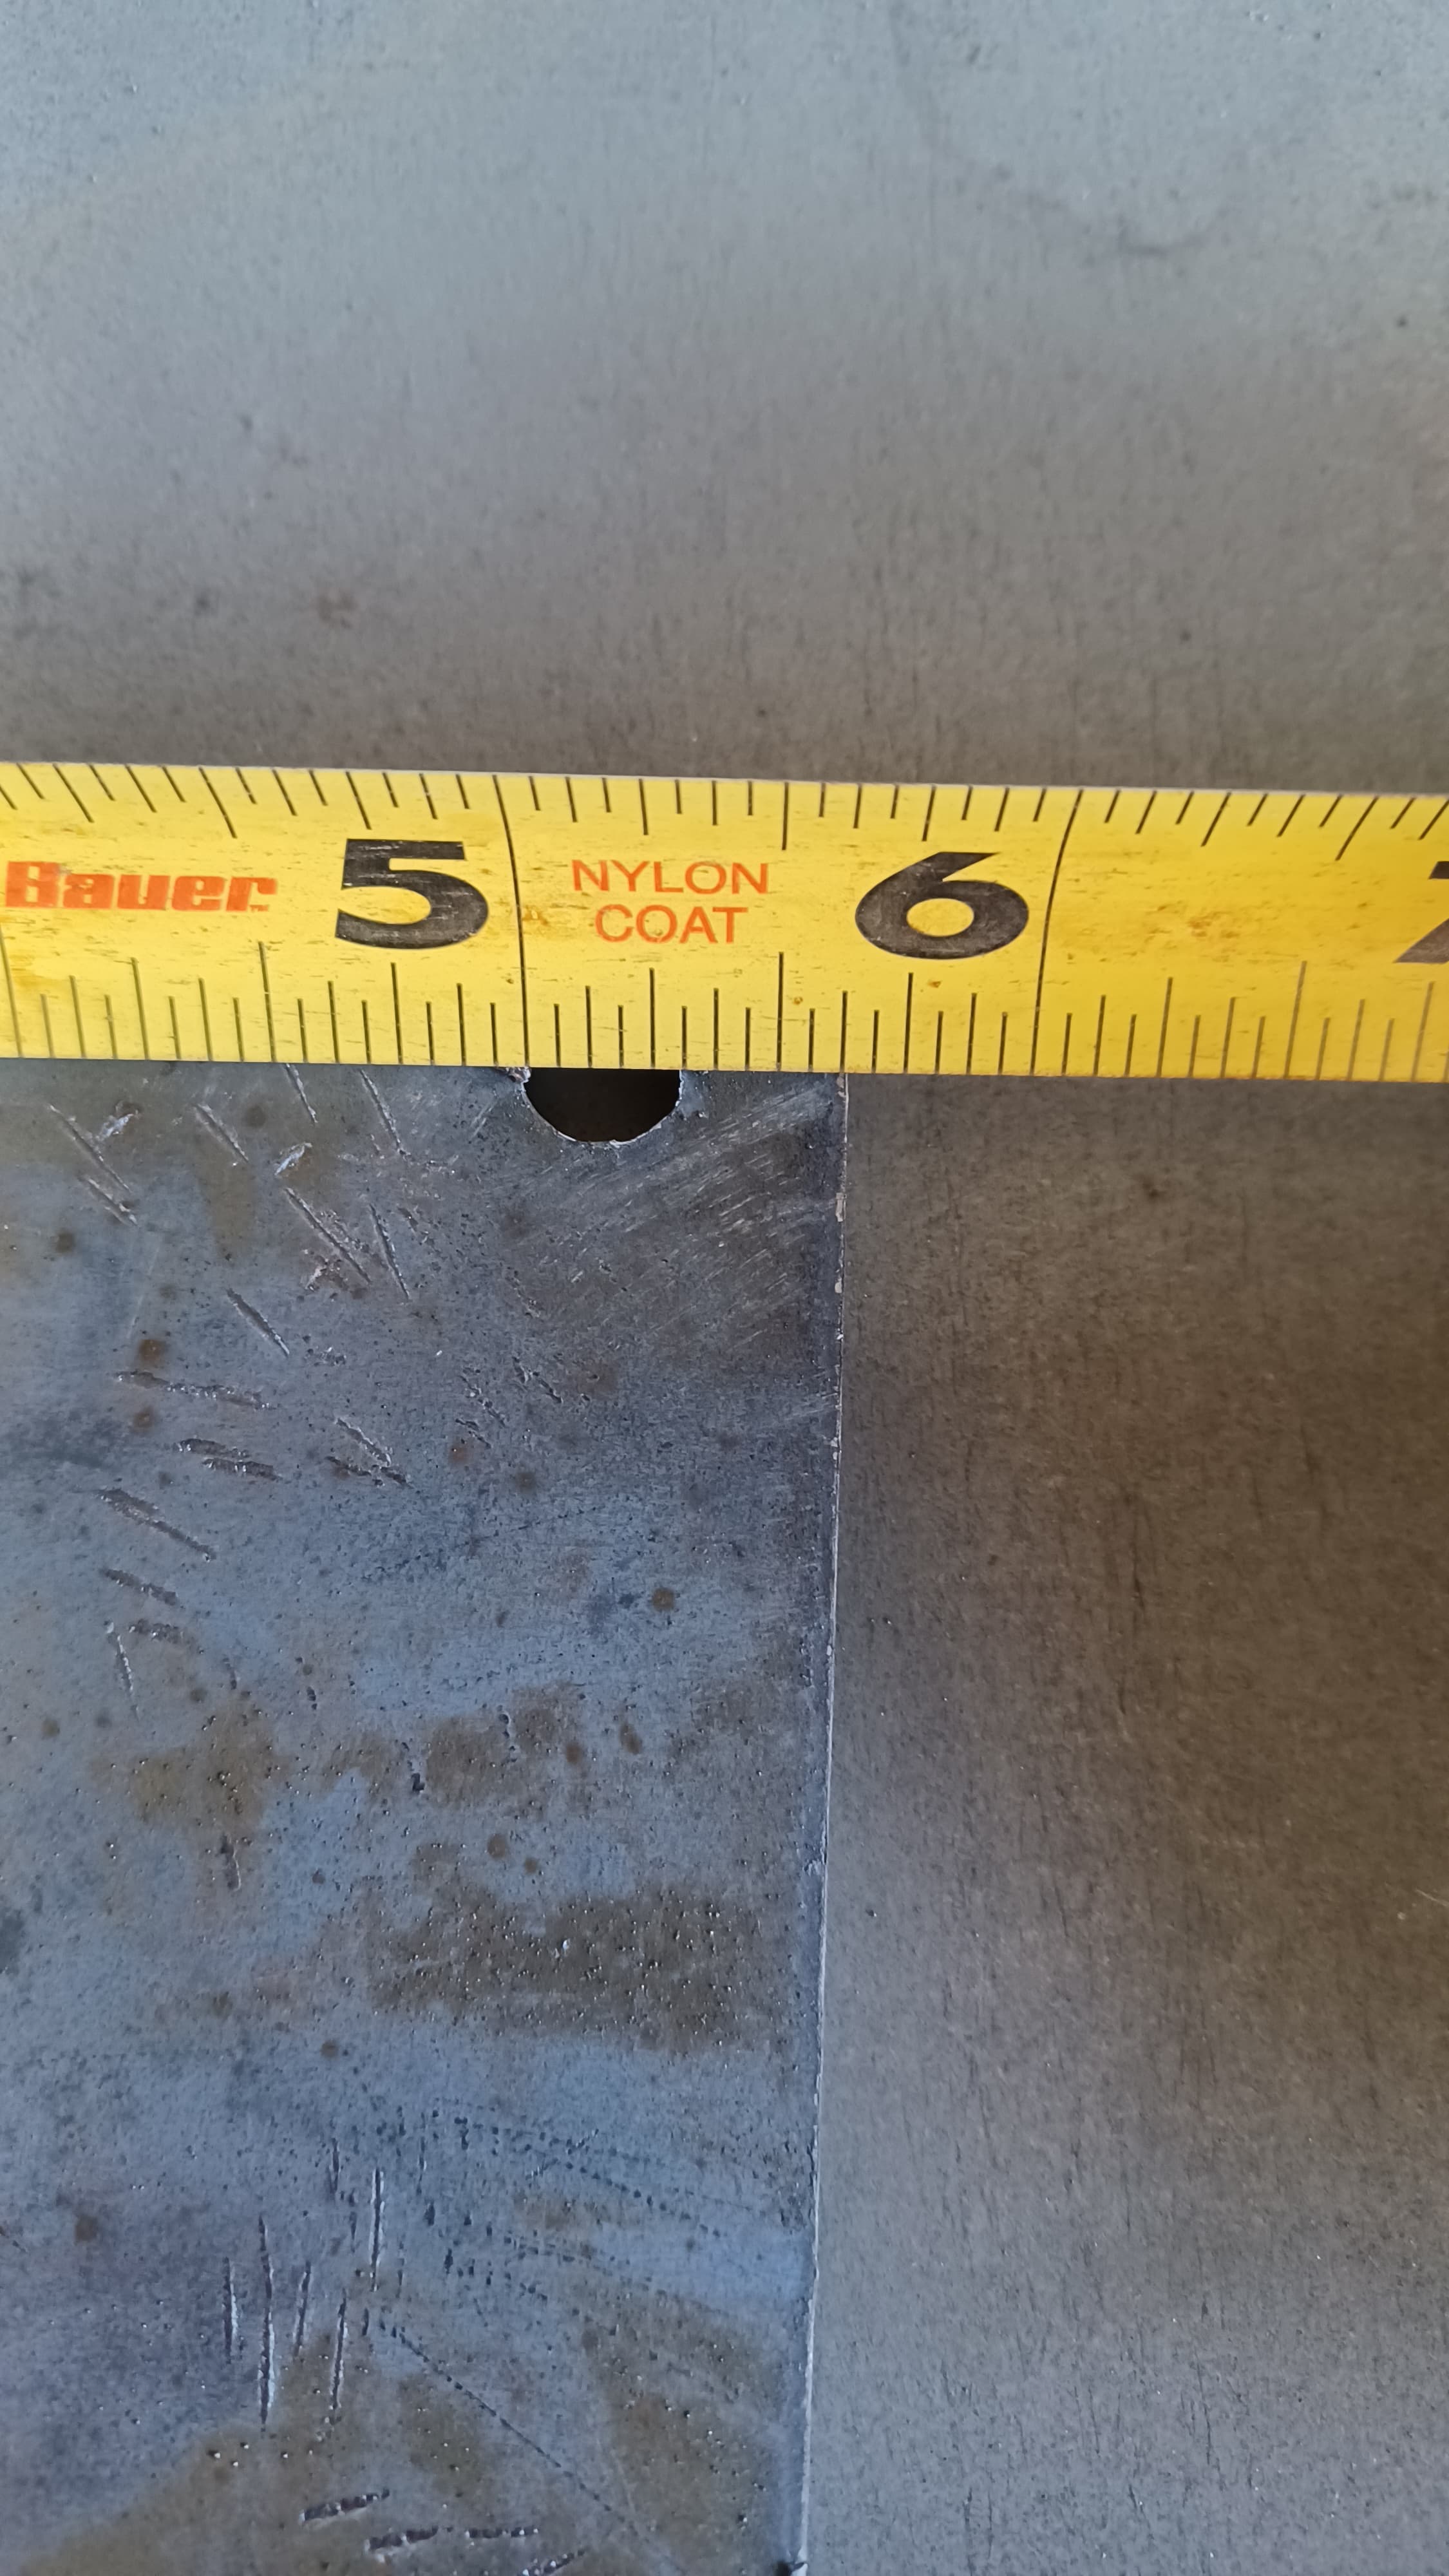
Material is 1/4" steel plate
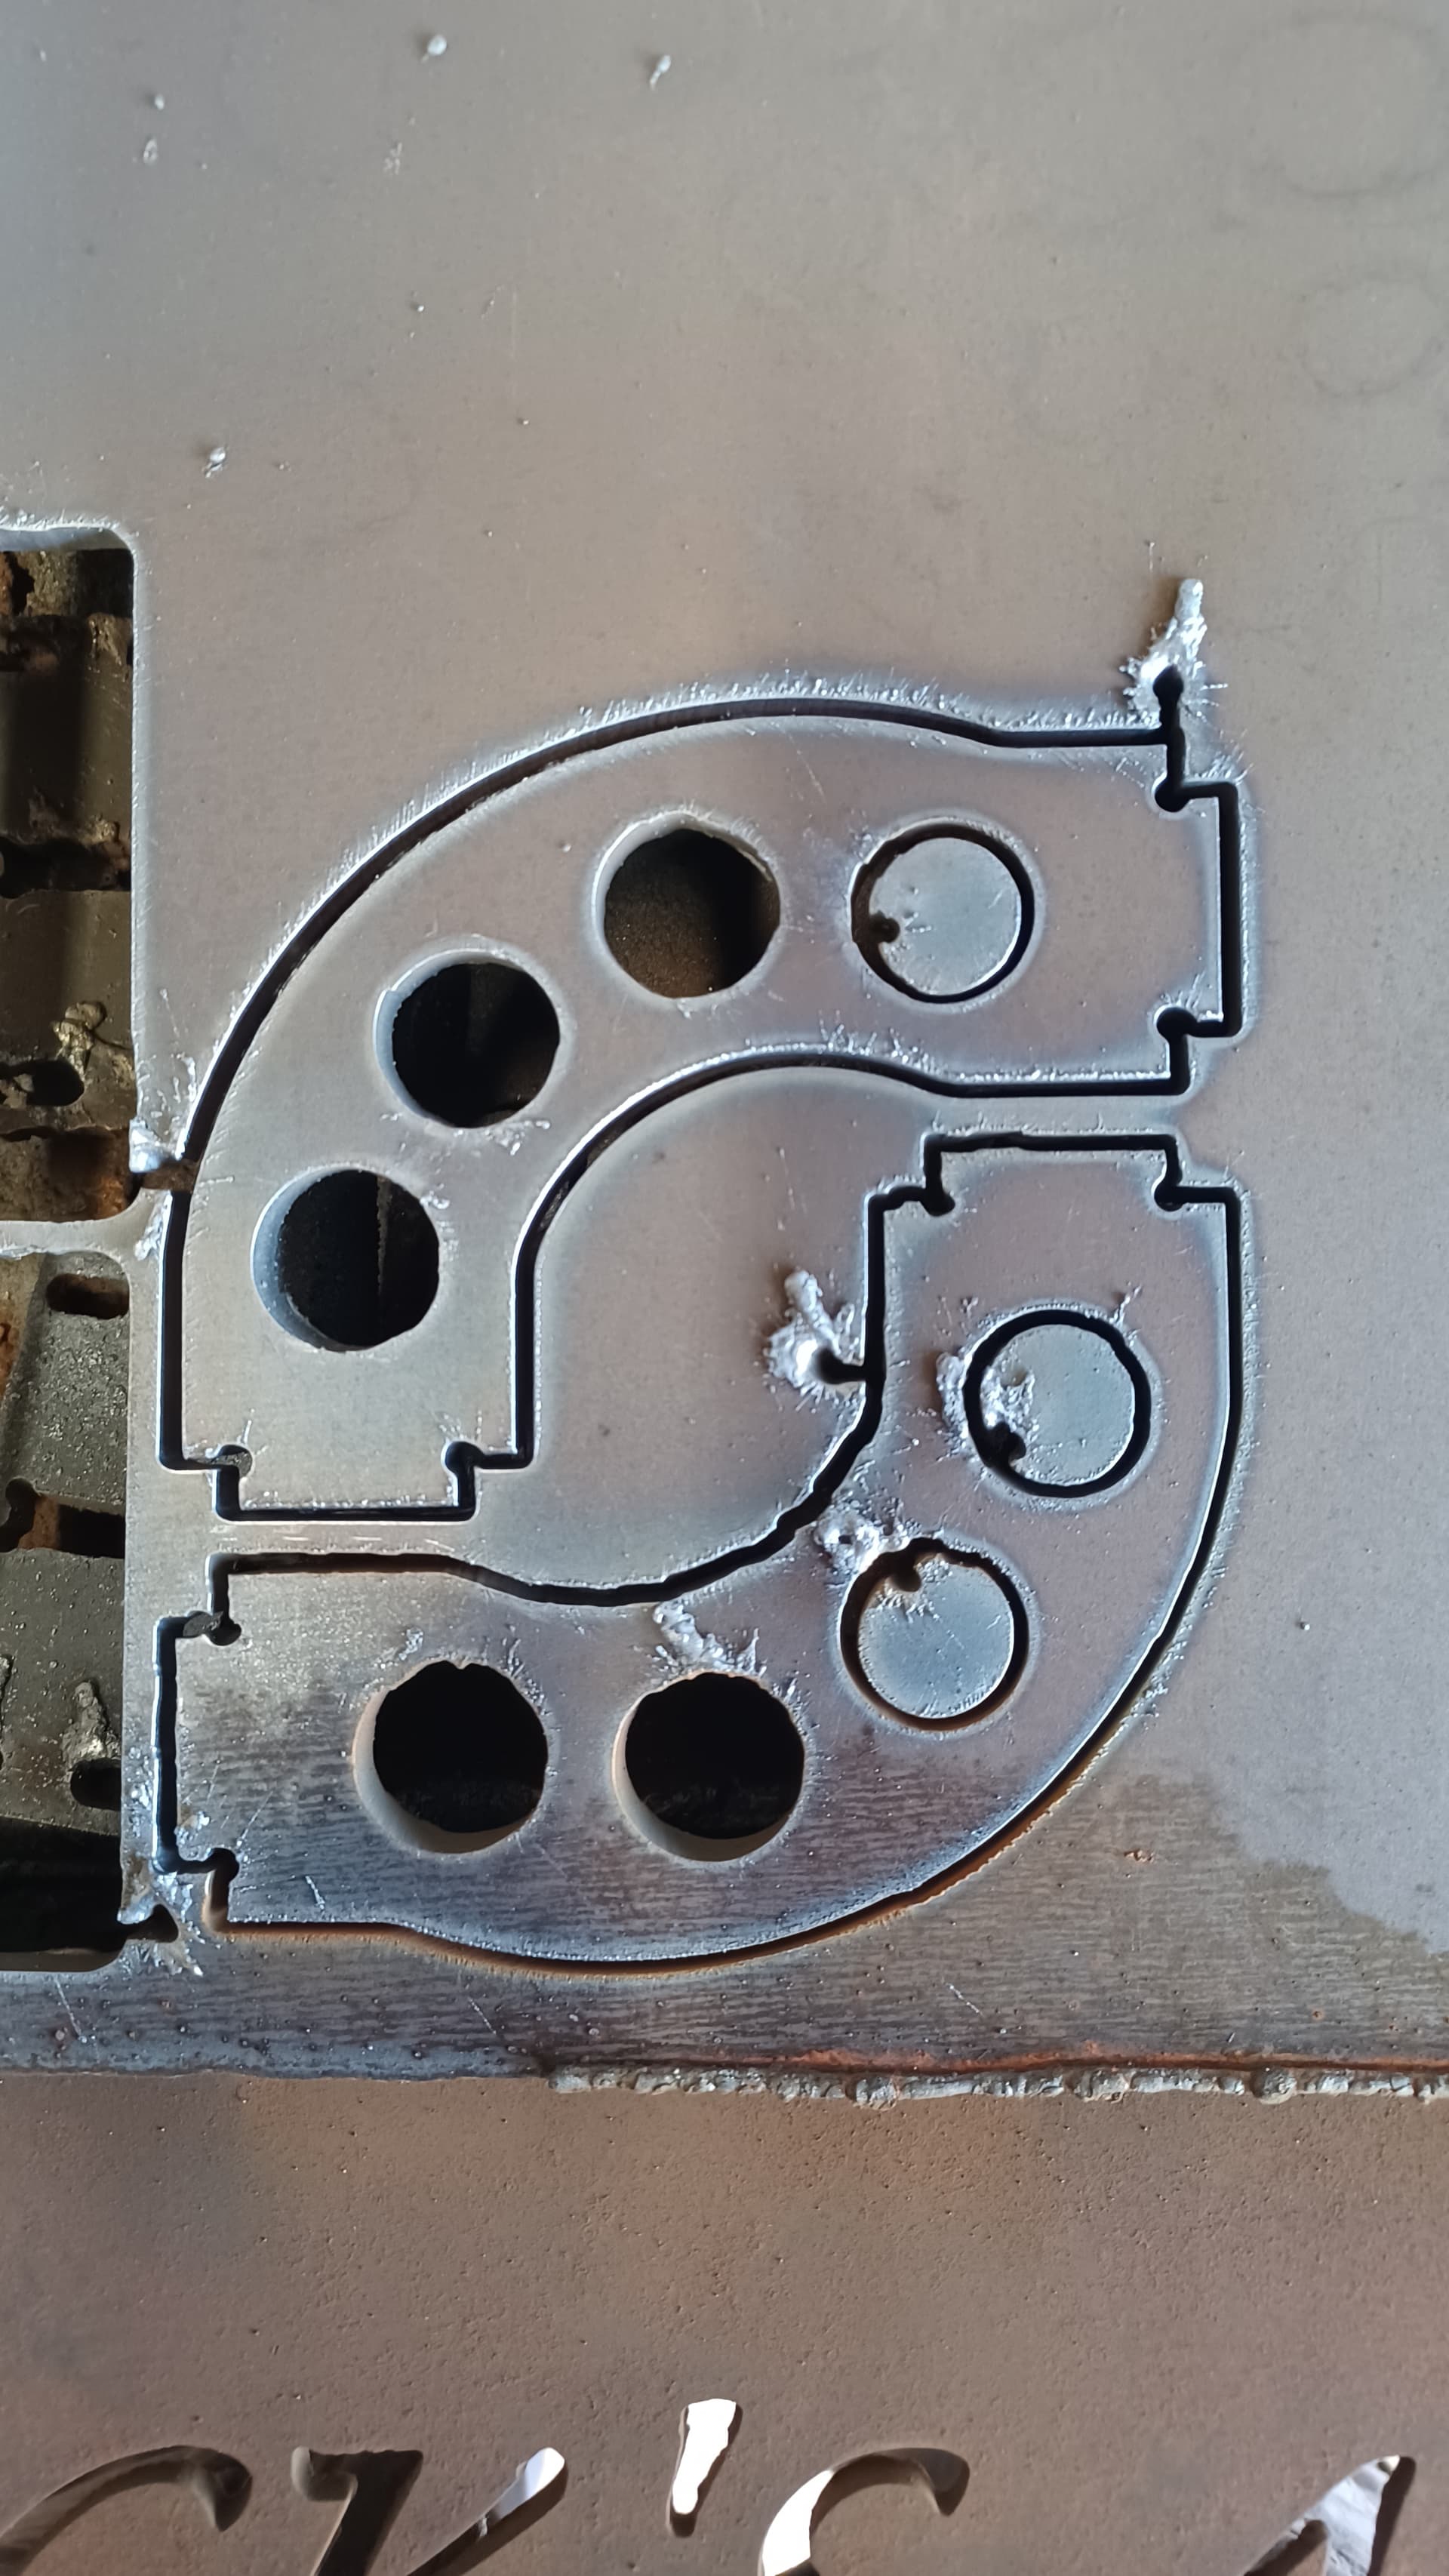
Top of my holes are the correct diameter of 3/8" but the underside is almost 1/4". I have attached pictures, f3d and nc file, just wondering what I did wrong.
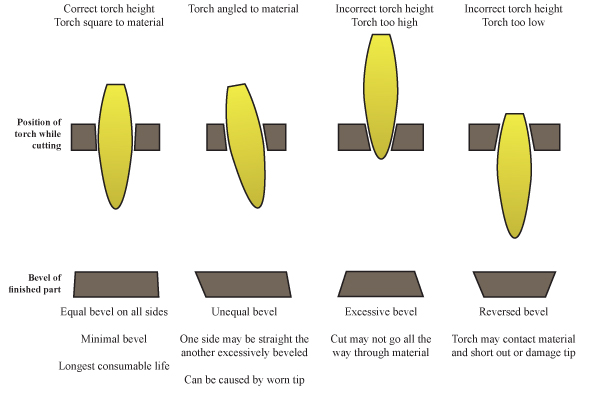
Here’s an image we’ve been batting around for some time. May help…
The image would indicate that your torch height is too high having a larger hole on top of your plate vs. the bottom…
I know what you’re thinking… "Well, why is the top of the hole the correct diameter then? If I move the torch down, that would make the top even larger!! "
You’re right!! But, you also have to consider that possibly your kerf thickness listed in your tool settings is possibly not quite spot on…
We all know there will always be some degree of bevel with plasma cutting and it certainly shows up more when we cut thicker materials… Alot of guys will oversize their hole sizes in a drawing to combat this fact…
I am definately not saying THIS is your problem… Just throwing some things out there to think about…
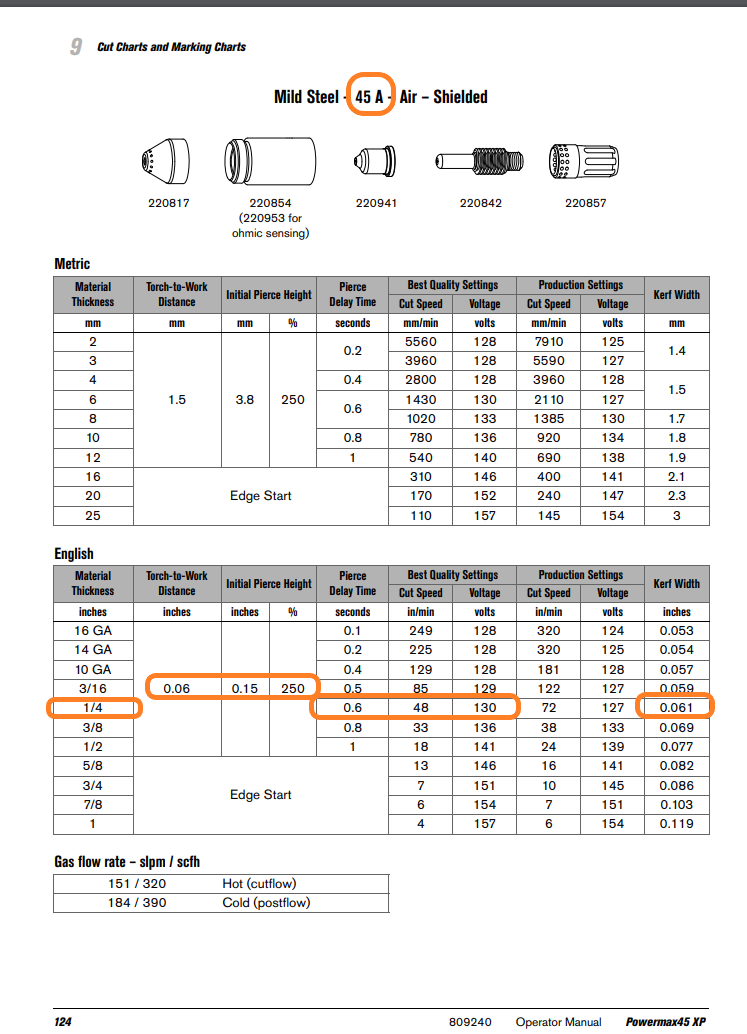
Yes sir and I have studied that image before as well I have THC on my machine and have the cut height set to .06" according to what hypertherm suggest. Yeah I guess maybe cut it a little larger.
60 % of 48 ipm is 28.8 ipm so 28ipm would be a good start.
remember in fire control if the program speed is reduced below 85% the THC will disengage till you return to the normal program speed for that set of g code.
Ok, thank you and yes sir that is the cut chart I was going by. I have had a problem with my material moving on the table real bad while the cut is happening so I was thinking maybe my amperage was to high, so I backed off of it a bit. I will have to verify the other settings you brought up and thank you for mentioning what you did about the reduced speed and THC.
Aside from slowing down for the holes. you really need to make sure your cutting height is correct. If you are setting your height at .060" in CAM, I’m almost 100% sure that your actual torch height is too high.
The post processor adds .020" in backlash compensation to the Z axis zero position. In reality the actual backlash is closer to .005" or less. This will cause your actual cut height to be .080" or higher, if you have a springback value set in Fusion.
There are a number of users who have done testing and found that setting the cut height to .040" results in an actual measured cut height of .060"
Just be aware that the hole will always have some taper and a hole with a programmed diameter of 1/4" will never result in a 1/4" hole at the bottom.
@Teknic the only problem with that is the torch height wont be active because of the feed reduction below 85% which turns off the THC. so it is critical for the actual height to be set correctly.
But defiantly for all program speed cuts use nominal voltage with your Hypertherm. I do , unless i have well worn consumables then ill use smart voltage till those consumable are done.
WOW that is good to know! May explain why I see a bevel on almost every cut. I am also going to check the straightness of my torch holder as well in relation to the material.
Everyone has their own way and that is good. I took a level and leveled my torch holder instead of square with the slates. When I do thicker material I use a level to make sure plate is good.
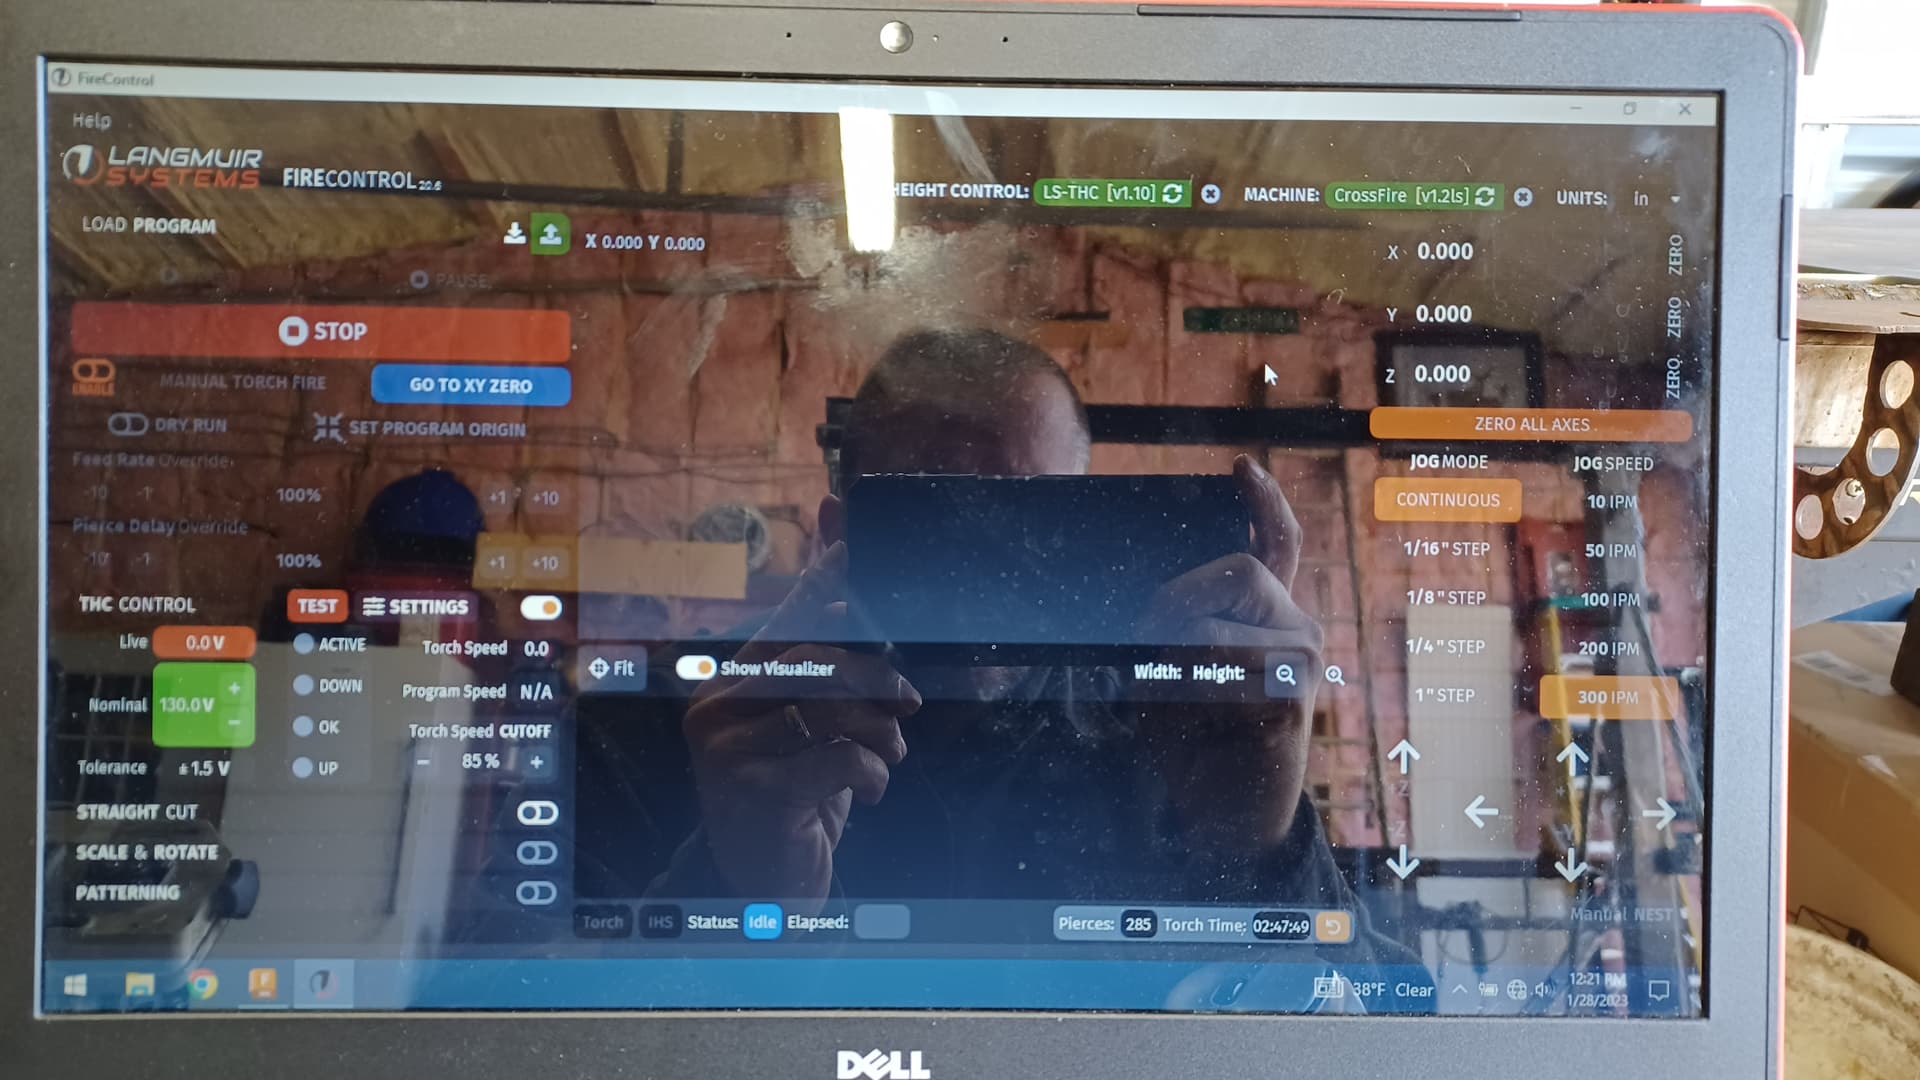
Based on the langmuir cut chart above and me cutting 1/4" material…do these settings look good? I have never set the Nominal V to 130 like this before…i was using Nominal yes but the V was 0 until just now.
I had to set the volatage back to 0…look at the pic of the cutout part…the half C on the bottom was with the volatge hard coded to 130 and you can see it has jagged edges and the half C on the top is smooth and it was with the voltage set to 0