So the thing I hate the most is the smoke/dust and smell from cutting. As you know, all welding/plasma extraction filter systems with any real CFM are crazy expensive. My first 2 modifications/ add-ons will be a custom-made extraction hood that can be ceiling or wall-mounted to help trap the rising smoke. it will consist of 2 sheets of .063 aluminum ($140) which will do the hood and brackets. I will weld all seams.
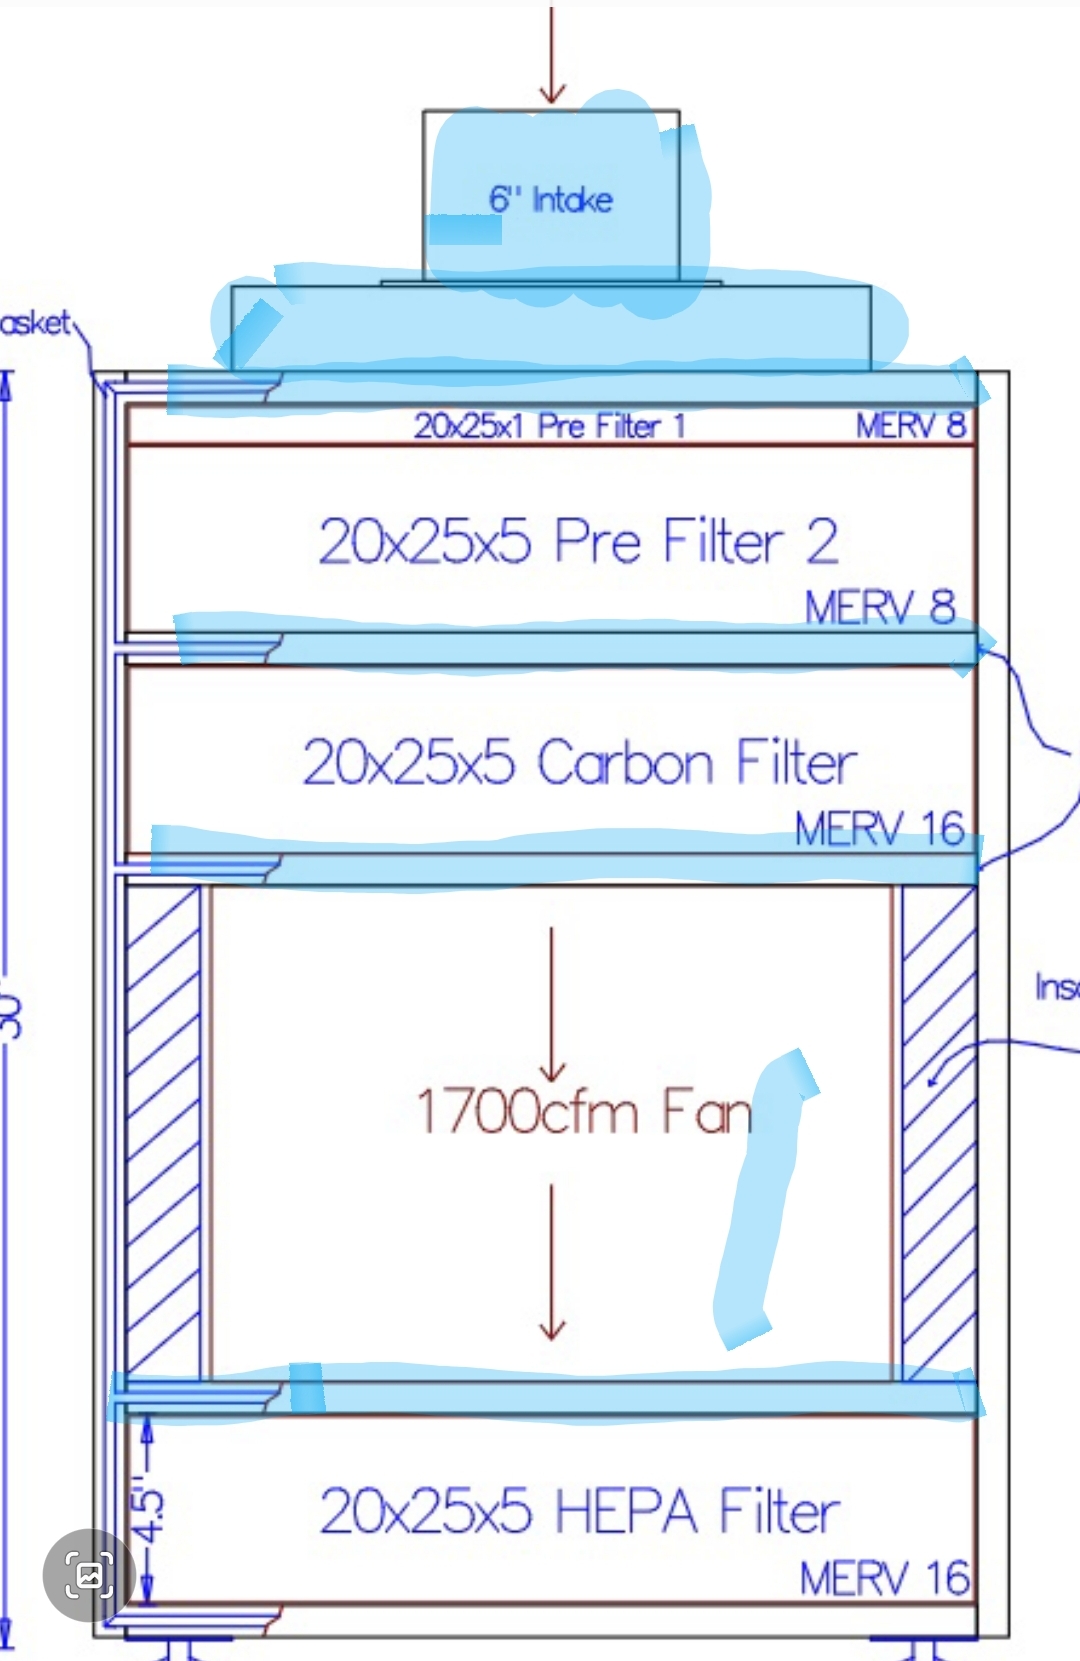
With 2 additional sheets ($140) and the leftover from the hood, I will fabricate a mobile extraction cabinet with a 5 stage filter system to collect, clean, and recirculate the air back into the shop. it will double as a welding extractor as well.
My total budget will be $900 including the ventilation fan, filters, and all other necessary parts.
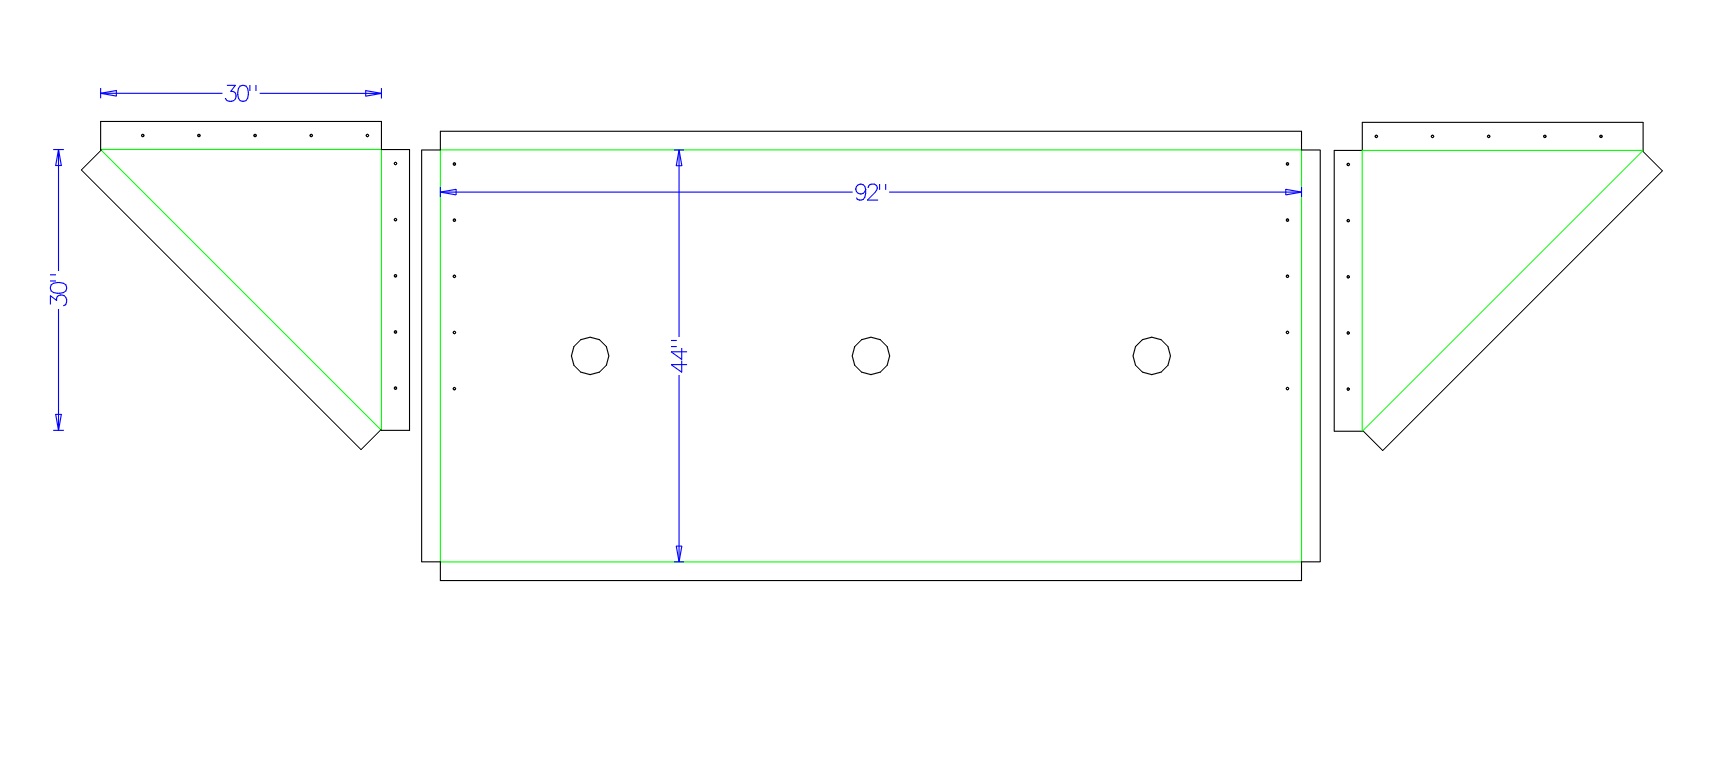
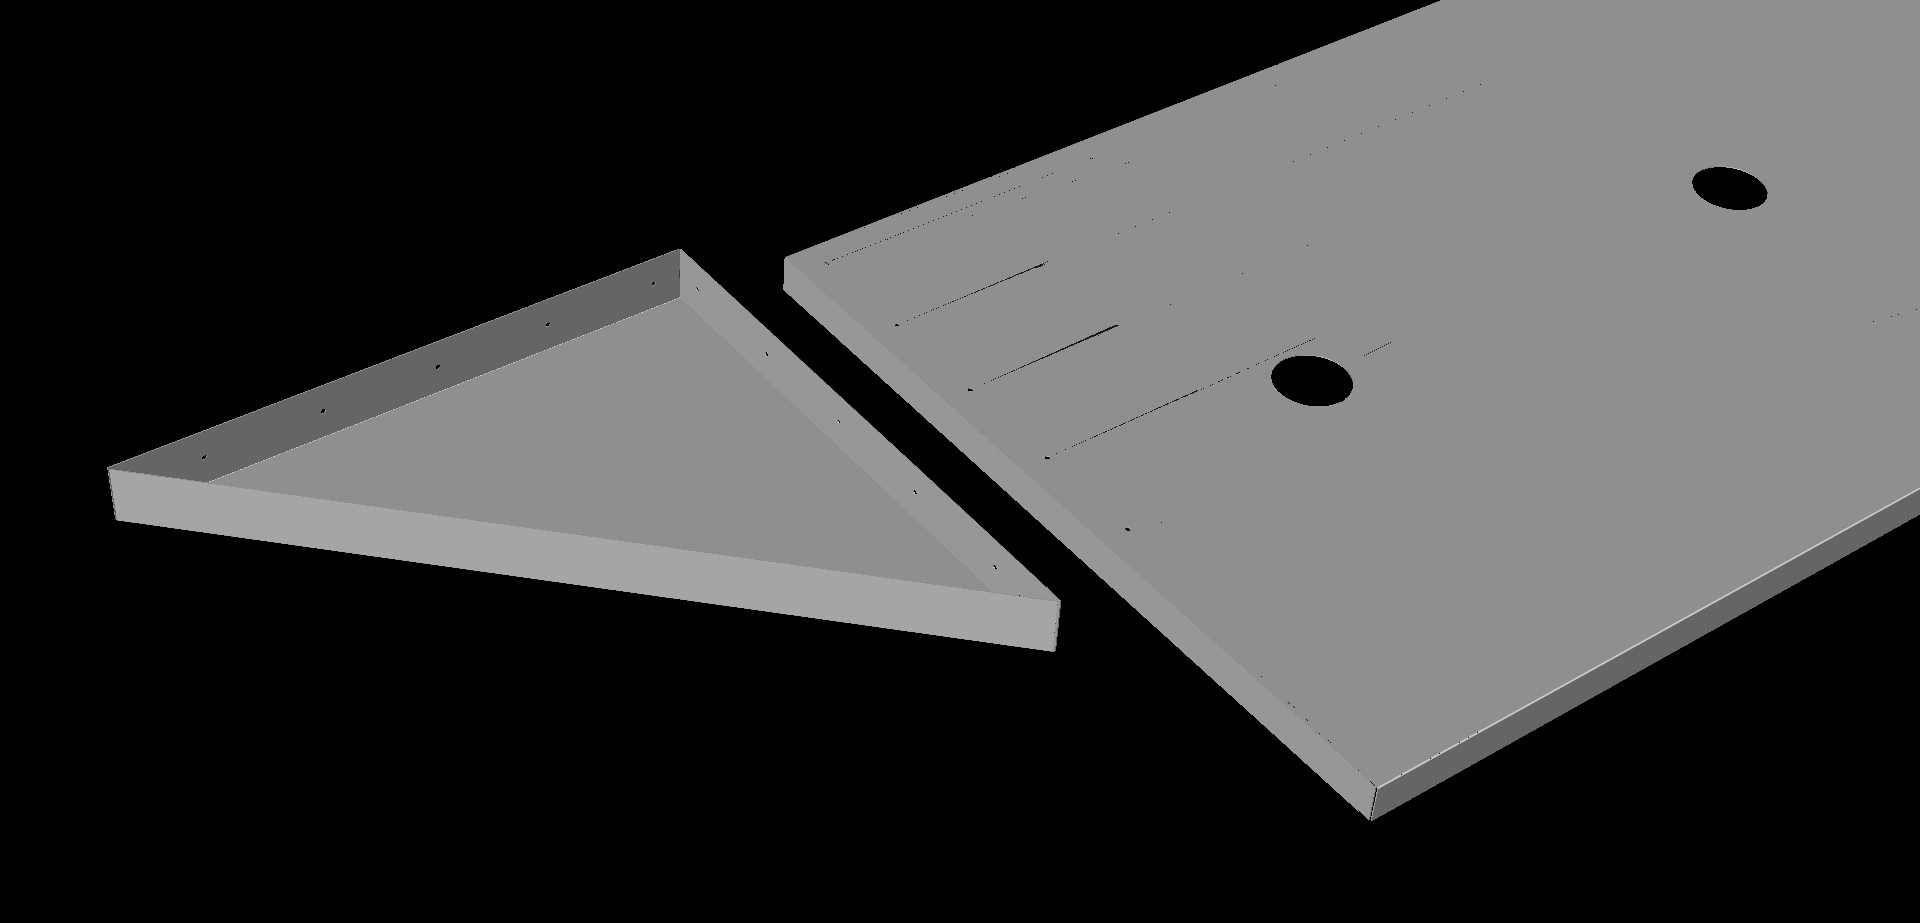
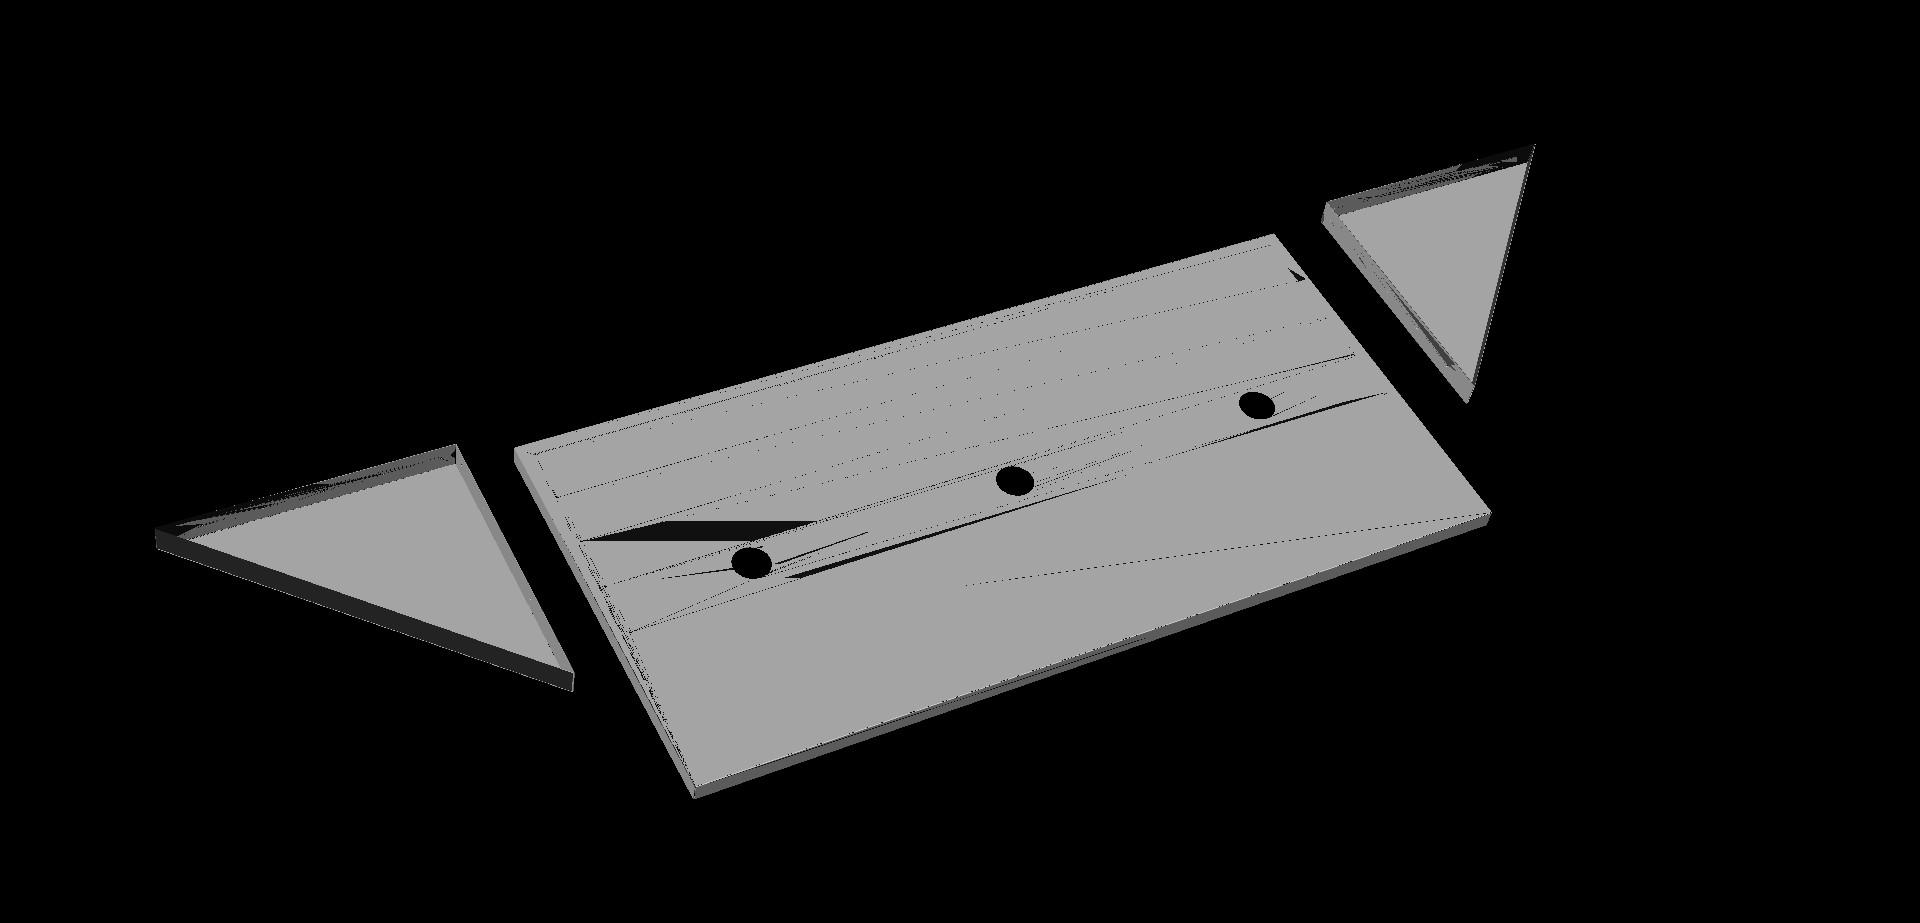
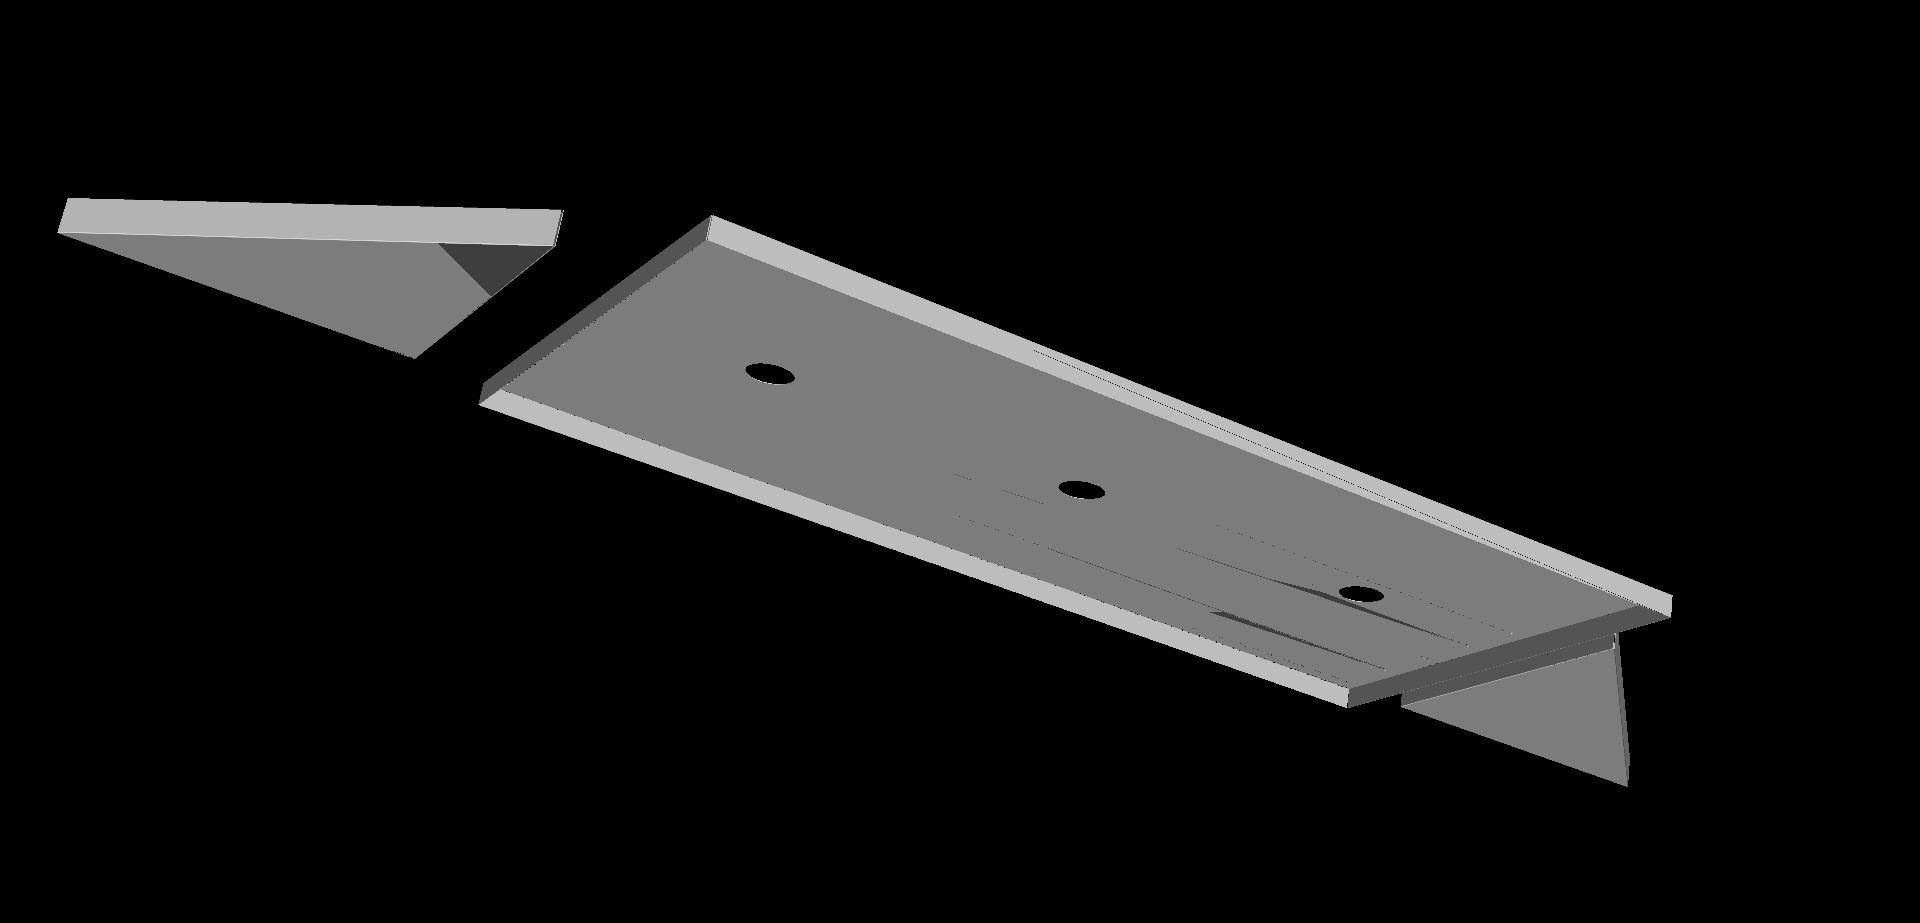
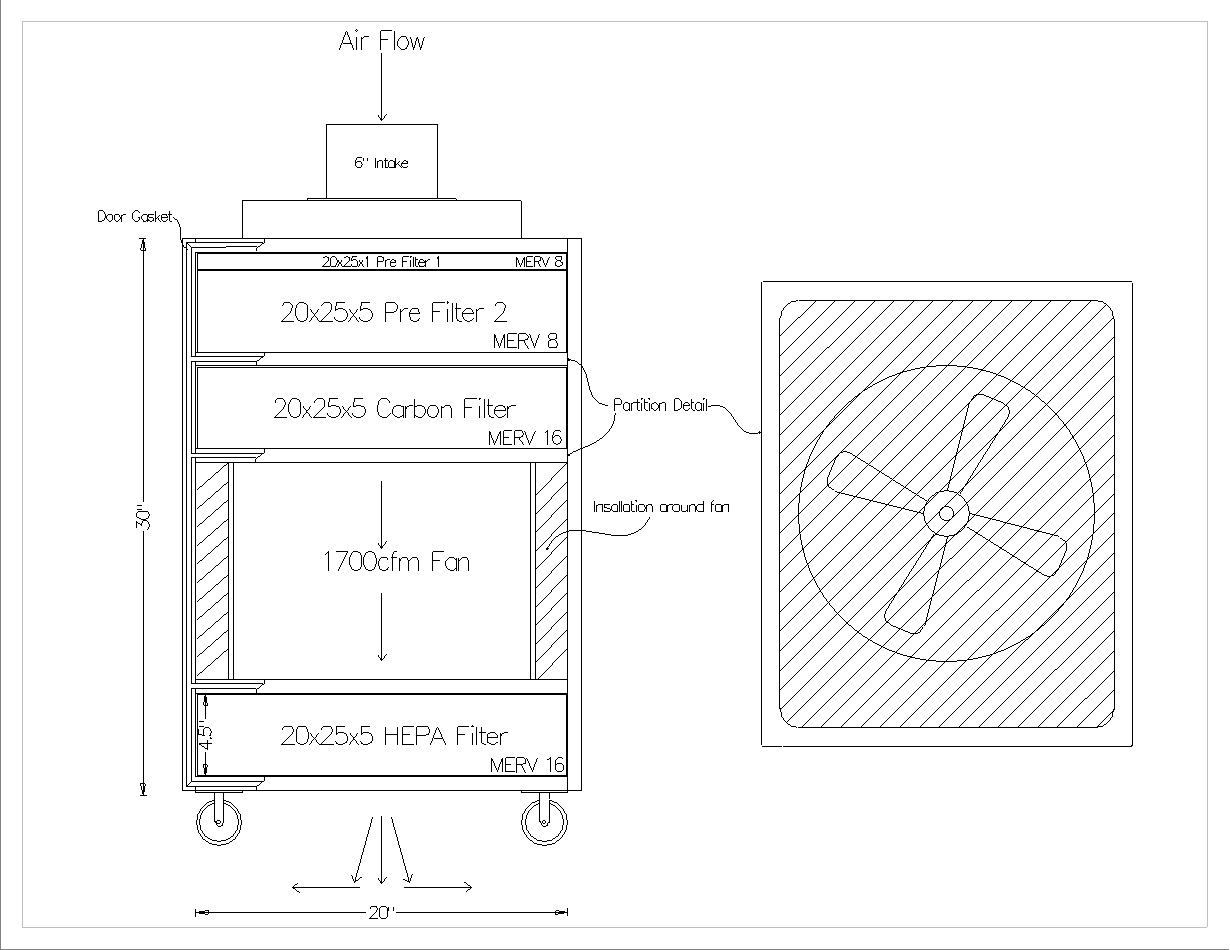
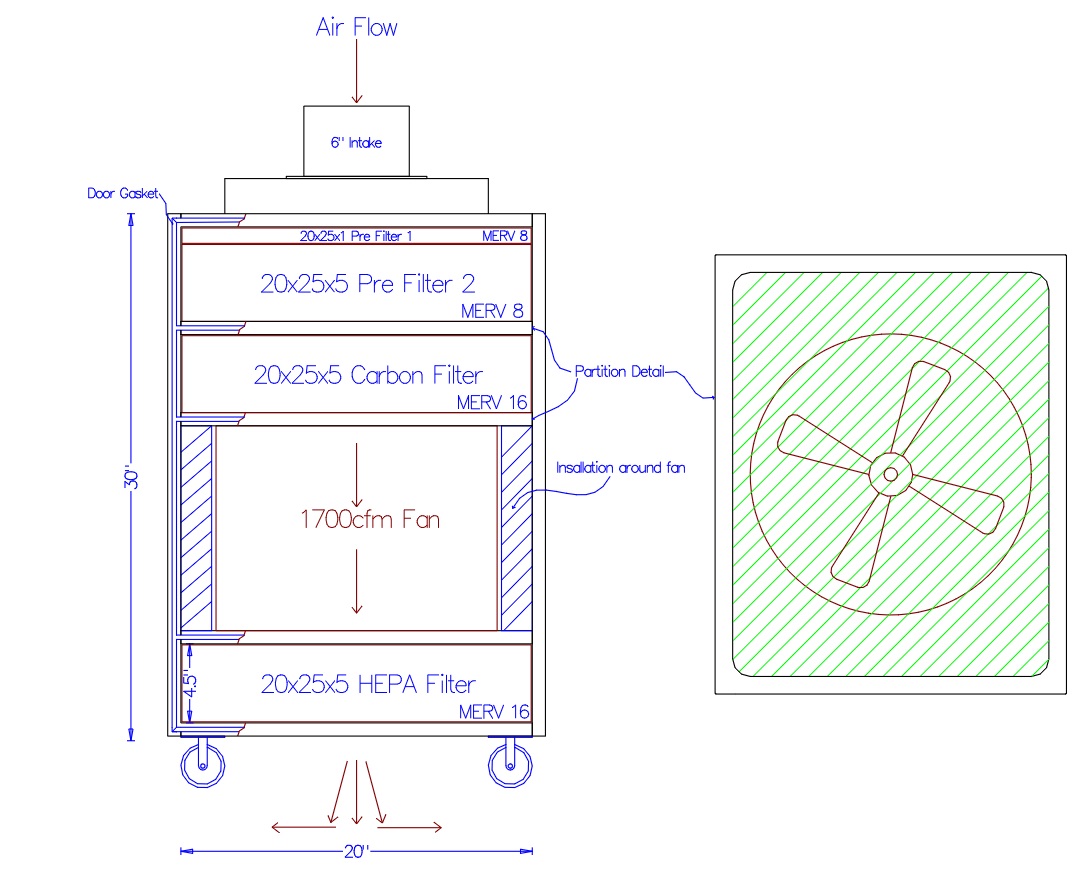
Below are the conceptual drawings for the hood, less the ducting. I’m designing the cabinet now. Oh, i will cut this on the new XR.
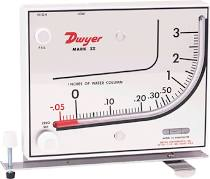
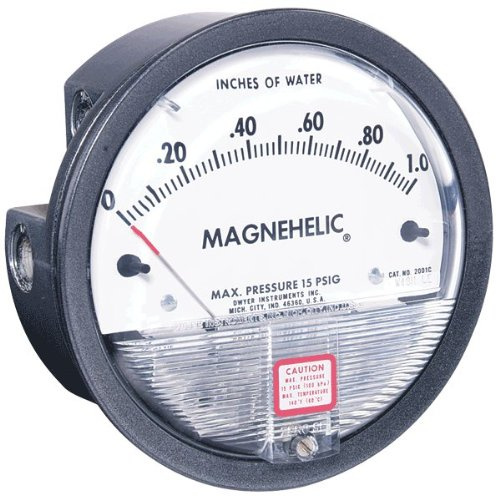
to prevent burnout of your motors and provide best efficiency of the filters…look into some digital Magnehelic Differential Pressure Gauges…or analogue ones…
we use these in HVAC system in hospitals to determine the condition of filters…saves changing a whole units filters…when we can change the prefilters…and gain 20% air flow for 4 months…then change the next bank of filters 4 months later…
this saves changing all the filters at once for big bucks
they are not cheap…but they come in different styles
I would place at least after the first 2 filters…that way when you see it rising you can change the pre filter first and see the difference …
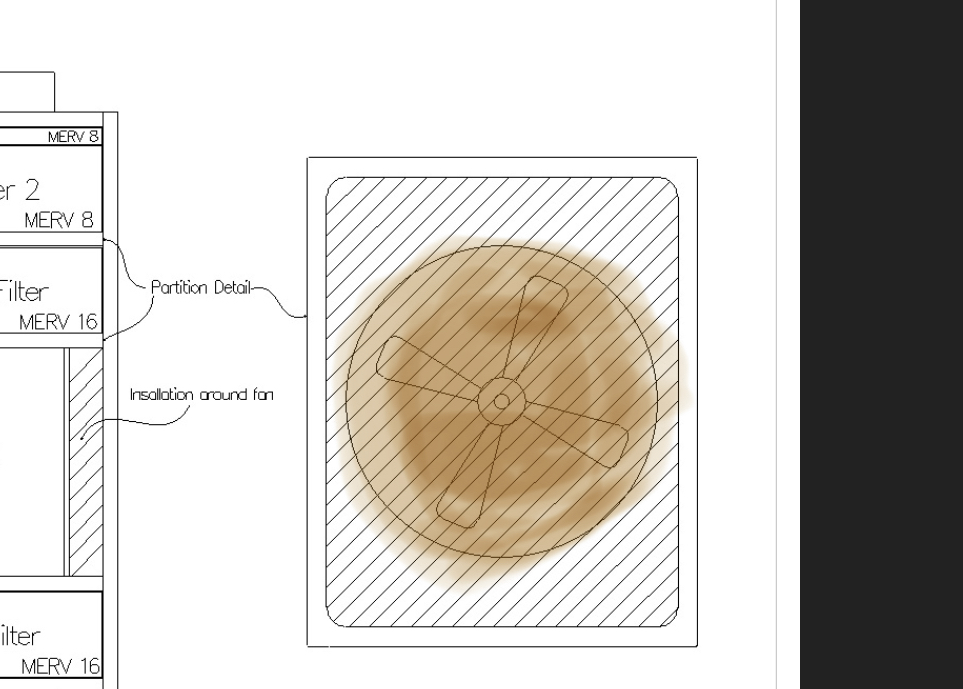
I built 20 x 20 air cleaner using a 12” ag fan and installed my filters directly against the fan intake the way your drawing shows. I have found that nearly all the air flow follows the shape of the fan intake on my unit. (upload://lBcdp5skIY7G7eHtlGdShydlgSd.jpeg). So, I have 400 in2 of filter, but air is only moving through about 113in2. You might want to test whether you find the same thing and either build in an air gap between the filters and the fan intake to let the flow mix or match your filter and intake closer. If it works like mine, you’ll end up using only around 200 in2 of your 520 in2 filter.
this pattern is classic example of stratification of air…meaning more or less follows a liner path through the whole system without mixing or changing…in large HVAC system this causes problems in cooling and heating coils.
this can be fixed by disrupting the air flow before the filter…you can install a tight expanded wire mesh before the filter…or an plate with holes in in…like a punch plate…it does not block the air flow…but causes turbulence behind the plate spreading the air over the filet…makes batter use of the filter surfasce.
So there is a 3" open air box that the 6" intake dumps into before entering the first filter. I could put an air disturbing baffle if it ends up not being enough.
Additionally there is a1" air space between each filter as the divider shelves are made from bent aluminum.
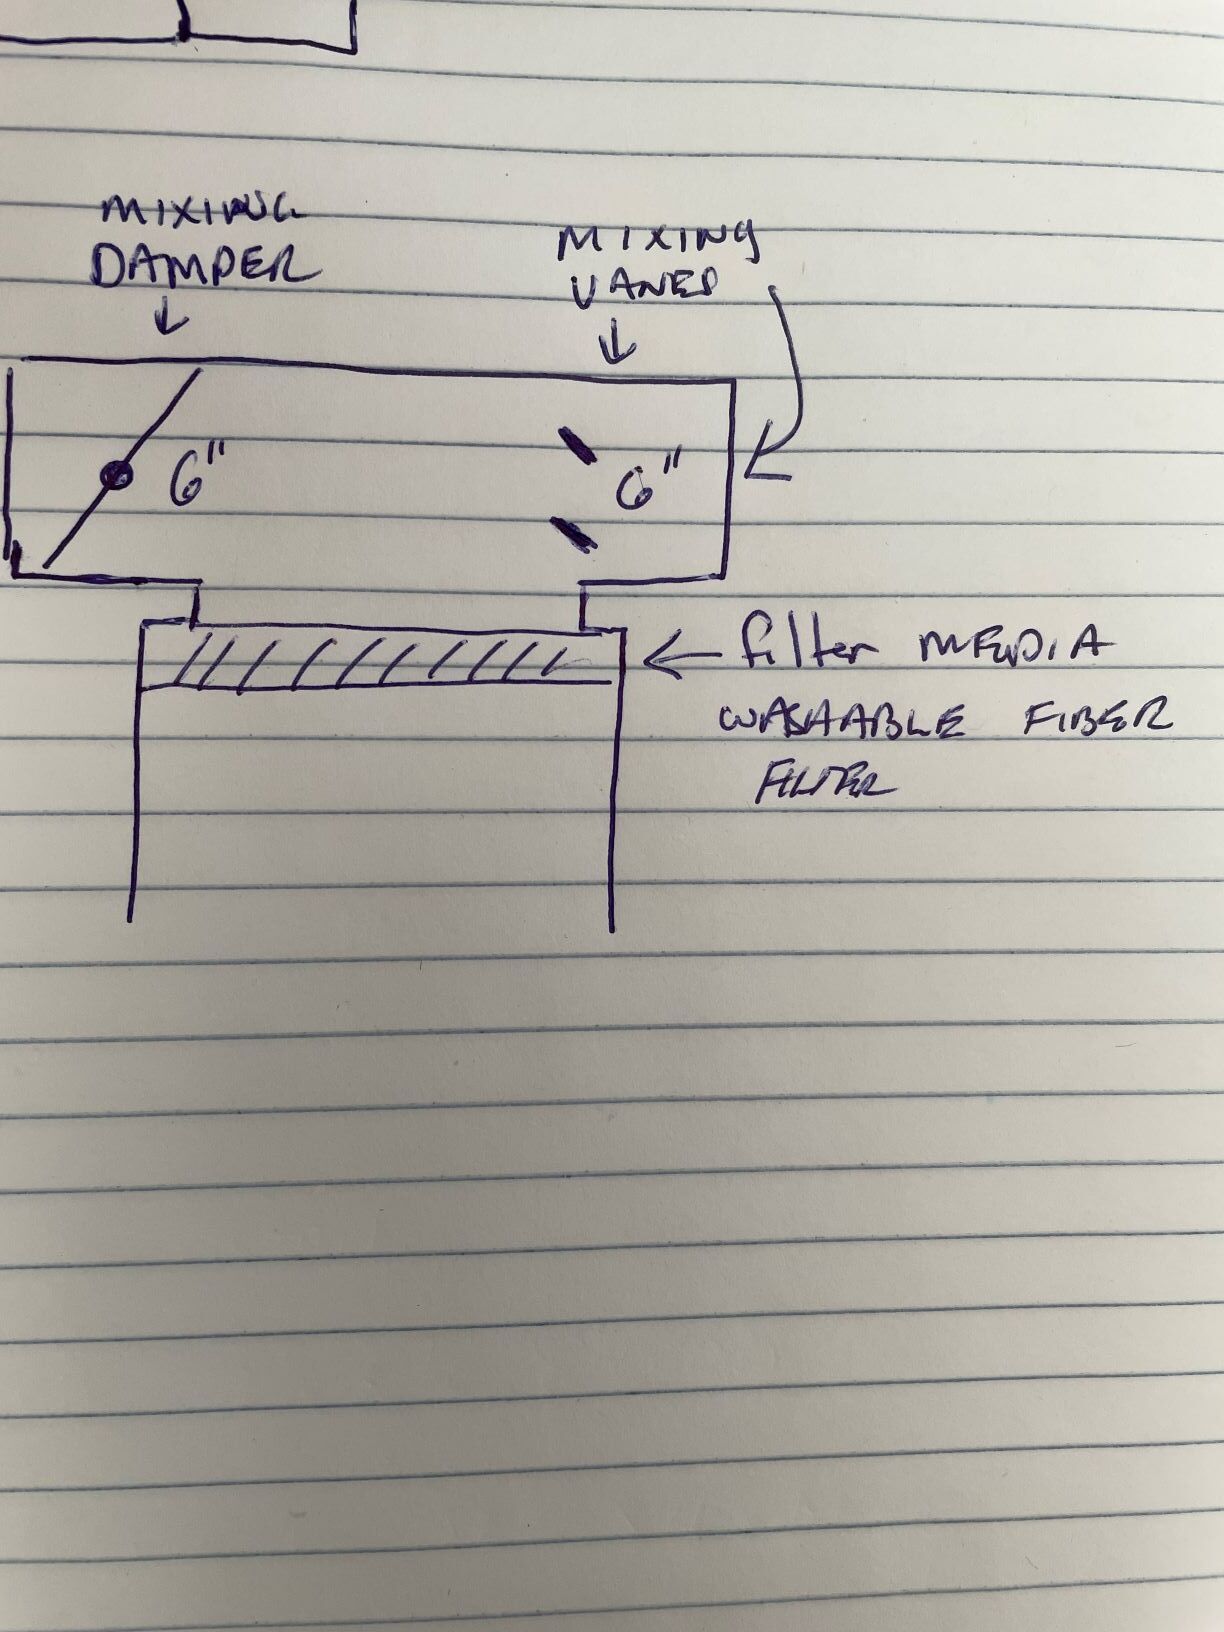
so here ia way to truly mix up the air and not put a lot of strain on your filter system.
this design allows you to draw dirty air in from the right…
it goes over mixing vanes…mixing vanes disrupt the direction of air flow but not hinder it…
the balancing damper side allow you to draw in other air to help mix the air. this can be an adjustable damper.
this will truly mix your air up and prevent patterning of the filters.
the other thing I recommend is that your first filter is a cheap filter media to catch particles…using a merv 8 on the first filter will block up in a couple of hours…this can be a washable filter media.
I would also recommend you give a couple of inches between filters…
this design is based off of what we have on HVAC systems in the Hospital I manage.
The Fan I’m using is 2,860 CFM. Not sure on what the loss will be pulling through the filters. I don’t even know if I need as many filters as I designed in. The filters are rated at 1400-1600 CFM flow.
My hope is the hood with a 3 inch deep recessed design will trap the smoke/fumes as the rise up and the 3 extraction ports with pull enough to capture it.
use ridged duct as much as possible and keep elbows down to a minimum… fles kills arount 4% per foot of air flow…and elbows drop around 10%…
expect up to a 10% drop in flow from HEPA filters…soyou may have worst case around 10 to 20% drop through the machine
Thanks Toolboy for heads up. I was so excited about the XR I didn’t even think about exhausting the smoke and fumes. At first, I was going to put it at the roll up door, so not a problem, but then decided to move it farther in the shop. so, I do need to put in an exhaust system.