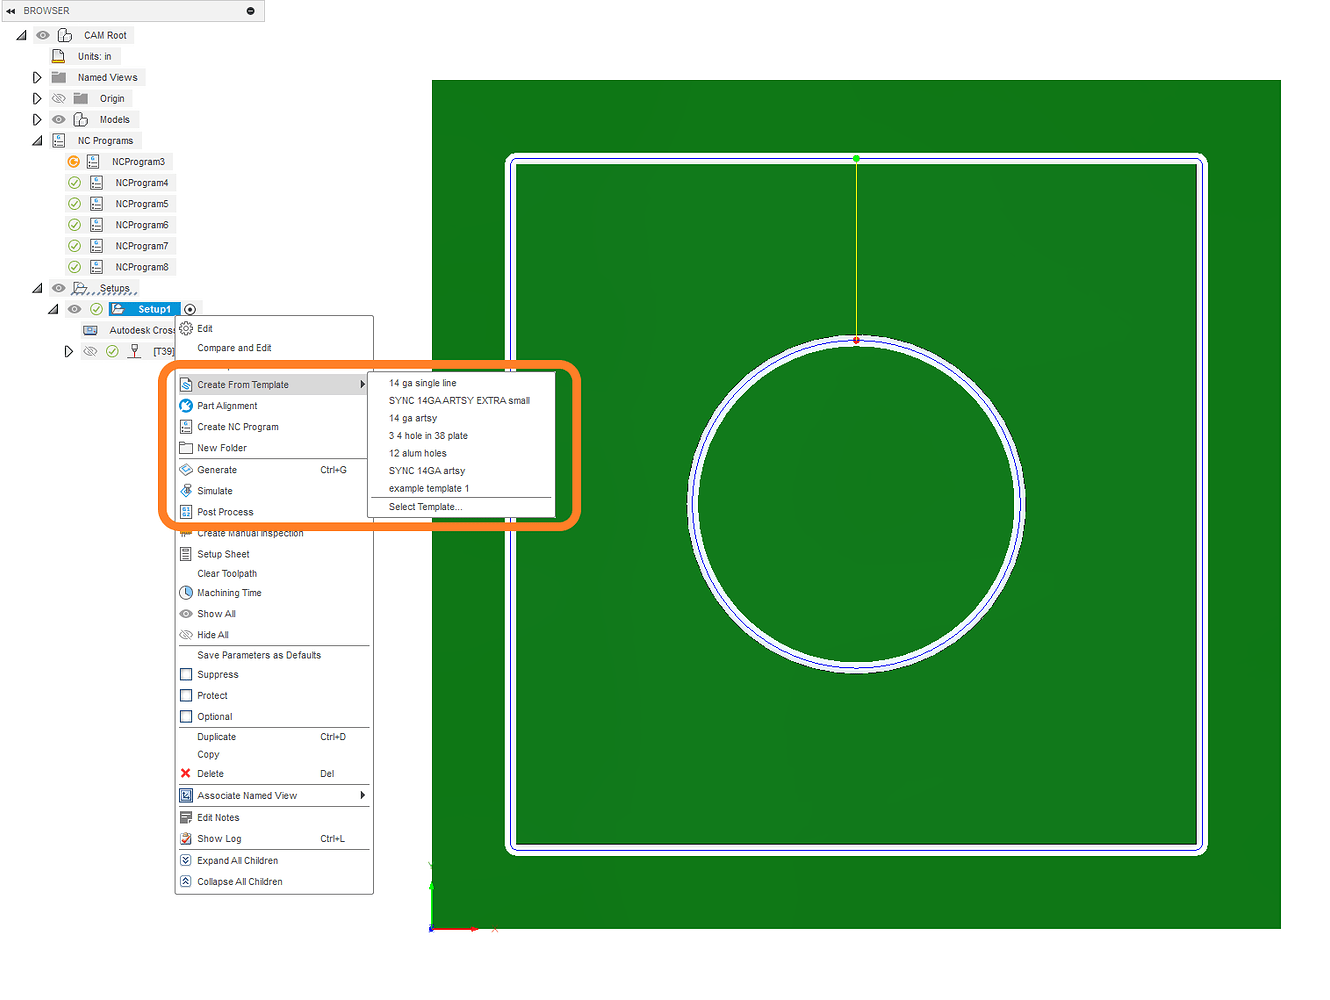
Yes. And you can do that as a template to help.
1 Like
simple enough when you have simple part with few contours
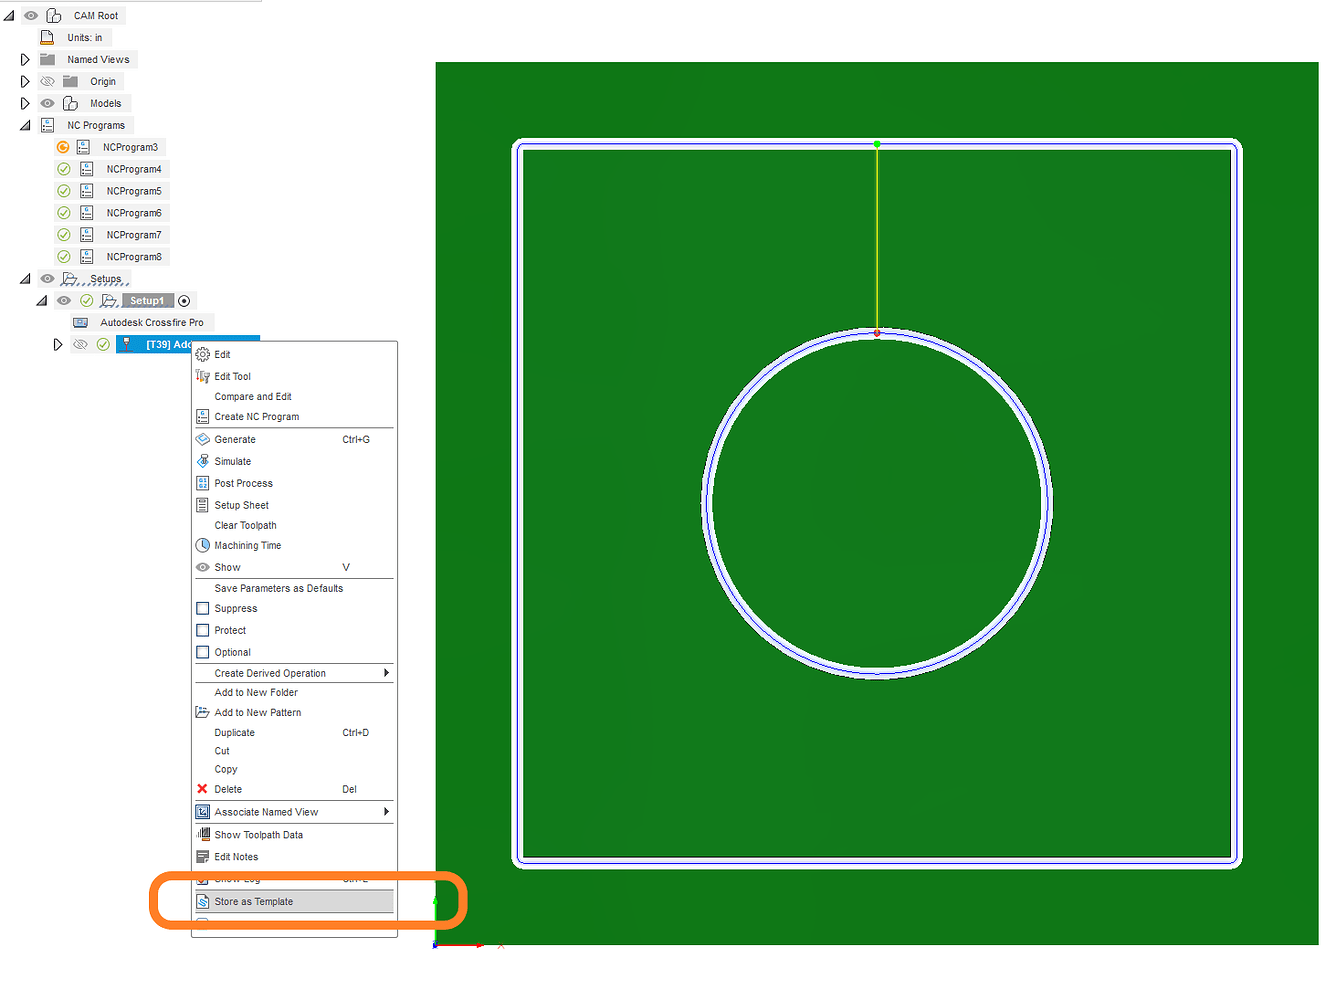
Store as template
Select that profile from your Fusion browser on the left hand side.
Click and store as template.
2 Likes
Ok good ideas as a template for sure.
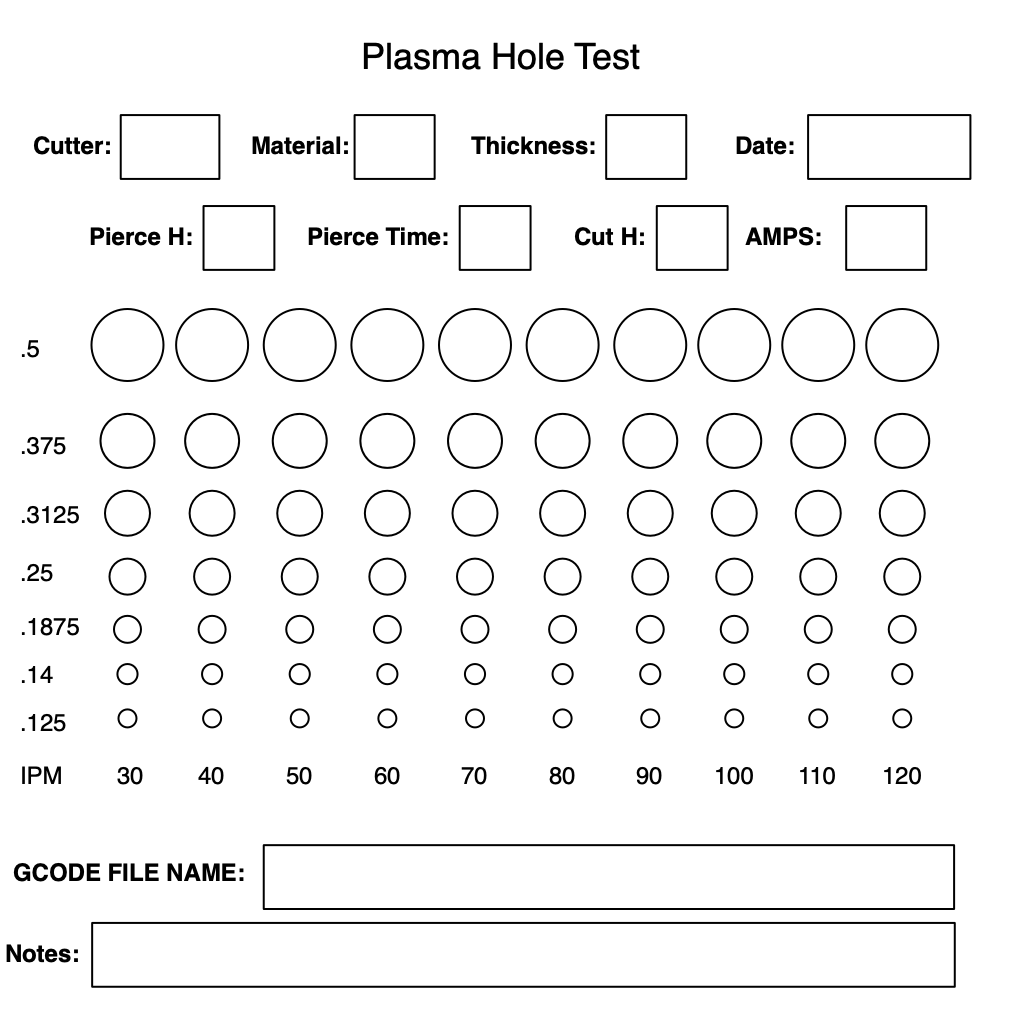
First thing I want to do is create a “speeds and feeds” test chart that addresses both basic lines and holes as separate tests. Right now I need to nail down all the parameters that have greatest effect on the cut quality. Next create a row of holes starting at .125, .14, .1875, .25, .3125, .375, .5. I don’t know yet, but I think the first tests for each row will be, cut a row of these holes in 1/8 steel at a fixed amperage lets say 30Amps on the dial. Have each row assigned to a setup and 2d profile with its own speeds. Run each row starting at 40ipm, then each setup will increment +10, so next row is 50, 60, 70, 80, 90, 100. This allows a fast method to watch various size holes at a fixed amp, over a range of speeds. Then repeat this program at 35amps or some interval. Then you can see what was best for each hole size.
This chart is the starting point for tests.
3 Likes
cut height is one of the most critical factors .
2 Likes
I commend your test concept. I personally wouldn’t try to cut .125" (11ga) at 30A with a Cut45. Start at around 40A and I think you’ll be happier with the results. For the small holes (< .180"), try to pierce from the center.
For your 30A cuts, are you using FineCut consumables? If not, I suspect you’re not getting the benefit of a smaller kerf at lower amperages.
3 Likes
I will be testing 16-18g steel and alum as well, I have no idea on what amps work well yet that was just an arbitrary number 30A. I treat this just like starting on a laser, do a bunch of cuts at different heights, speeds, wattage and pick the best one for the material and material thickness.
1 Like
This is why having a Hypertherm with its cut charts comes in handy because 90-95% of this testing for amp, heights, feed and speeds was done by the manufacturer. only a little tweaking is necessary for the CNC table it happens to be on. One of the reasons it is the worldwide standard for plasma cutting.
You will have to consider changing the consumable very often during the test so you can have a baseline for cut quality that isn’t slowly changing as the consumable wears.
4 Likes
This is so often overlooked.
If you look at the nozzle, even though it may have a uniformly concentric orifice, if you can visually see that it is larger than the brand new nozzle, it is going to throw your results. I had a nozzle that wore perfectly even and looked to have ‘life’ left in it. I changed it and the cut was night and day difference.
1 Like
I have cut 45, I don’t know if there is a fine cut for it yet. Once I get past this learning curve and determine that I “may” be able to get good results with small holes on some thin gauge aluminum or steel electronic backplanes around 10x10" with numerous holes required for standoffs for circuit boards, I will get the 45XP sync with fine cut. As it is right now only cutting a few tests I see that this is realistic to move a number of laser and cnc things to plasma and be “good enough”.
This is just a few minutes getting started yesterday on first cuts. No thought to settings just started cutting. I tried a few others, faster speed is worst holes.
I have a cut45 and have found for me atleast,
I always cut at 45 amps and just change feed rate
5 Likes
You’ll get better results with holes, by running them at about 60% of the feed rate for the rest of the program. It results in more dross on the back side, but much less taper on the hole.
1 Like
You probably know this but the dross is not what reveals a good hole. It is the cylindrical cut of the hole. You will need to accept more downside dross for a good hole.
If your cut height is correct, the dross should be easily removed with a sharp strike of the Fireball tool, dropping on the concrete, or tumbling in a concrete mixer.
If it is a hard rolling dross, you cut height is probably not dialed in (my experience).
1 Like
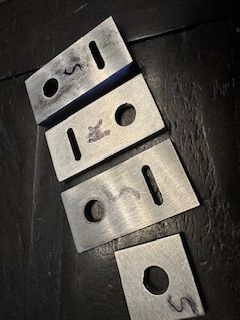
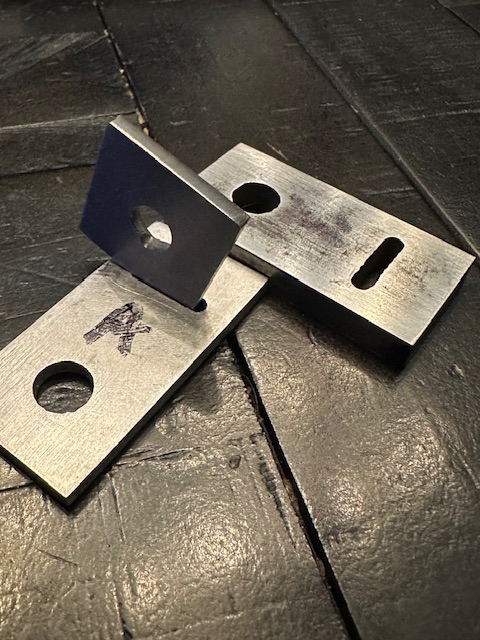
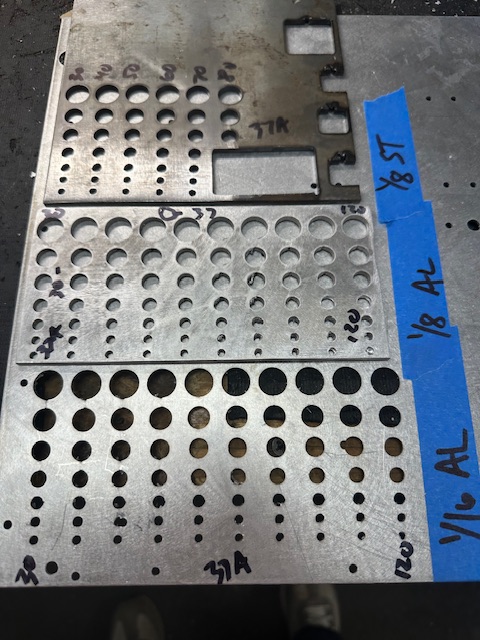
Thanks for all the tips. The hole test was enlightening. I ran 1/16 alum. 1/8 alum. 1/8 steel. Starting first row at 30ipm. 40 50 60 70 80 90 100 110 120. Amps were around 37 on these tests. Need to look at other parameters next to understand how things affect the cut. Outside edges and straight lines are all great and not even a thought. A few seconds on a sander and those are perfect. Holes and slots need work and that’s the focus. Really pleased with the Cnc. Cut45 is good for now I think. Aluminum holes drilled and tapped really easy.
5 Likes
That there is dedication. Good work.
2 Likes
I agree. That’s how it’s done.![]()
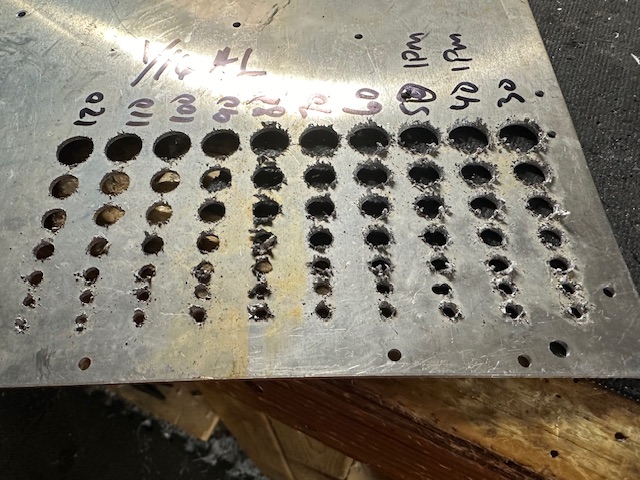
It’s more telling on the back side. 1/16 aluminum 6061.
I think this could go faster than 120 I need to add a few more speeds for thinner material. Although as noted faster does not mean better holes. I prefer more dross and better holes if that’s the trade off.
1 Like
That is normal for aluminum. Yes, you could dial it in, but it looks perfect. It’s not a laser.
Try putting some mig welding gel on the tip and cup.
It will keep the molten aluminum from sticking to the tip and screwing up your Voltage readings on the THC.
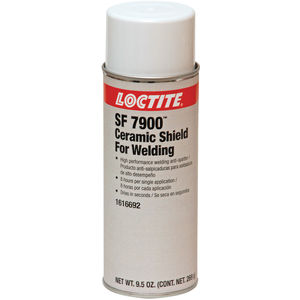
This what I use when cutting aluminum. I also use Nitrogen instead of air.
1 Like
Ok good I’ll get some.
The gel works great, too. It cheaper.
This Loctite stuff is a white powdery spray.
The gel is, well, gel.
1 Like