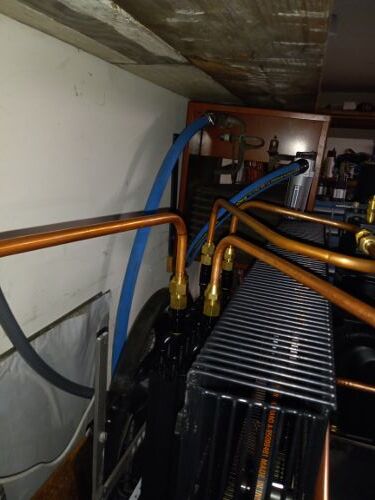
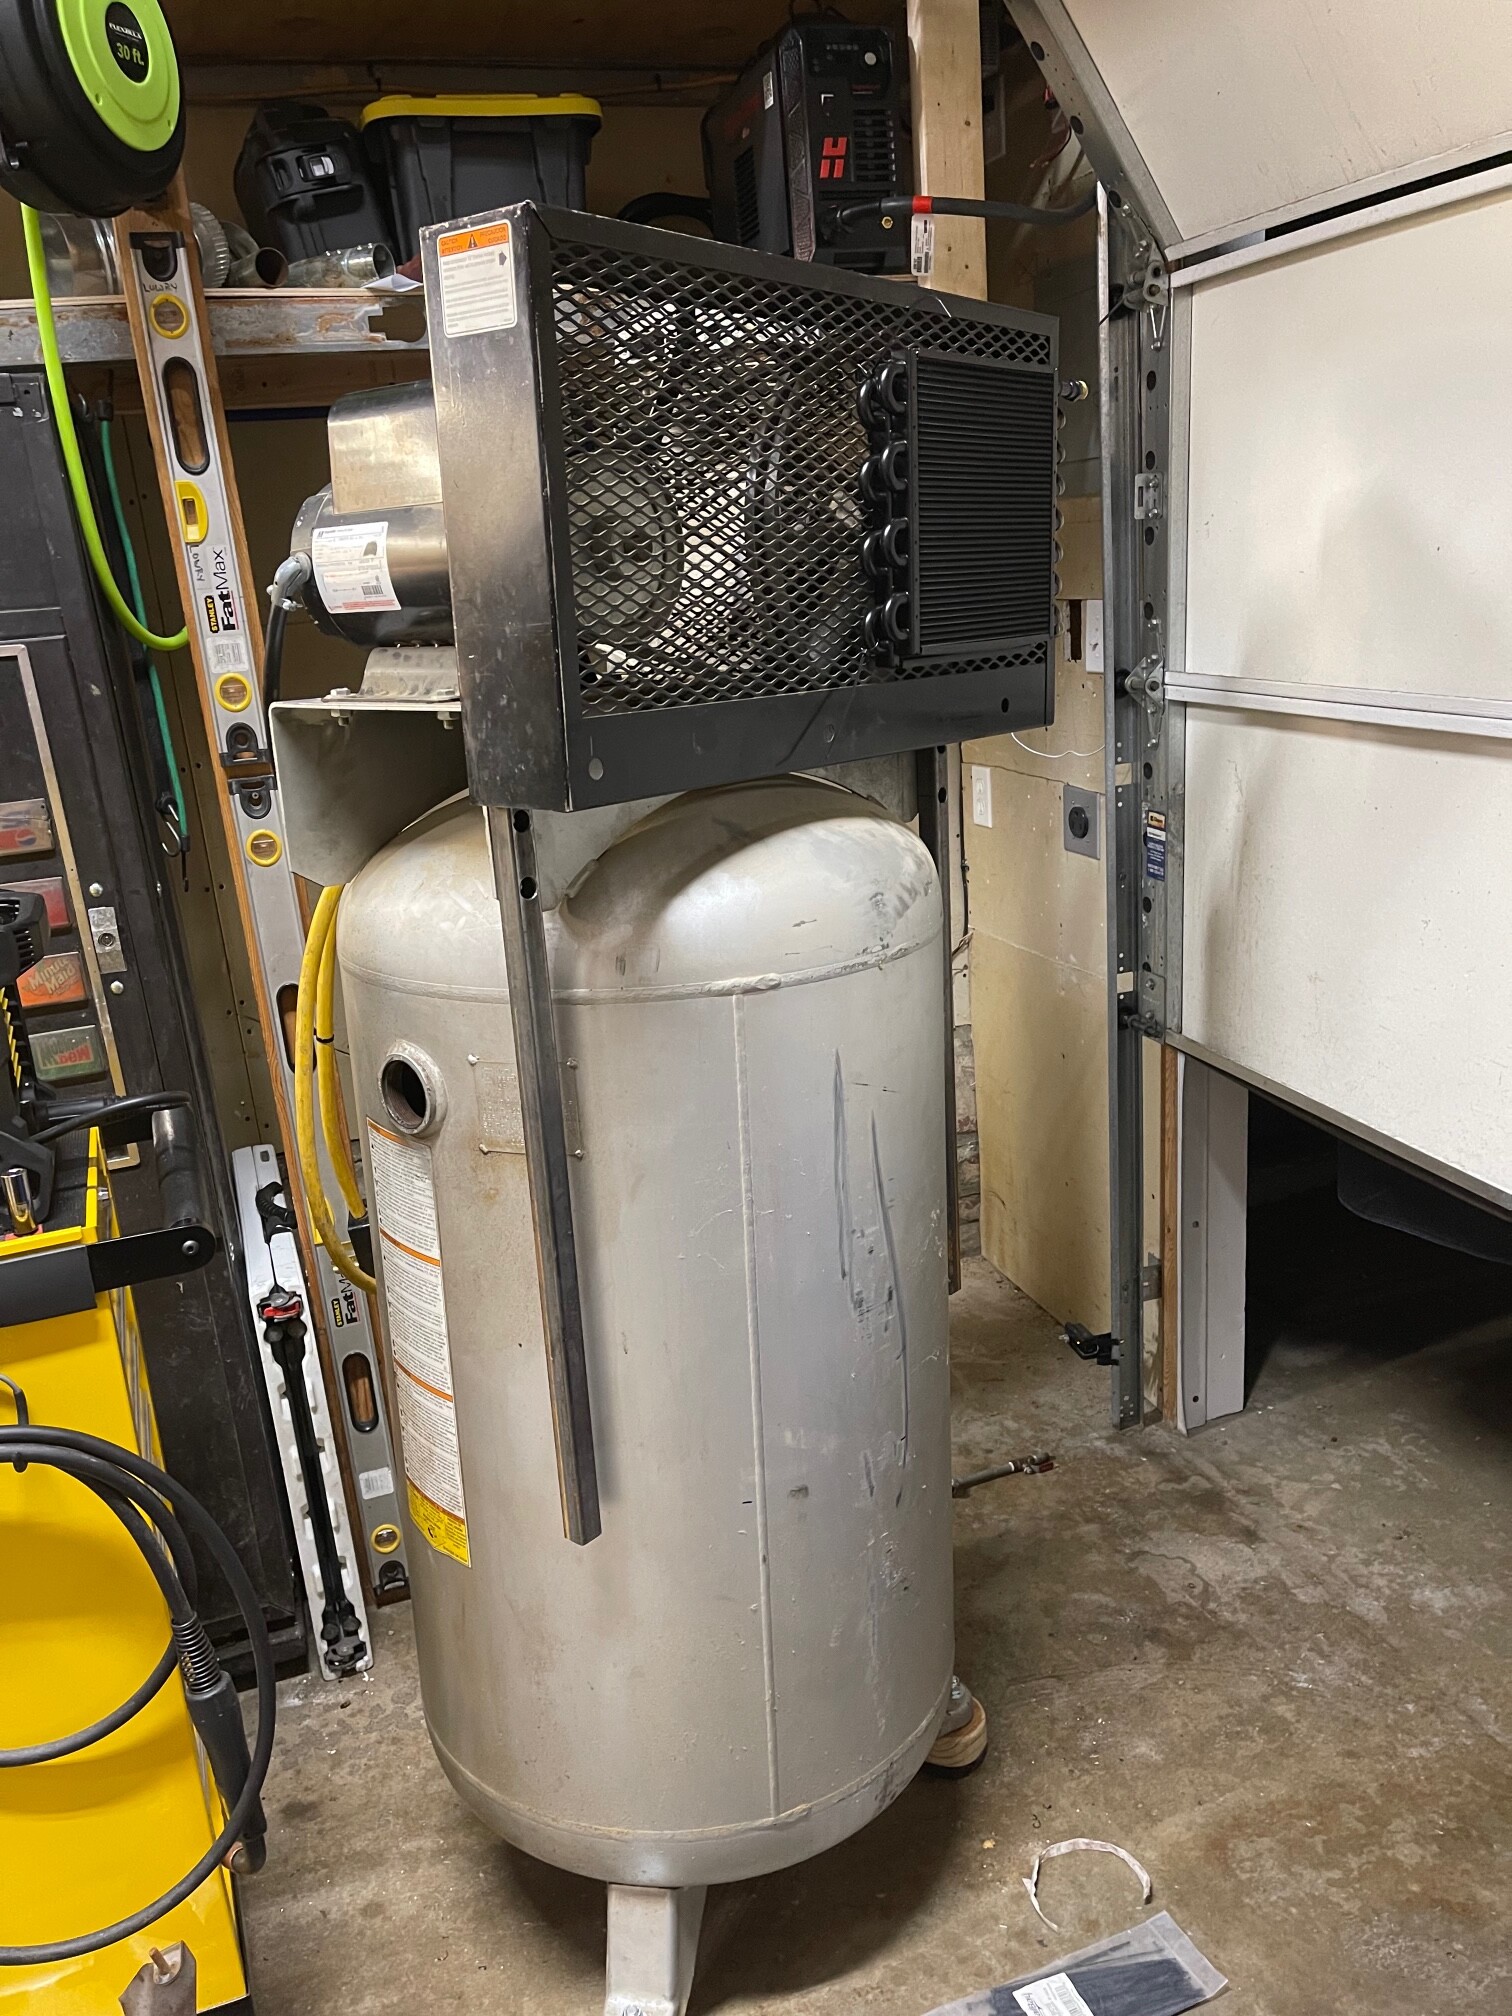
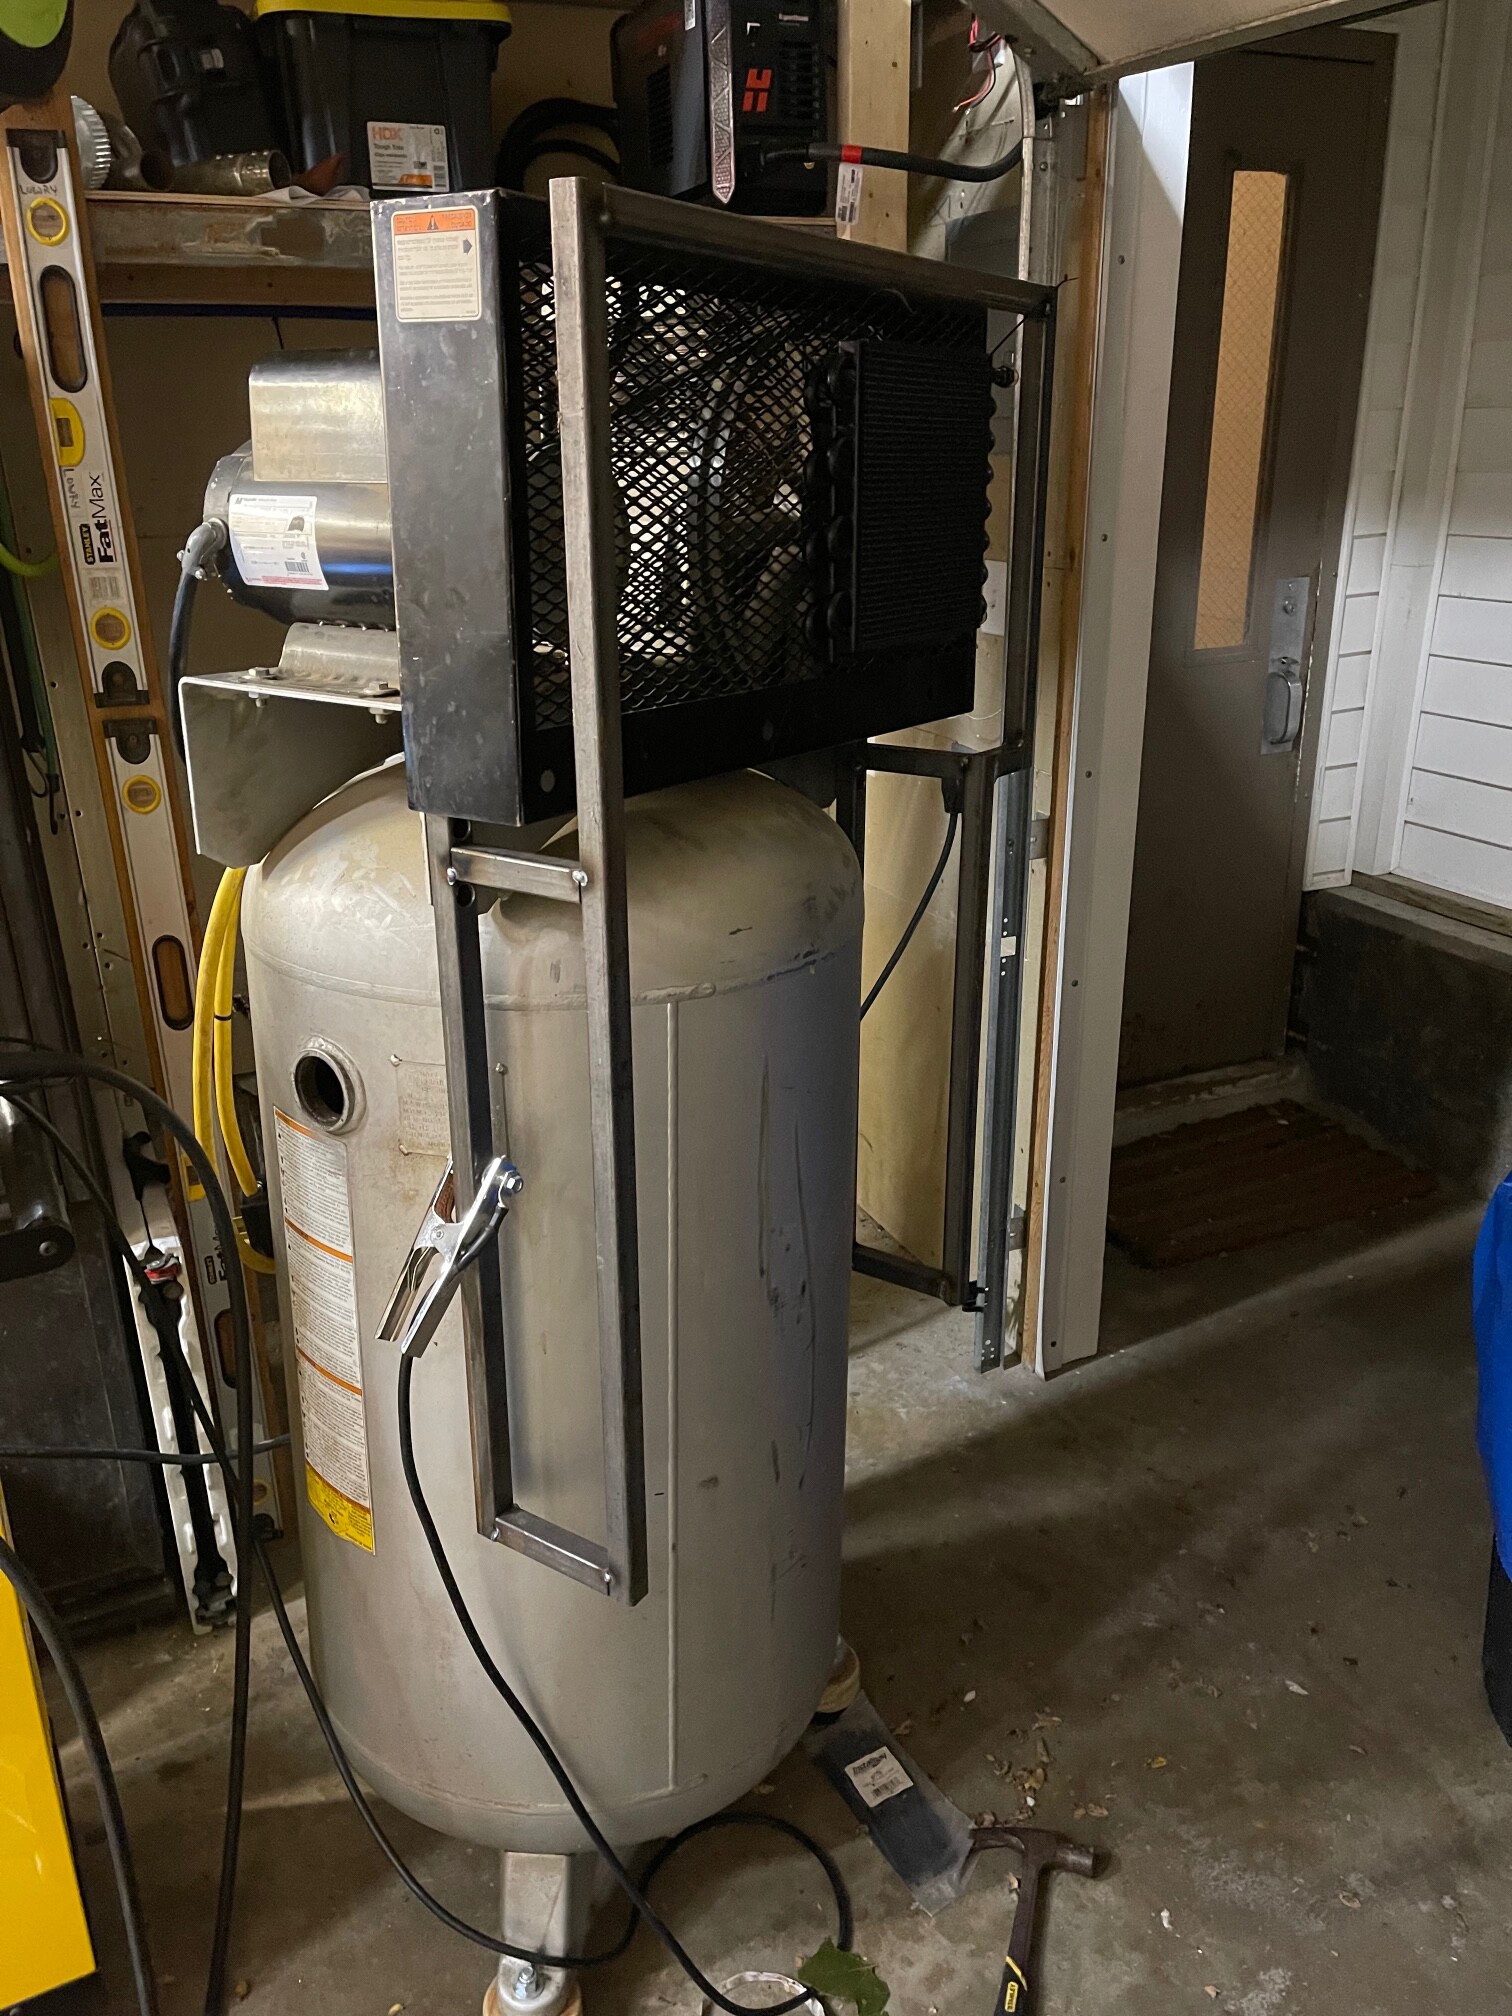
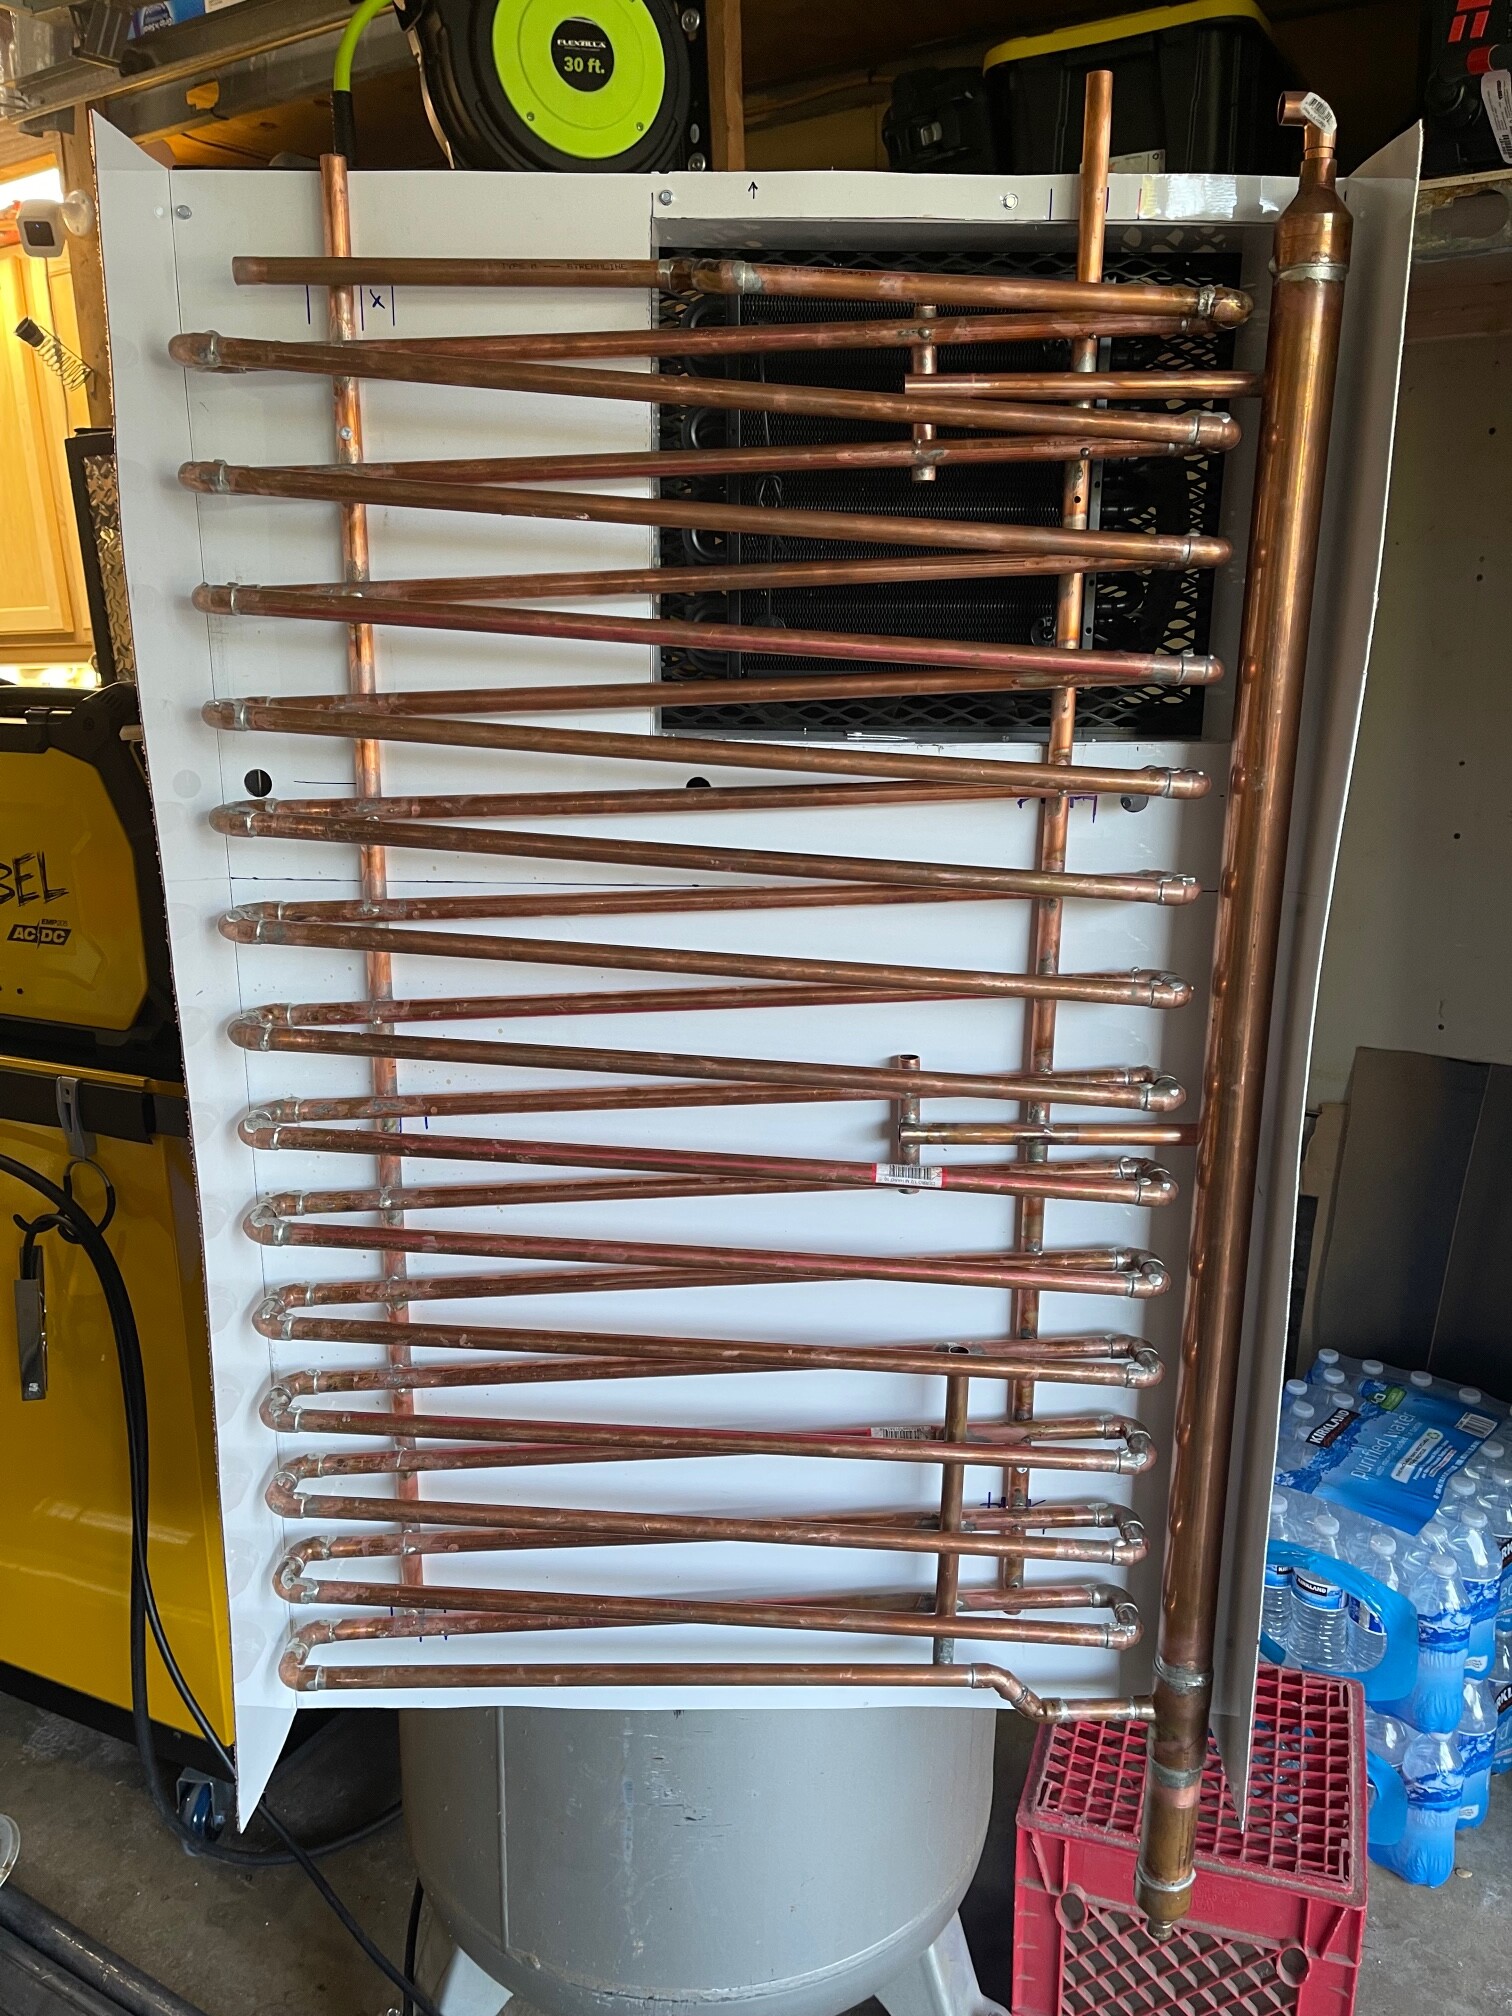
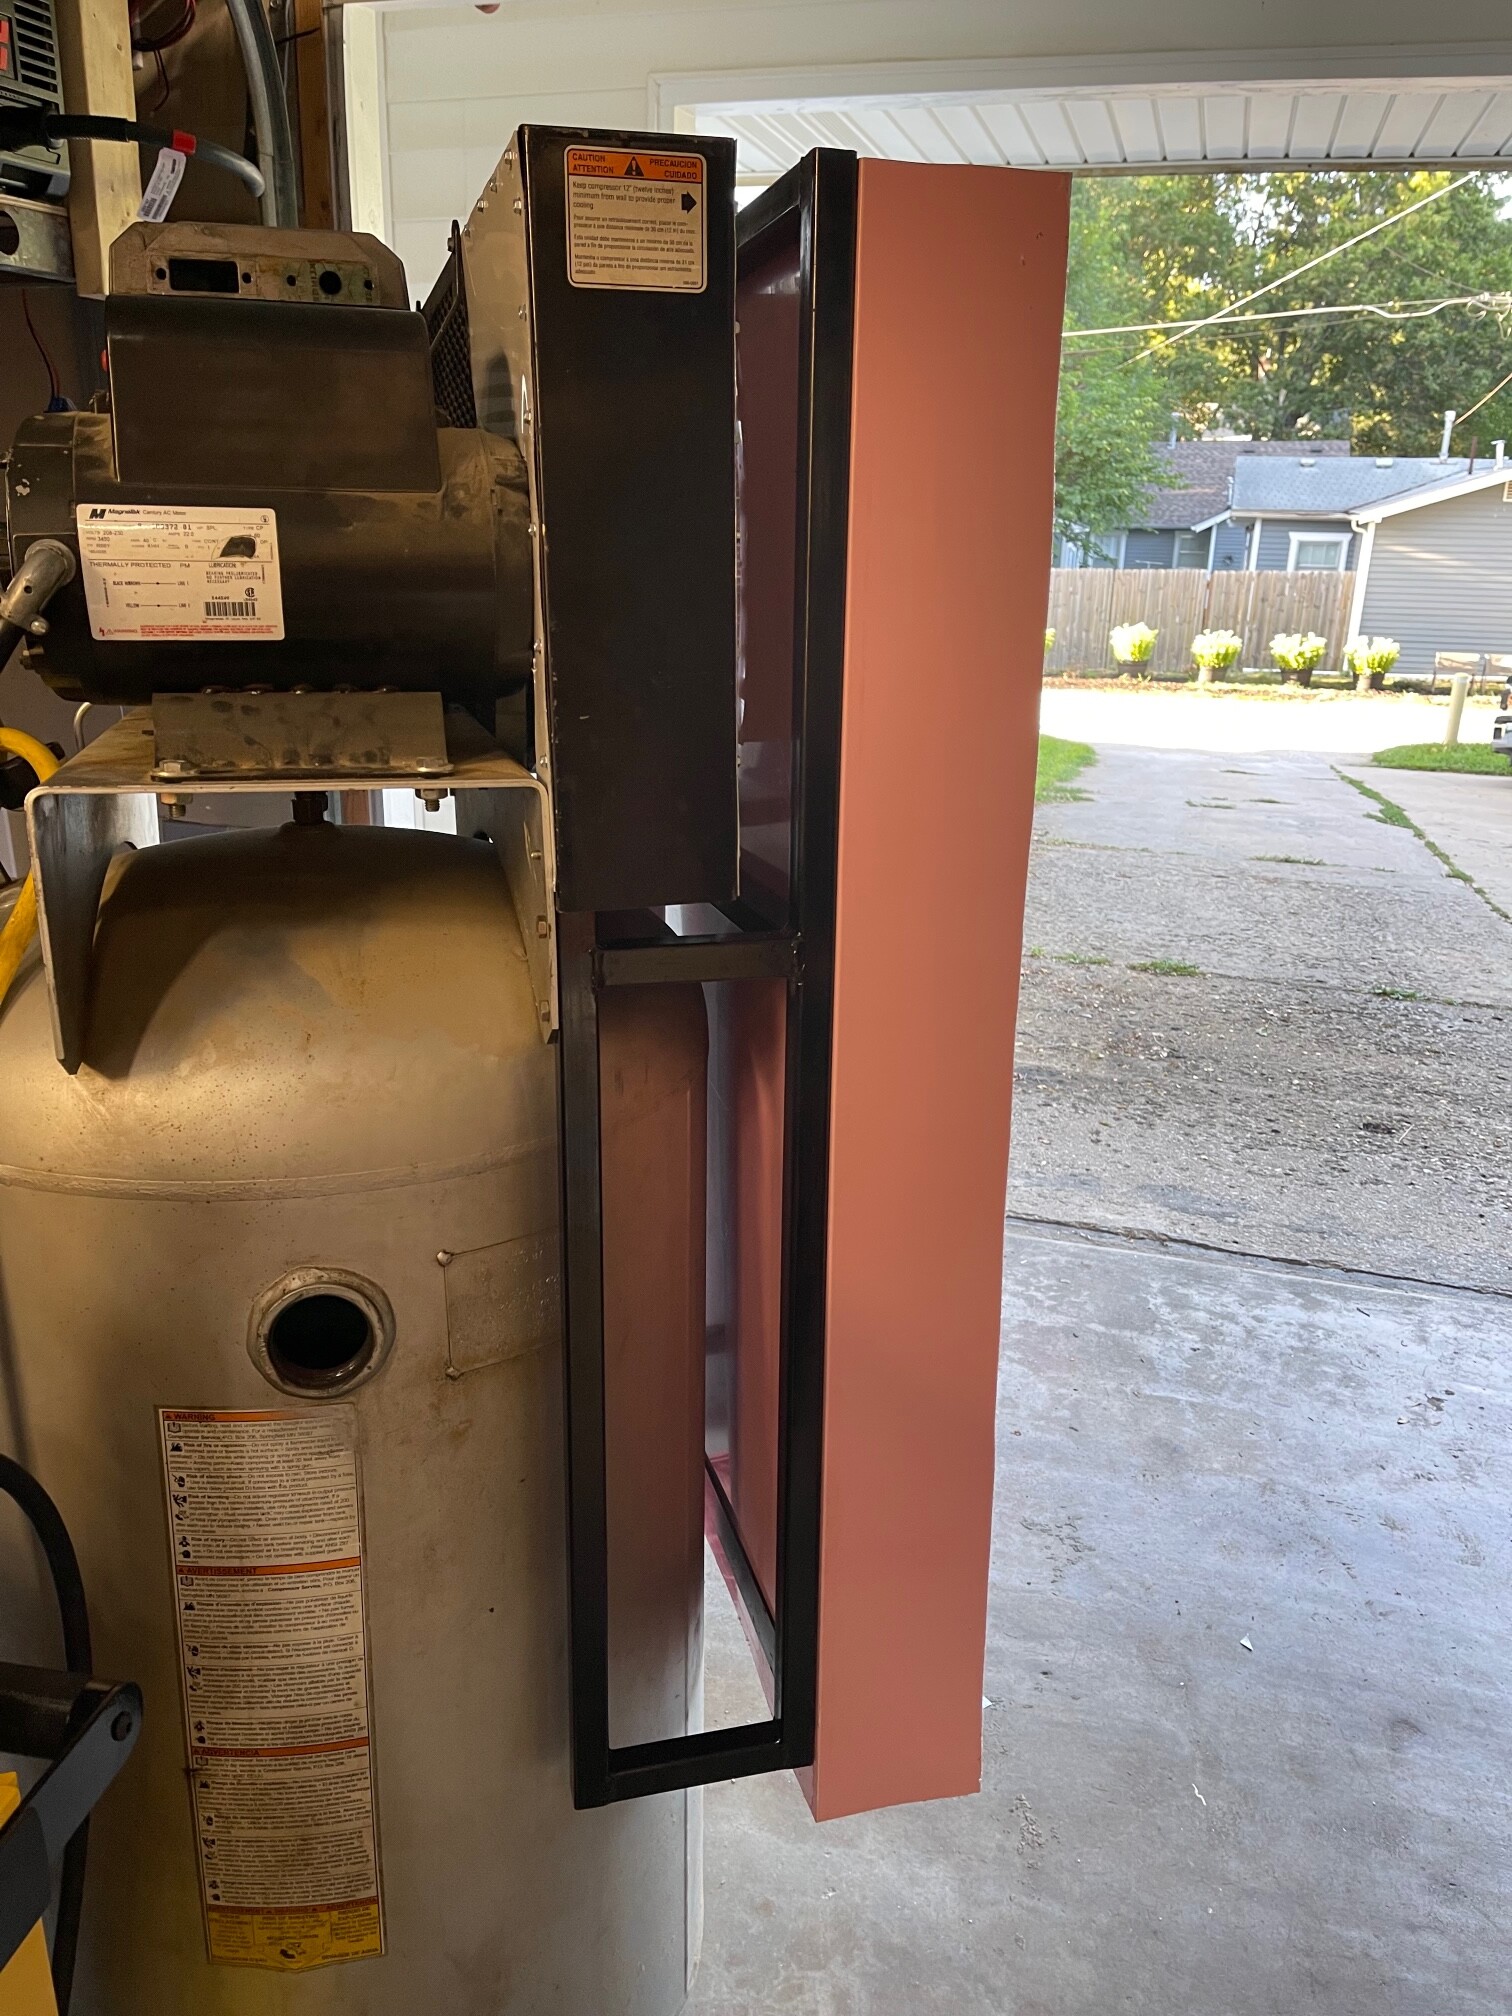
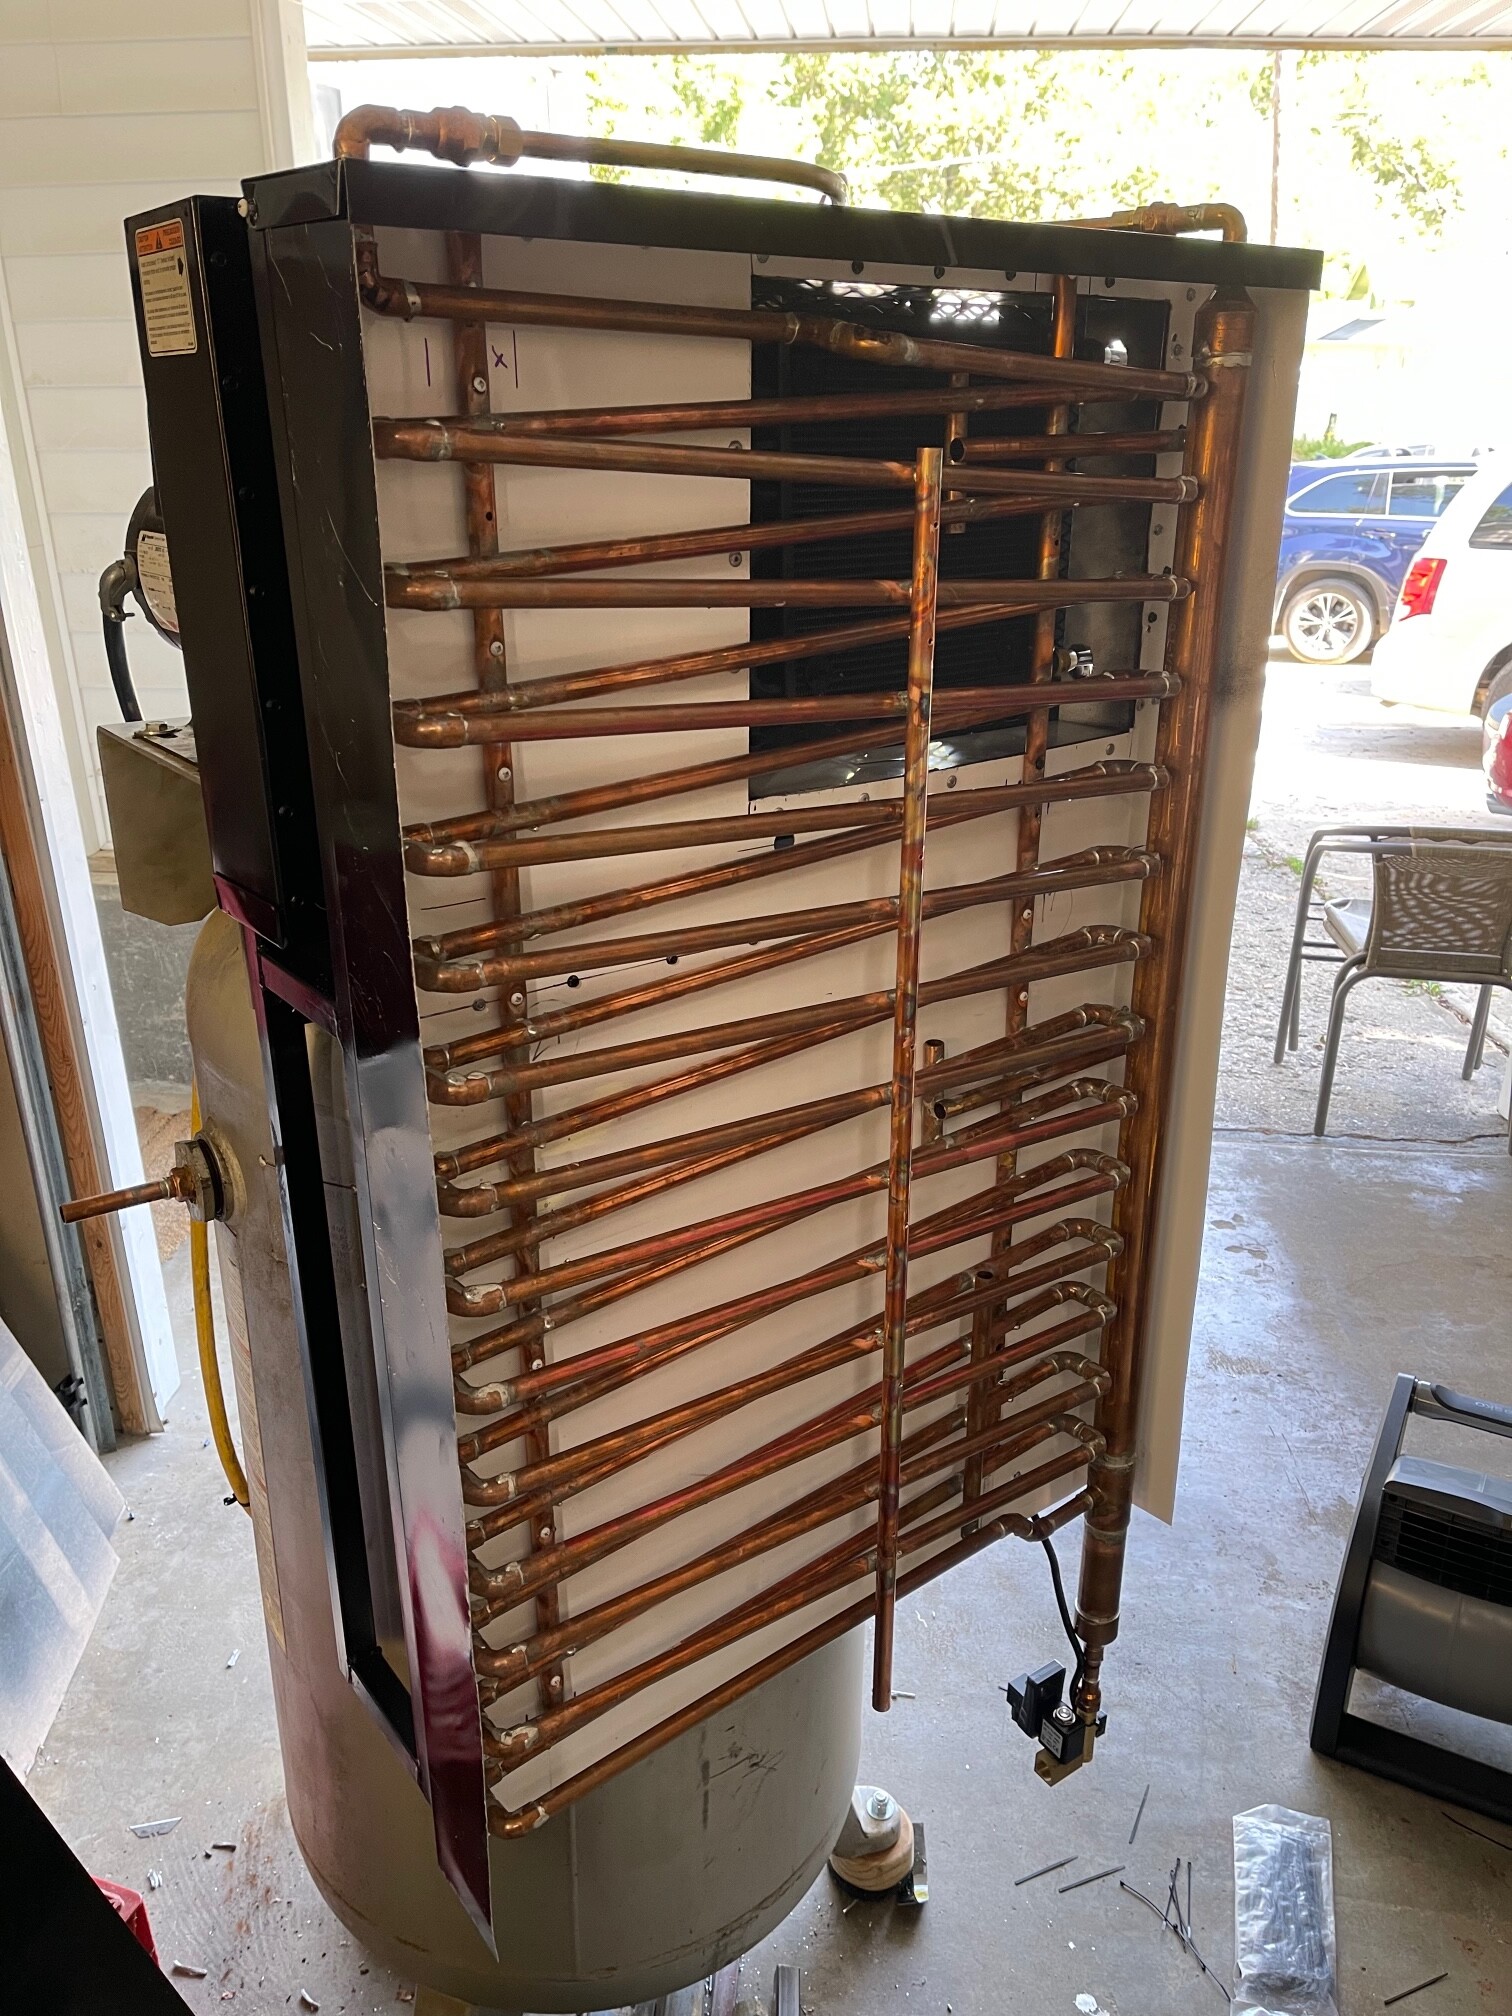
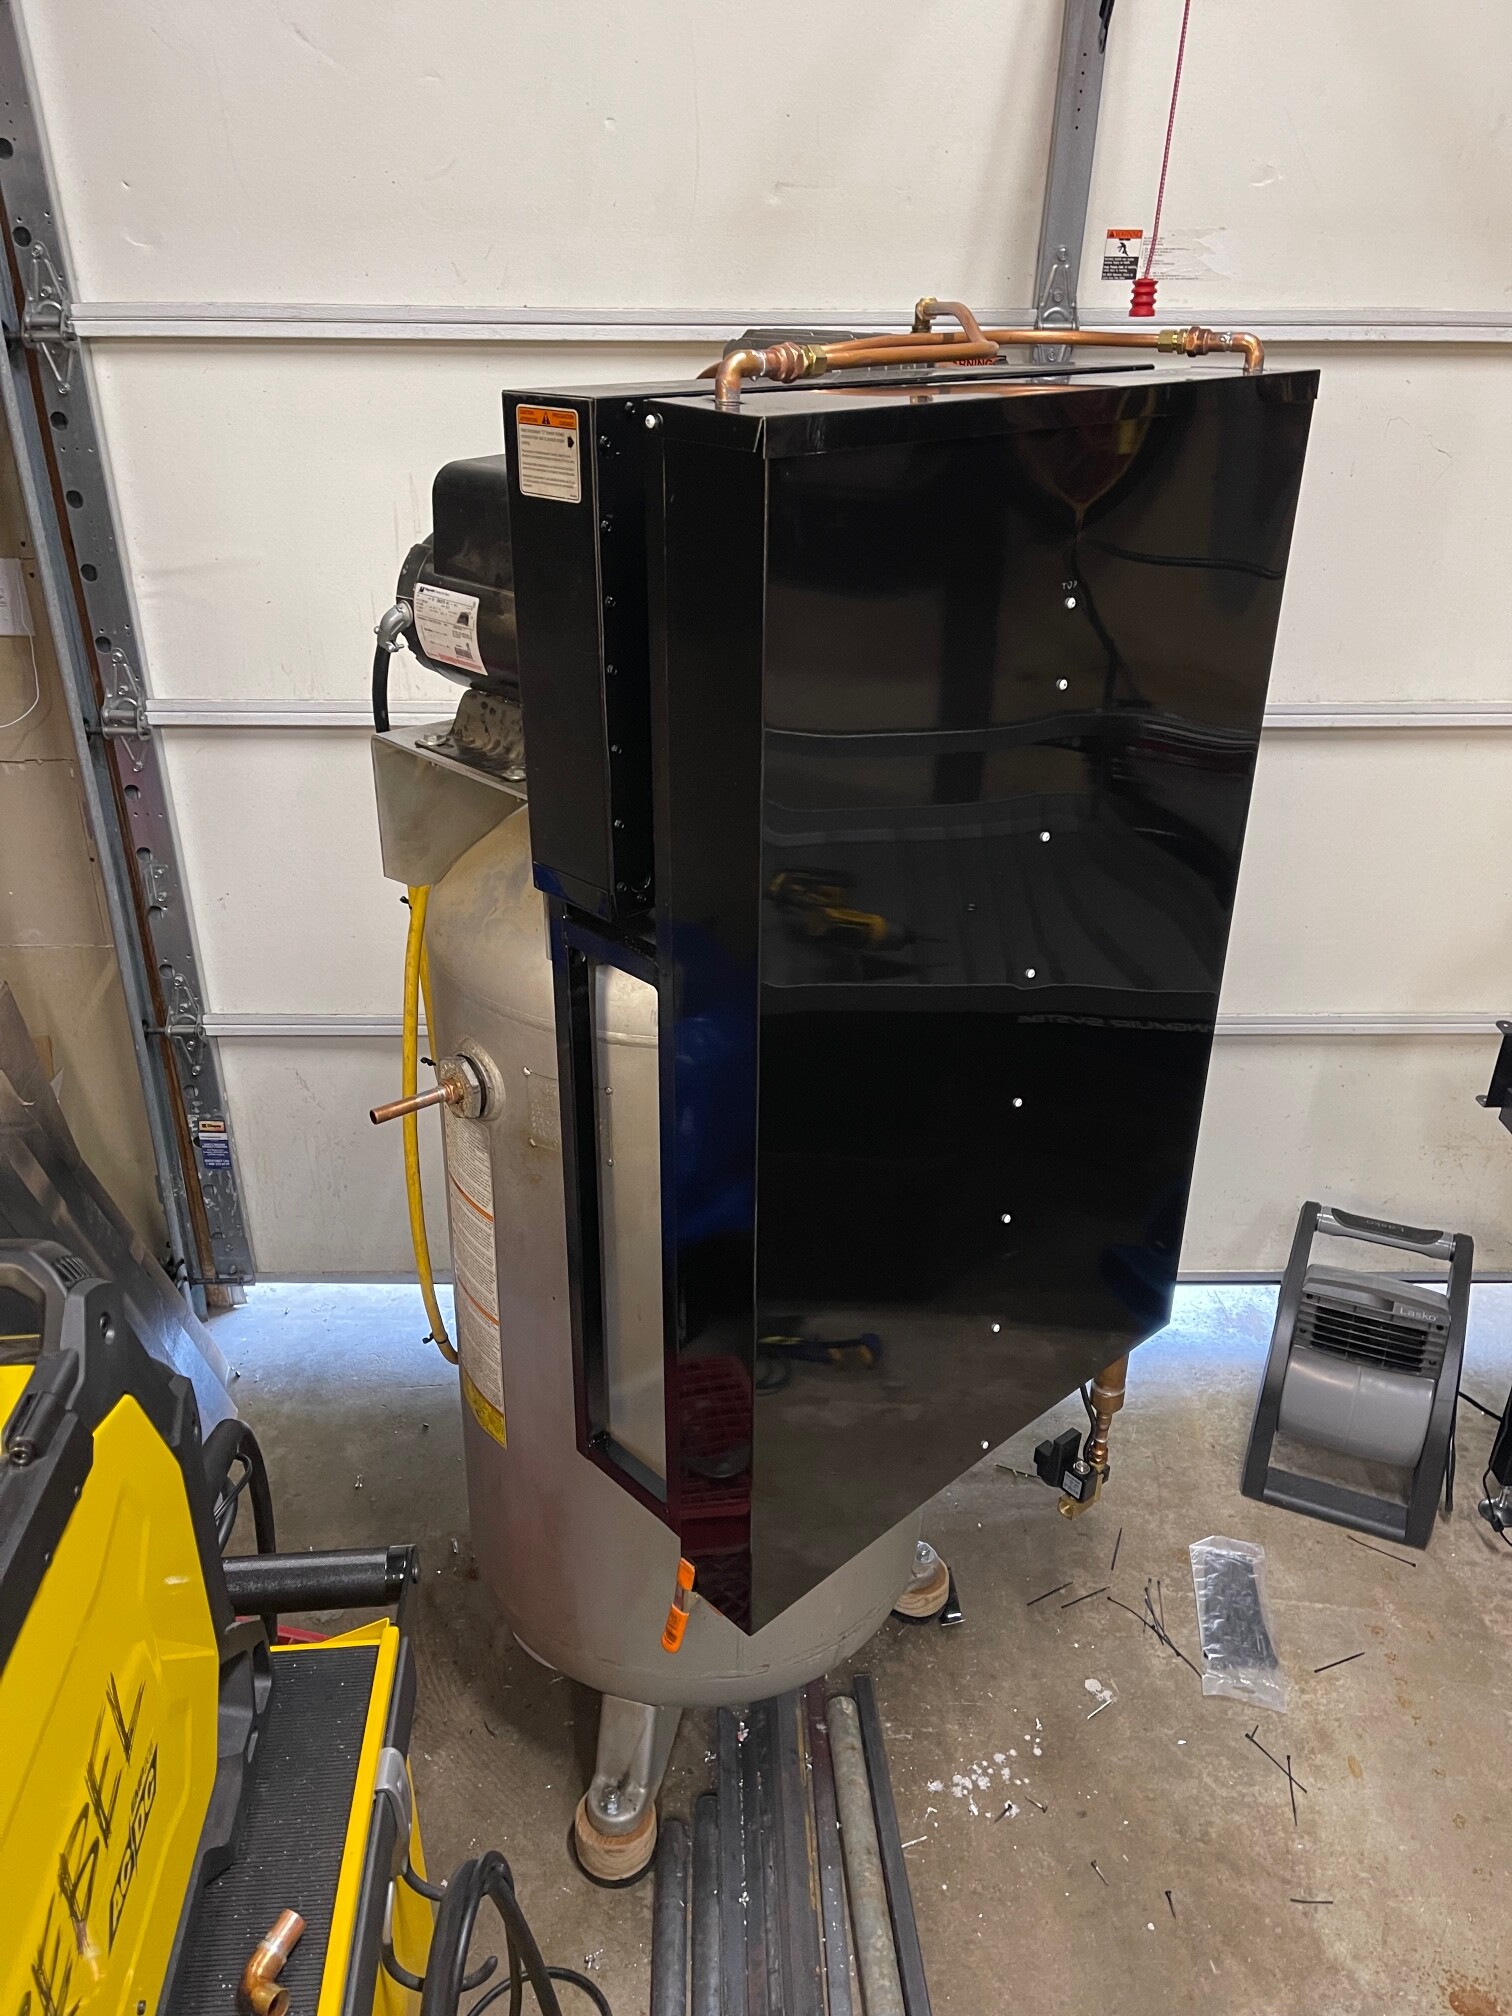
I have an Ingersoll Rand 7 hp compressor with a 5/8 outlet from the pump and returning to the tank. That is where the complications started.
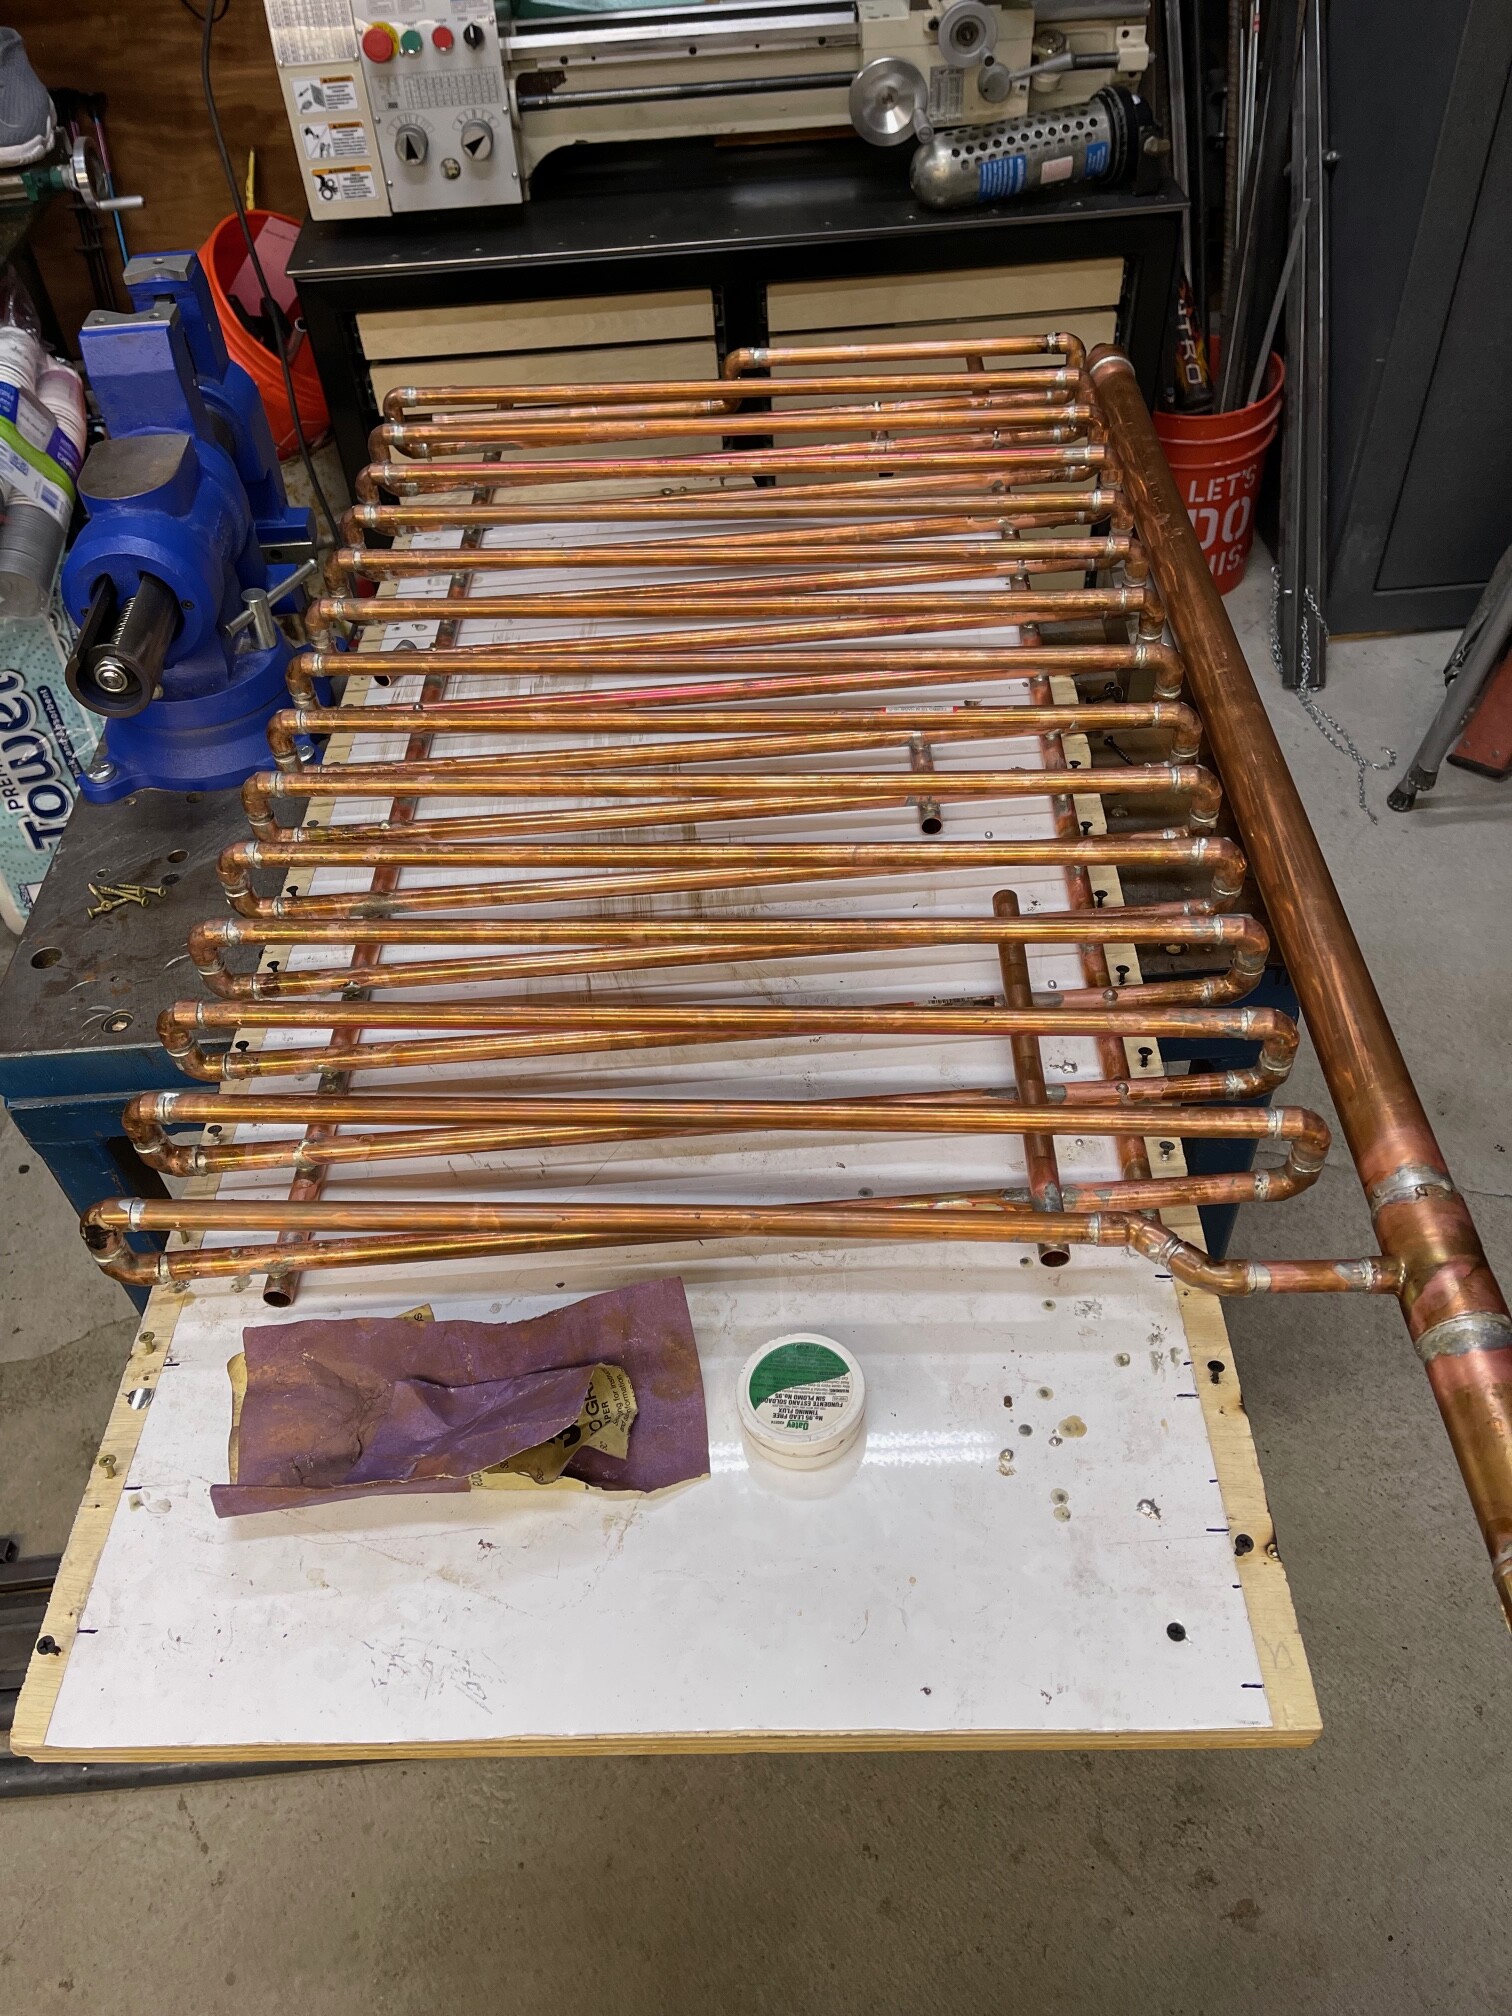
I couldn’t find a radiator with 5/8 AN fittings, and I didn’t want to choke the airflow with a single reduction from 5/8 to 1/2, so I ended up deciding it necessary to Tee off from 5/8 to 1/2 and use two radiators. I didn’t know what kind of reduction in air temperature I would get, but I couldn’t be happier after testing it.
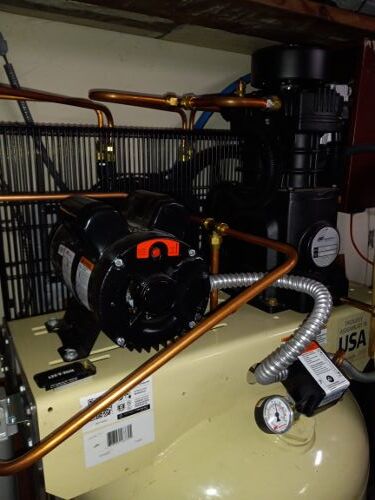
I have water traps on each return line going to the tank and getting a fair amount of water out of the system daily. I suspect I might not need the refrigerated air dryer.
I have an automotive fan mounted behind the radiators but had not connected it to power at the time of this test. I might not need to run the fan because the temp drop was near to ambient with only the pump pulley moving the air that it does. Had I known it would be so efficient, I would have positioned the radiators directly in line with the pump pulley.
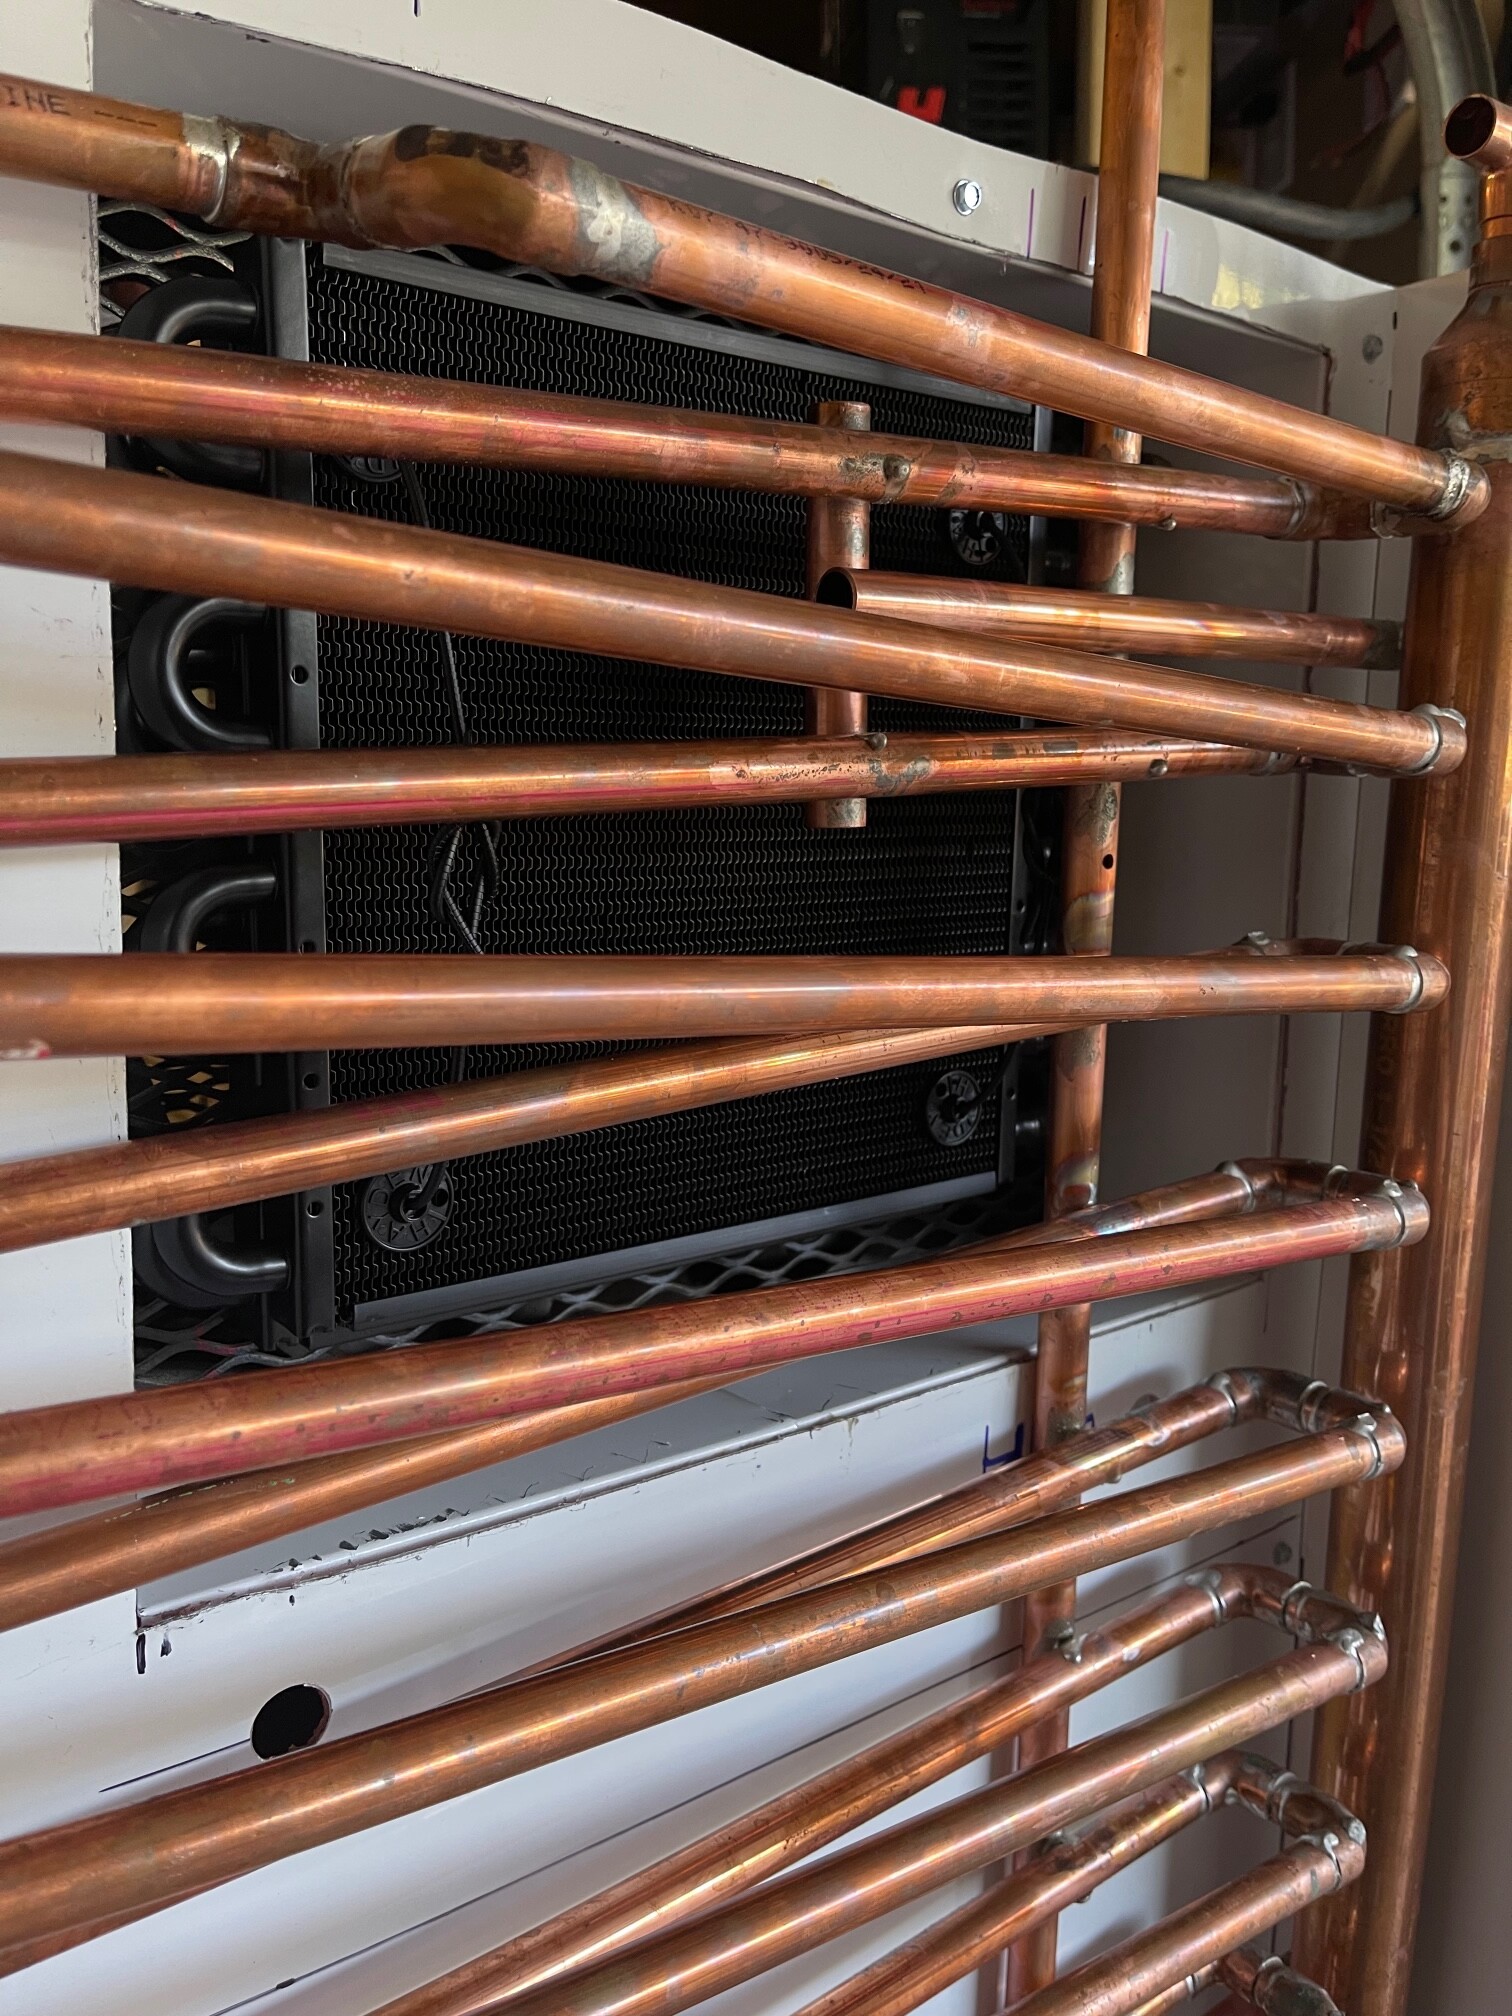
Two 1/2" lines coming from the pump outlet tee, 5/8-1/2 x 1/2, then entering the inlet ports of the radiators.
Both lines exit the radiators and enter the water separators.
1/2" lines to another identical tee and back to the tank via a 5/8" tube.
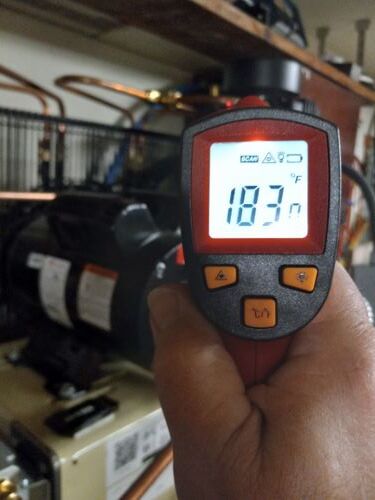
Air temp at the pump outlet.
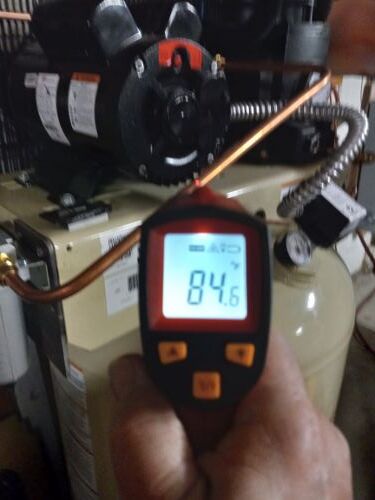
Air temp past the radiators without the fan running.
Nice work. I just finished my cooler setup too! About the same drop in temp through radiator. Another 70 through cooler. Cooler adjusts output based on intake temp and is hardly working. The 24 feet of aluminum in radiator is impressive. I have the fan set to start running when temp hits 100f on input side.
Max temp I’ve seen on hot side is 205 after forcing it to run right at top of psi shutoff (165) for a while. Temp out of radiator was 105. Cooler delivers the air to the tank at 35 deg.
Very cool setup. Putting the refrigerated dryer before the tank, are you seeing water collecting in the tank? I don’t know if mine does or does not, but I’ll check.
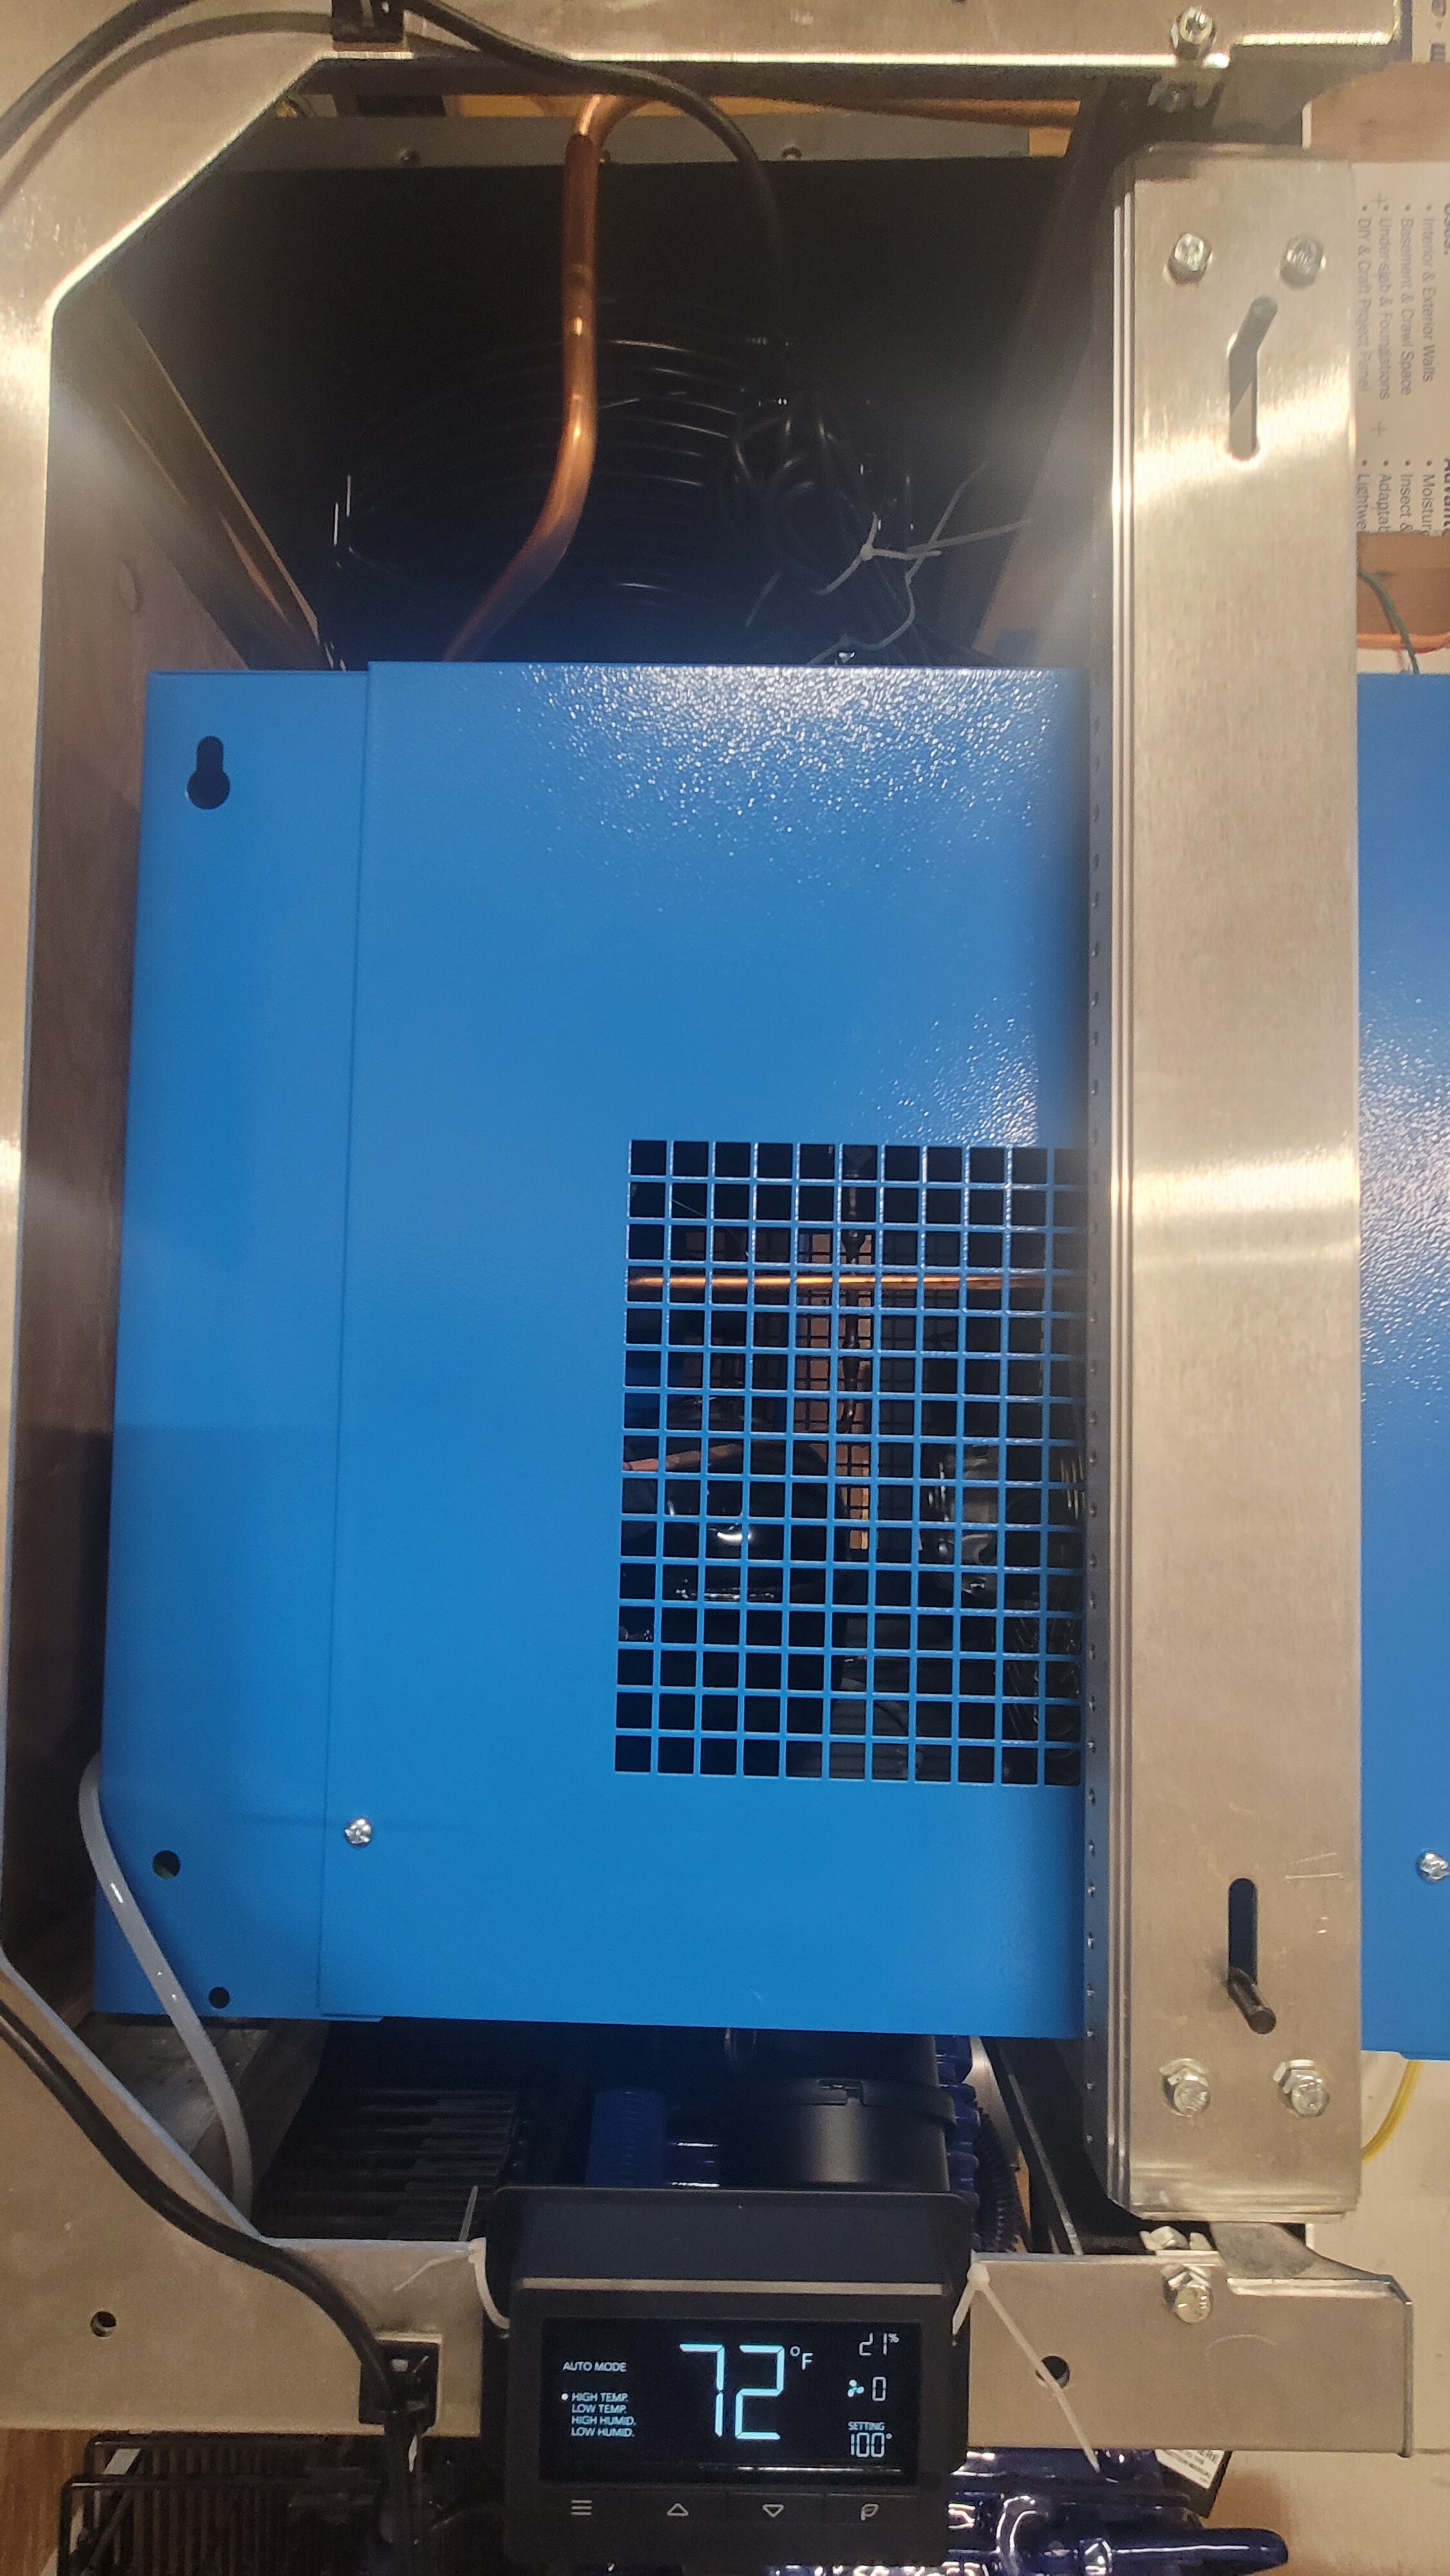
It makes the most logical sense placing it there. Air is moving the slowest so drying is more efficient, and has the highest temp differences for condensation to form and be removed. It also allows your tank pressure to be true pressure. Hot air takes up more room, so compressor shuts off @ 150, then tank cools, and actual pressure drops. Dry tank air means no rusty tank water to deal with. Once it’s clean and dry, it stays that way till it exits your tool.
If you look at the really high end commercial compressors that have integrated dryers, they are between the compression cylinders and tank.
Why aren’t all setups this way? My guess is that it’s a matter of convenience… It’s a real pain in the ass to make copper lines the right way… Much easier to sell a aftermarket dryer that you can install on tank output.
The downside is that the purge air volume is really high, so when compressor turns off, it hisses for about a minute… Lol, I’m working on a muffler for that little hole.
I agree with having the dryer between the pump and tank. In my case, it would be a royal pain to include the refrigerated air dryer with the radiator setup. The dual radiator is doing a good job, but might have room for improvement by turning the fan on. When I find time I’ll wire it up and find out.
As you said, it would be a pain to run copper to the refrigerated air dryer, which is, in my case, in a remote location, and back to the tank. My thinking was since the radiator setup is working well, the refrigerated dryer, located after the tank, would remove any remaining water before going on to the equipment. I think that still holds true, but putting additional airflow over the radiators might pull nearly all of the water out. I could sell the dryer and free up so space in my dinky shop. I guess the way for testing this is to put a water trap after the tank to see if it collects moisture?
Maybe only a desiccant dryer would be needed for insurance.
Bottom line is my setup as it is will be 100% but might be over kill?
Definitely agree you built an amazing setup! Your split design was a good work around the output size issue. It’d be really easy to add a solenoid to auto turn on the fan with compressor cycle. If the fans don’t pull too much watts, even taping into one side of the 220 for each could work too.
It makes perfect sense to put the “intercooler” between the compressor and the tank. That’s how I designed and piped mine as well, prior to finding out the commercial sector has been doing it that way for years. I went a step further on my little 80 gallon and have 2 intercoolers. One between stage 1 using the small pre-built amazon radiator and a large hand built one from stage 2 to the tank since each stage produces heat and lowering air temps results in more efficient compression. I melded various designs and engineered what I feel is the best parts of multiple designs in my unit. I built a plenum using the compressor fan to draw air over both sets of coils. I have very limited space so I wanted everything mounted to my compressor to reduce it’s footprint but still have many feet of cooling surface area. I have around 60 feet of copper in total in the big cooler. Then at the bottom I have a large collector where the volocity is reduced prior to entering the tank. Both stages have auto drains that purge .5 seconds every 40 seconds while running and they definitely squirt. It fills fast and cold entering the tank at room temp. I have not had one drip of water in my big tank since doing this. I too have the long hiss when it cycles off. Anyways here’s a few pics.
That is a very cool radiator and plenum you build.
So you’re using the smaller Amazon radiator as the intercooler between the first and second cylinder of your compressor and the large radiator you built is the aftercooler between the second cylinder of the compressor and the tank?
I was having a hard time seeing exactly how it was piped in the pictures.
Are you using the factory-installed check valve in the top of that tank or did you install the check valve after the second cylinder and before your custom aftercooler?
Just in the process of revamping my own air system so I’m very curious and how other people are accomplishing it.
I’ve been re-reading a lot of these topics trying to find my best course of action.
Thx on the compliment. I left the factory check valve in its original position. Once the compressor meets its set point all the lines of the inter coolers bleed off. That is why I put auto drains set to activate only while the compressor is running so they have pressure behind them. I just wired each one to the cold side of the pressure switch. My original pipes were actually steel with welded flanges between stages so I had to make new flanges with nipples welded to them to adapt to the compression fittings. It was a process and I am glad it’s done. I needed air so many times during the build and didn’t have it.
Tip for anyone: Plan thoroughly and get what you need, get things you might need, get things you probably won’t need because you will probably end up needing them then get extras of everything. Save your receipts and return what you don’t use. It’s one return trip for the returns vs a day of running back and forth. Good luck with your setup.
I can relate to this completely. I spent more time waiting for connectors than assembling the parts. One problem was I was plumbing terms challenged but now I understand the terms difference between pipe and tube and AN fittings are understood well. My tube bending skills also improved thanks to some good instruction from some Youtube videos.
That’s a great tip. Every project I do seems to require multiple trips to the store. Even when I try getting extras, it seems I miss something I’m only 15min from my local big boxes but it’s an hour between driving back & forth and time in the store. Multiple trips add up.
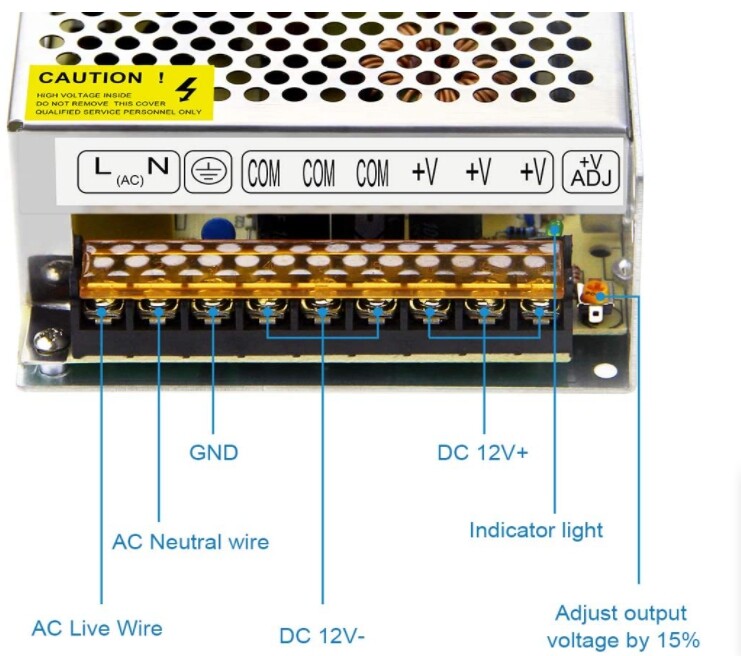
This is the power supply I purchased. " 12V Power Supply 20A 240W AC DC Adapter, 110V / 240V AC to DC 12 Volt 20 Amp Switching Power Converter Transformer"
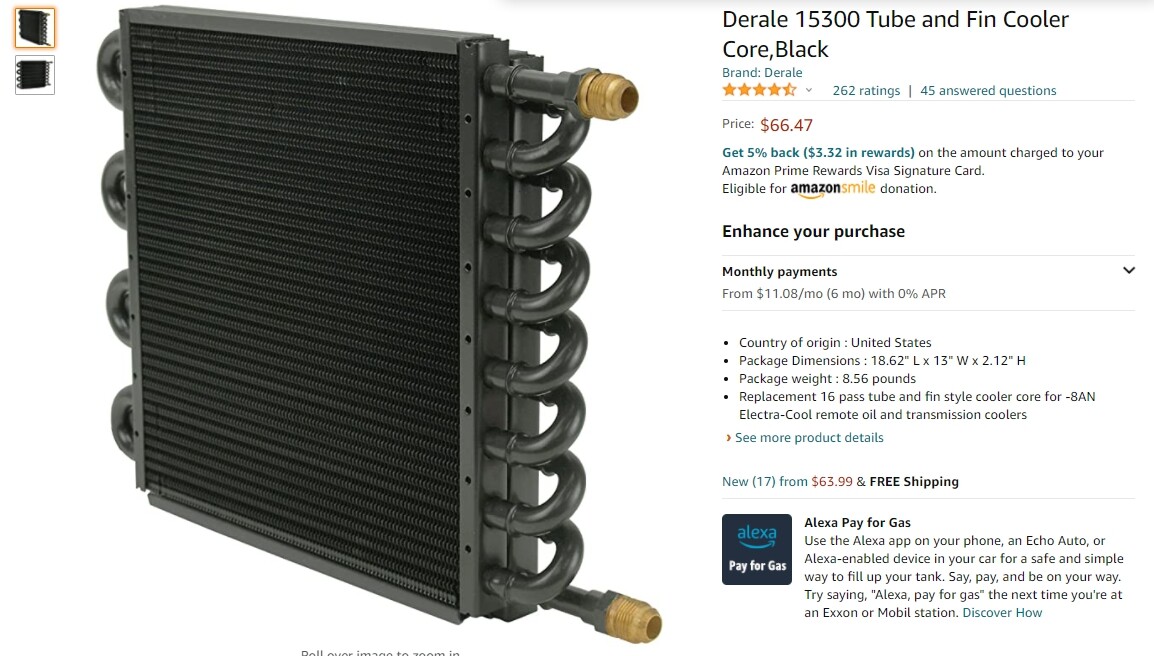
What are you using for the radiators? I’m still in the planning stages for mine, and I’m liking what you’ve done better than the idea I borrowed and was thinking of using.
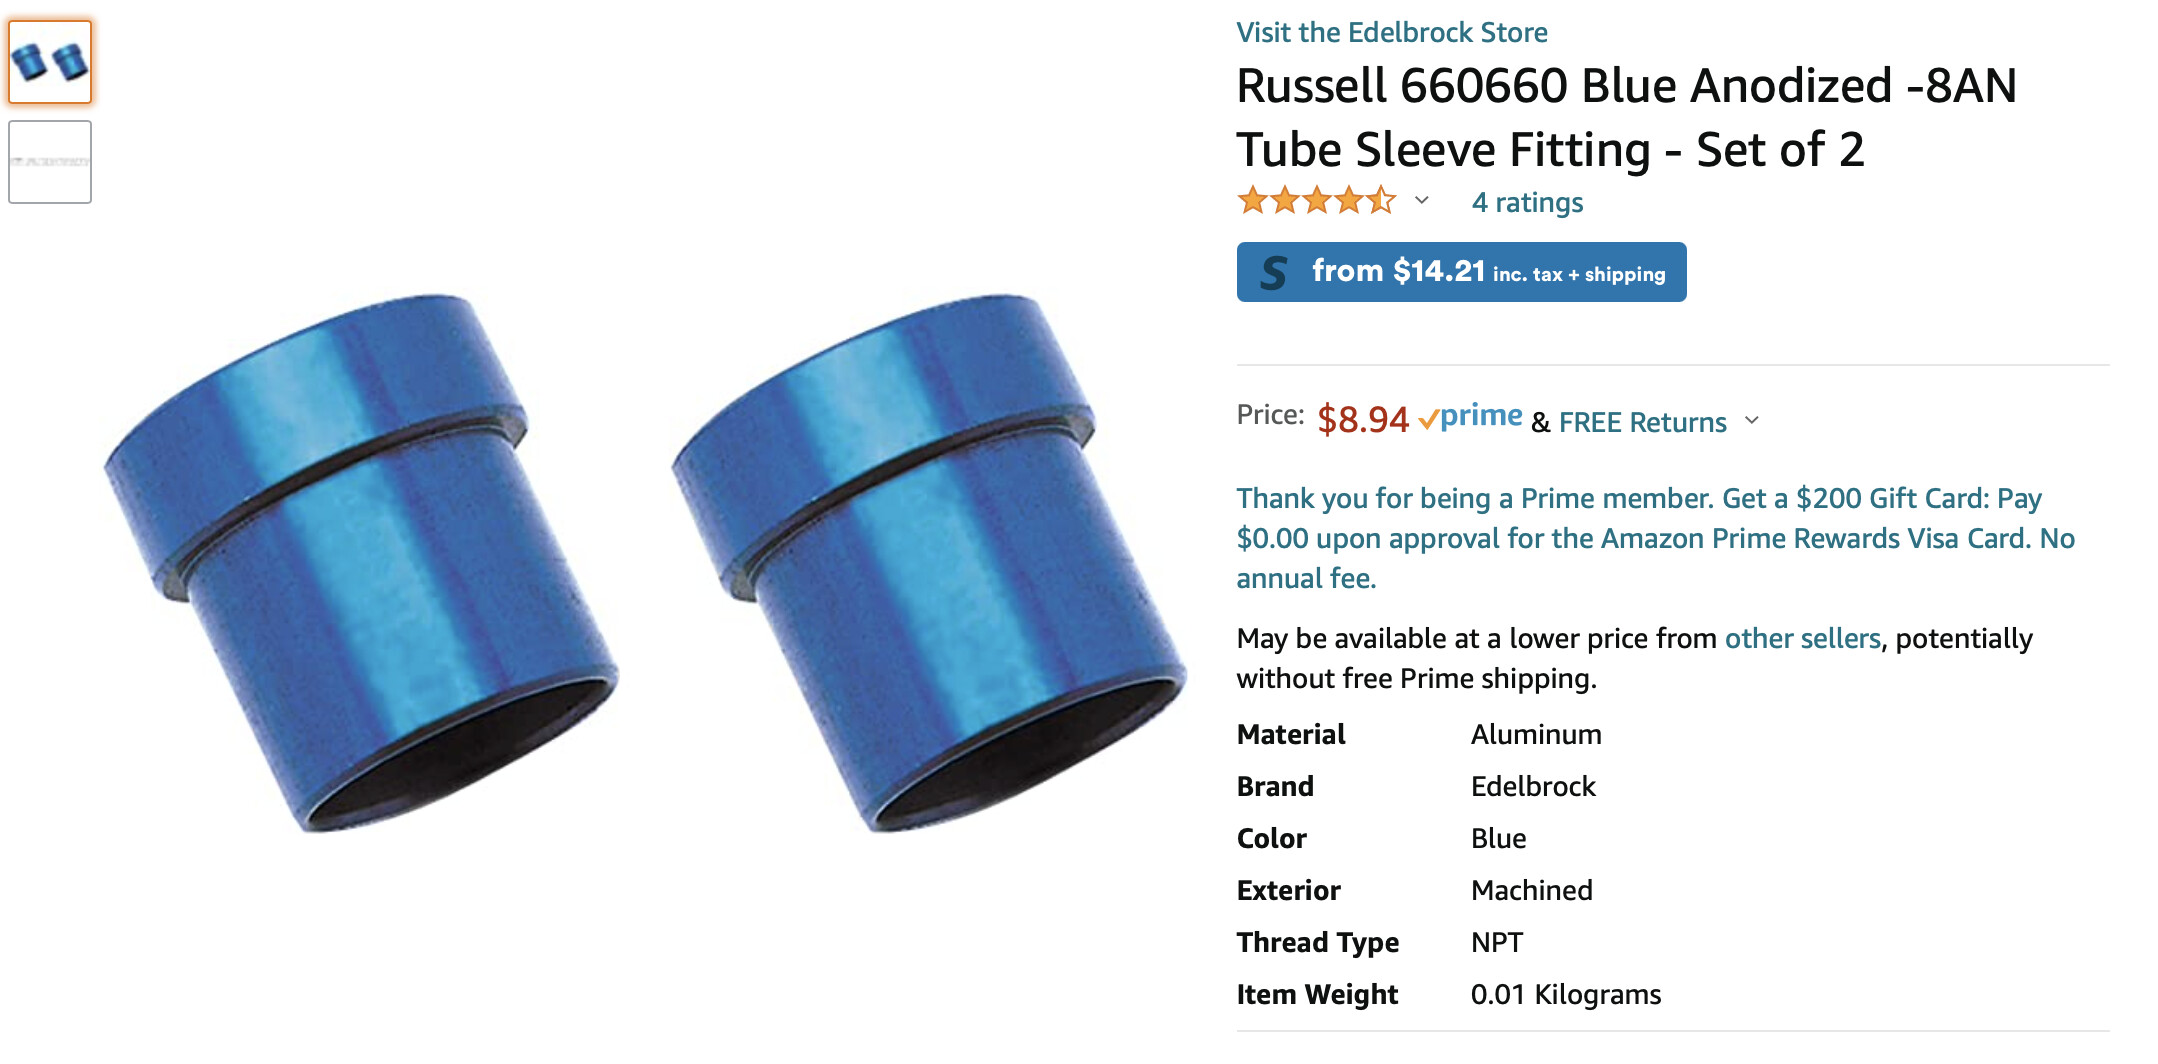
This has AN-8 fittings which have 37% ends. Most flaring tools are 46% or something like that. I did not want to buy the right tool and have very slow air leaks because of the mismatch. By slow, I mean the tank will bleed off over a half-day of sitting.
On Youtube, I found someone used that same cooler core and the adapters shown below to pair up the 37* and 46* ends. I tried them out and things went well, no leaks. I have a smaller compressor than yours and the way I plumbed mine there is no pressure held in the cooler when the pressure bleeds off when the compressor is not running. So, even if there were a leak it would not affect the tank pressure. It would only slow the fill time and probably at an un-noticeable rate.
By the way, I am jealous of your copper pipe bends. Mine did not turnout too bad, but I would have liked them to look more like yours. I used salt to fill the tubing and bent them by hand. Looks like you had a proper bending tool. I did not want to spend the money on one. I had already forked up the cash for the flare tool, that I will likely never use again. Well, unless something breaks on the intercooler system.
I searched the part number and read the description, but didn’t find a mention of the two flare degree problem, however it might not be an issue.
Good point about how you plumbed yours so their is no pressure after the bleed off. Mine works identically, so that means I have a leak somewhere else! It has to be somewhere from the tank outlet and beyond.
I can no longer hear high frequencies, so I’ll have to get busy with the soapy water!
In most commercial systems is it best practice to have a wet and a dry tank. Typically if you only have one tank its going to be a wet tank, as you have on these little reciprocating units like are generally used with our tables. if you are running a refrigerated dryer you really don’t need to add an additional cooler. The tank allows the air to cool to a temp the dryer can handle and also allows some condensation to reduce the load on the dryer. Also the dryer in this situation is only drying the air volume needed at the point of use which also reduces the load on the dryer. So basically if you are going to run an actual air dryer it should be after the tank, save yourself the time/money and skip adding a cooler and just put an auto drain on the tank.