I am still learning as well but wondering if you slowed the feed rate just a little to see if if helped. My thought of wondering to give the arc just a little more time to cut even. But then i could be way off base as well.
Hi, lots of good suggestions. I have had a similar problem with the bevel cut on one side. My problem was crane location causing a stiff cable to load against one axis which caused the torch head to shift a few thousandths. That caused the bevel cut. Once i hung the torch cable over the center above the table on a short crane arm, i was able to greatly reduce the torch deflection. I used dial indicators to track the torch head runout on dry runs and got good results. Also do frequent checks on the orifice of your nozzle. If it elongates over use, it too can produce a bevel cut on one side.
4 Likes
THAT is a fantastic idea !!!
Have you tried a new retaining cup on your torch?
Early on in my experiments I did try slowing the feed rate. I thought it may help the cut, but the bevel stayed there and the cuts just got sloppy. Now that I’m cutting at 45-47ipm, the cuts look great! Just beveled.
1 Like
I have not, but may be worth a try?
I spent most of the morning yesterday fine tuning the table. Re-leveled the table, shimmed the material to level. Then adjusted the gantry, it was out more than I expected after leveling the material. I thought for sure that would fix it, but it didn’t.
After hours of getting everything as level and square as I could the bevel came out slightly worse still on the same side. As a last effort, I intentionally set the torch out of square to account for bevel. The bevel got slightly better!
I had a bunch of 1/8 and 14Ga to cut, so I moved on from troubleshooting. All of the thinner material cut beautifully with the torch in the un-square position.
I’m actually fighting the same issue when I cut 3/8 plate. Using a PrimeWeld 60 and a PTM-60 machine torch. I’m going to try and turn the torch 90 degrees and see if the bevel changes. I also received a new retaining cup from George, try that today. I’ll let you know
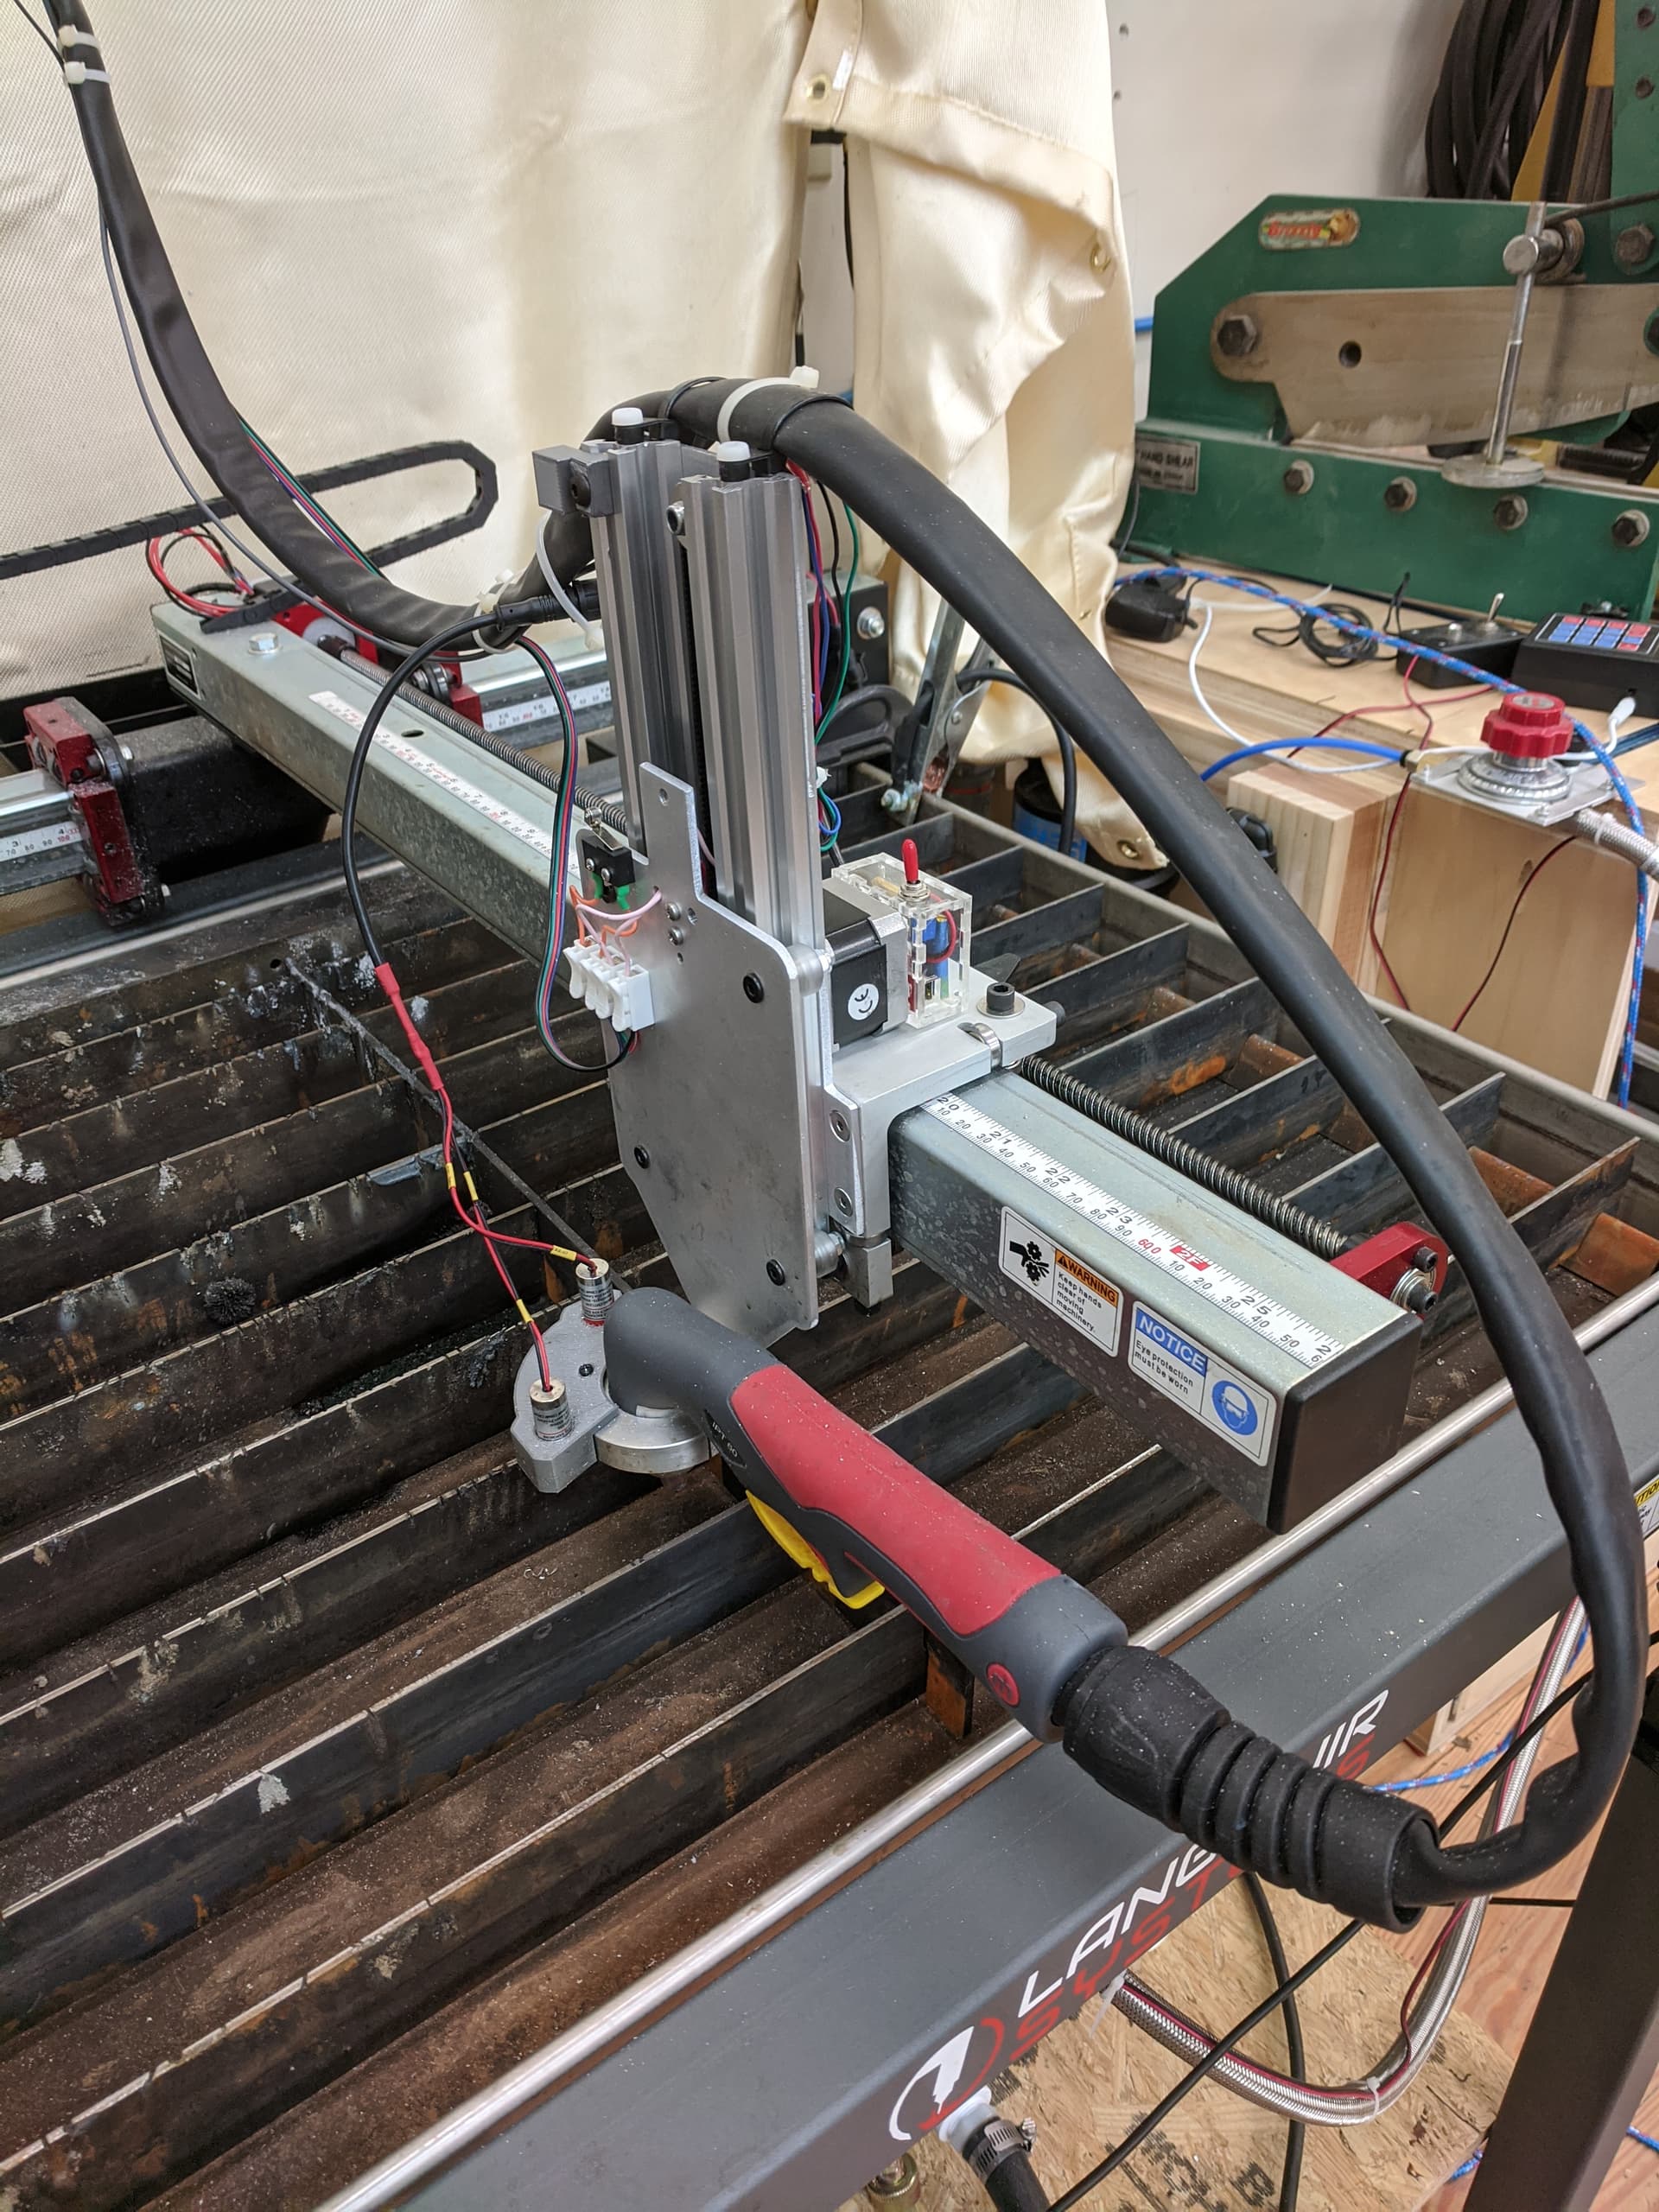
Here is how I mounted my hand torch on my custom Z axis. I looped the torch cable around to tie it off on the top of the gantry. This keeps it from moving around while moving the gantry and makes the torch hold itself much stiffer and easier to align. The round mount holds the torch shell rather than the torch cup as well, making it easy to change consumables without removing the torch.
6 Likes
Now that is funny that you compensated the bevel and it improved makes me wonder if something isn’t wrong with your torch head or the rest of the consumables. kinda as though your electrode and nozzle is on a angle in the retaining cup.
is your plasma new or have you owned it for a while?
1 Like
nice setup up!! i like the tape rule.
Interesting, I like the idea of mounting to actual torch instead of the cup. Very nice setup! I may consider designing up a torch holder for easier setup and consumable changes.
I may try turning the torch 90 deg like @MechanicJon mentioned. If the bevel changes sides with the torch, then it should mean the torch is off somehow.
Plasma cutter/torch is pretty much new. I bought it a few months ago when I bought my table.
Might pay you to change your whole consumable set.
1 Like
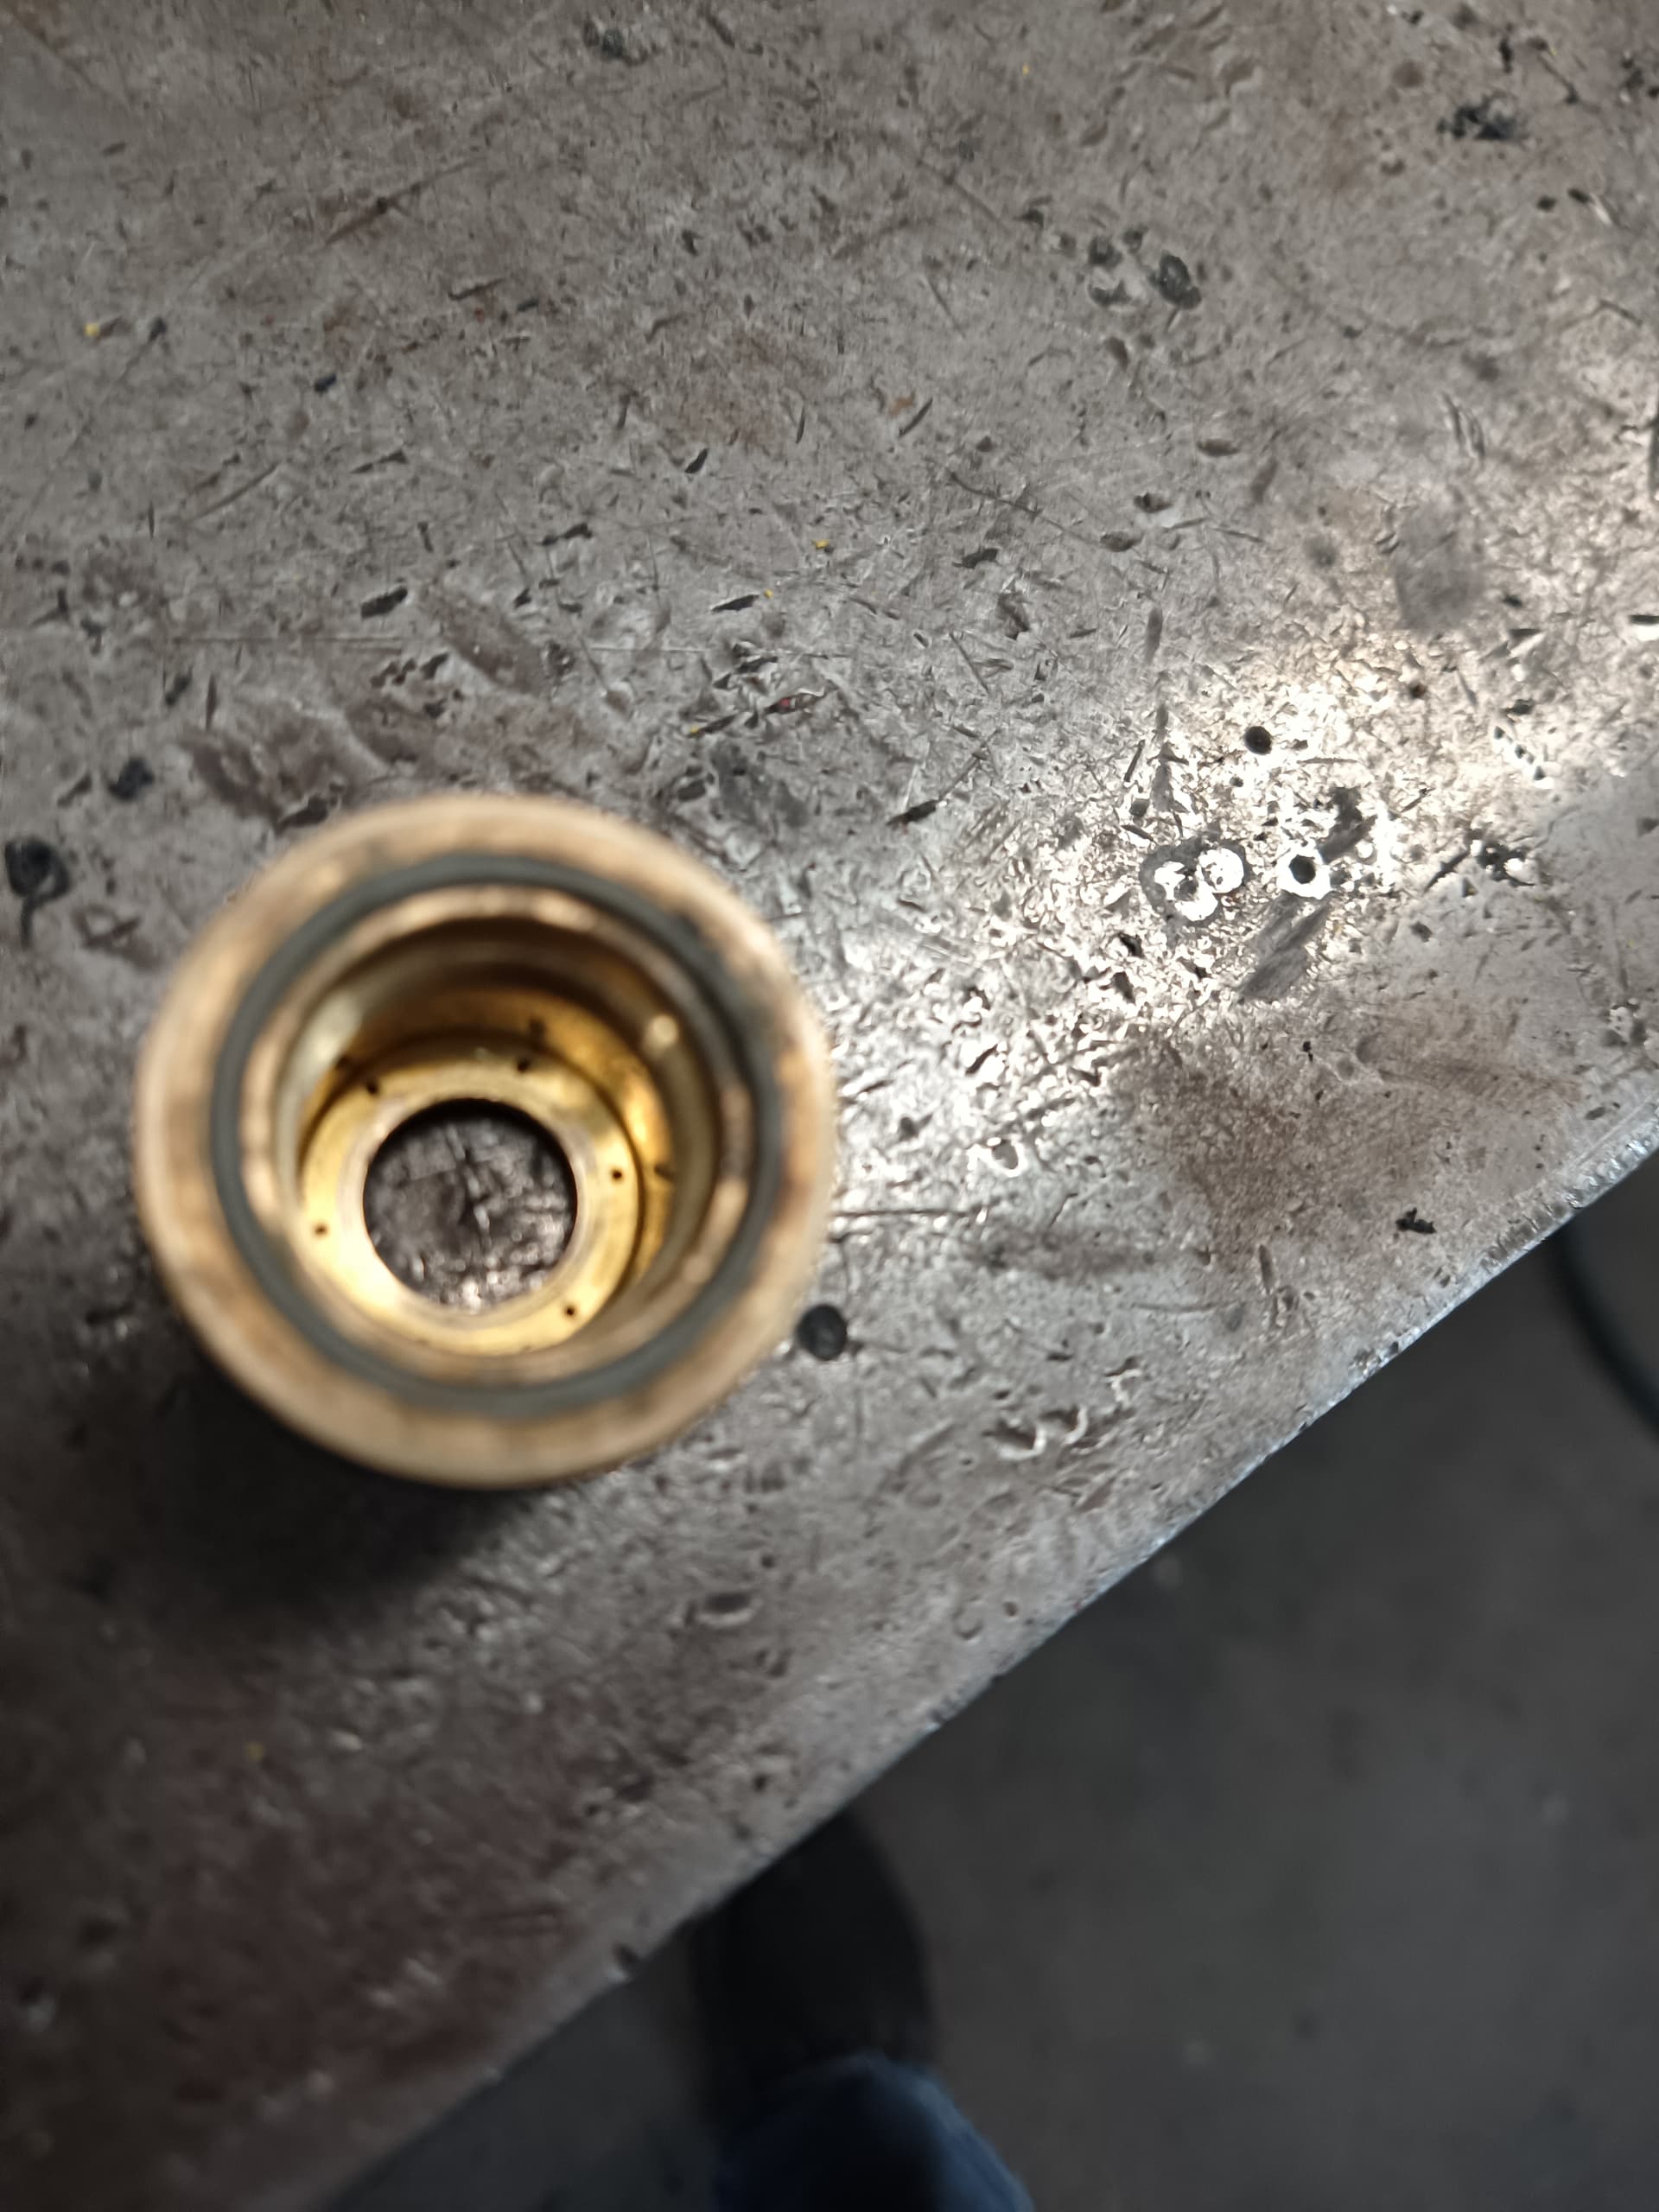
Found the problem with mine. One of the air holes in the retaining cup was plugged. One of the little holes you can see in the picture.
6 Likes
I like the laser lights on the torch holder been looking for some of them! Easier for x and y square up? Thanks!
Were you able to clean it out and it worked? Or did you find it after you swapped cups? I would be a very happy man if that were my problem.
Unfortunately the lens on these little lights is dual purpose, it is both the collimator for the single laser line and it is the focusing element. So, you mount the light, focus the light, and then remove it and try to reinstall so the line is lined up with where you want. Oh, and the thread is loose depending on how stiff the spring is inside the cylinder so it tends to wobble as you’re reinstalling it.
So, depending on how much you want to fiddle with it, yes, you ‘could’ use it to give you a good reference point for the center of the torch AND the lines line up with the table X & Y axes. In my case I was pretty much happy with having a reference point for the center of the torch.
I do use it to quickly rough in the torch to the workpiece and, if I’m indexing a work that is larger than the table, I use it to align the workpiece to a fixed torch position.
The other thing you do need to know is that water splash will get on the lens and you have to use a paper towel or something to soak up the drop if you want to use the beam. It’s quick and easy, but just something to be aware of.
Net: I use the reference point every time I’m setting up a job and it makes indexing very easy and accurate. Water on the lens doesn’t seem to leak inside and corrode the unit, I’ve been using the same lights since I installed them back in the beginning of 2020.
1 Like
I swapped in a new cup. It’s possible it could be blown out with compressed air. I haven’t tried it yet.
I cleaned mine out with a small wire.
@lowp, you can modify the subject line and add [SOLVED] now, I think…