I want to have my SMW fixture plate where the stock one would be so I don’t loose any Z height. My question is how to best a line the dowel pin holes with the gantry. My current plan for the X and Y is to put 3/16" plastic around the outside of the SWM plate when pouring the concrete. Then I can pull the plastic out and that should leave me enough adjustment to dial X and Y in before I pour the epoxy. I know I will be decking it off but I would like to get the Z aligned with with the dowel pin axis as best I have come up with is to put my height gauge on the plate after it is in the concrete and get the 4 corners as close as possible and hope for the best.
Any thoughts or ideas on how to do this better are welcome. Thanks.
I might not be following you, but the plate has to be anchored in the concrete, the epoxy doesnt do anything other than look pretty and allow coolant to flow easy. The factory plate has studs (actually bolts) that stick out of the bottom to allow the concrete to bite a little better. In theory, you can loosen the stud mechanism from the top and bust the factory plate free at a later date, but its still retained primarily by concrete, not epoxy. Is this how the large Saunders plate works?
SMW plate is 24x26. It bolts to the stock plate that has the anchors on it. The stock plate will just be an inch lower than normal. i am leaving the gap in the concrete so the plate can be adjusted and then once aligned i will add the epoxy so there is no gap for chips to get in.
Be aware that the machine cannot surface the complete plate. You are opening a can of worms. But that is just my opinion. I sold both my SMW vises. Opening this issue could lead to more complications. That’s just my perspective. After losing several large projects, I sold both of my SMW vises; they became someone else’s problem. Since then, not a single project has been flung out of the vises. Some guys love them, but I hated them. I followed the directions, used a torque wrench, and tried everything. I hate to ask what you paid for that plate. I bet it was half the cost of the base machine.
I bought it all last year, tax write off for the business. Shop wasnt ready so it has been sitting in a box. I was really supprized to learn you cant surface the entire plate and not sure why they made it that big. 24x22 would make a lot more sense. I might just figure out what i can surface with the flycutter and bandsaw off the rest. I am more worried about aligning the Z with the dowel pins holes axis then have some unfinished parts of the table.
I have not used the mod vices before. All the you tubers say theyre great ;D. I really like the idea of the versatility they offer as i mostly do prototype work. What generation did you have. I know i have gen 2 and they now have gen 3 but i dont know the difference.
That’s just my opinion. Like I said, some guys love them, and then there is me. You put a 6x4x6 hunk of T6 in there, and your ass will pucker up the whole time. You must cut it down to not much bigger than the stock plates. Some guys have extended the plate rearward but had to turn the gantry around to finish. Like I said, a can of worms.
Any reason not to just set the stock plate deeper by the thickness of the SMW plate? That way everything is being used as intended and you don’t loose the height you were worried about.
I hadn’t thought of that. I would think the thickness of the concrete would be important to the stiffness of the machine. Going from a 5" pour to a 4" is a 20% reduction in height and mass.
Im doing this on mine right now. I just used some !" spacers and longer 1/4"-20 bolts when hanging the stock baseplate.
with the head in the low position and a 4" endmill it reaches the baseplate just fine. Ill post some pics next week when i am back in the shop.
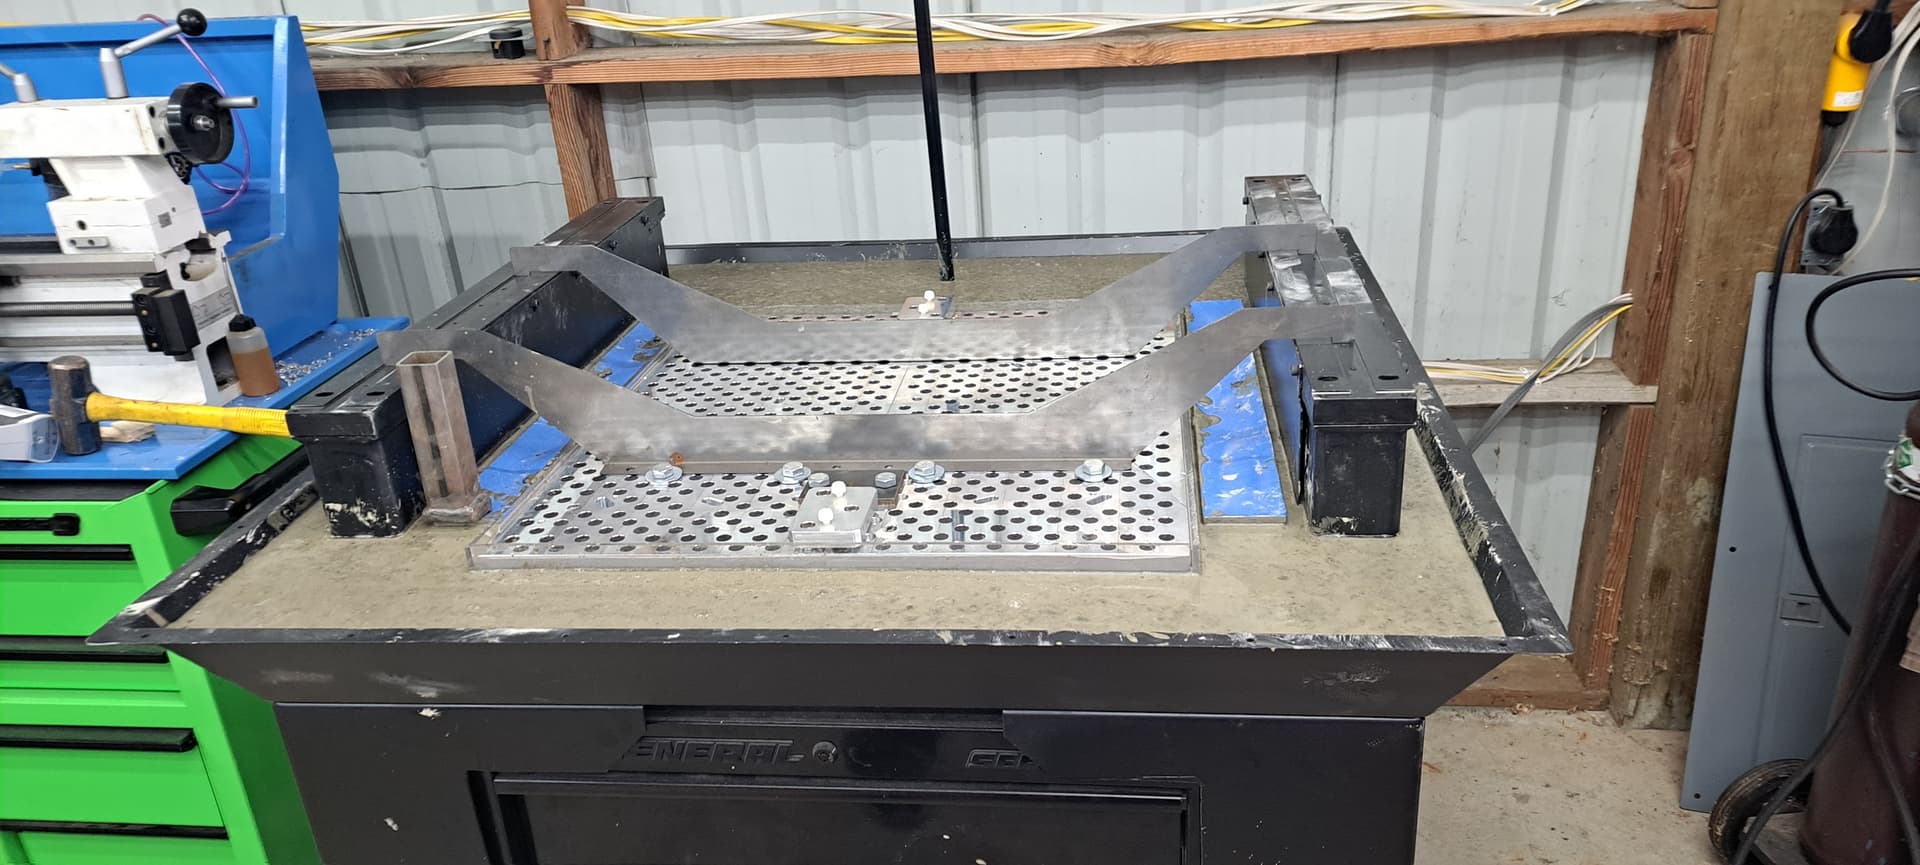
I did concrete as close to the top of the lowered plate, then ramped it up a little bit as it moved away from where the SMW plate is going to cover.
Im going to pour a seal epoxy coat up to the top of the faced OEM plate, then tram in the SMW plate. Toss some silicone around the base, add a coat of epoxy release agent, then pour the remaining epoxy.
My reason for wanting this was similar to yours, having a properly alligned fizture pattern as well as no z height loss.
Can wait to see the pictures. I think you did it the right way though. The only way to make sure it is aligned is going to be to deck the OEM plate. How did you mark out the SMW plate when you where doing the concrete to make sure it wasn’t going to interfere? Cardboard cutout, some kind of template or just a tape measures? I almost wonder if it would be better to do it in two concrete pours. One to the OEM plate, deck it off while the concrete is still green, add the SMW plate and then the rest of the concrete. Do you guys think the machine will ever shift enough that you would need to realign the fixture plate?
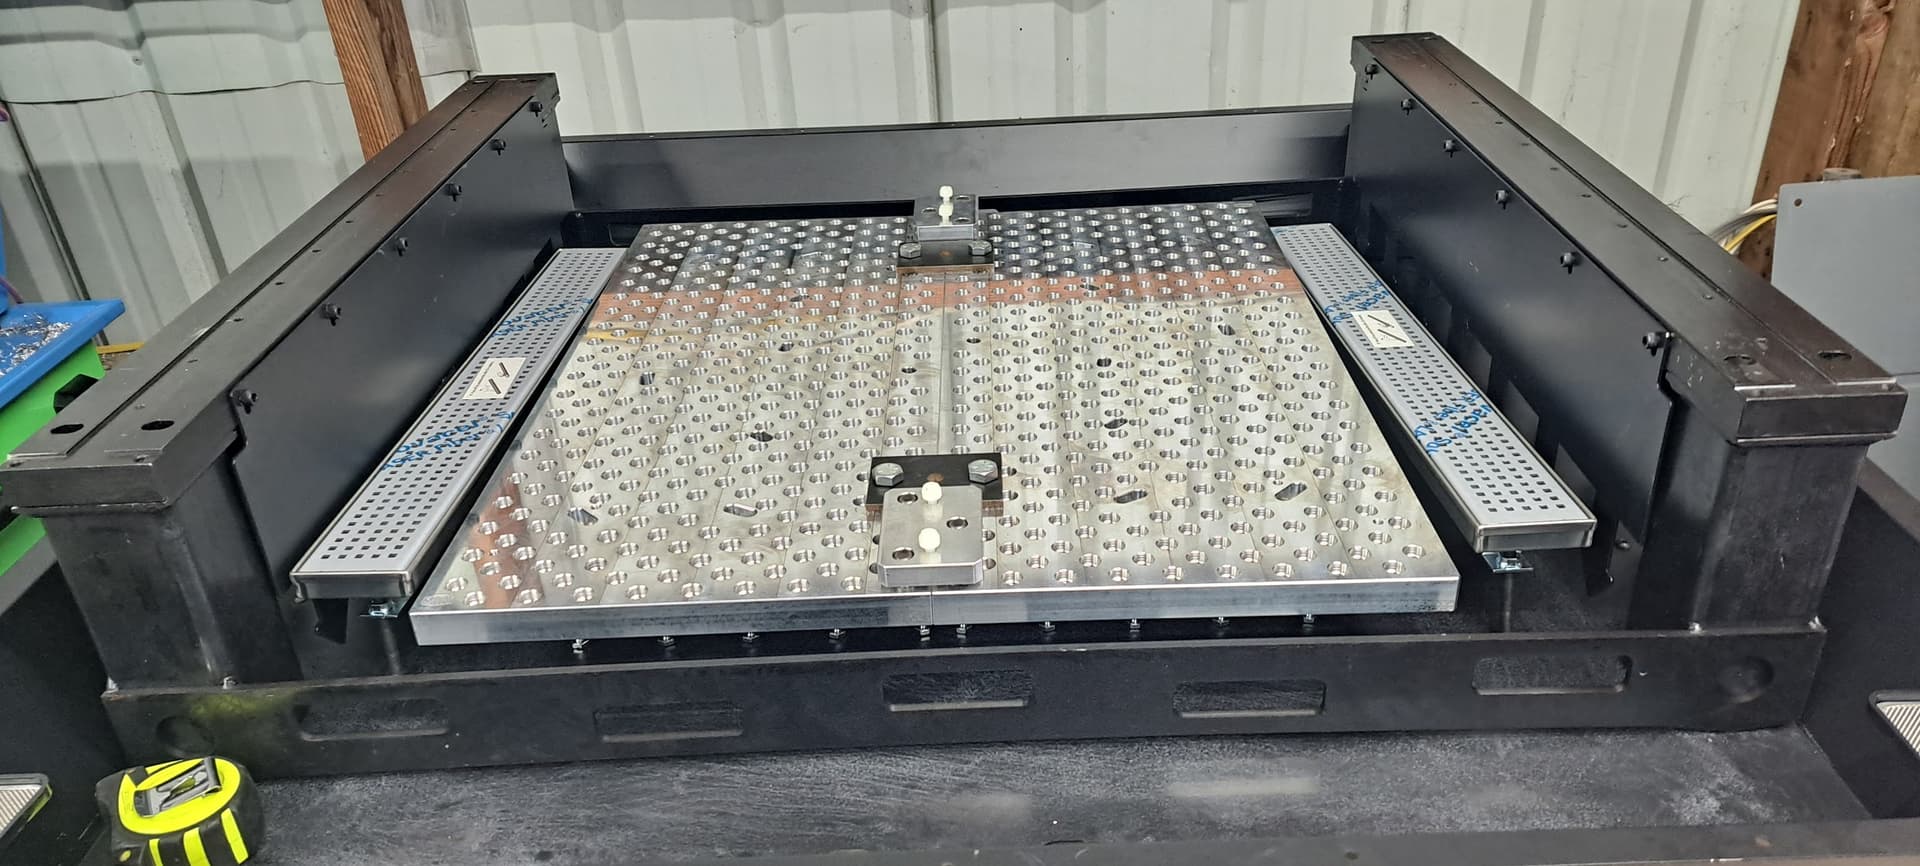
We moved the OEM drains back a few inches and towards the Y rails. The stock Position is to narrow for the SMW plate.
I didnt check what spacers we used, we happened to have 8 threaded female threaded couplers that were just under 1" (i think like .905) long and had an ID big enough for a 1/4-20 to freely pass thru. They dont have to be perfect, just close. The plate gets faced and will fix any error.
I think overall I am only missing about 1/2" of concrete where the SMW plate overhangs, and about a 1/4" the rest of the surface, will get flooded with epoxy next week. For the overhang area, I just laid the SMW plate on the MR1 plate while on my bench, measured the overhang. Sharpied it onto the face of the MR1 plate so I wouldn’t forget… then just screeded it out with a short 1x4.
The few pounds of missing concrete shouldn’t be an issue. If you wanna nerd out on it, figure out your missing weight, then dump in lead bird shot to make up the difference.
You will need a 4" Endmill, or an extension, to be able to face the MR-1 plate in the lower position.
Overall, the benefits of having trammed locate holes on a standard spacing, extra space to be able to fixture outside the machining area, without loosing 18% of the machine Z clearance is 100% worth it.
One thing I learned is dont wait until the SMW plate is in the enclosure to put the plugs in. there are like 800 of them, and its way easer to do when you arnt reaching thru the front or sides.
This is the way! Are you going to have your epoxy go up to the SMW plate? I bought some upgraded drains that someone suggested on the forums. It is really tight with the the SMW plate. I think I am going to have my SMW plate attached to the OEM and add some 3/16 plastic around the bottom and outside. Then I should be able to get the concrete to full depth and still be able to pull the SMW plate out to face the OEM.
Thanks for the tip on the longer reach needed. I just ordered the ER20 extension so hopefully that will be enough to reach it with the fly cutter.
Yeah, looks like you have an older generation MR1, the new ones don’t have the corner drains, they come with the side ones shown in mine.
My plan is to put a layer of epoxy up to the top of the mr1 plate. Once that cures, I’ll put the SMW plate in, tram them, and run silicone around them so that epoxy cant flow under or in them in the second pour. I will also use an epoxy release agent on the sides of the smw plate, in the event I ever need to pull it.
In the second pour, I will bring the epoxy up to the drain height.
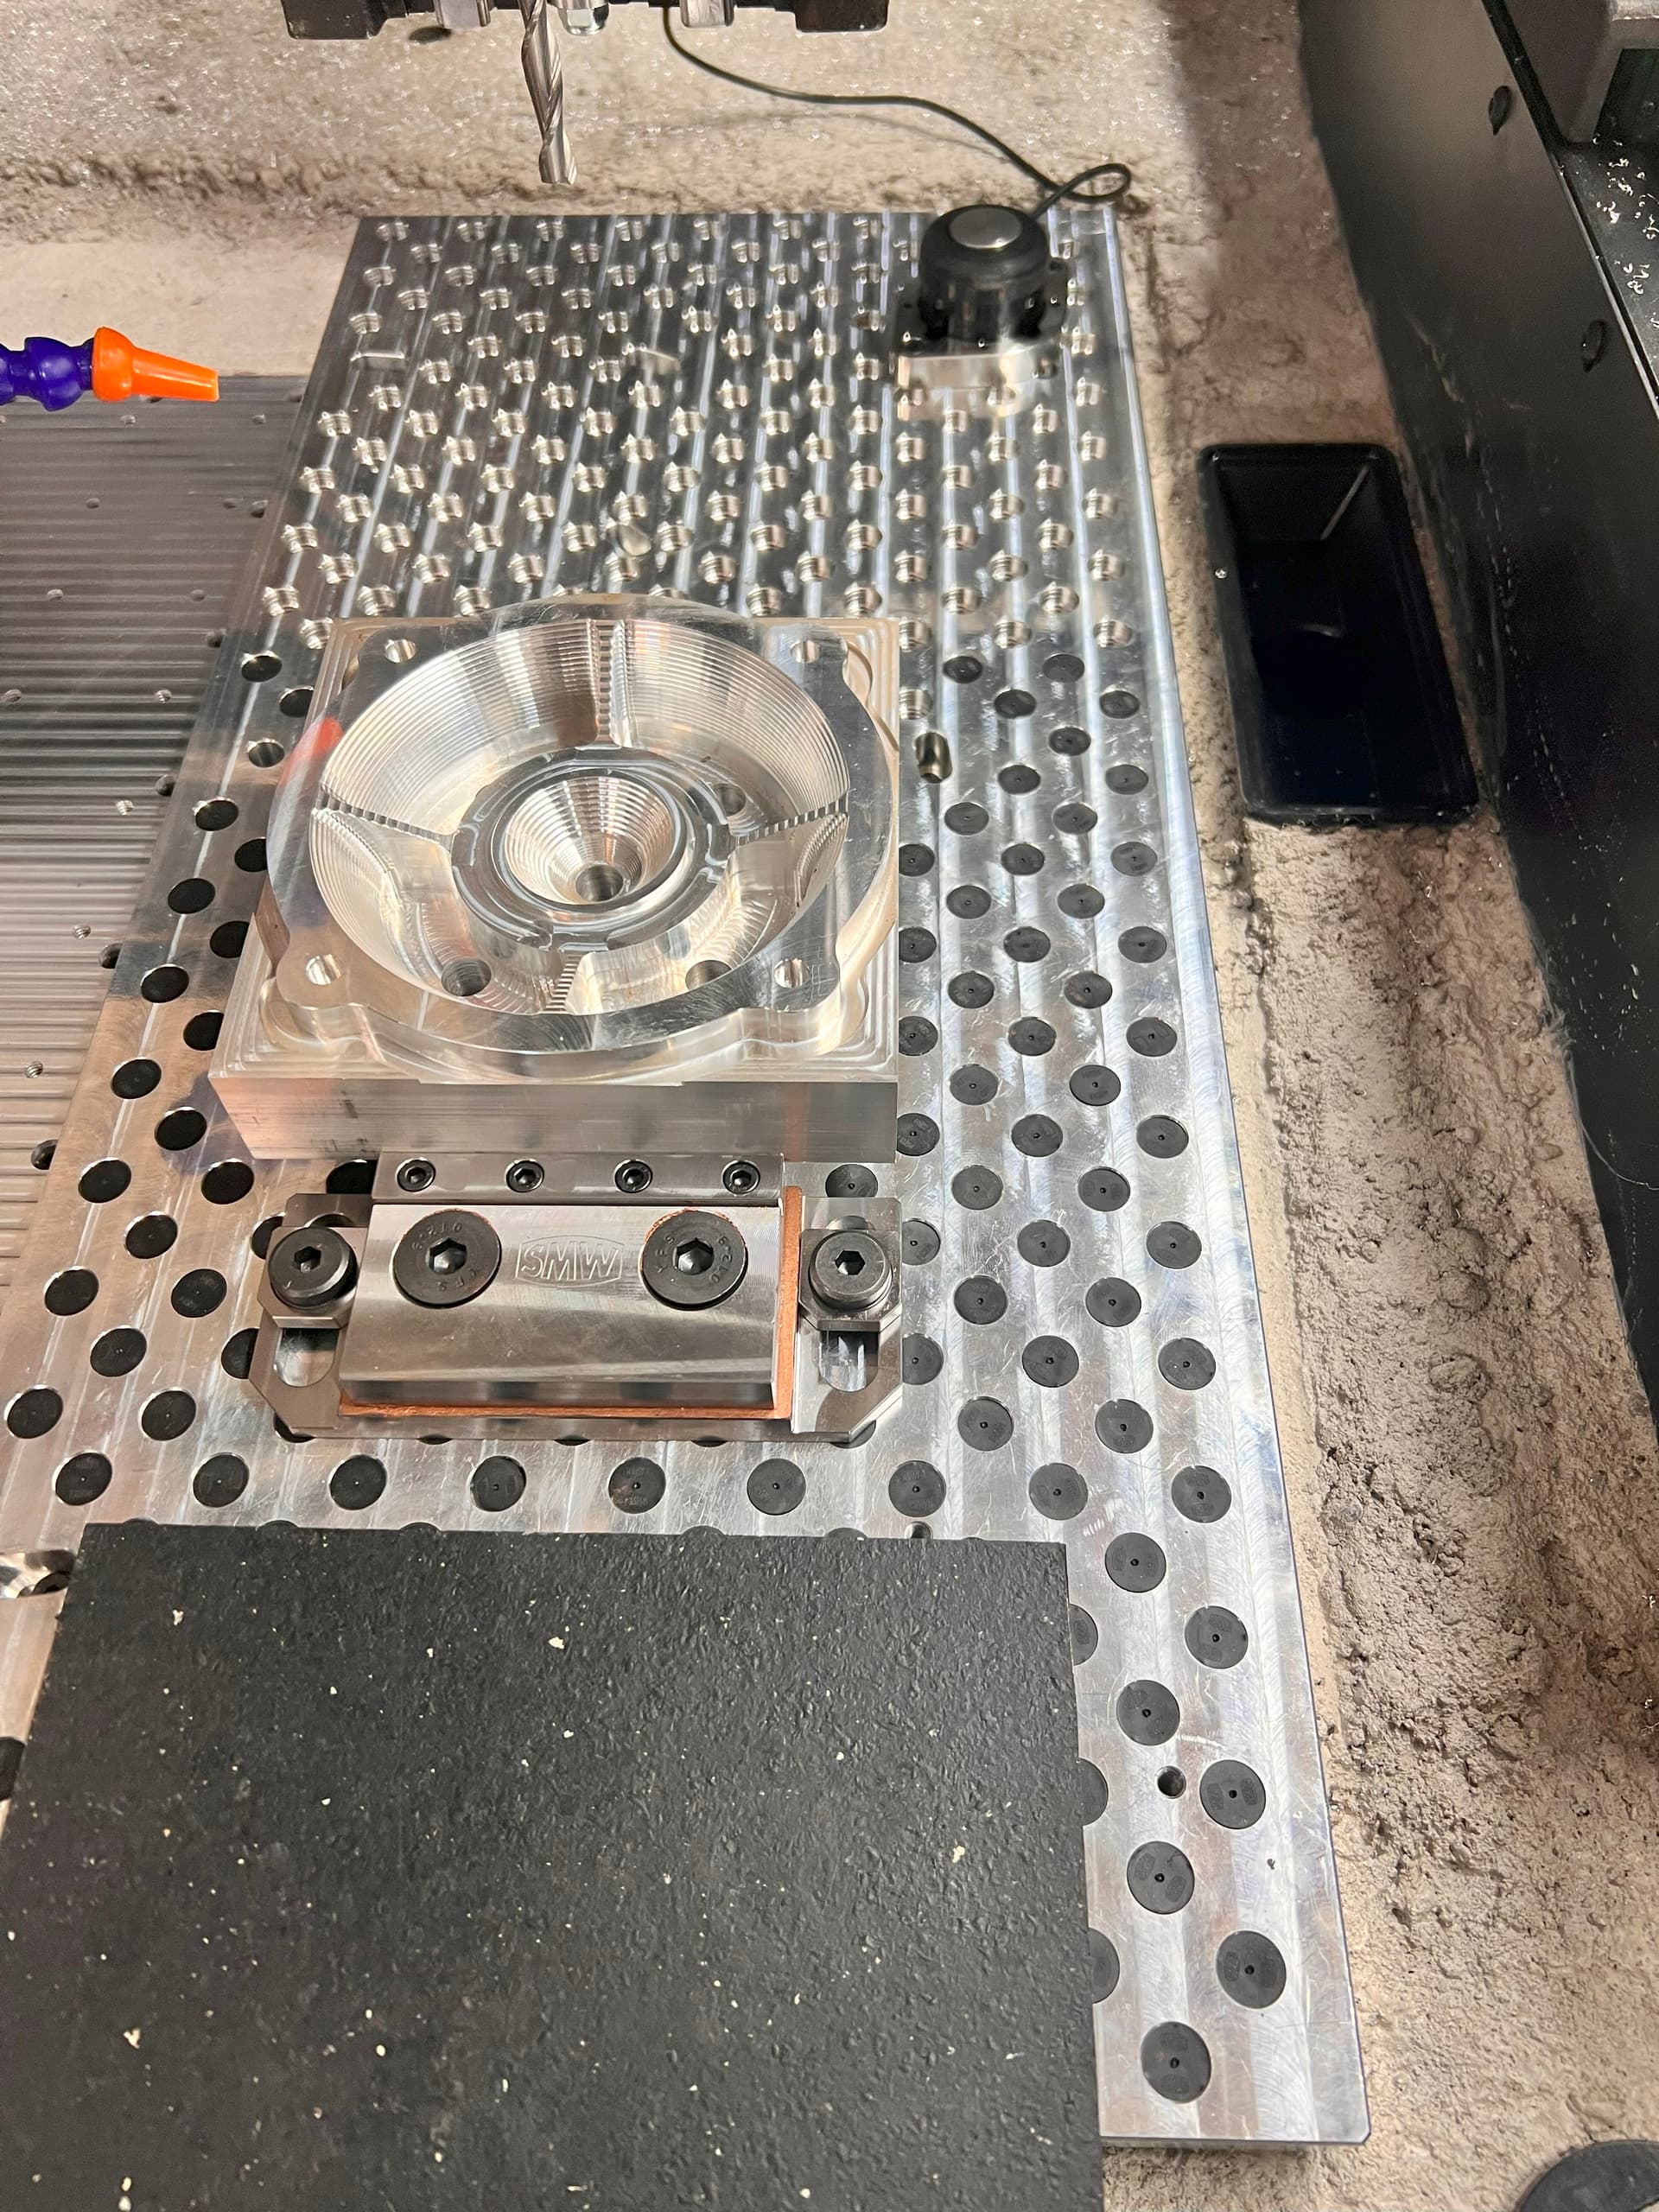
I havent used the SMW Jaws yet on the MR-1, but they check all the boxes I need. If this DS works good, I’ll grab a second dual station so I can run 4 parts at a time. I plan on setting the fixed jaw right on the split between the left and right plate, one in teh front, one in the back. WIll give me 4 vice stations (in quadrants) and still be able to fit 2 of their fixture plates on (One on each side) wihout haveing to pull the fixed jaws. In My OCD I want to also have the fixture pins able to stay on the table without interfereing with the vices, but not sure that will work. I also dont know if I will ever use teh fixtures because we wont be doing big runs on this, this is just for prototyping before sending off to our production contractors
Im confused on how you plan on having the SMW and MR1 Plate together and still hang from the support bars. I dont think you want that concrete coming all the way up to the bottom of the smw plate, because you will be facing teh MR-1 plate. When you do that, the concrete will wind up higher than the MR1 plate, and then you have to grind the concrete down to get the smw plate to fit without interference.
I am going to have 3/16" plastic on the bottom of the SMW plate outside the OEM plate. Basically I am creating a 3/16" bubble around the SMW plate that I can peel out once the concrete is hard. Do you think that will be enough wiggle room?
If you are going to be swapping stuff out make sure you get the colored plugs. What kind of parts will you be making?
depends on how close to square your MR1 plate is. Should be enough, if you wind up with concrete in the way, grab a grinder and make it not in the way (make sure you get all the dust cleaned up good before you epoxy).
Check, double check, and triple check your mr1 hole spacing on the centerline. it must be 2.00". Not 2.04", Not 2.08". Exactly 2.00 inches. Oddly enough it even says it in the assembly guide…
We thought we had it all right, turns out we had 1 (or both) MR-1 plates backwards and the SMW plate would not mount up. Wasn’t a hard fix, just had to drill and tap 20 new holes .3" offset from the original ones and face it again.
Got it siliconed off to the concrete today, will be getting it all taped off and pouring epoxy on Thursday.
We did get the plugs, not sure how much they will get used since our parts are relatively small, will have 2 dual station SMW’s on it so we can run 4 parts at a time. Probably just need to mark the holes used for pallets. Not sure if Im gonna buy the pre-made SMW blank pallets or just make my own. Or I might have my machine shop run me blanks.
Going to 3d print some plugs for tall the 1/4-20 slots to keep chips and crap out of them.
We mainly make enclosures and other components for communications equipment used in mining. This will just be used to rapid prototype or small R&D runs for alpha and beta products. No way this will handle our production runs.
Concrete completions. Are there merit badges? I did manage to mount the drains a little low so I am about a 1/4" lower than planned on the concrete but it is good enough. Now I just hope I can easily remove the SMW plates in a couple day. Not in a rush though as I am waiting for Langmuir to ship the extension I ordered last week.
Forgot to post this last week - looks so much better once the epoxy is on.
Don’t worry about exact drain height. If you tape up real good you can pour the epoxy above the drain height (the tape acts as a form). Once epoxy cures, pull the tape off, might have to trim with a razor but worked great for me.