
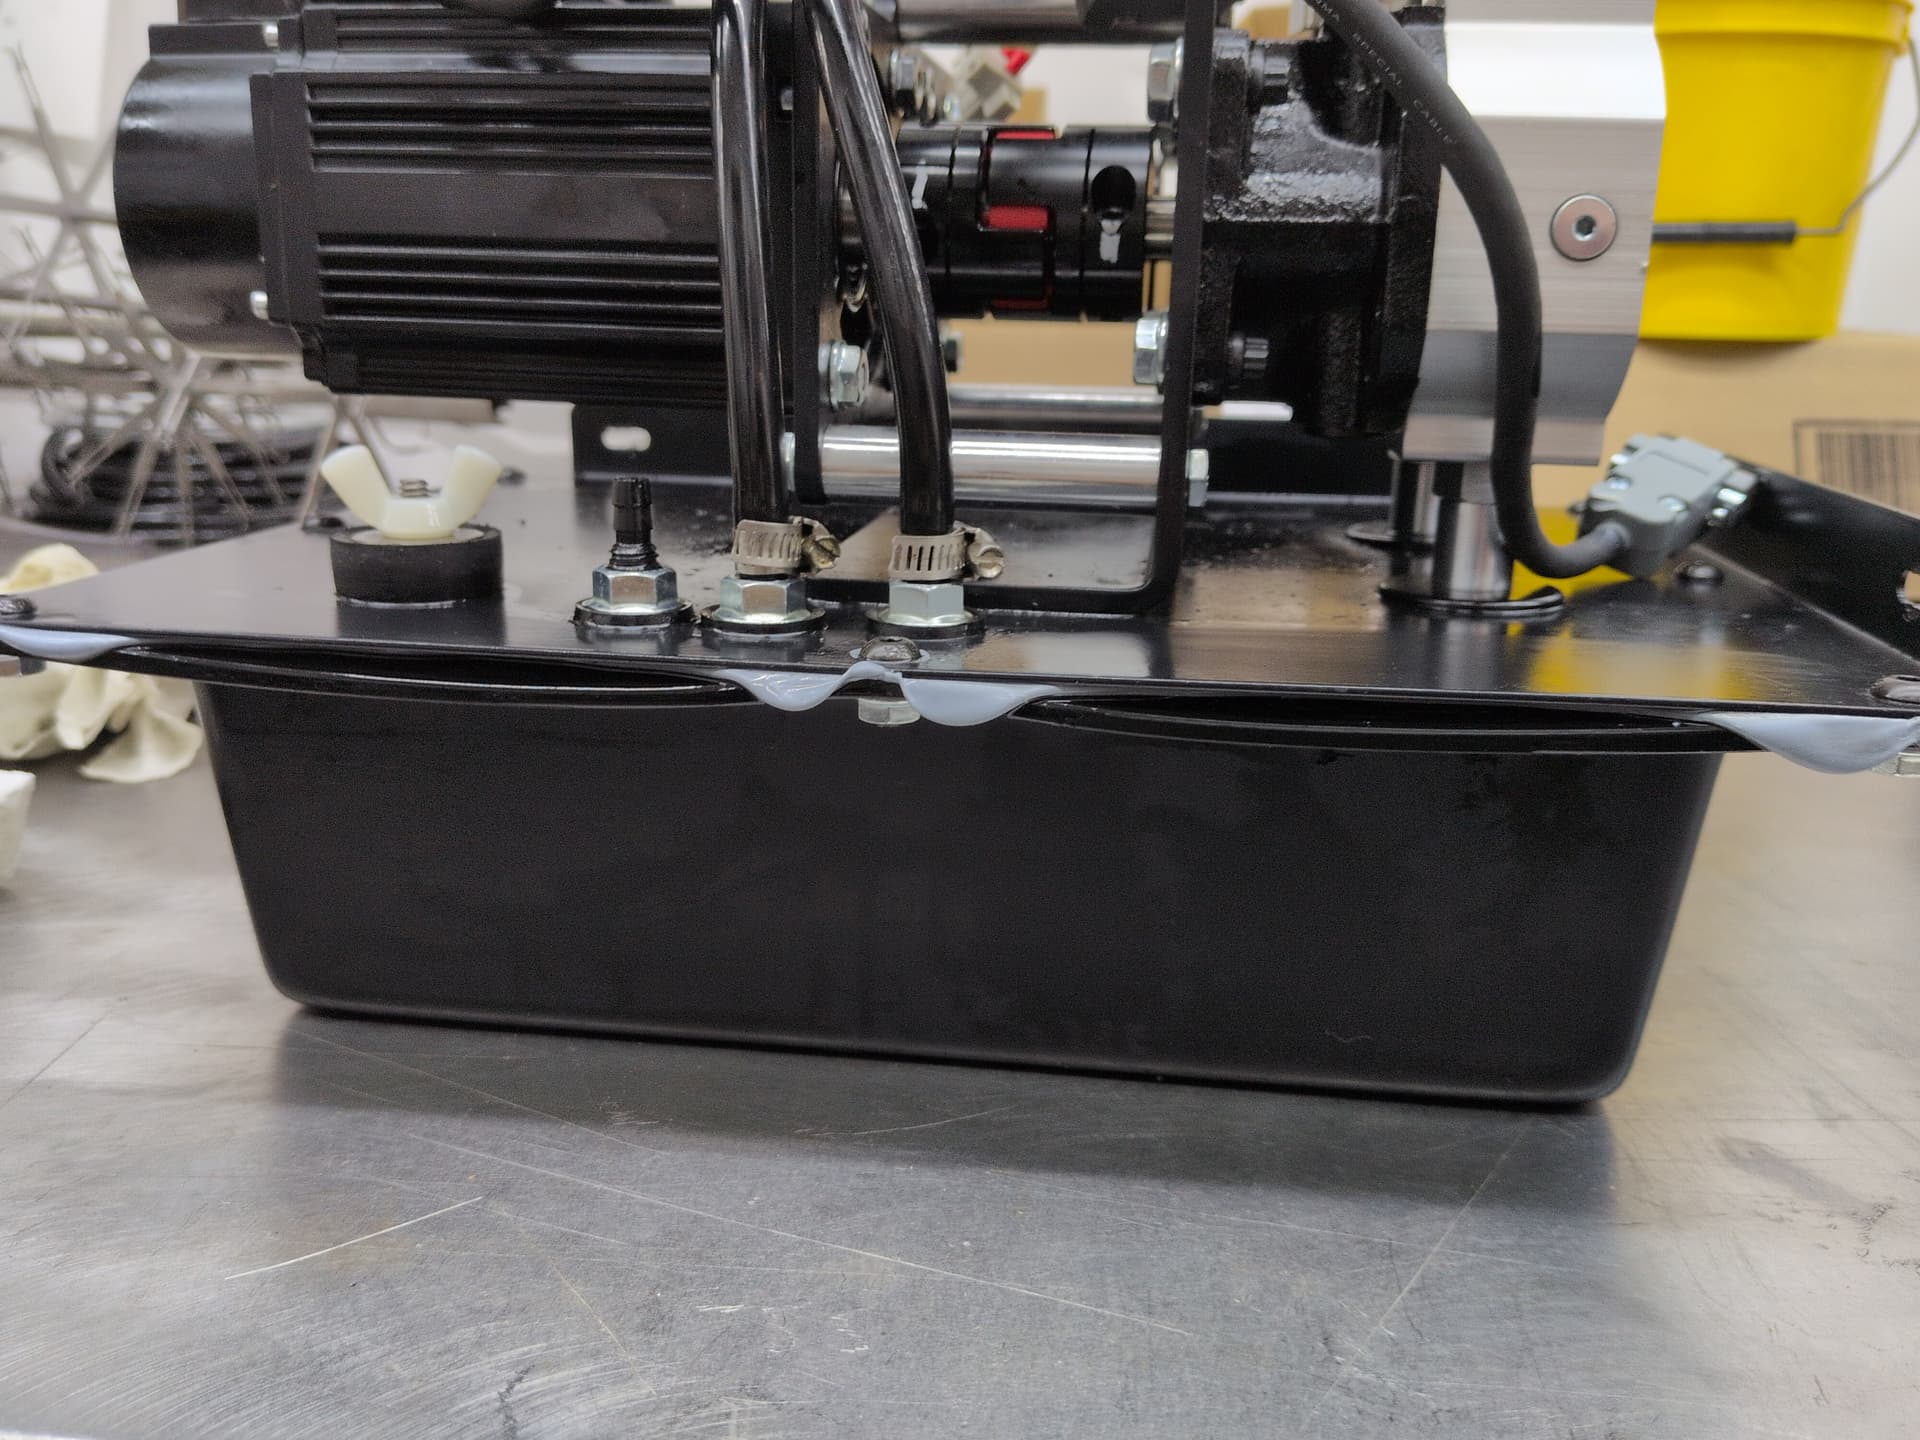

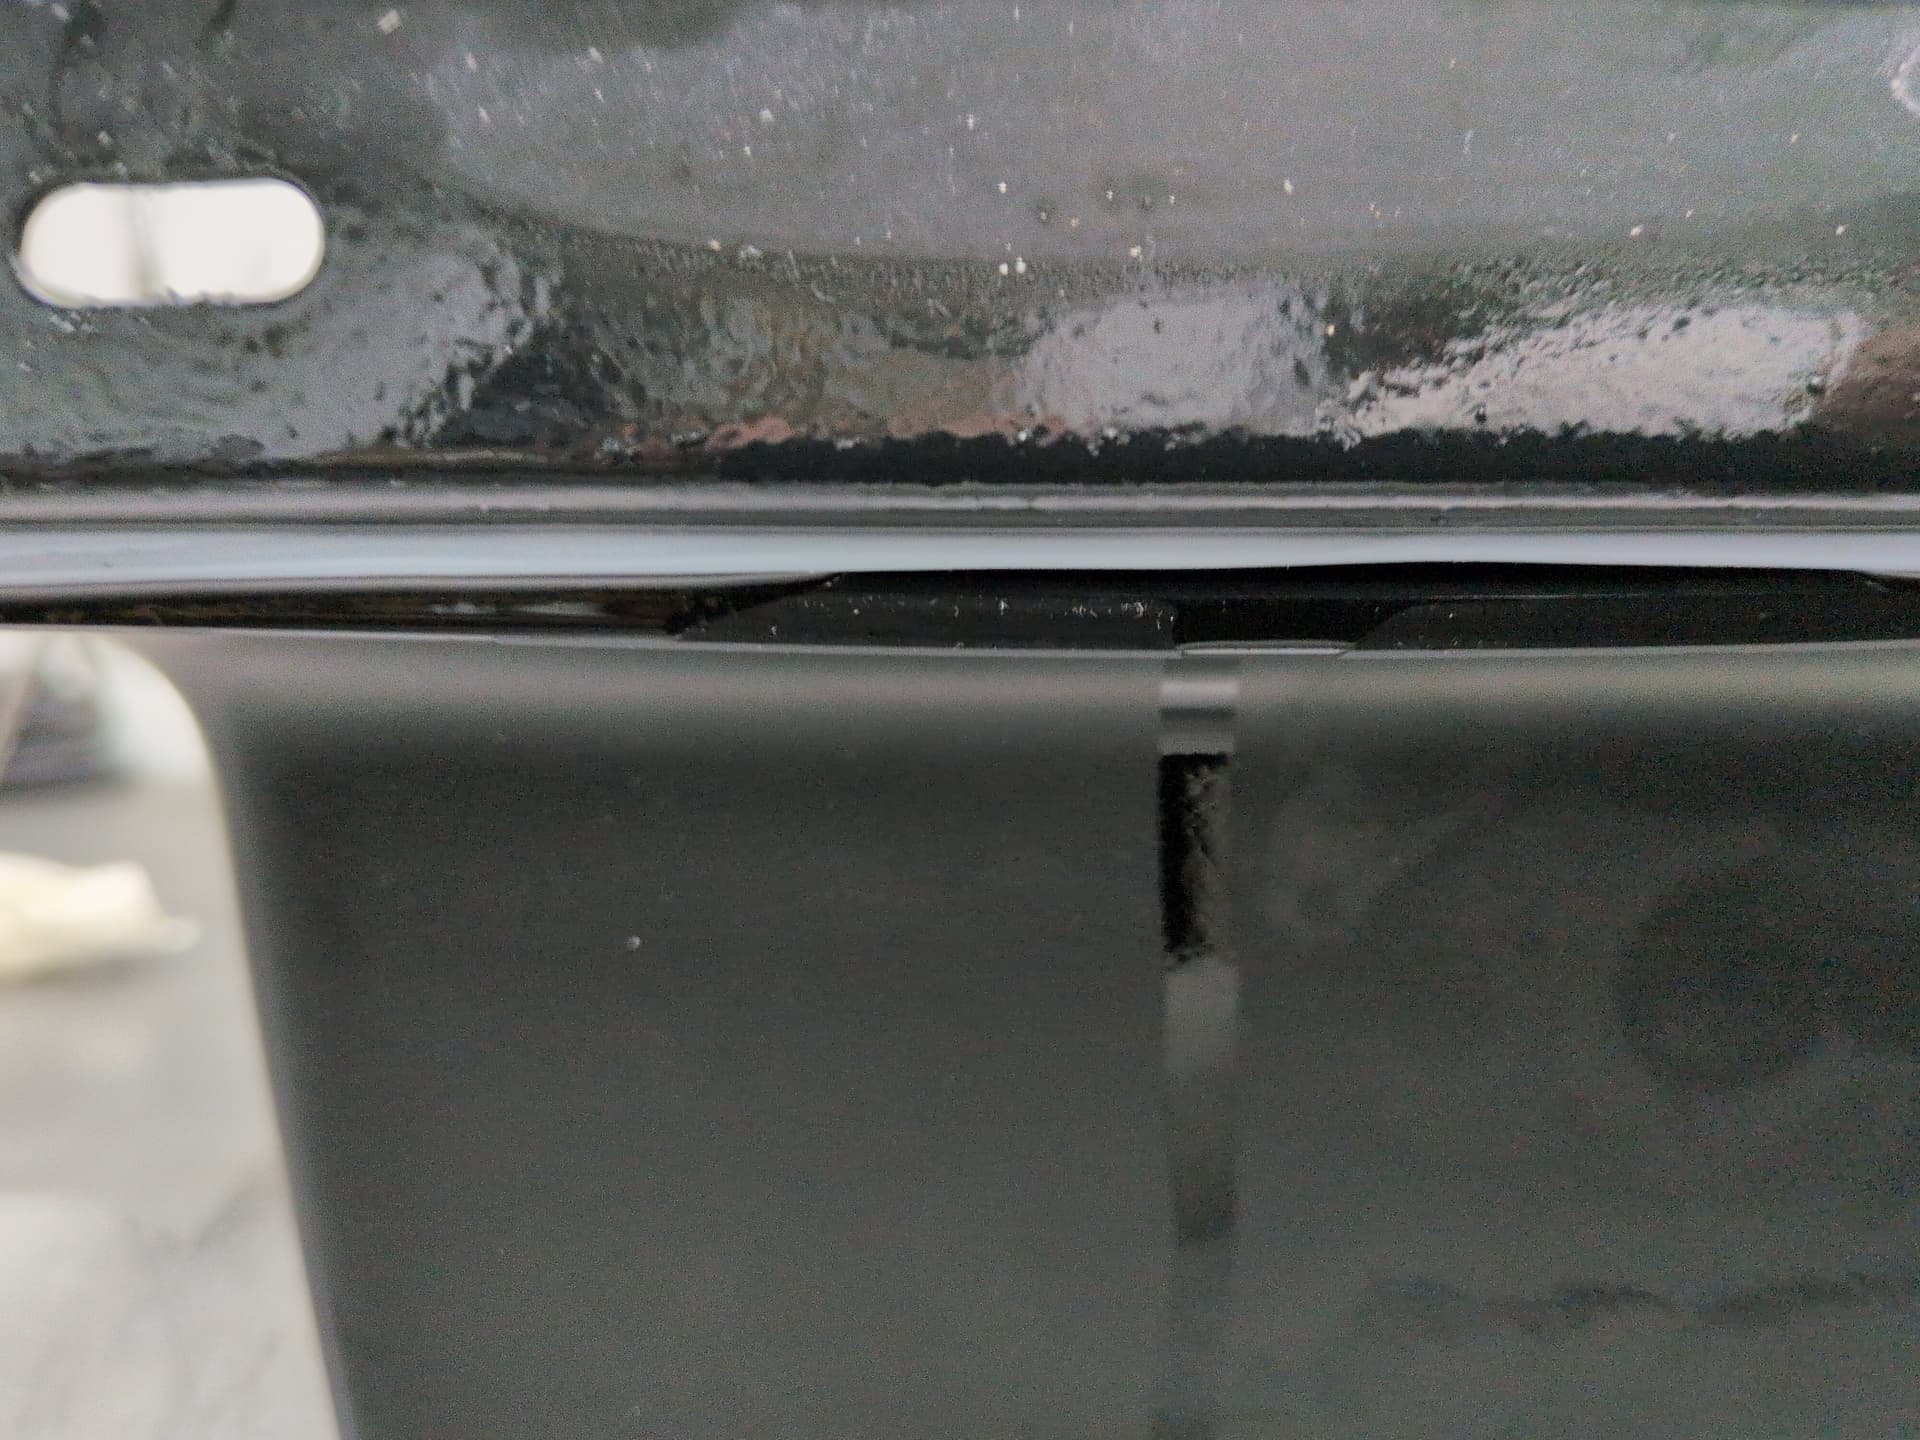
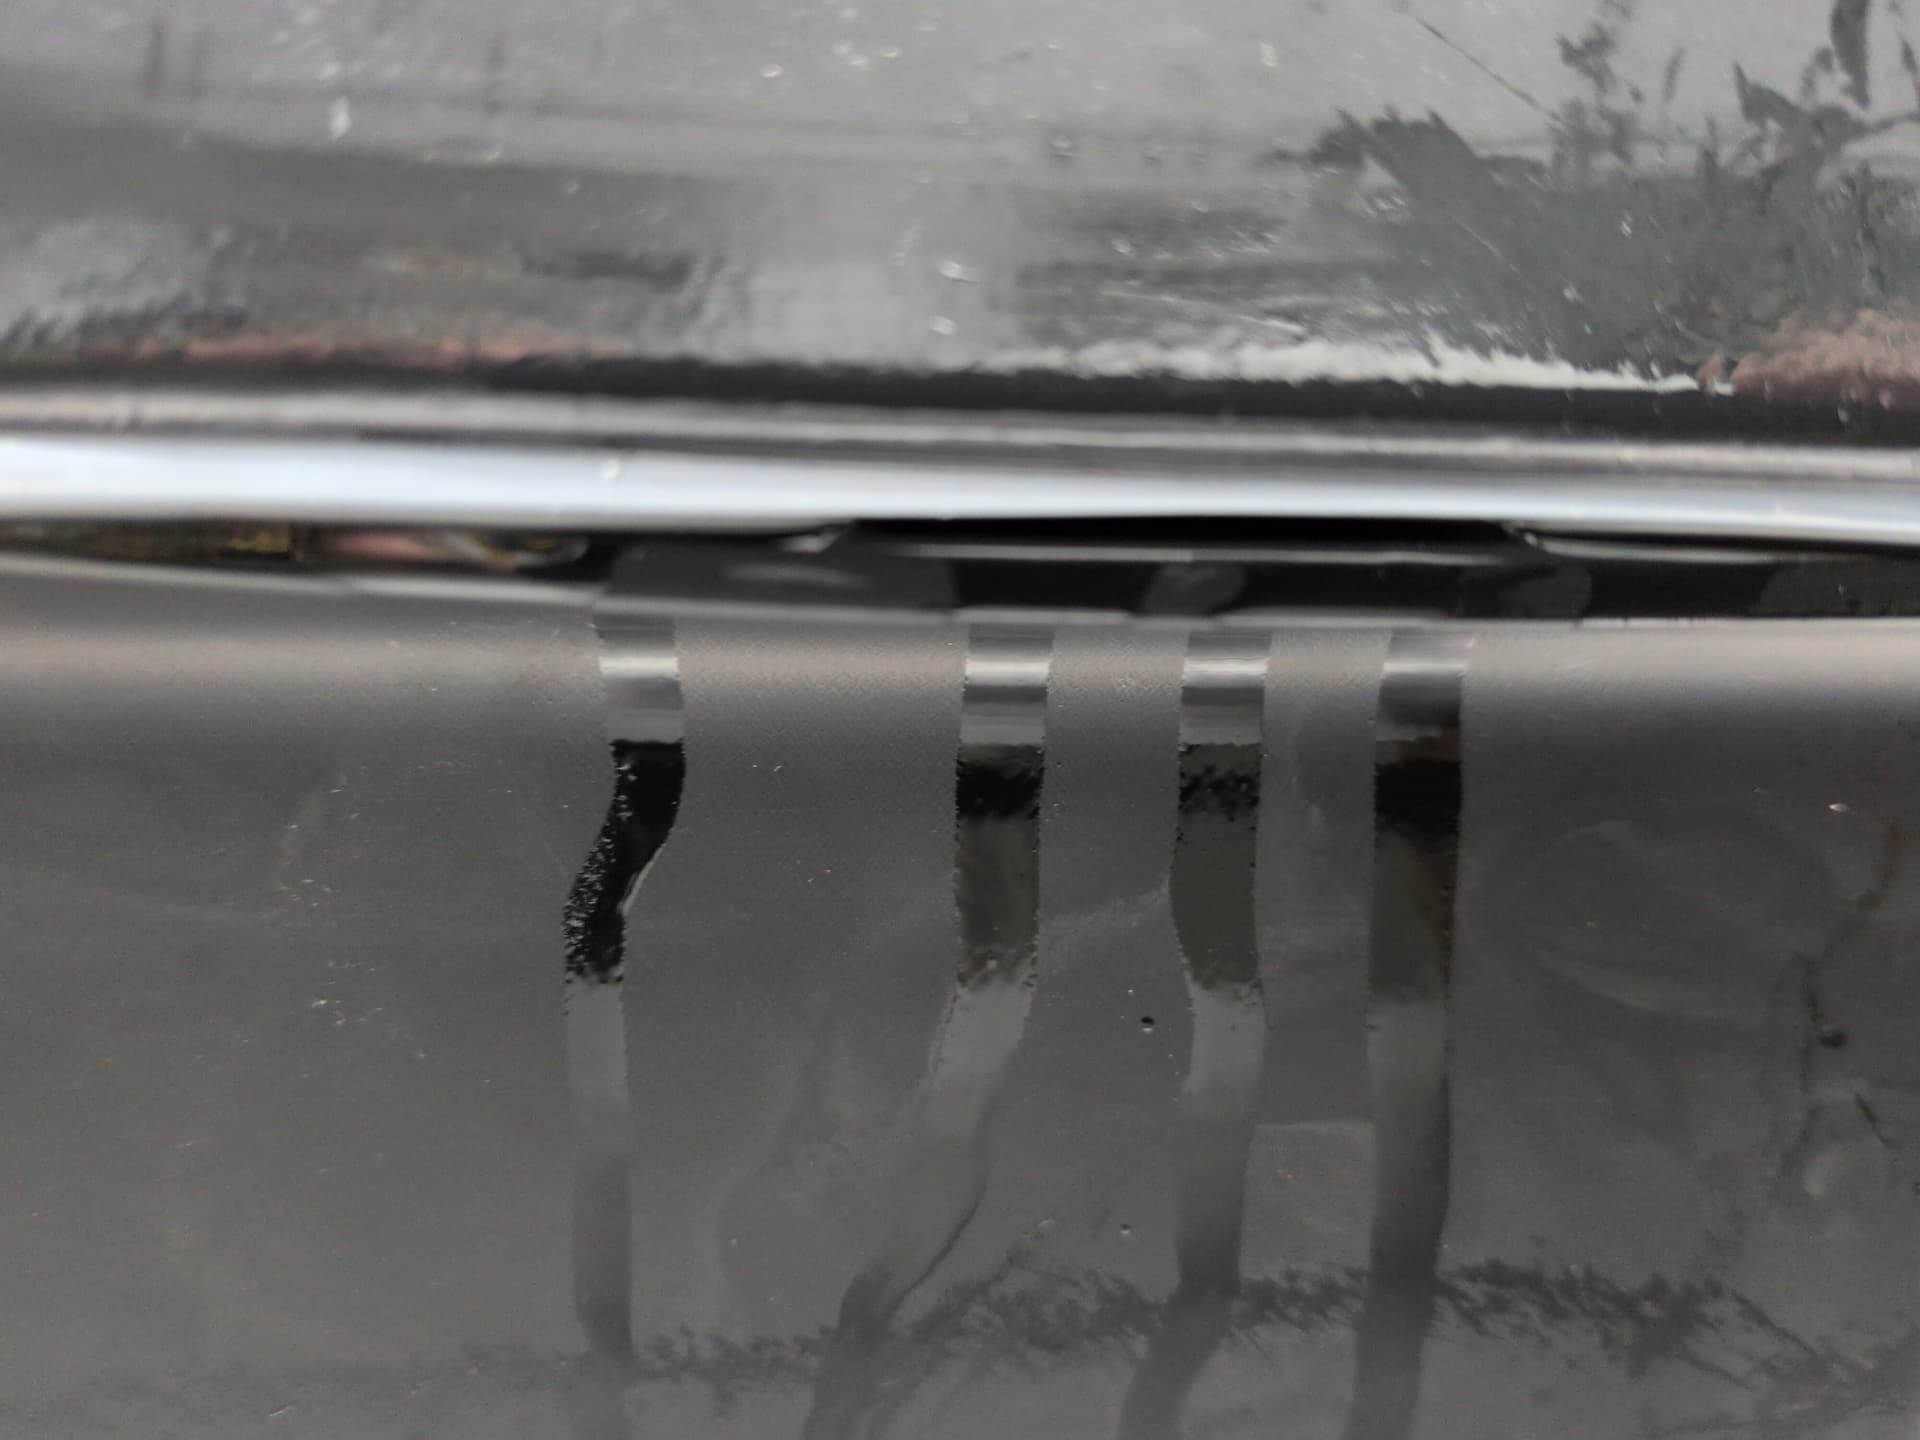

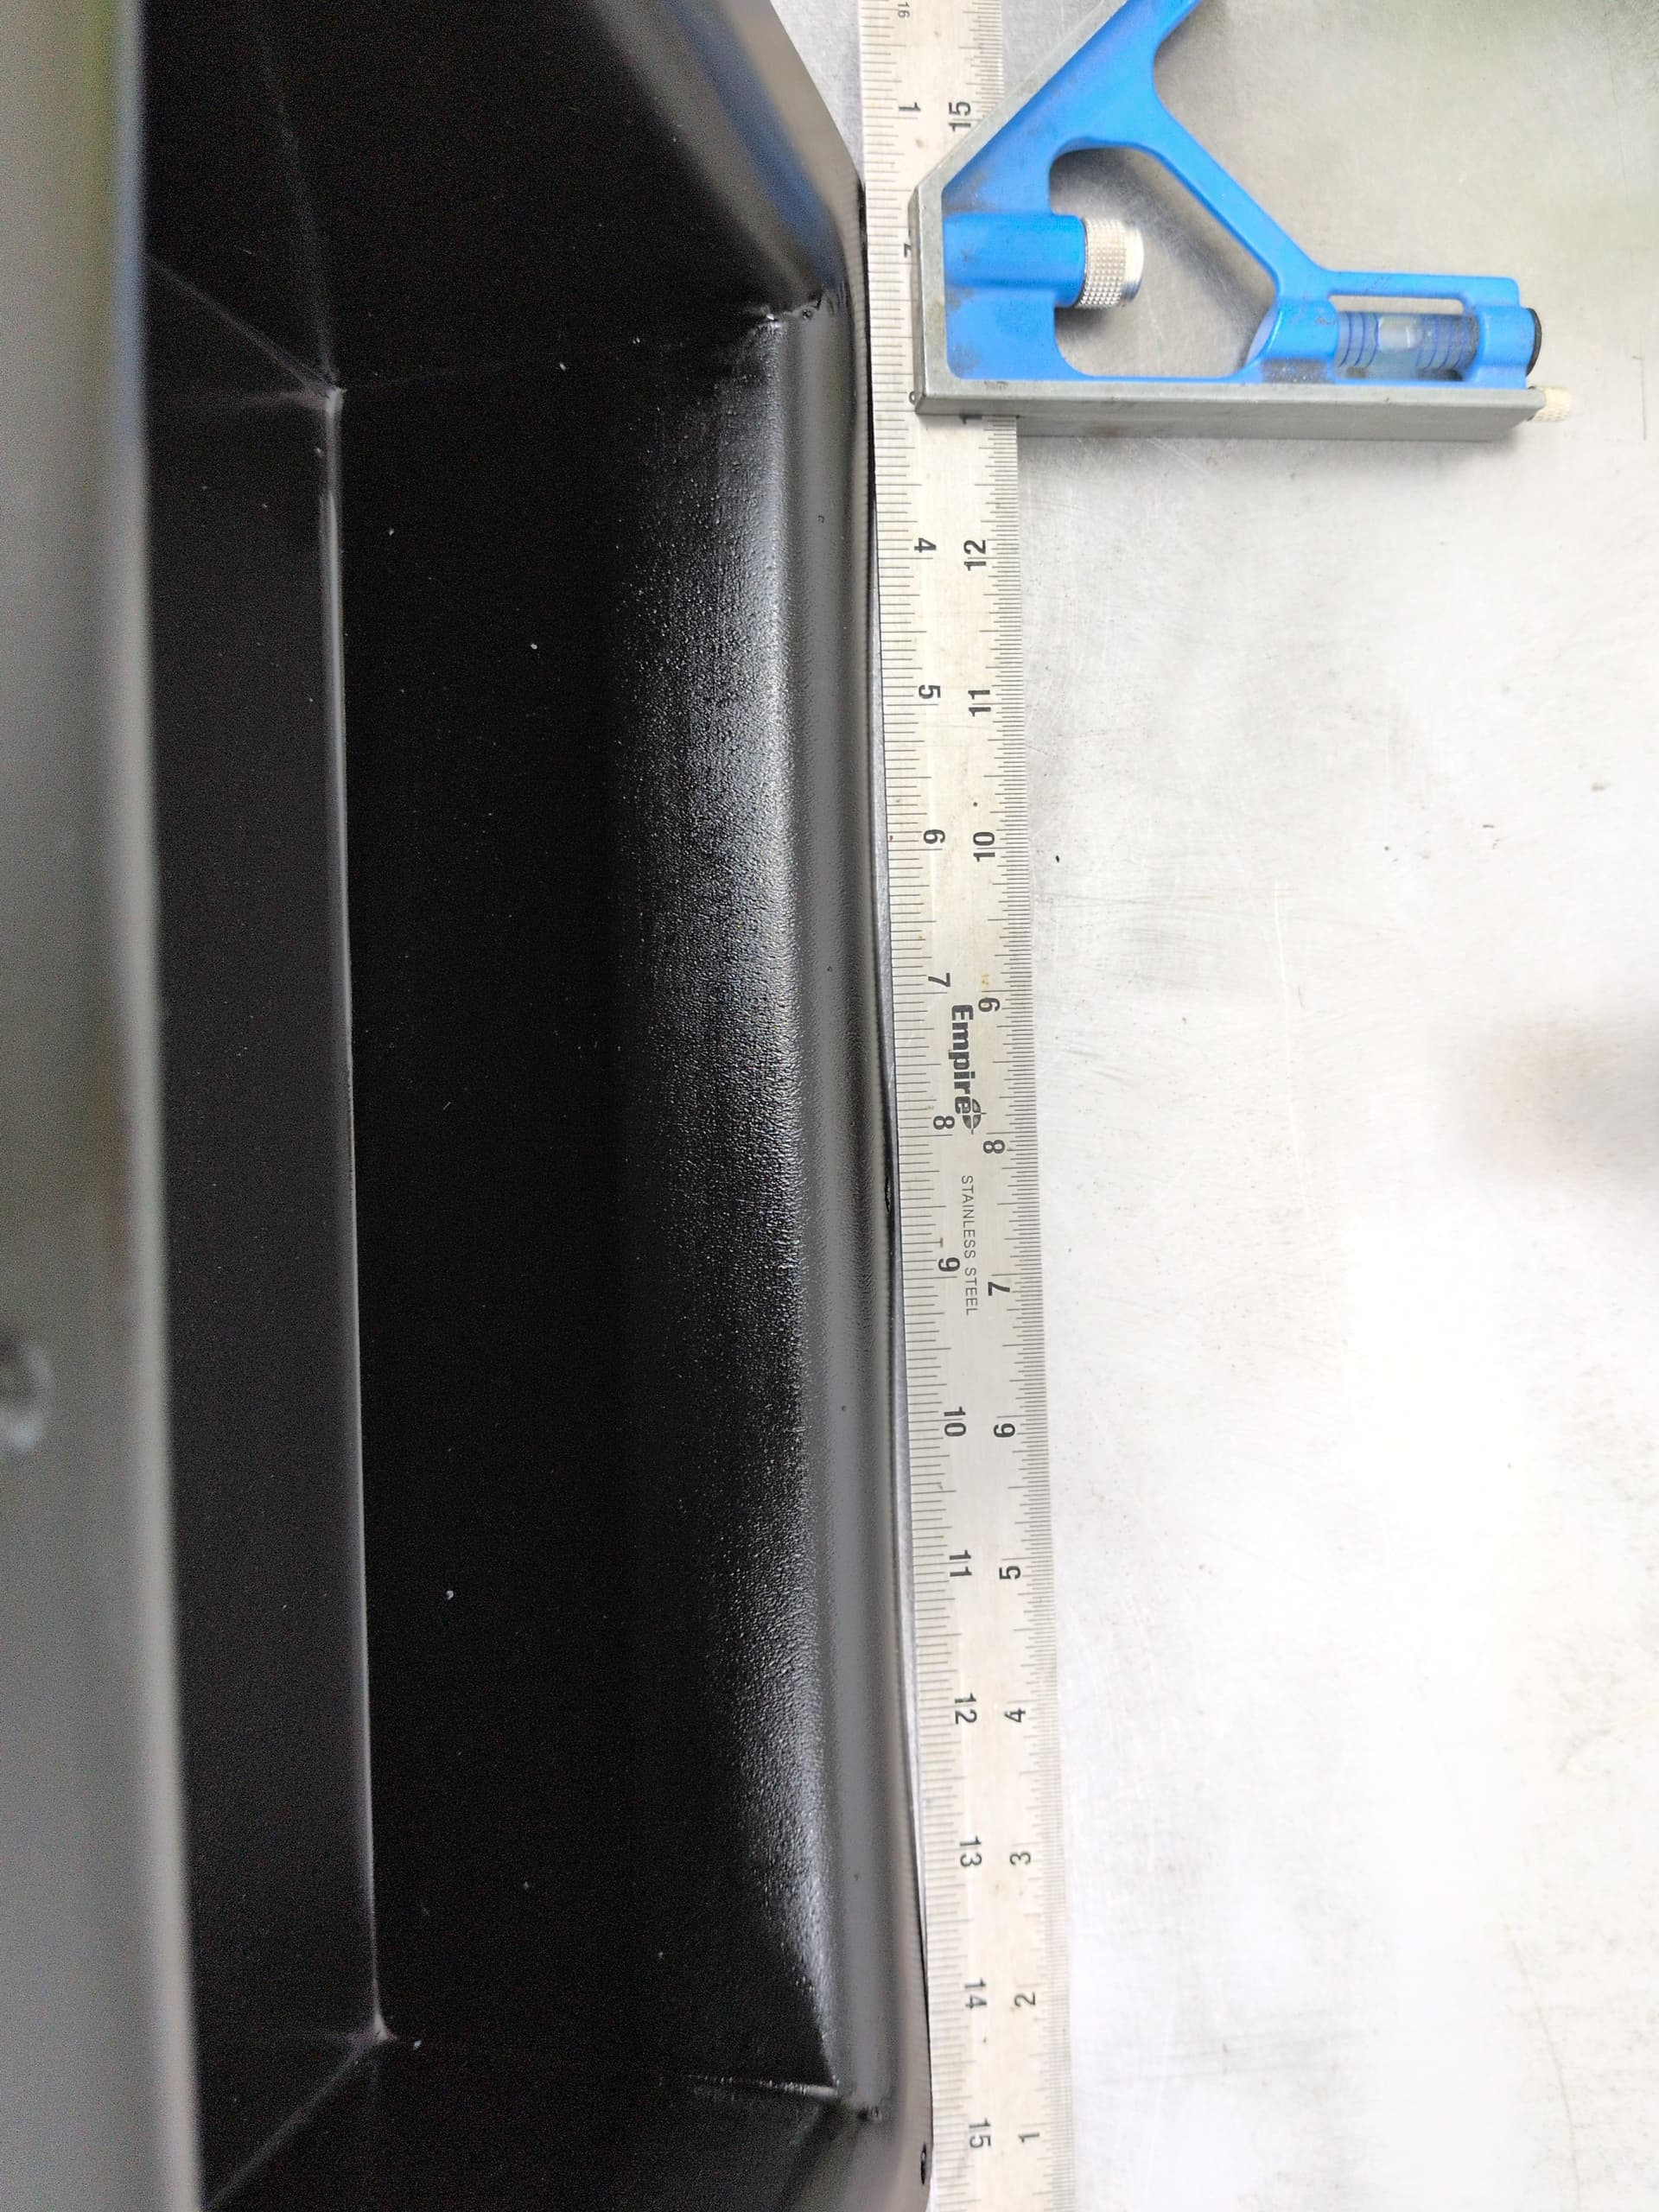
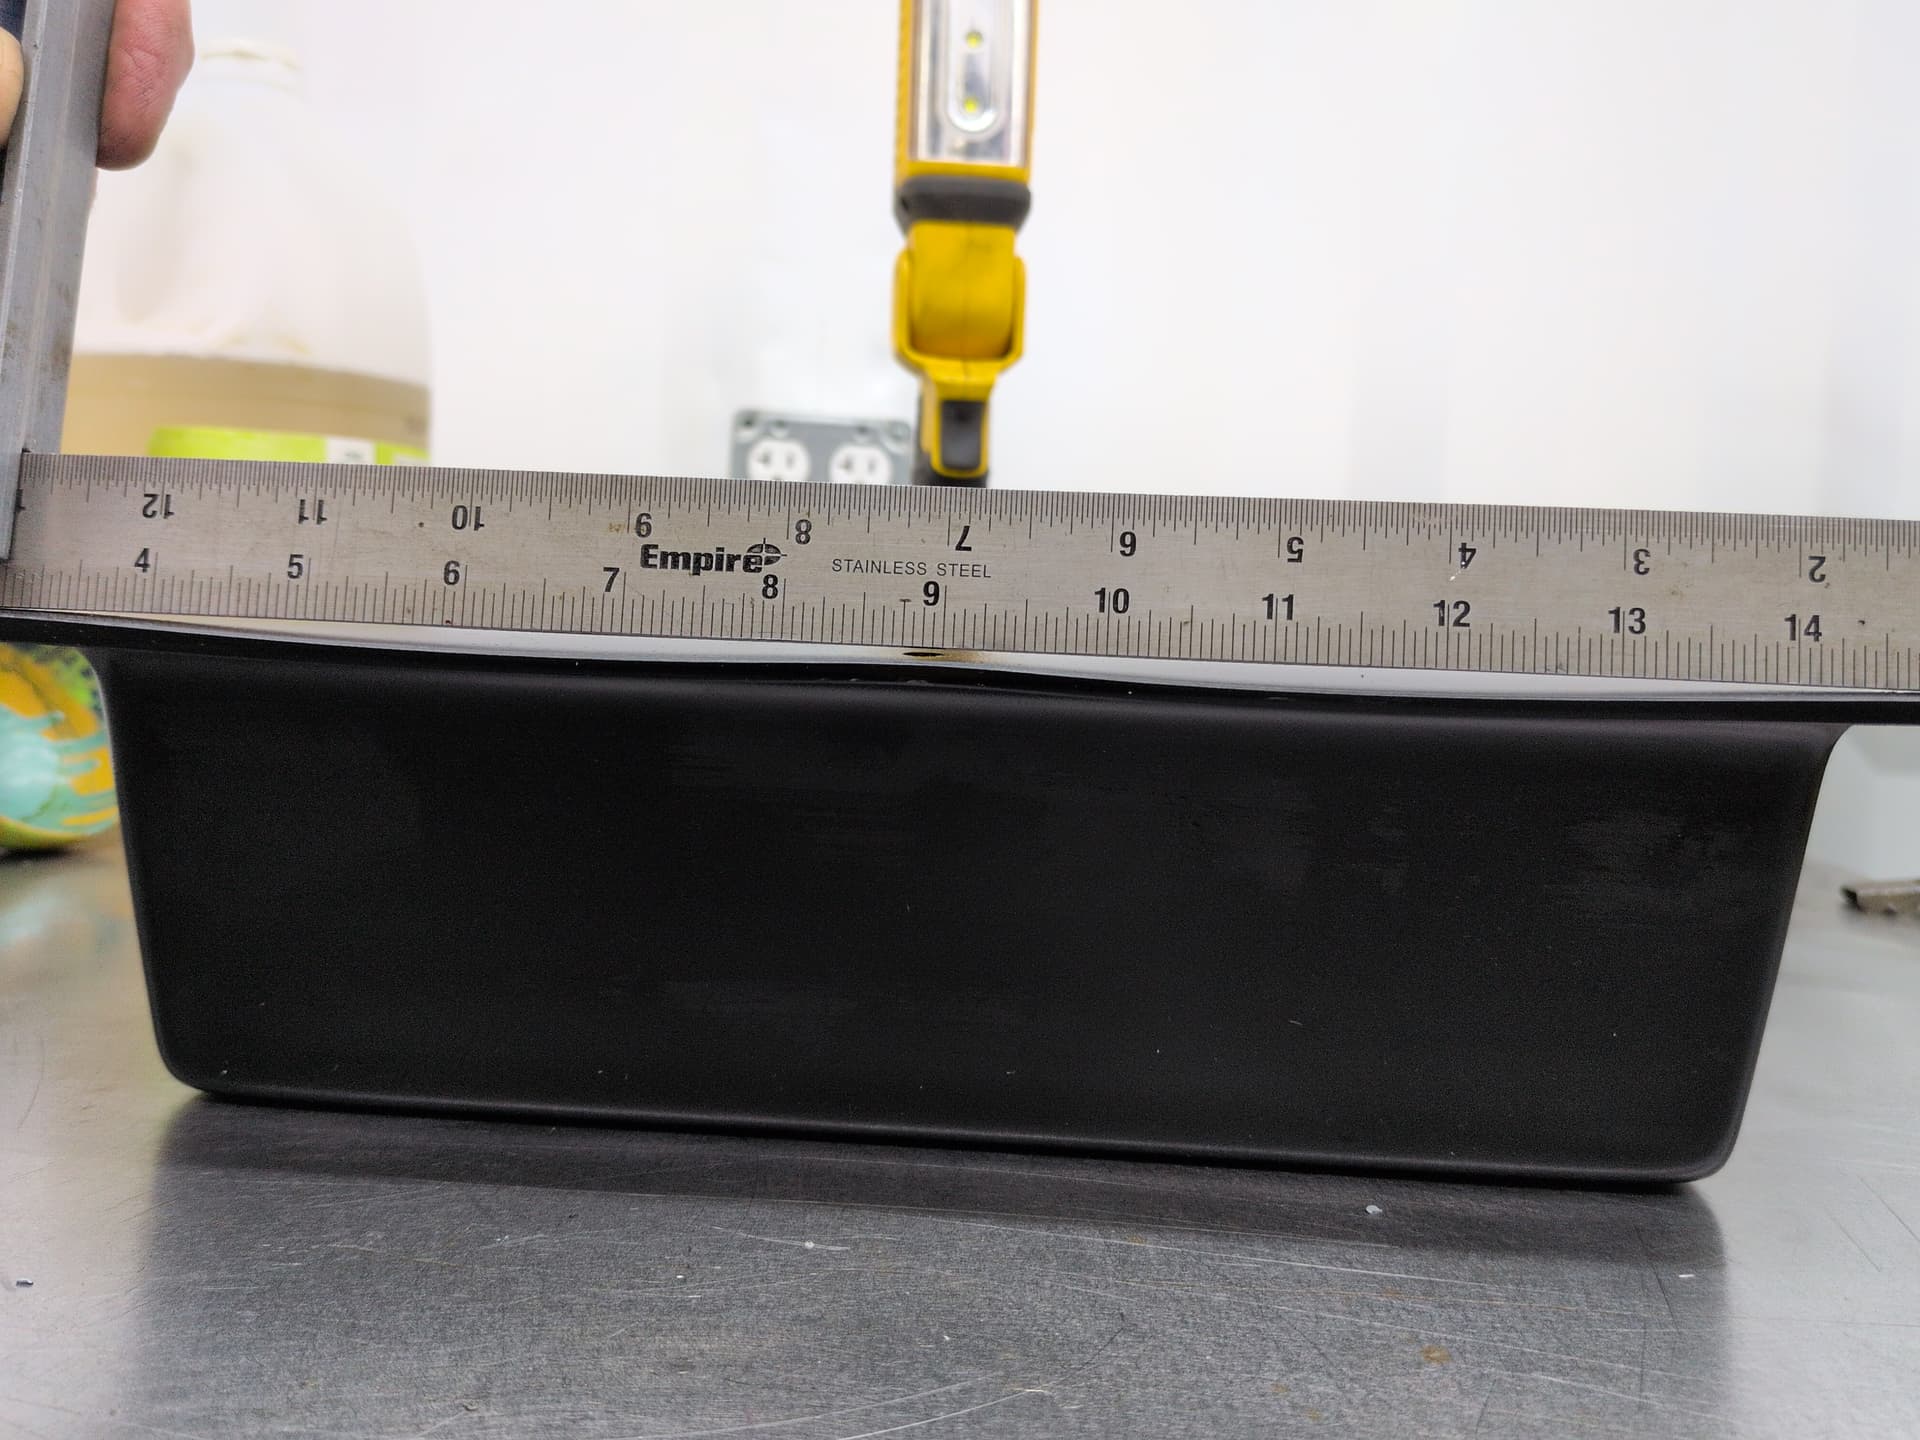
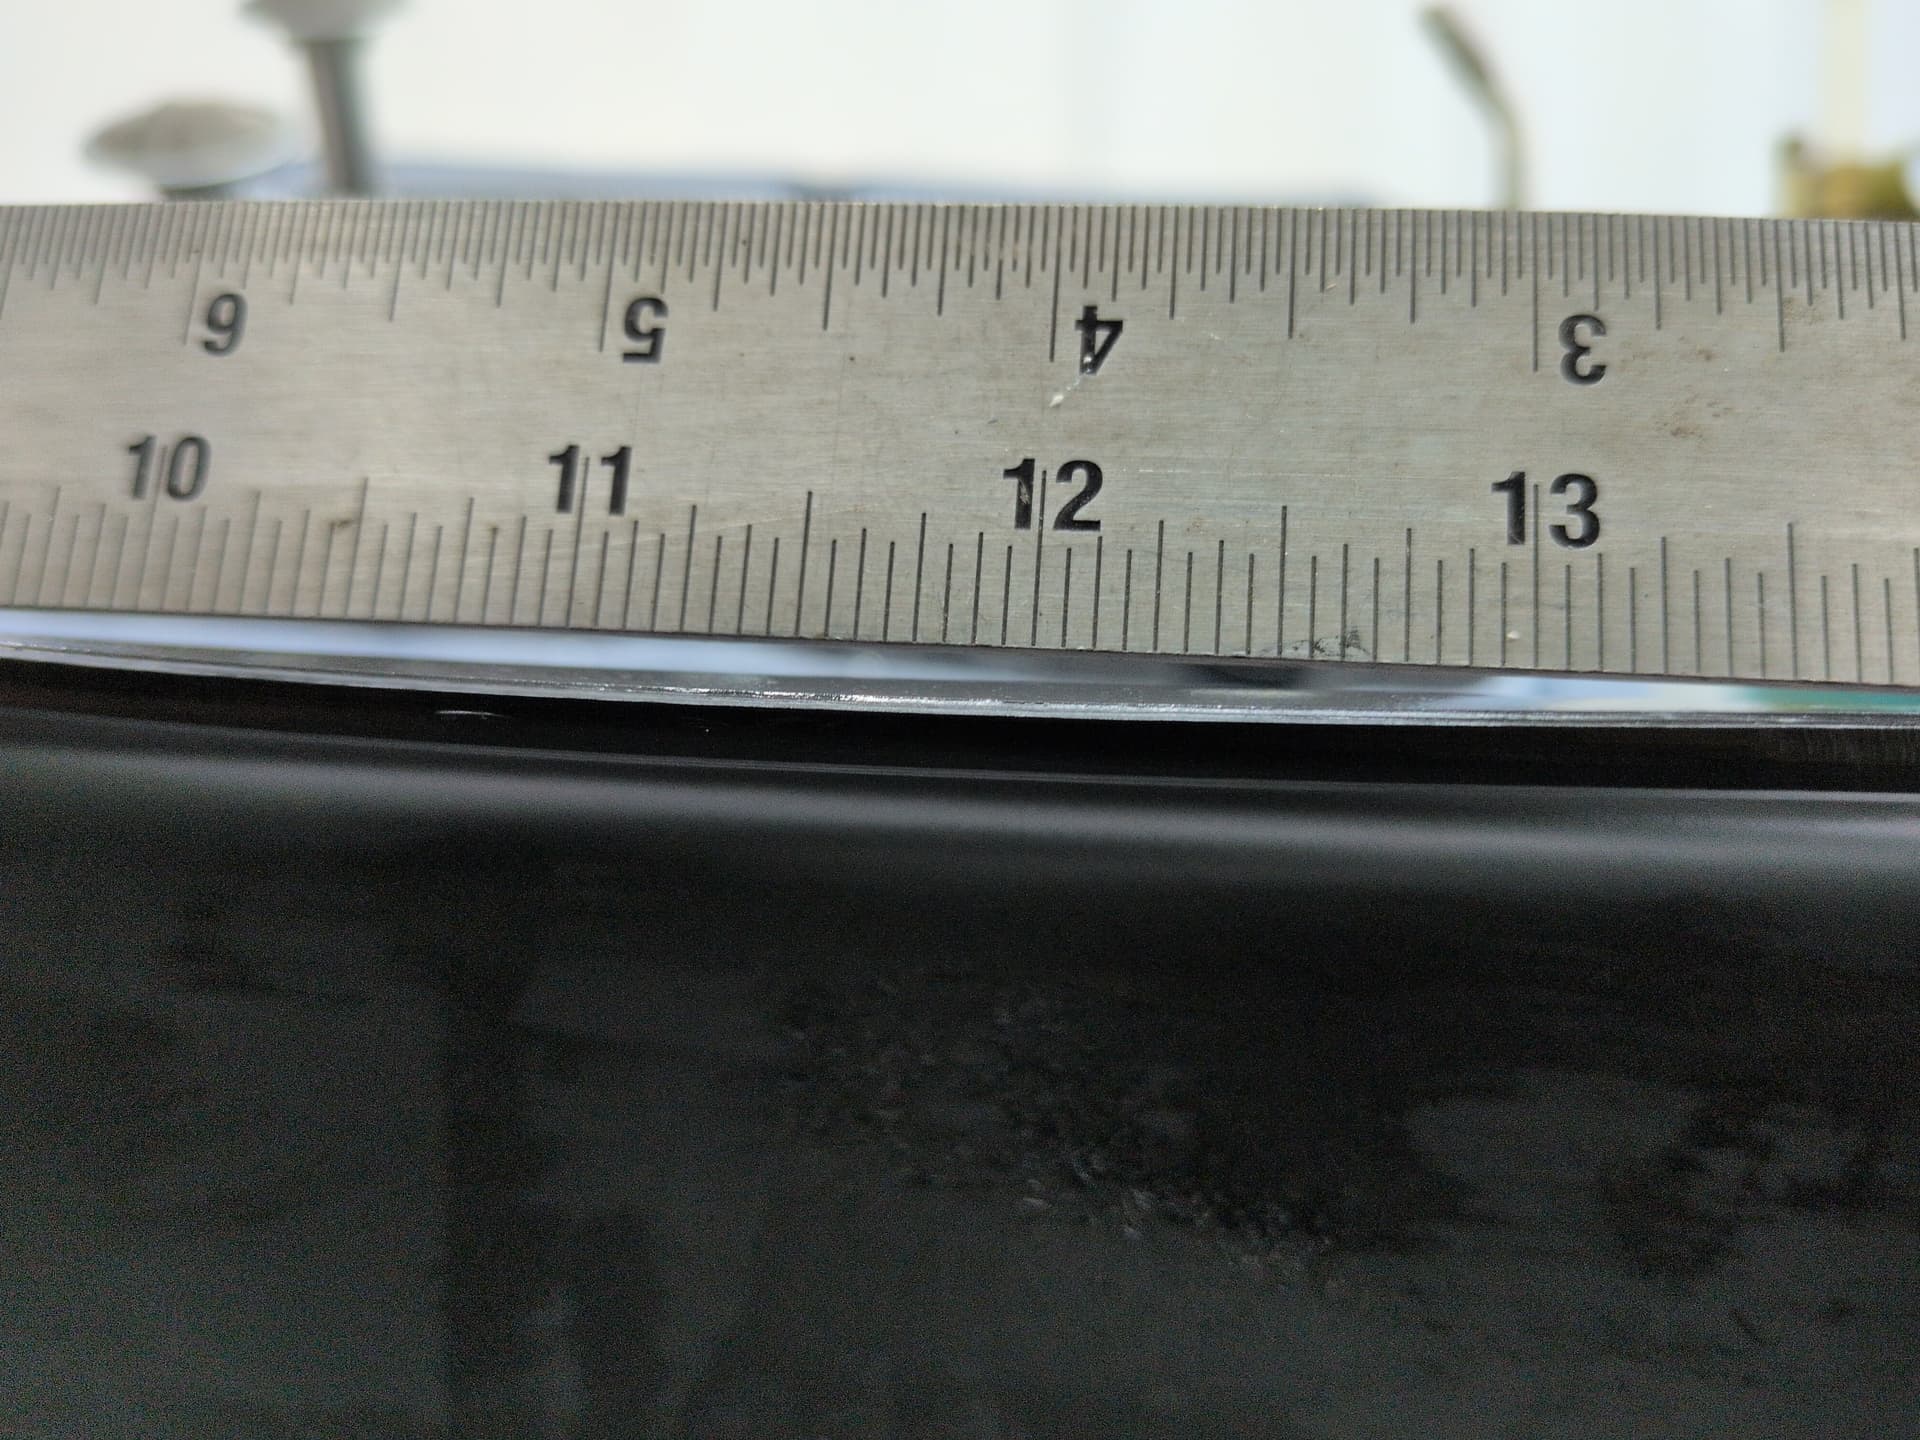
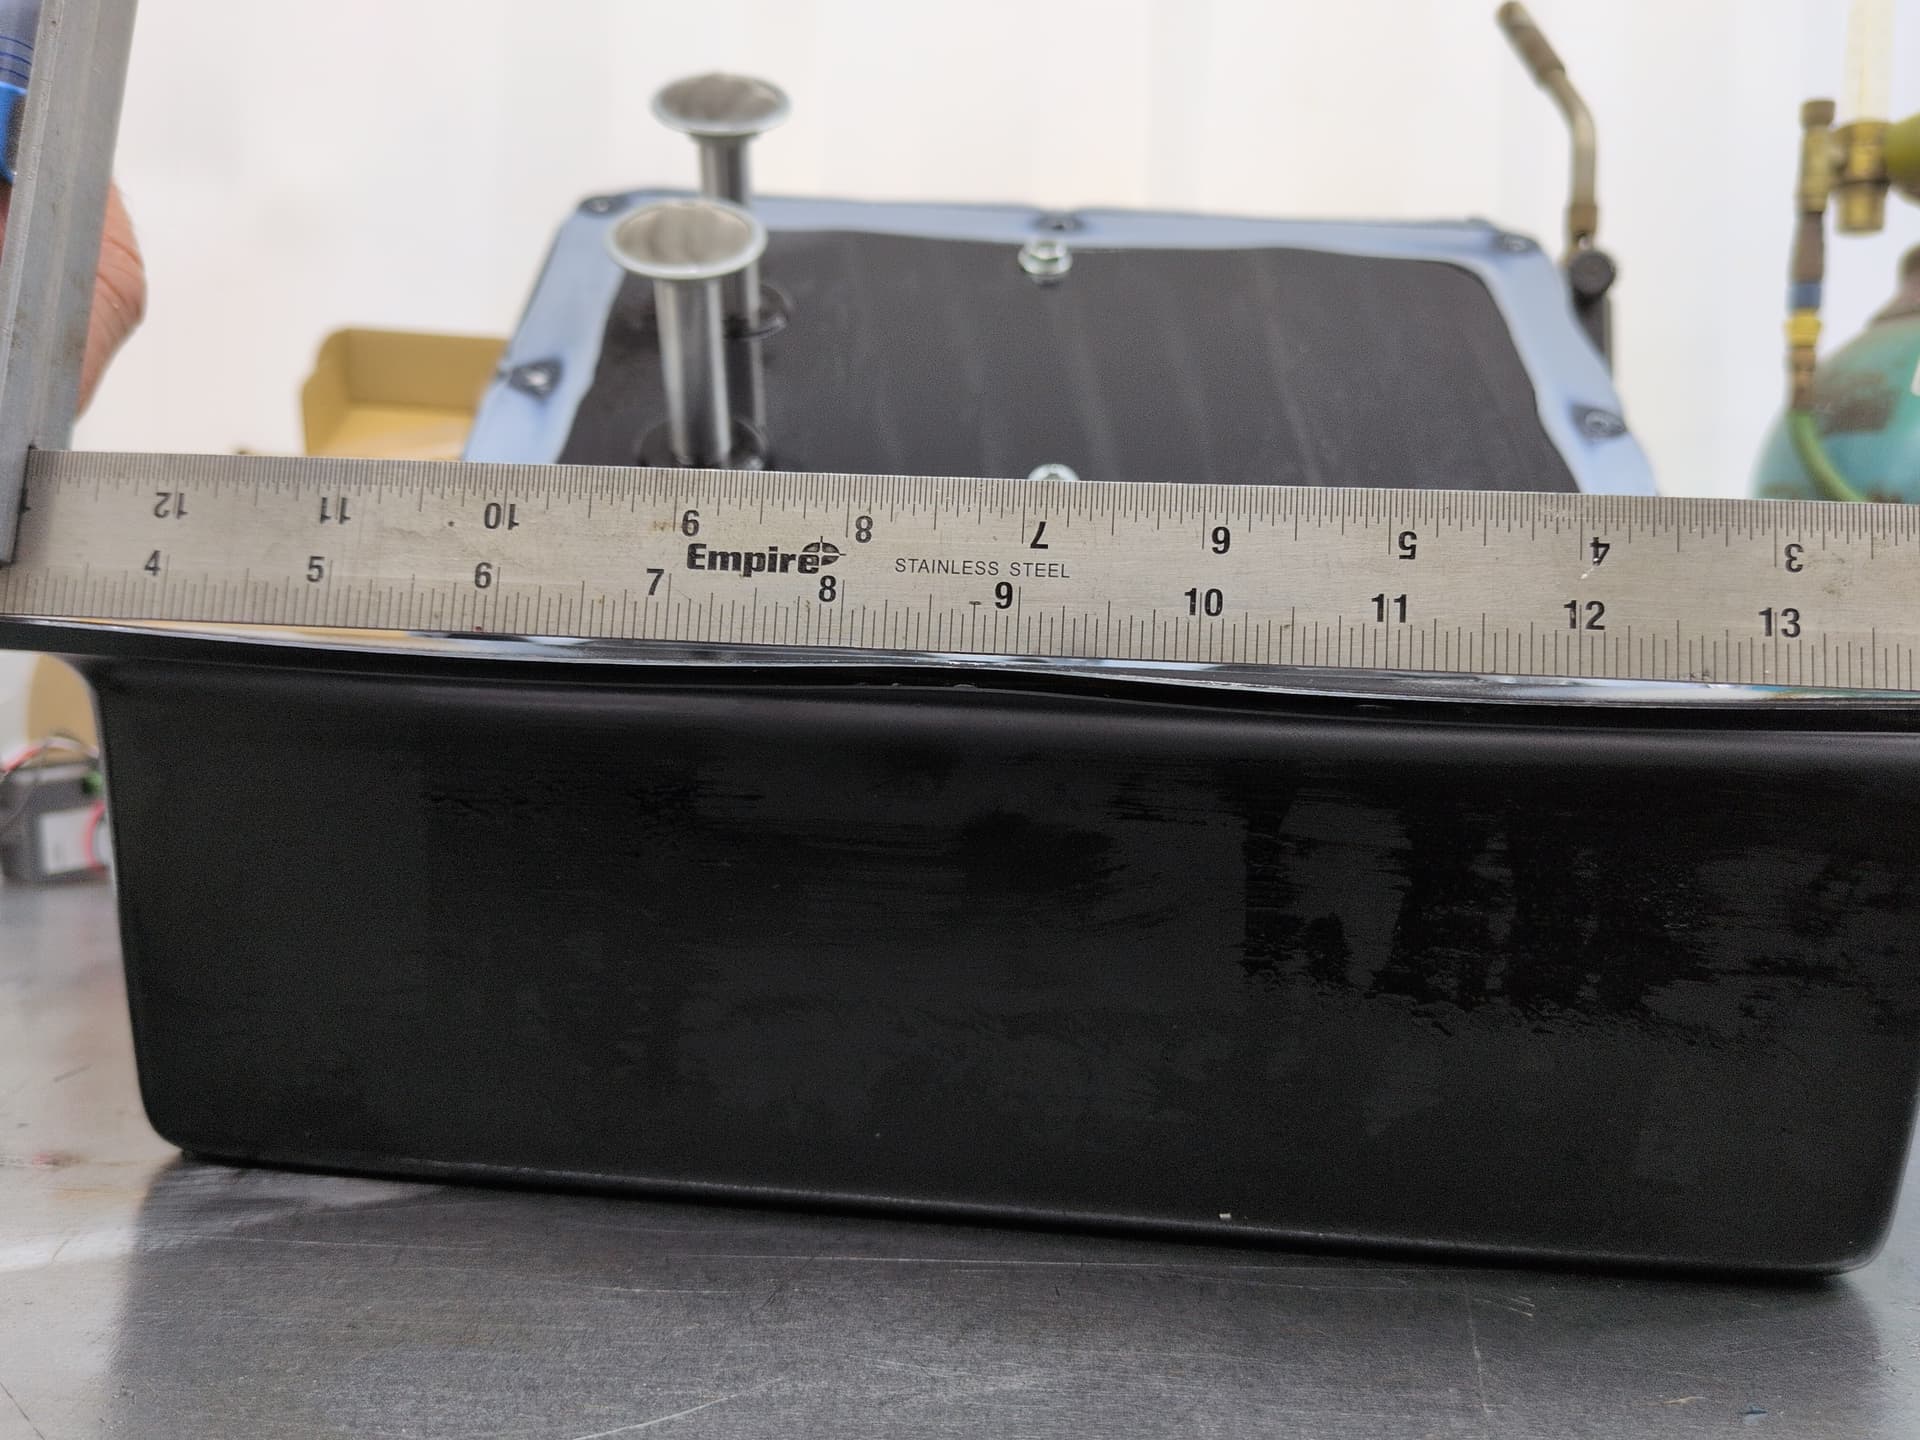
What is the warranty fix for this going to be??? - because i’m sure as hell not putting this pos tank back in my machine. Silicone does not adhere to ABS (or whatever plastic was used to vacuform this ‘tank’. There is 6 inches between bolts, and the sealing surface is warped on all sides over 3/16”. You guys could have purchased a stainless steel restaurant food pan nearly identical to this shape for cheaper than you made this….
I was expecting to have to pry the lid off due to the silicone bonding, but when the bolts came out, the lid was sliding around on it’s own. you can see there is zero silicone sticking to the plastic tank at all.
how hard was that to remove?
We’ve run tests here and the silicone we are currently using does stick - I think sometimes the heat and vibrations of the shipping process does cause it to detach. We’ve also changed our preparation process on the tanks and the number of shipping leak reports have gone down significantly (from every machine last year to maybe 1 in 30 now). Unless you are moving your unit around violently at this point now though, there shouldn’t be any more ongoing spillage. The tank doesn’t really bubble at all. I can send you silicone to re-seal that if you would like. Just shoot me a message.
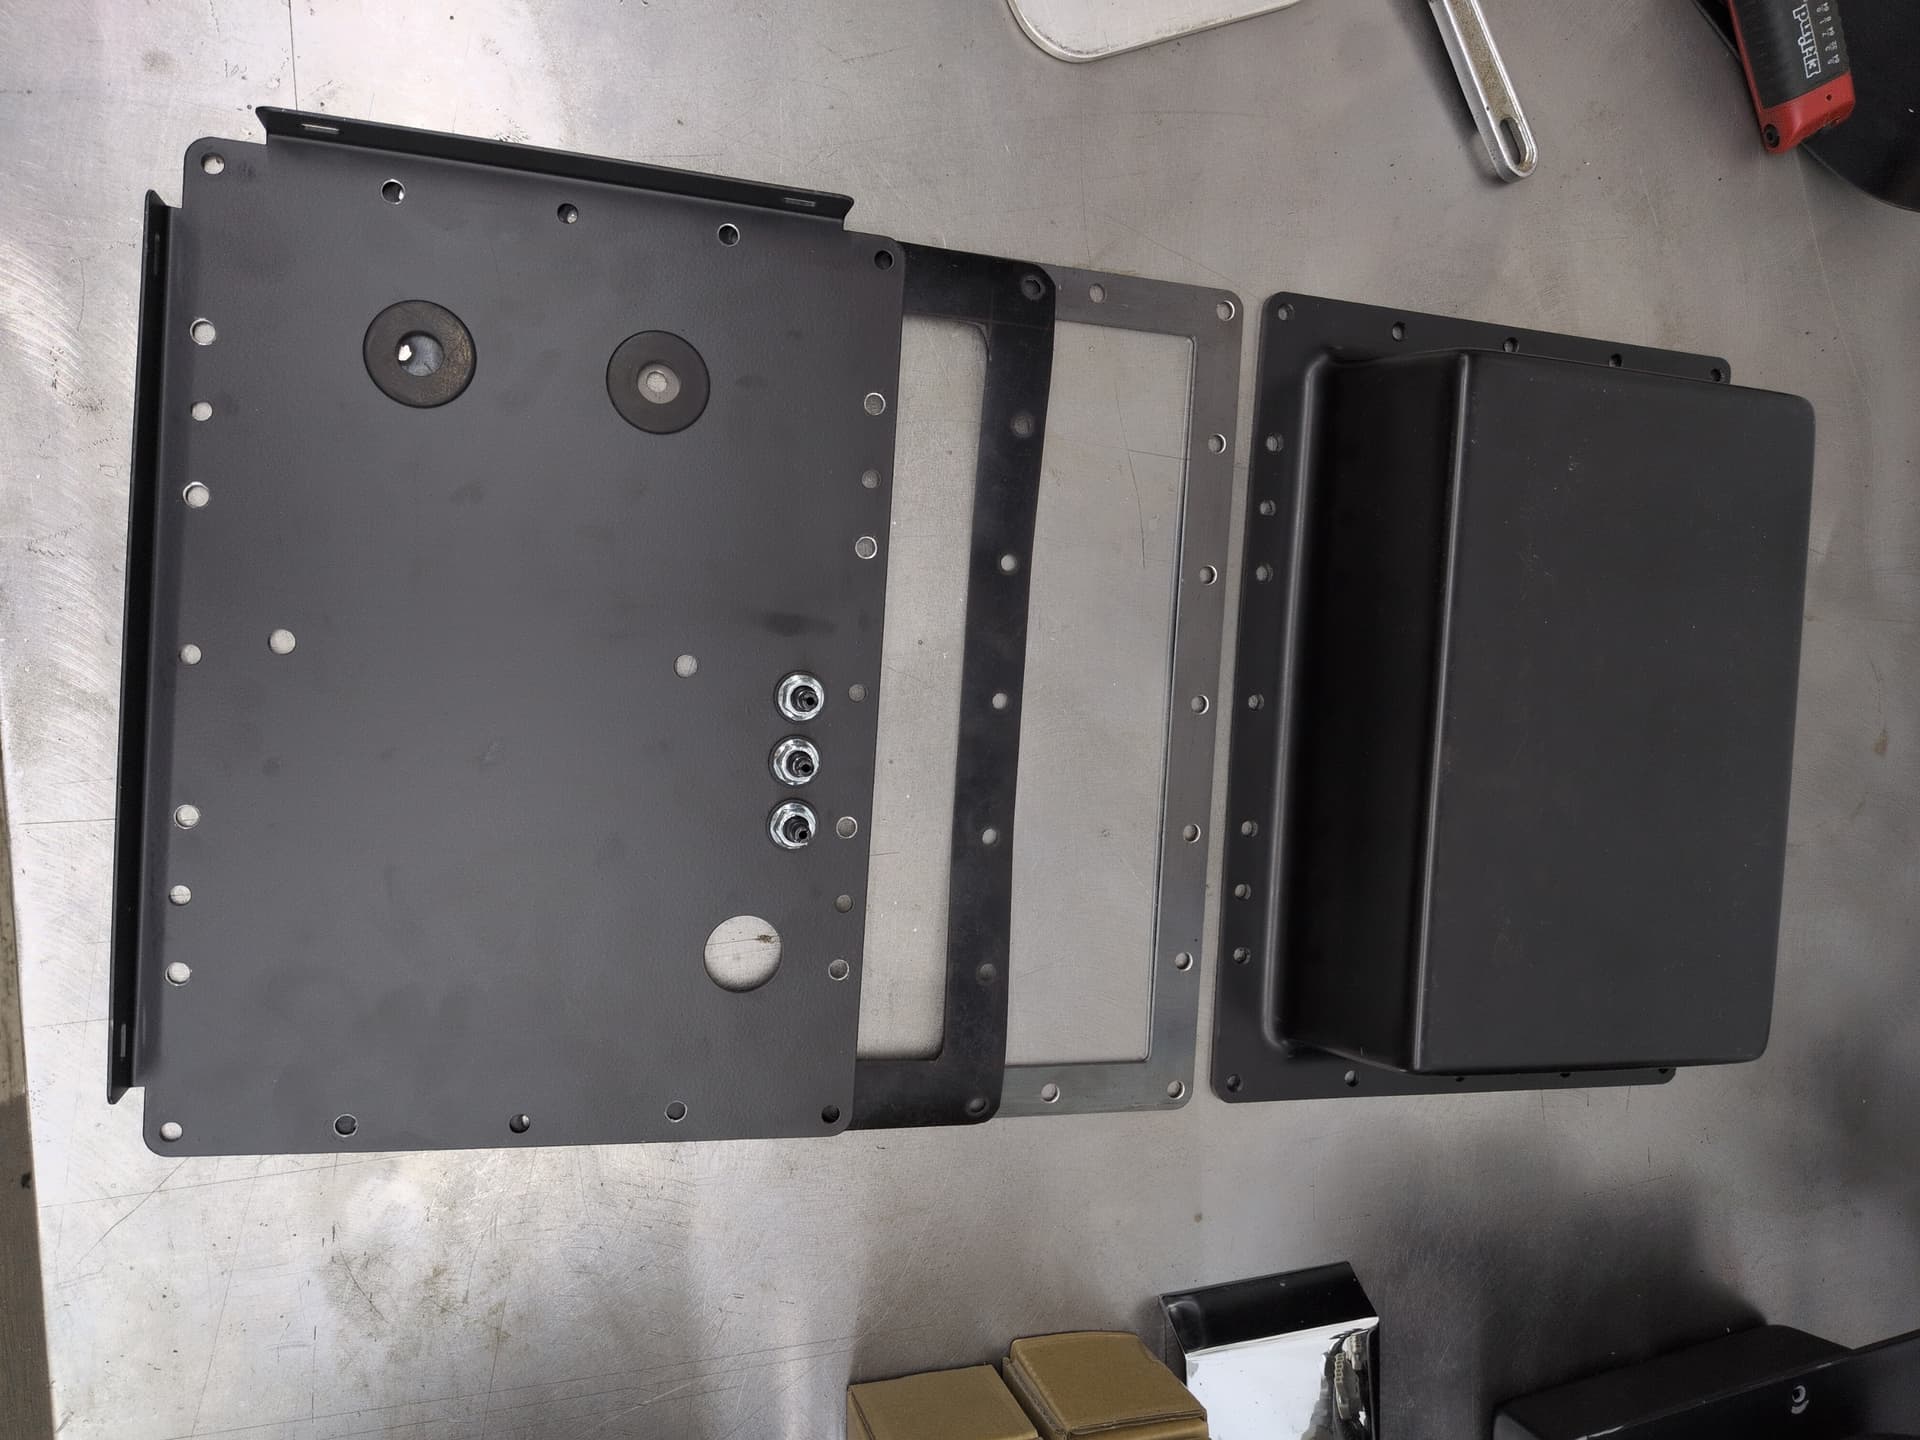
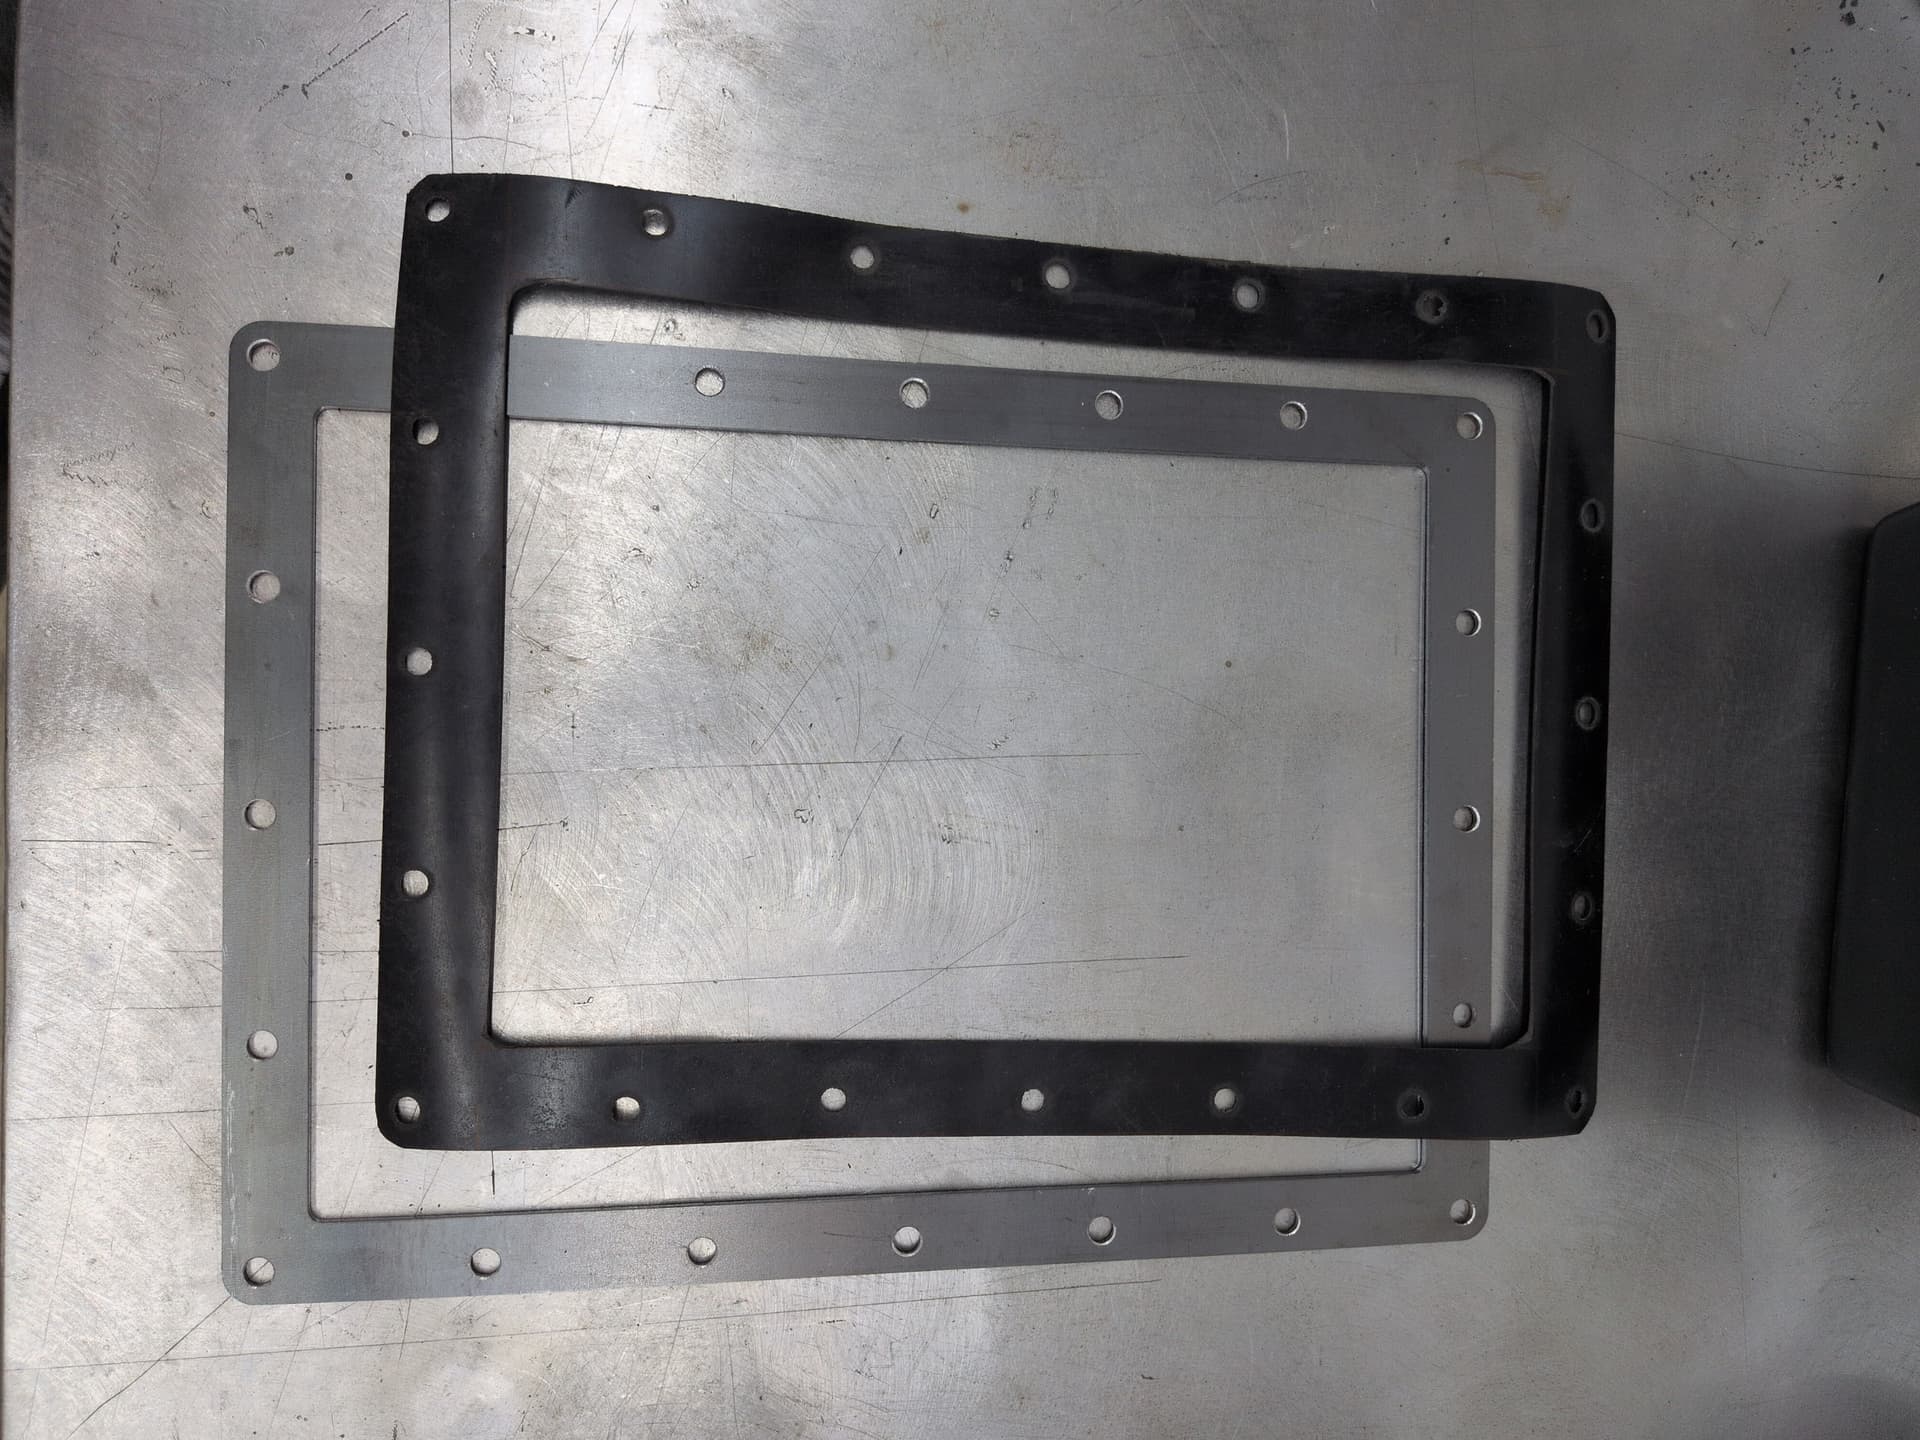
One thing you could do on future units is put 4 strips of 11 gauge steel under the plastic lip and double the number of bolts. Sure you could laser cut a single bezel for under the plastic flange but that would cost a lot more and waste material. This would pinch the plastic tub’s flange between the steel and not allow it to deform as much. Laser cut 11 gauge steel strips would only cost a buck or two. Just brainstorming to help reduce future calls to the support guys.
Or when you get the plastic tub molded you make its top flange the shape of the MR-1 coolant tank. This would increase its rigidity giving you a better seal.
To the original poster I suggest strips of steel and doubling your fasteners since your unit is already warped and will require a massive amount of sealer to fill the gap.
I can also send you out a new tank bottom that is not warped like yours is. I’ll work to get a shipment ready. Taking another look at your pictures, that does look like a very severe case.
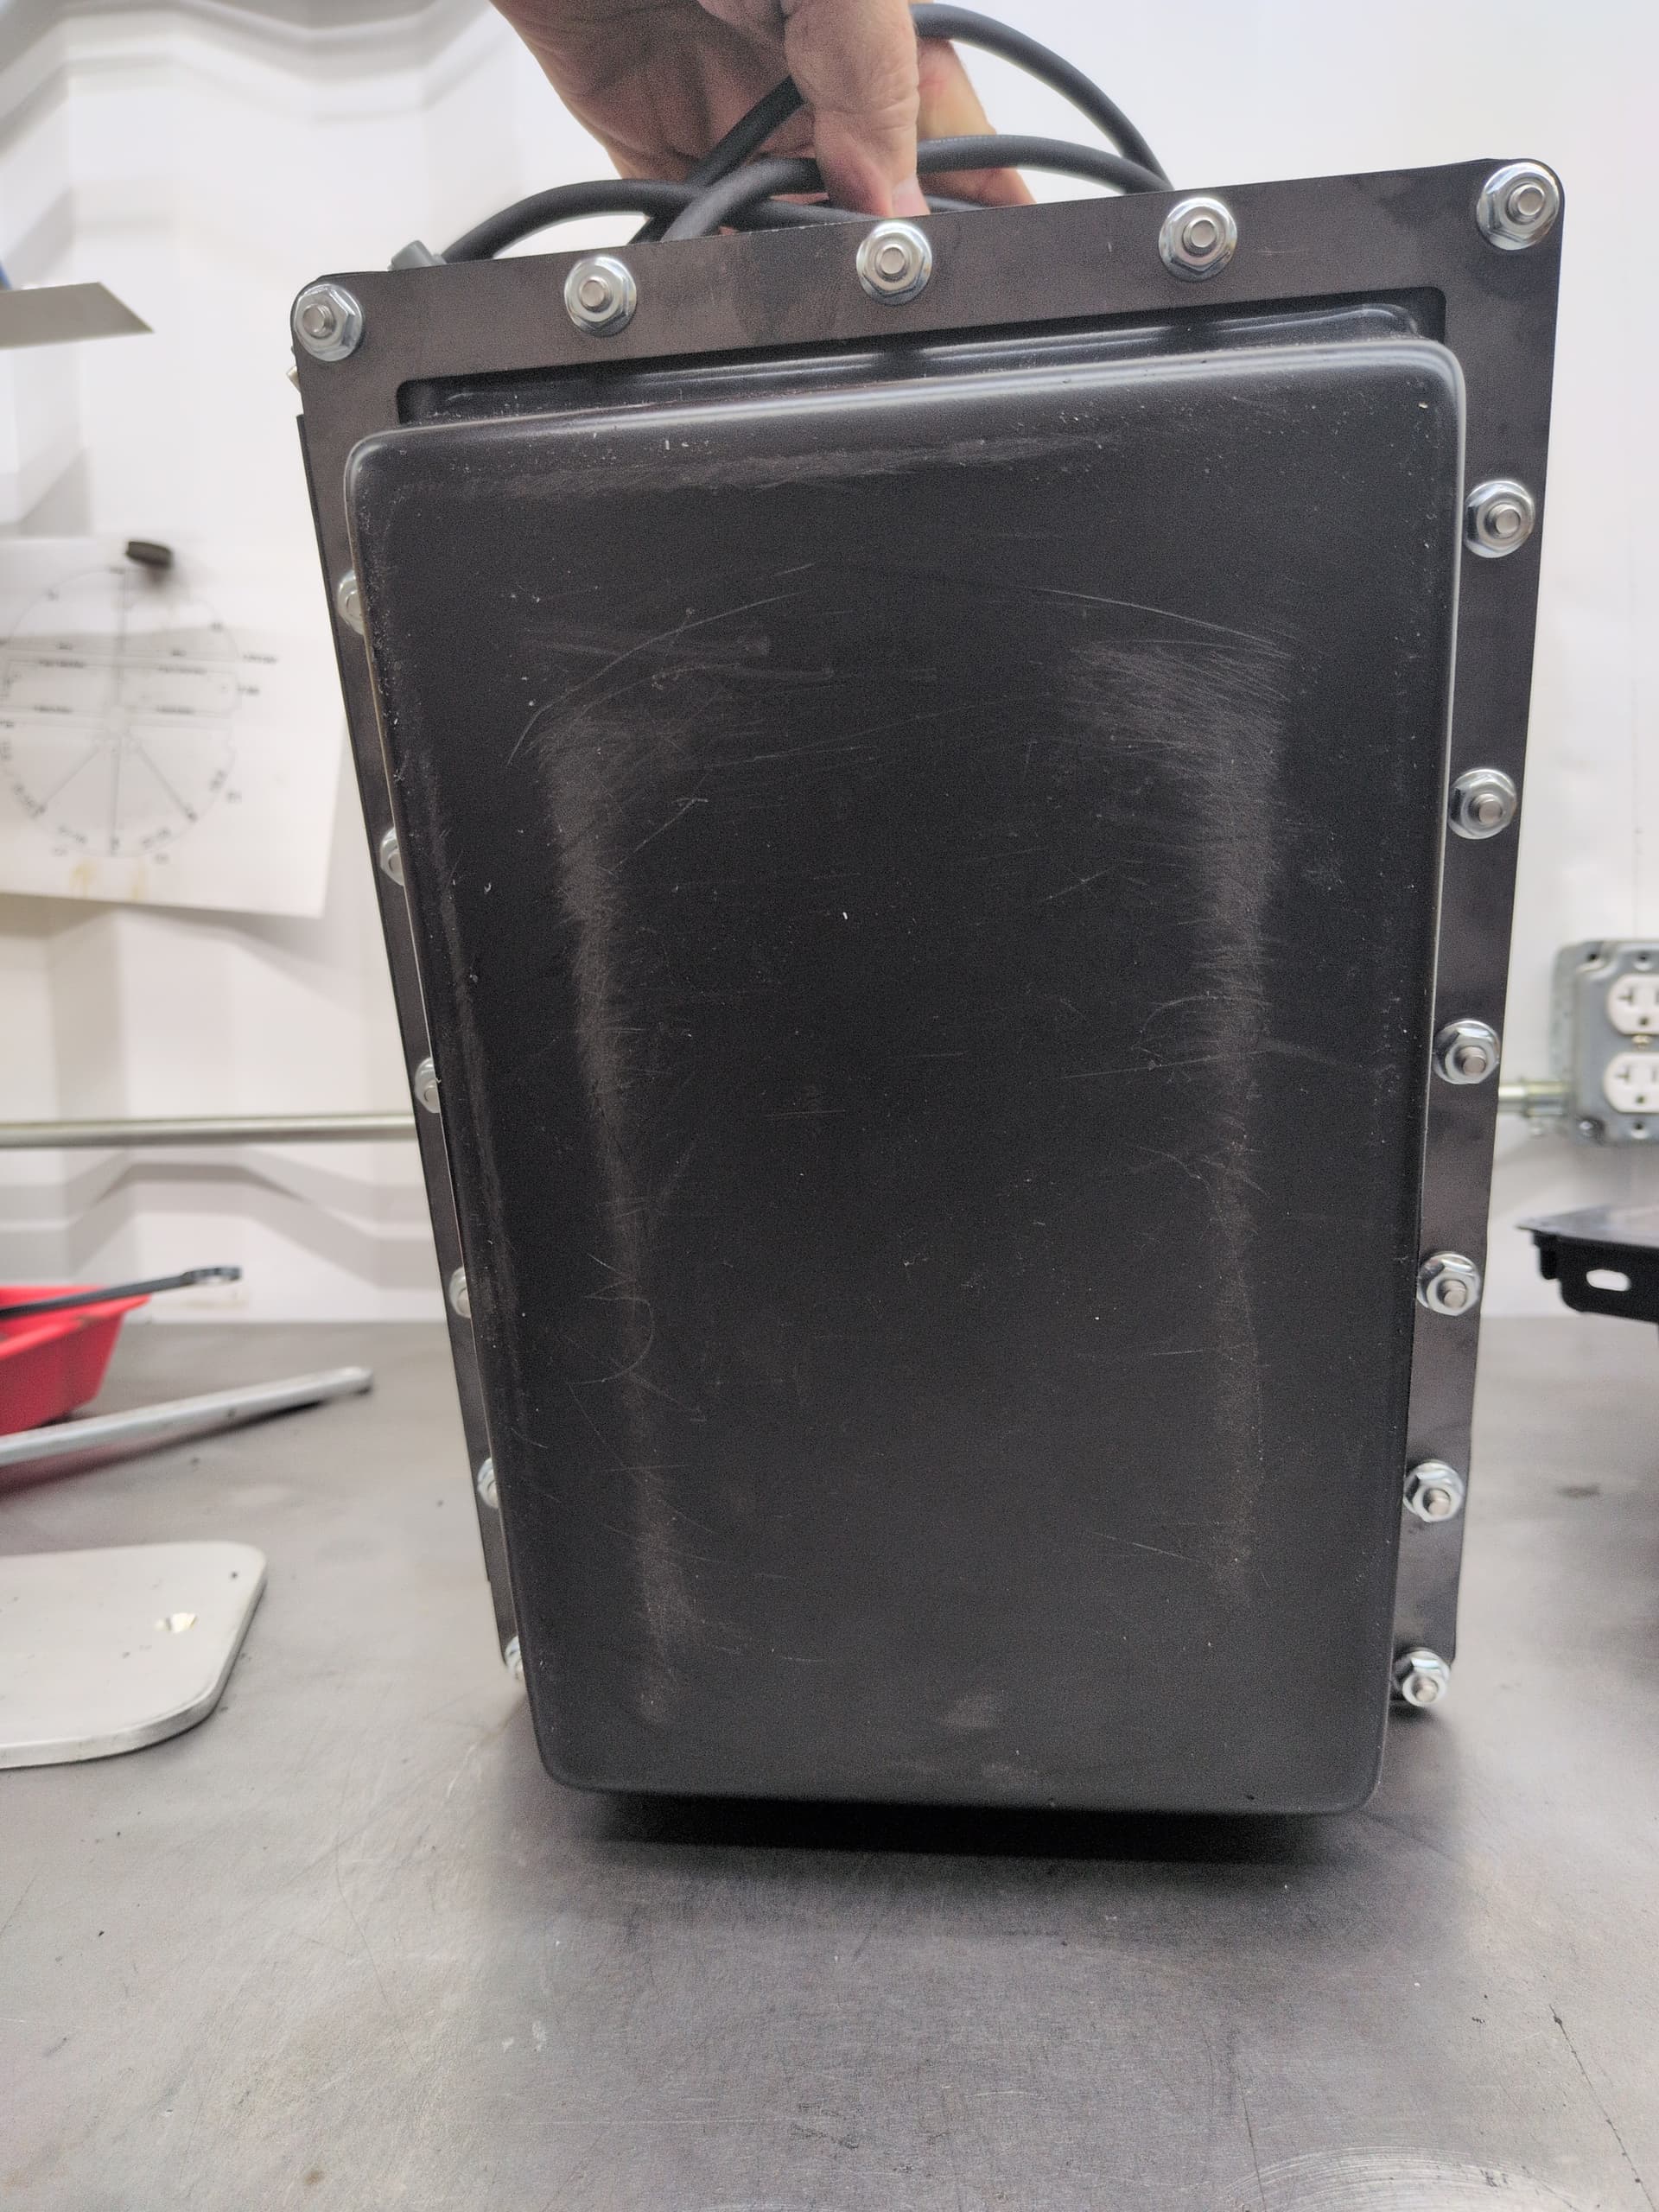
Sam, the tank is warped severely as you can clearly see in the photos - there are 3/16” open gaps on all sides. The machine is on wheels….wheels for moving and rolling around the shop when needed. there is no way to move an 800lb machine around with an open top bucket of oil in the electrical cabinet and not make a huge mess. A machine that doesn’t get moved is never going to leak, and no one is going to tell you there is a problem, so the 1 in 30 is not an accurate reporting of this problem. “you’ve run tests” - which tells me you have ran into problems with this issue previously. what brand of silicone were you using before? which brand and type are you using now? It sticks for about 60 days, then it separates from the tank. Are the tanks warped when you install the steel lid? or is the oil causing the plastic to cross link and expand after you bolt them on? Just “put some more glue on it” is not going to cut it with me. My machine is down, no parts are getting bent until this is fixed properly, and i’m not going to band aid and zip tie this together. You saw the photos of the warped tank and made no mention of it being a problem at all.
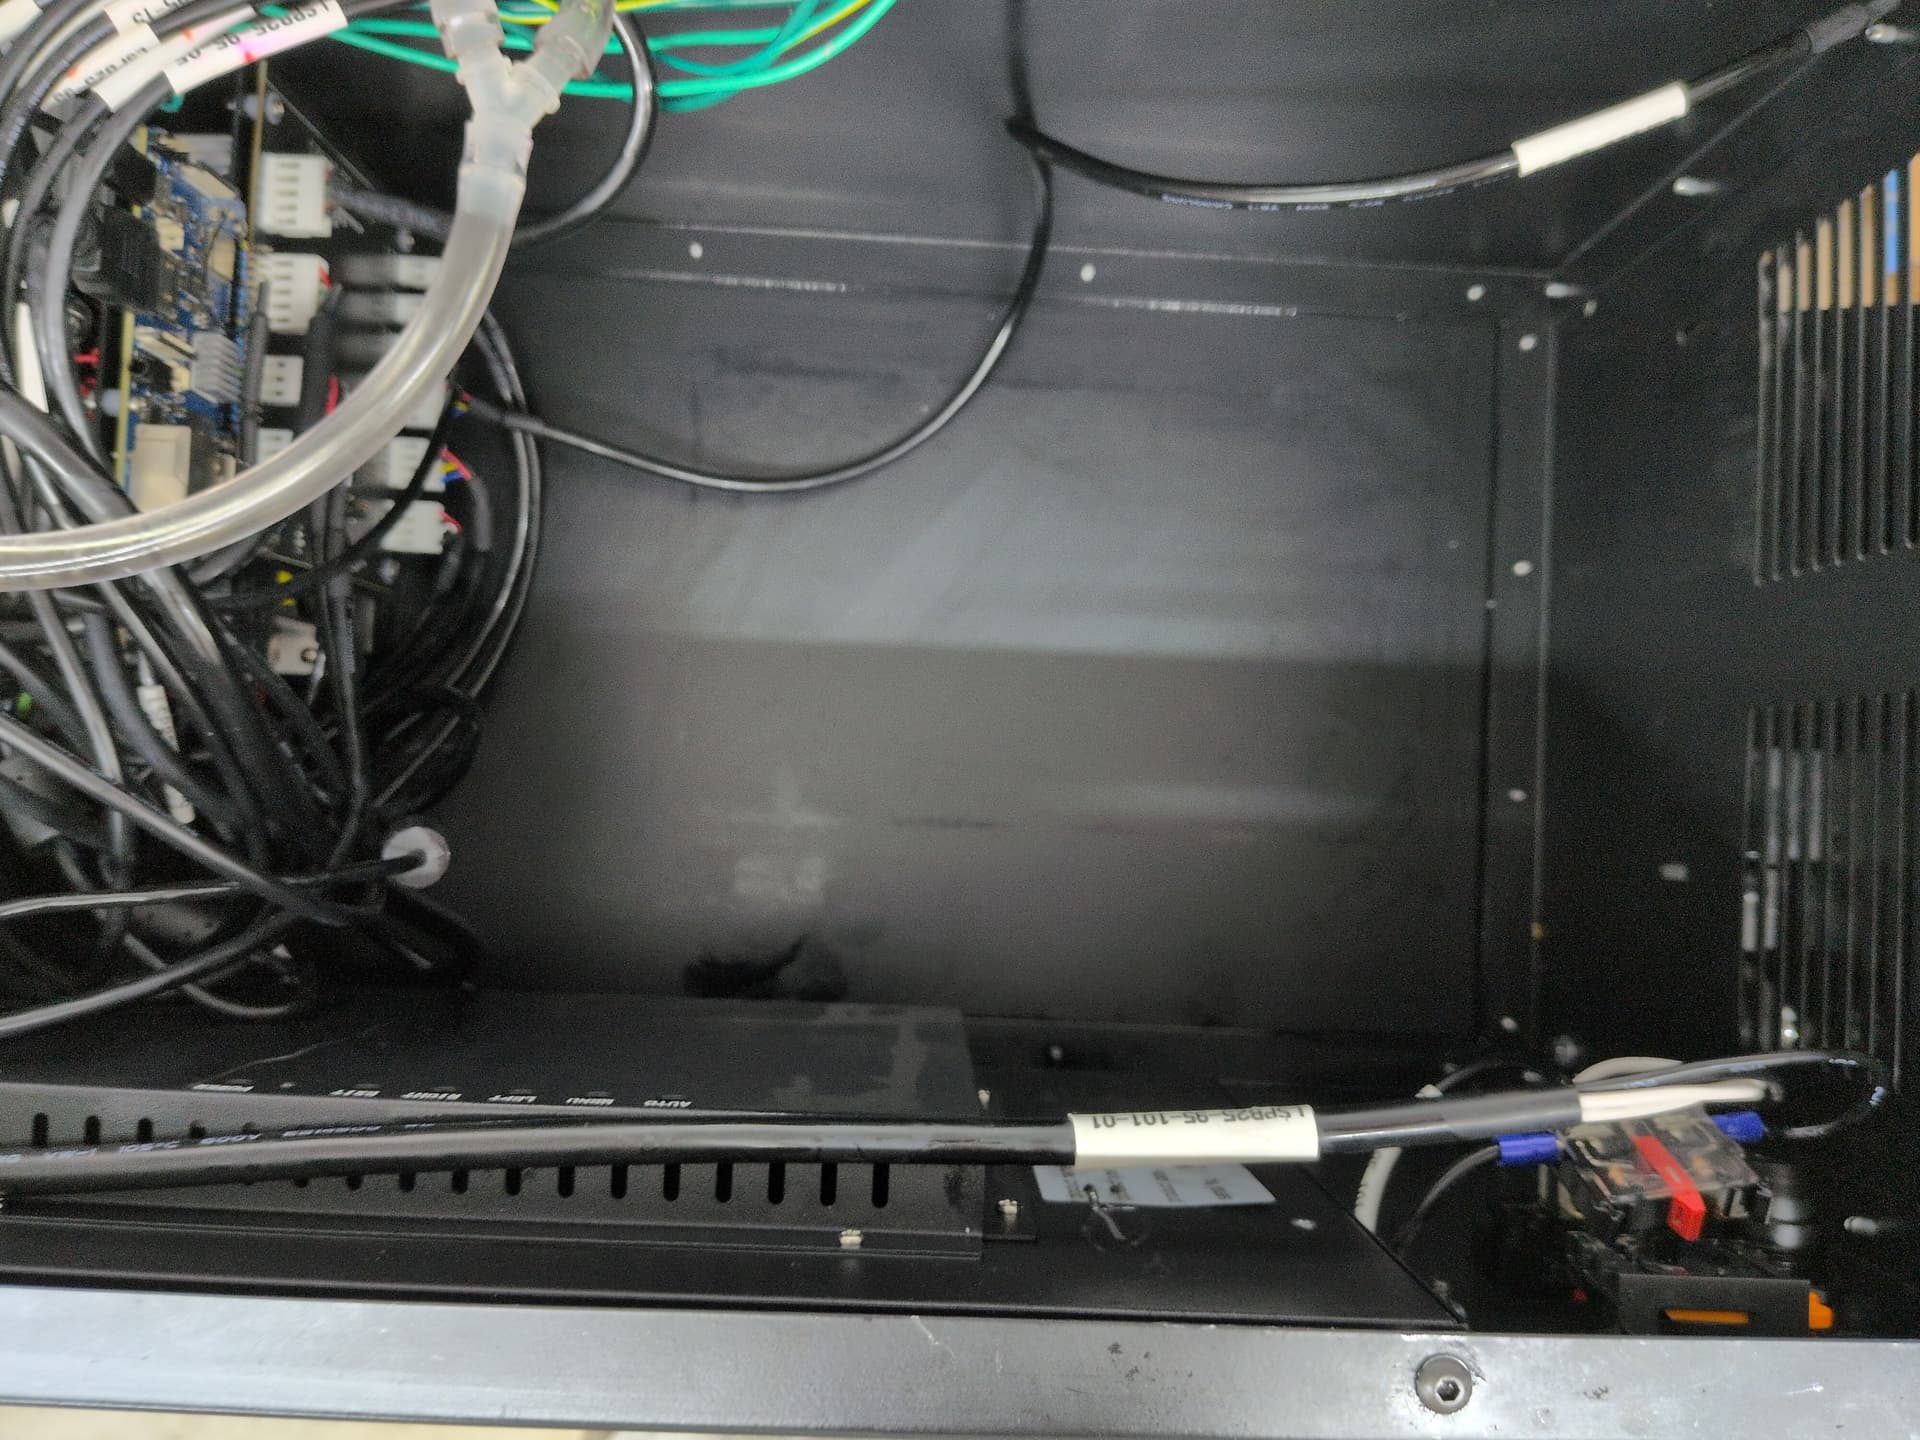
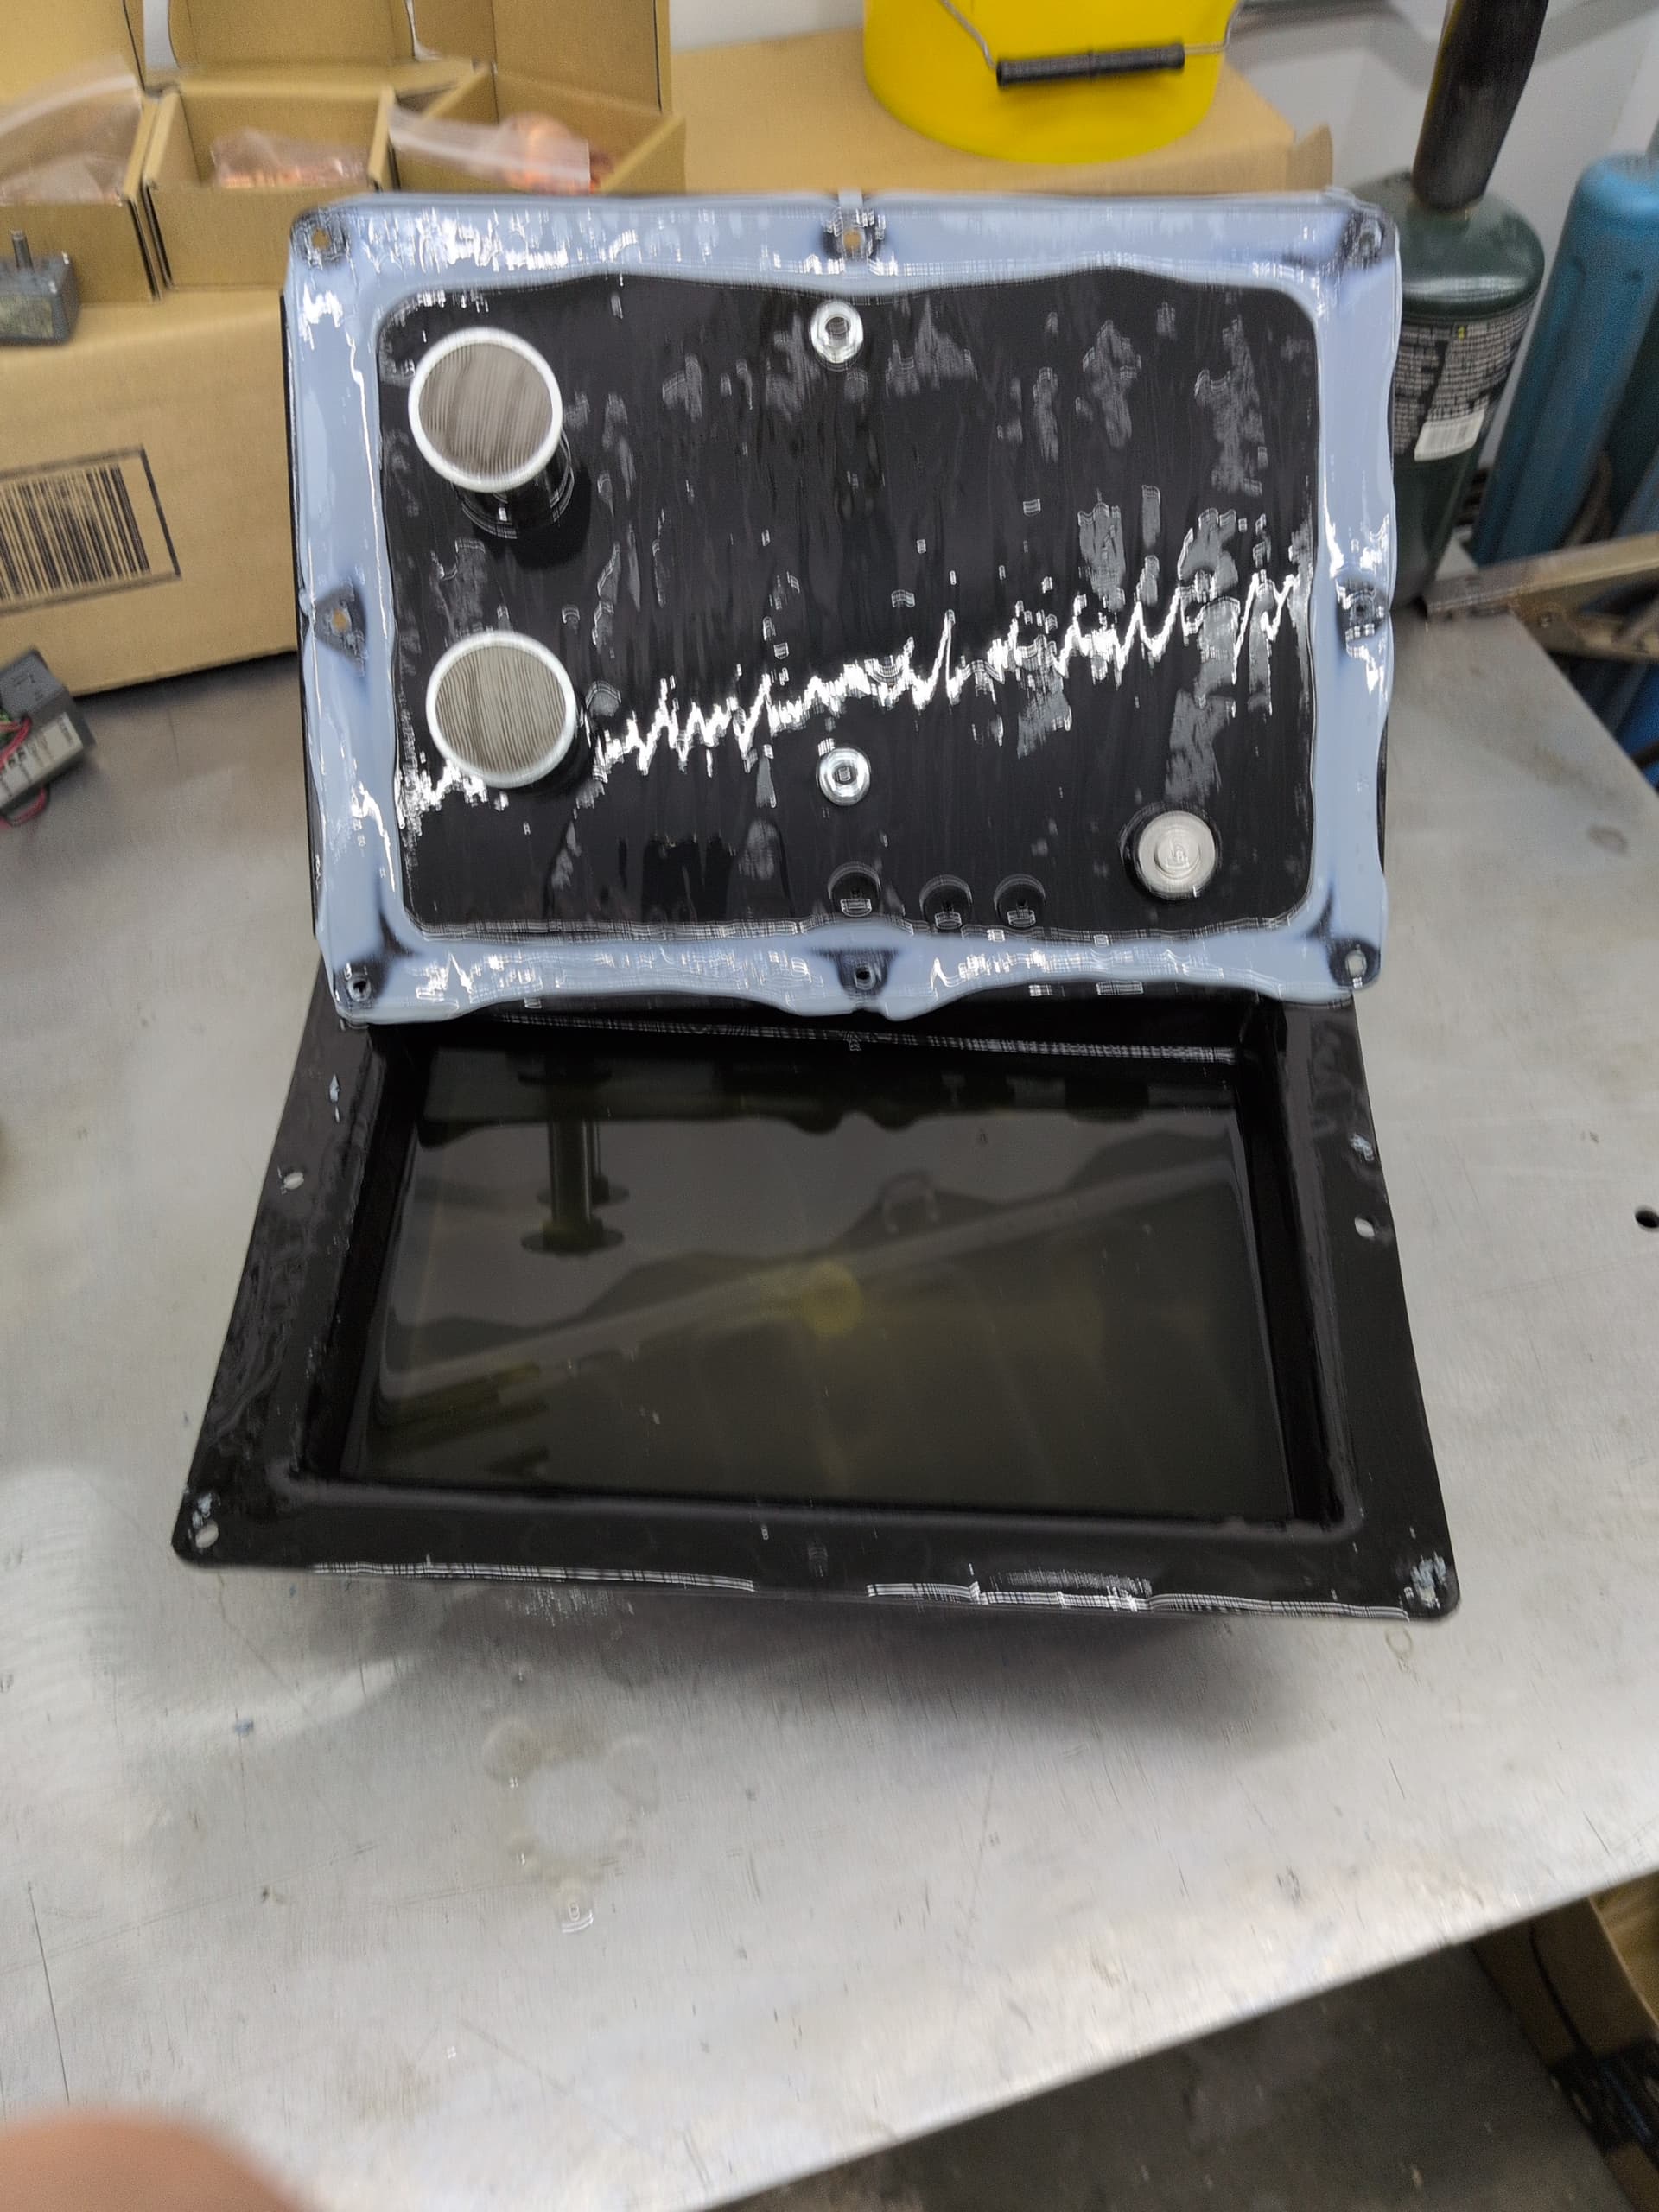
removal requires draining the tank - either a siphon hose in the fill port, or an extension on the return line and use the bleed function to pump it out.
The two hyd lines on top can be rotated upwards so oil doesn’t leak out. 4 electrical connectors and very carefully move the wires and cables out of the way. The tank/pump assembly has to be rotated to get it out, and it barely fits. There are only 4 screws holding the tank in place are all on the lid, one is hard to get out. that is pretty much it, my machine was already sitting in a puddle of oil, so cleaning up the mess required taking the tank out anyway. Take some photos of your warped and not sealed open top tank as well.
good suggestions. I’d still opt for a stainless steel food pan with a stamped flange if I were going to fix this the right way. I assume the tanks are severely warped when they come out of the vacuform, or maybe when they cool and sit on the shelf for a day or so. The fact that every machine sent out has this same issue is disturbing to say the least.
As I said, I’ll be getting you out a new tank that is not warped. We did swap to a higher temperature rated silicone, but I don’t have the name of the old brand written down. The tanks are not warped when we install the lid. I think yours is the way it is from the way were were assembling them, with how we were flooding that area with silicone and then tightening them in a way that was warping the tank. Or it was a bad batch. We have run week long tests, but not 2 month long tests. Thanks for the feedback.
I strongly suggest Langmuir address this problem immediately and not ship out any Titan machines until a viable solution is implemented. Every single machine sent out from the factory has this same issue, however only the machines that are moved in any way will slosh oil out. I highly suggest you send out some sort of updated status report detailing this issue to all current Titan owners warning of this problem instead of letting them soak their machine electrical cabinet in oil. Something along the lines of “if you move your machine around the shop, drain the oil out before doing so” and come up with an instruction PDF and video of the procedure.
Sam, can you post a DXF file of the tank lid? A one piece support plate ( as Richarddbeck83 suggested ) under the tank and a new thicker tank lid seems like the fastest and easiest way to get my machine up and running. I don’t want to have to map out and draw all the holes and measurements if you have that info already? Do you have a laser cutter in your shop in Texas or do you have these lids mass produced for you somewhere else?
I should also add that the assembly change we made was adding more holes to the lid of the tank .
We do some CNC work here for prototyping but the lids are mass produced somewhere else. I’ll send you the dxf file.
If they posted a dxf of a new tank you could cut and bend that would be awesome. Ive been just kinda dealing with it like whatever.
I just sent you the file. I would recommend just trying to apply more sealant around the rim if you are suffering from any slow leak from moving the machine around. It is a lot of work to fully remove and replace the lid with the revision. You would also want extra nuts and bolts, and if your tank is old enough, extra barbed connections.
So mine started leaking after I did the bleed procedure. Before that it had never leaked. But ever since I keep getting oil dripping out of the control cabinet over the tooling and lower shelf. I’ve tried seeing if I can find a leak anywhere and I haven’t seen anything. I did run into a situation recently where the relief valances were triggered, at around 17 tons, and that caused more oil to start dripping out. I don’t ever move mine, it’s been in the same location since I assembled it. I did fix the relief valves where they don’t open until 25 tons. Is there someplace I should be looking or could this be related to the same tank issue? I do not look forward to getting this apart to clean and fix it as I’ve looked at doing it and there’s barely enough room for my hands in there.
Overall, I’m very pleased with the machine but would love to Solve this oil leaking issue as it’s keeping my tooling all oiled up and not rusting, well, maybe that’s not a bad thing but it’s still a huge mess to keep clean
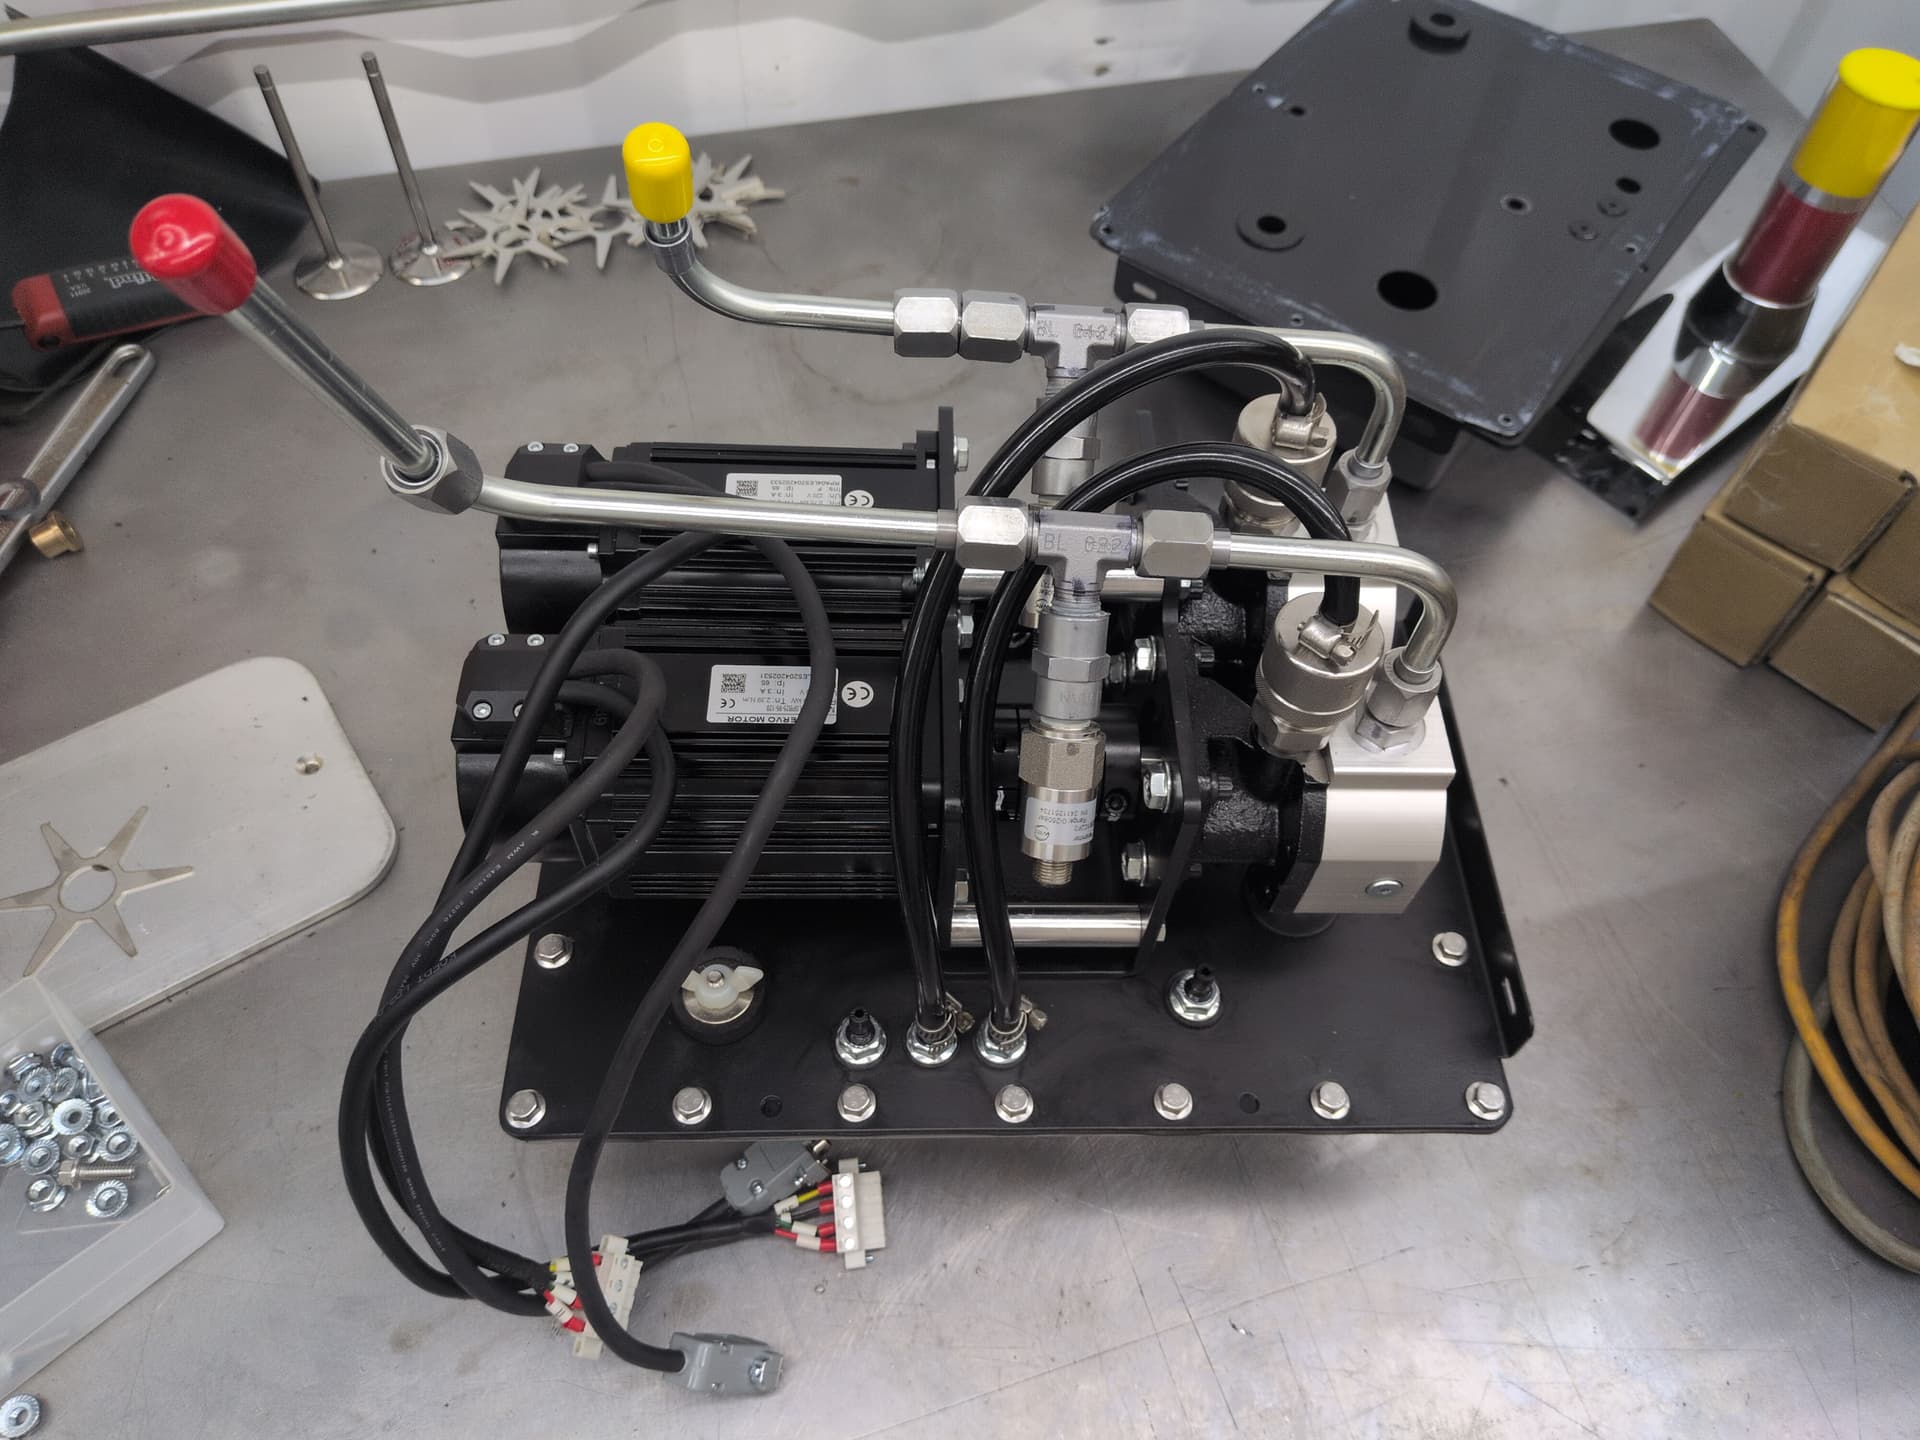
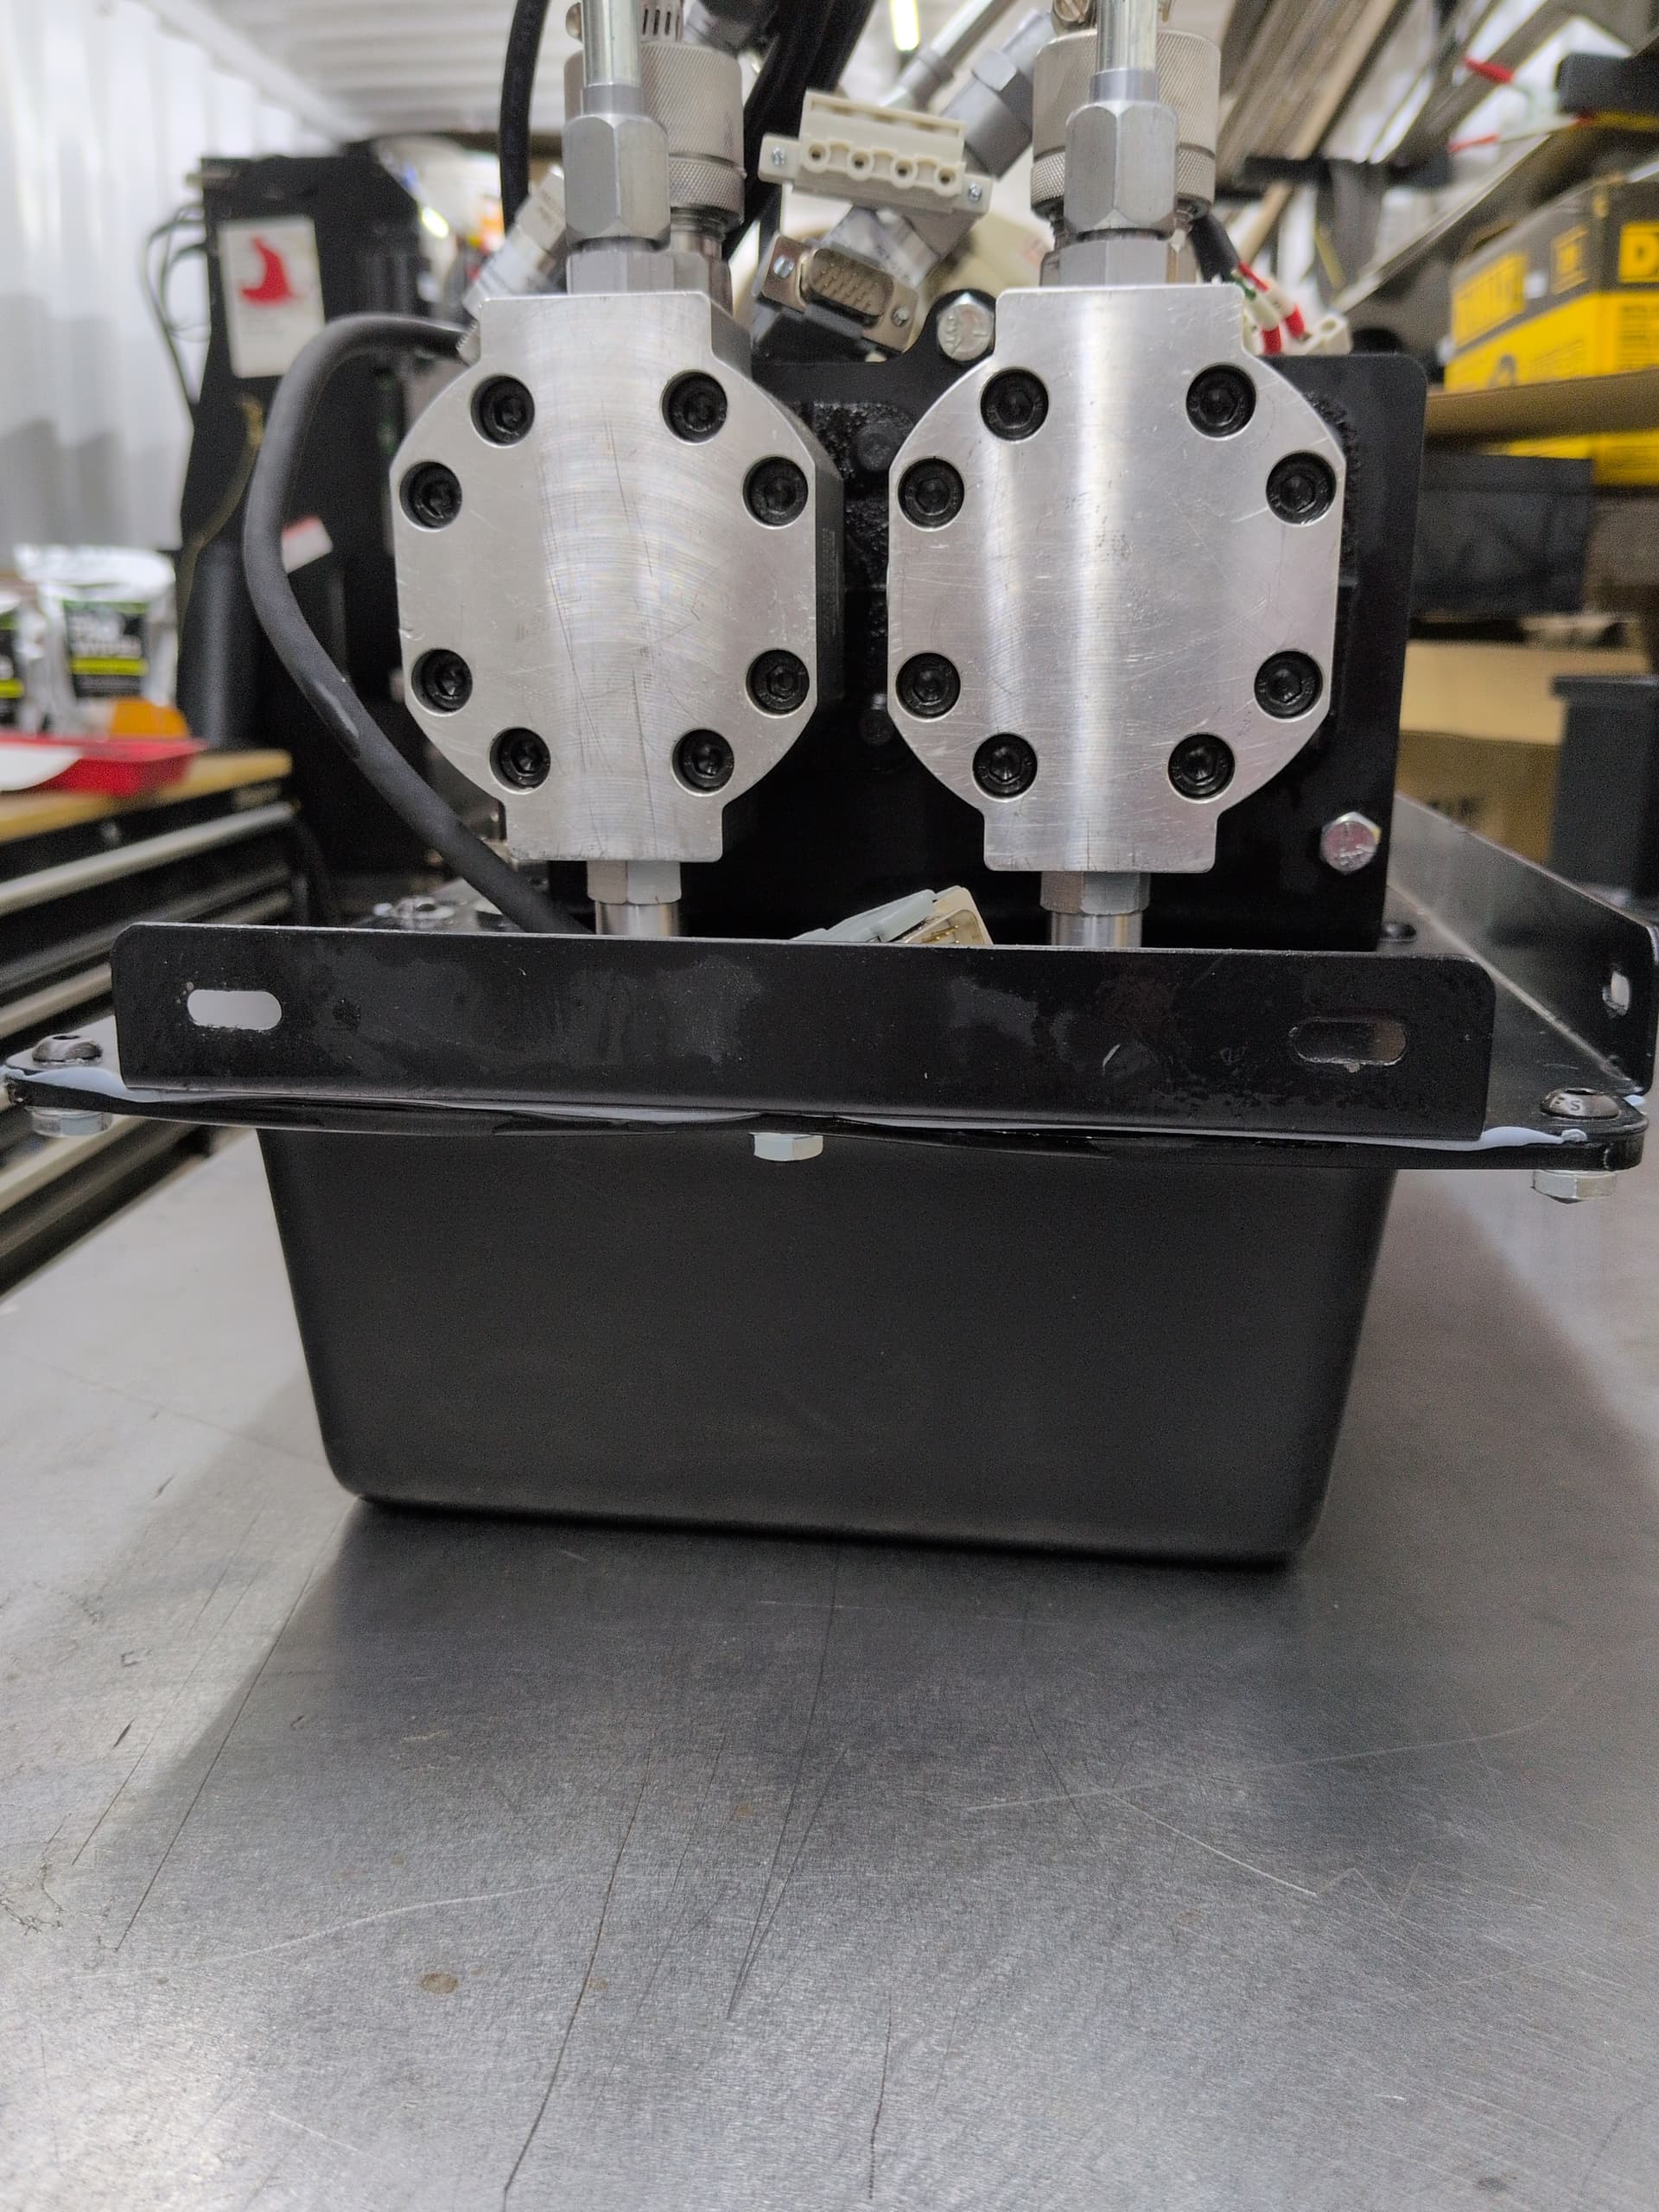
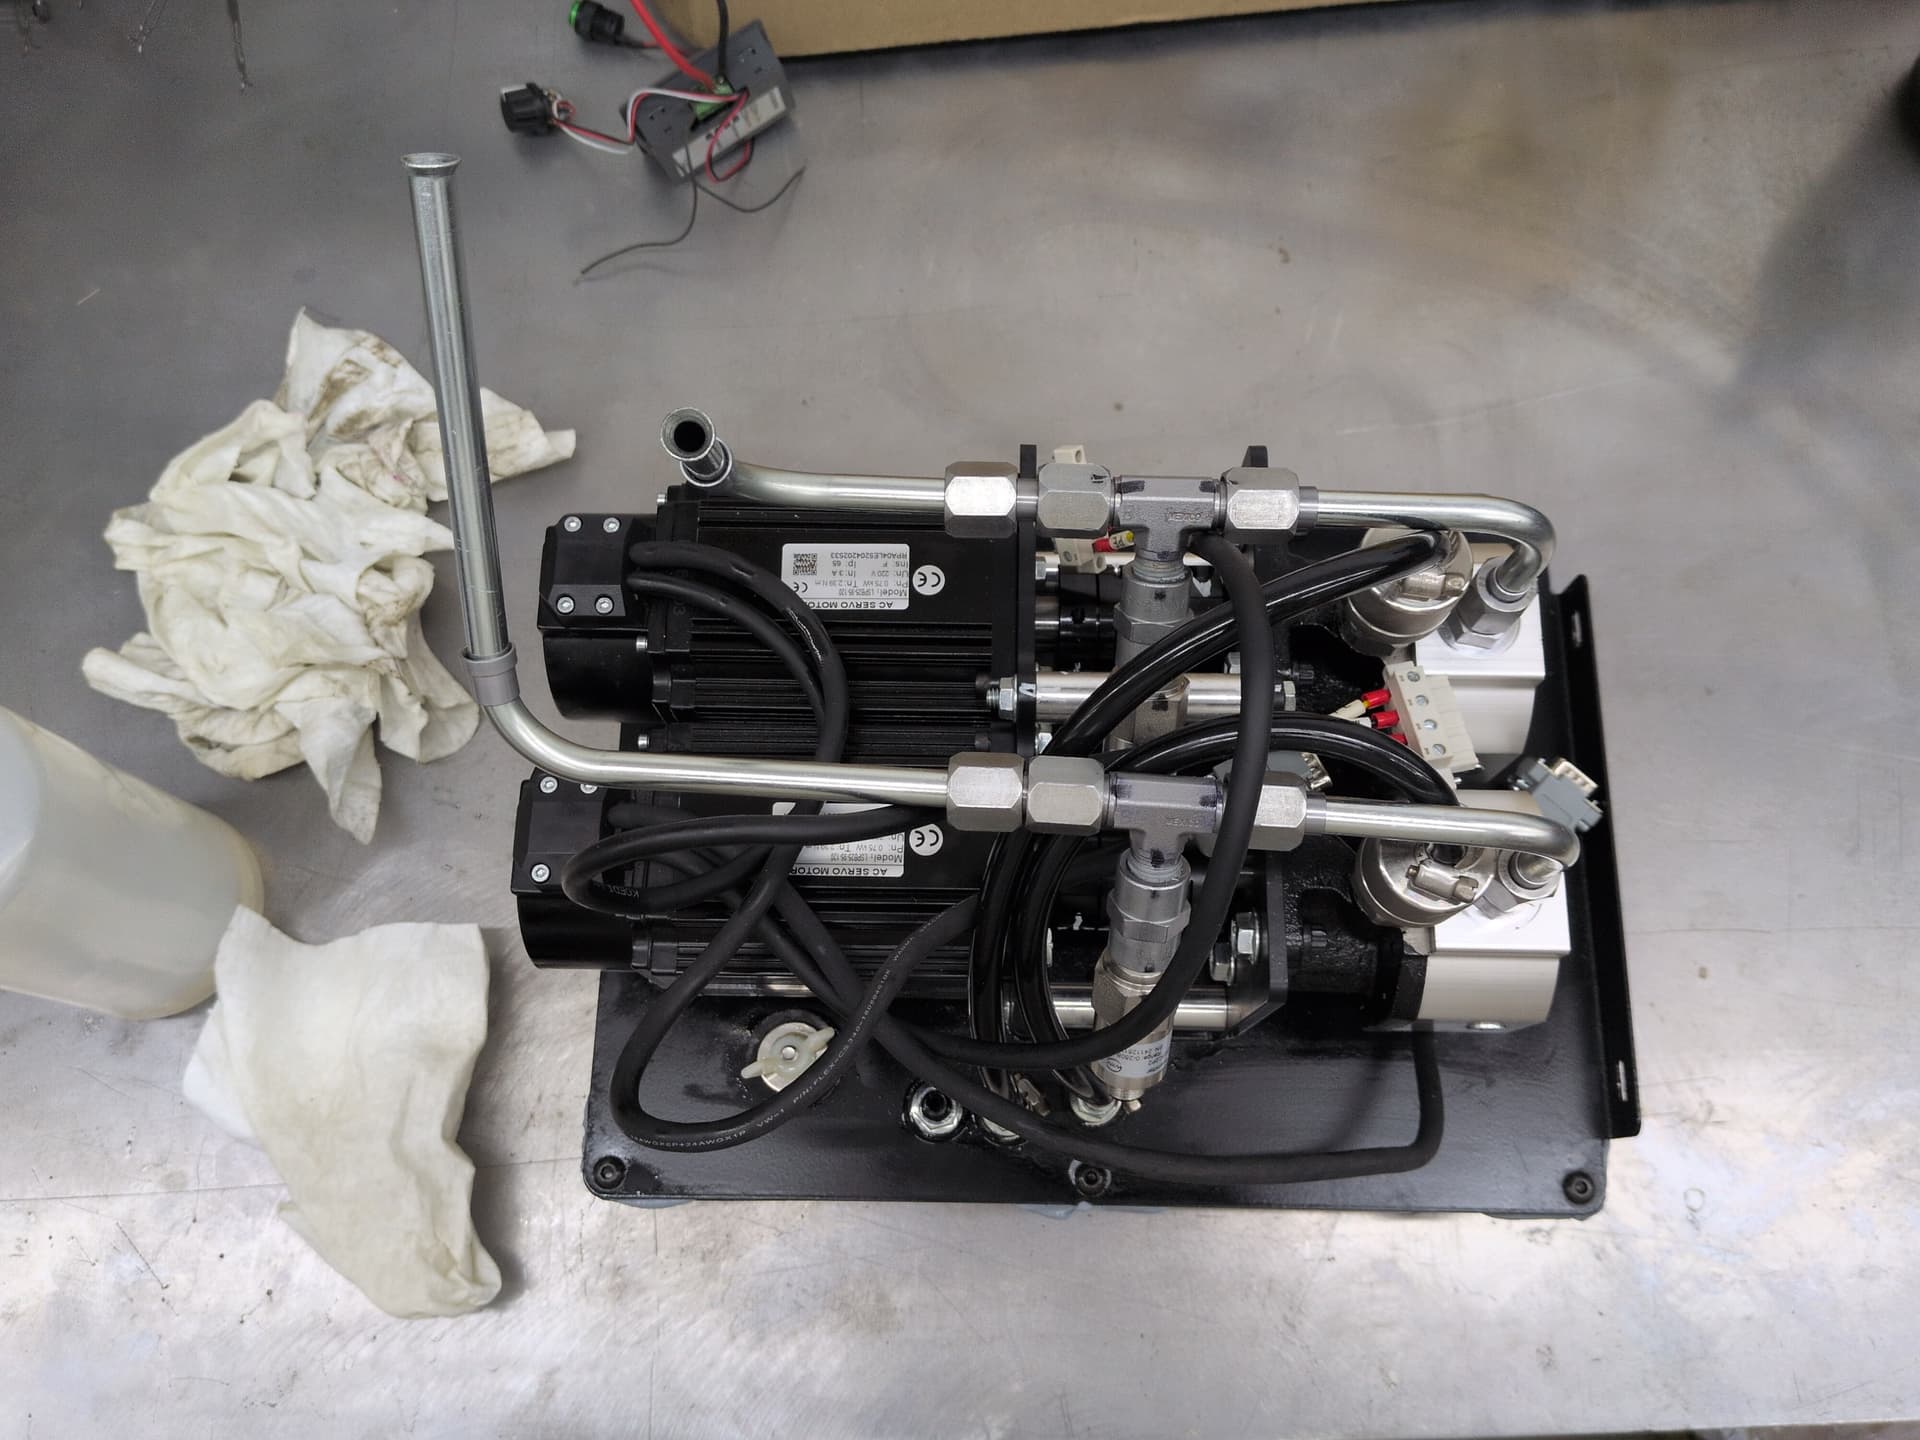
Here is the tank modification that feel confidant will never leak again. laser cut a one piece stiffener/backing plate, a one piece EPDM rubber gasket and added more bolt locations. No silicone or sealer was used since it’s not going to adhere to the plastic tank after 60 days anyways. I added an additional bulkhead return fitting for the tank vent, and each relief valve has it’s own individual return port now. A box of rags and a gallon of 99% Isopropyl alcohol later, all the oil is cleaned up. Sam sent me a new tank and a new lid as well so I didn’t have to scrape all the silicone off the old one ![]() .
.