They’re yours when you want them. Mike doesn’t want to be a guinea pig.
Resin is quite solid. I was going to sacrifice a set to a torque test but I broke my cast iron vise today - it sheared off the throat channel. I wouldn’t have believed it was possible So I think I will have to just go with a scrap piece of steel and drill a hole to test them with. I’ll try to do that tomorrow.
I thought about trying to weld the vise (Tig with AC and aluminum/bronze filler rod) but I’ve only seen it recommended for tabs and things - not the guts of a vise that’ll be under significant strain (like the next time I try to straighten 3/8" square rod using a 2ft extension pipe on the vise handle )
If you are trying to use the .f3d file you will have to download it and then delete the .DXF extension. This forum only allows certain file types so we sometimes have to trick it by adding an allowable file extension name. I had to add the .DXF so simply remove it. Also unless you want the Mod1 die for some reason make sure you are downloading the Mod2 design as it is the one that creates the desired flat in the drain hole.
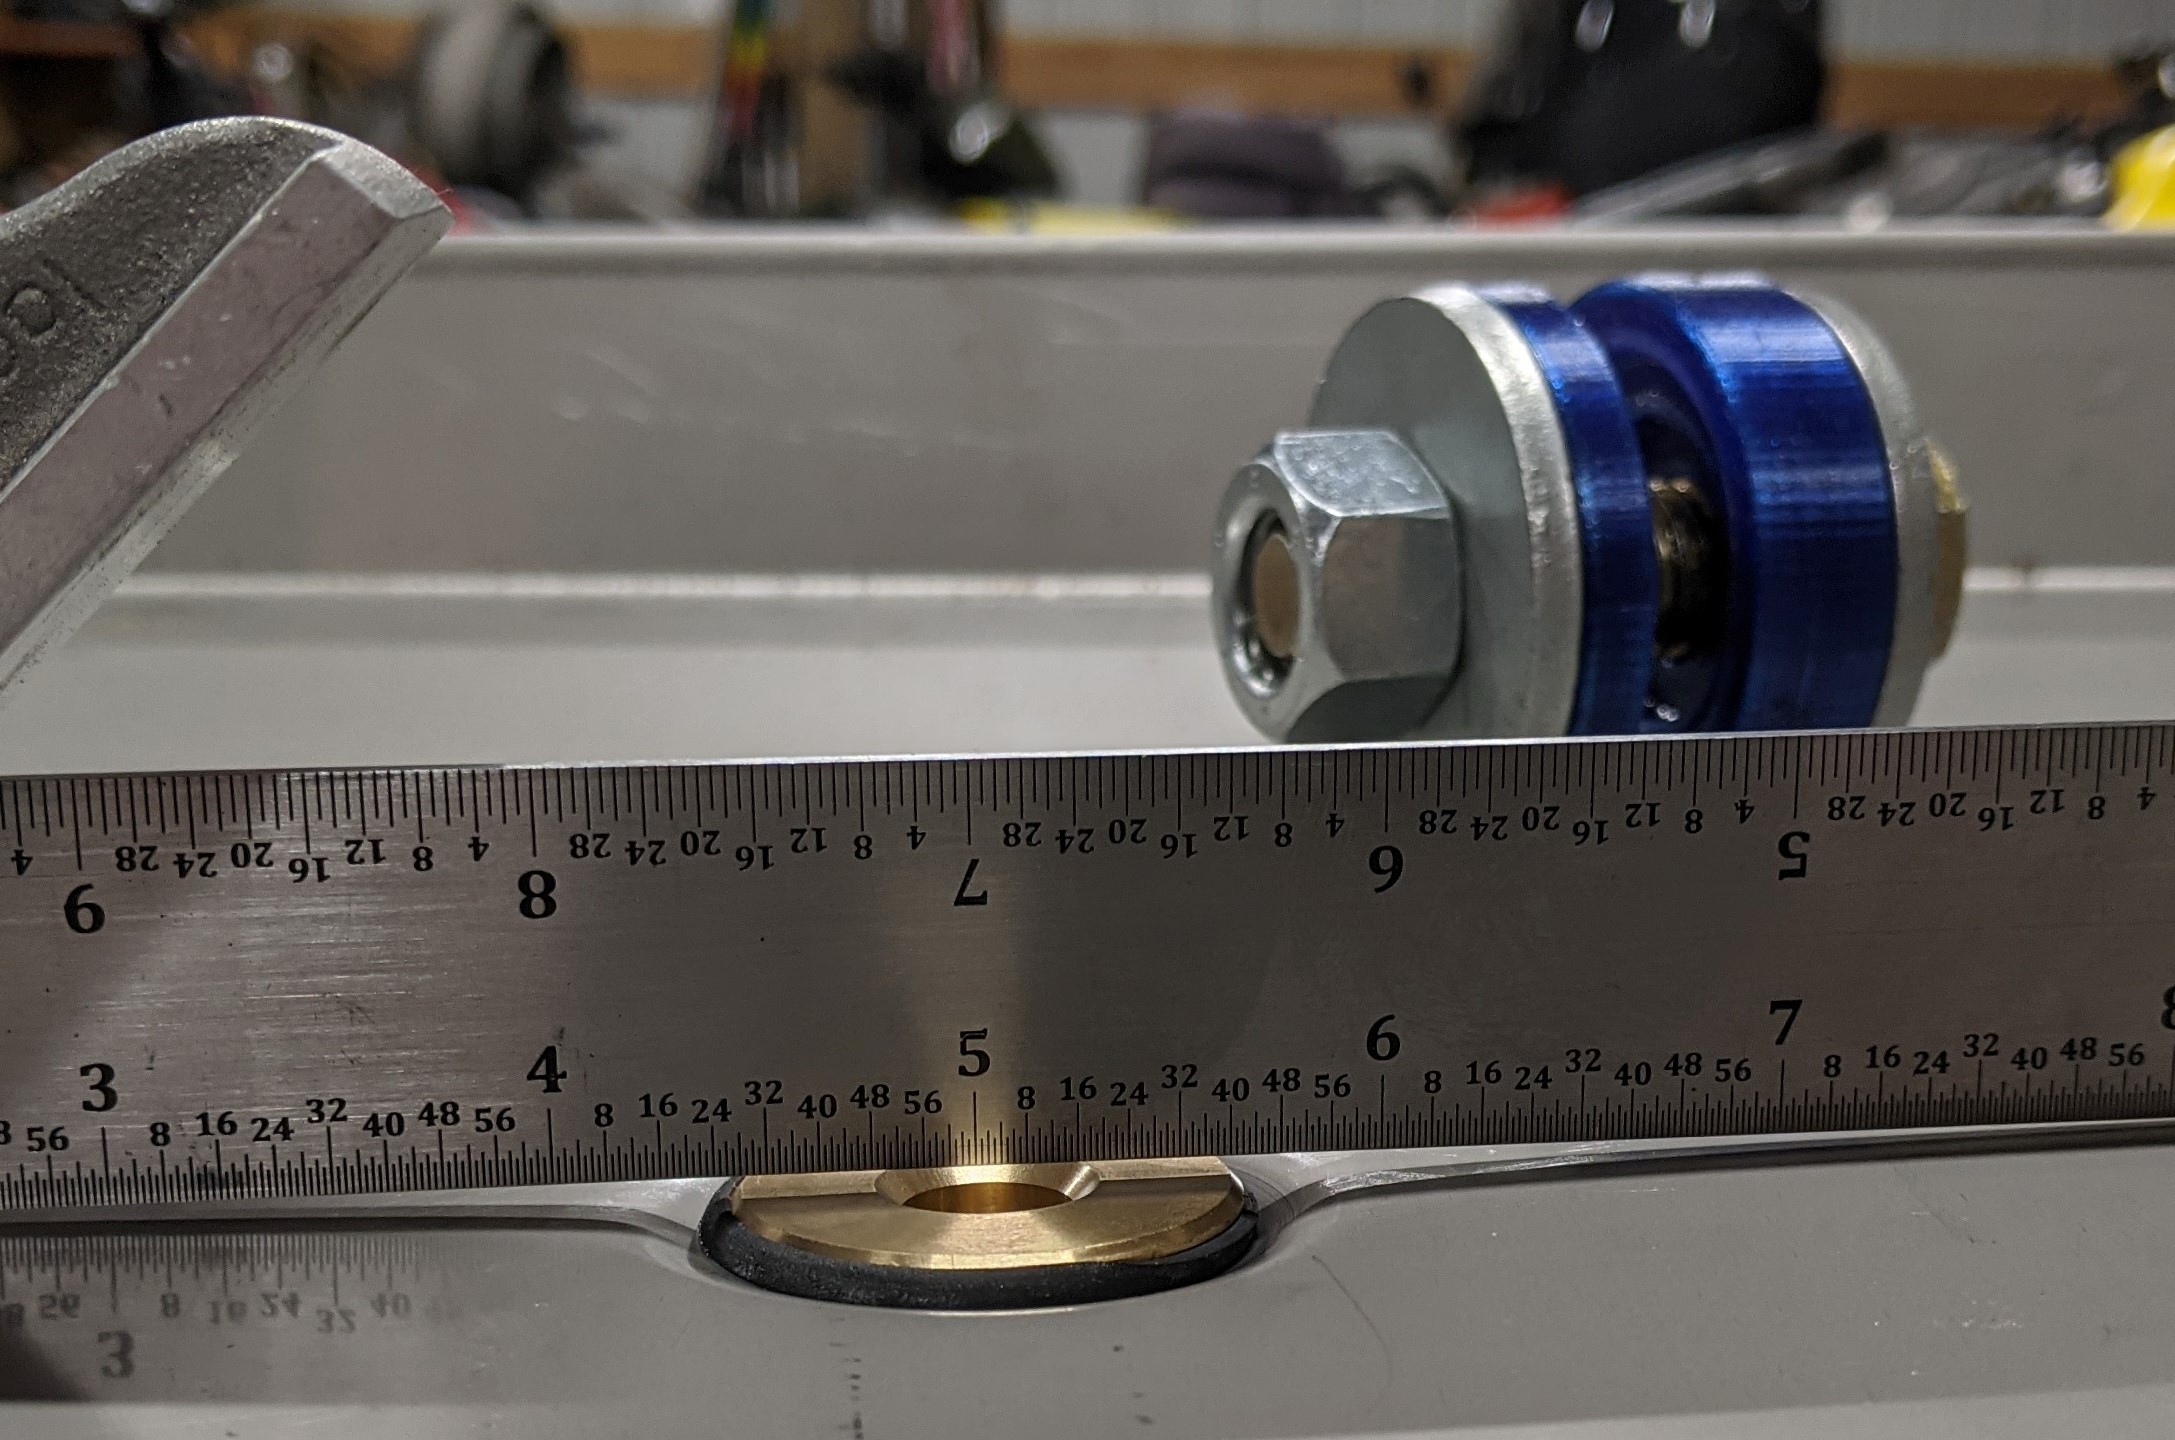
The resin one worked a treat. I used a scrap piece of 20ga steel. Using a torque wrench, 20ftlbs bottomed the resin die fine. The dimple was nicely sloped and the bottom was flat. No real noticeable wear on the resin die.
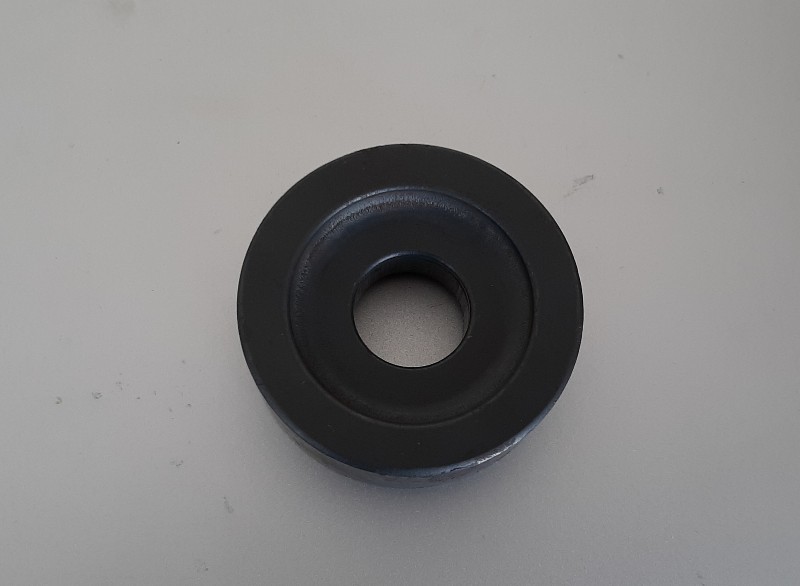
The dimple was as good as the ones I remember making a year ago in my pans using a commercial stainless steel dimple die.
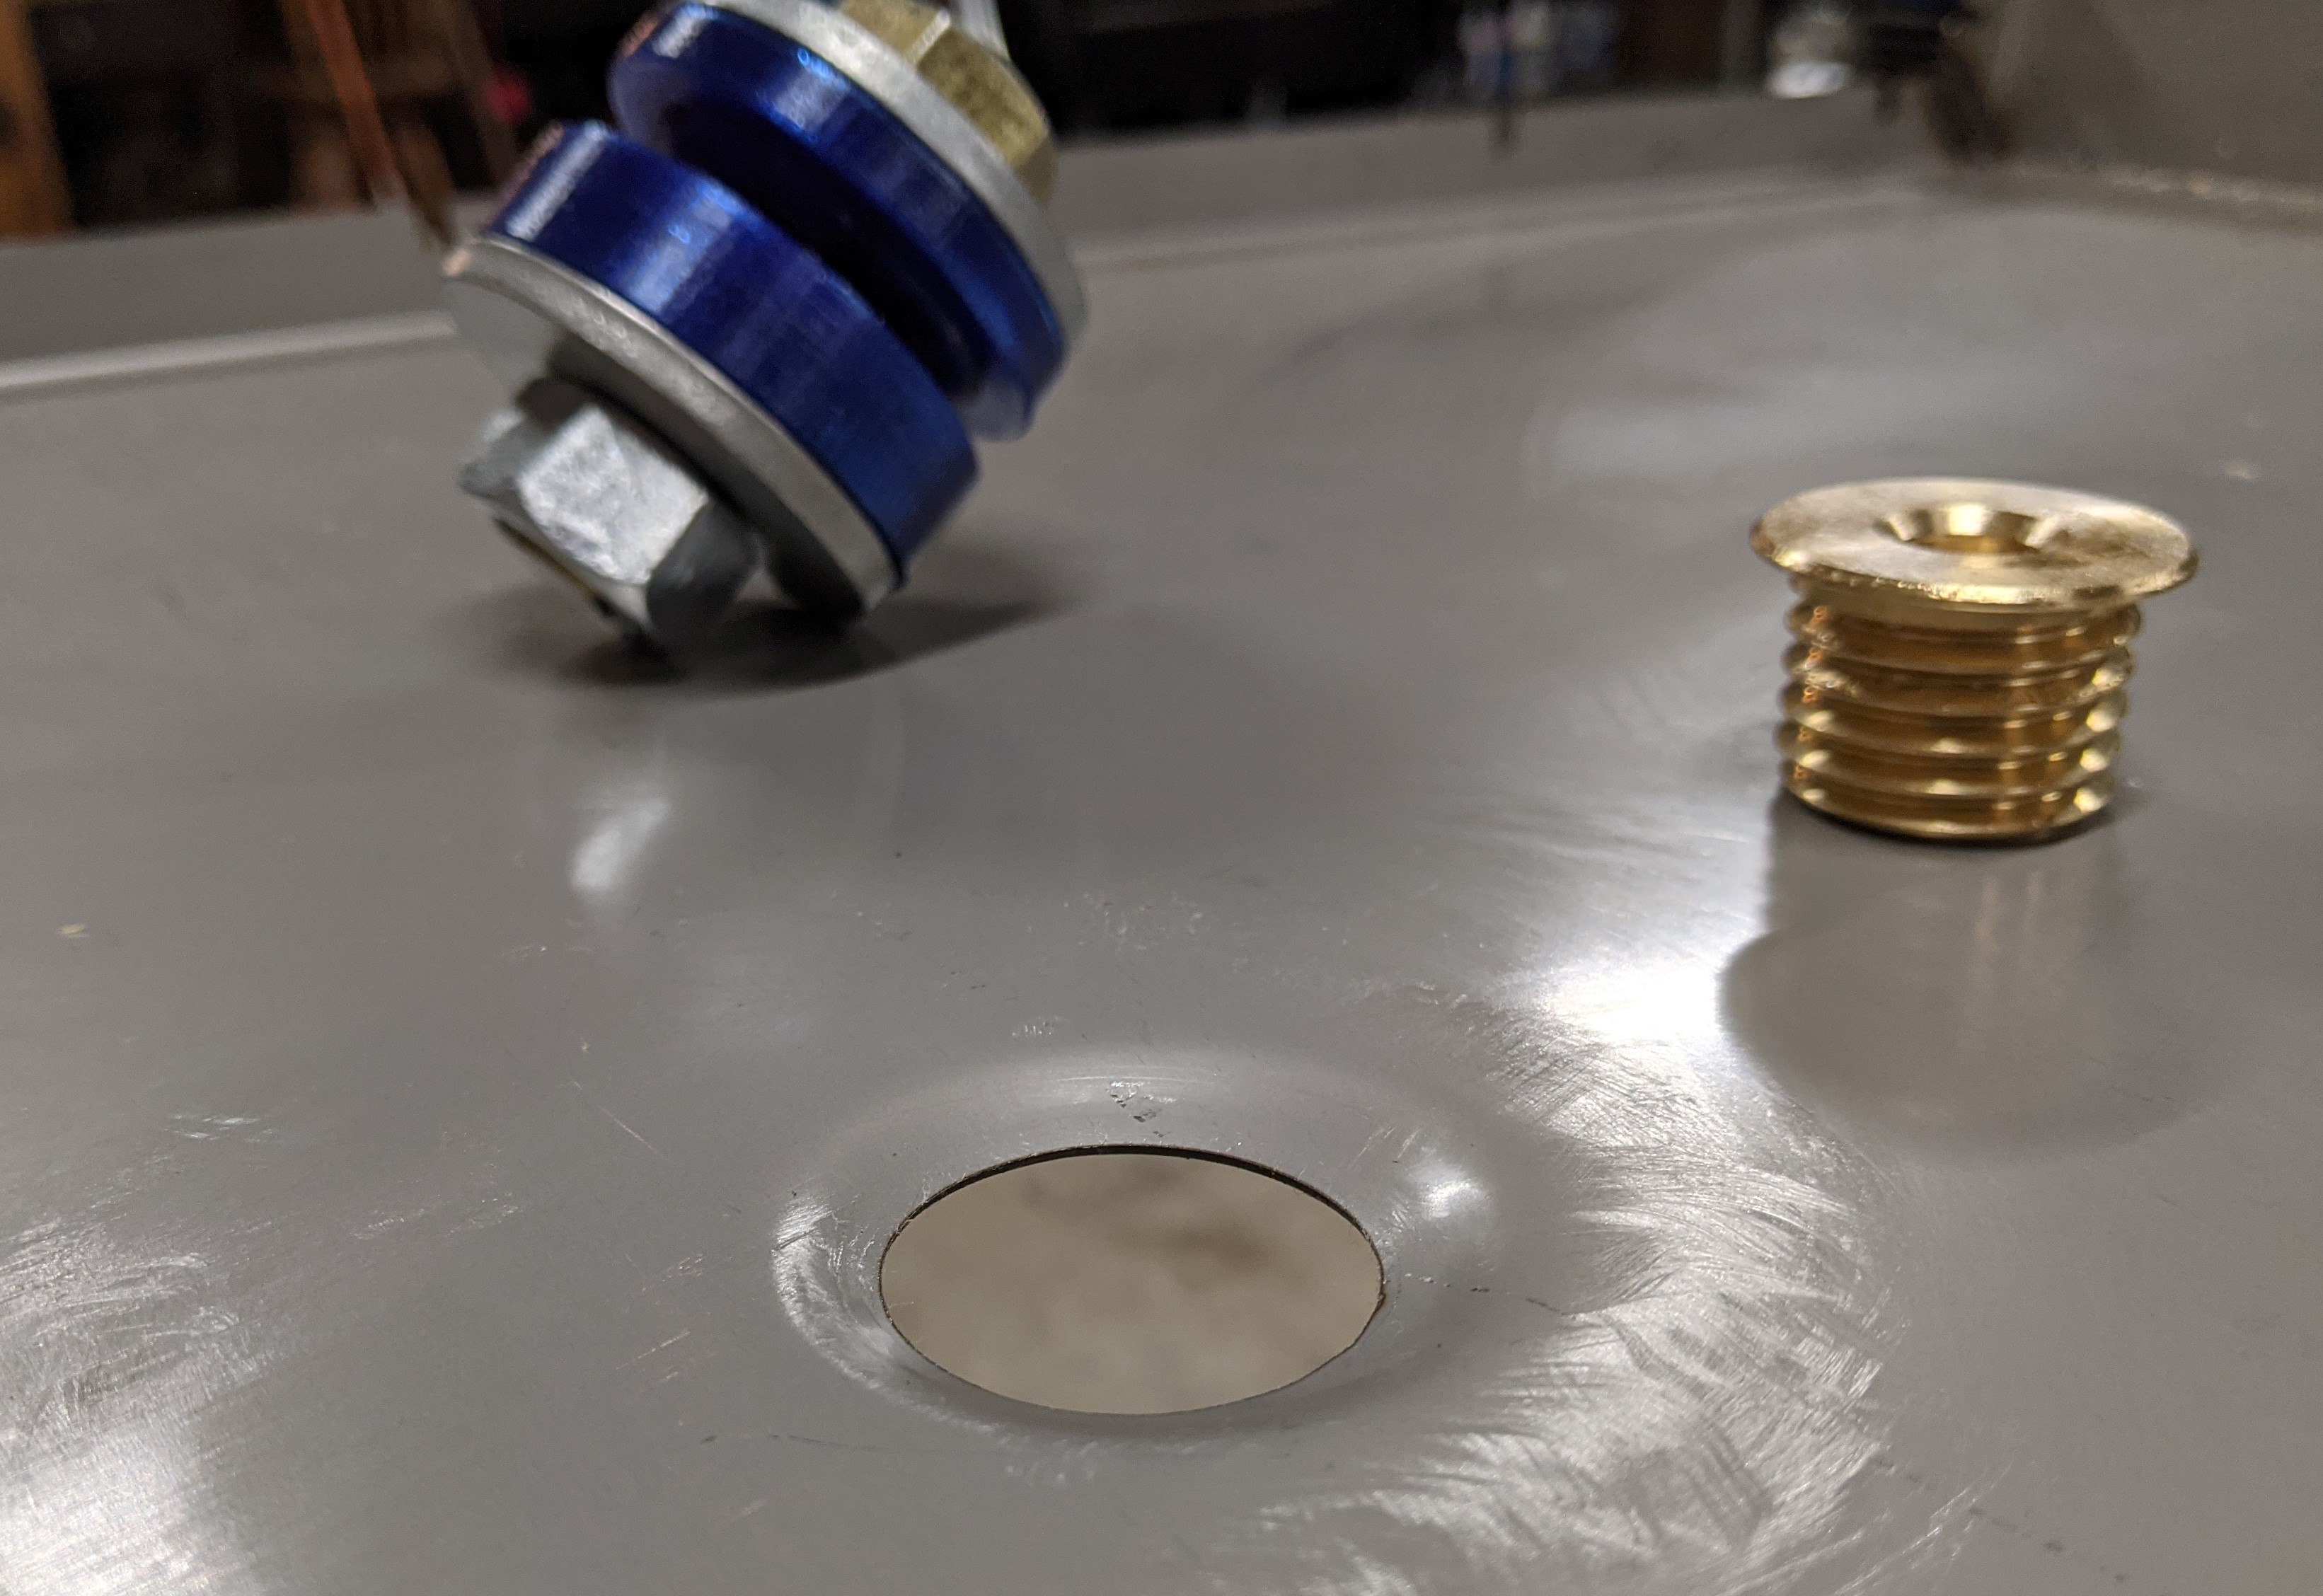
Crappy picture but does show the results. The center hole I drilled in the scrap was a little oversized when I started which is why the dimple isn’t centered. I didn’t have a 1" drill bit handy so I used a 1.125" bit and since my vise is toast used a ratchet on the nut and the torque wrench on the bolt. Cinching the bolt in a vise, putting the water tray on top and and then tightening the nut would keep everything centered.
The OD is 0.615" - it’s the 3rd piece in the STL file that was in the Mod 2 posting. I believe it was so that it matched a bolt he had (3/8"). The ID is sized for a 3/8" bolt. I used a 3/8x2" bolt, fender washers and nut. I think a 5/8" bolt fits tightly without that 3rd piece.
It’s a resin print so infill doesn’t affect print time and the resin it uses isn’t materially different than just making it solid. So for my resin prints I almost always make them solid (equivalent to 100% infill for FDM prints). Resin prints also don’t take any longer if you have 1 piece or a full plate to print. I used standard layer height (0.05mm). It can print at 0.01mm but that’s not needed for this. It’s already much finer resolution than your typical FDM print.
Well my die didn’t work well I was able to make just a cone but not the flange on the bottom. I going to re print the die at either 75 or 100% infil and I will tried again. I noticed the wall got press out little bit from the pressure. I let you guys know if I get a better luck with the second print. So I can share the dies.
In another note. Is anyone here install the cnc automation kit in the extreme 625. I but one for a really good price but I have trouble installing it. Any help will be apreasiated. Thanks
I’d go with 100% - it won’t be stronger than that. Otherwise you may find 75% doesn’t work and you need to print a 3rd one.
I’m not sure I’d use PLA in fact. If you can you might want to try ABS. That’s what I tend to use most with filament 3D printing. With resin I just don’t bother with infill - always print them 100% because the print time is the same and the difference in resin used is pennies. Not worth the time spent reprinting when something isn’t strong enough.
I printed a set in PETG that I am going to try tonight. PETG is easy to print and stronger than PLA. I’m hoping it will work well. I’ll share the results.
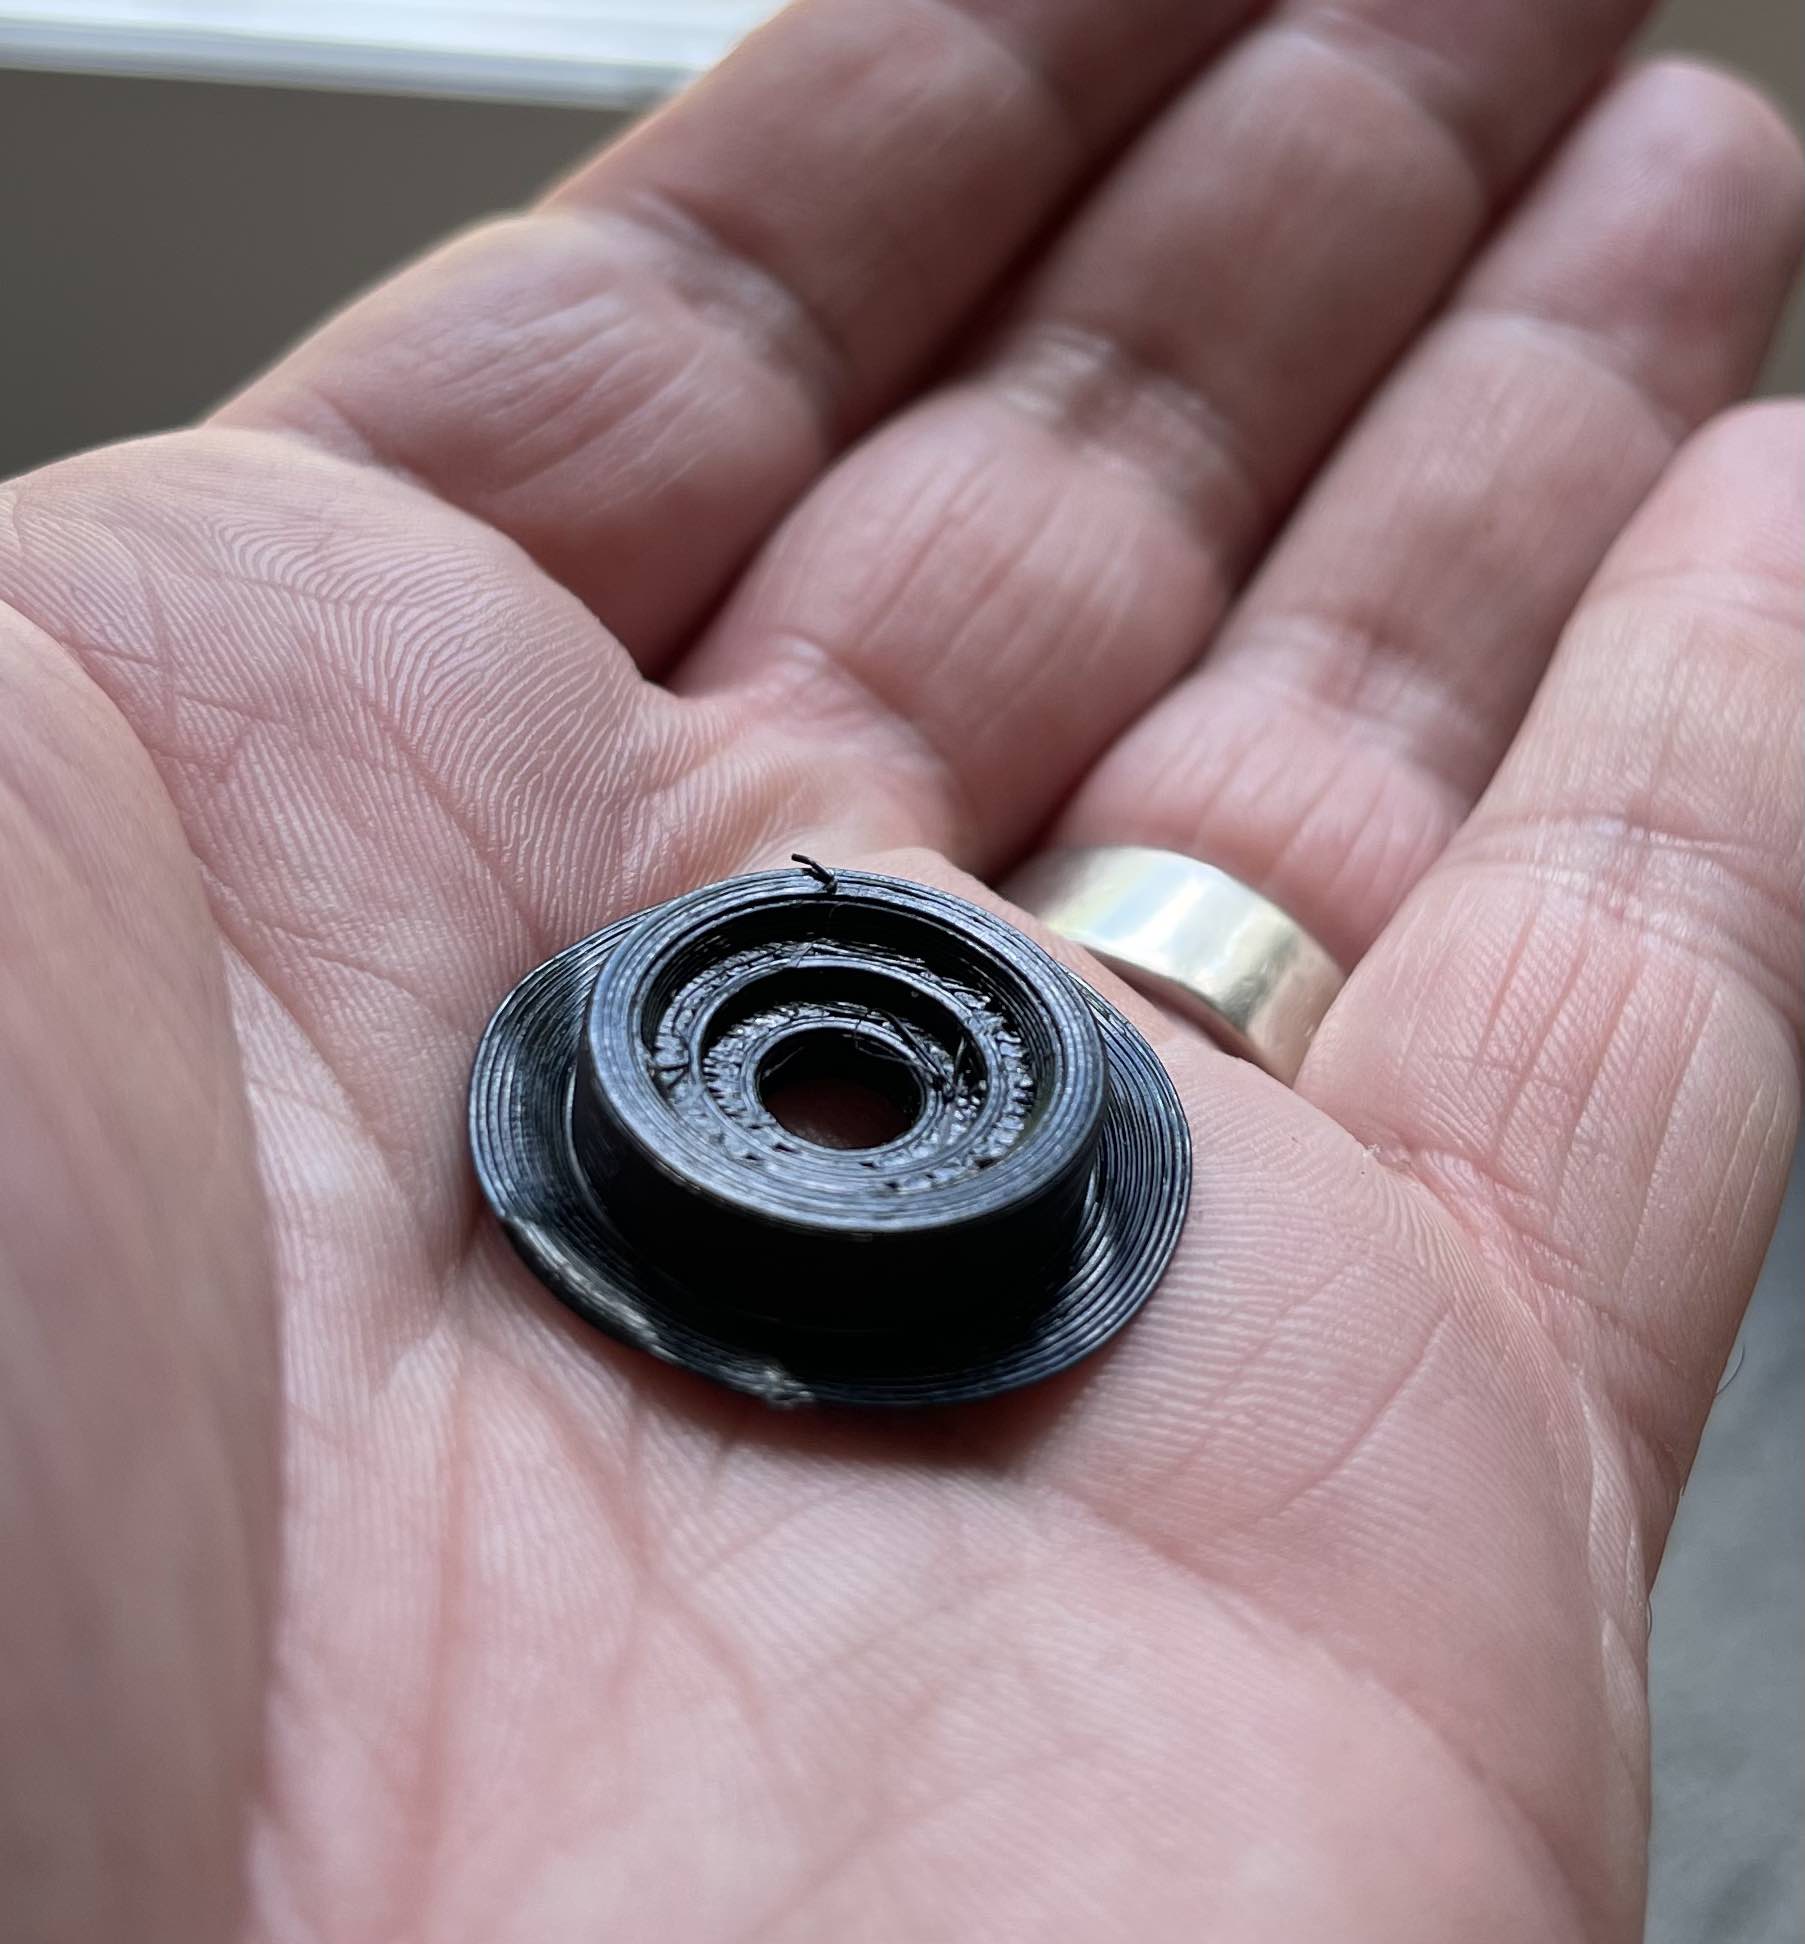
Here are my results with PETG. 100% infill. I believe the plastic may have deformed in the high stress areas. I didn’t get much of a flat at the bottom. Perfectly acceptable to me though. I think that they would work several more times. No signs of cracking or breakage. I could send this with a couple more sets of plastic dies if anyone is interested.
Look what I found last night after my supervisor left for the night… LOL
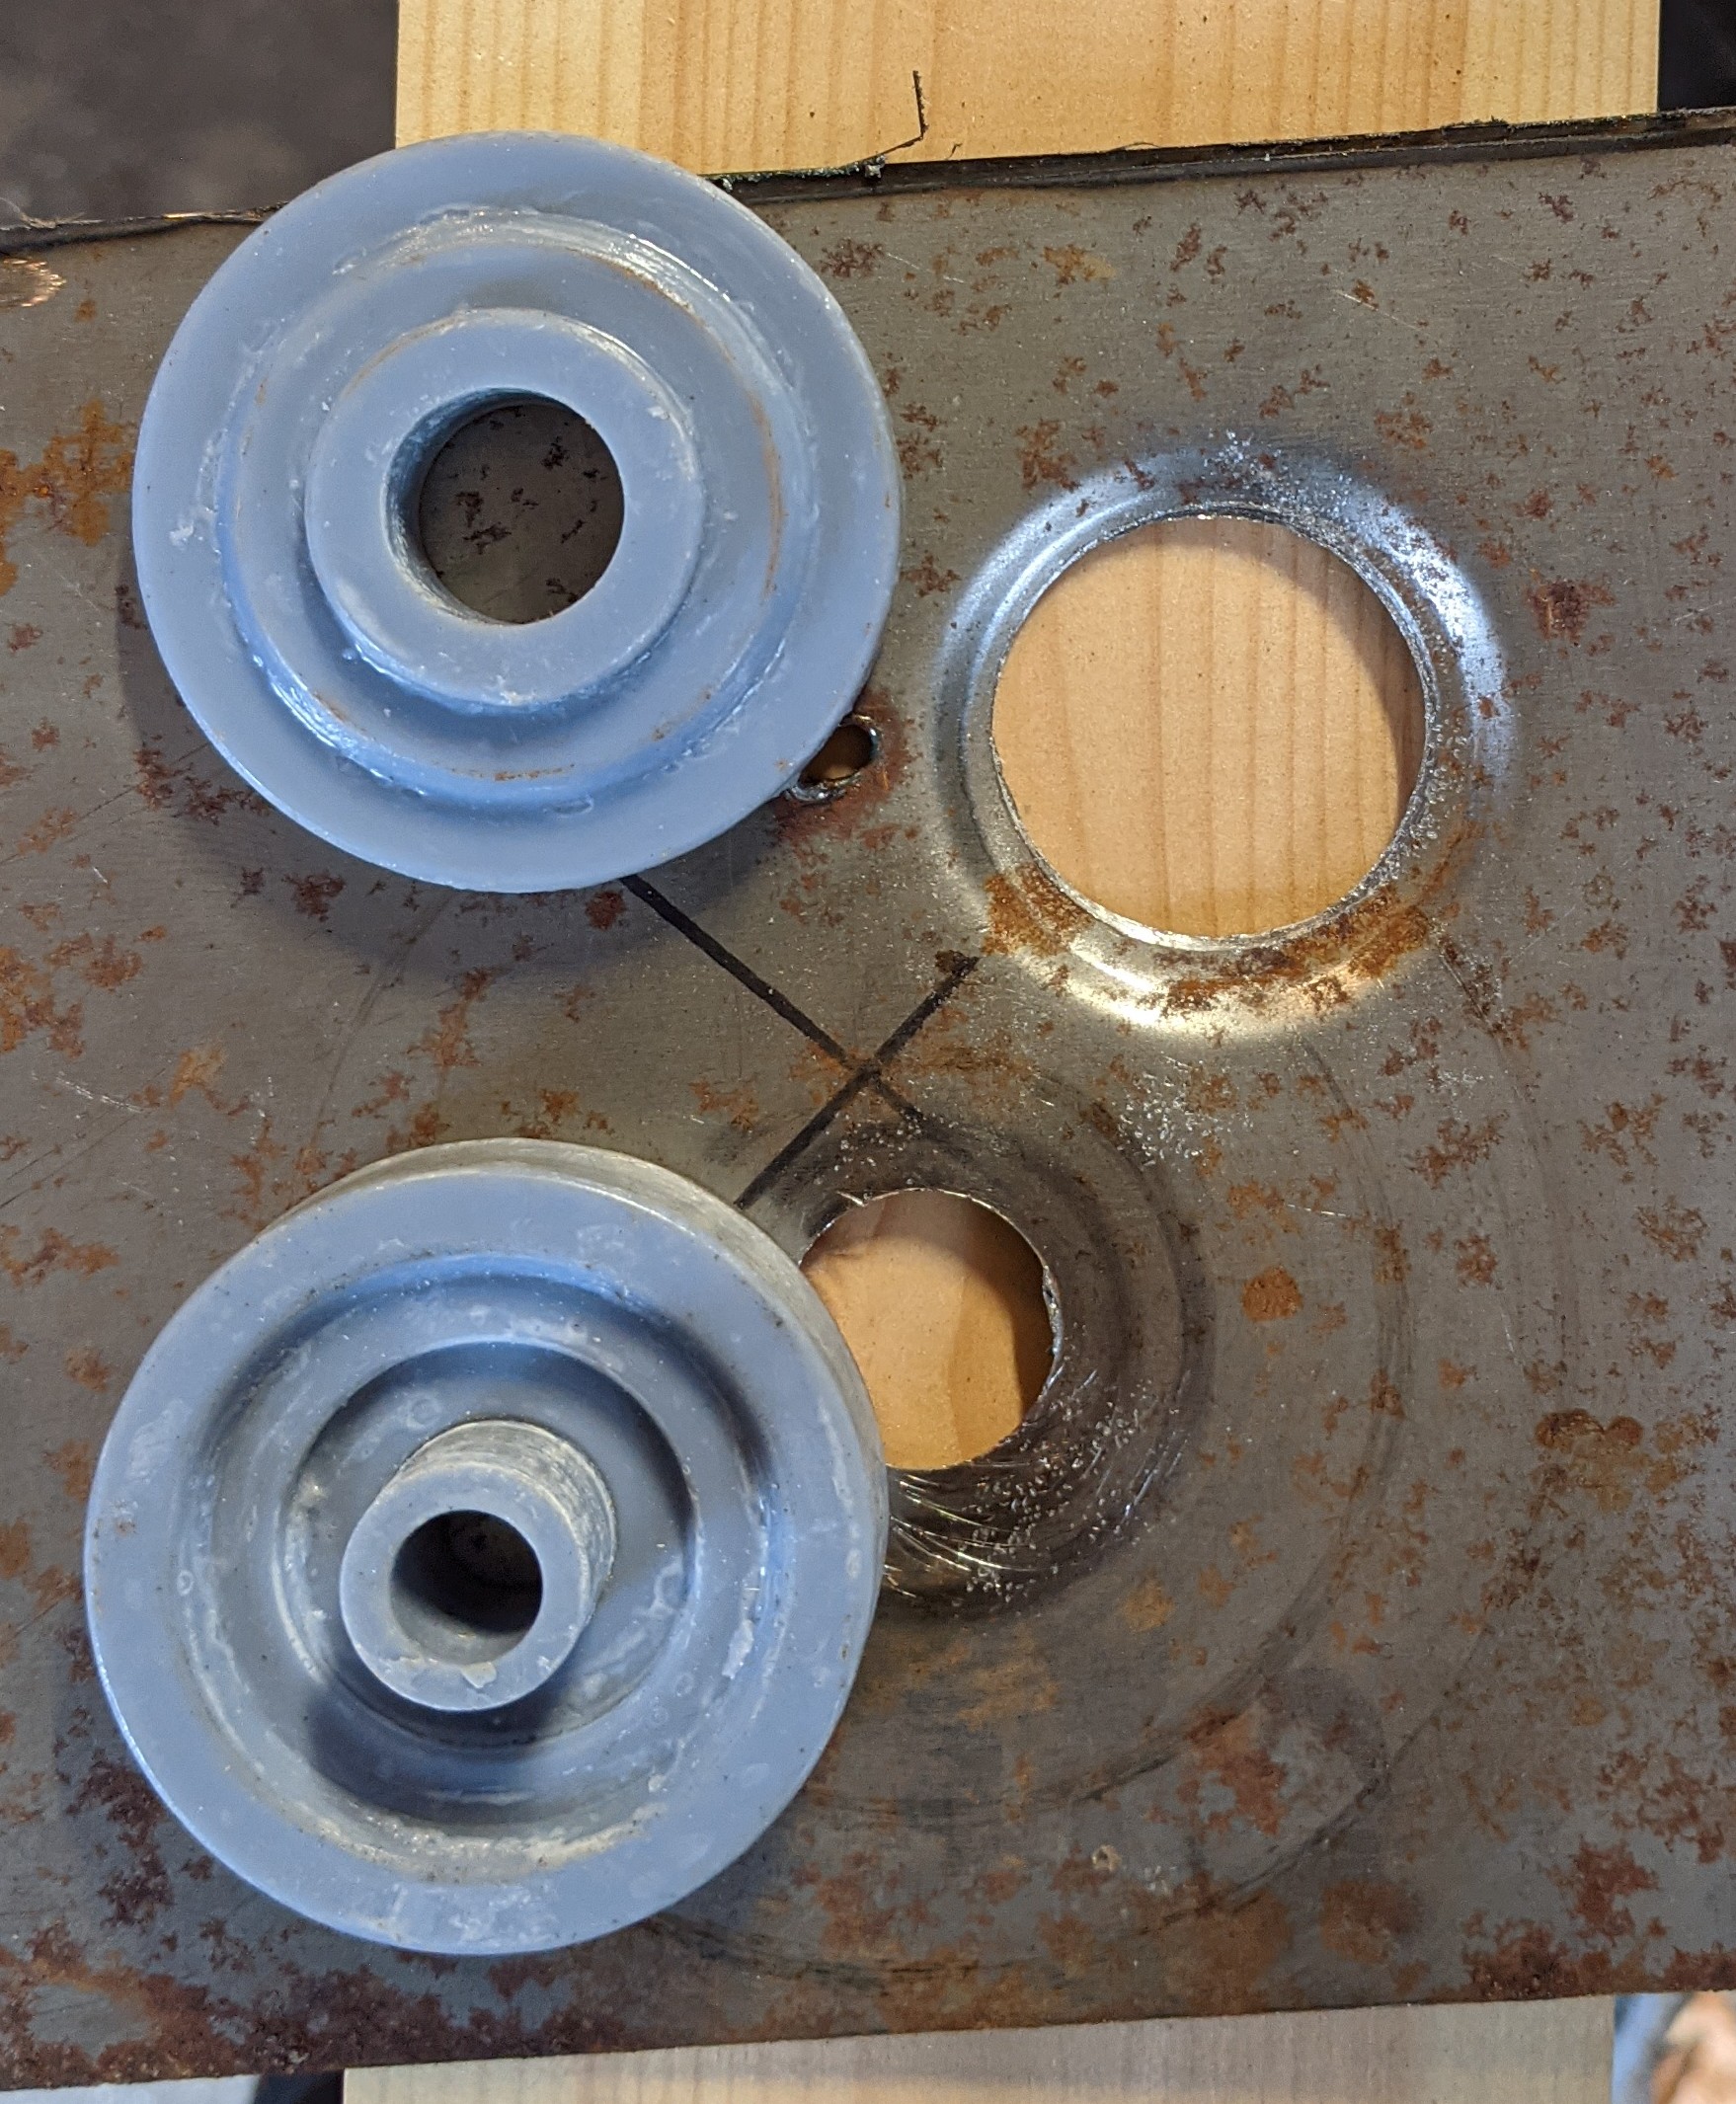
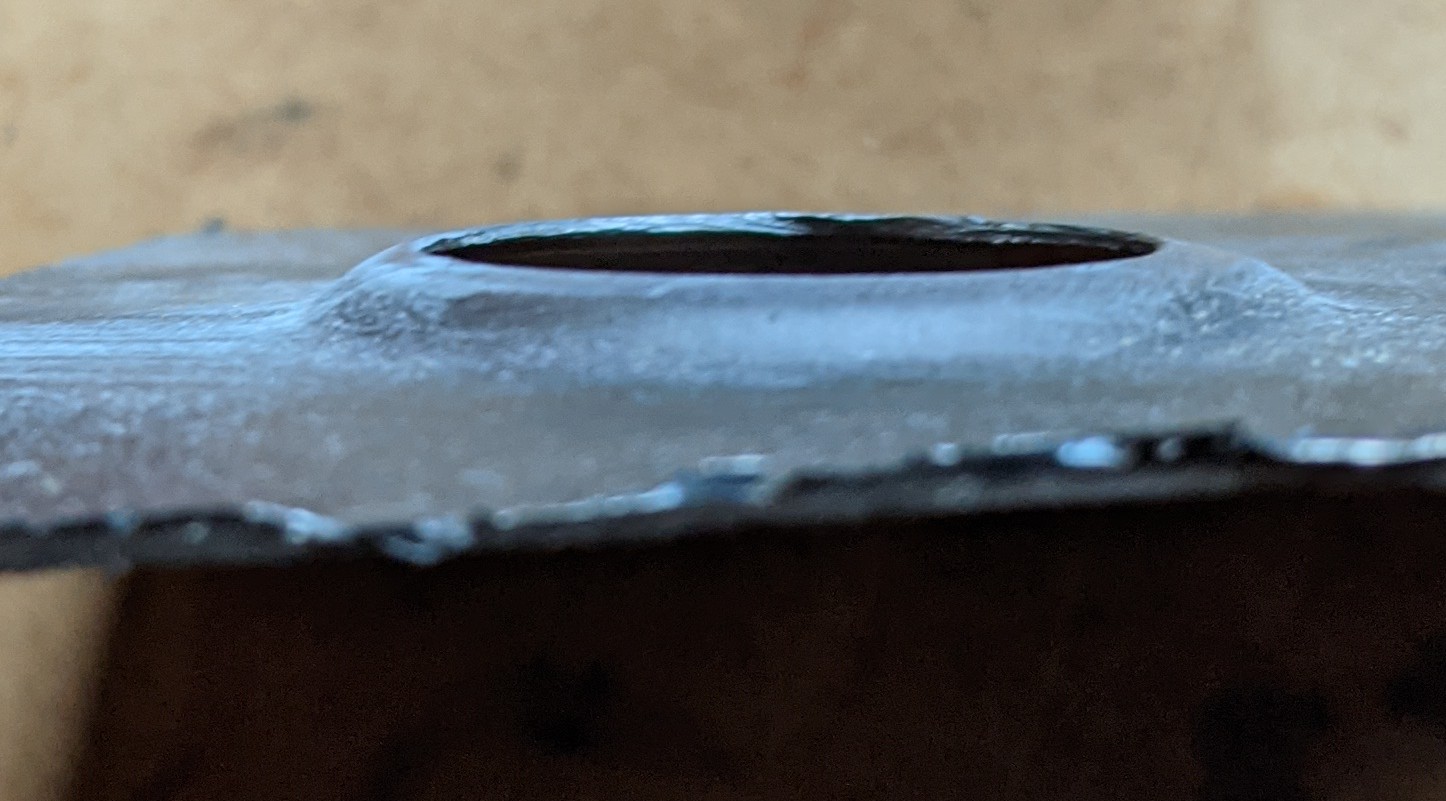
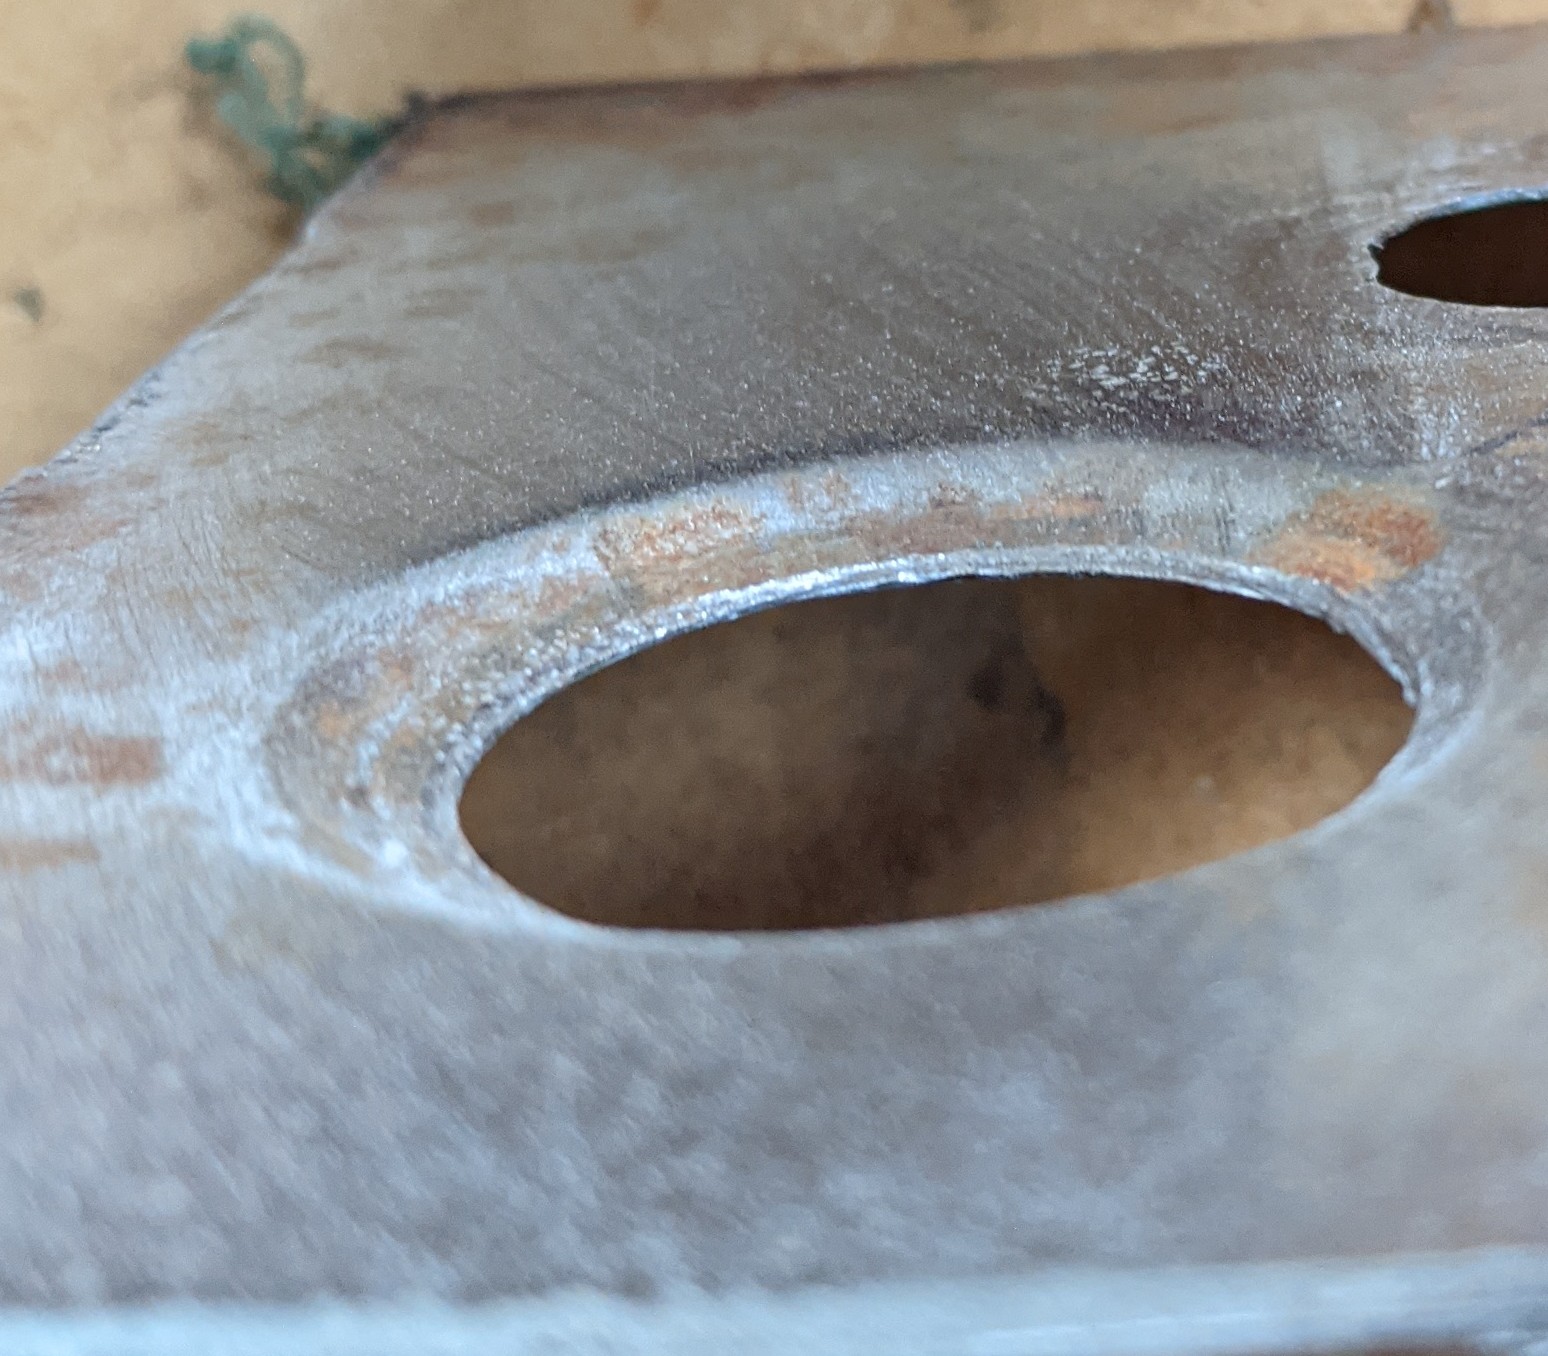
I work in a factory that forges large nuts and washers had some down time last night so I went rummaging around and found this in the scrap Hopper I think it will work perfect for the bottom side. Can anyone tell me how big around the hole should be in the middle I think I might have to have this milled out a little bit.
Langmuir forum i need help. I put my table pro together. But now I have trouble to figured out the wiring. I’m using a miller 625 with cnc port but I only have the hand torch. And I dont know how to approach and be safe on the connections. Thanks
 So I think I will have to just go with a scrap piece of steel and drill a hole to test them with. I’ll try to do that tomorrow.
 )
)