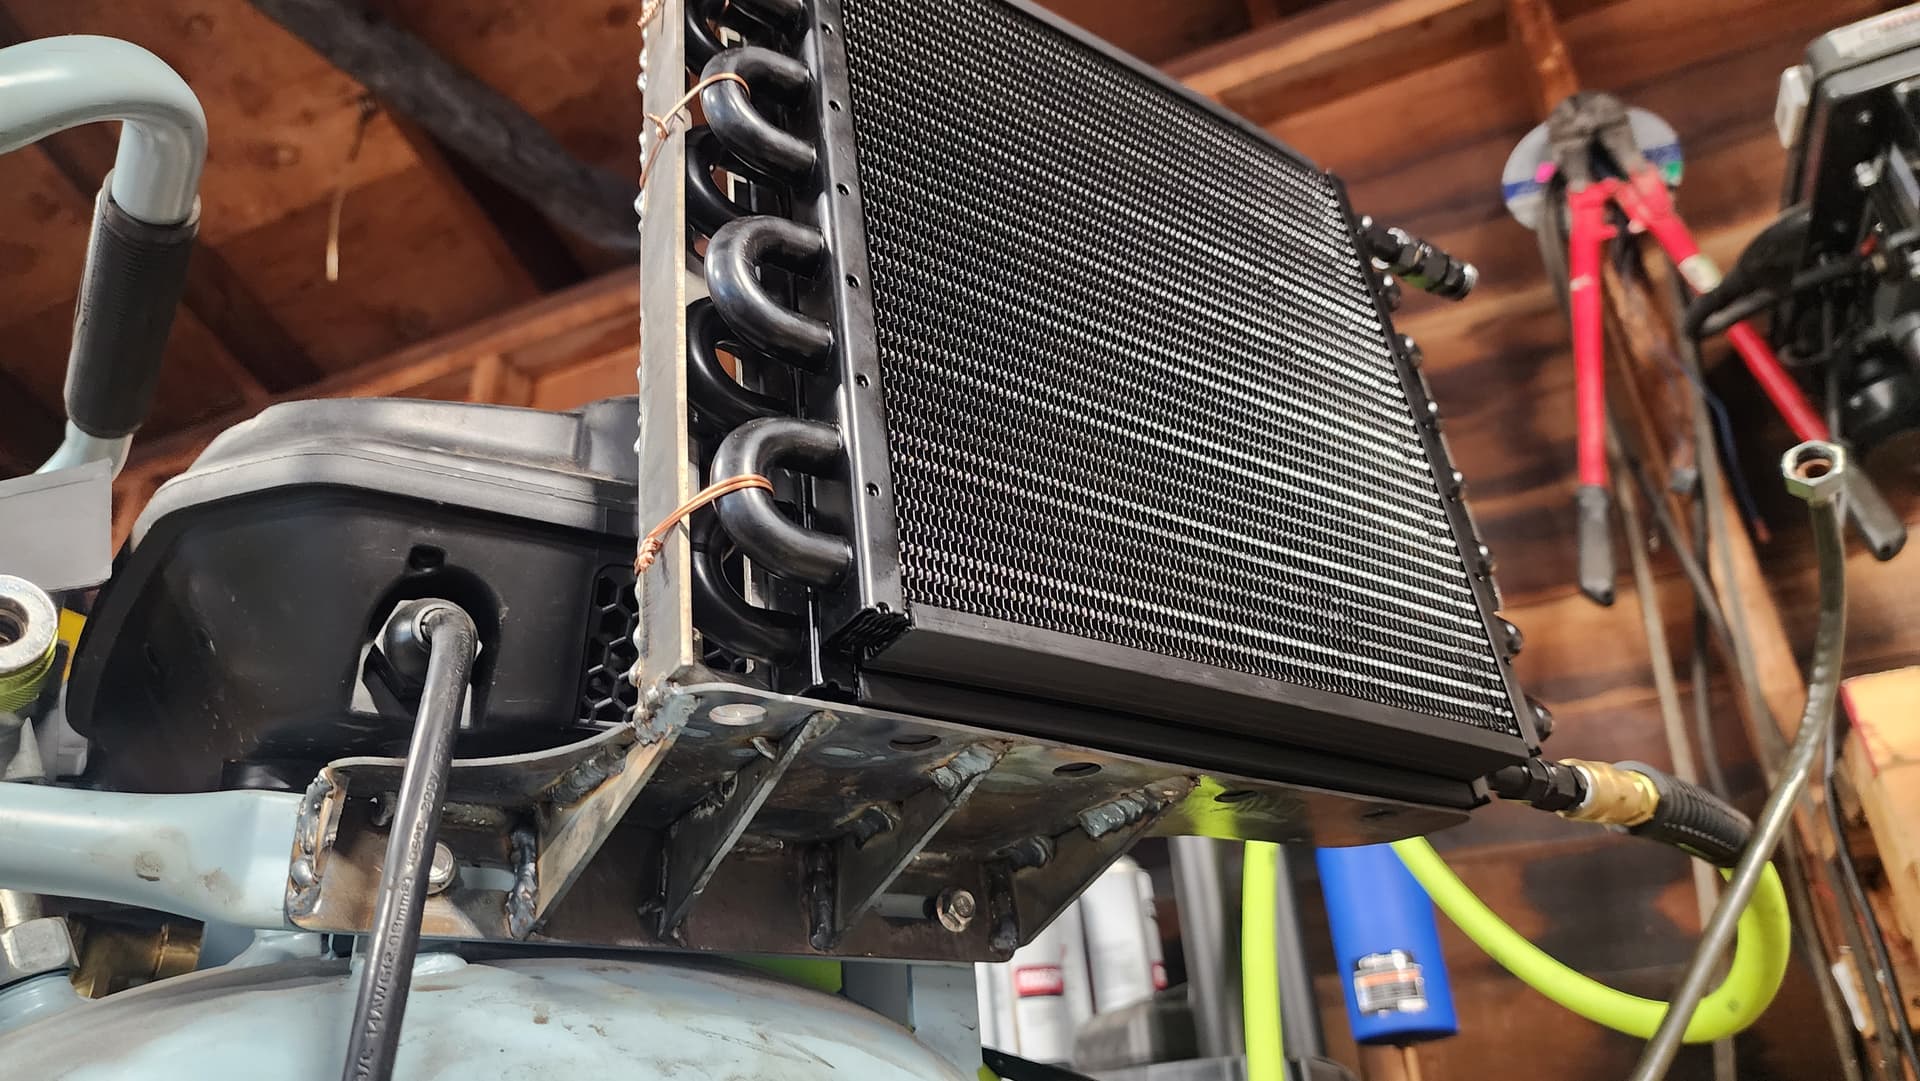
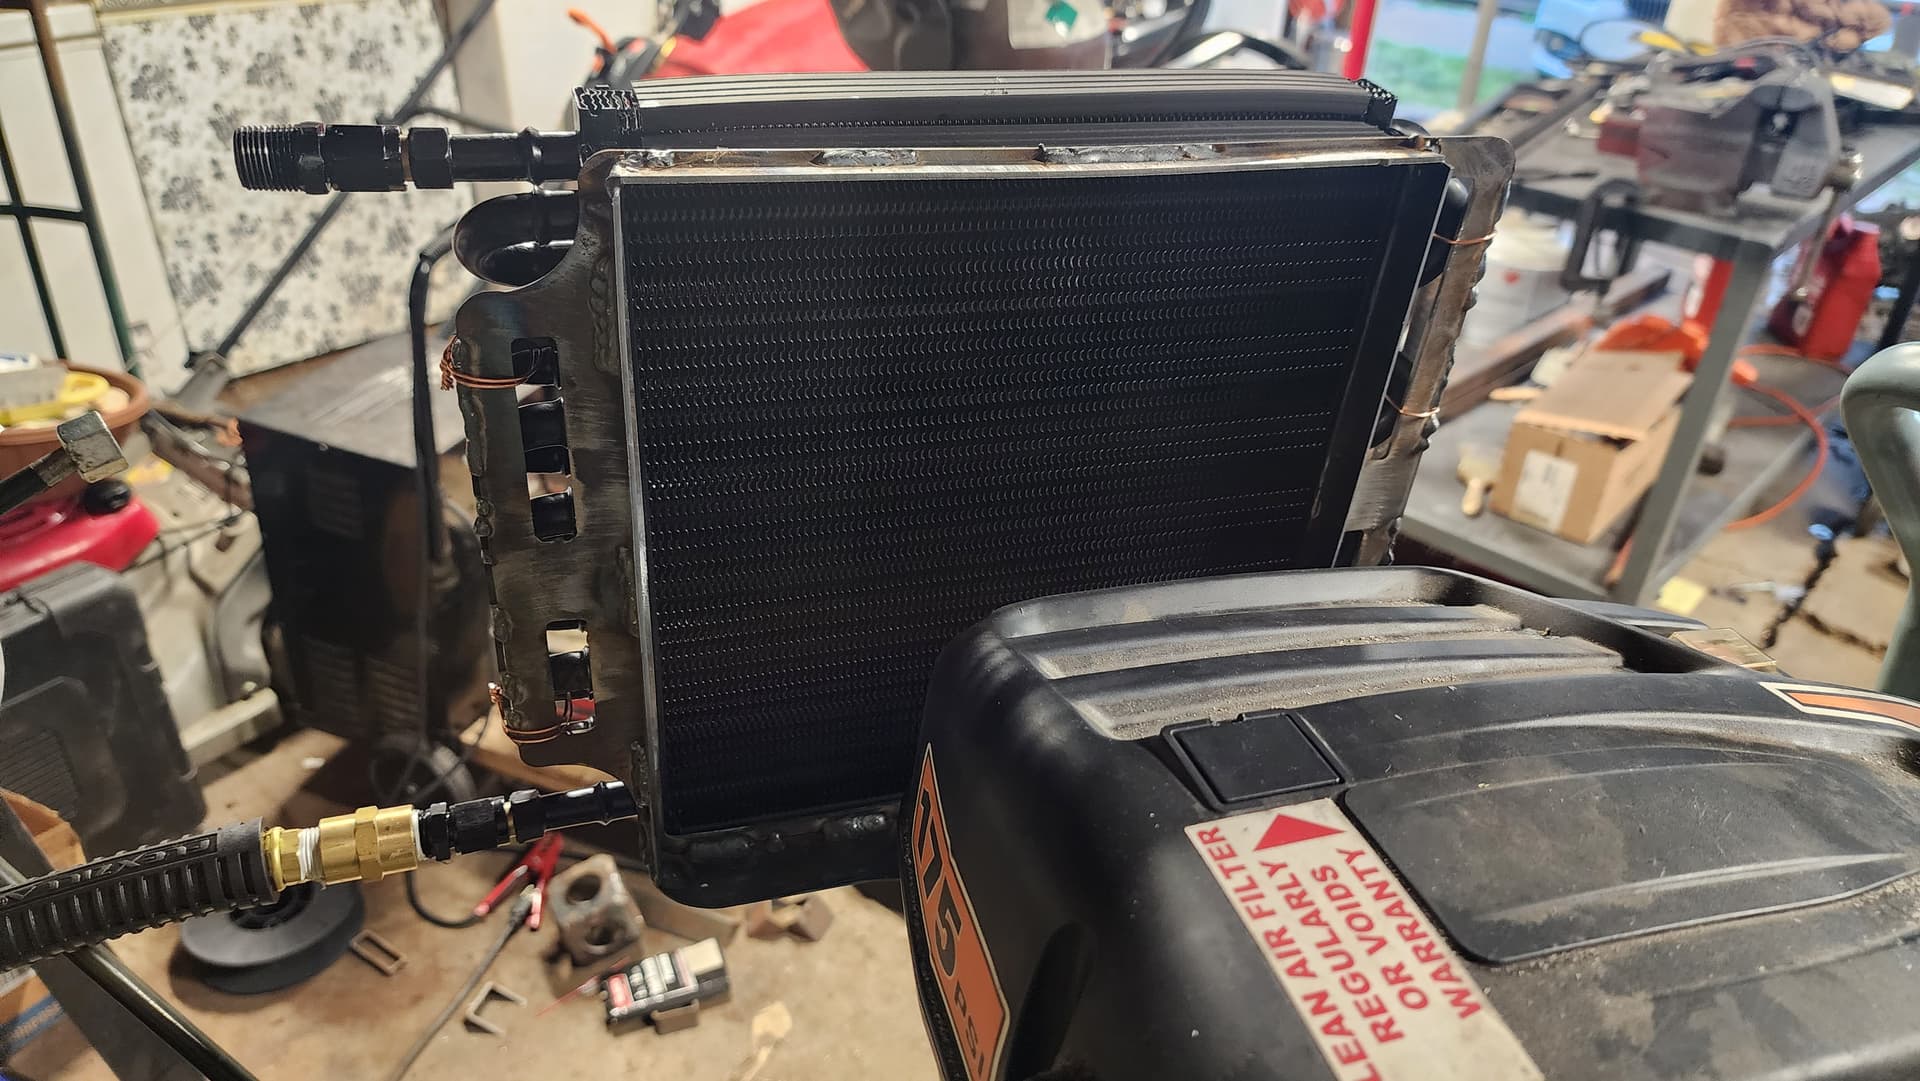
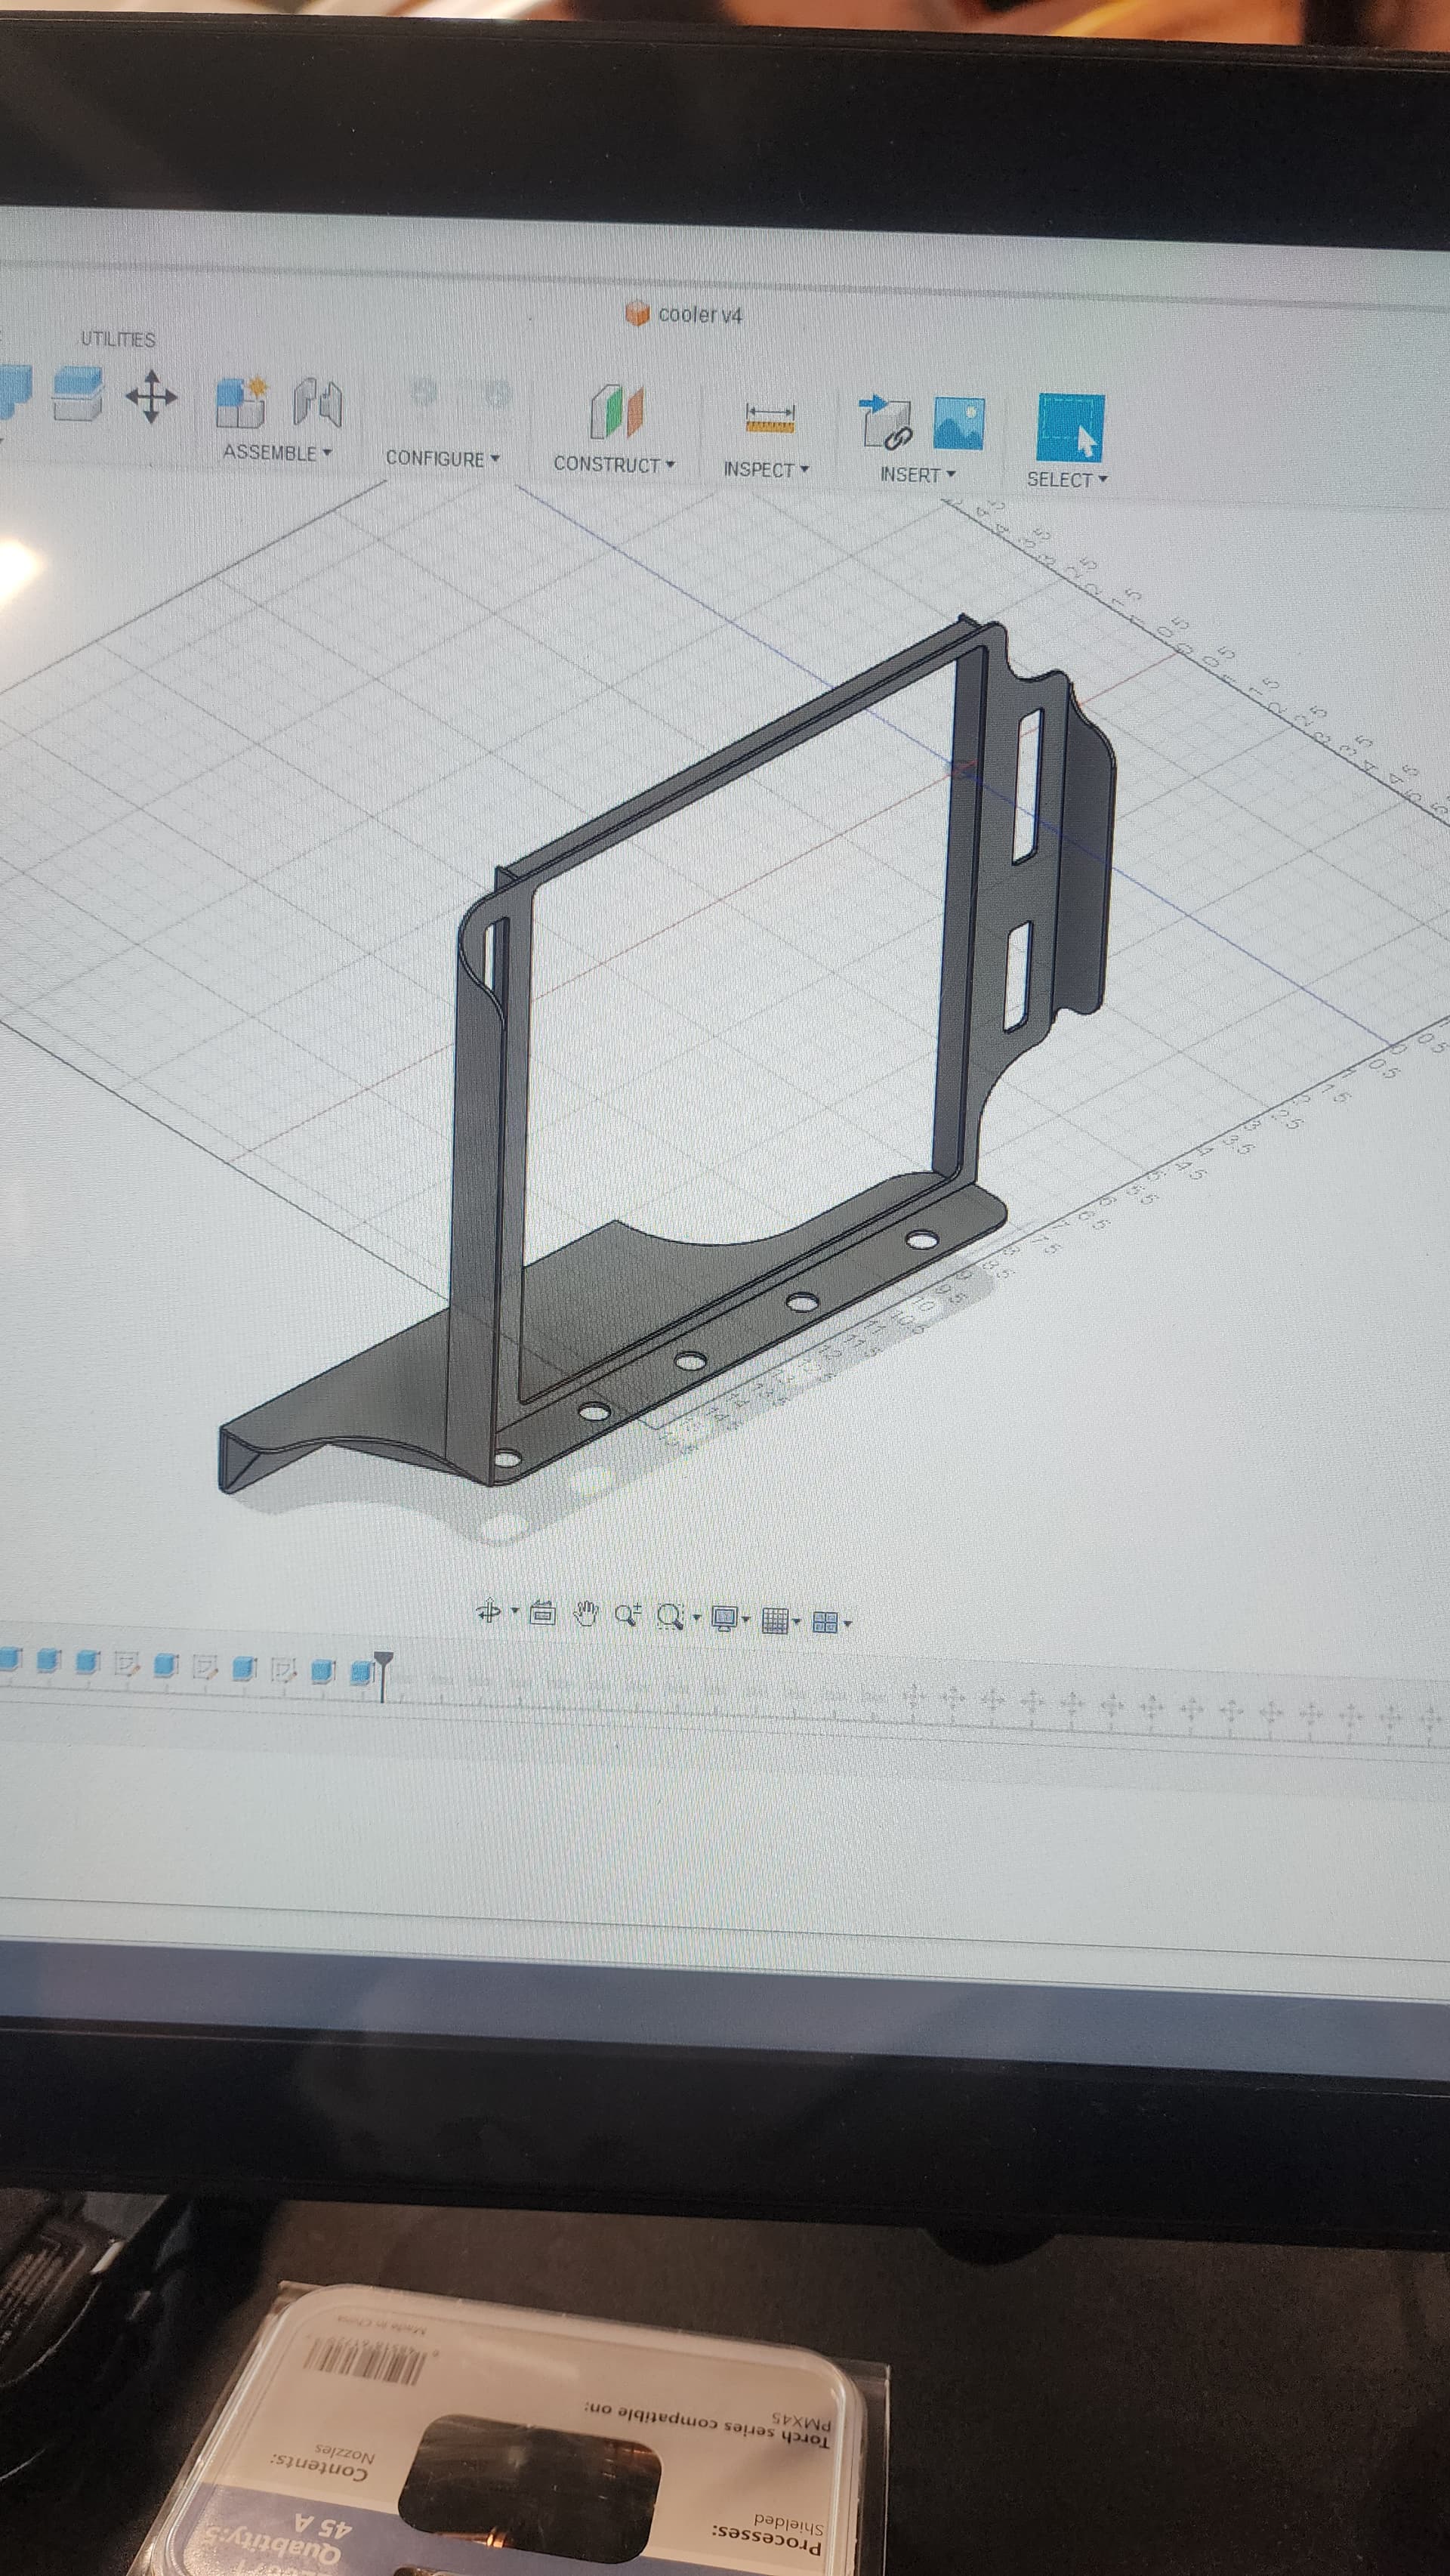
Hey im new on here and had my xr for almost a year and still learning the ropes with the system. I’ve been using the MCGRAW 21 gallin air compressor from harbor freight and i just recently got the derale 13300 tube and fin cooler that’s been working wonders so far. I dont have a fan hooked up yet but i did just design and make this bracket mount out of 14 guage. it hugs the cooler pretty good, ive make 2 parts, one is just the bracket around the cooler so it can go on any compressor setup im making some changes to the design and then i will release it on fireshare
I am unable to upload the pictures of it can anyone help me out?
Welcome to the forum.
When you are new, it takes a bit before the ‘system’ recognizes you and upgrades your standing. If you have a youtube account you may be able to share a link to a posting there.
Meanwhile this is what you will be looking for:

4 Likes
Thanks ill try to make a video on my youtube then.
1 Like
@tonypart117 Welcome to The Forum.
Looking forward to seeing some pictures of your bracket.
There’s been quite a bit of discussion over the years on the forum about the cooling of the air using these heat exchangers.
Where in air line do you plan on installing your cooler? before or after the tank ?
Are you providing any sort of vibration isolation to the connections?
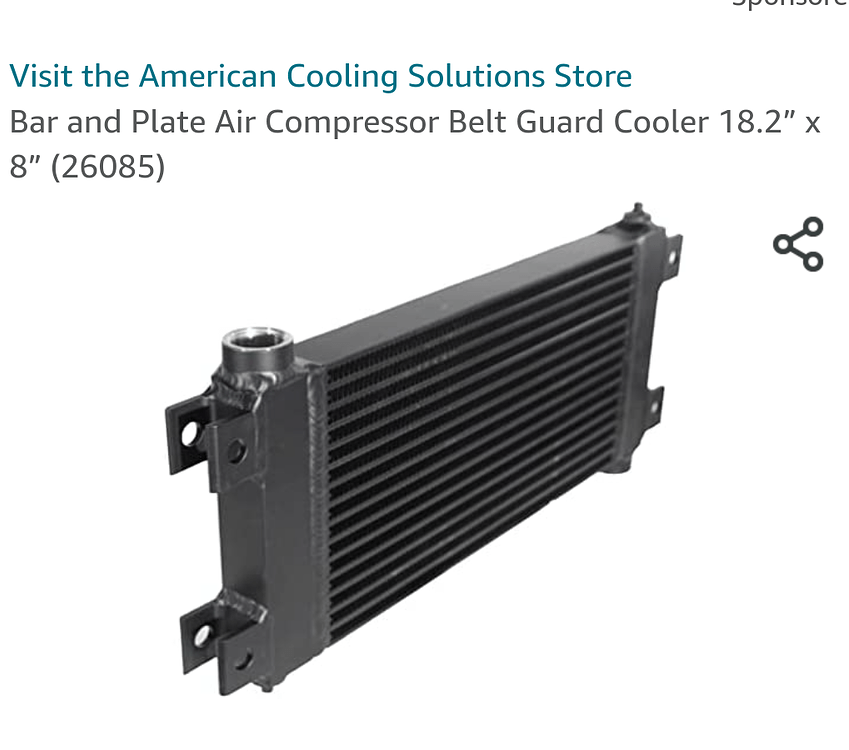
What made you decide to use a oil to air heat exchanger instead of the air to air heat exchanger?
Here is an example air-to-air style heat exchanger for compressed air.
https://www.amazon.com/Plate-Compressor-Guard-Cooler-26085/dp/B095KYG8H4
4 Likes
Thanks ive got it hooked up before the tank right now with a catch can hoping to get most of the water out before reaching the tank. Ive seen alot of people just use ac condensors off of cars but all the ones i found have holes in them and brand new the cost isnt that much under the derale ones. Plus these derale oil coolers are layered so its kind of like having 2 reguler oil coolers but the size of one. in my tests with the compressor constantly running and no fan on the heat exchanger worked well cooling the air down by the time it reached the end of the cooler. It did howerver start getting hot after about 5 to 10 minutes of the compressor non stop running. i had a very weak desk fan lying around and decised to try it out with the fan. So with that weak fan blowing on the heat exchanger and continues cutting on my xr so the compressor was running for about 15 to 20 minutes before it turned off and the air stayed cool the entire time.
1 Like
I really like how it turned out. the vibration dampening didnt come to mind at all when designing the bracket so ill have to make some changed to it. Ill prbably make it slightly bigger and i can get those foam tapes or stick on foam sheets at walmart and tape it on to the heat exchanger doesnt get damaged from the vibration.
2 Likes
Limiting movement between the inlet/outlet tubes and the cooler is a lesson I learned the hard way.
My cooler broke at the outlet fitting, due to the cooler vibrating and flexing the tube at the AN fitting.
4 Likes
did you fine a solusion? Im gonna be changing to ptft instead of the hardline that goes from the compressor to the cooler so i wont have to worry about bending it to the exact place i need it.
I don’t know for sure. I zip tied the outlet tube to the cooler, so they don’t move separately. I’m hoping that prevents a repeat of the first broken cooler.
I was able to repair the broken one by cutting back some of the fins and soldering the connector back on, so i have that one for a spare.
1 Like
Vibration-Damping Sandwich Mount with Stud
Neoprene, 5/16"-18 x 5/8" Thread Length, 45 lbs. Capacity, 1" High

2-D PDF


![]()


$5.29 Each
Delivers tomorrow 10 am - 12 pm
9213K23
Each
ADD TO ORDER
4 each ordered on September 14, 2023 0914JMESSAR.
![]()
3-D PDF
Learn more about our Solidworks Add-In
| Mount Type | Threaded Stud |
|---|---|
| Thread Size | 5/16"-18 |
| Thread Type | UNC |
| Capacity per Mount | 45 lbs. |
| Deflection @ Capacity | 0.1" |
| Shear Capacity per Mount | 8 lbs. |
| Deflection @ Shear Capacity | 0.1" |
| Diameter | 1" |
| Height | 1" |
| Thread Length | 5/8" |
| Hardness | Durometer 50A |
| Hardness Rating | Medium |
| System of Measurement | Inch |
| Shape | Round |
| Material | Black Neoprene Rubber |
| Stud Material | Zinc-Plated Steel |
| Temperature Range | 10° to 180° F |
| RoHS | RoHS 3 (2015/863/EU) Compliant |
| REACH | Not Compliant |
| DFARS | Specialty Metals COTS-Exempt |
| Country of Origin | United States |
| USMCA Qualifying | Yes |
| Schedule B | 401699.6000 |
| ECCN | EAR99 |
2 Likes
This is the cooler I have mounted on mine as an aftercooler
amazon.com/gp/product/B004XONT3E
I would recommend mounting the cooler OFF of the compressor to maximize rigidity (minimize induced vibration), and run at least a small portion of FLEXIBLE line on both sides. There is some nylon braided AN line you can pick up from summit racing that I used on my old hotrod that should work wonders and not be a total PITA to cut and install, like SS braided.
Also, notice the angle of the tubes. To do it 100% correctly, you need to mount the cooler at a 45° angle so that the tubes are horizontal, avoiding any moisture trapping. (Example, tilt the top of the cooler BACKWARDS in the image of the cooler on the zon)
4 Likes
With a cooler hooked between the compressor and tank do you notice a longer cycle time to charge the tank?
3 Likes
There should be, yes, as you’re making the air charge cooler and denser before it enters the tank, thereby taking up less volume, thereby adding more air by mass (also less water vapor).
PV=nRT
(at the tank, end result)
Pressure and volume remain constant, and temp decreases, mass increases.
1 Like
I didnt really notice a significant change in mine. Im positive there is a difference but not noticeable. The only thing i picked up was it sounded different after about 1 second of starting up which didnt happen before, im thinking this is because theres more volume before the tank now so it taked that second to full up defore the check valve and encounters a more load.
1 Like