I’ve seen some confusion in regards to using text in Fusion 360 peppered throughout the forum and just wanted to address it broadly here. There seem to be two problems our users are having with text, either they cannot get text that appears in Fusion 360 to cut in their final product, or the cut text has undesirable drop-outs.
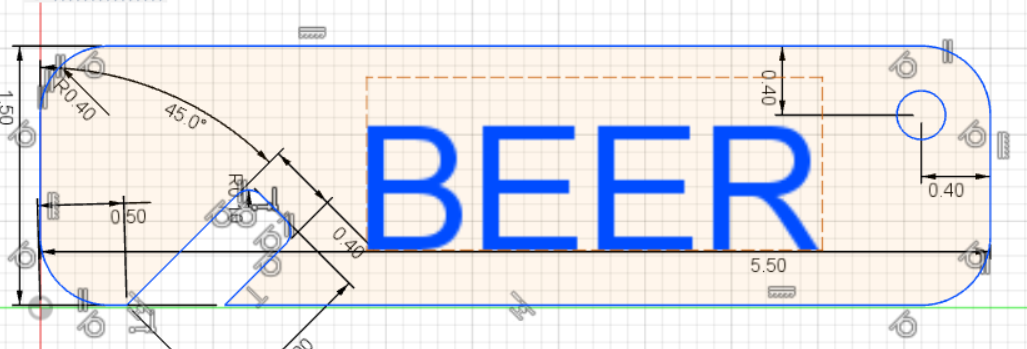
Let’s solve the issue of text missing entirely from your final product first. Any text you add to a sketch in Fusion 360 will default to construction lines, meaning they are imaginary lines in your sketch to help show important information and will not be cut in the final product. It treats text this way because the intended purpose of text in Fusion 360 is to take notes within your sketch. You can tell the difference between the types of lines because a construction line is hashed, and a cut line is solid. Note below that the text is outlined with hashed lines, indicating that the text is a construction and will not appear in the final product.
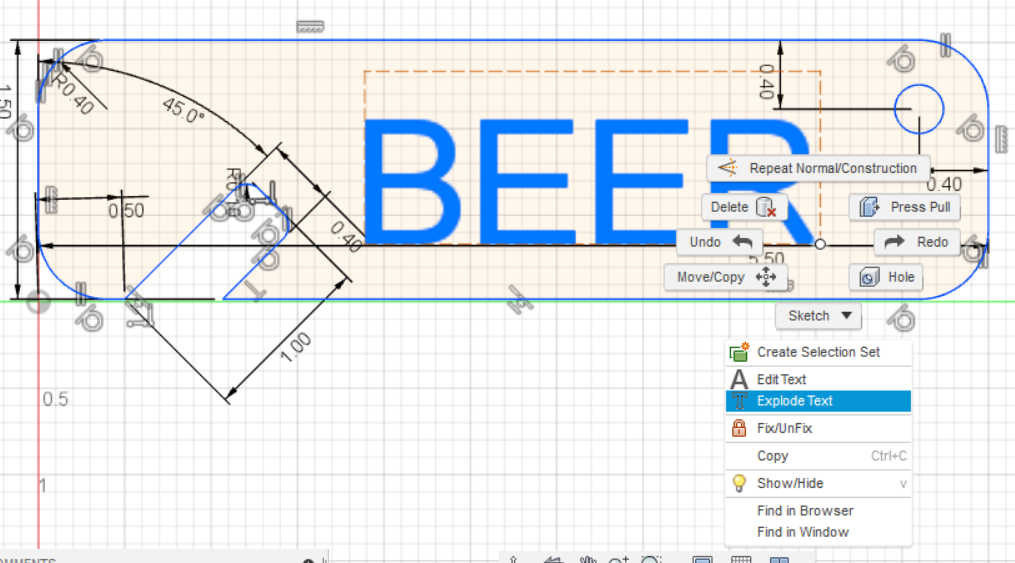
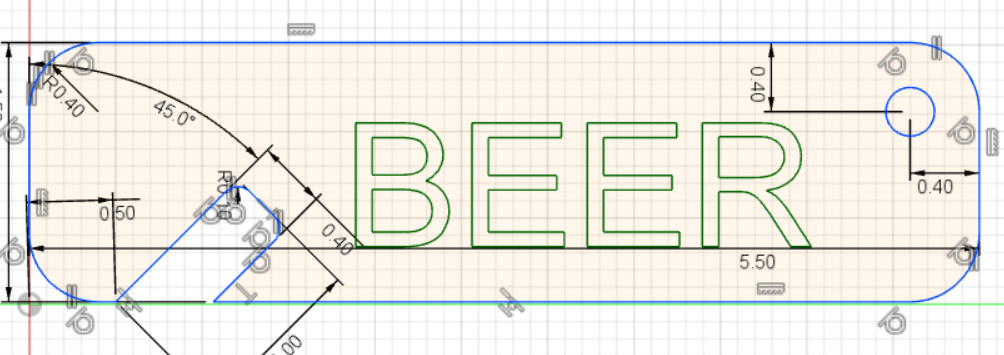
To remedy this, highlight the text and right click it, then select ‘Explode Text’ from the menu that appears. What this feature does is convert text lines into sketch lines that can be individually edited. Note in the images below where the ‘Explode Text’ feature is, as well as the fact that the text is no longer outlined with hashed lines after using this feature.
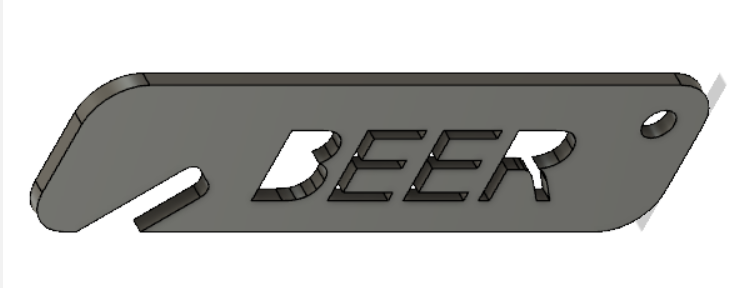
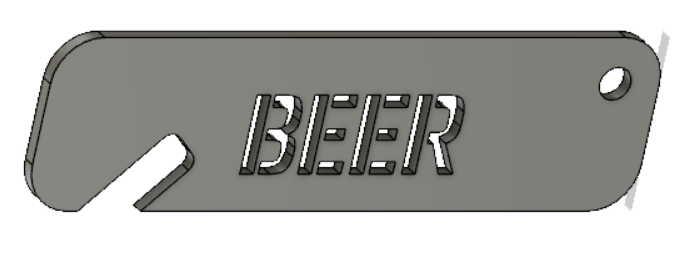
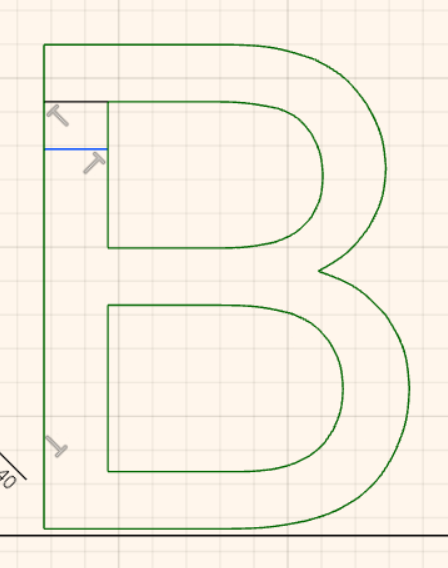
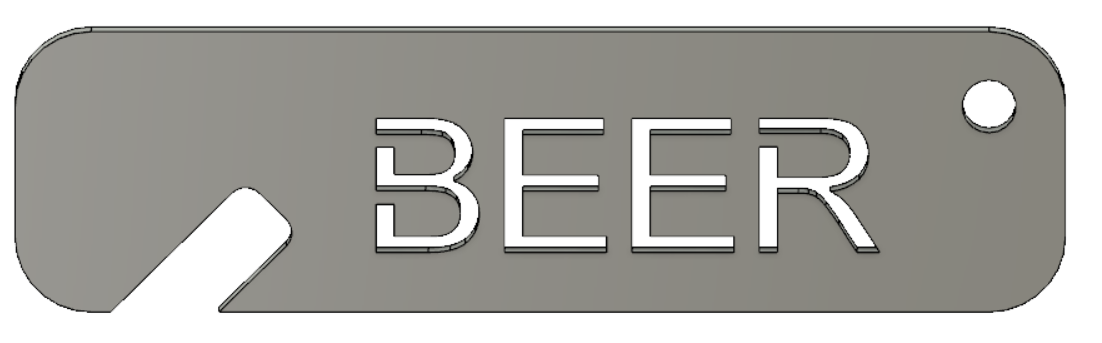
If you haven’t noticed yet, there is geometry in the letters ‘B’ and ‘R’ that will have an undesirable drop-out effect in my final product. Note below that you can preview this effect using the ‘Extrude’ feature.
You can solve this problem by changing your font to one that is cut friendly and will preserve the whole letter. I downloaded and installed a simple stencil font for this. It is important to mention that you will need to undo ‘Explode Text’ in order to change the font, so it is easier to be careful of your font selection before using the ‘Explode Text’ feature. Note below the preserved lettering and lack of drop-outs in my final product.
I hope this helps resolve any issues relating to using text in Fusion 360 and that everyone is enjoying their CrossFire!
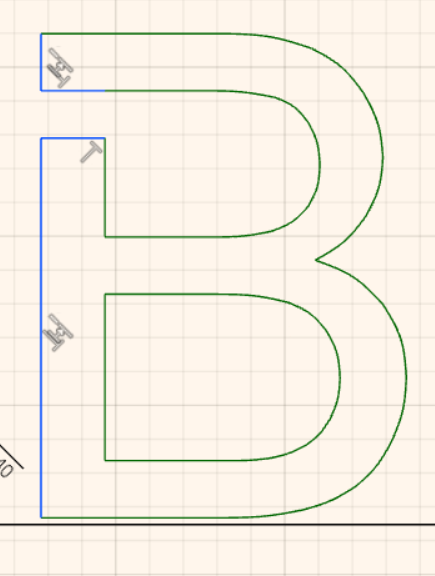
Side note- if you’d like to get a standard font to cut properly instead of downloading and installing one, all you have to do is add bridges to any potential drop-outs. Once you’ve used ‘Explode Text’ your letters are made of editable cut lines. Note below how I use two new lines to create the bridge in the desired location.
I know this post is old, I am doing everything coved in this post, when I get to upload to mach 3 the g code loads fine but the display box only show parts of the word (1st cut in the word) then nothing. not sure what I am missing. thanks for the help
Can someone please point me to a good place to download a stencil font(s) and explain exactly how to get it uploaded into a windows machine so it is selectable by Fusion 360??
Dafont.com has thousands of downloadable fonts. 1001fonts.com is another website with downloadable fonts.
The fonts will download to your machine (usually in the Downloads folder). They’ll be either a TTF file type or a Zip file with the TTF file. If it’s a Zip file, double-click and chose the Extract option in the window that comes up. Once you have the TTF file, just double-click it and it will pop up a window showing the font as well as an “install font” button. Click on that.
Next time you start Fusion the font will be available for use.
You can also use stencil font art (https://www.designshop.com/stencil-font-stock-art.html) where you assemble the text you want manually. This is a good one for cutting as it doesn’t have some of the fine detail lines/cuts that may not survive plasma kerfs. It is a more time consuming process to assemble the text you want. However, if you use this as a guide you should be able to find similar Windows fonts in one of the links I had above.
For the inkscape users if you find that you cant use the fonts after you install them its because windows 10 has changed where they are installed and inskape doesn’t look there.The work around is you have to have two users assigned to the computer and install the font for all users.I dont know why this works but it does for me.You have to download and unzip the files then right click and select install for all users.
heath,
Make sure you select “Install for all users” when you install the fonts (right click on the font). If you are using Windows 10. If you do this you will not have to copy the font into the inkscape folder. To get the “Install for all users” option you have to unzip the font file (if your file came down zipped…sites very there download styles).
I’ve been trying to get some text to be only attached at the bottom it’s easy enough but I can’t figure out how to make fusion cut the center of the letters out. In this case I want them to drop out
Is there a chance that the centers of the letters you want to cut out are not complete contours? Meaning is there an open corner somewhere that causes that line to be just that, a line, and not a closed contour?
When you place your cursor over the letter in question, does the entire letter highlight including the area you think should be dropping out? If so, this would be a good indication that something’s amiss…
Could you take a screenshot of what you’ve got going on?