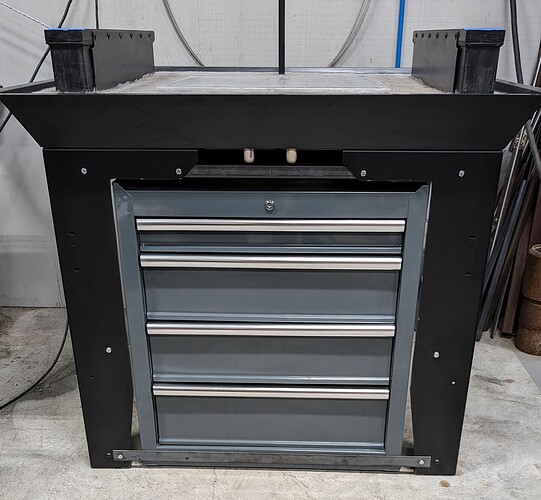
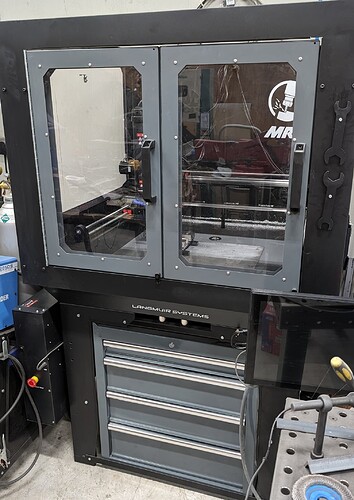
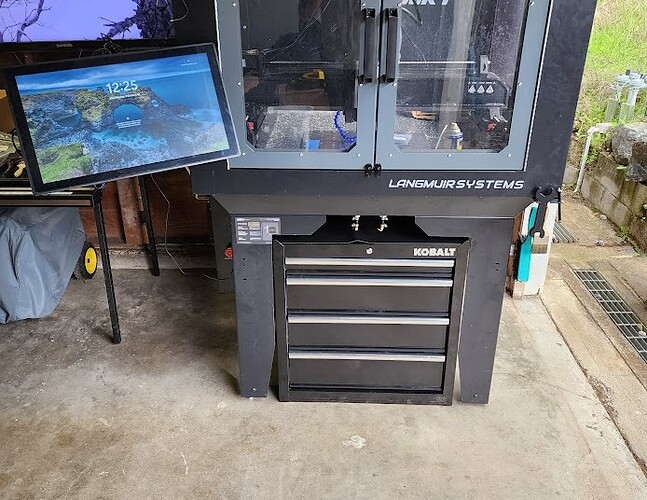
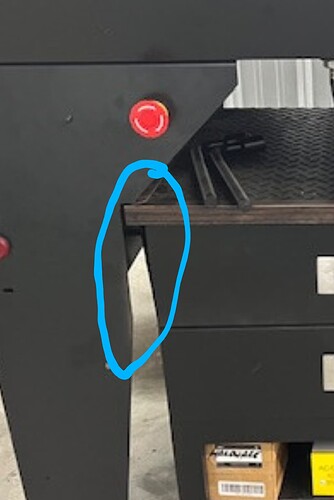
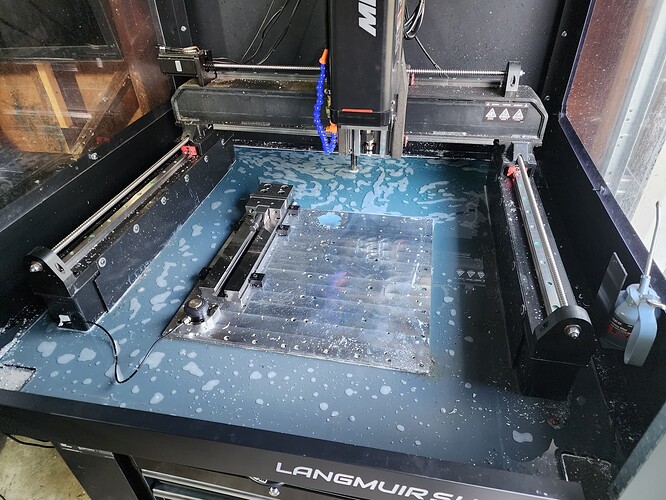
Little bored waiting on the concrete to dry. Decided to install a cabinet for tooling, touch probe, etc. Not a recommendation…just something I did. There is a welded angle iron across top and sides…bolted in and then a steel strap across bottom to tie both legs in. Can probably see the strap under the cabinet. It’s all threaded and bolted to the legs/ base and a continuous load path to the concrete floor. When I cut the legs…didn’t seem to effect them as for movement or able to flex any additional from nominal. Strap is insurance.
This looks great. What box did you go with? Any rigidity issues from the loss of that leg material? Still room for the coolant tub behind it?
No loss of rigidity. I added some support but probably didn’t need it. Just insurance. It was Kobalt brand from Lowes. Bought it for the dimensions and the fact I could still modify drains and have room for the drains and basin. Works great.
I’m going to buy that box today, thanks for making this post and I appreciate the extra photos
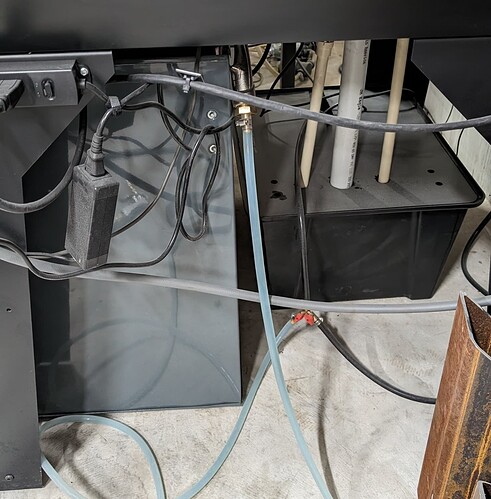
I am going to have to figure out how to deal with the drains though - I have the stock setup, and the tubes won’t make that tight of a radius.
You already poured base?
Yes - I purchased my mill 2nd hand, and it was up and running when I got it.
This is looking to be a more complex problem than I anticipated, due in part to some odd design choices by Langmuir, like;
-
Why have an exposed fitting, made of soft brass,- which could theoretically be easily damaged - affixed via concrete? Insted, have a female fitting sit recessed & protected inside the tub, that would accept a threaded male fitting which, if damaged, could be replaced from the outside.
-
Why use 5/8"-11?? Apparently an uncommon thread size and a total PITA to find parts for.
Armchair quarterbacking aside, I was initially looking for a 90° fitting to interface between the male fitting protruding from the tub, and the hose. That proved impossible because of the distance offset caused by the barbs. Next thought was to trim off the barbed end and leave just the threads, but I really do not want to cut/modify the male fitting, as it is not replaceable by any reasonable means. I also don’t think the apparent clearance (from your photos) between the top of the box and bottom of the fitting would accommodate the radius of the tubing without causing stress damage over time.
After several hours of Googling, and becoming more upset at the lack of 5/8 NPT fittings, I have decided to try using a 3/8" 90° male-to-male barb fitting, and joining it to the male fitting with a very small amount of tubing (~1 inch long).
I am off to Lowes now, hopefully will get this installed tomorrow.
If assembled already… probably best to bust out a 1 1/2 hole just behind the fixture plate…install PVC drain and float it in for finished look. Really all that’s needed. The flood coolant doesn’t flow enough to over do a little more. It’s more a insurance it drains so it does build up over the sides.
Would definitely fix the problem, I have to admit that I am a little nervous about cutting into the concrete.
I got this installed today, looks great - thanks for the inspiration. Last thing is finding and waiting on leveling feet. I am undecided about adding strapping, but after I get the spindle reassembled, I will see if rigidity is affected at all.
Does look good… Chipping/breaking out small portion of concrete not a big deal. Can drill it out…but those holesaw bits not cheap or you can just use a hammer/ chisel and take chunks until you get to pan…then reg holesaw for drain through pan. Can fill back in around drain with concrete leveler…and then top with some epoxy. Will not be visually perfect but will function perfectly. It’s in the back and once chips start flying…will never notice it.
Man, careful. Keep talking like that and you are going to talk me into another side project LOL. I am tempted - worst thing about getting this “premade” is not having the flexibility to do many of the mods on here as easily as it would have been if starting from scratch.
I don’t mind the aesthetics nor the cost of the hole saw, but have no experience with cutting concrete and am worried about mucking it up and damaging something.
Cutting concrete is not really that big a deal, it can just be a little messy. If you have the gantry disassembled now would be the time to drill it. Check with any local equipment rentals they usually rent core drill you just have to purchase the bit. A lot of them a magnetic so you just bolt a metal plate to the surface plate mount the drill, than really no different then using a drill press with a little added water. Once through the concrete get a metal hole saw and through the pan. Build the new drain and epoxy it in. If the original build used the stock color epoxy you can order a kit from Langmuir. It will match and should self level.
Cutting concrete is like cutting wood… just slower, more dust and little different equipment. Take your time and you will be drilled/ chipped through before you know it. If you plan to drill… dont start chipping at it first. Go straight to the drilling if that’s your plan. Chipping out some first will make the drilling go much harder and make a mess of the surface/finish.
i didn’t cut mine
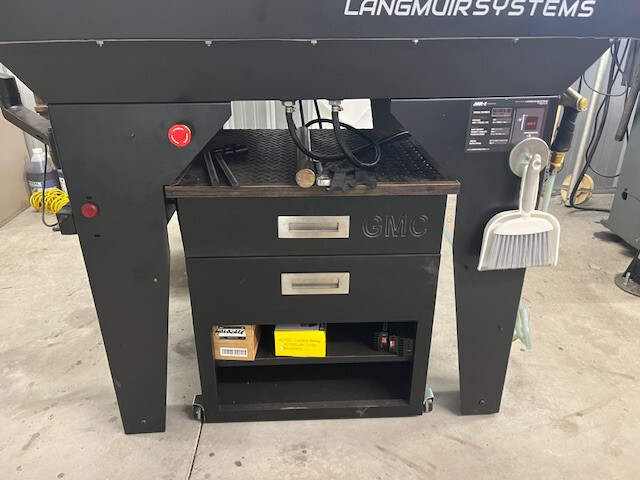
i didnt remember but i guess i did notch it. my box builder made the top wider than the drawing
Sure it’s level? Four corners should get fluid to them. Only should back up if they are clogged. Looks like from pic fluid is moving more to the back. Check level machine and then check level epoxy. See if same or if it was tilted when epoxy was poured.
Machine is level to 1 degree, but that was measured off the build plate. I will measure the epoxy tomorrow. Also, I noticed that the lip of the drain housing sits proud of the epoxy, so Ill have to grind that down
