I think that rushing definitely has something to do with it. I’ll read through that post when I get a chance, thank you!
Just a thought on your issue, make sure you have a good ground.
2 Likes
I always ground to material and periodically clean the contacts on the ground. I haven’t had an opportunity to try any new variables to see if my cuts have improved.
My 2 cents, i have been running my Crossfire table since 3/2019, viper cut 30, consumables from Paul Gamble, amazon and the mother ship. I have been welding and fabricating for 30 plus years, amps are set around 27, speed currently for 14 ga. A36 is at 67ipm, no THC, i know it as slag proper name is dross, will always be present to a degree on 14 ga. , the parts above of you if you drop them on the floor will the slag fall off? if it does you are closer than you think my friend, travel speed is big, you have to take your time and dial it in, if on large jobs, long cuts you see slag increase, you may be losing air pressure. Take and breath and work the problem, do not let the problem work you. sip some good bourbon, smoke a fine cigar, keep calm and cut on. Semper Fi
6 Likes
Solid advice. I just get overwhelmed with all the possible variables that could be causing my issues and dint know which direction to take.
I have extensive experience in the CNC world, been a machinist and in the machine trade for 23 years. Its been mentioned above but not necessarily in these words, when you are troubleshooting and dialing in a process change ONE variable at a time. I.e. change amperage, air pressure, cut speed, cut height, THC settings, etc. but one at a time. Get your best setting for that variable and then move on to changing another. This way if you solve your issue, you know what you changed to fix it and you understand what a particular change does to the quality of the cut.
Also, if your cuts looked good on a small test but went south on a longer cut you may be dealing with a pressure drop issue. Try your best settings you have developed on a larger piece and watch the pressure gages on the compressor and the plasma during the cut. Do they change as the cut progresses or remain the same? Also, as part of the pressure drop issue, what air line diameter are you running to the plasma? Is it feeding directly from the air tank or through shop plumbing? Try switching to a 3/8 ID air line directly from the compressor to the plasma. But again, make this change and leave the other variables the same if you try it. That way you understand the impact if any.
Chris
9 Likes
welcome back…
I completely agree with this…as I am guilty of this myself being at the time a total noob to plasma CNC…now I am a partial Noob…
3 Likes
We were all noobs at things during our lifetime, great part about places like this forum is that we have resources like this to ask questions and accerate past noob much faster. Cheers!
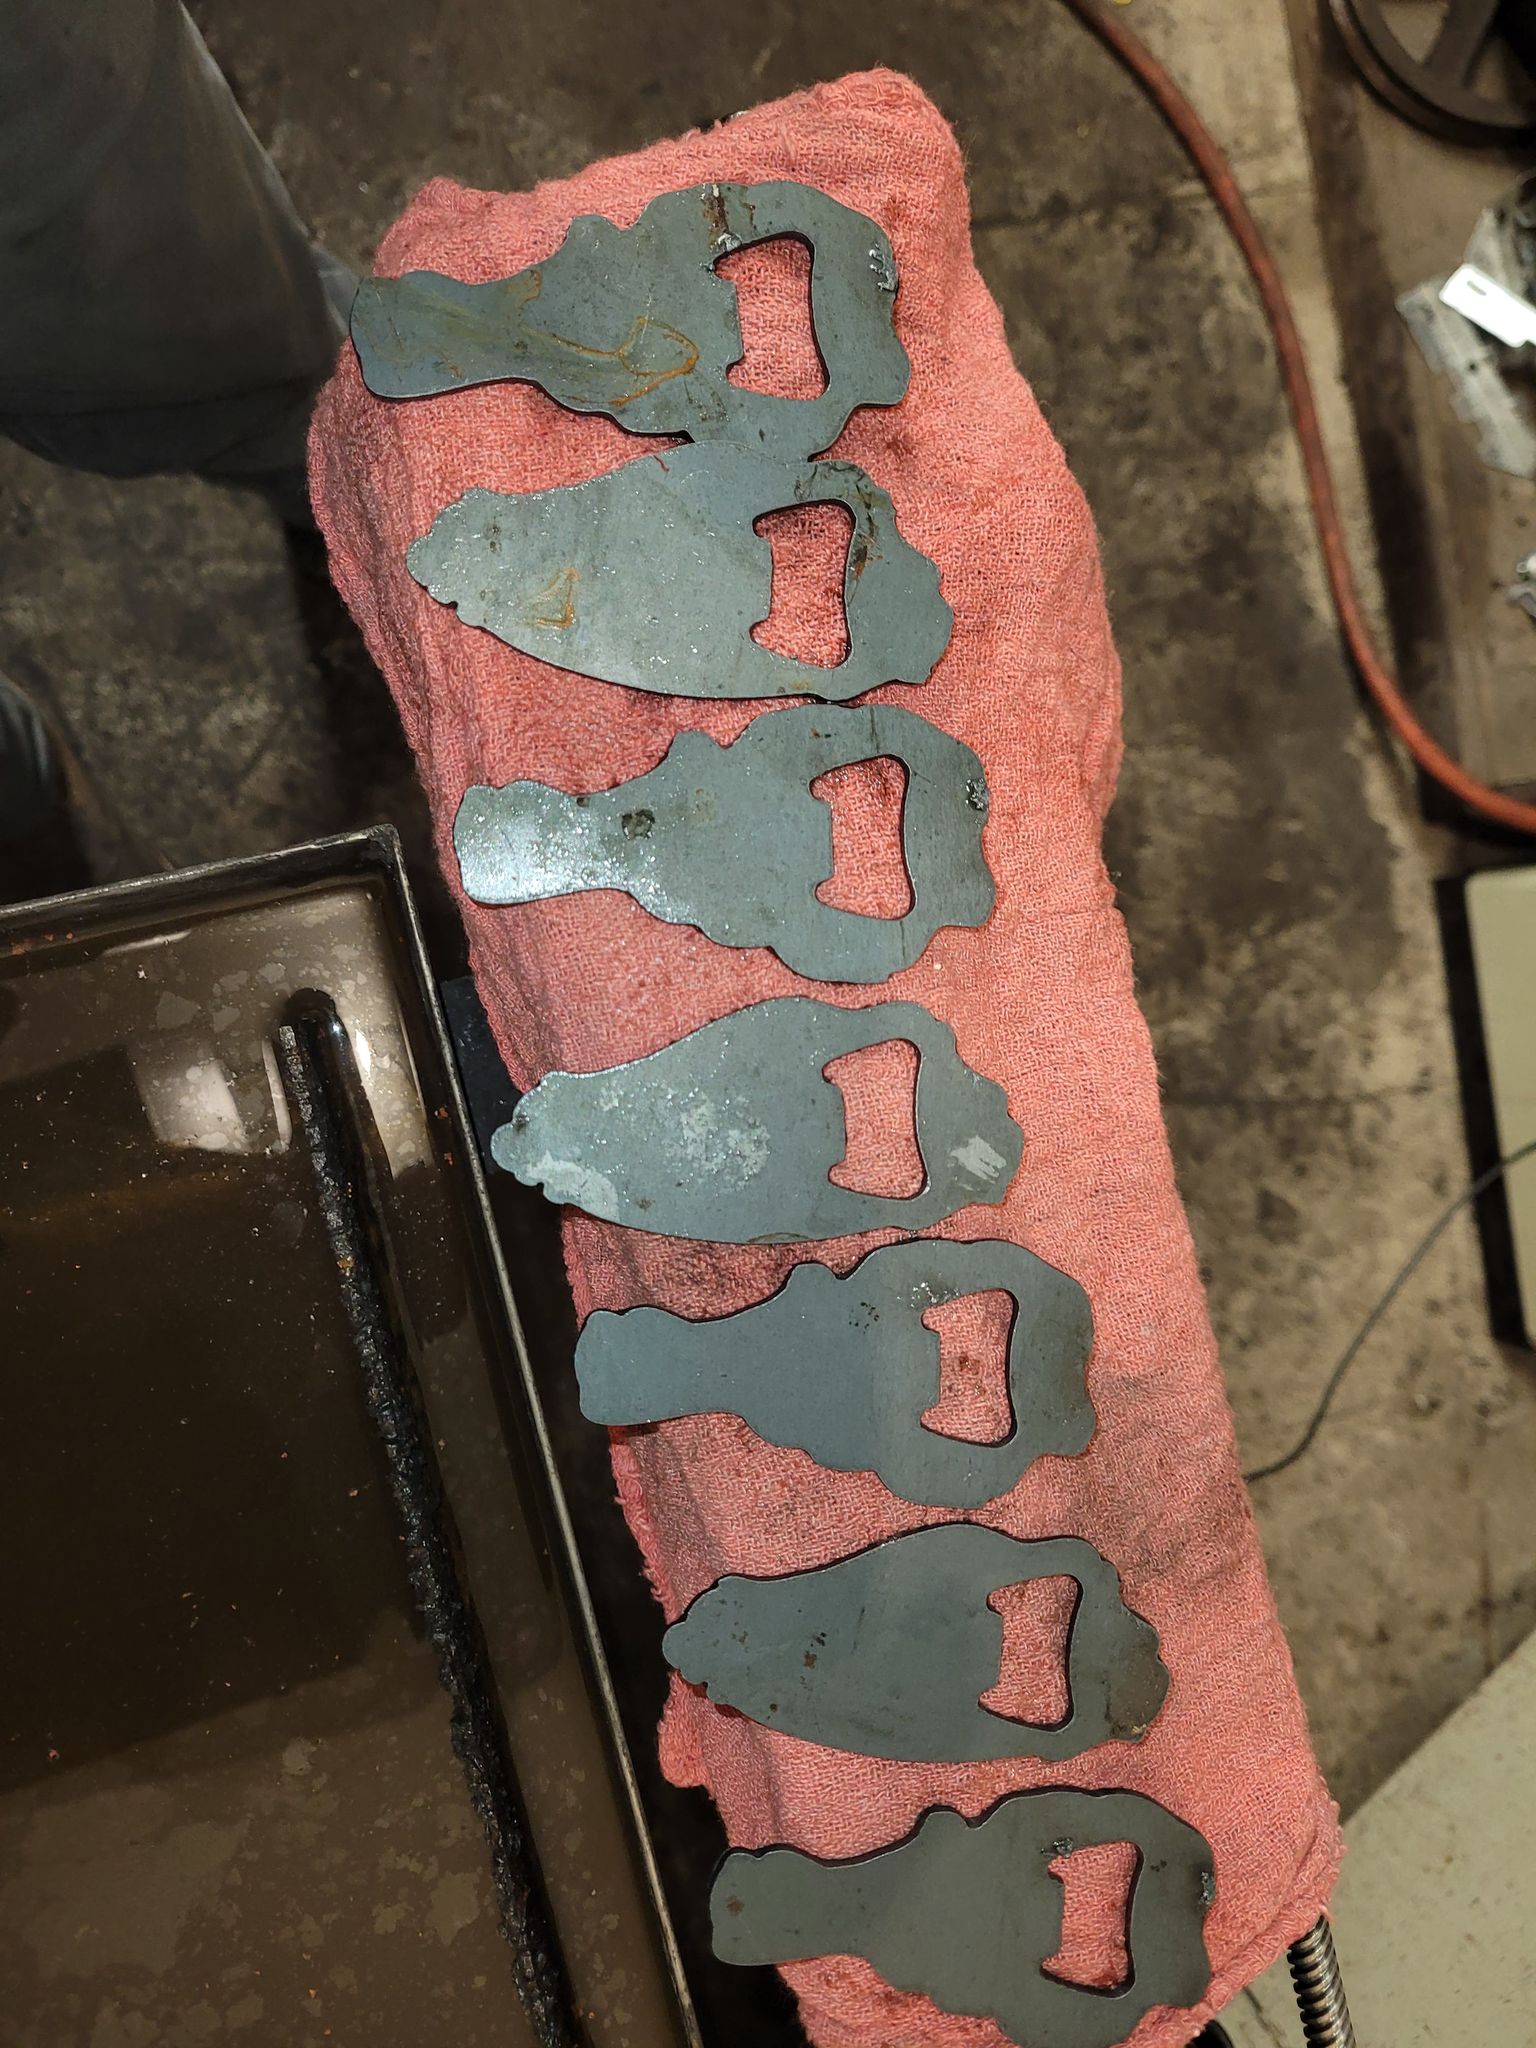
After taking a couple days away from my machine, went to do the line test and it wouldnt load correctly. so i decided to cut on a different small bottle opener. I decided not to run my compressor since I wanted to empty anyway and change the drain valve. So my cuts started at about 80 psi, and went down to about 60 psi. I mostly wanted to see the effect on low pressure, also changed some feed rates as I did cuts to see how it changed dross and cut quality.
14g HR, 30amps, THC set to 110v nominal, with a 5v range.
I started at 100 ipm, average amount of dross ive seen.
Dropped to 70 ipm, a lot more dross notived.
Upped to 130 ipm, and saw the dross I’m trying to achieve on every cut.
From there I tried some different THC settings until I felt air pressure was effecting cut quality.
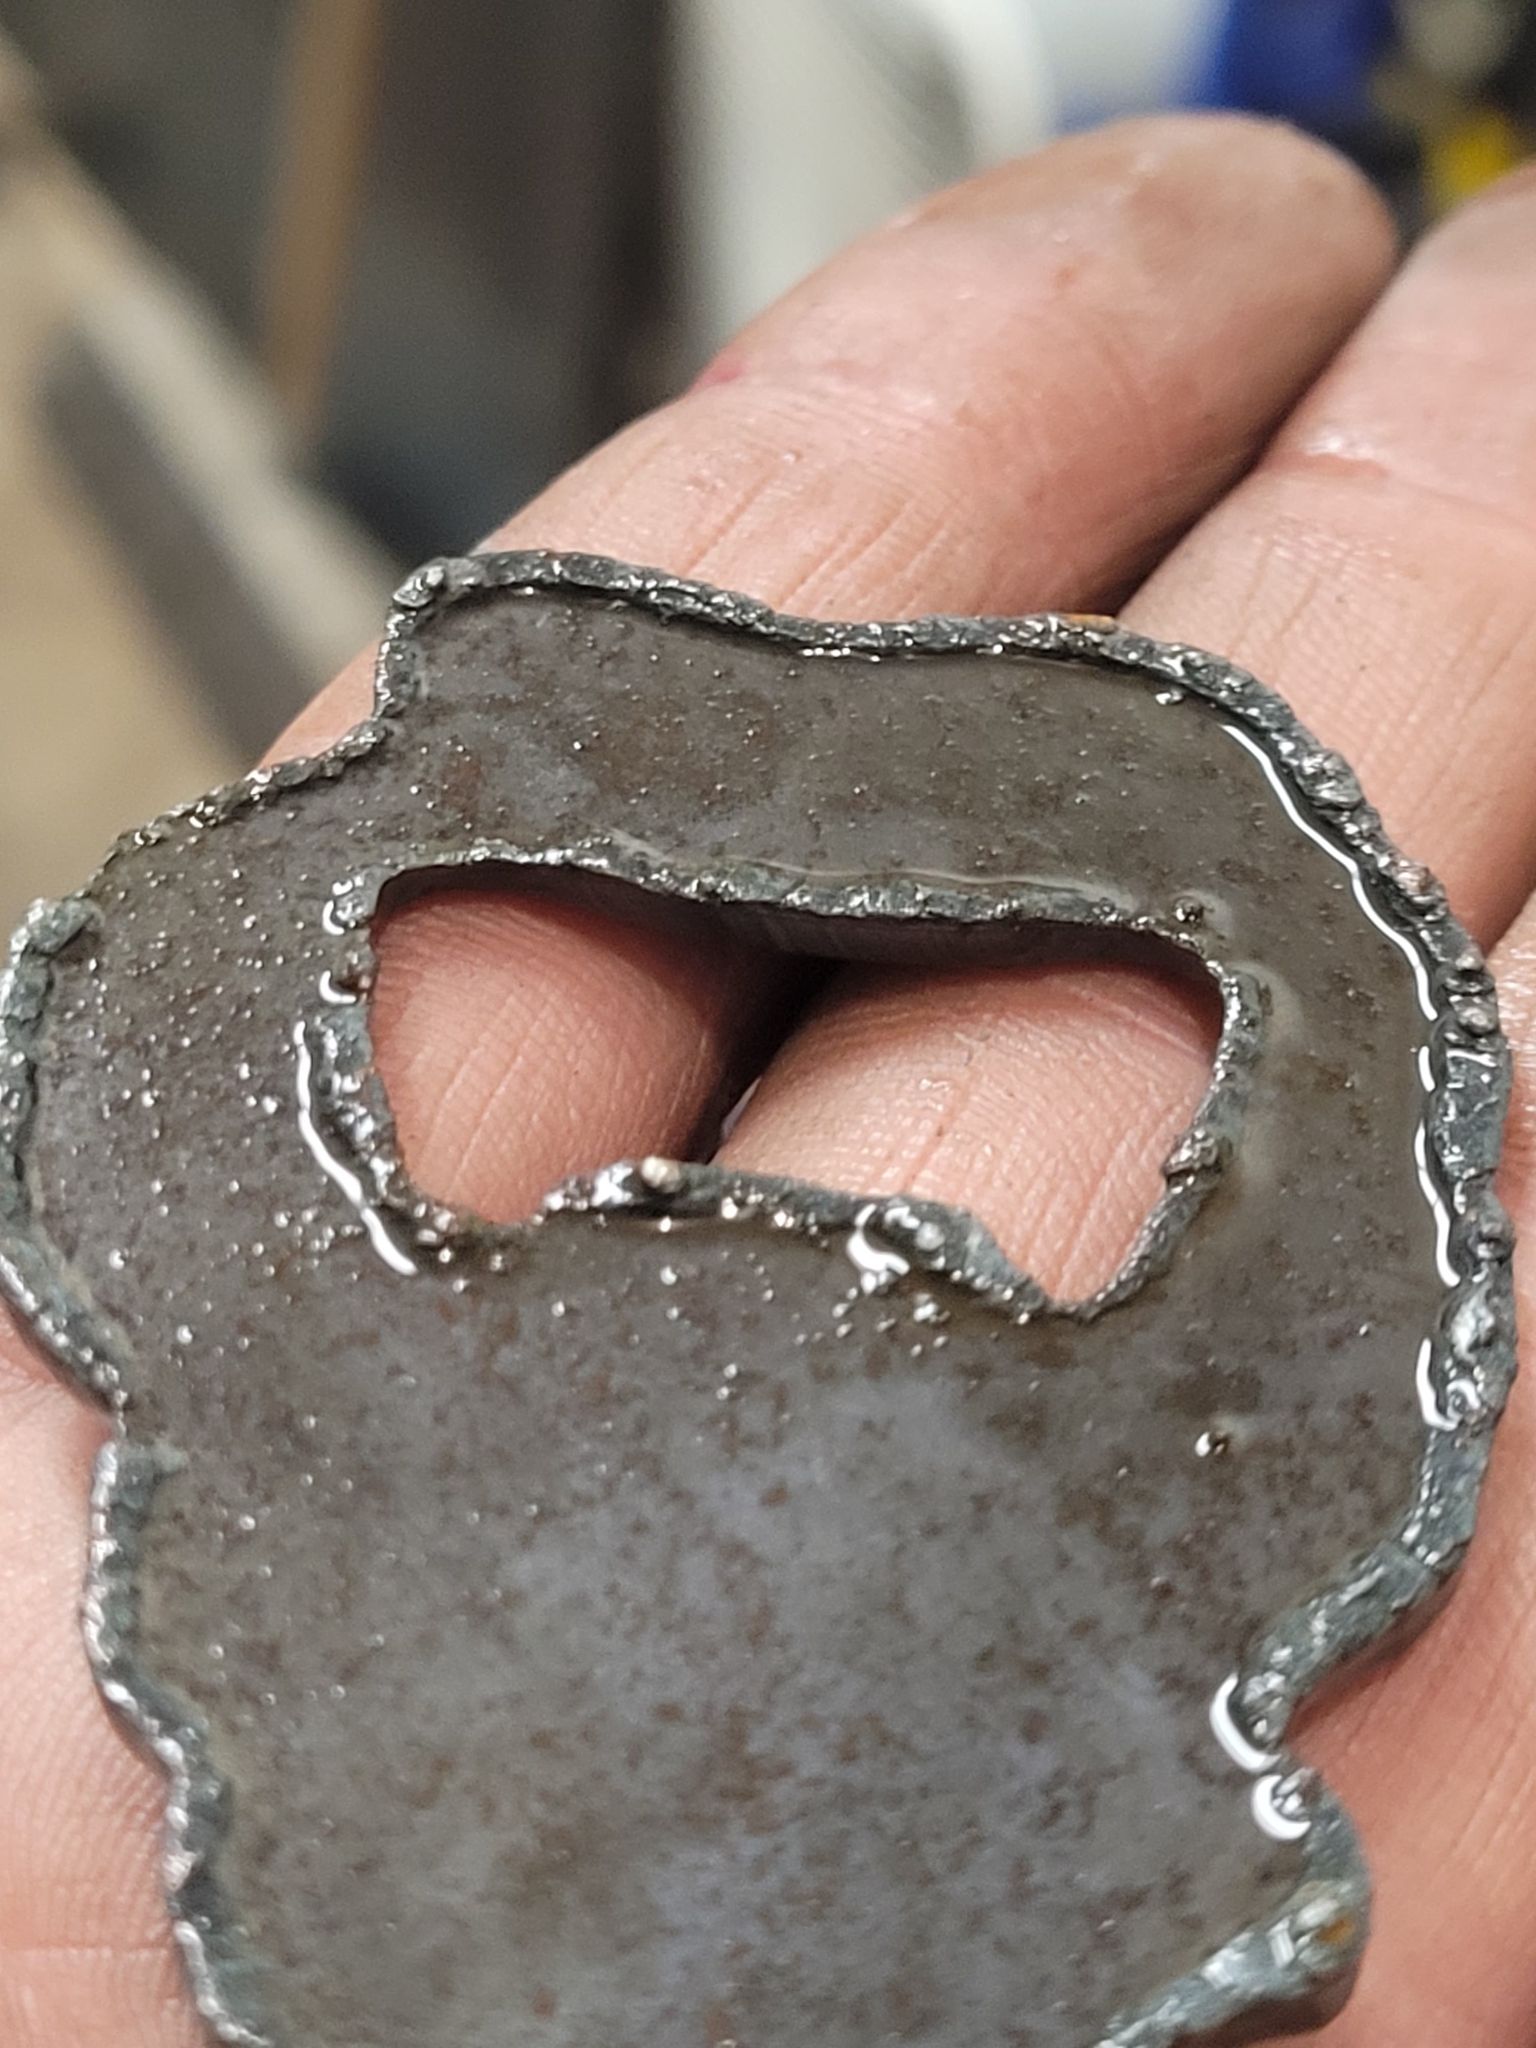
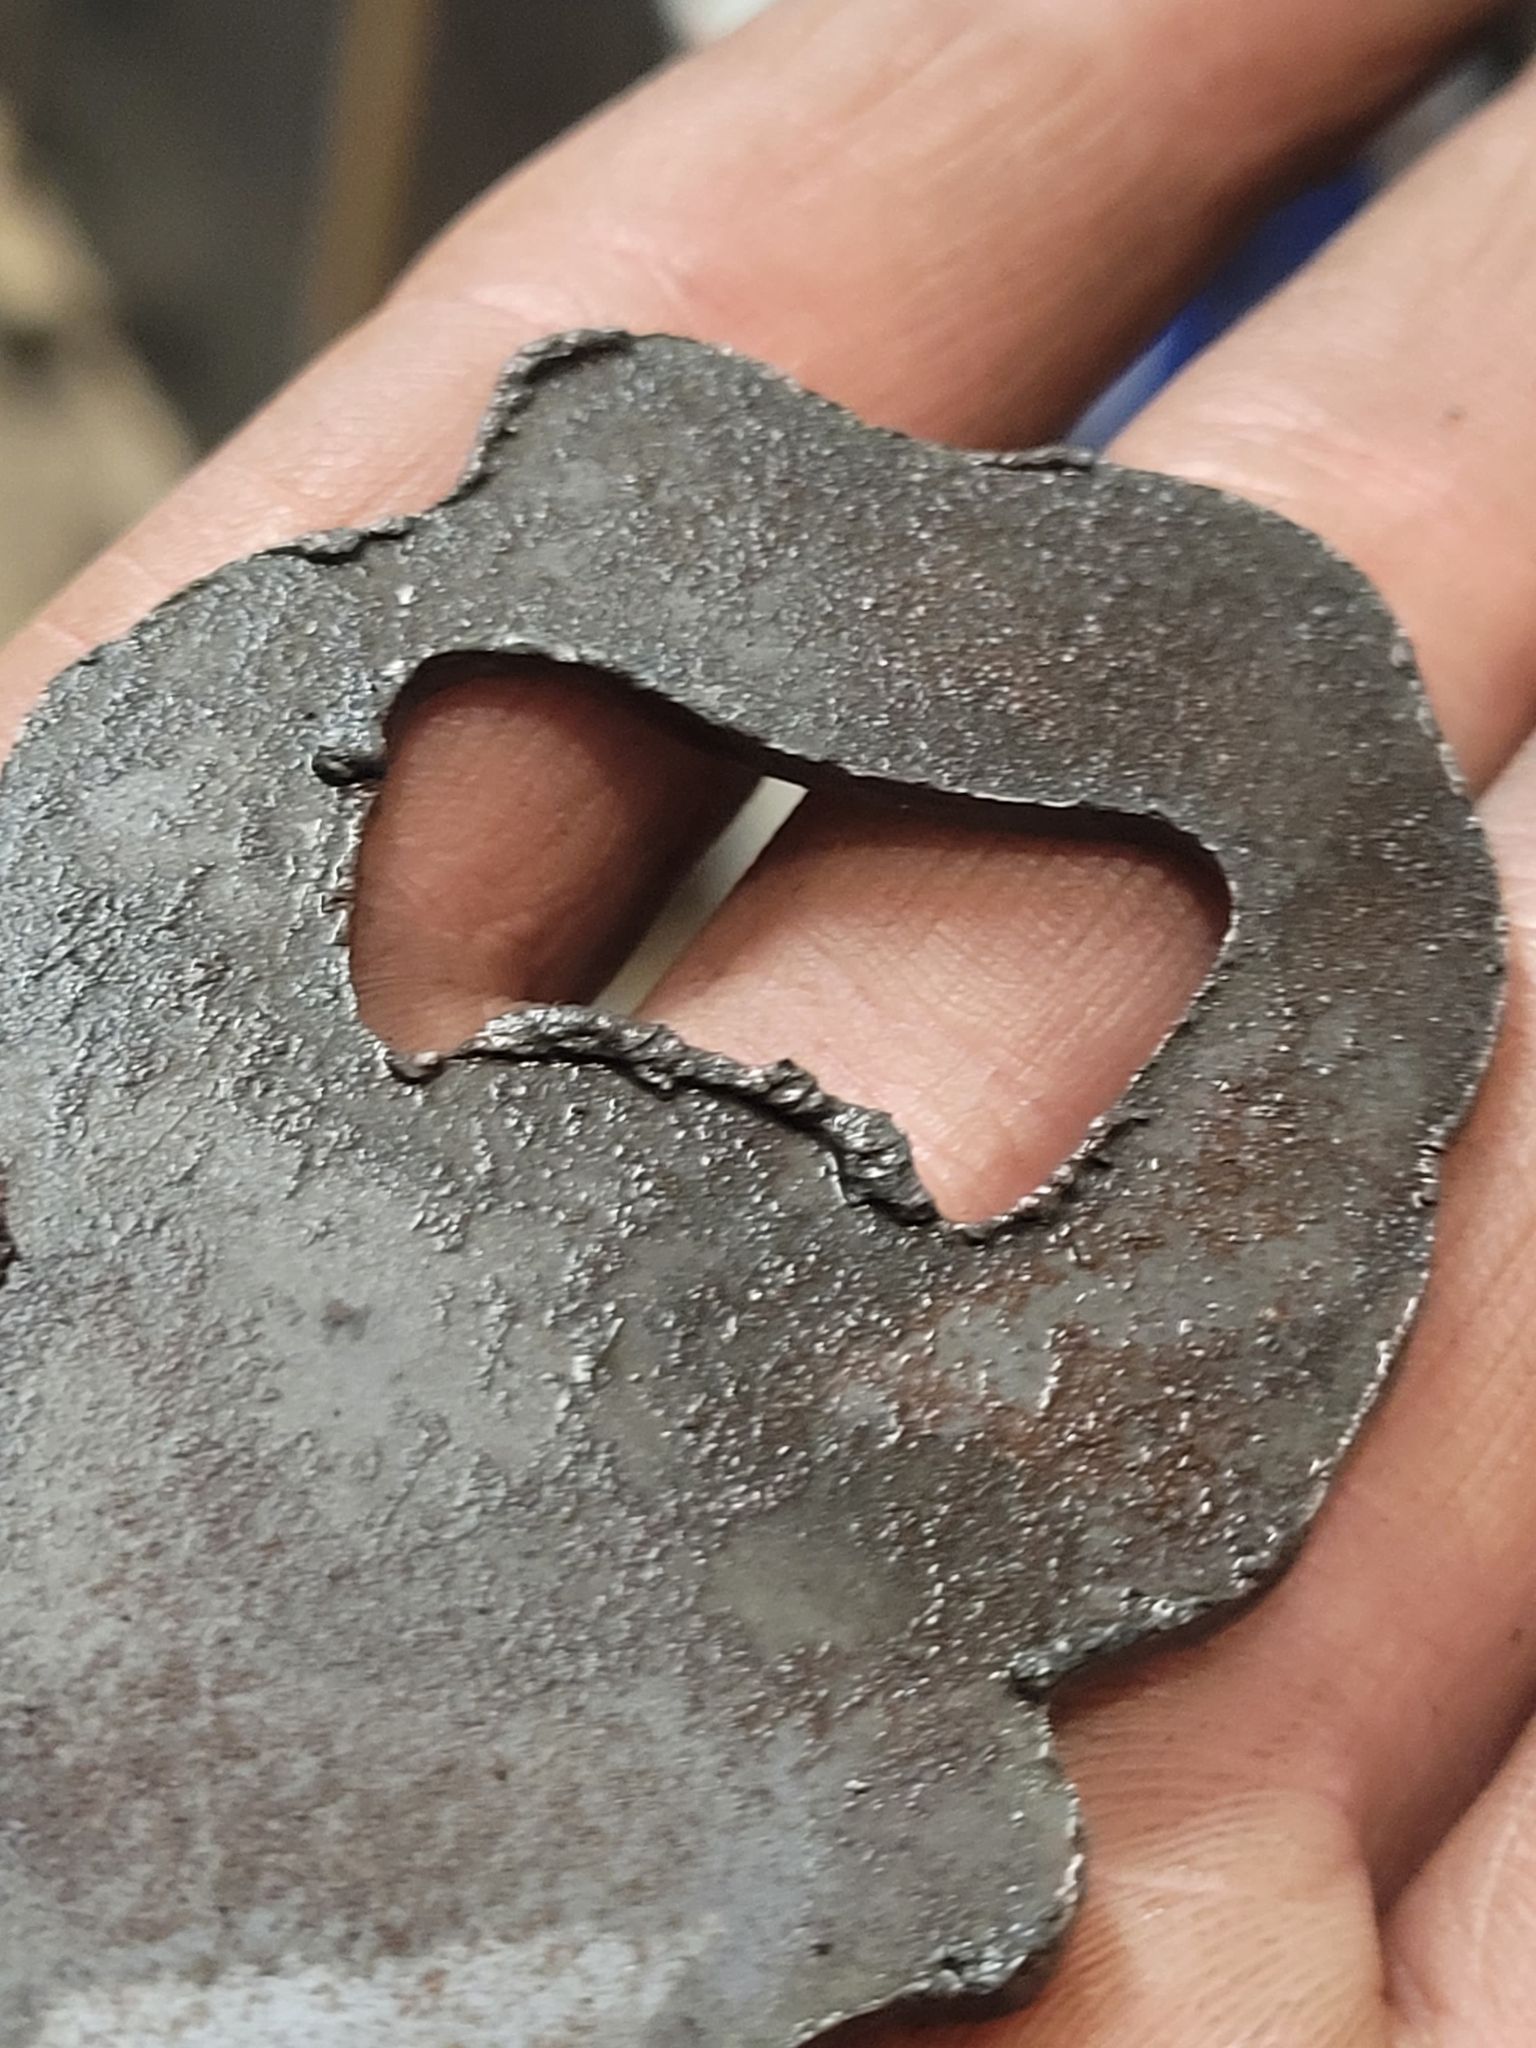
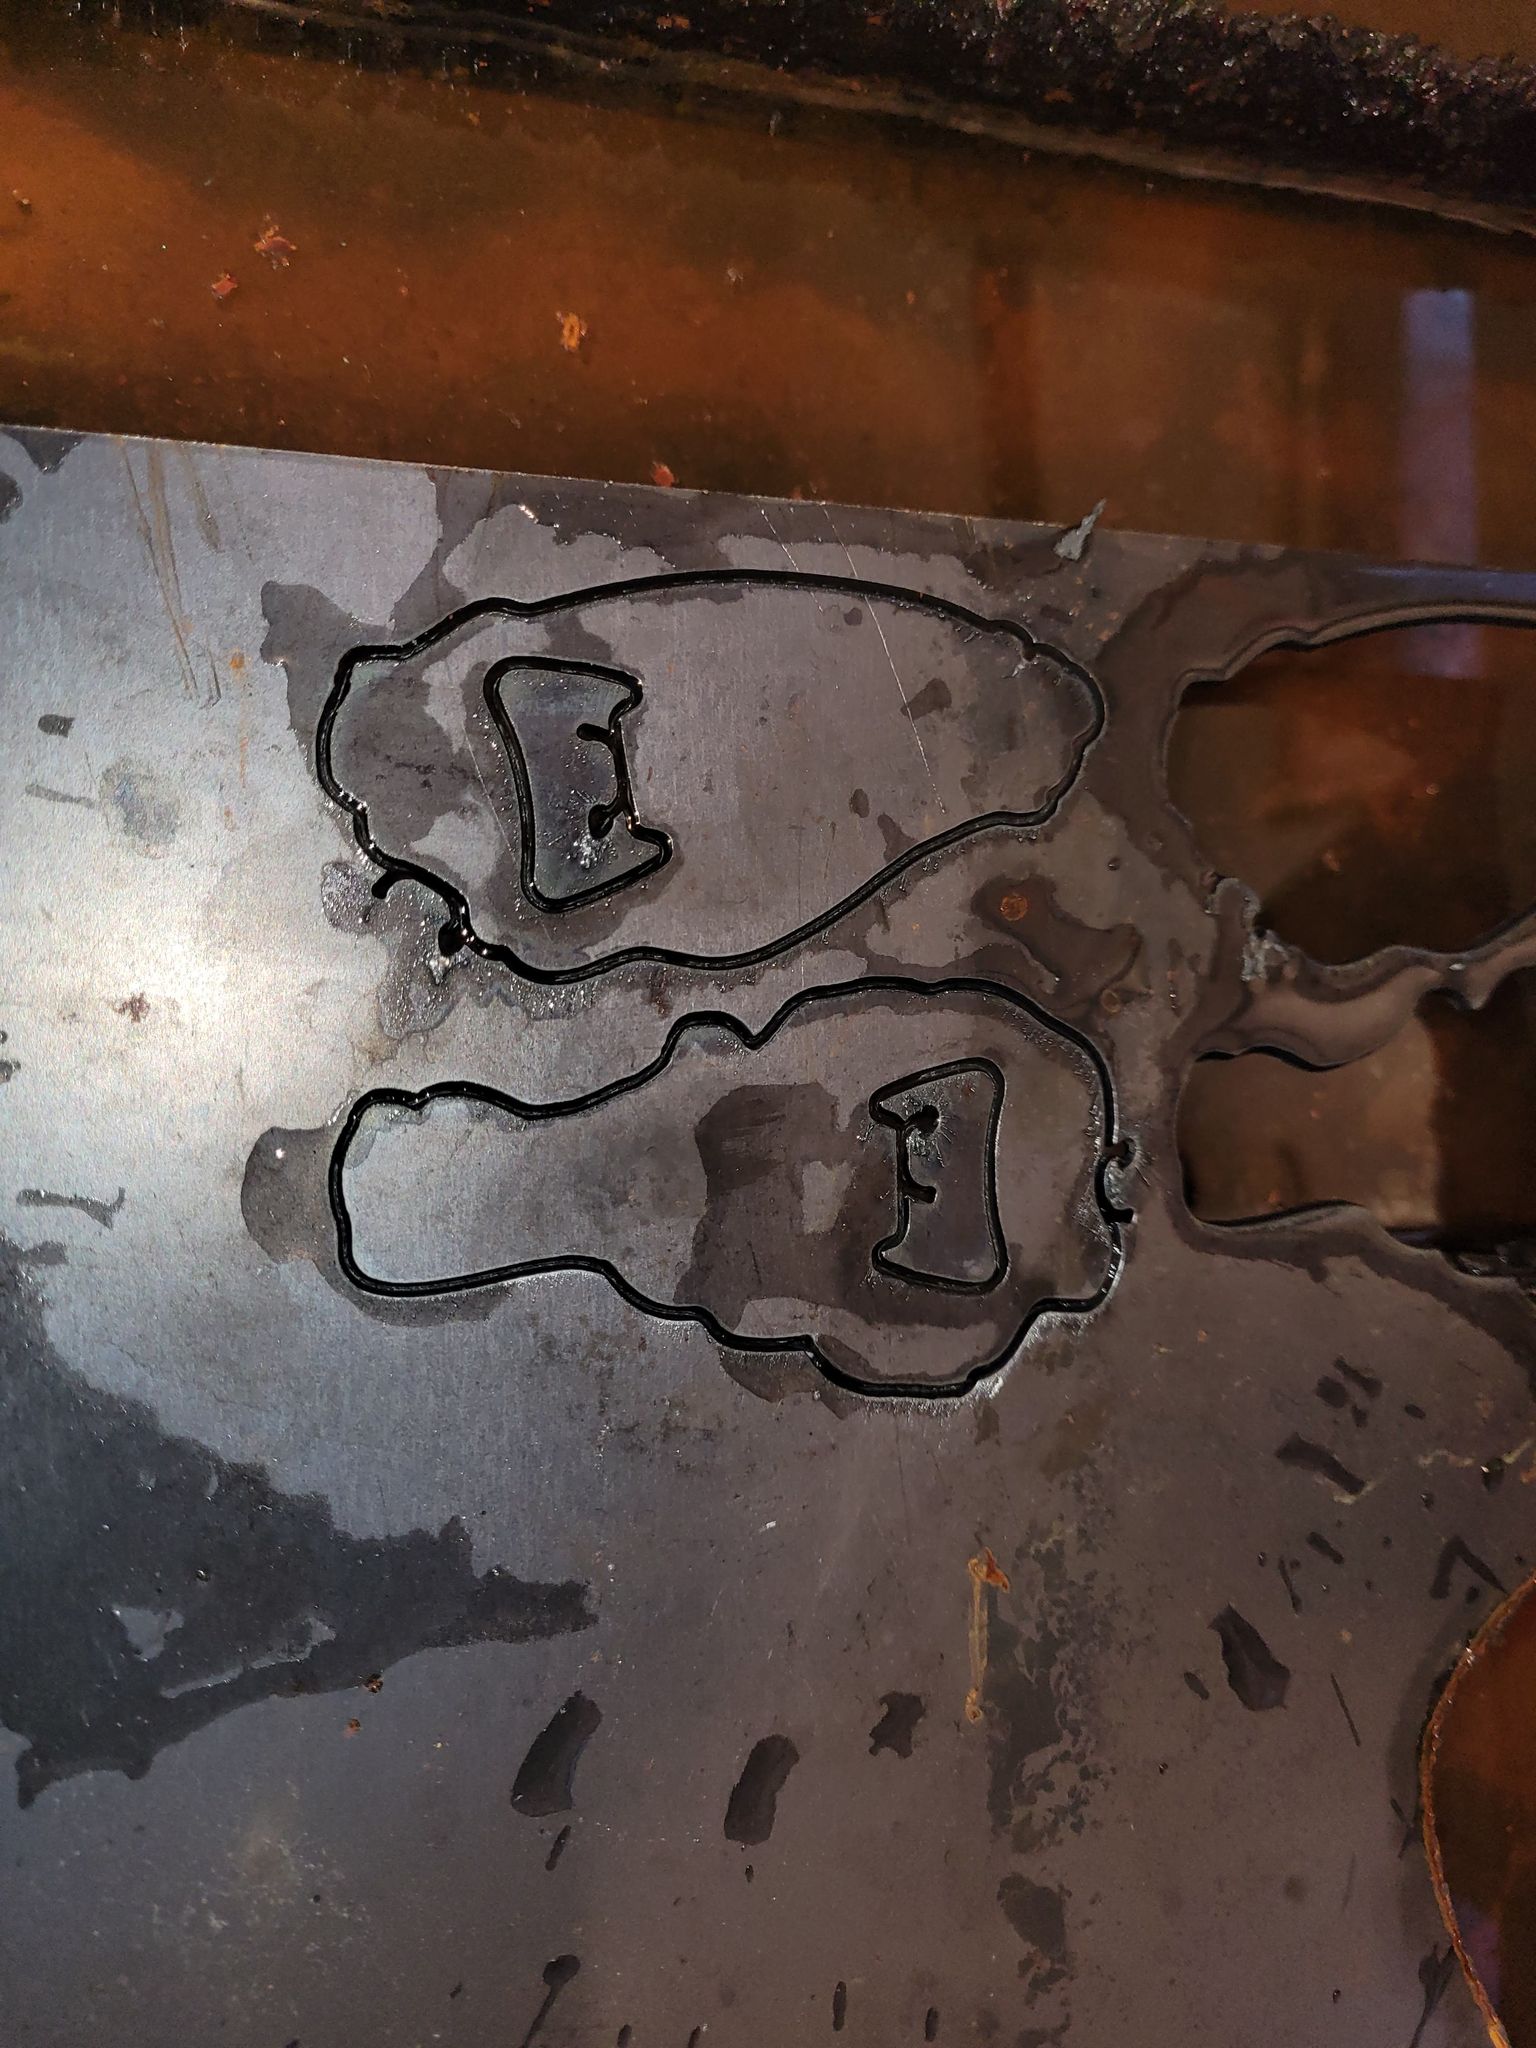
First picture was dross I saw from 100 ipm.
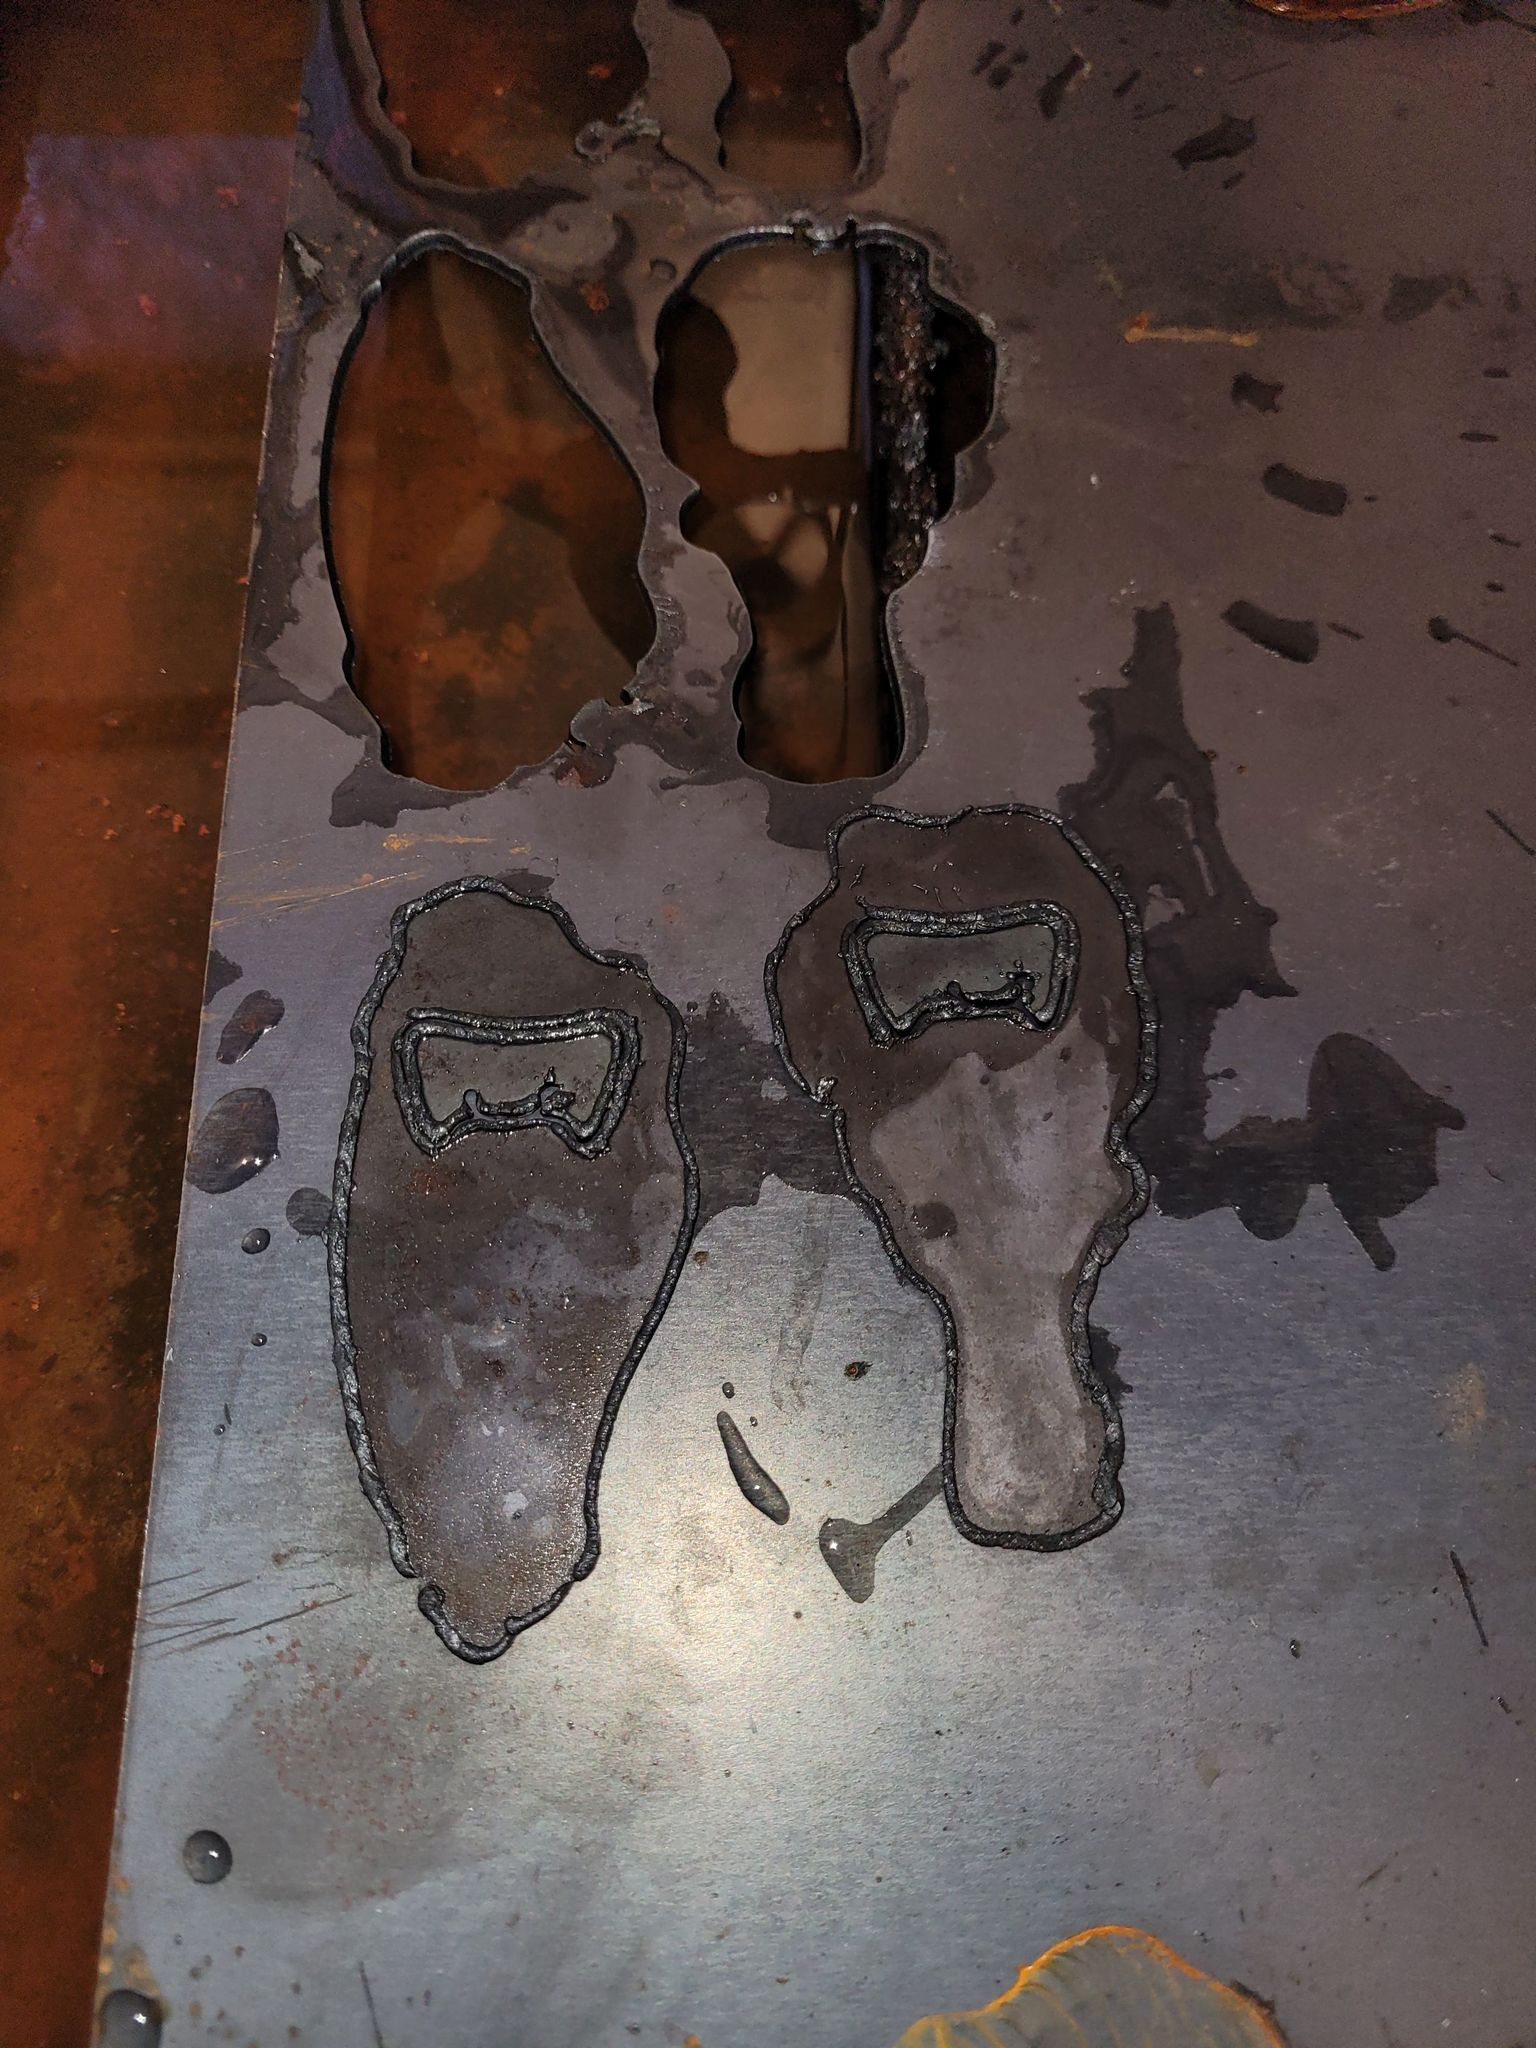
Second picture was my best results. (130 ipm, THC set to smart voltage) There was a little more dross, but not much and it came off super easy.
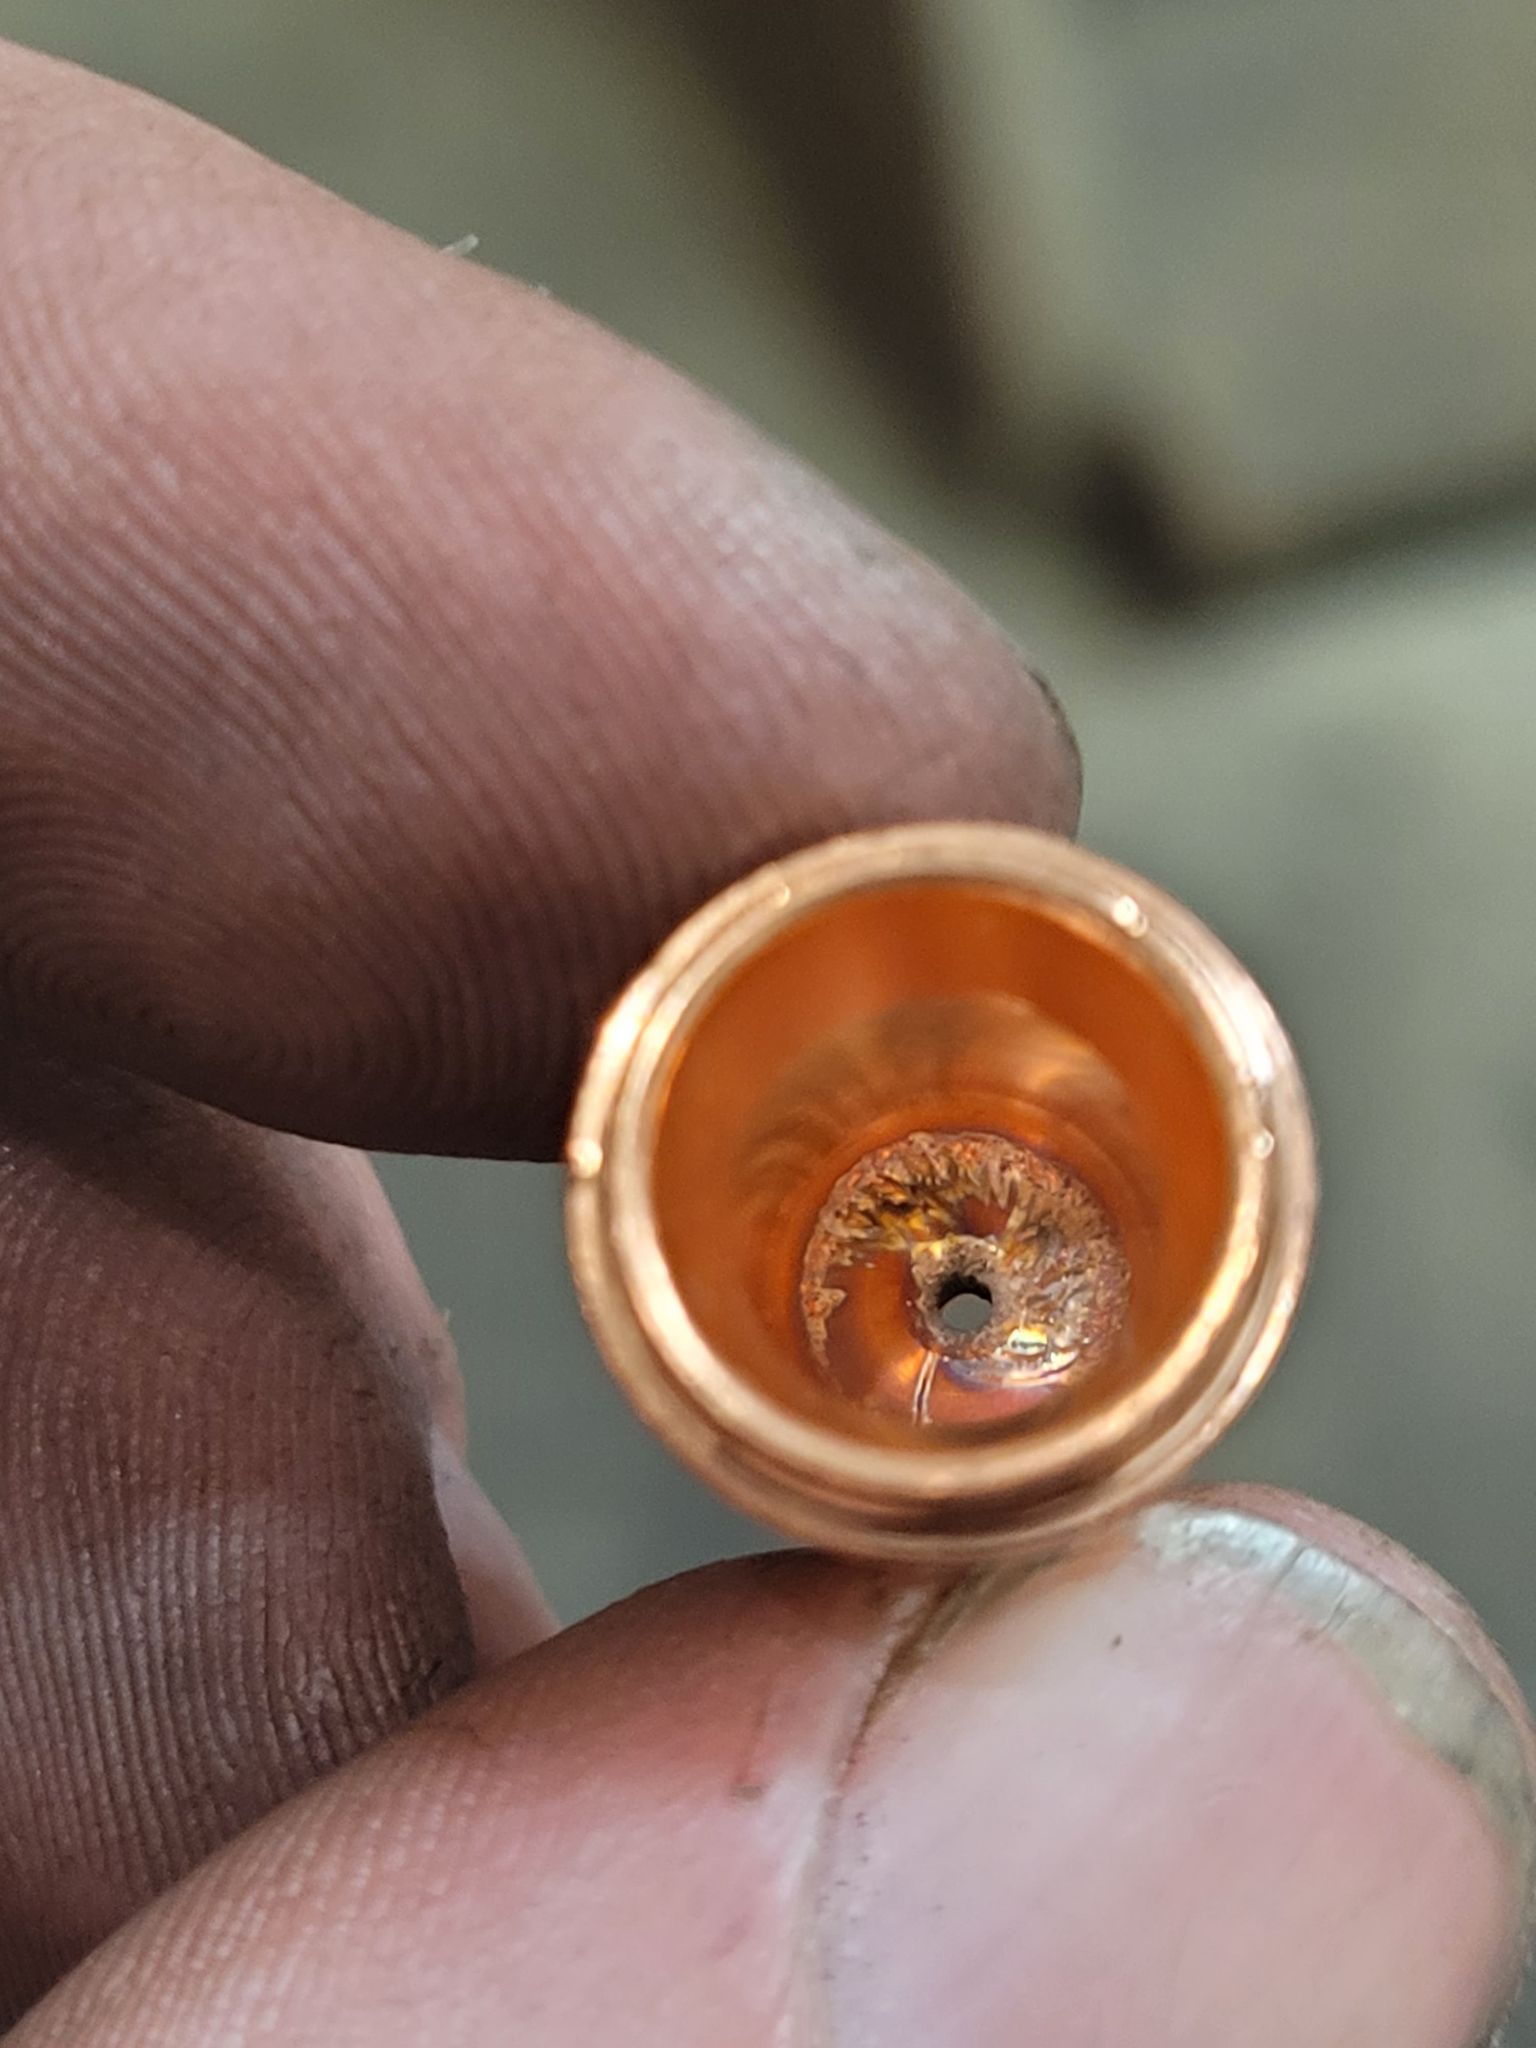
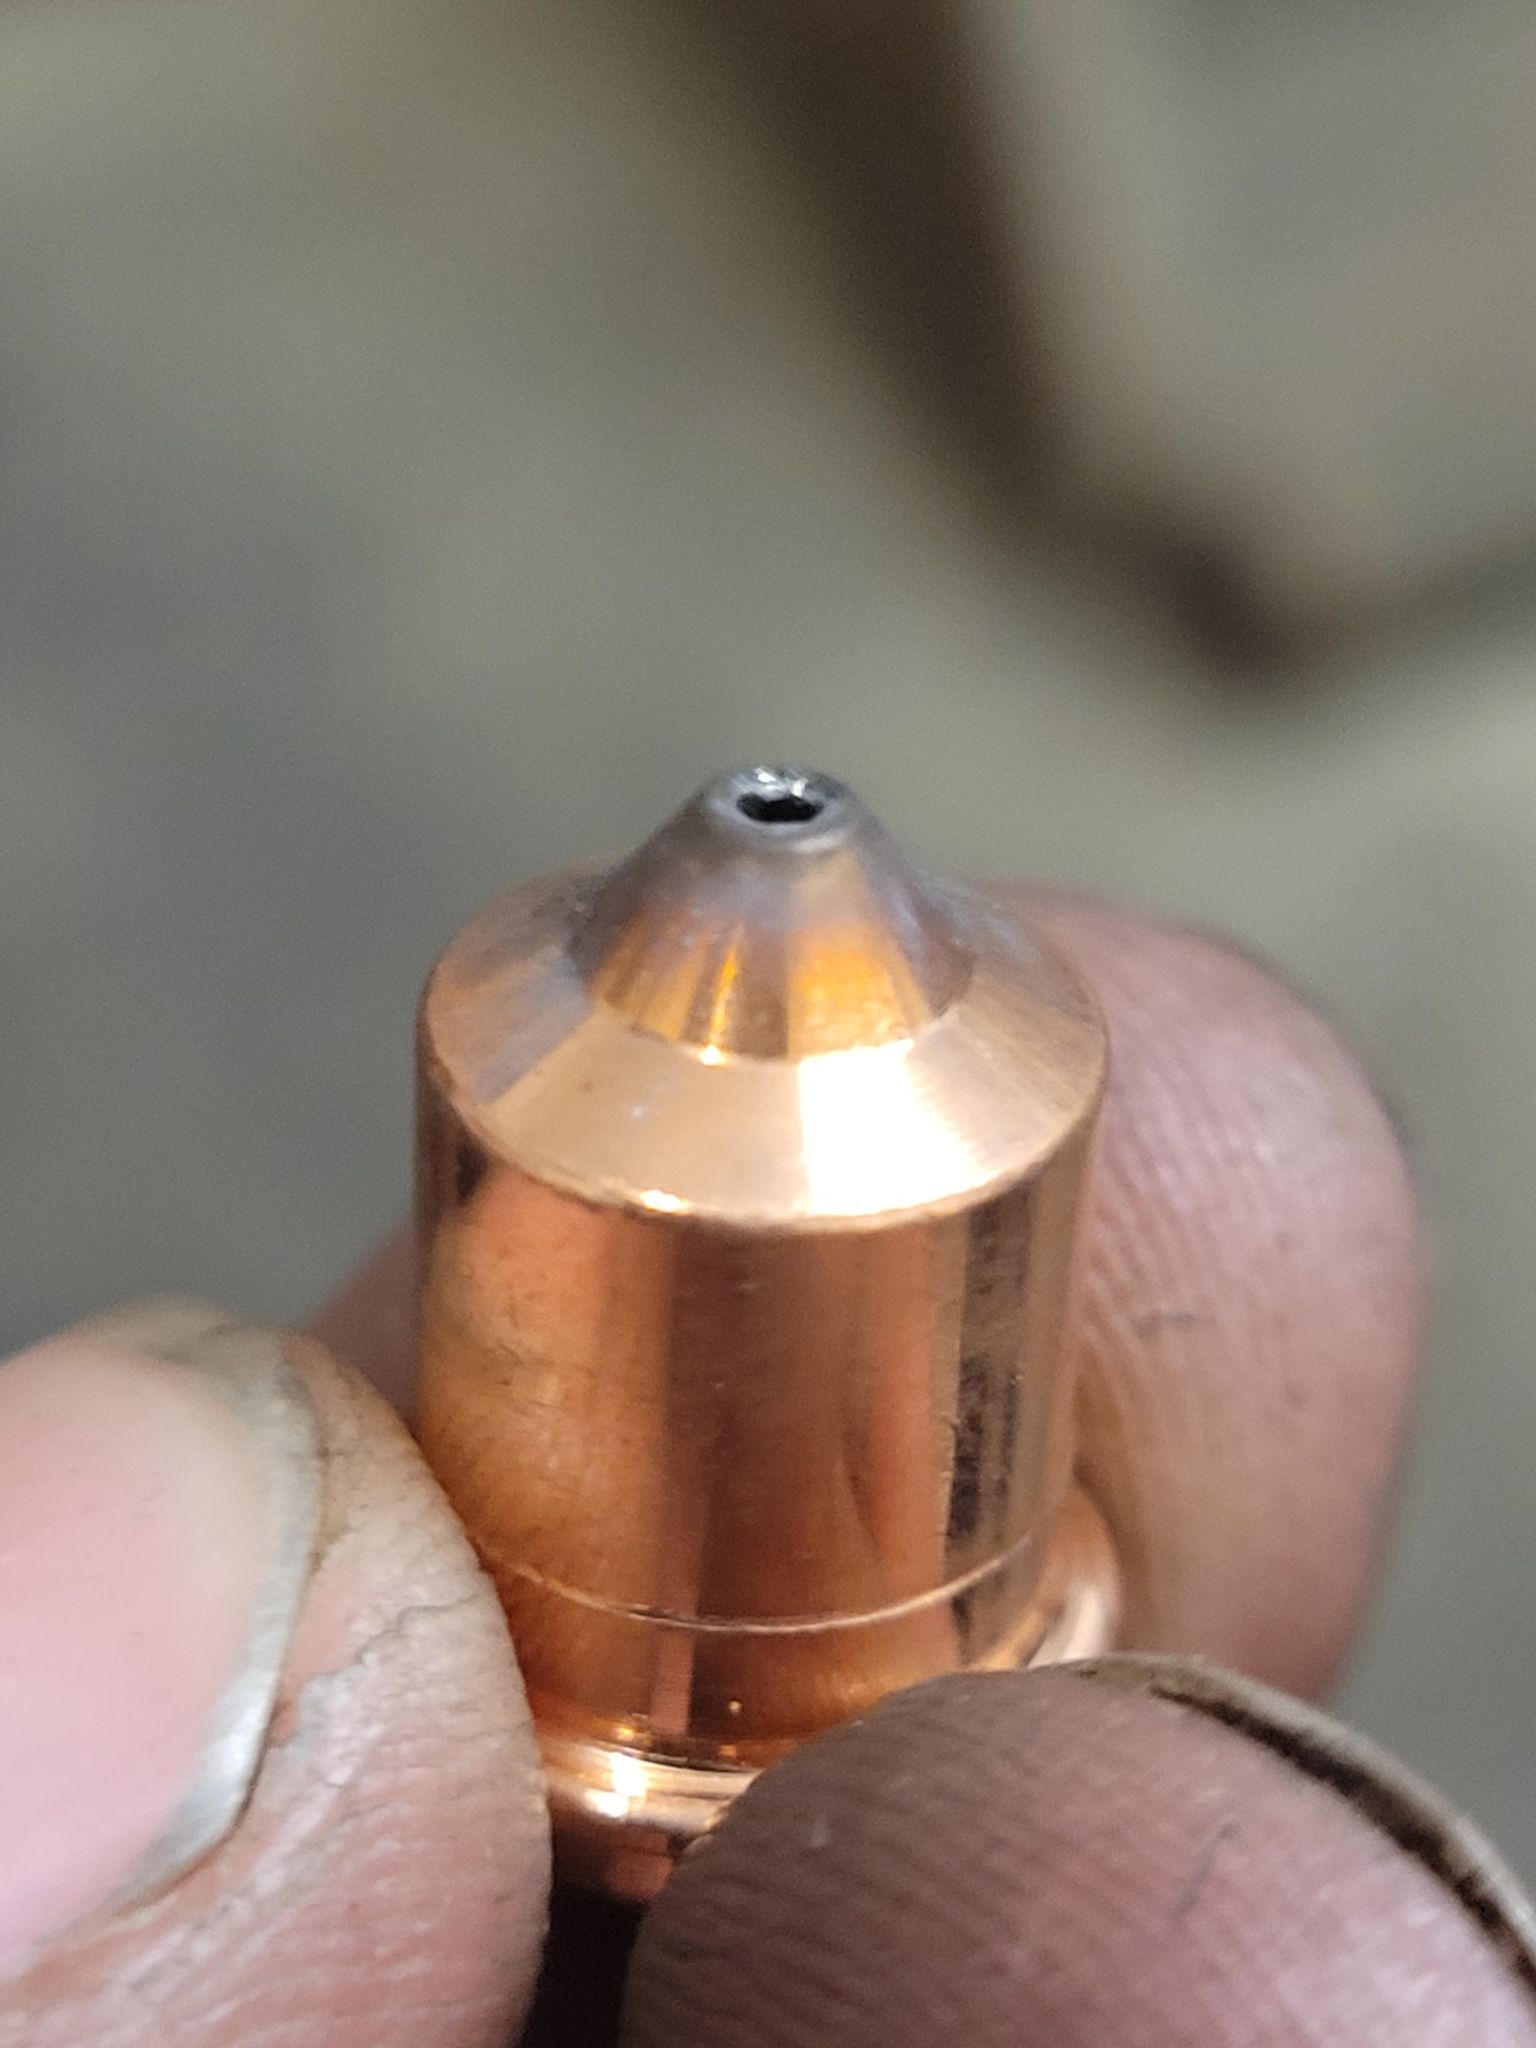
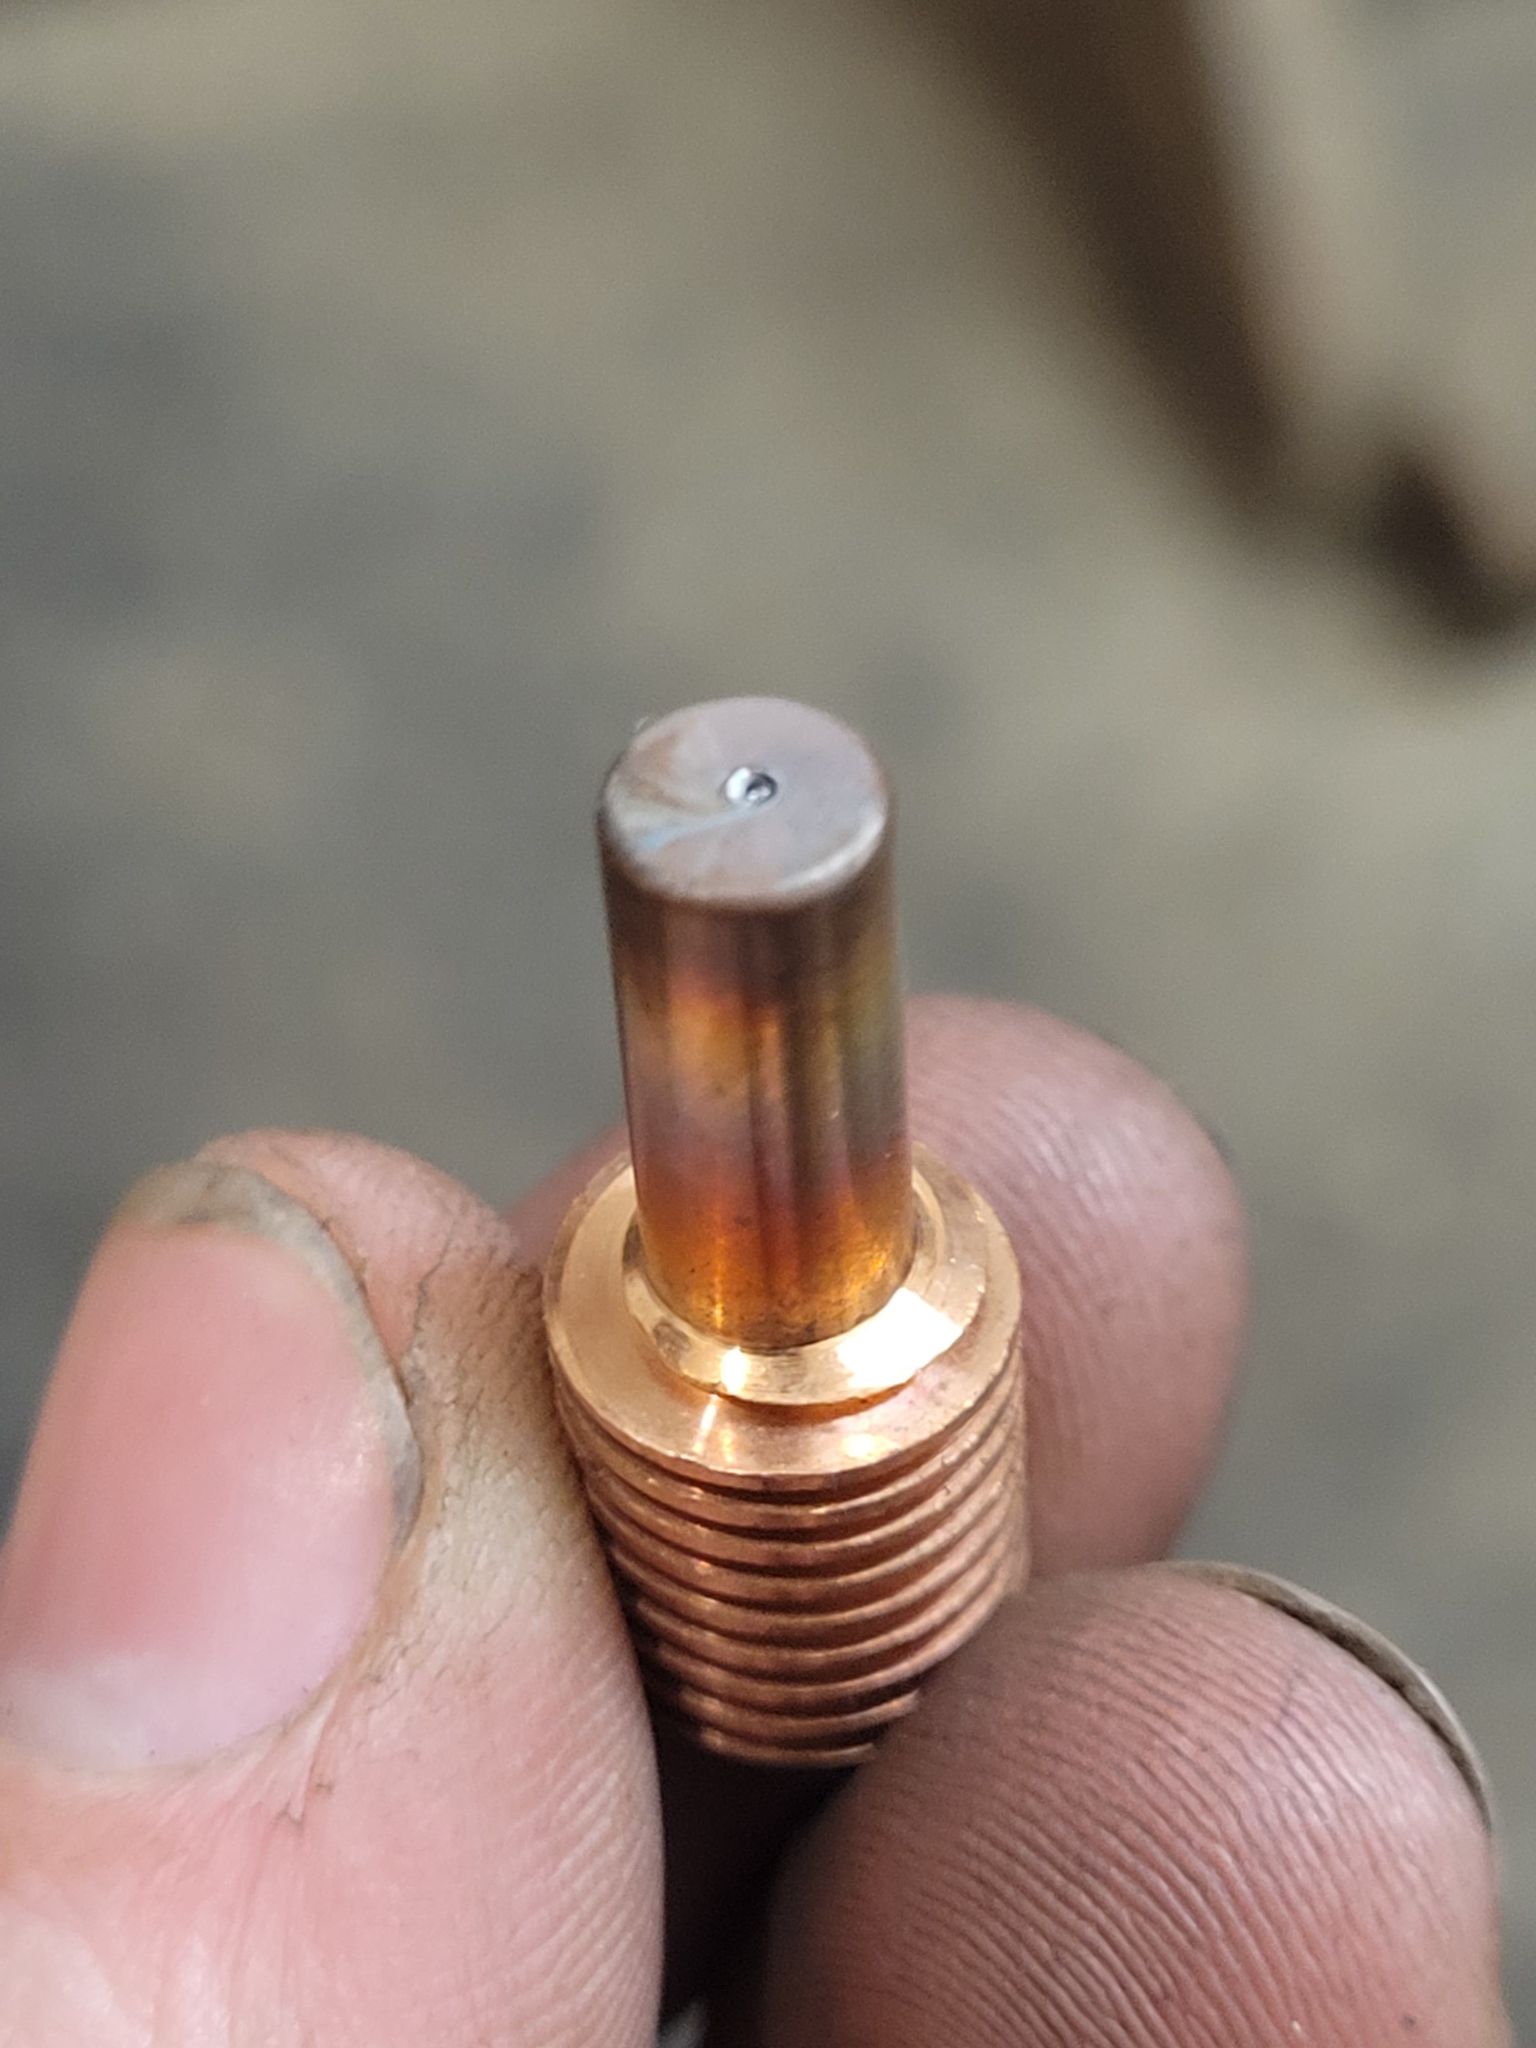
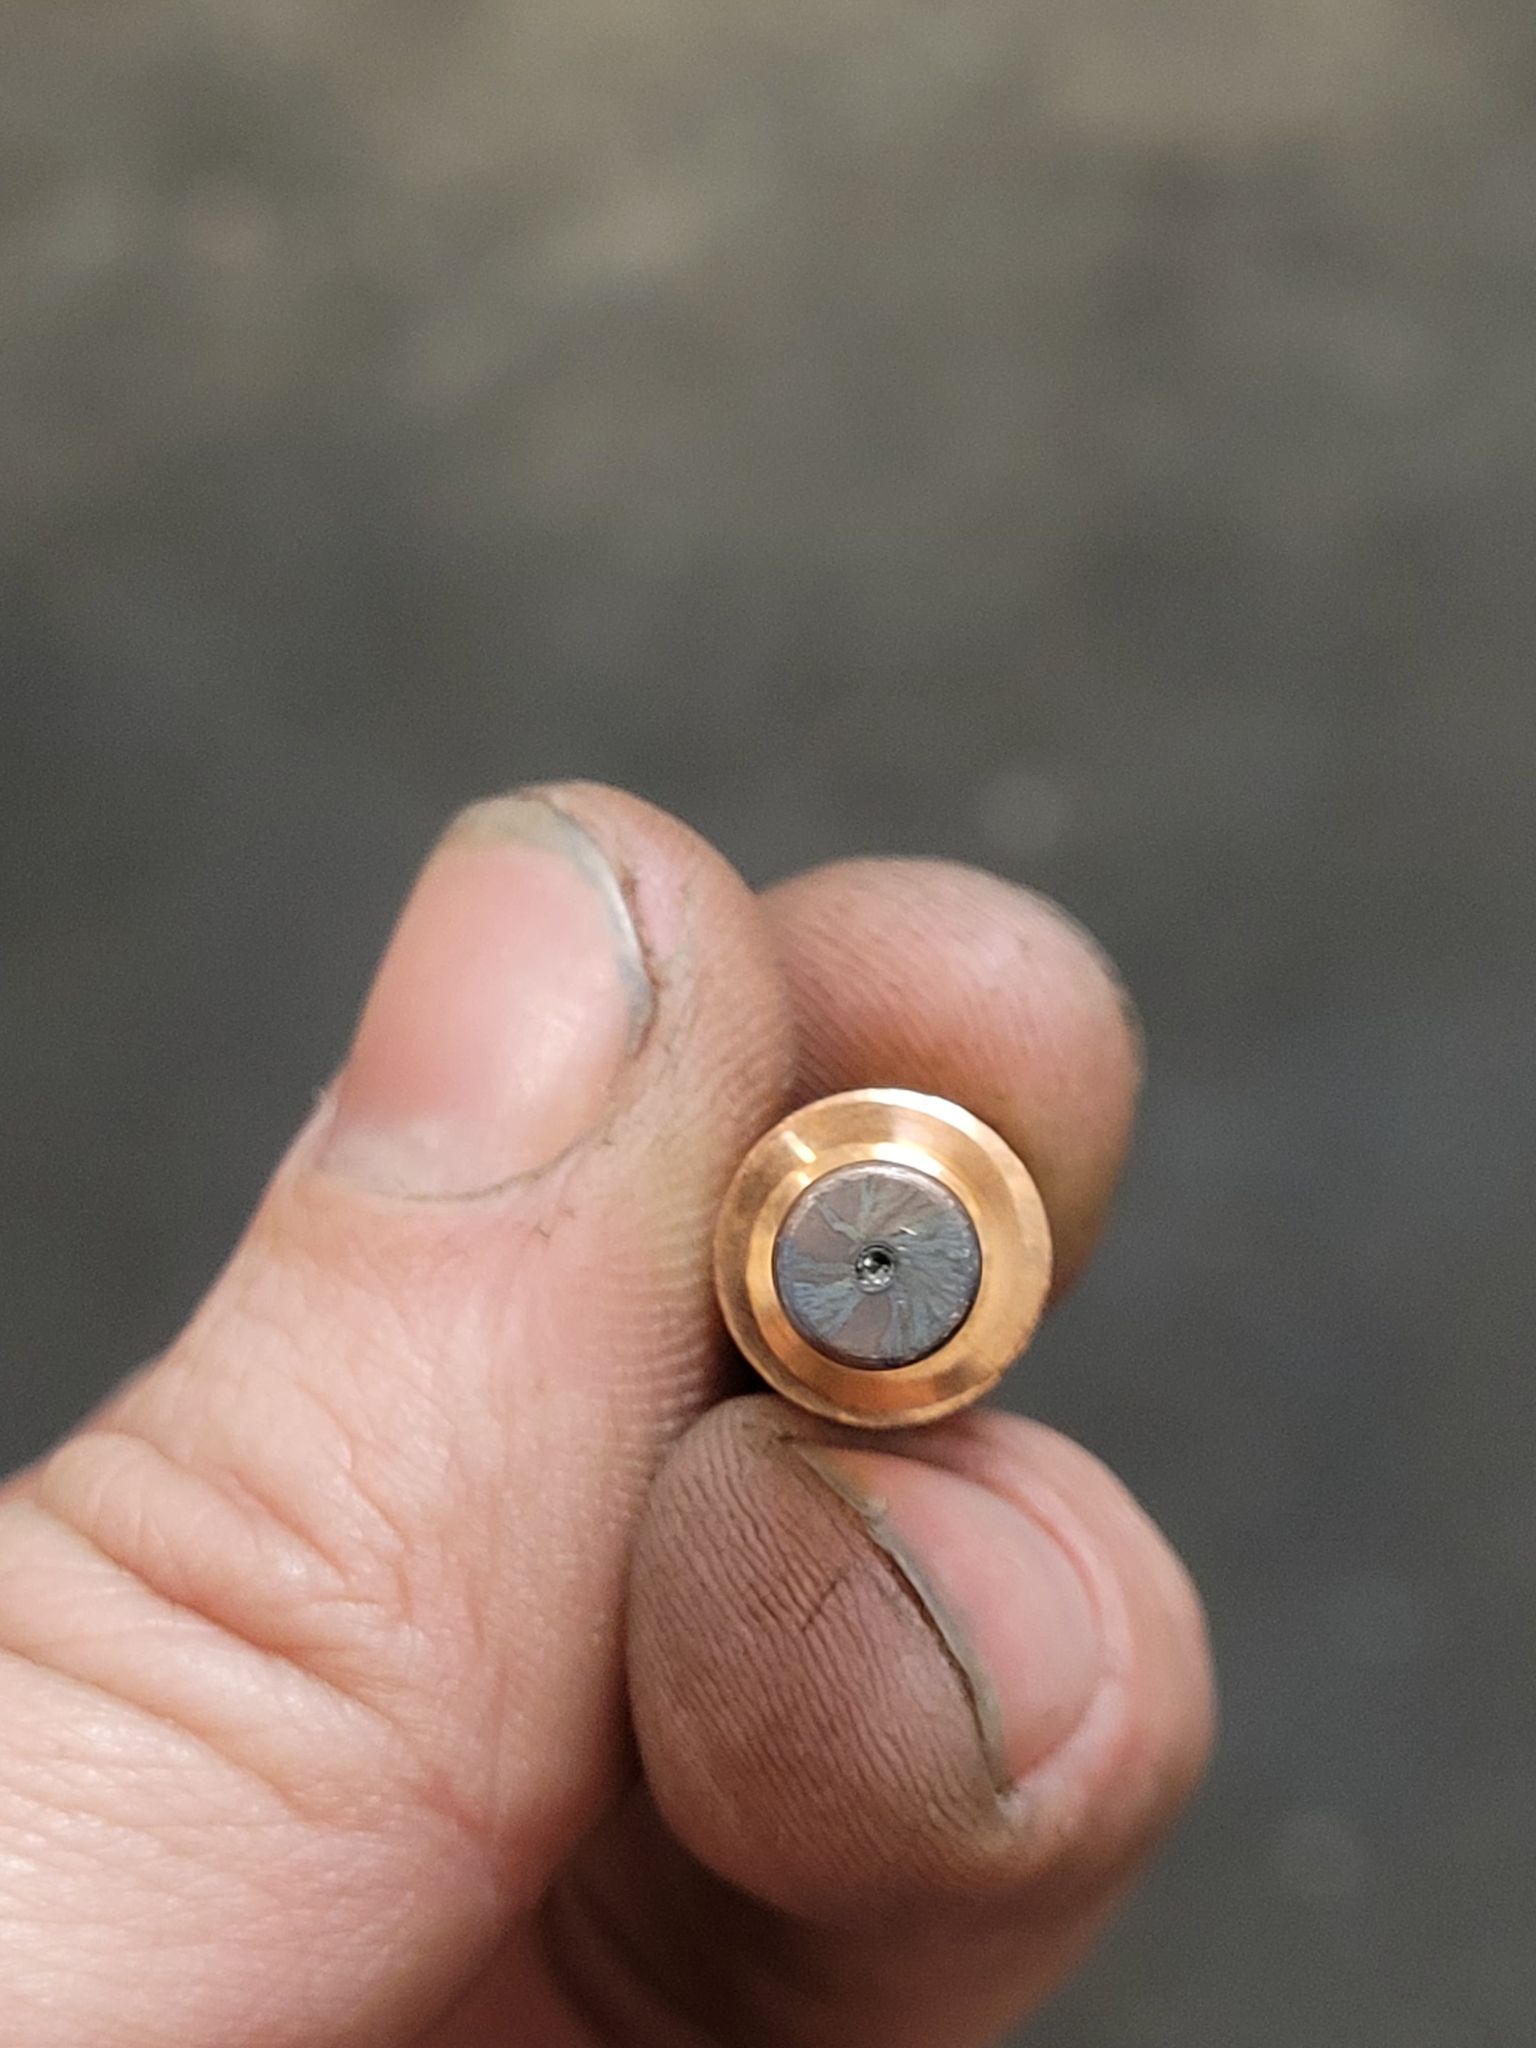
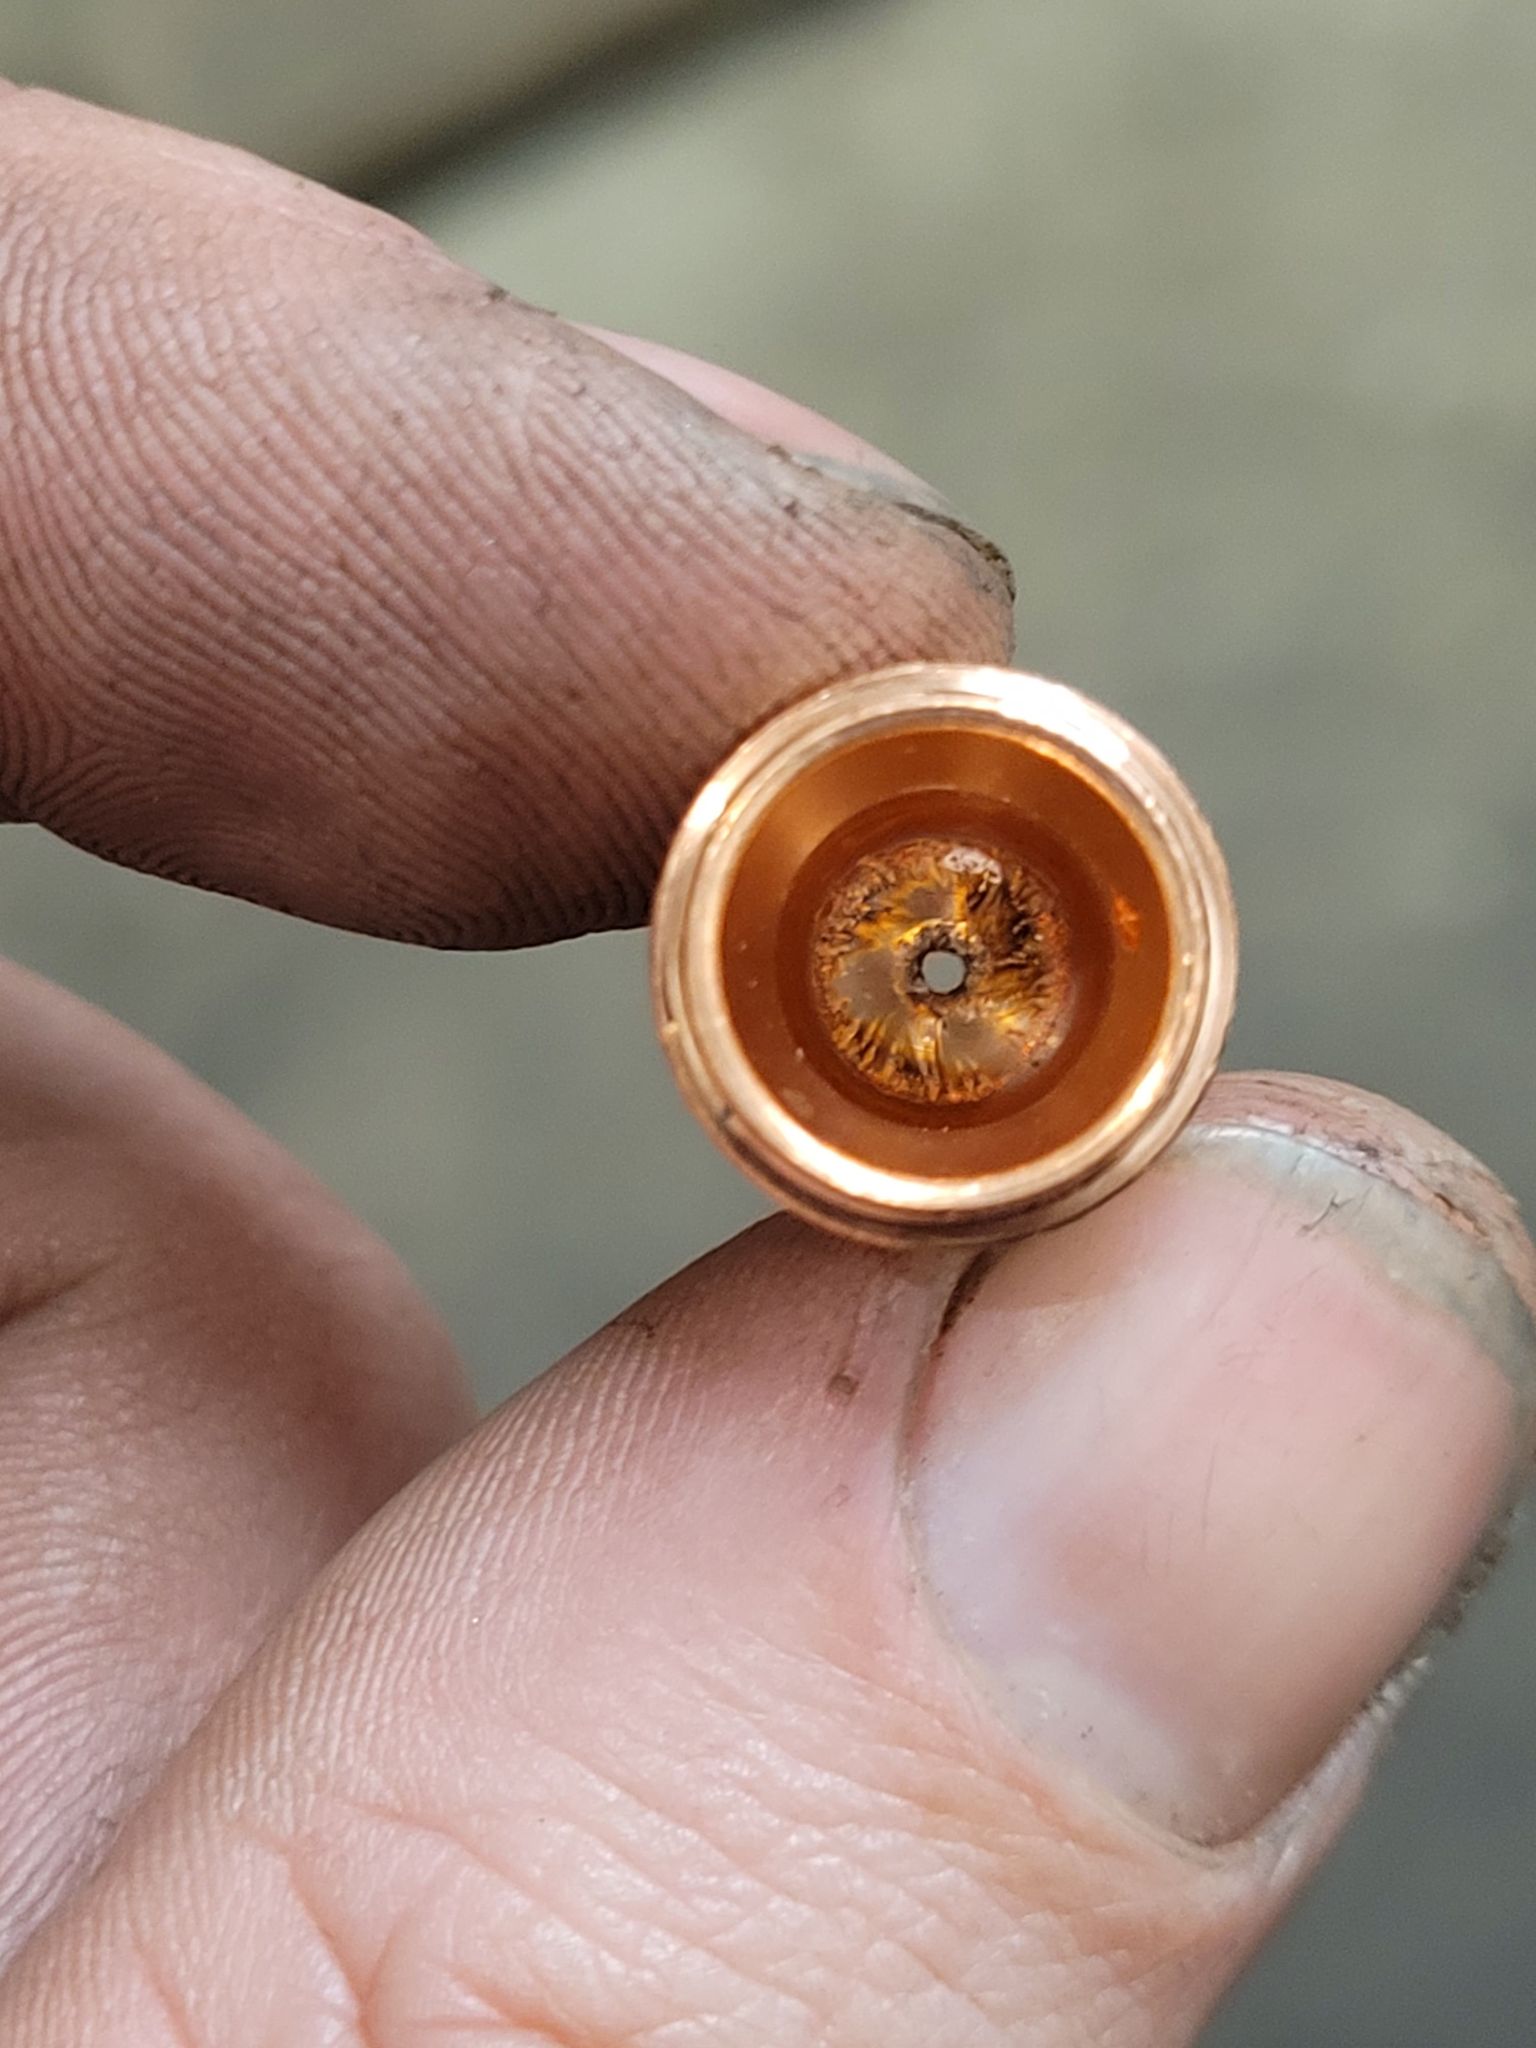
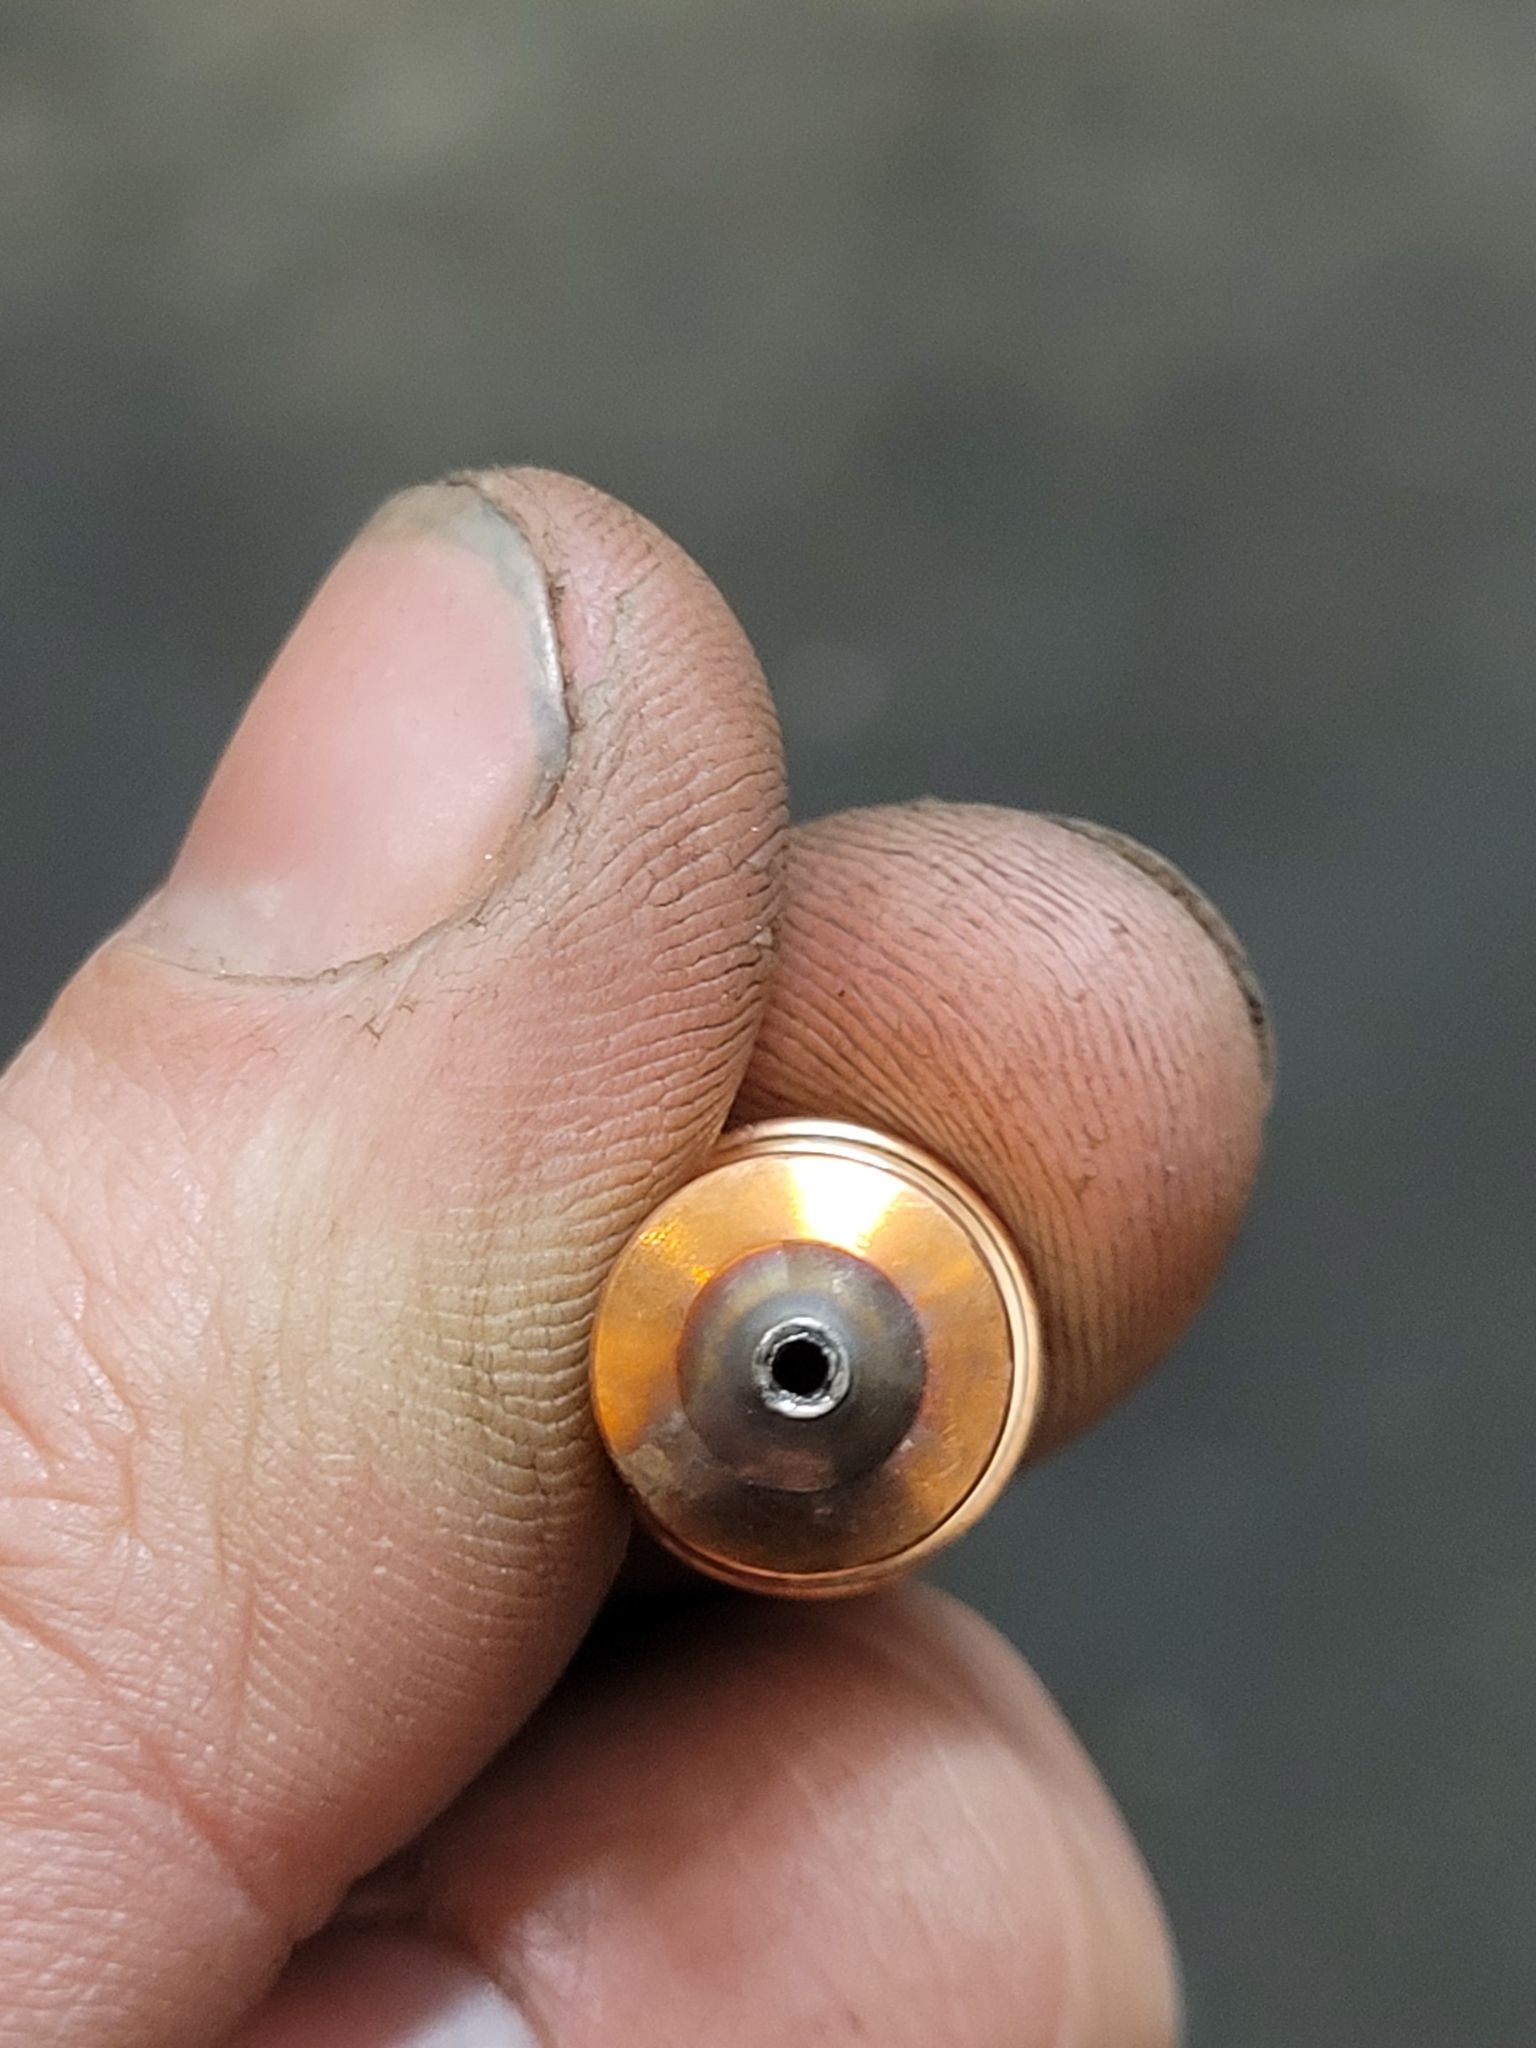
Before cutting I took some pictures of my consumables (less than 300 pierces)
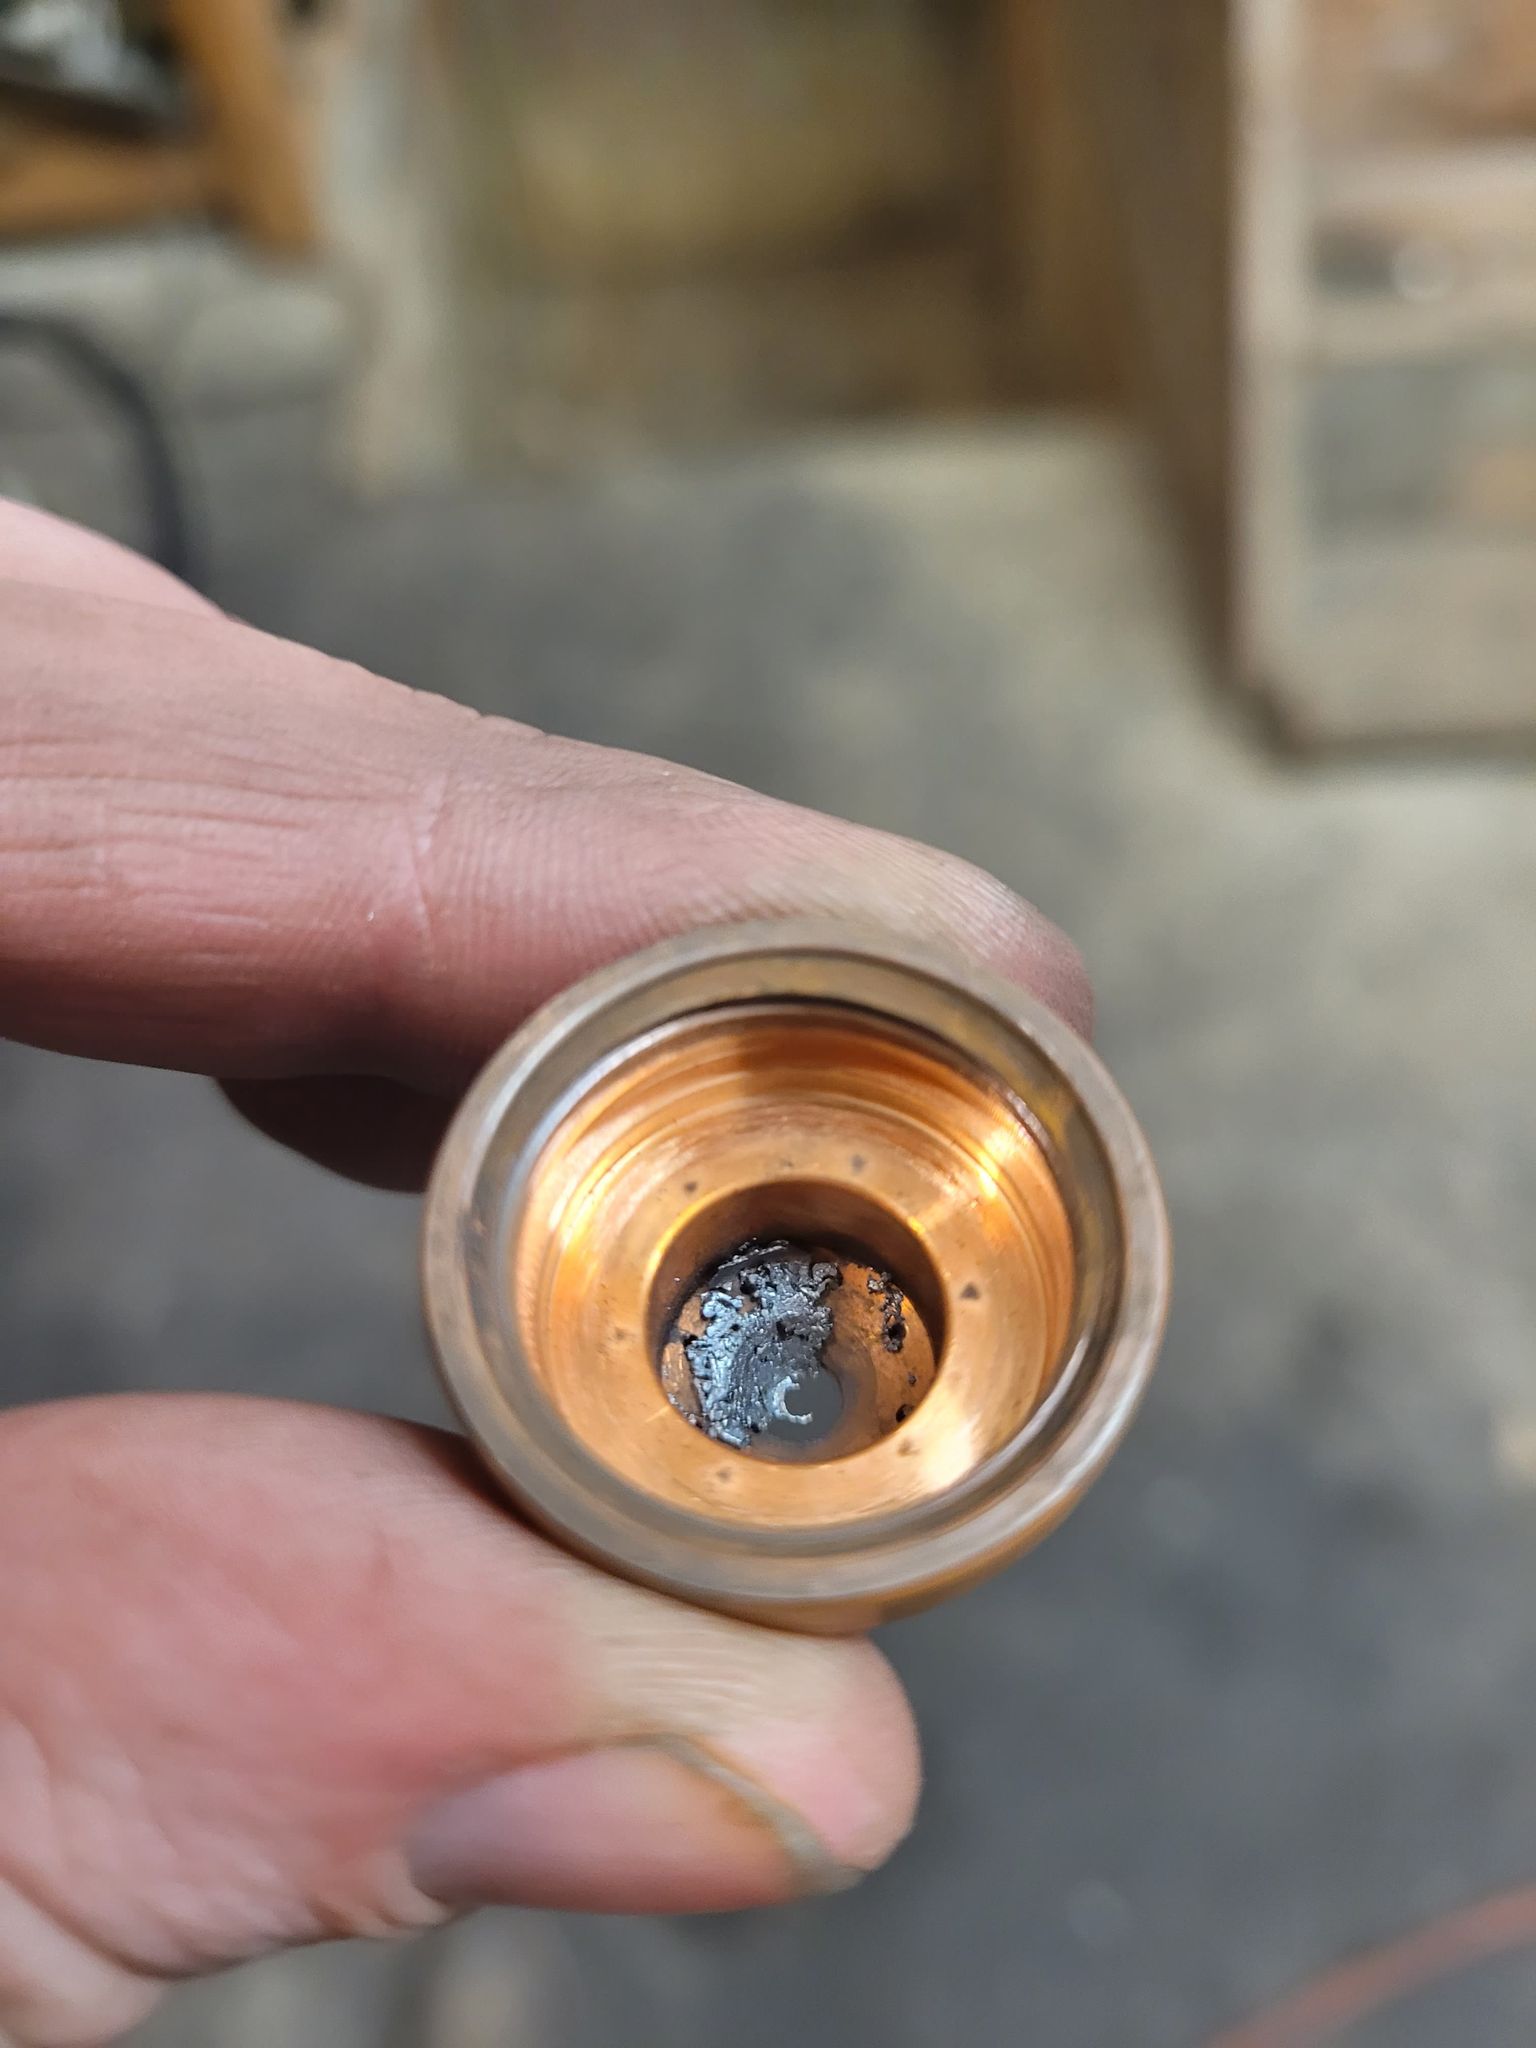
I cleaned the shield after taking the picture, not sure whats causing the slag in the shield.
Enjoy my gross fingers.
Next time I’m going to change the drain valve on my compressor, attempt a little more fine tuning and then try to see how my cuts change while the compressor runs. I know my setup is capable of producing the cut quality I want, I just need to figure out what in my system is causing poor quality.
Thanks for all the help so far!
What do you have for airline filtration? You have a lot of oil or water in air system, neither is good for getting quality cuts and hard on consumable’s.
1 Like
I have an aftercooler setup on my compressor with an inline auto drain, goes to a harbor freight refrigerator dryer, then to a devbliss qc3 dessicant filter, then to a motor guard m60 to my plasma.
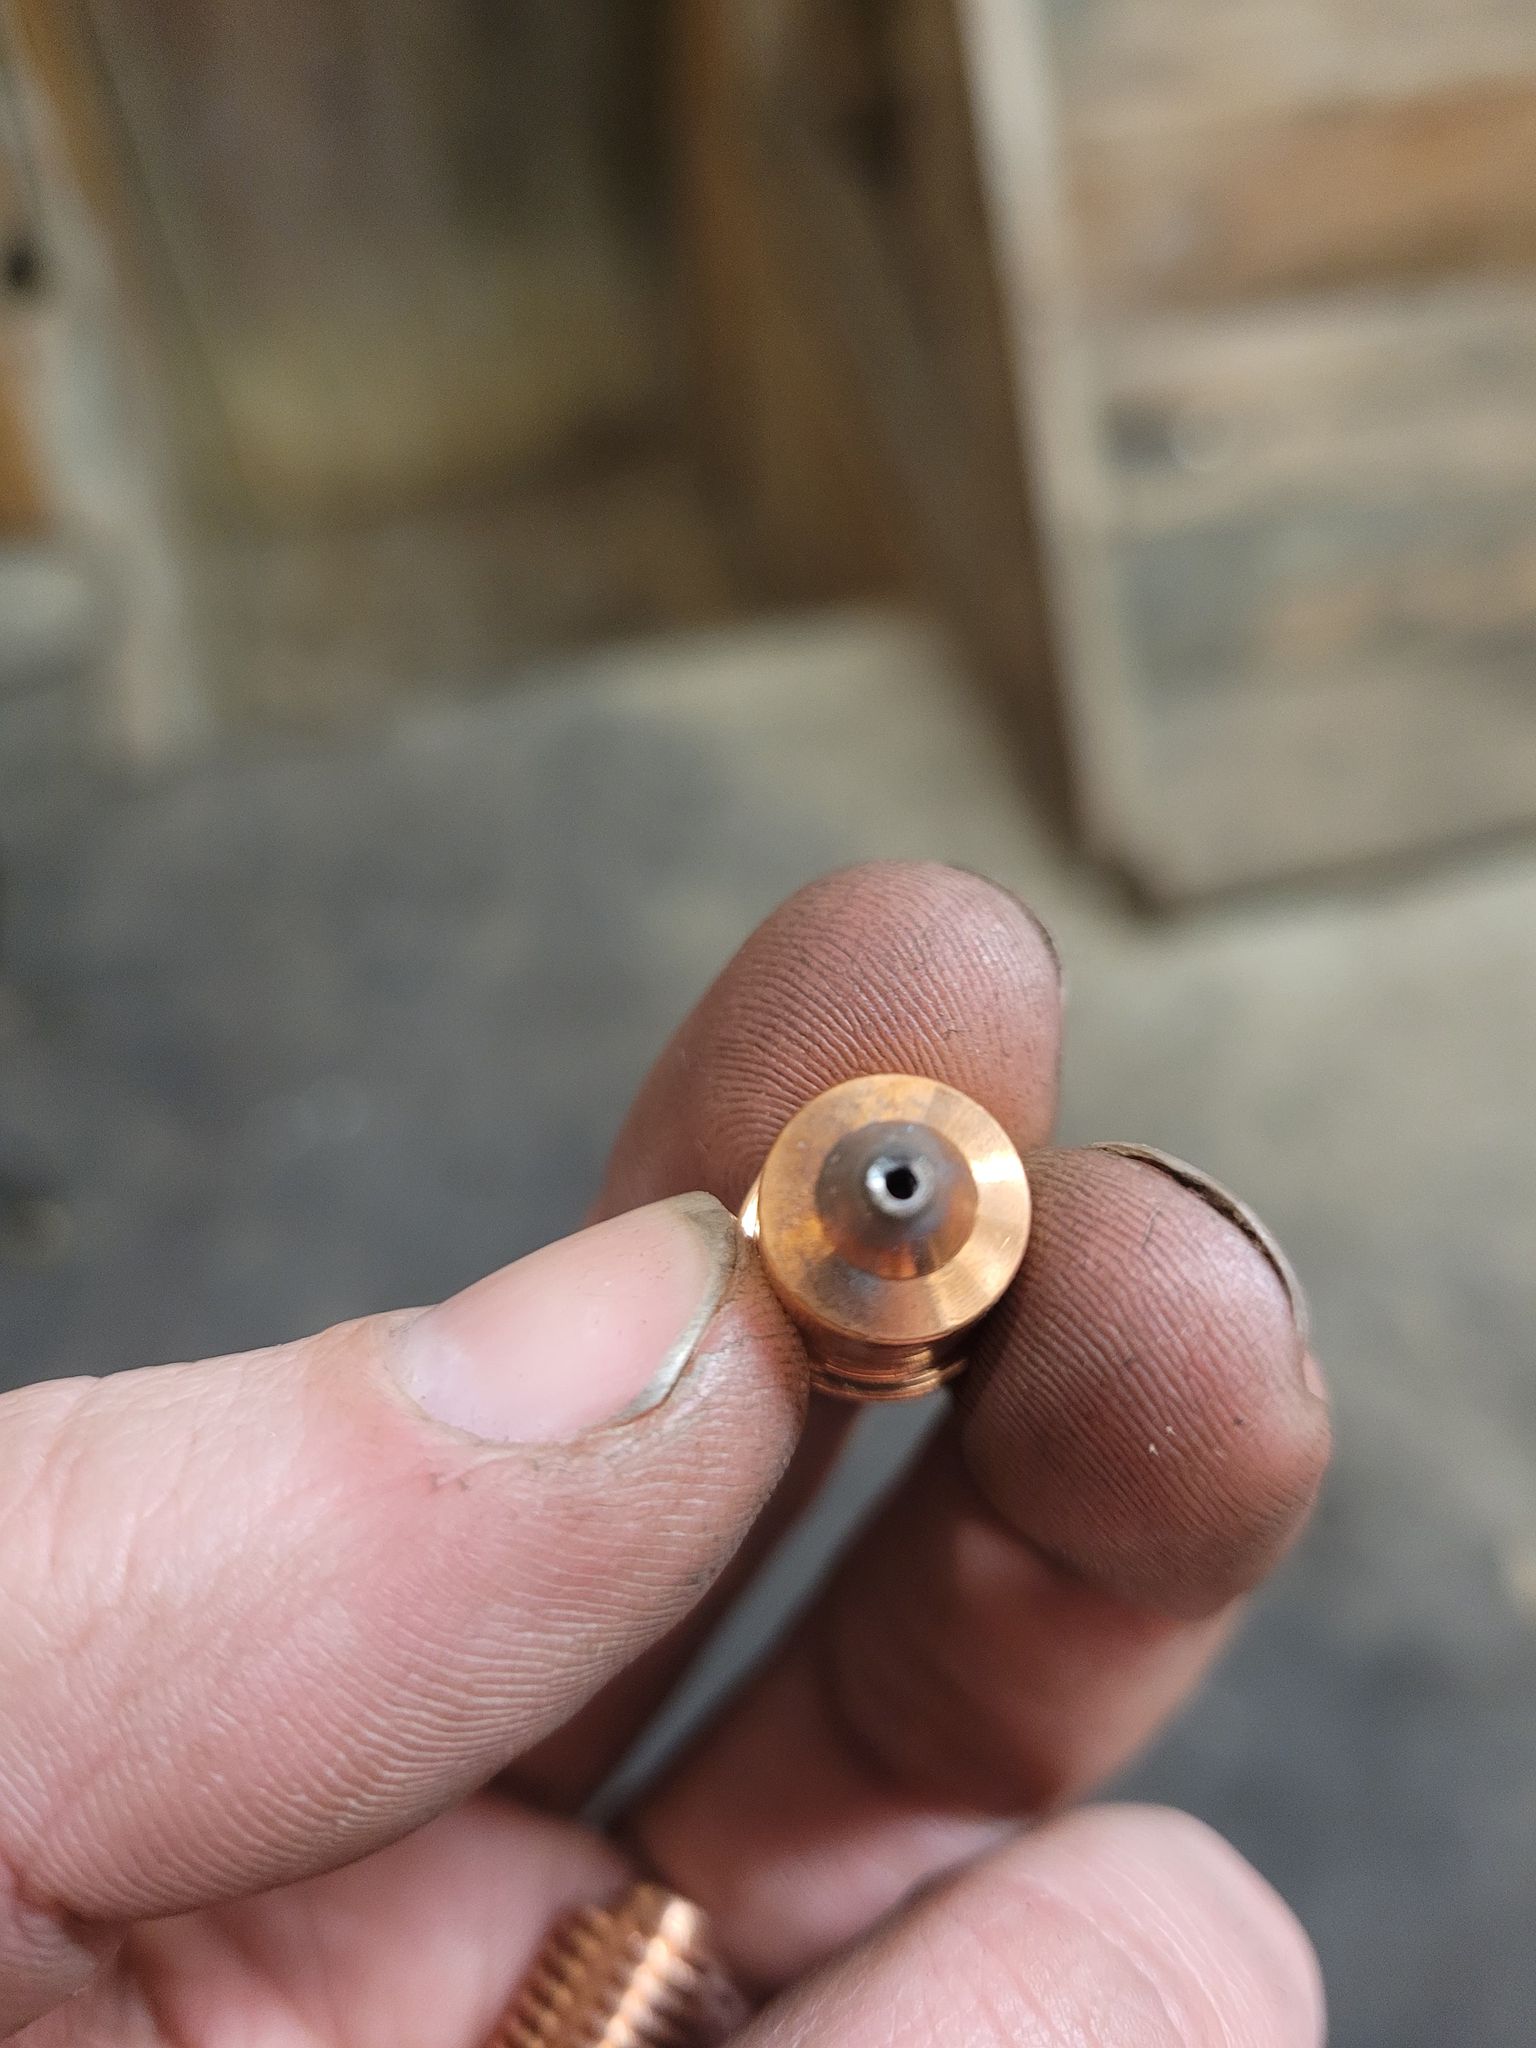
The inside of the cutting tip has been firing off center, it is bad as the hole has been eroded out, the marks are normal other wise.
It may just be the picture but the electrode looks like its also firing off center, but other wise looks good.
The stuff inside the cnc shield is doss form piercing blow back.
1 Like
What would cause it to fire off center? Incorrect install?
So on my way home, I stopped by the shop to install a new compressor drain and move my regulator from before the plasma cutter to after the compressor and before anything else.
After I let the compressor get filled back up I decided to try a quick experiment to see where my switch was set to ( messed with it the day before, but never ran my compressor.)
I had an air nozzle hooked up, and held it wide open with the regulator set to 75 psi, it took about 1 minute and 45 seconds to for the compressor to drop from 130 psi to about 105 psi.
From there it took about 1 minute and 40 seconds for it to fill back up and shut off.
Not sure if this is acceptable, or if compressor is on the weak end. It’s old and was a hand me down from my father.
About to load up a file and go try some fine tuning. Ill report back later after I’ve done some cuts.
Progress? I achieved some results I was happy with, not sure if I found a possible solution.
Started with my best results from the other day, still needed to adjust cut pressure after moving the regulator.
30 amps, nominal voltage at 115v, 130 ipm, .6 pierce delay, pierce height .15", cut height .06", .2 arc in, .2 arc out and .1 overcut. Same consumables from the other night (less than 300 pierces)
Also not sure I ever mentioned, razor weld 45, with a machine torch.
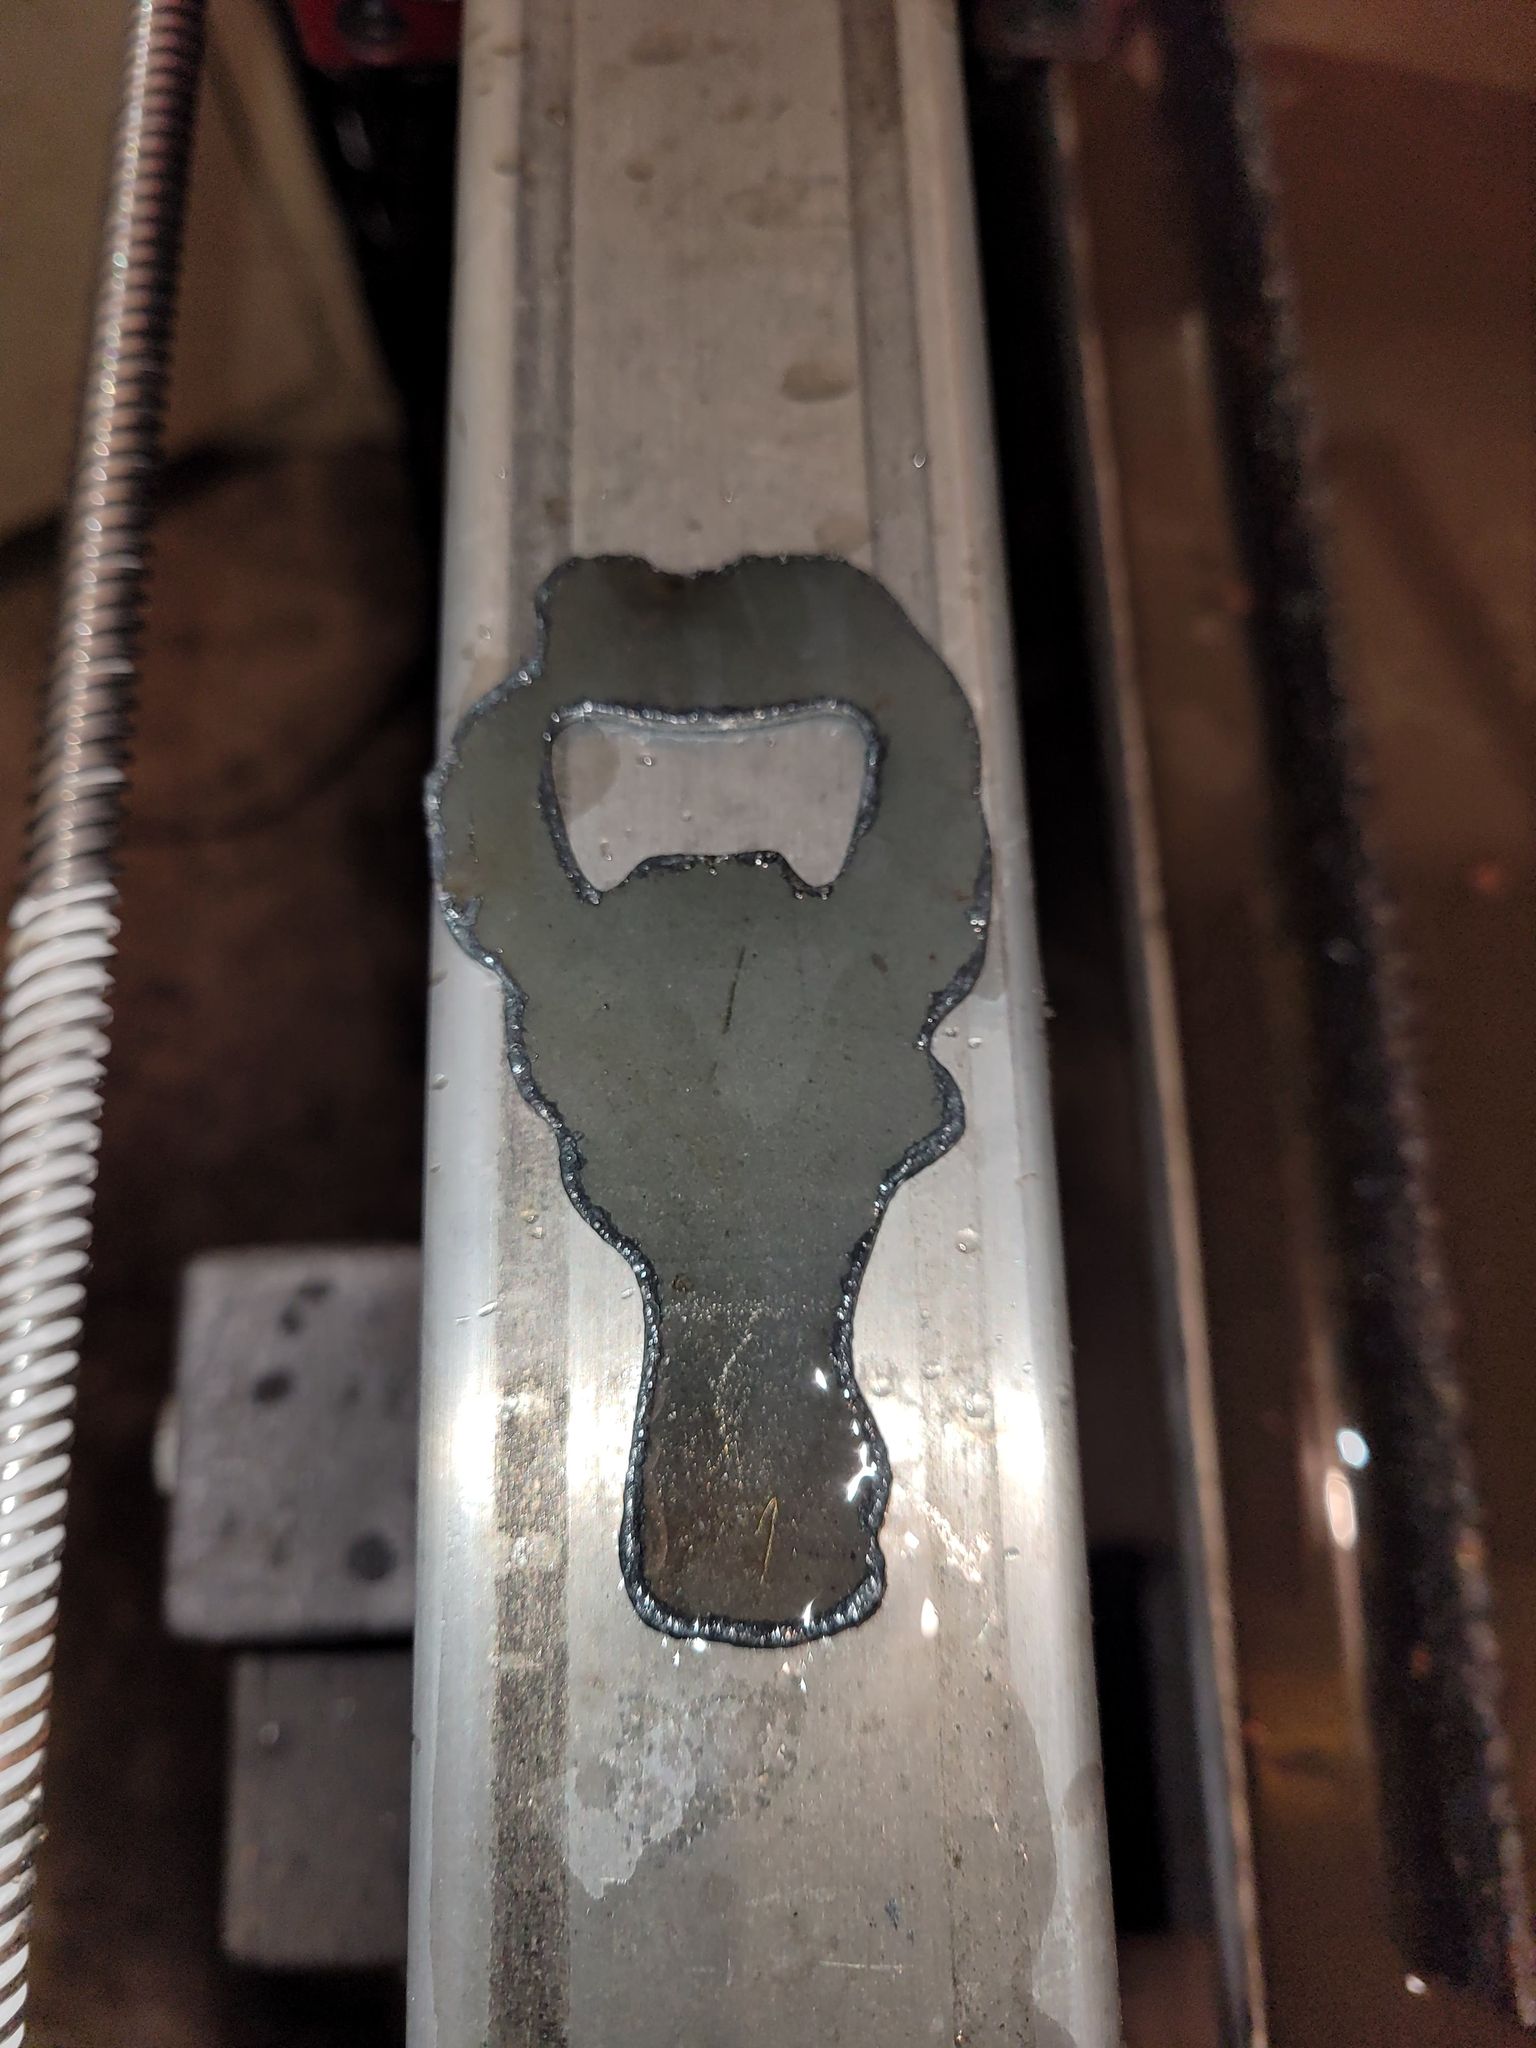
First cut (left) was at about 60 psi, then the second was at 75 psi (right).

Dross seemed like what I usually see on my cuts, pieces don’t fall out.
Turned on smart voltage thc. Verified 75 psi during cut. Tried the same cut again.
Similar results, dross possibly improved slightly, but not much.
From there I remembered I had tried cuts with a loose retaining cap, (backed off 1/2 turn.) Ran the file again and instantly noticed better results.
Parts fell right out, little to no dross. From there I decided to run the file 4 times continuously. (from top to bottom)
End results weren’t terrible, but still not as the good cut prior.
Ran a few line cuts at some different heights to see if results changed with dross, which seemed to be consistent with all the different cut heights.
At this point I decided to try new consumables (from LS) and see how the results changed. Tightened the cap snug, then backed off 1/2 turn and ran the same file with nominal voltage set to 110v.
Results got worse, decided to speed up the cut to 150 ipm.
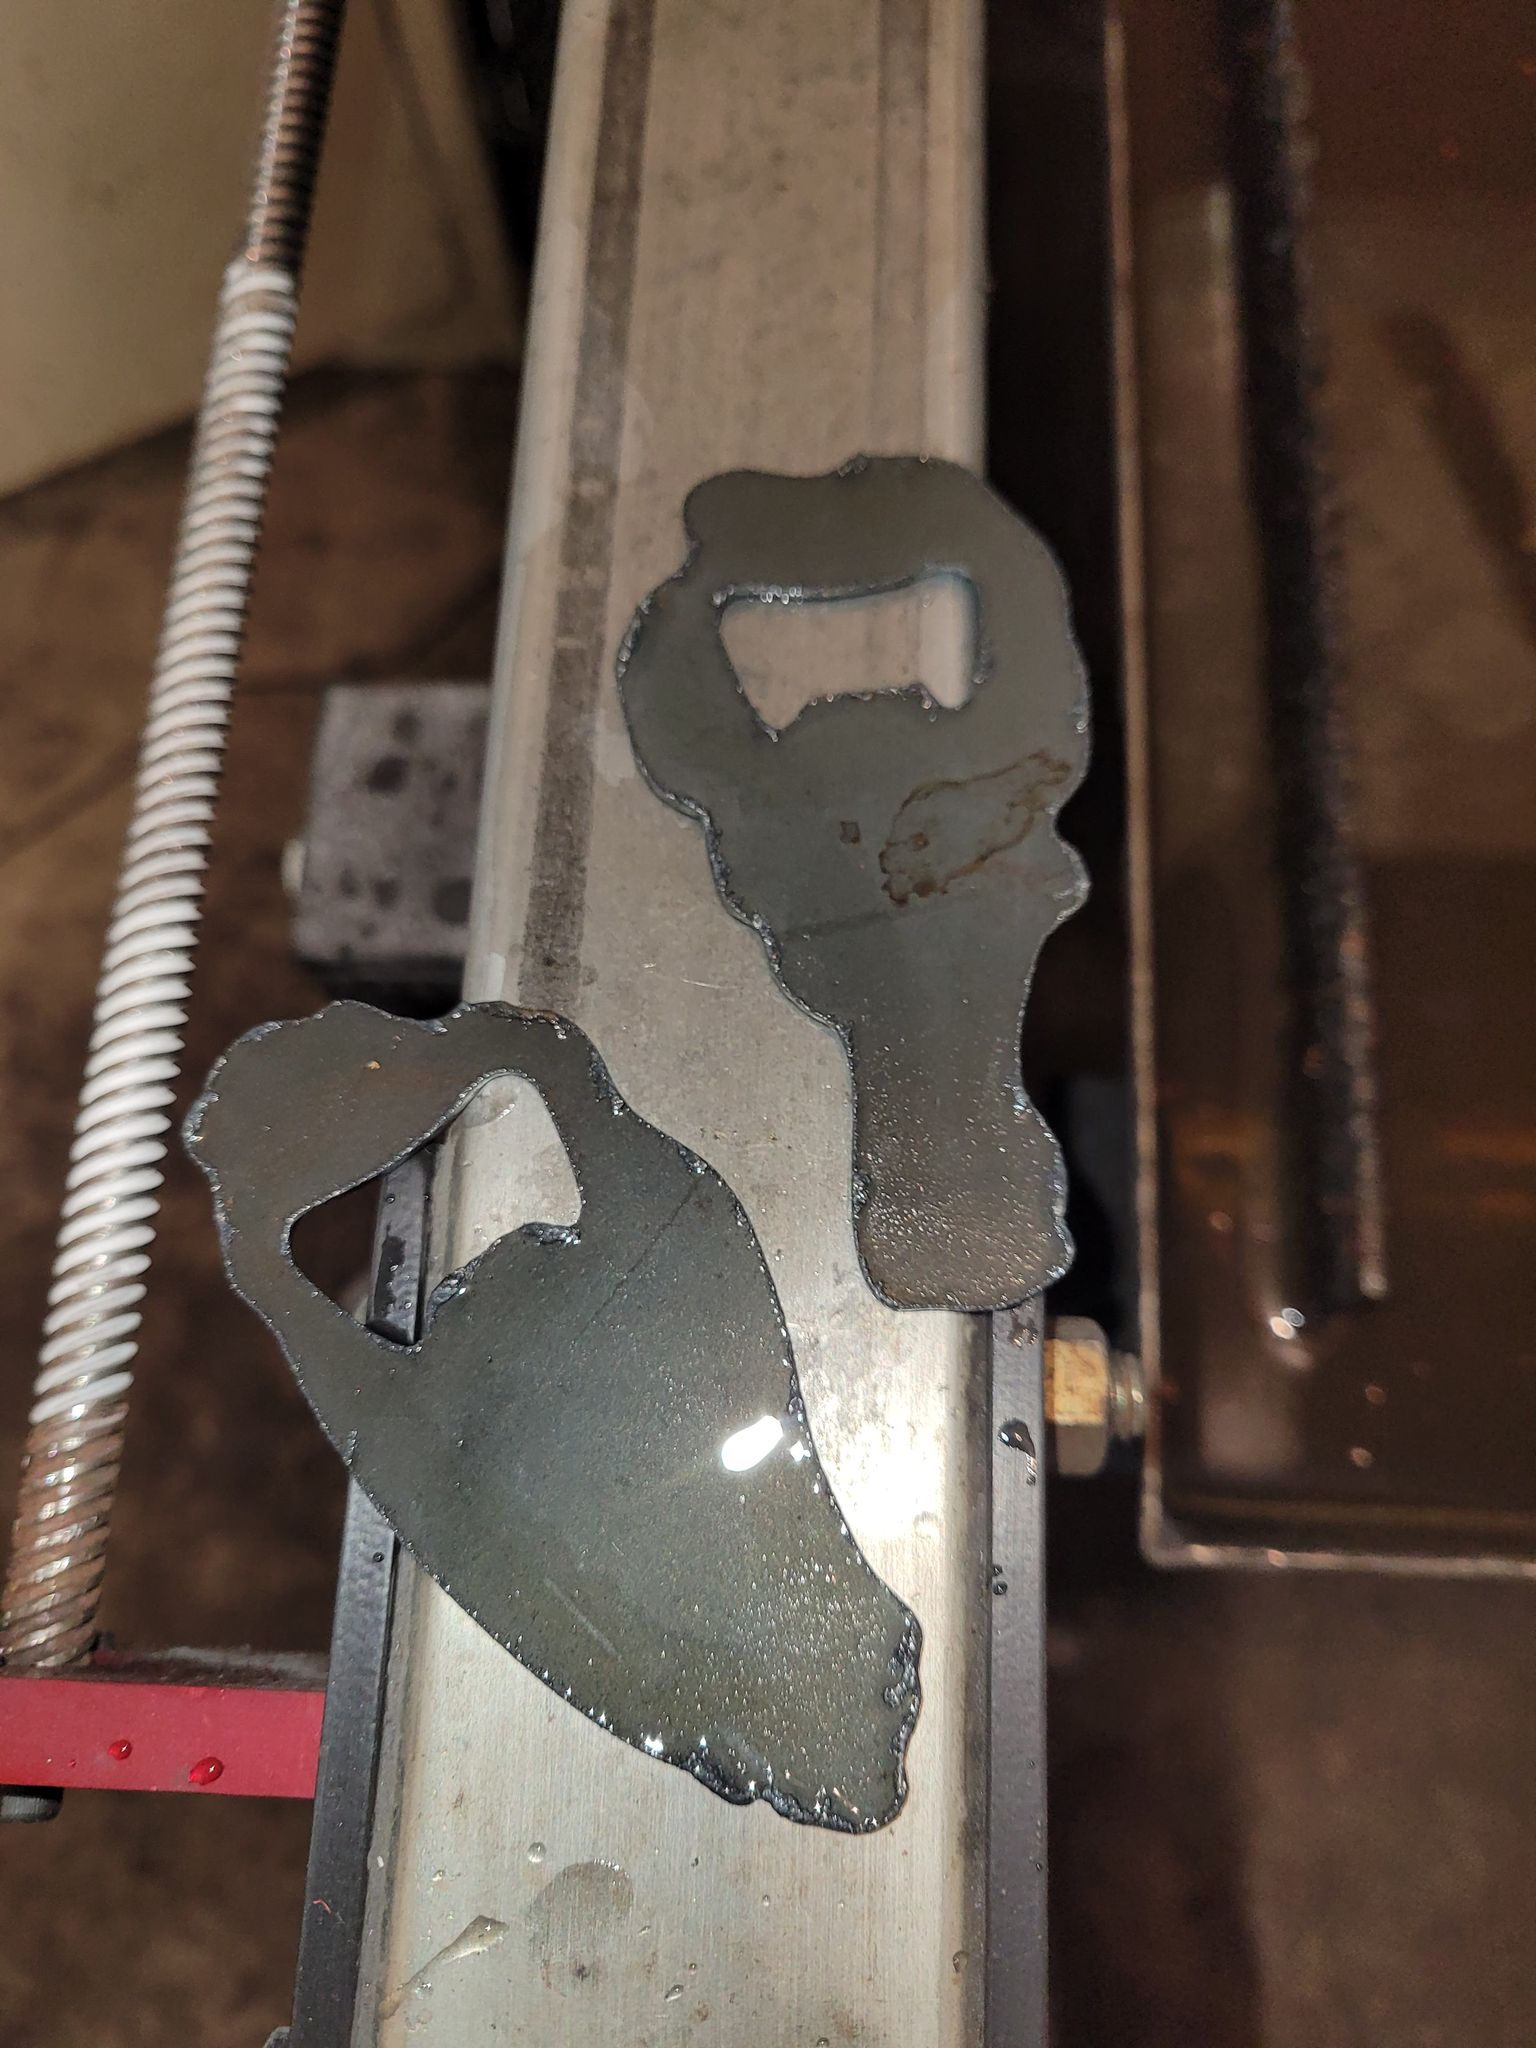
Little to no dross, ran the same file 4 times continuously.
Results seemed pretty good, I’d be happy if everything cut like this. I think my next test would be to run a bigger piece to see if the results are consistent.
Curious if the retaining cap needs to be loose for the plasma to work correctly?
If I load a bigger file, run it at these settings and instantly notice different or inconsistent results, what would that tell me?
I’m hoping this is progress and I can start using this machine without hating it and my end product.
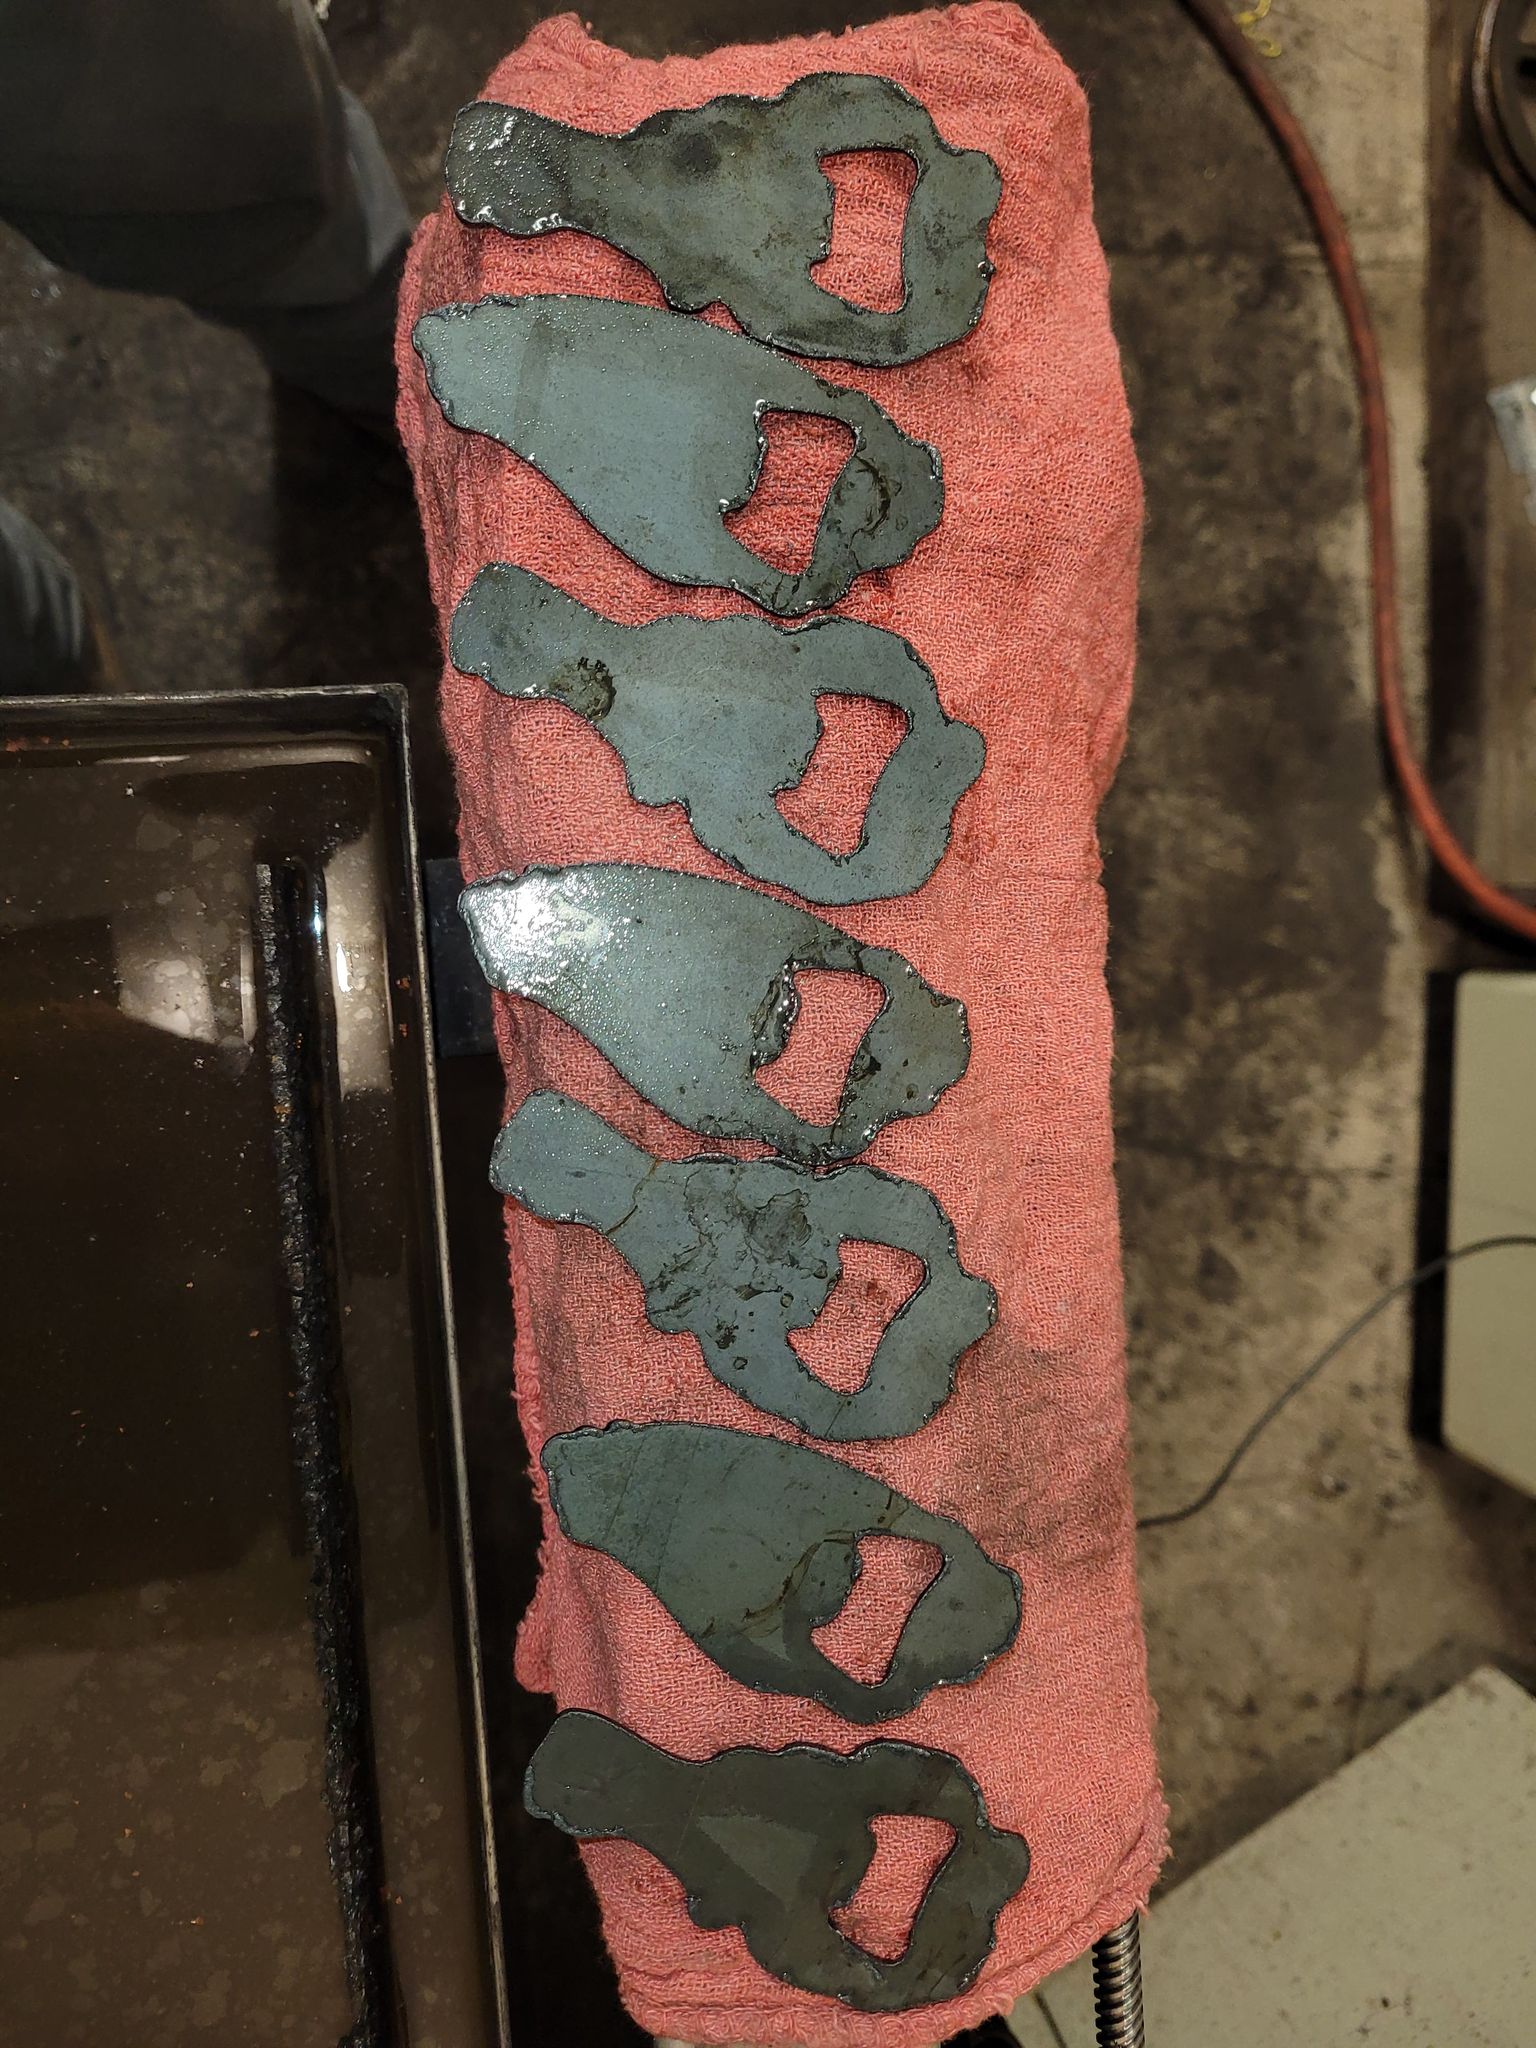
These were the consumables from the other night and today. When I replaced them they were a little over 300 pierces, honestly they look a little better than the other night.
Let me know what you think of my results from tonight, and if you suggest checking anything else. I did take a video of the machine running if that would help with any diagnosis.
Thanks!
That cutting tip is shot, bad, no good!!! Why do you keep trying to get good cuts with bad consumables???
There is something wrong with your consumables if you have to leave the cup loose.
I cut with those consumables as a part of diagnosis. I did change to new consumables, had to up the ipm and got the best results. I ran the new consumables with the retaining cup 1/2 turned back. I didn’t try it with it snugged tight.
The cup should never be loose. If it does then there is something wrong with the torch or the consumables…
1 Like
Anything in particular I can look for?
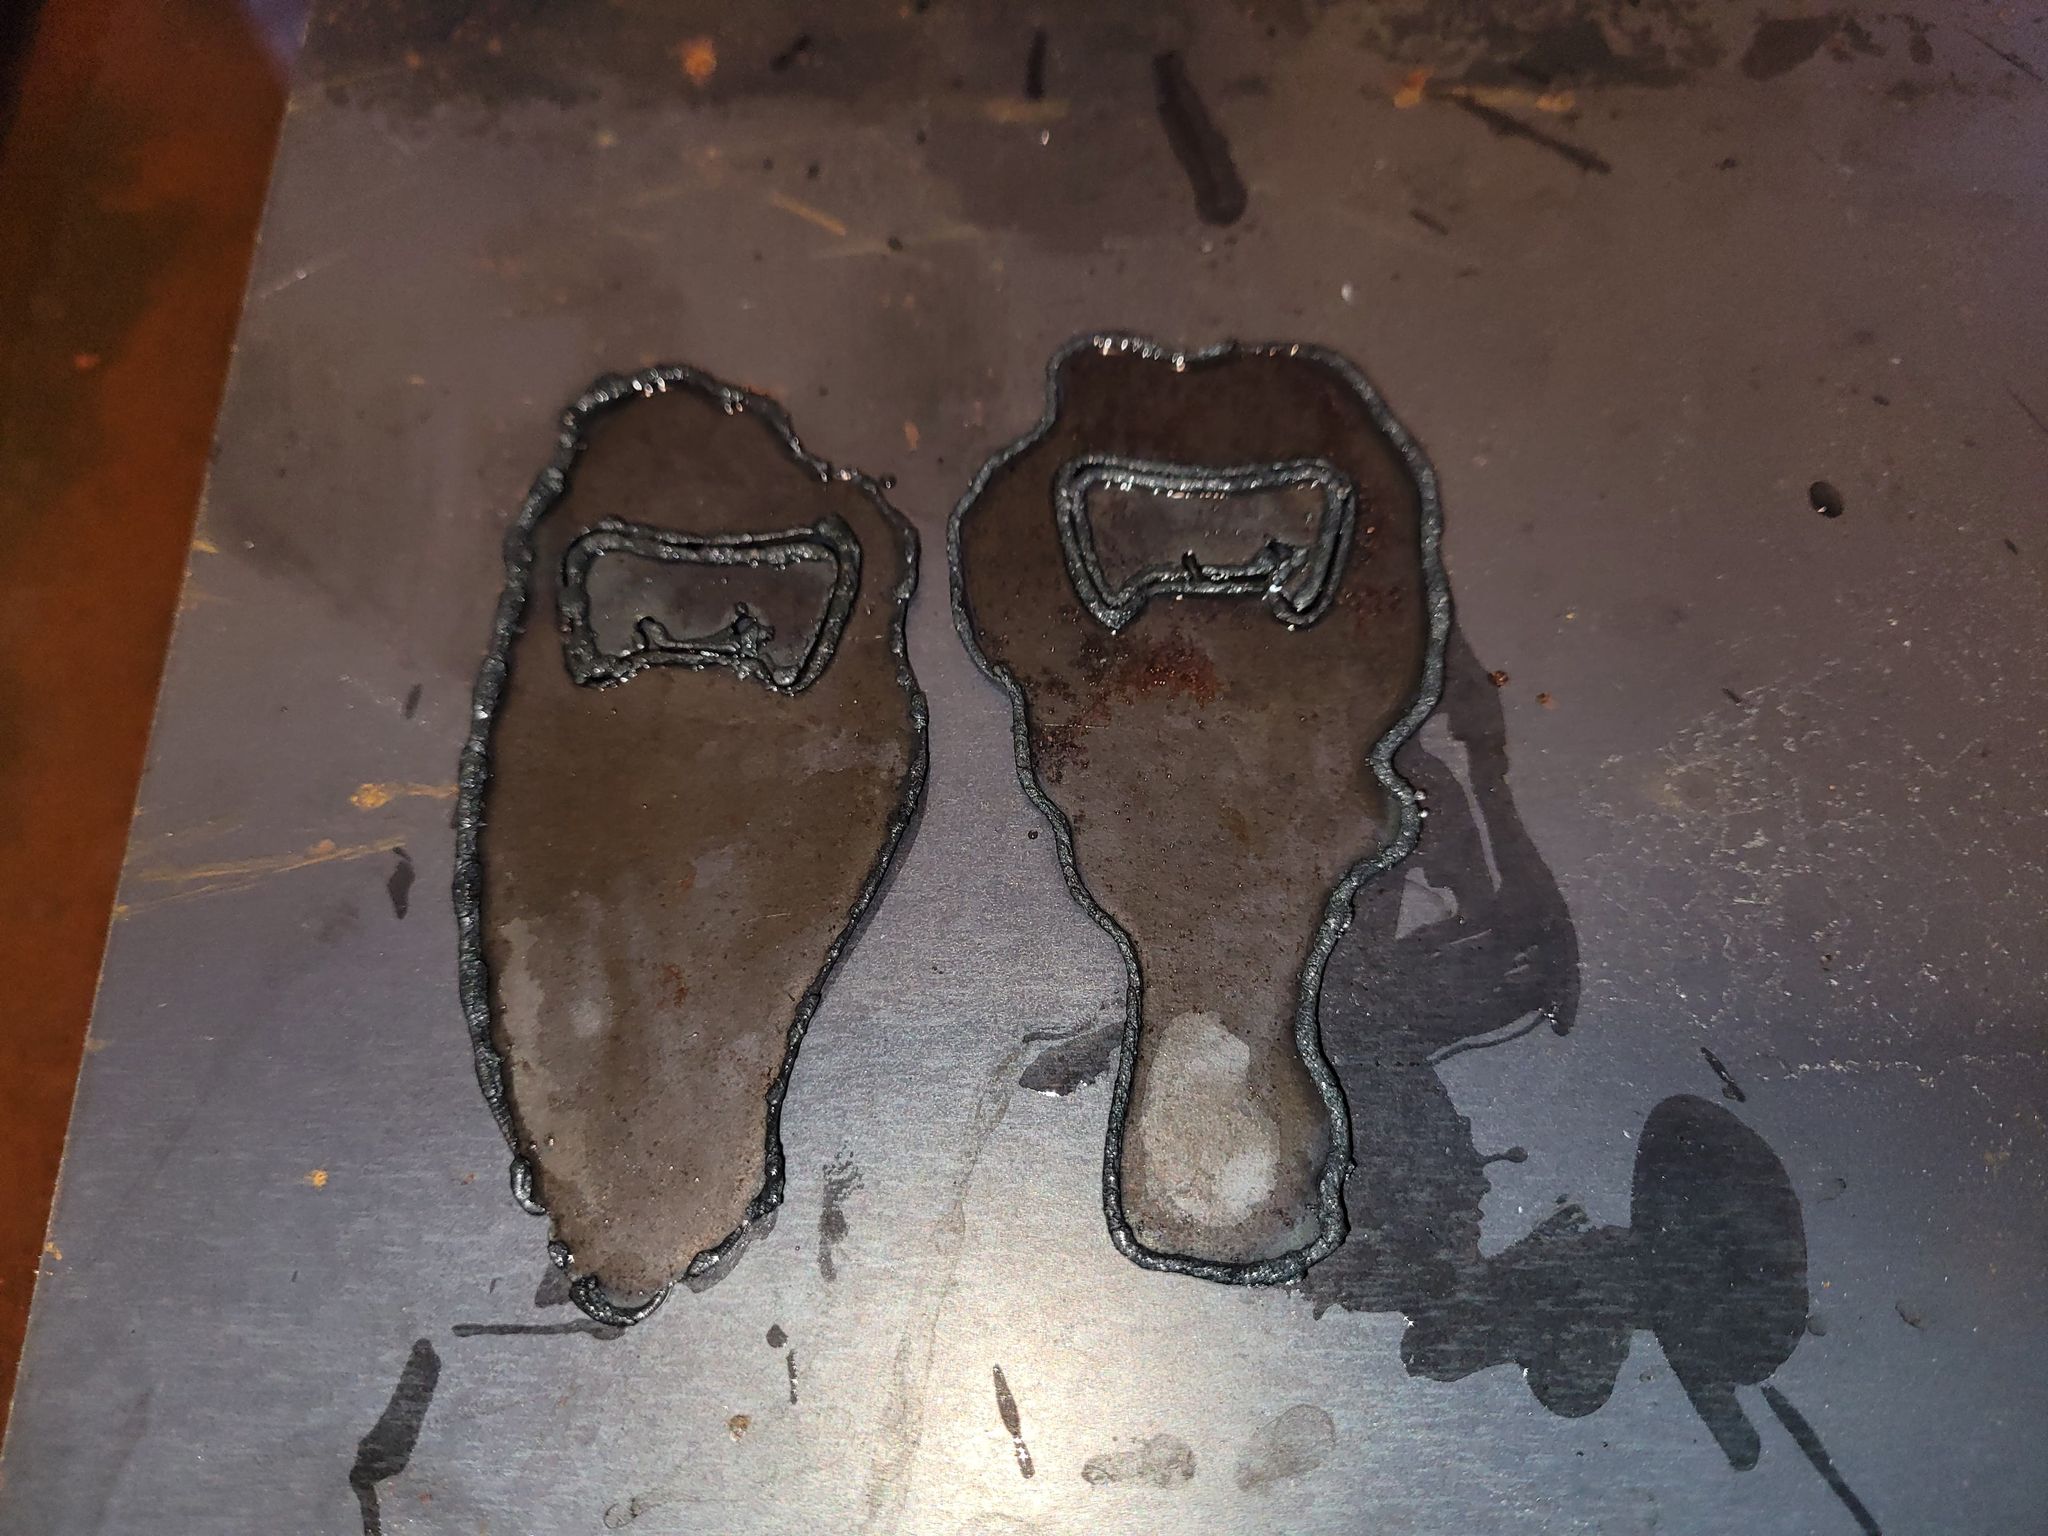
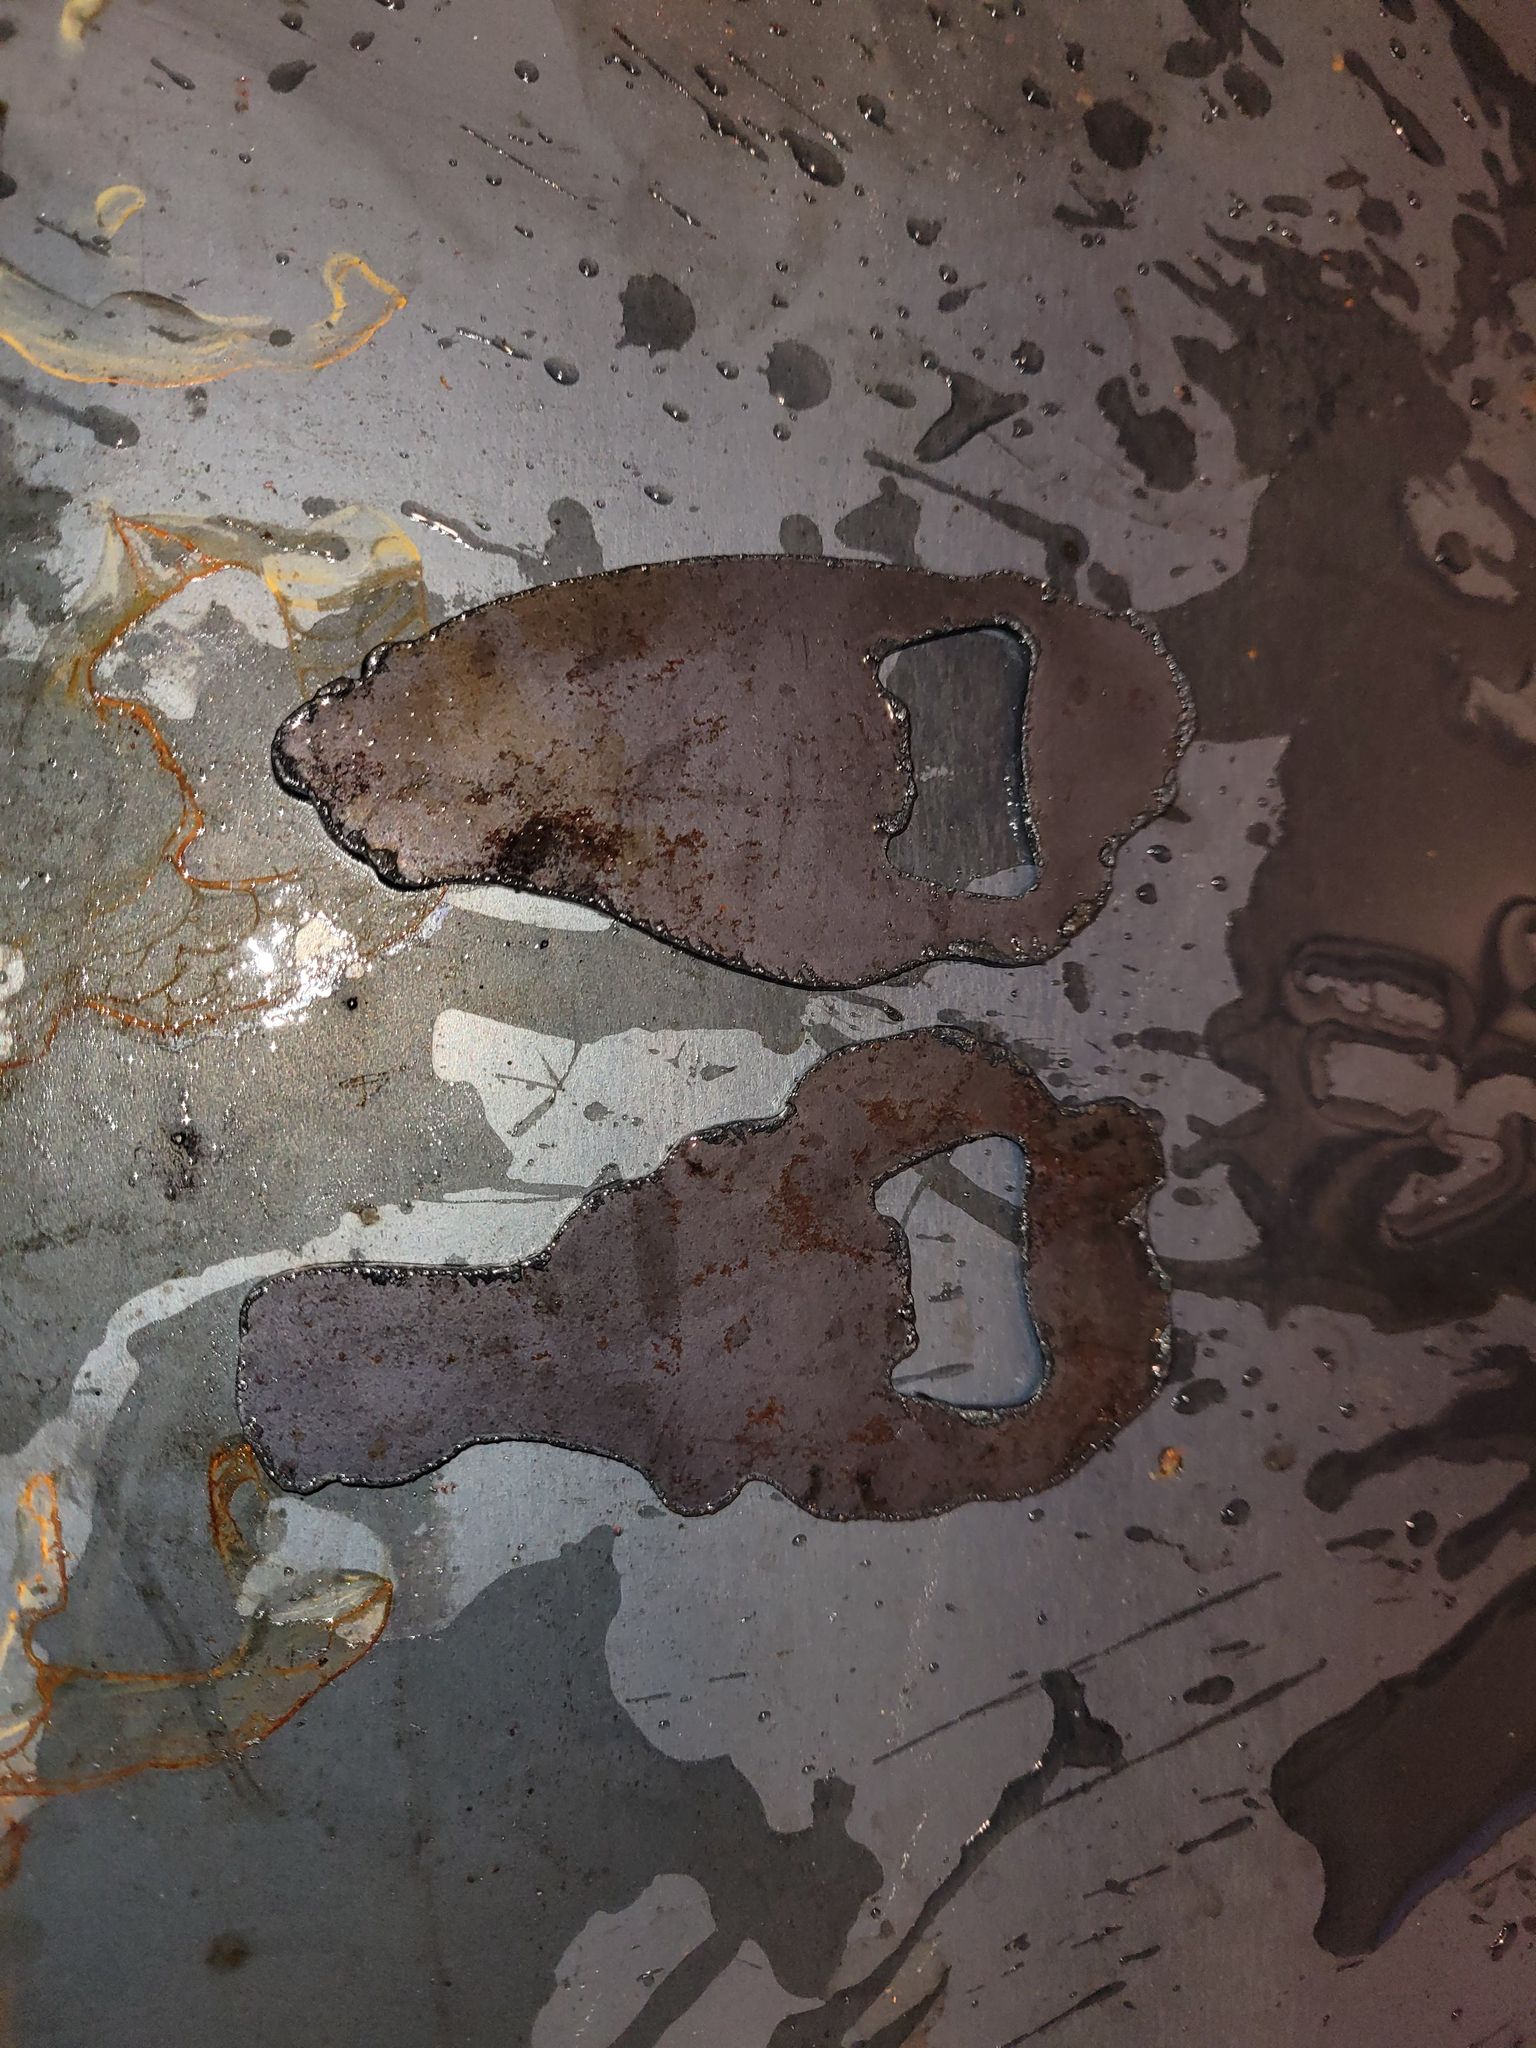
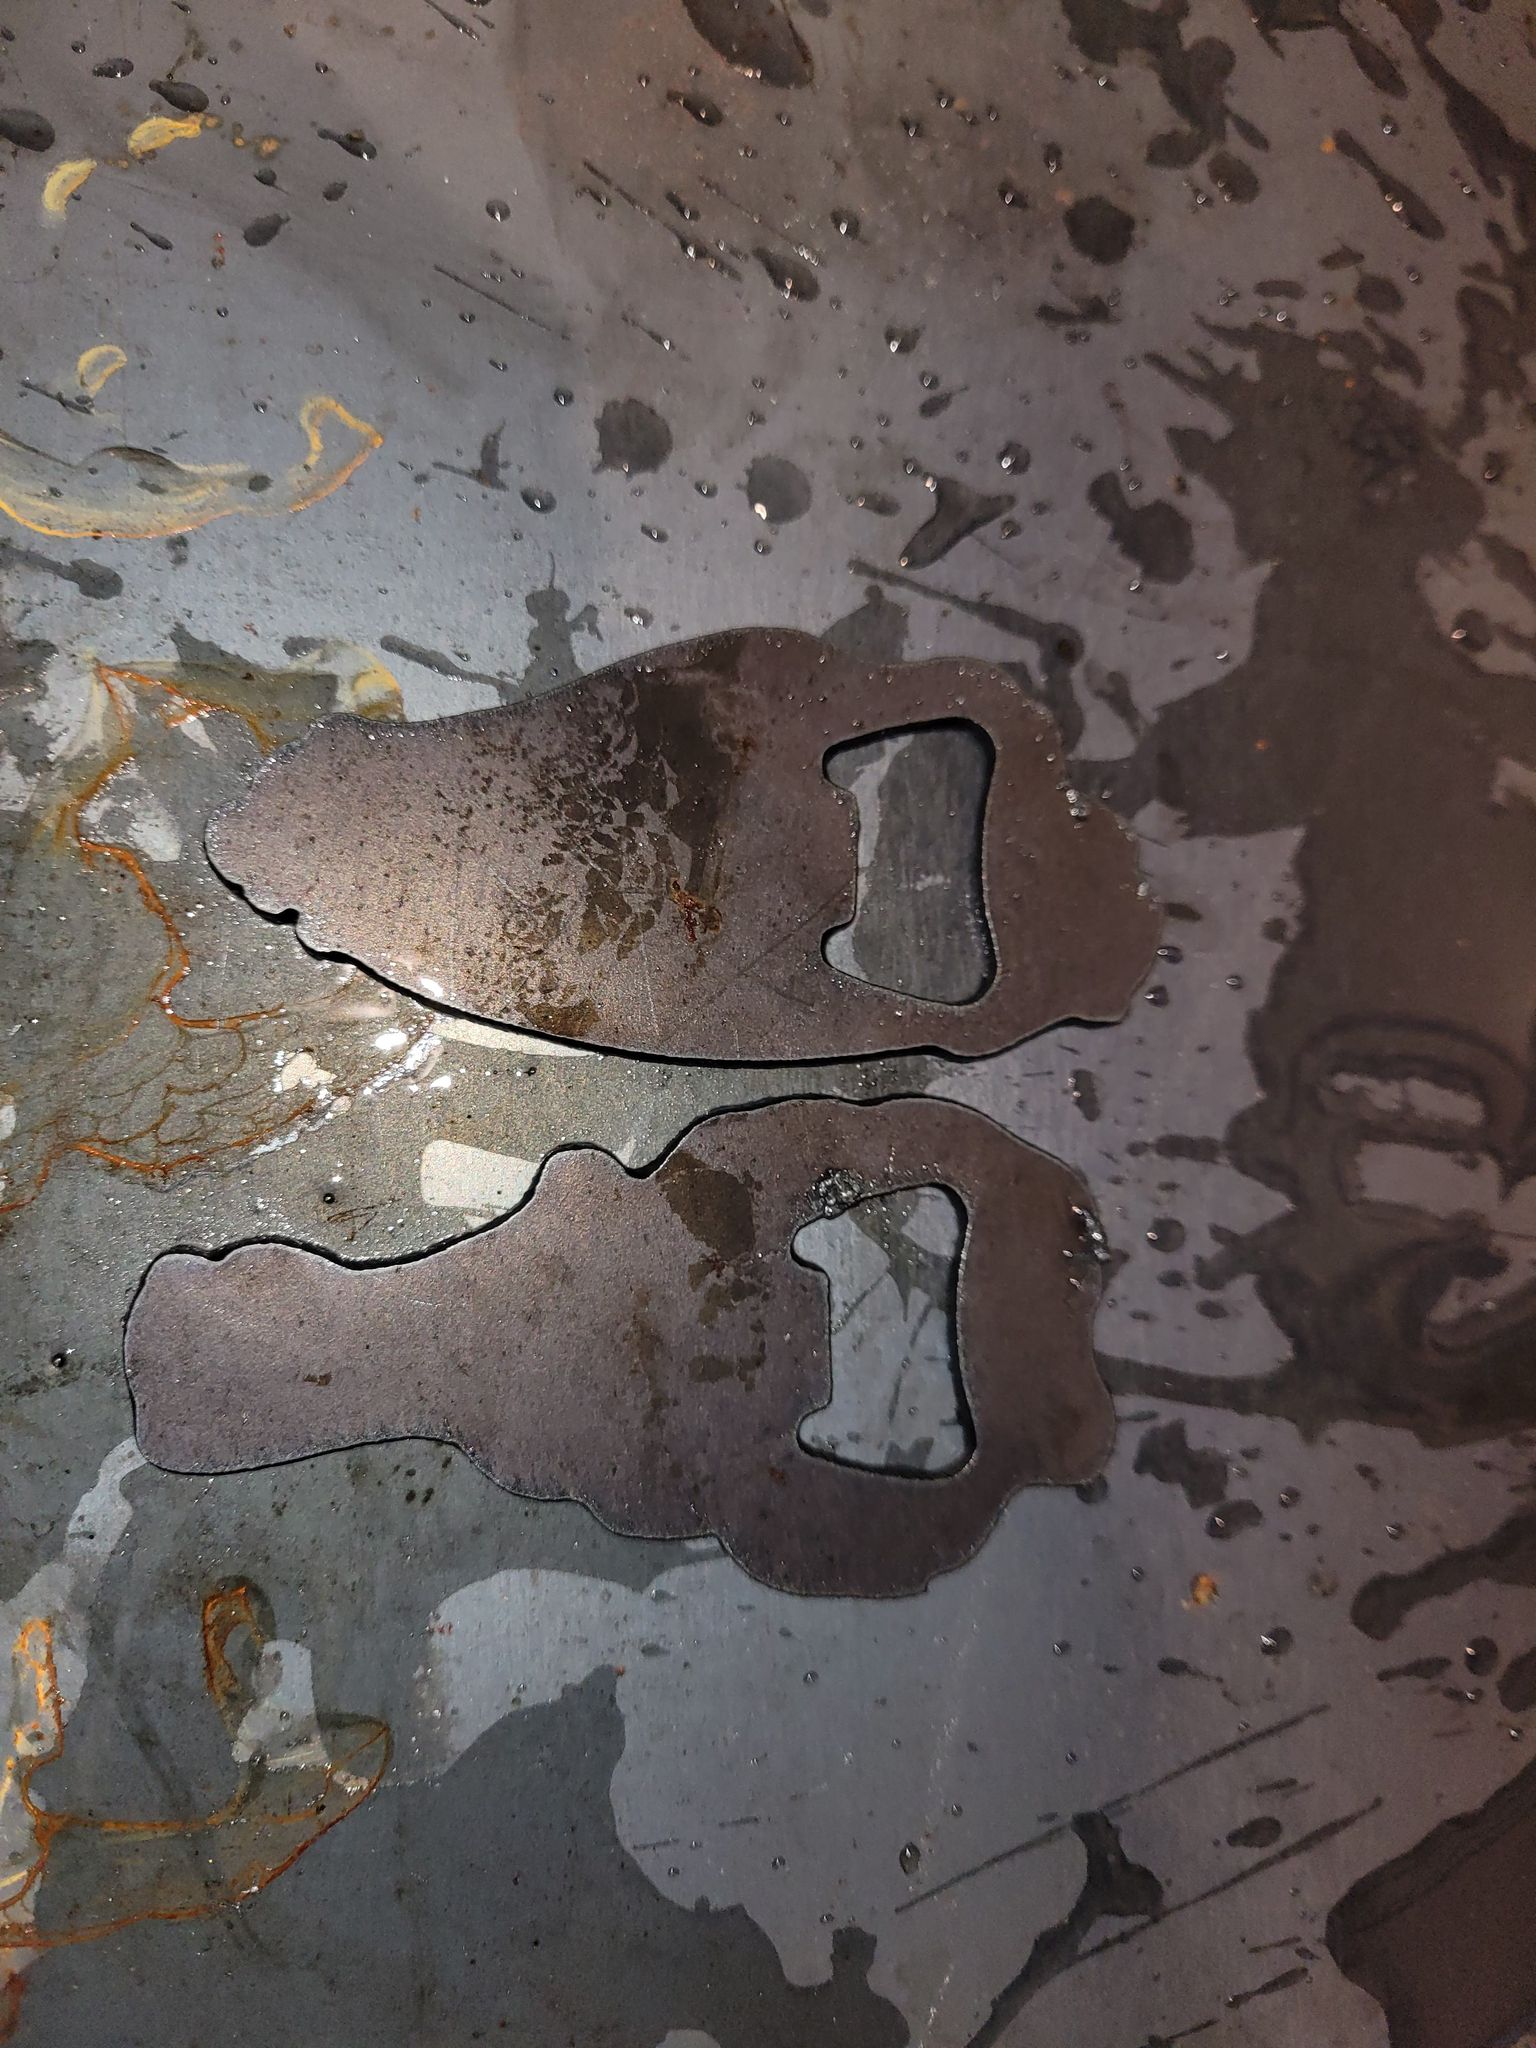
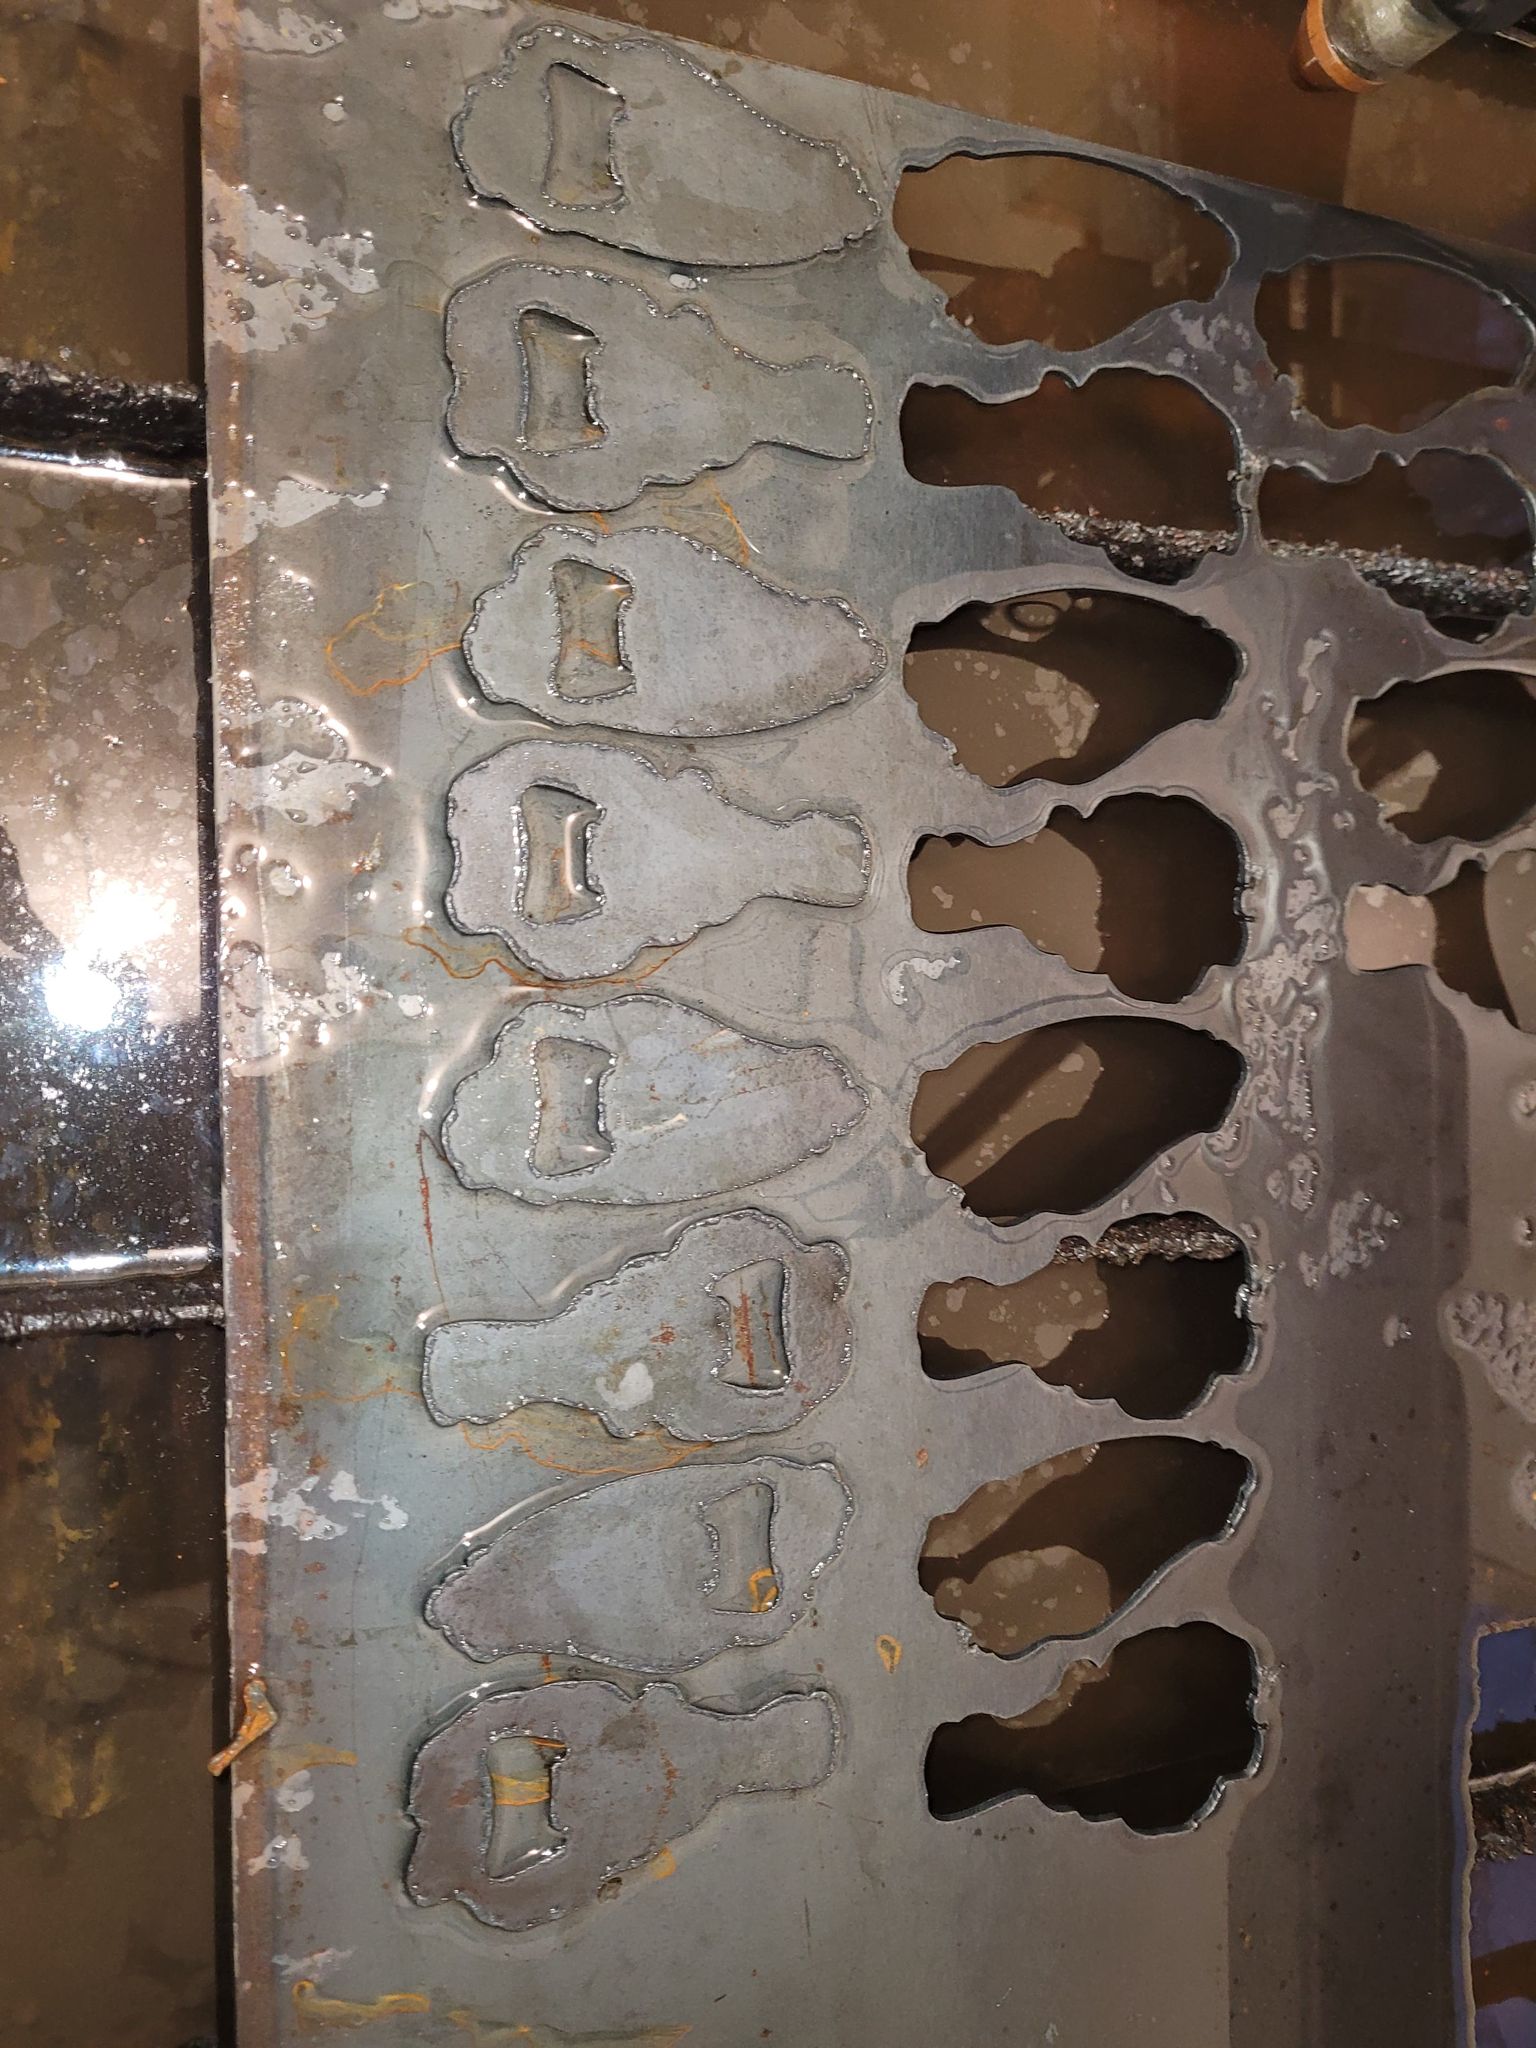
Performed a larger/ longer cut today. 30 amps, 150 IPM, nominal voltage set to 110v, consumables have about 30 pierces. Prior to cutting this, I tried some test cuts with retaining cap snugged tight, and there was excessive dross like I’ve seen before. Tried another quick cut with the retaining cup backed off a 1/2 turn and achieved good results. I decided to run the longer file with the settings set like this. Normally on a longer file I end up with heavy, hard to remove dross. I was pleased with these results, this dross is manageable in my opinion.
Dont mind the 2 pierce marks at the bottom, They were from a previous cut.
Still don’t understand why I need to have the retaining cap backed off a half turn, or what could be wrong with the consumables or torch. But this is progress I believe.
1 Like