Im having a problem where my cut height is higher than what I have it set at. i am running a crossfire xr with a prime weld cut 60 with raw voltage gotten from inside the machine. my torch height is set at .06 and when I test it by pausing it mid cut, I’m finding around .12 with a feeler gauge. I tried to set the cut height to .03 in fusion and that brought my torch down to about .08.
I am using smart voltage and my live voltage hangs around 107v when cutting. let me know any questions or potential solutions.
Thanks,
Sam
Post your G Code (can open it in notepad).
Assuming you’re not fat fingering anything, ensure your Z axis dip switches are correct on the driver. You can do this by just removing the cover on the large control box ensuring only one dip switch is in the down position (I’ll have to check later which one), or a quick one by jogging the Z axis in small increments, and physically measuring that the distance traveled is correct.
It’s quite normal to have a different programmed cut height in order to achieve the correct physical cut height.
For me, a .02" programmed cut height gives me .06" physical cut height. When I used a different setup/plasma cutter, my programmed cut height used to be .04" the entire time for a cut height of .06".
If you’re using Fusion, set the spring back value to zero or a negative number to get the correct measured cut height.
If you look the the code, the post processor adds .02" as a backlash compensation, in addition to whatever value that you put into the spring back field ( .02" if you follow the Langmuir instructions).
There really isn’t any backlash with the way the IHS operates, so it’s just adding height to the pierce and cut heights.
Any material over 14 ga is not going to spring back, so you’re also adding more to the pierce and cut heights by putting a value in there
1 Like
here is my Gcode
(v1.6-af)
G90 G94
G17
G20
H0
(2D Profile2)
G0 X0.04 Y-5.04
G92 Z0.
G38.2 Z-5. F100.
G38.4 Z0.5 F20.
G92 Z0.
G0 Z0.04 (IHS Springback + Backlash)
G92 Z0.
G0 Z0.18 (Pierce Height)
M3
G4 P1.
G0 Z0.06 (Cut Height)
H1
G1 Y-0.04 F100.
H0
M5
G0 Z1.
M30
(PS100)
I cut a lot of 16ga. should I set spring back to 0 for everything or sould i have a little for things like 16ga?
I would set it to zero and take a measurement to see what the actual height cut height is.
The torch isn’t that heavy and I haven’t noticed much flex in full 16ga sheets. The only time I see any spring back is on sheets that have already been cut and are bent slightly.
2 Likes
Like @ds690 mentioned, springback does add some cut height but you actually made it even higher yourself since default value is .02", and default value for pierce height is .15".
Hi Kwikfab, (and everyone else reading)
I know this post is a bit old, but do you have any additional info or pics on the correct dip switch positions? I’ve having an issue with my IHS setting much lower than programmed. I have to command .3 (yes, .3 as in almost 5/16) to get an actual pierce/cut height of .062 or 1/16.
Additionally, I don’t know if the Z-axis is supposed to move in the same commanded increments as the x & y axis, but if I have 1/16 increments selected and I move the Z-axis 1 increment, it’s much less than 1/16" actual movement.
I’ve been looking for info regarding IHS calibration/function but haven’t found anything…it’s all about THC (which works just fine when the pierce/cut heights are physically correct)
Any input is greatly appreciated and thanks to all in advance!
That definitely sounds like a dip switch setting on the driver.
All of the drivers should have the same dip switch settings.
Check the X , Y1 & Y2 drivers and set the Z to match.
1 Like
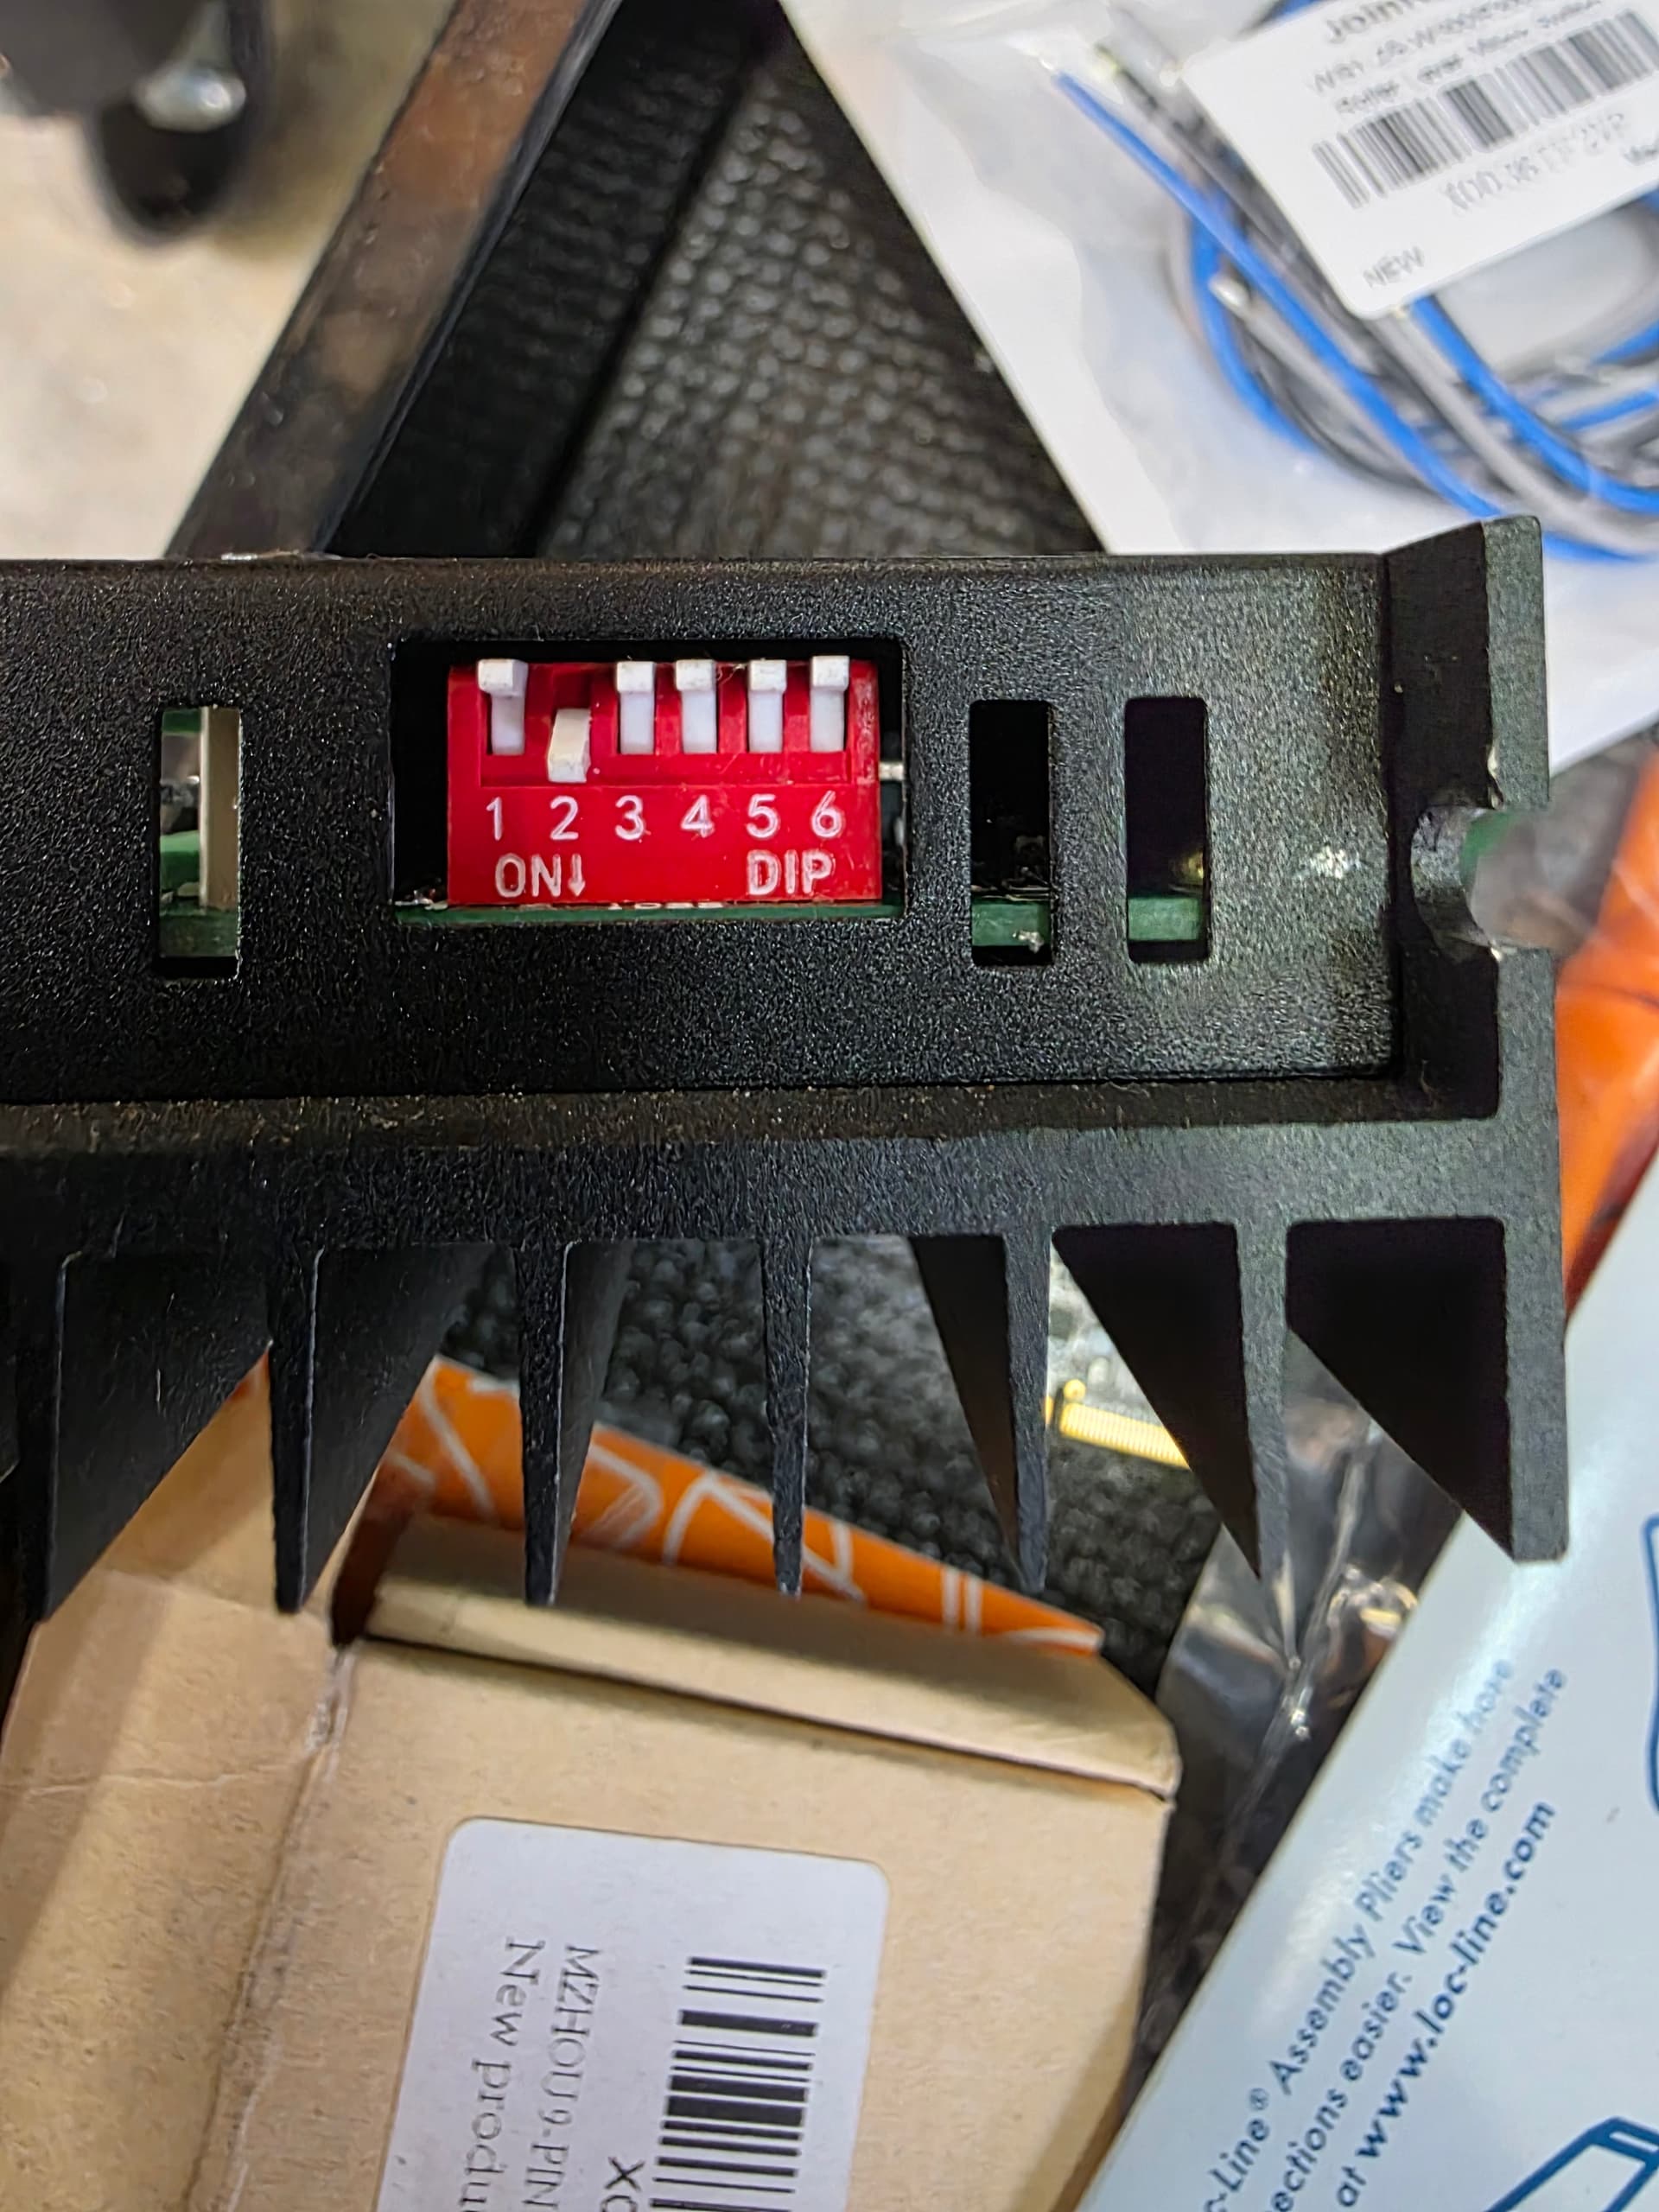
Thanks for the info guys! I pulled the cover off and the 2nd dip switch is down (just like the others). I even toggled it up/down to make sure it’s “engaged”.
If I run my torch down until the IHS light turns on and zero my z-axis DRO, it takes 5 increments of 1/16” step to get to ~.062 actual height (and the DRO reads .312 as if it actually moved those 5 steps of 1/16”). What else could cause this? I just don’t know what else I can do or check. Processing: IMG_6562.jpeg…
It could be the coupler, between the motor and the lead screw, slipping. It probably won’t slip on the way down, because there isn’t much load on it. It has to lift the torch on the way up, so the extra load could make it slip.
Other, less likely, possibilities could be burnt pins in the stepper motor connector or a bad stepper motor or driver.
EDIT: Try switching the Z axis motor to the X axis port and see if the movement is correct. That would indicate that the Z driver is bad.
Thanks for the feedback! It’s not the coupler…I watched it while moving up/down and the lead screw turns the same as the stepper.
That’s a great idea, feel pretty stupid I didn’t think of that. Was trying to figure out how I could test the driver…DUH! Now I have to wait all day until I can get home & try it!
1 Like
Thanks ds690, I really appreciate your help & suggestions…that was it!
Plugged the Z-axis motor into the y-axis driver and immediately upon jogging the “actual z-axis” you could tell the difference in sound & speed. Did a quick test similar to what I explained previously & although there’s still a small offset, it’s expected & within acceptable range.
I don’t know much about stepper motors/drivers and I haven’t actually removed the z-axis driver from the enclosure yet, but do you (or anyone else) know if this is the kind of thing where I can just match up part numbers & get a driver from anywhere or should I go exclusively through Langmuir? I’ll be contacting them regardless, just curious in general.