Critique My Cut!

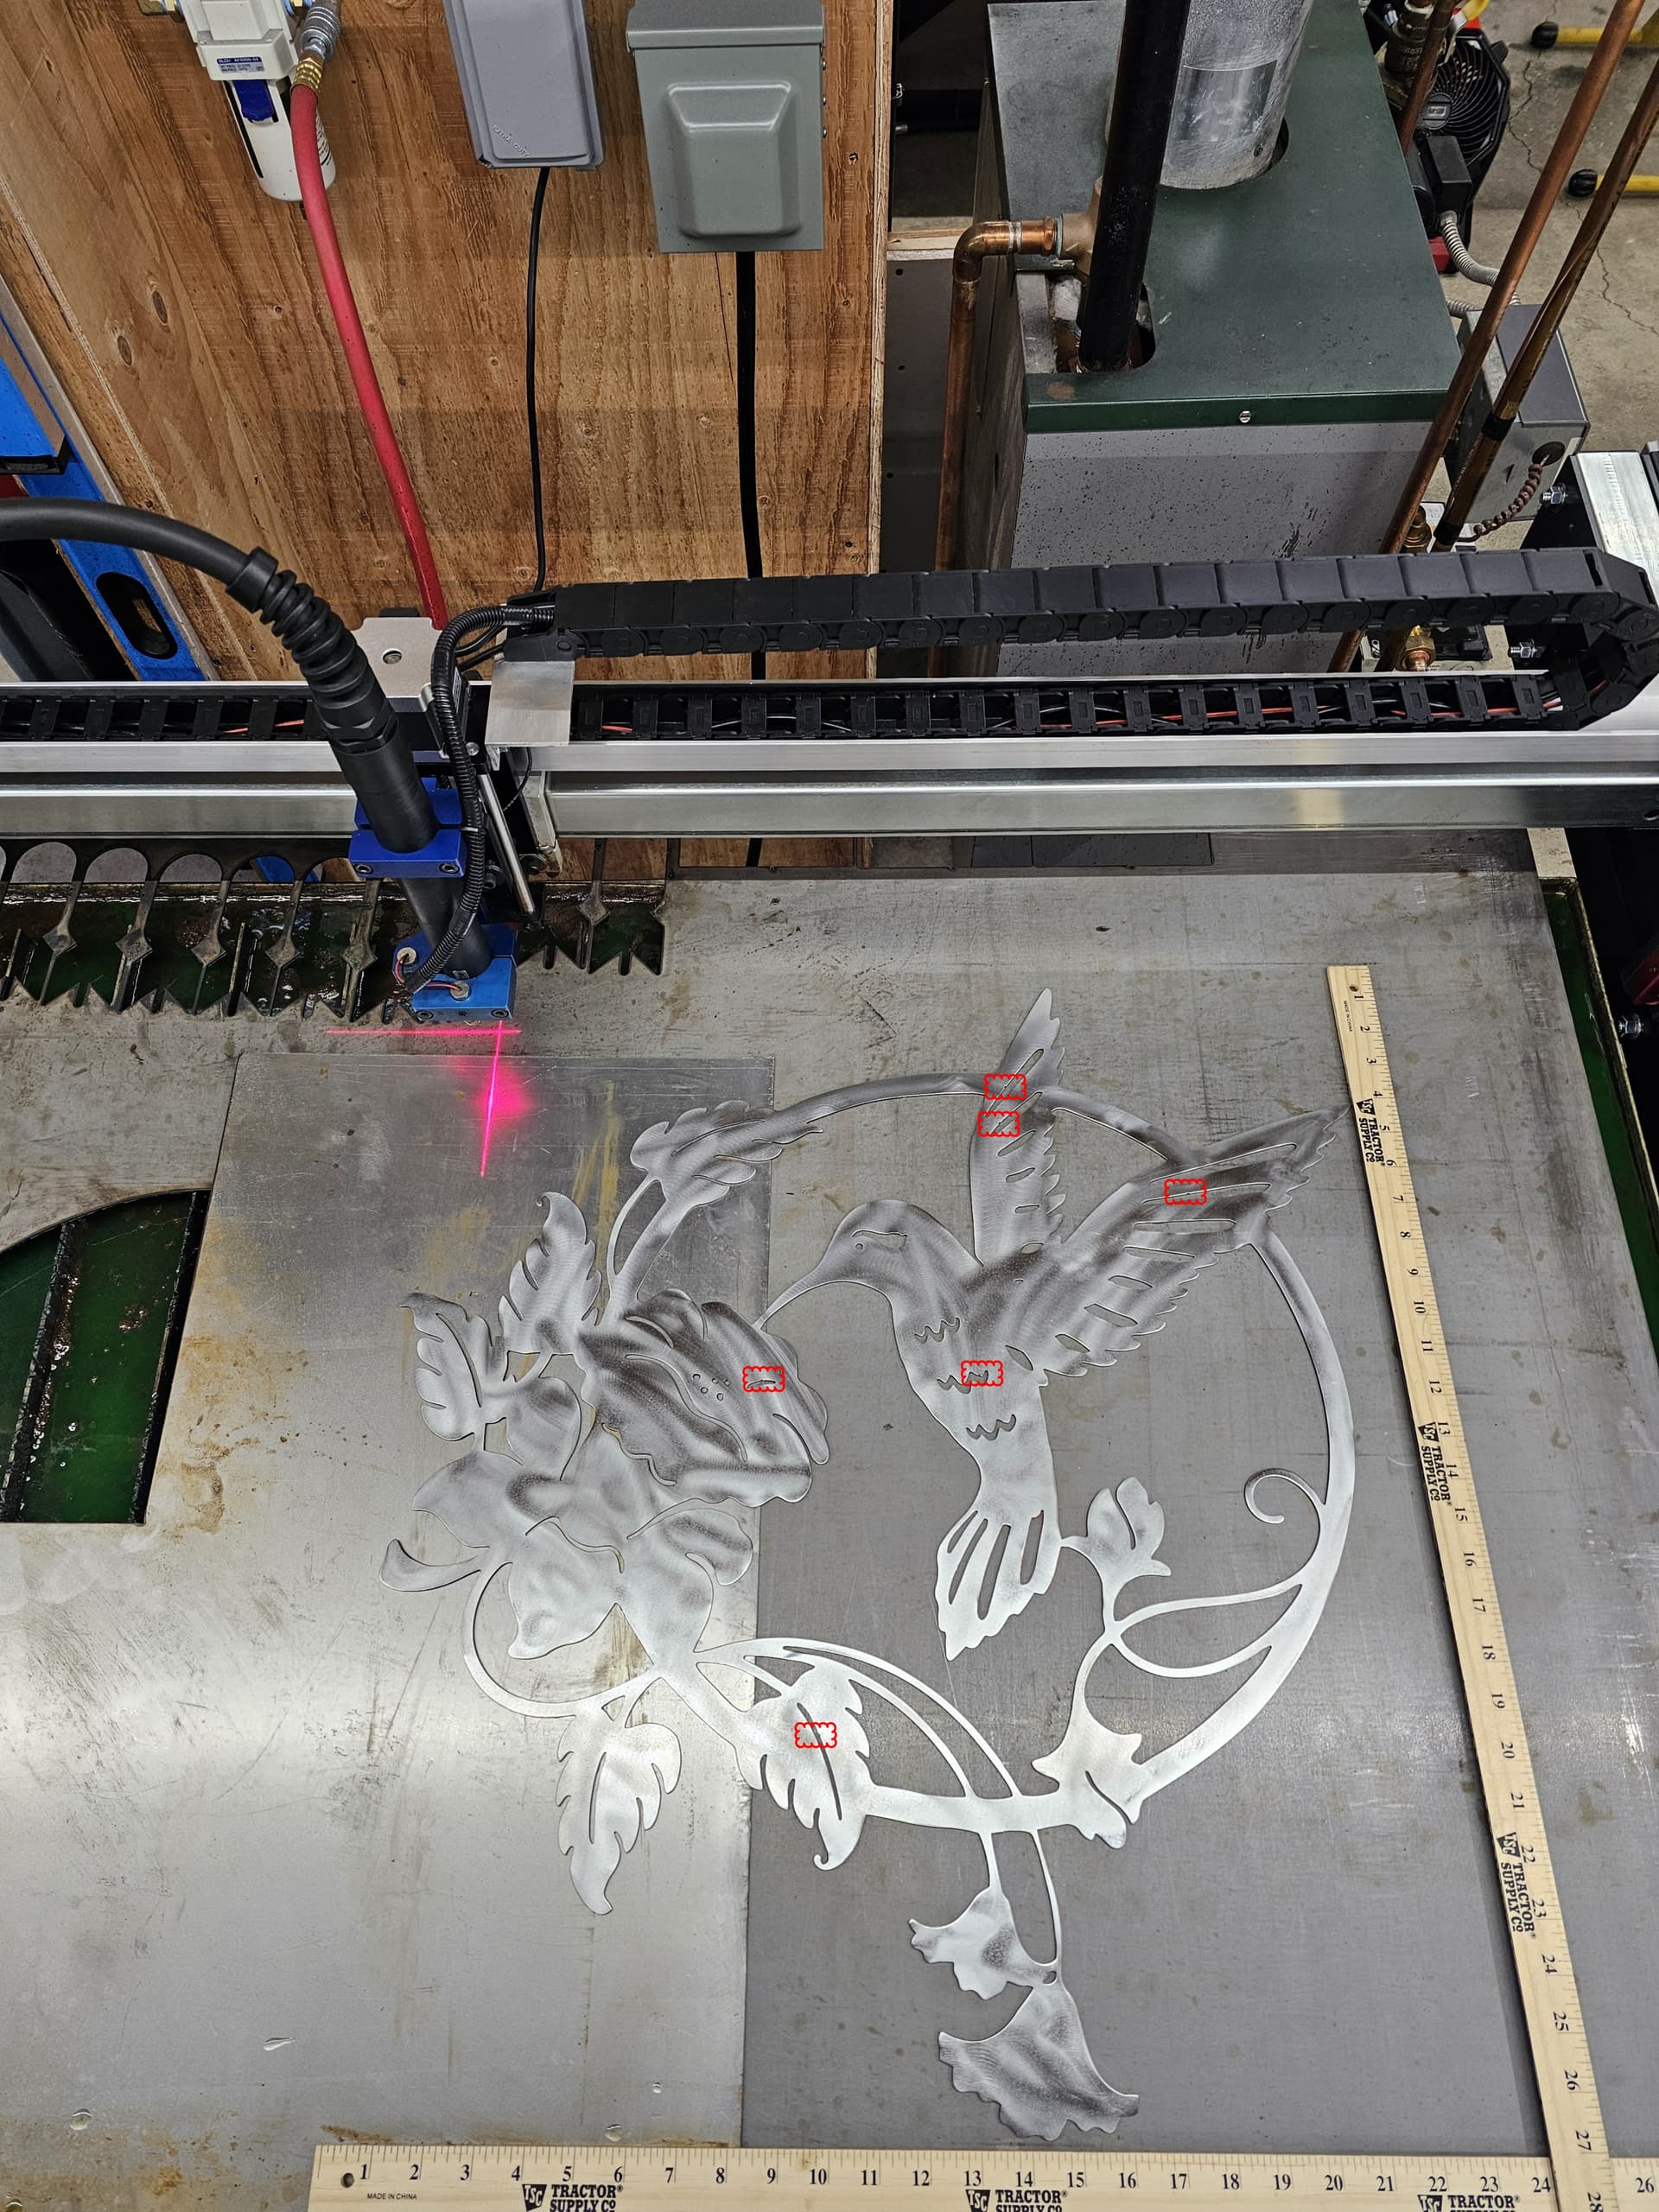
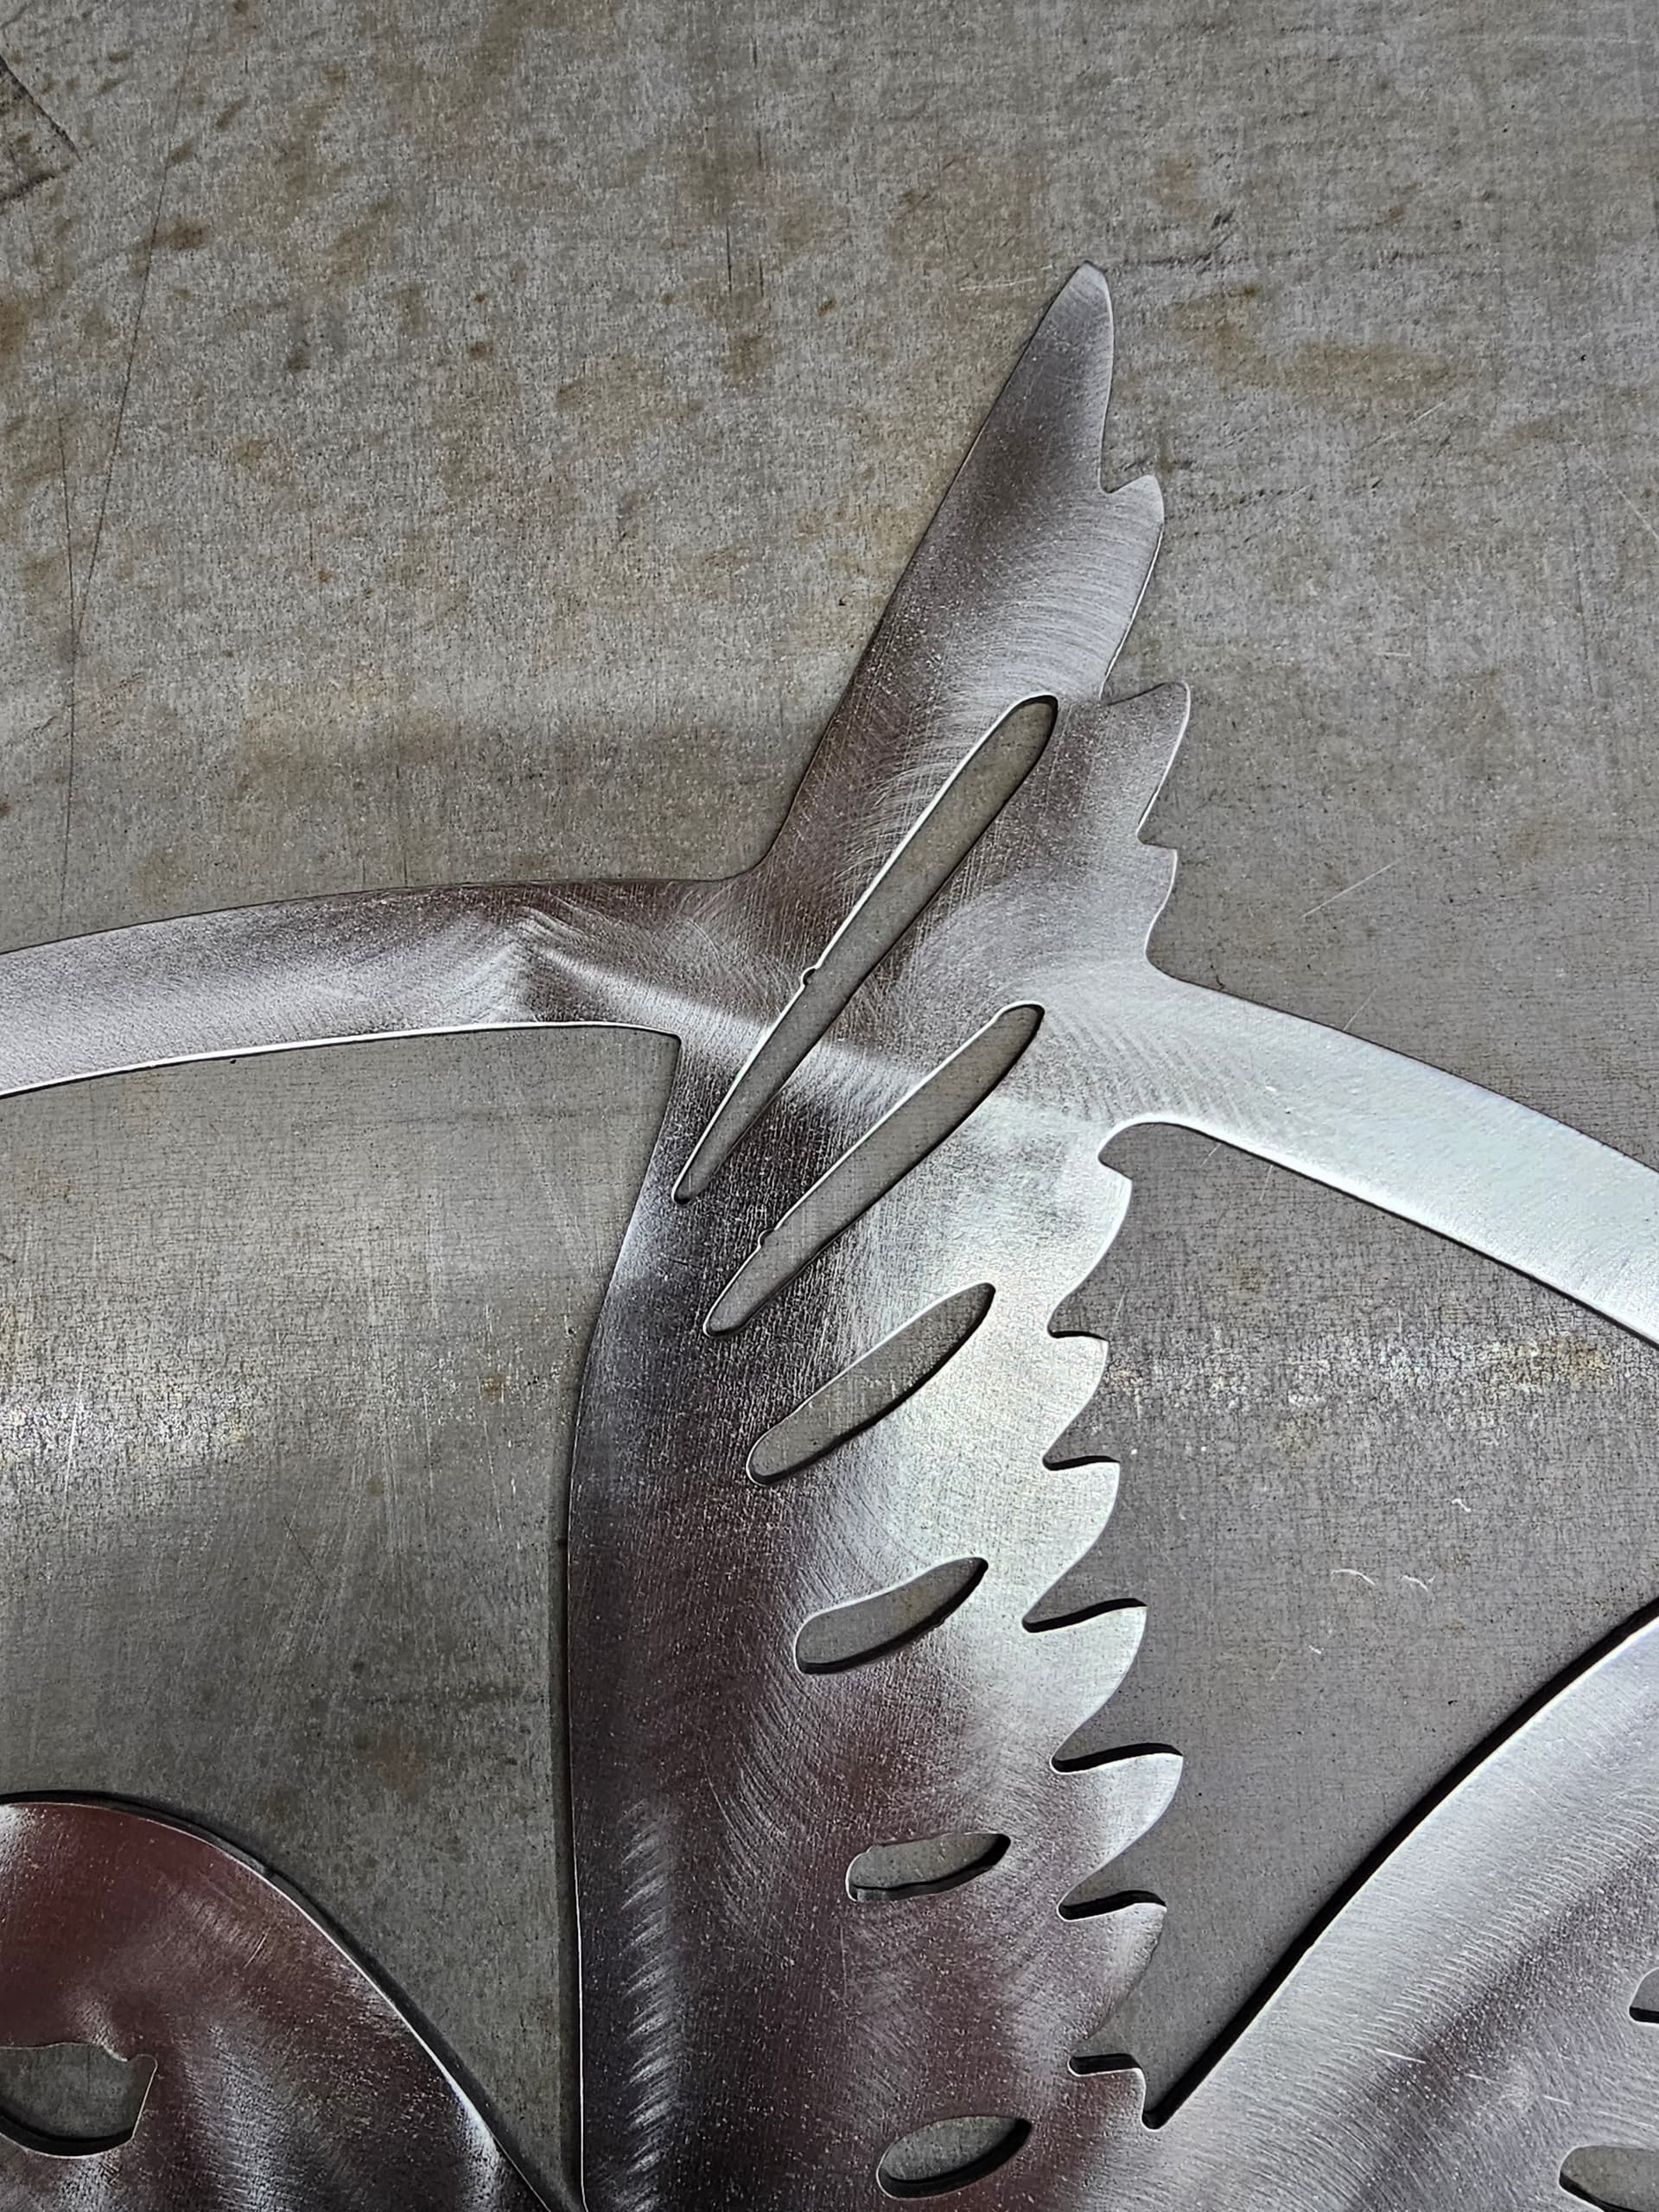
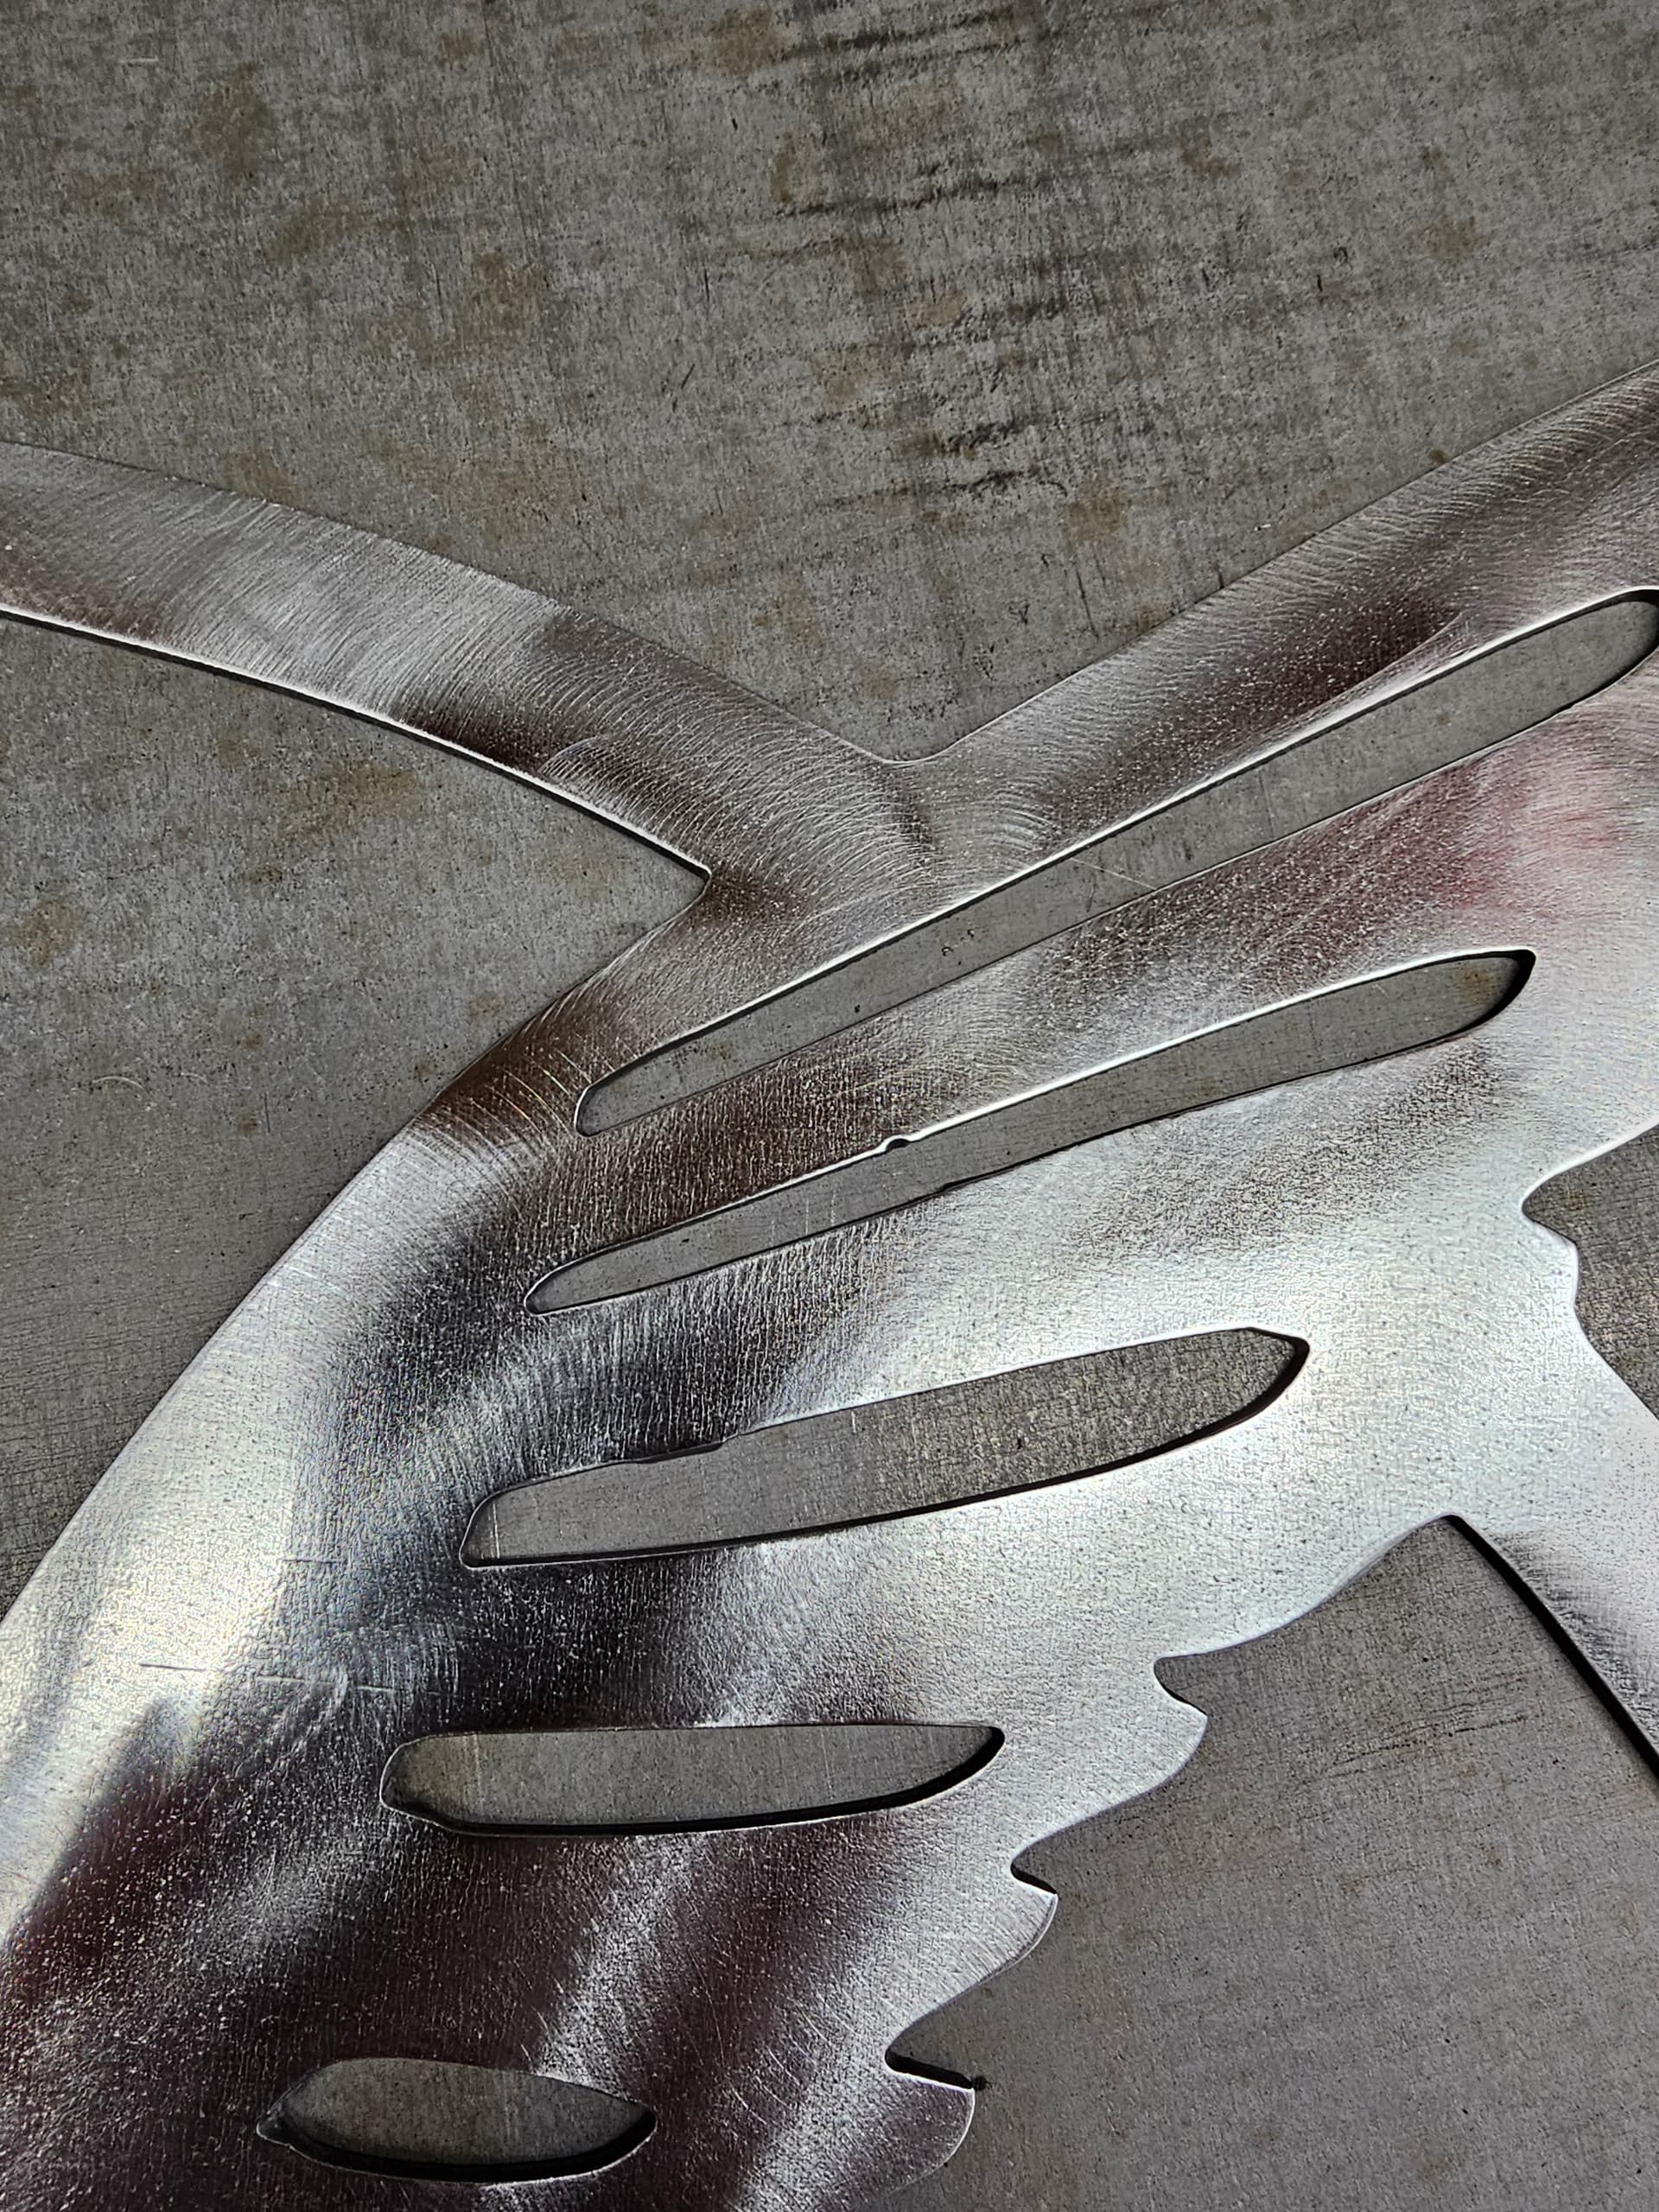
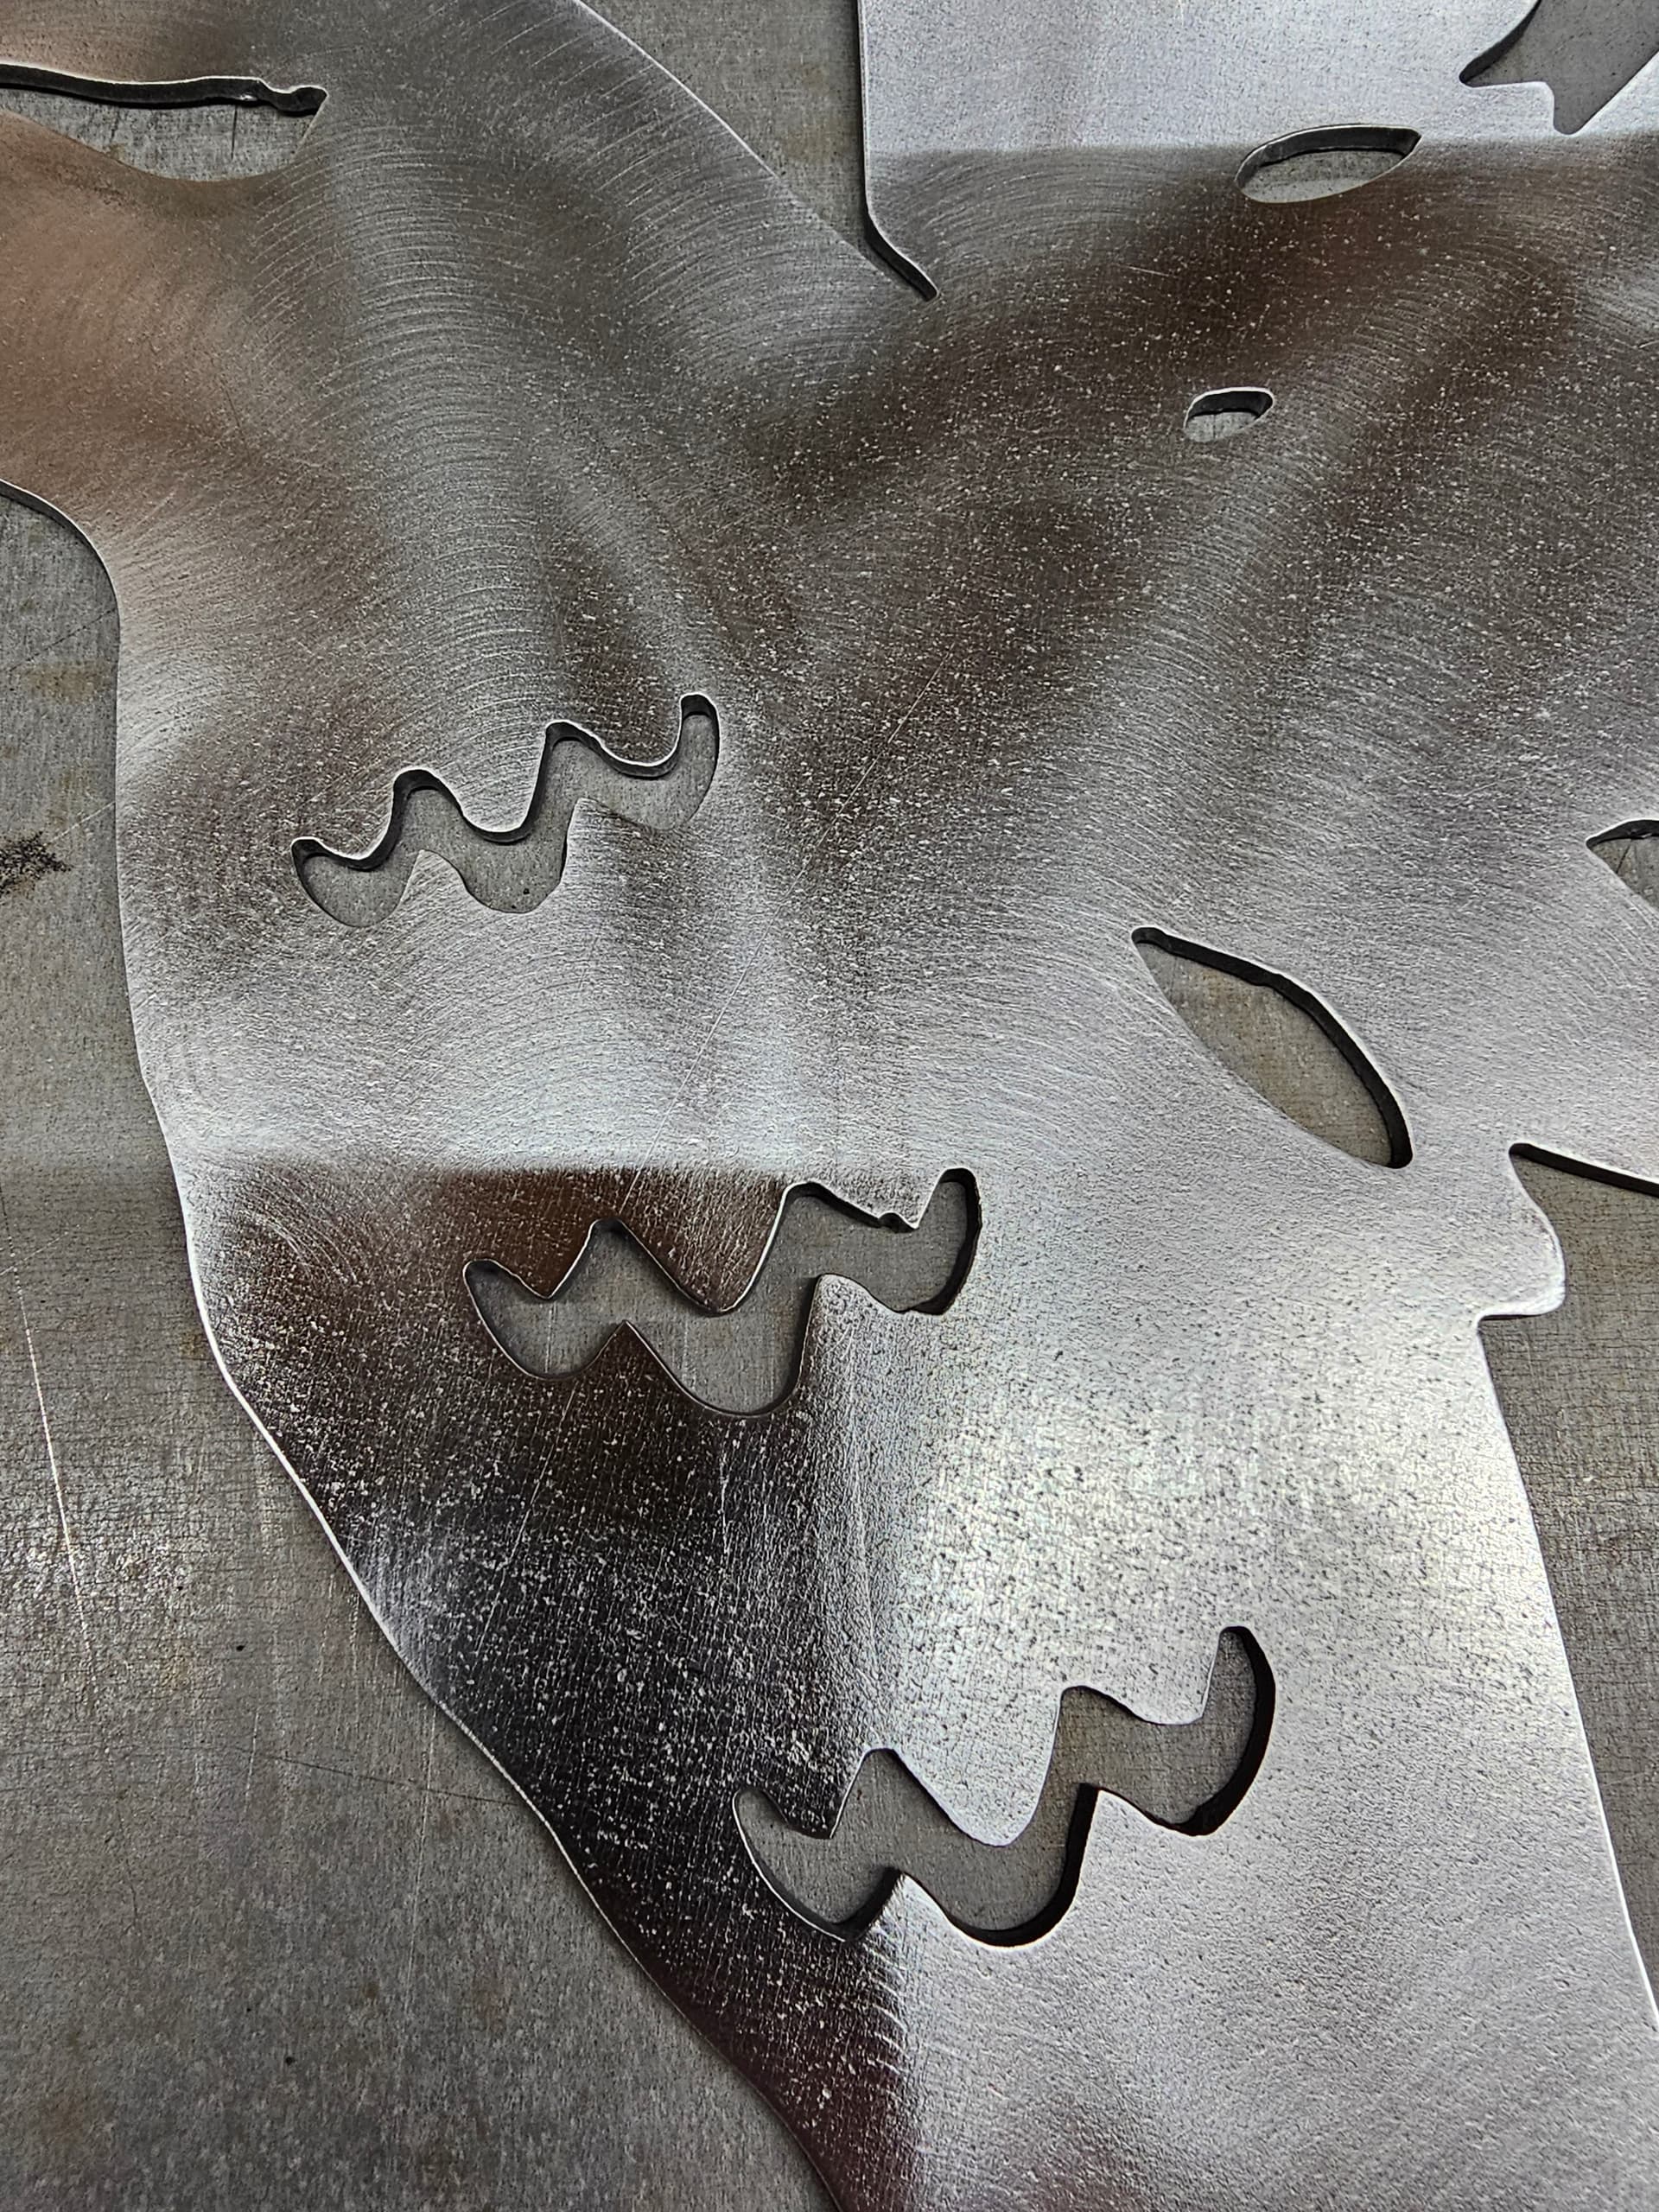
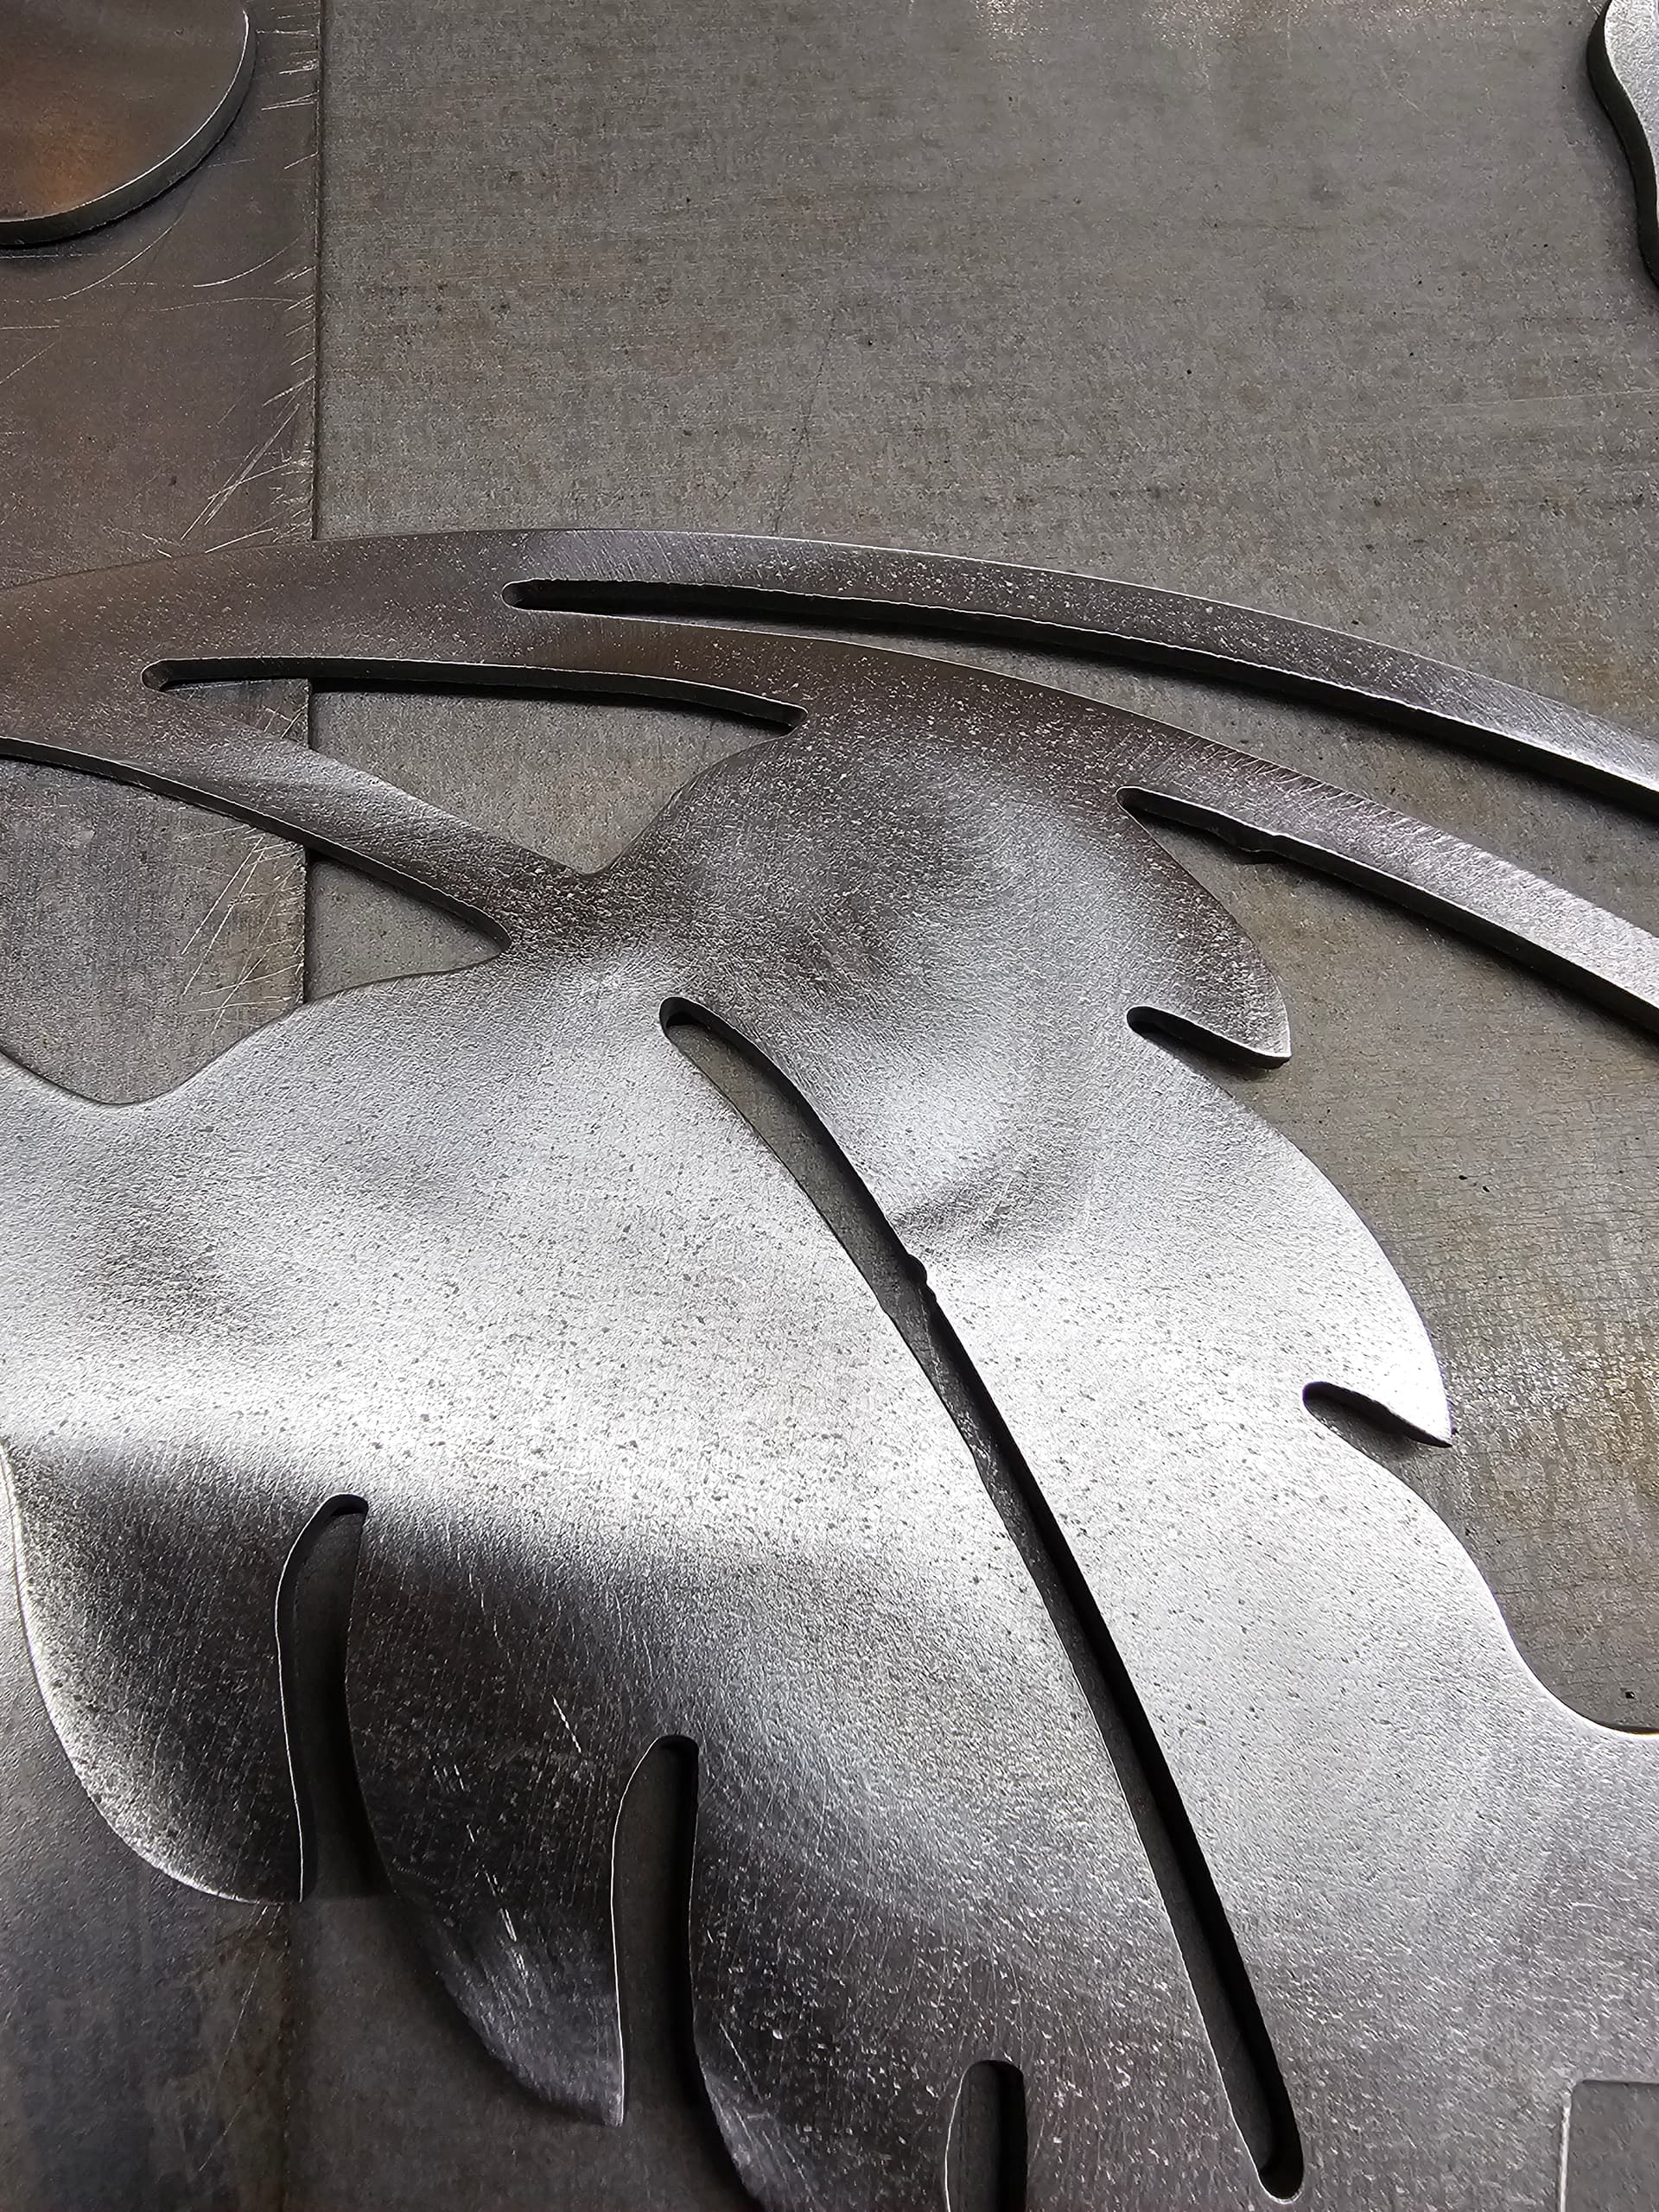
Good morning! I am finally getting more comfortable with my Crossfire Pro and the software in general after spending days on this forum soaking up the information. I was hoping you seasoned gentleman would be able to review my cut out and check out my f3d file to see what I can change in any settings to get better results or fix the pierce issues I circled in red.

Specs-

CrossFire Pro
Razorweld 45 with machine torch
Factory consumables that come with it (are these 1.0mm? only markings I see is 45a)
Dry Clean Air
75 PSI to the plasma cutter while its operating
Physically measured .060 cut height
Material - 14G HRP&O
45 AMPS
83 IPM
0.6 Pierce Delay
0.15 Pierce Height

Let me know if I’m missing any key settings, thanks for your help!

HummingBird-24in-SunsetRidge-PP.f3d (537.9 KB)

1 Like

The most important thing that you can do, if you have not already,

MEASURE YOUR ACTUAL CUT HEIGHT WITH FEELER GAUGES!
(even if you use nominal THC values - you need to know what cut height value to enter as THC has a high failure rate and you may need to finish a cut with it turned off)

Simple way is start a cut [with THC turned off if applicable], stop the program, and with the above mentioned feeler gauges, measure the gap between the nozzle and the work. Your target is .06", not .05, not .065…

Take your measured cut height, subtract the entered cut height from your post processor input, and then either add or subtract that value to the post processor value.

Entered cut height - .06.

Measured cut height -.75

Difference (.75 - .06)= .15

Adjust post processor cut height (.06 - .15) = .45

Run a new cut and verify that you made the correct change.

SECOND MOST IMPORTANT THING

Run test coupons - a 2" square with a 3/4 hole in the middle, and one of the outside corners of the coupon with a radius not right angle.

Measure height and width to see what the end result is (+/- actual value means adjust your values in CAD or increase/decrease your scale %.)

Inspect the under side for dross and the serrations of the cut. This is a cut speed tell. Too slow, lots of dross. Too fast a little dross, and the serrations are really wavy and at an angle as apposed to perpendicular to the surface.

I’ll let others harp on limit switches, air pressure, and the definition of “Clean dry air”

3 Likes

The pierce marks are a result of the length and angle of the lead-in. On small contours, it may be impossible to get rid of them.

83 IPM on 14ga at 45 amps is what I consider to be very slow. I cut 11ga at 90 IPM. I prefer 140 IPM on 14ga for the best detail, but could go faster on less detailed stuff.

1 Like

I cut that same design for my wife to hang on the wall of her craft room.

But I cut mine out of wood and used a laser, because of all the fine detail.

Like David said, on some of that small detail you may not have room for you lead in or lead out.

I have a RW45 and cut 14ga at 100-110 IPM 45 amps.
Personally I think that looks very good for a RW45.

I would look at your drawing and see how close the cut is getting to that spot where you see the divot. Sometimes you just can get away from it.

I think you have your set up very close to ideal, Nice job!

1 Like

You can also move where the initial pierce and lead-in starts manually.
I would move those pierces/lead-ins to the end where it is rounded or into the widest area.

You can also set no lead in on very thin lines, like when making fold/bend lines, but I wouldn’t do that on this piece, just mentioning it’s an option.

But overall looks like a success, nice work!

1 Like

Thanks Lanty!

Thanks Knick! I just now zoomed in and looked closer to the pieces I circled and if I had made another cut path for those, and moved the lead in closer to center I think it would of been a bit better! Its wild the variations of speed cutting on the same material / machine, it just shows how you really do need to dial in every setup individually per metal thickness.

I tried faster speed on test coupons on 14G and didnt get great results, I think I will re-visit similar faster speeds and see how it goes, Thank you

1 Like

Great info, thanks for taking the time Sticks

Overall it looks good.

You can definitely hide those lead in marks easier by dialing in your CAM settings.

A better picture would’ve been right off the table without any finishing done to the surface.

1 Like

thank you Kwikfab!