There are some recurring themes of mistakes that are made by people on this forum but probably other forums as well. I wanted to highlight some: Hopefully this will help some folks avoid getting into trouble. I encourage others to add some of the ‘other’ common mistakes they see.
Don’t skimp on consumables. You should have, on hand, a half dozen setups at least for the nozzle and electrode and a spare or two of the swirl ring and other components. When you are problem solving, you may easily damage a nozzle in one cut. Now I realize it is no fun to throw away an $8 part that might have some ‘good’ left in it but if you keep trying to make a compromised part give you desired results you are wasting time, money and giving you false results. It is better to eliminate all the variables. If you swap out one component and it does not make a difference, keep the old one as a back up. Put a label on it to say “Potentially good.”
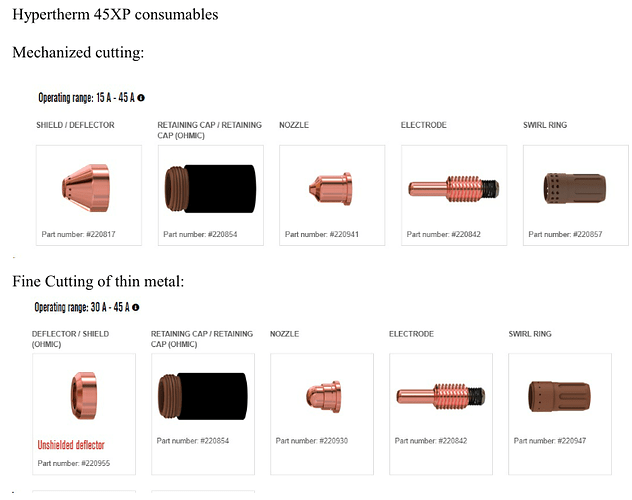
So often, folks run out of supplies and do not have their typical shield, nozzle or another part. The next thing you know, they have the wrong stack of consumables that are not meant to be together. Keep a chart with the consumables and how they go together. You should find this in your plasma manual.
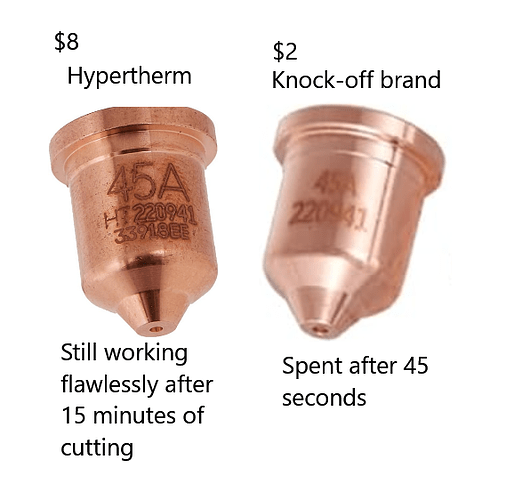
Never buy knock-off brands unless you like playing Russian Roulette. I have Hypertherm 45XP and got a smart idea that my nozzles seem to wear out much quicker than my electrodes.
My venture into knock-off consumables:
Reputable dealers of consumables (not meant to be an exhaustive list):
- Baker’s Gas; https://bakersgas.com/
- https://www.georgesplasmacuttershop.com/
- STV; Hypertherm® Consumable Hub - STV®CNC Plasma Tables
- Langmuir store; Consumables – Langmuir Systems
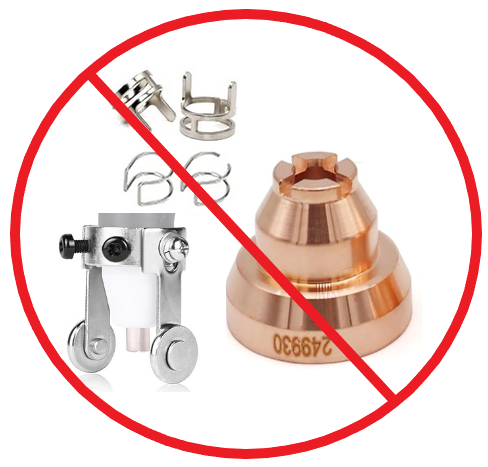
Learn the difference between the drag shield and the machine shield: you do not want the projections nor the stand-offs that surround the torch. This is meant to aid with positioning torch 0.06 inches off the metal when using the torch by hand.
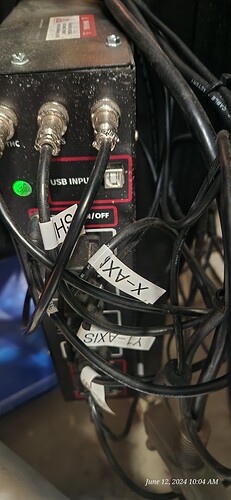
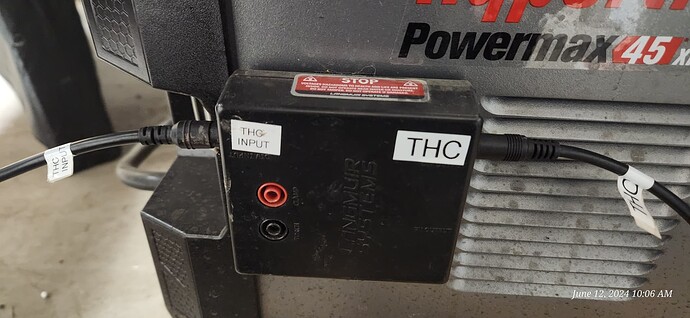
Cables/wires: label them.
Doesn’t matter what you label them…just so you know where they go.
Work clamp:
It is responsible for carrying all of the energy that goes thru the torch/plasma stream. If the connection is weak it is not going to help your cut. Make the connection to clean metal with a clean clamp and be sure that the connection in the plasma cutter is solid. The nut that secures the wire to the stud has been known to loosen in the plasma cutter.
Check your air pressure, as close as possible, to the actual plasma cutter. For Hypertherm 95 psi will not hurt that machine at all. Hypertherm will regulate the pressure it needs. For other models, check your manual but 65 to 70 psi is usually considered a safe bet. When cutting, occasionally monitor the air pressure in the line. If you see that is dropping 10 to 15 psi, you could be getting into a ‘troubled’ area since the cutting relies on the air to clear the path of the plasma stream but also to initiate contact with the electrode when the arc starts and uses the air to cool the torch after cutting. Without adequate air flow, you will get a poor cut and potentially damage your torch.
Have water/fluid in your table before cutting.
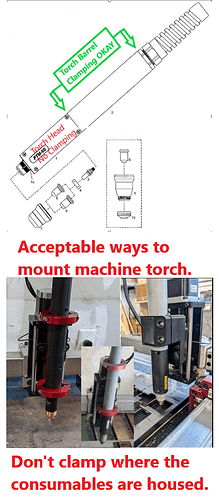
Machine torches need to be mounted carefully to avoid damage and also allow adequate movement. Do not apply pressure in the area that houses the consumables. When adjusted properly, you should be able to move the z-axis so the torch can move as much as 0.1 inches below the top of the slats. It should also be able to easily lift up at least 2.5 inches above the top of the slats.
To minimize possible EMI (electronic magnetic interference) keep the USB cable away from the torch and/or work lead. Cables should be uncoiled to limit creation of a magnetic field. The USB cable should have a ferrite coil on each end.
Now let’s get out there and have some success!
