Hey folks, I am about at my wits end. I am getting terrible bevel on some 1/4" steel. Wasted several square feel already. I feel like my Nozzle blows out WAY to quickly all the time. My bevel has never been perfect but its really bad now. Like 10 degrees on the one side. I have played with a lot of different settings. Some times I get // some times /\ sometime 3 sides are bad and 1 side is only a degree or 2 off. Starting to feel like I should get a Hypertherm. But I’m sure that would have issues too.
For Specs I am using:
Crossfire pro
Prime Weld Cut 60
Georges Machine torch (recently the electrode blew out and I had a hard time getting it out. Was able to coax it out and ran a trap to clean up the threads.)
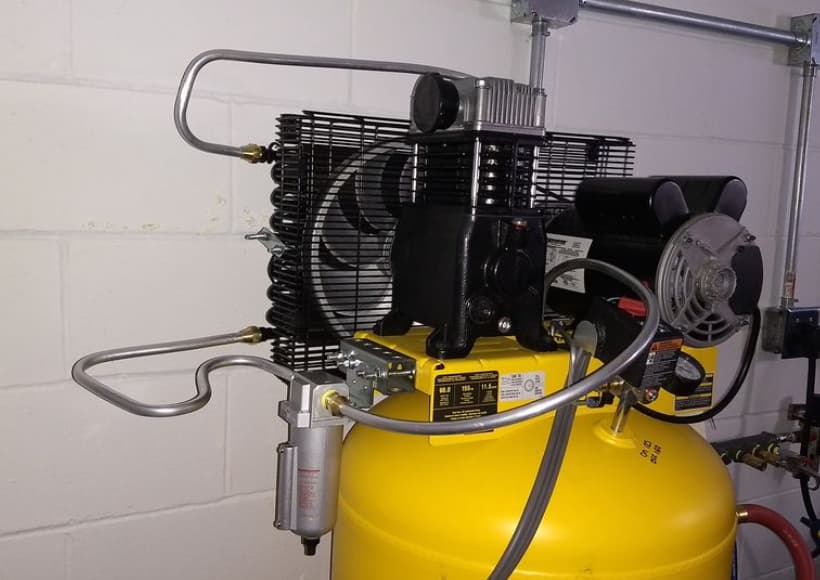
60 Gallon Dewalt Compressor with water trap then plumbed to an air cooler>regulator
Next in line 20 feet away is a water trap>Desicant beads>water trap/particulate filter>regulator>30 feet>Motorguard filter>into machine
It’s currently winter and pretty cold so I am not thinking moisture is my issue as this nozzle blew out like this after only maybe 2 minutes or (3) 2" test squares cut.
I have squared my torch to the best of my ability using a building square and a 123 block to space away from the torch.
Fusion Settings:
Cut Height .060
IHS spring back 0.00
Pierce Delay .8
Pierce Height .15
cut speed 40ipm
55 amp on plasma cutter
First run this file and confirm your cut height. This will not fire the torch and is programmed for a cut height of .060. measure with a filler gauge. cut height test.tap (224 Bytes).
If you are thinking moisture is a issue wait it summer. Post a picture of the electrode.
Some photos of the edge of the cut could also be helpful.
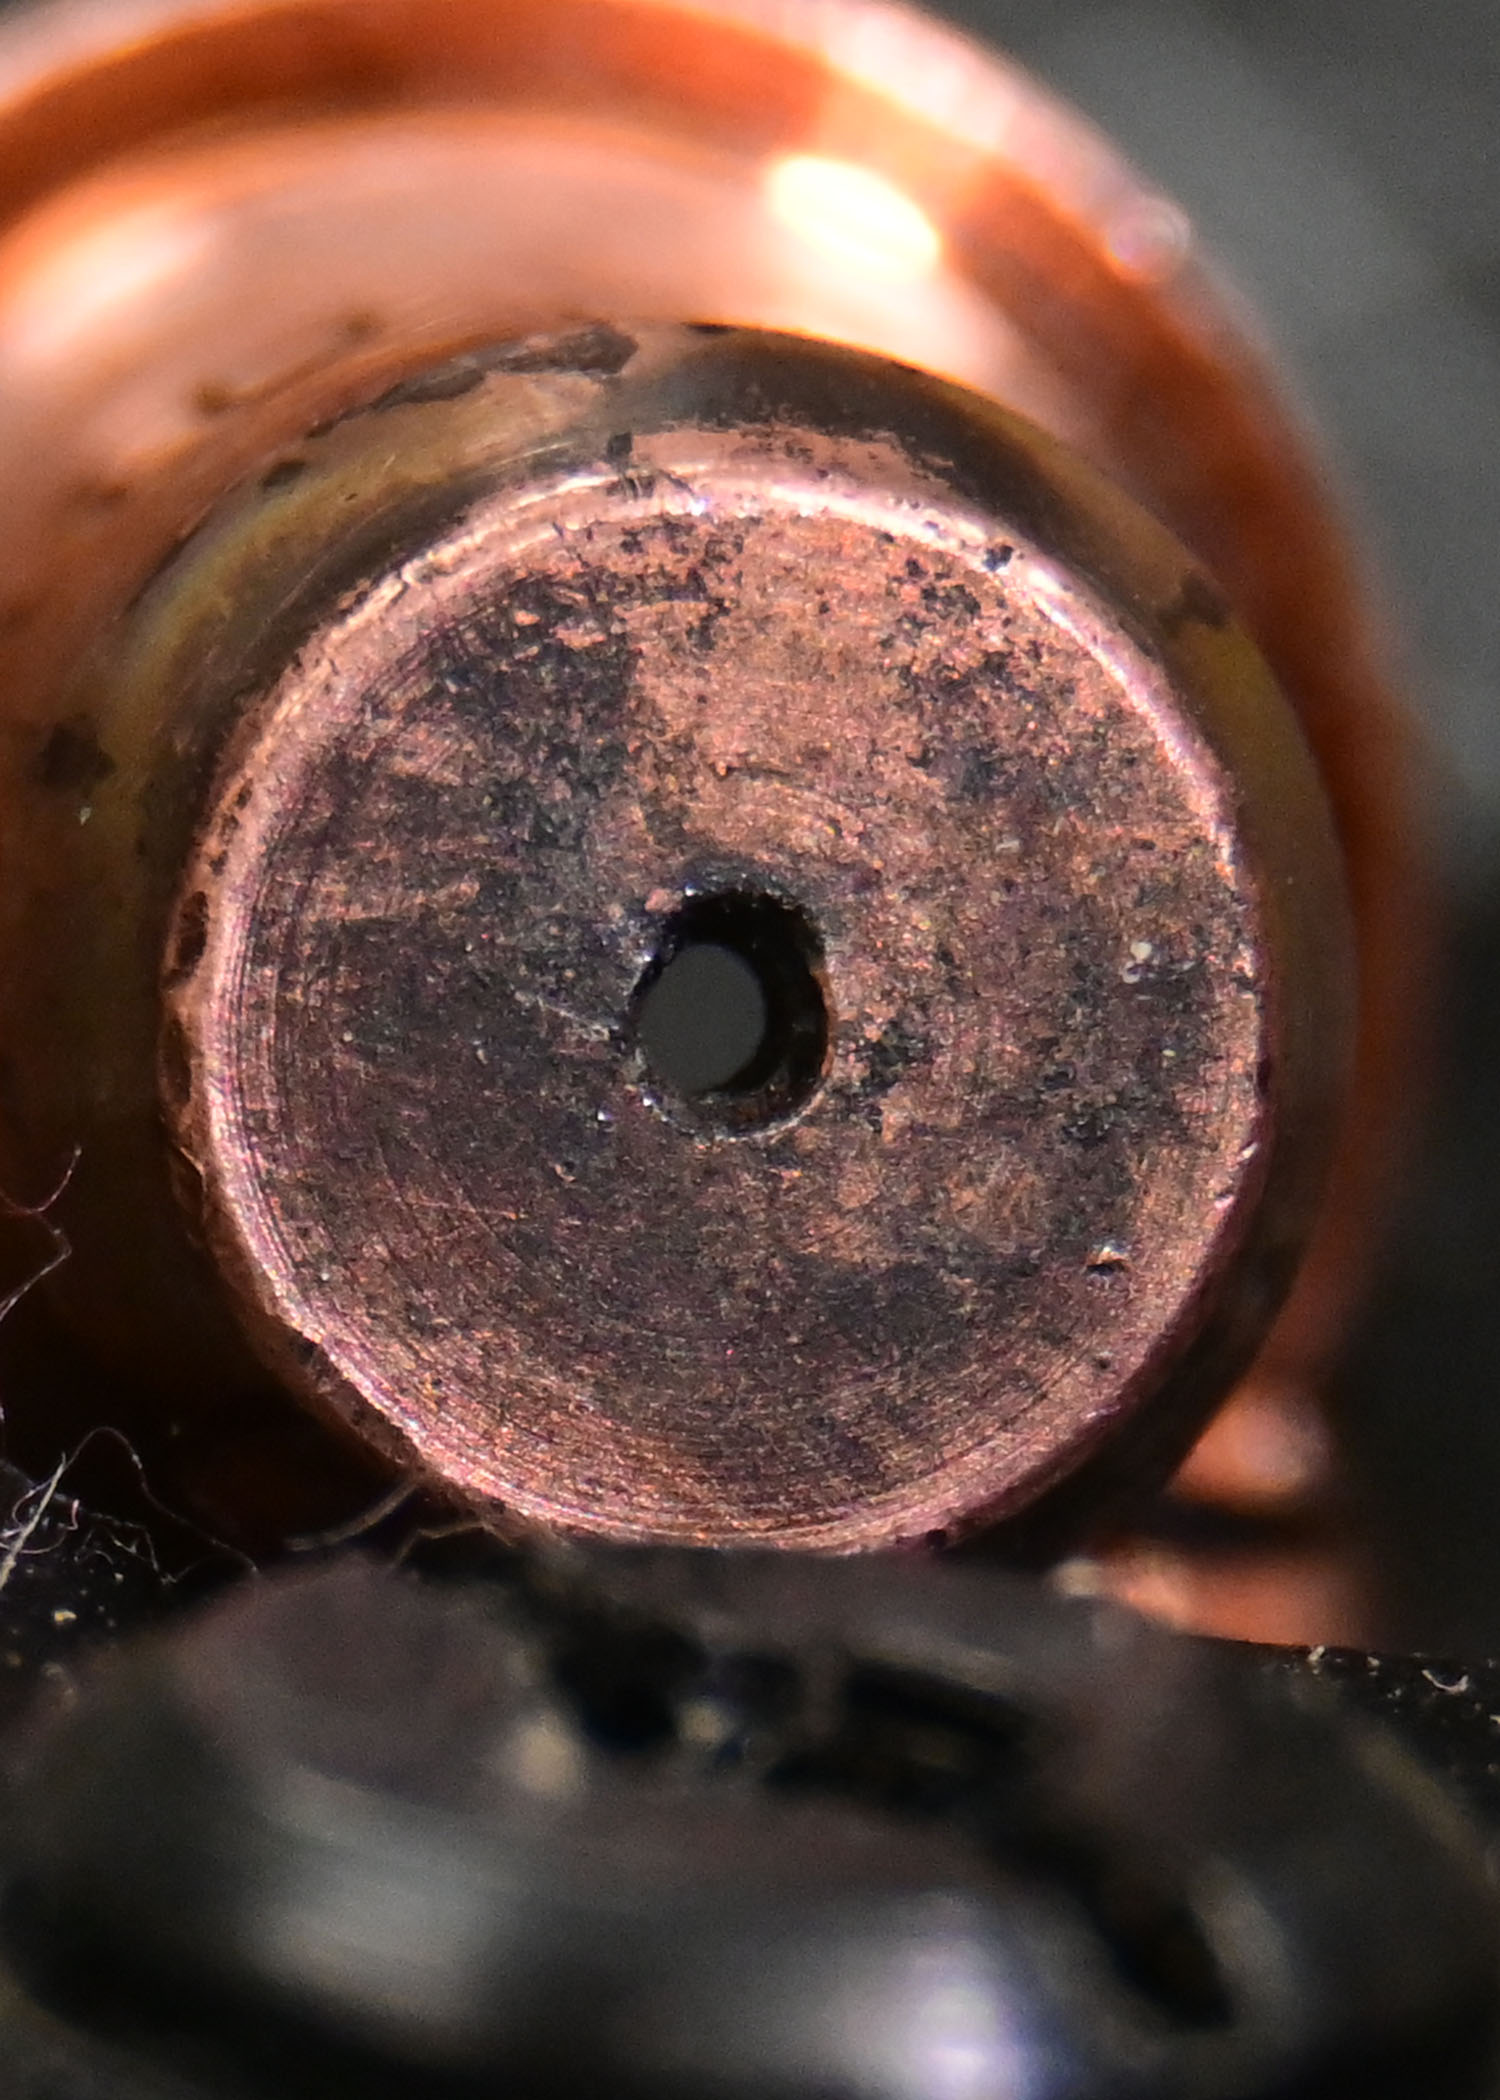
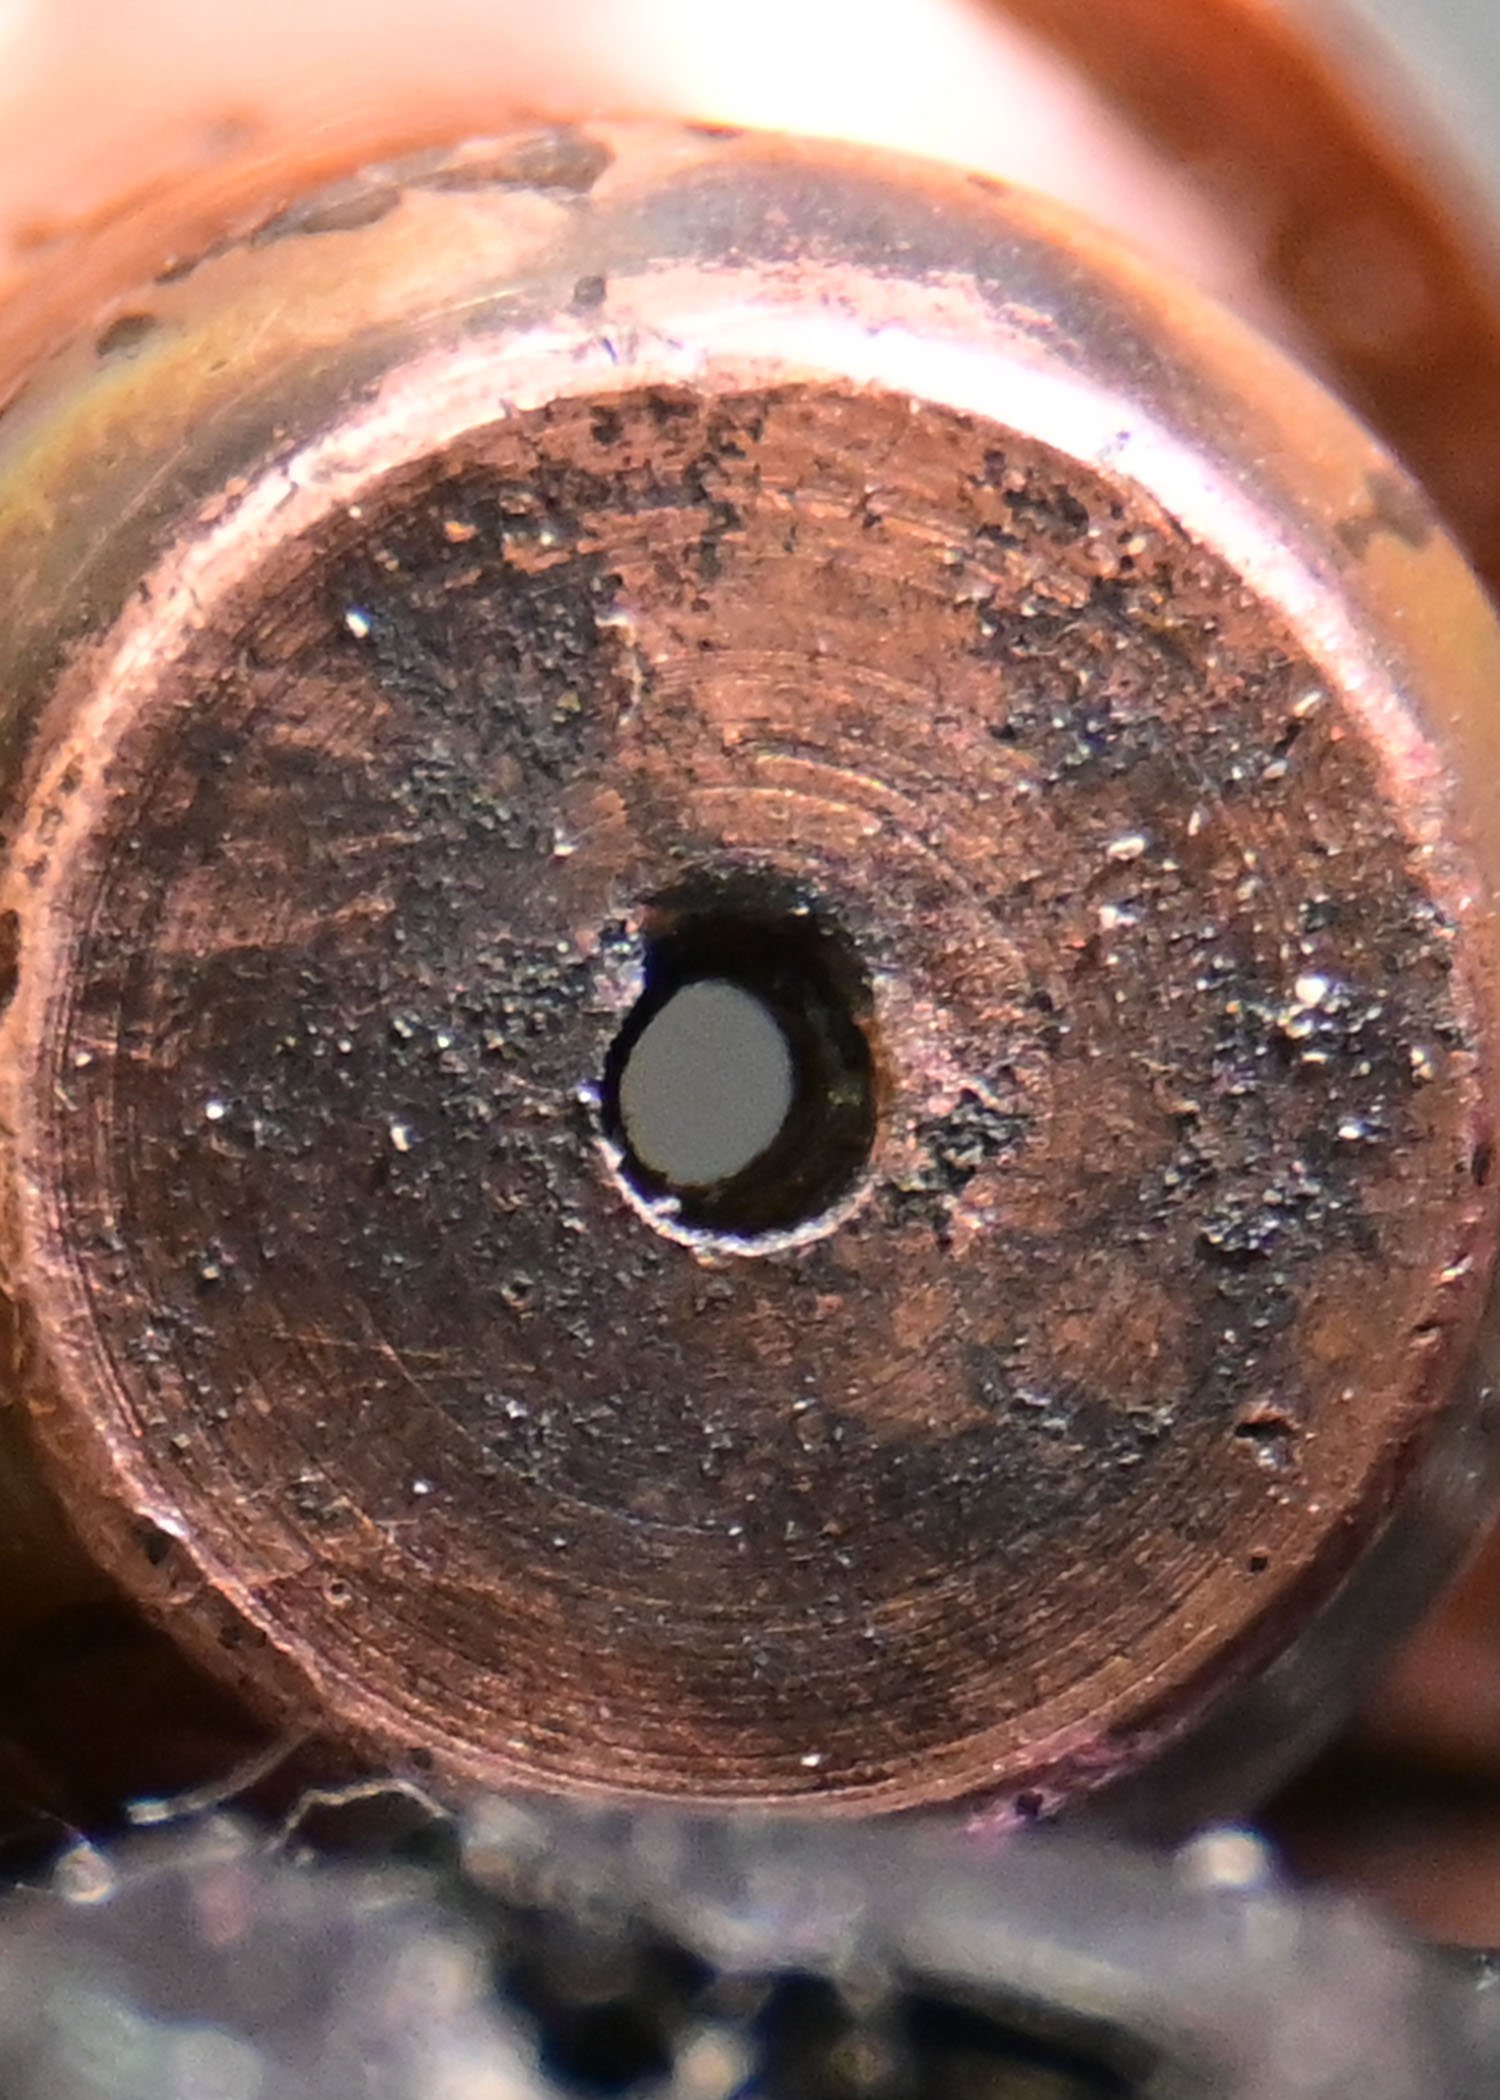
You are right to blame the nozzle as it has an irregular wear pattern. Last year I tried some knock-off nozzles off Amazon. The one that I tried, lasted less than 40 seconds before it was performing badly. I returned them and got my money back. And I have Hypertherm 45XP.
You might want to verify you cut height as that could be some of the issue.
I see that Phillip is also replying but I would suggest you run his test g-code that will cycle the machine as if it is getting ready to cut but will stop at your cut height setting without firing the torch. Then you can measure what the cut height is actually doing. He beat me to it! cut height test.tap (224 Bytes)
This file never gets the command to turn the torch on (M3). Very small file.
Also, this might be helpful to you when looking at a g-code file. Here are some common codes you will see and what they mean:
This is how the gcode will look at the beginning of each cut loop:
G92 Z0. - Set Z axis zero at the current location
G38.2 Z-5.0 F100.0 - Drive the Z axis down (up to 5 inches) @ 100 inches/min until it opens the
IHS switch on the Z axis
G38.4 Z0.5 F20.0 - Raise the Z axis (up to .5") @ 20 inches/min until it closes the IHS switch
G92 Z0.0 - Set the Z axis zero at the current location
G0 Z0.02 (IHS Backlash) - Raise the Z-axis .02" to account for backlash
G92 Z0.0 - Set the Z axis zero at the current location
G0 Z0.15 (Pierce Height) - Raise the Z axis to pierce height
M3 - Torch on
G4 P1 - Pause (in this case 1.0 seconds for Pierce Delay)
G1 Z0.06 F70.0 (Cut Height) - Lower the Z axis to cut height @ 70 inches/min
H1 - turn on the Torch Height Controller
Additional commands you might see include:
G00 Fast move
G01 Linear interpolation
G02 Circular interpolation CW
G03 Circular interpolation CCW
G17 XY plane designate
G20 Set English units (inches)
G21 Set metric units (mm)
H0 - turn off THC
M5 -torch off
All these are great suggestions. There can be several different causes we will try not to suggest too many at once we will try🤣.
You will get it it will just take some elimination. Just keep in mind it isn’t likely you will get rid of all the bevel this is a plasma cutter. You can get very nice cuts though.
Thanks Phillip. Ill give these a shot tonight when I get home.
I think I am pretty realistic with my expected cut. 2-3 degree bevel reams reasonable for a plasma. Any better and I would imagine you would need to upgrade to a laser.
That was a 60A nozzle from George. I was trying to burn though some of the primeweld ones that came with the plasma, but when I couldn’t easily fix it I put in Georges, and that seems like it blew out almost instantly too.
I don’t think you expectations are too far off. You may have to confirm your air quality.
The cut quality of a water jets is pretty sweet also. We used to get some of our parts s work cut with one.
How can I undeniably tell if moisture is a problem? I will invest in a quality air drier if we can PROVE that’s part of the issue. It feels like a lot of people on the forum just say its moisture with out any data. Is there a humidity sensor I can rent / buy to install? I have thrown plenty of money at this “moisture” issue with lack luster results.
Don’t take it that I was implying that was your problem. It is a known fact moisture is very detrimental.
We see a lot of oh I have cool dry air and turns out a water separator is all they have. I am sure there is some way to check the humidity in your air. I don’t think that would be cheap. I would like to know what my set up is actually doing myself.
There is tell tell signs of bad moisture. One being consumable life, two you can see sometimes swirl markings on the electrode.
Where you live will ultimately dictate what kind of setup you need. That is solely my opinion. I live in the Appalachian mountains in the summer before adding a after cooler post compressor tank I could freeze my refrigerated air dryer up.
whatever you do don’t install a after cooler between the compressor and tank.
Yeah I actually made that mistake there is a thread on here where I did a lot of testing.
I installed one not thinking first any truly thought it was grand. We had a discussion and through testing I very quickly determined I was putting unnecessary pressure on the compressor for no reason.
A summary is I had twice the cycle time, never lost rpms on the electric motor or compressor. Which meant half the air would bypass either the piston rings or the reeds in the compressor head. You can’t get all the moisture of of the air before it goes in the tanks. So it is wet either way so a teaspoon or a cup of moisture doesn’t matter. It will do the exact same thing post tank with no damage to the compressor.
Suggestions:
1: Verify your actual cut height as suggested by others.
2: Verify your swirl ring is in the right way and the holes are clear
3: Verify there aren’t any plugged holes in the cap
More questions:
Have you tried using the hand torch? If so, do you get the same results?
What is the pressure at the line regulators and the regulator on the machine?
What is your post flow set at? (time the air blows after the cut is complete)
How much does the pressure drop when you hit the set air button?
What size desiccant filter are you using?
Put a piece of glass under the torch and blow air through the torch, using whatever button the Cut 60 uses to set the air pressure. If you get moisture on the glass, you have moisture in your air supply.
I’m not sure that is your issue, though. Your electrode could be off center, due to having to re tap the threads.
I had to do a similar thing when my PTM 60 torch got an electrode stuck in it. The torch never cut the same again.
I replaced it with a Hypertherm torch and have never had better results.
Try your hand torch and see if you get the same results. Use the same consumable stack that is in your machine torch, so you are only changing one thing at a time.