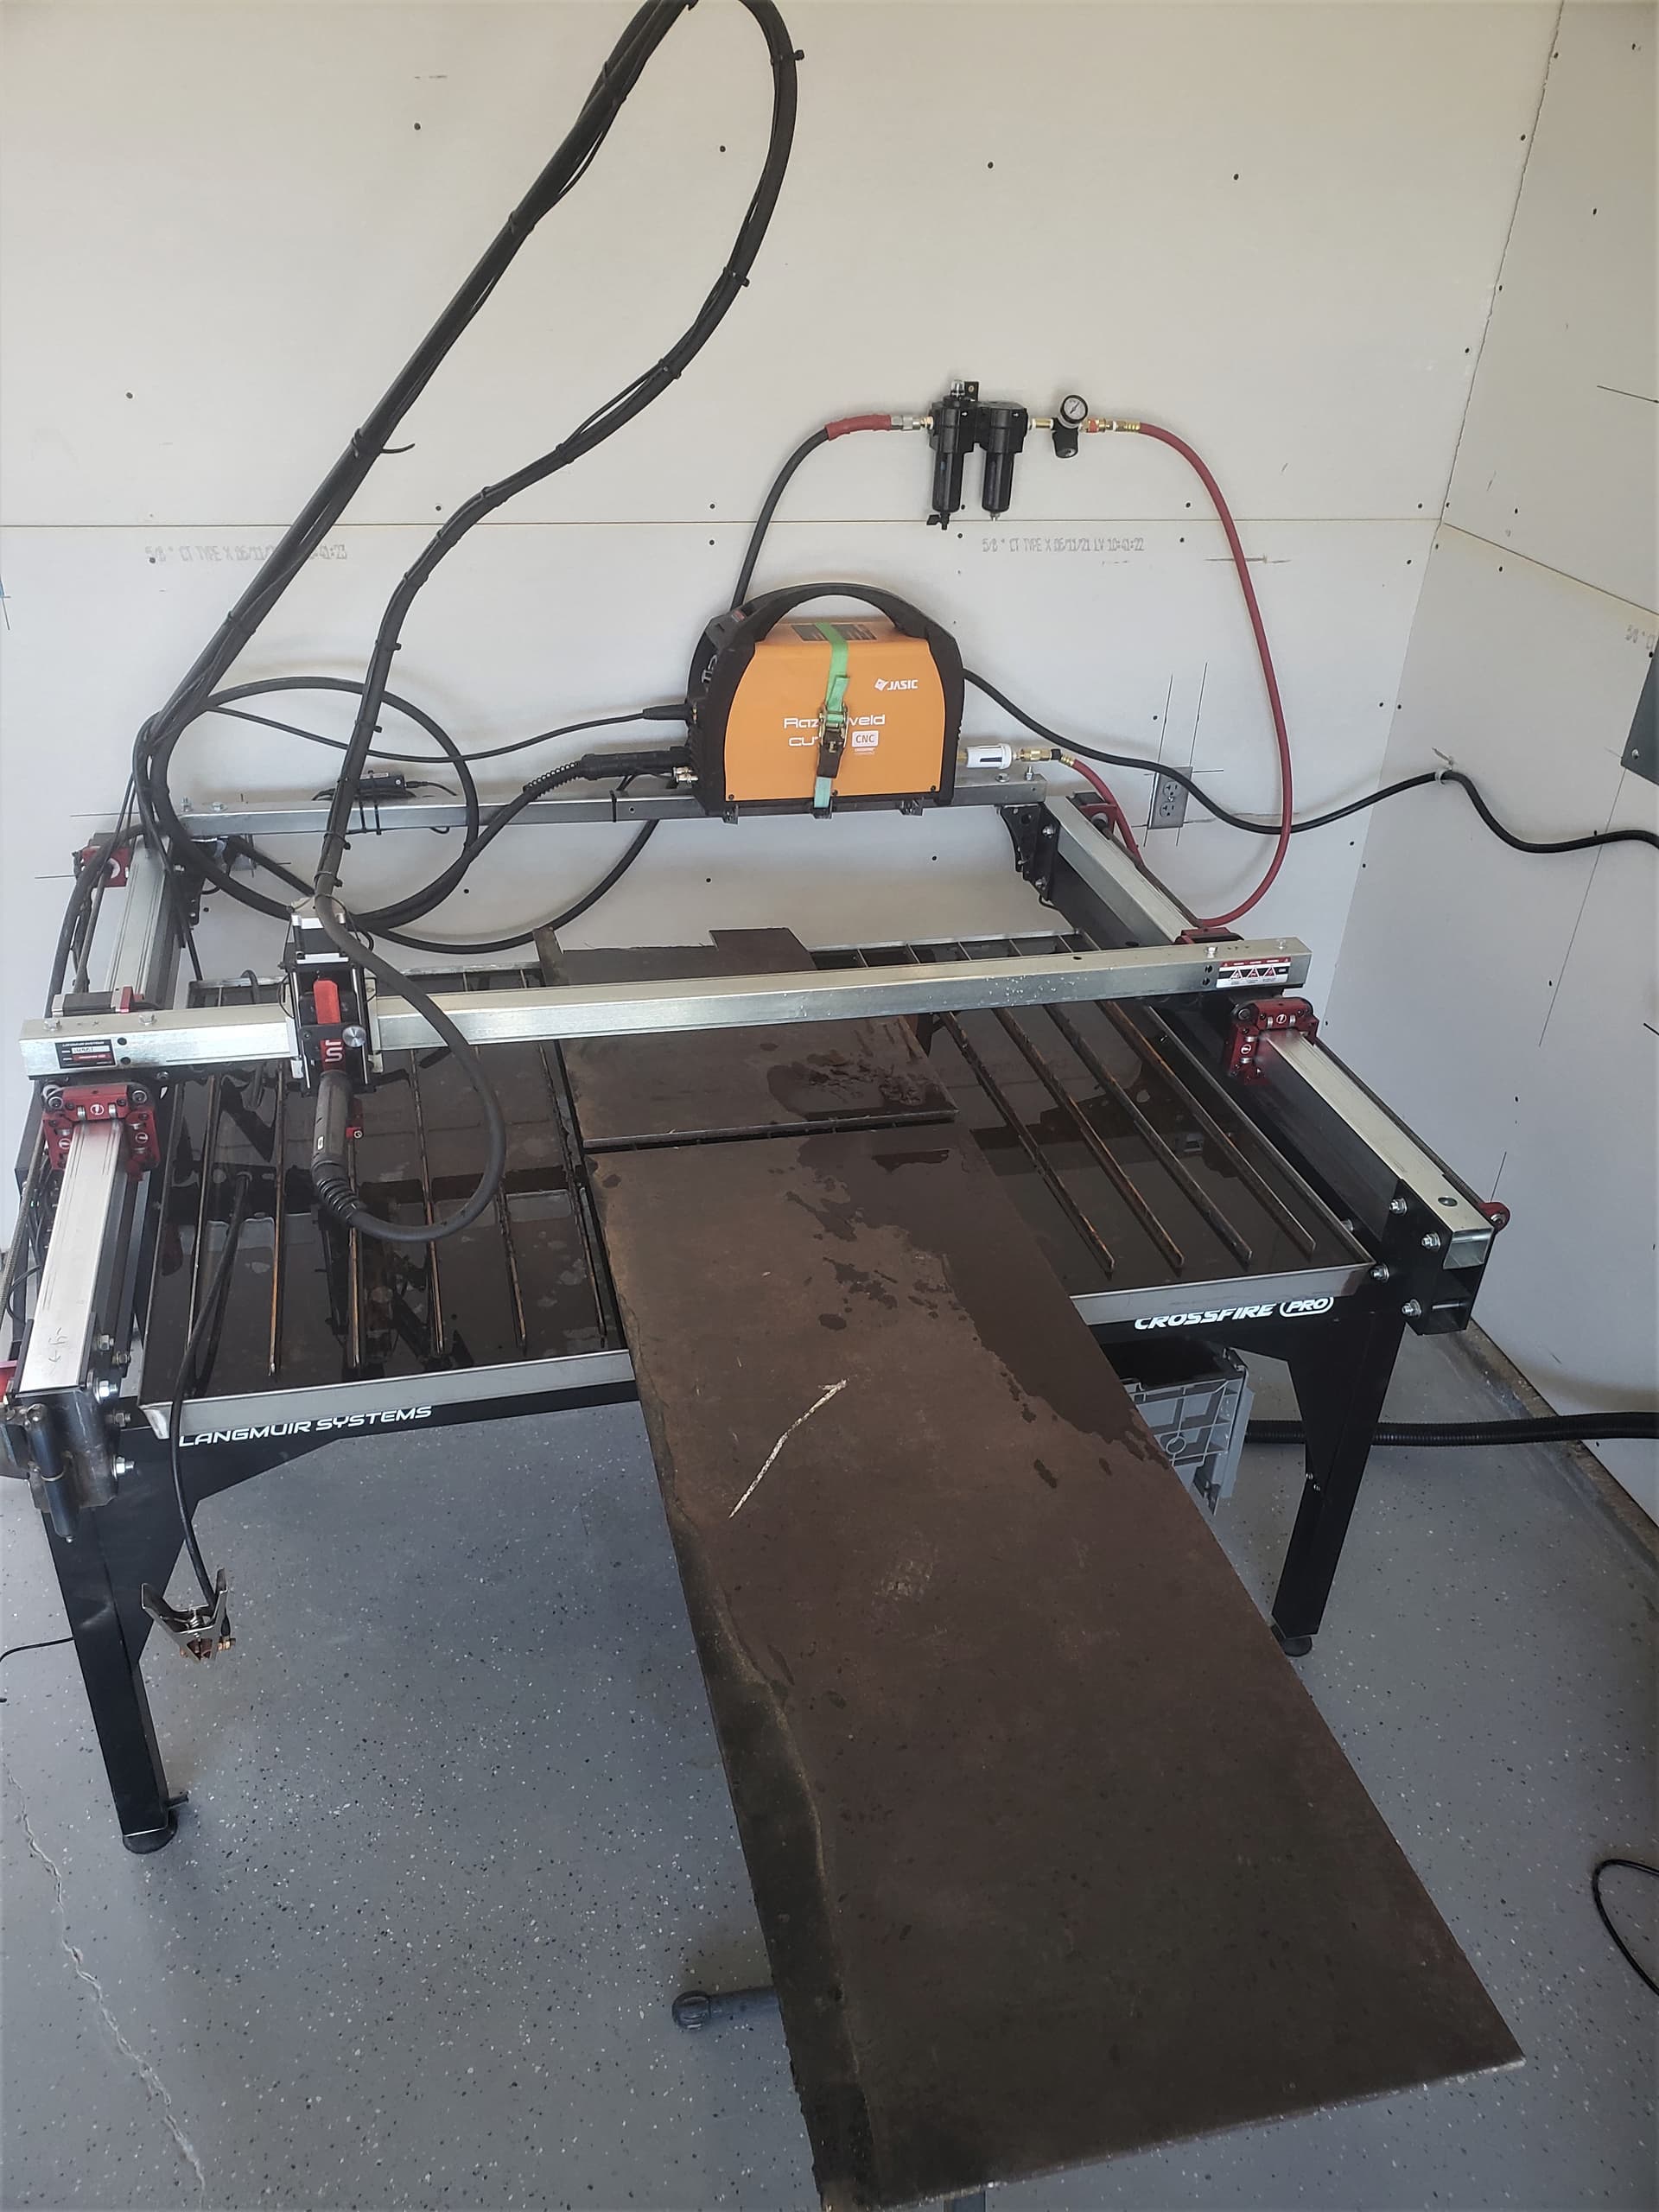
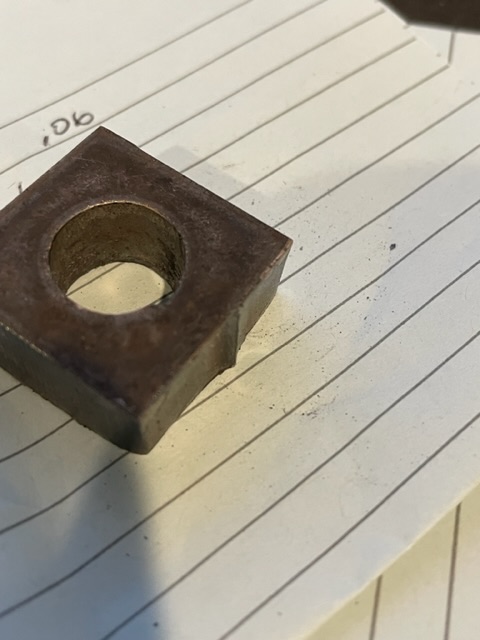
Did some test cuts for a project coming up. Very stoked with the RZ Cut 45… 3/8" like butter!
Also, shout out to @Langmuirsytems for Firecontrol! The Straight cut feature is FREAKING clutch. Customer brought his material in and was like can you cut it to fit the table… I was like no problem! It would have taken the customer several cut-off wheels plus time an energy. The Crossfire Pro cut it in less than a minute with beautiful results!
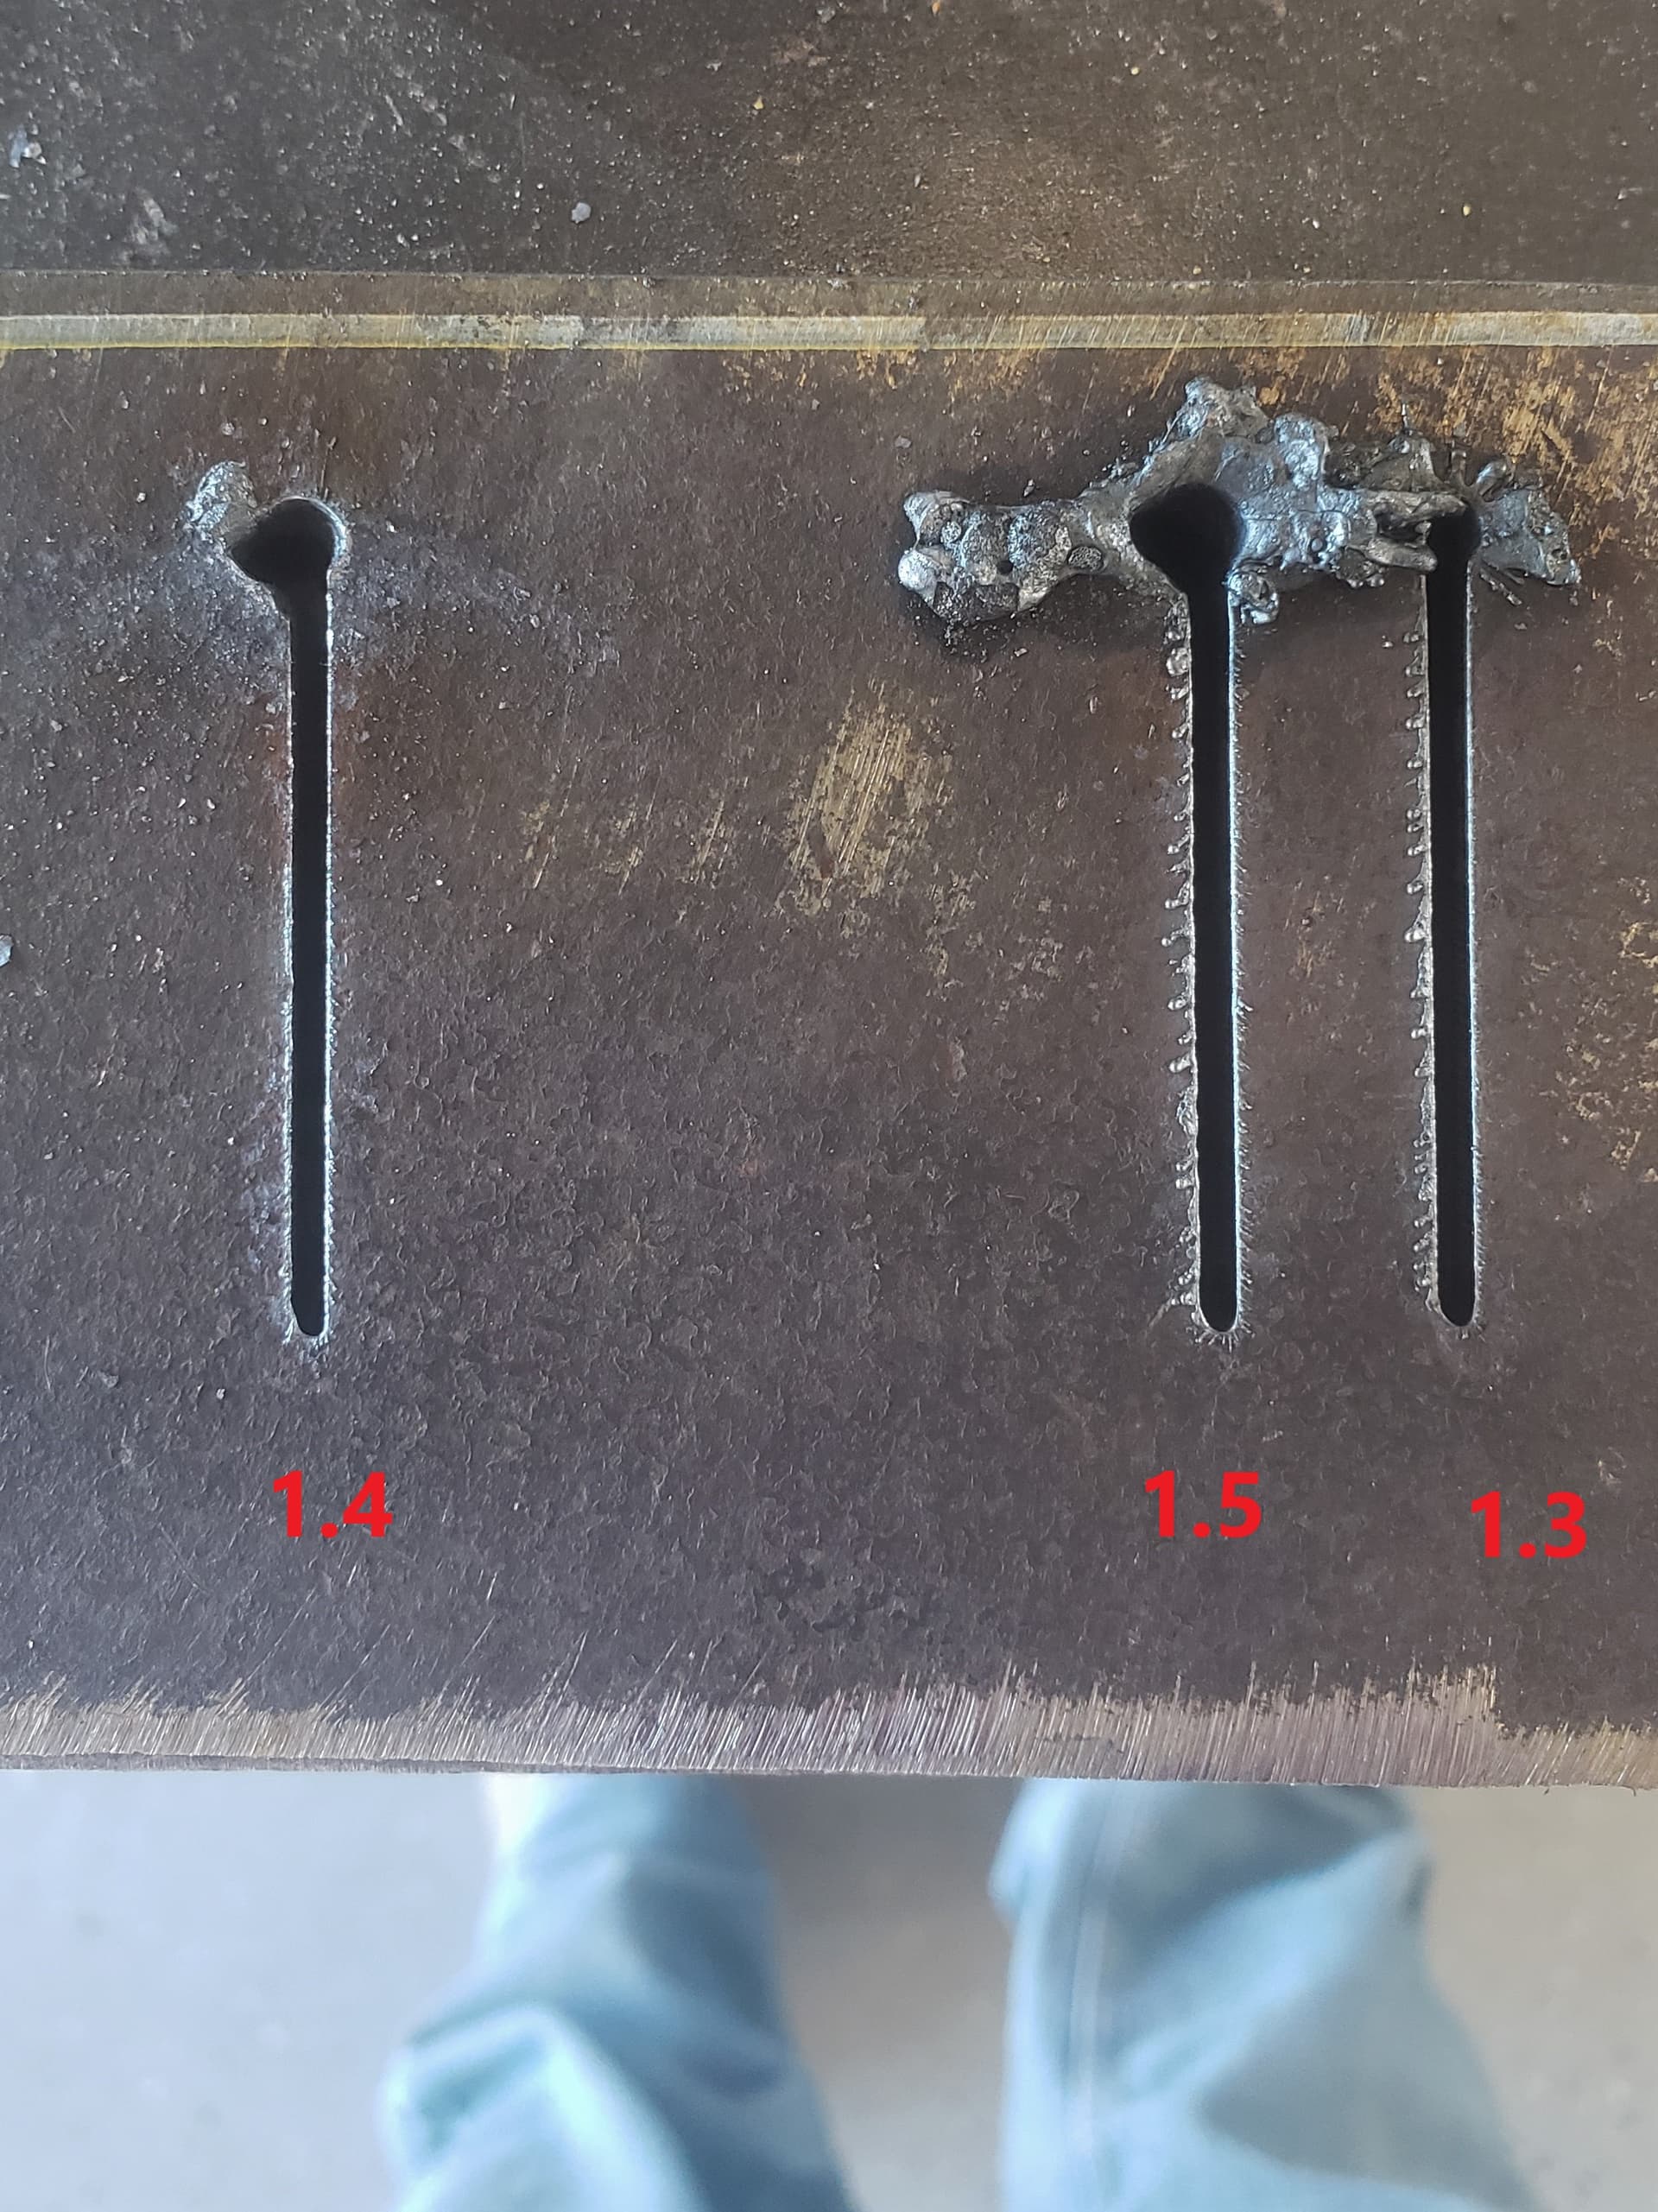
See the results below…
Settings: 18 IPM/ 45Amps/Stock Air Pressure Setting
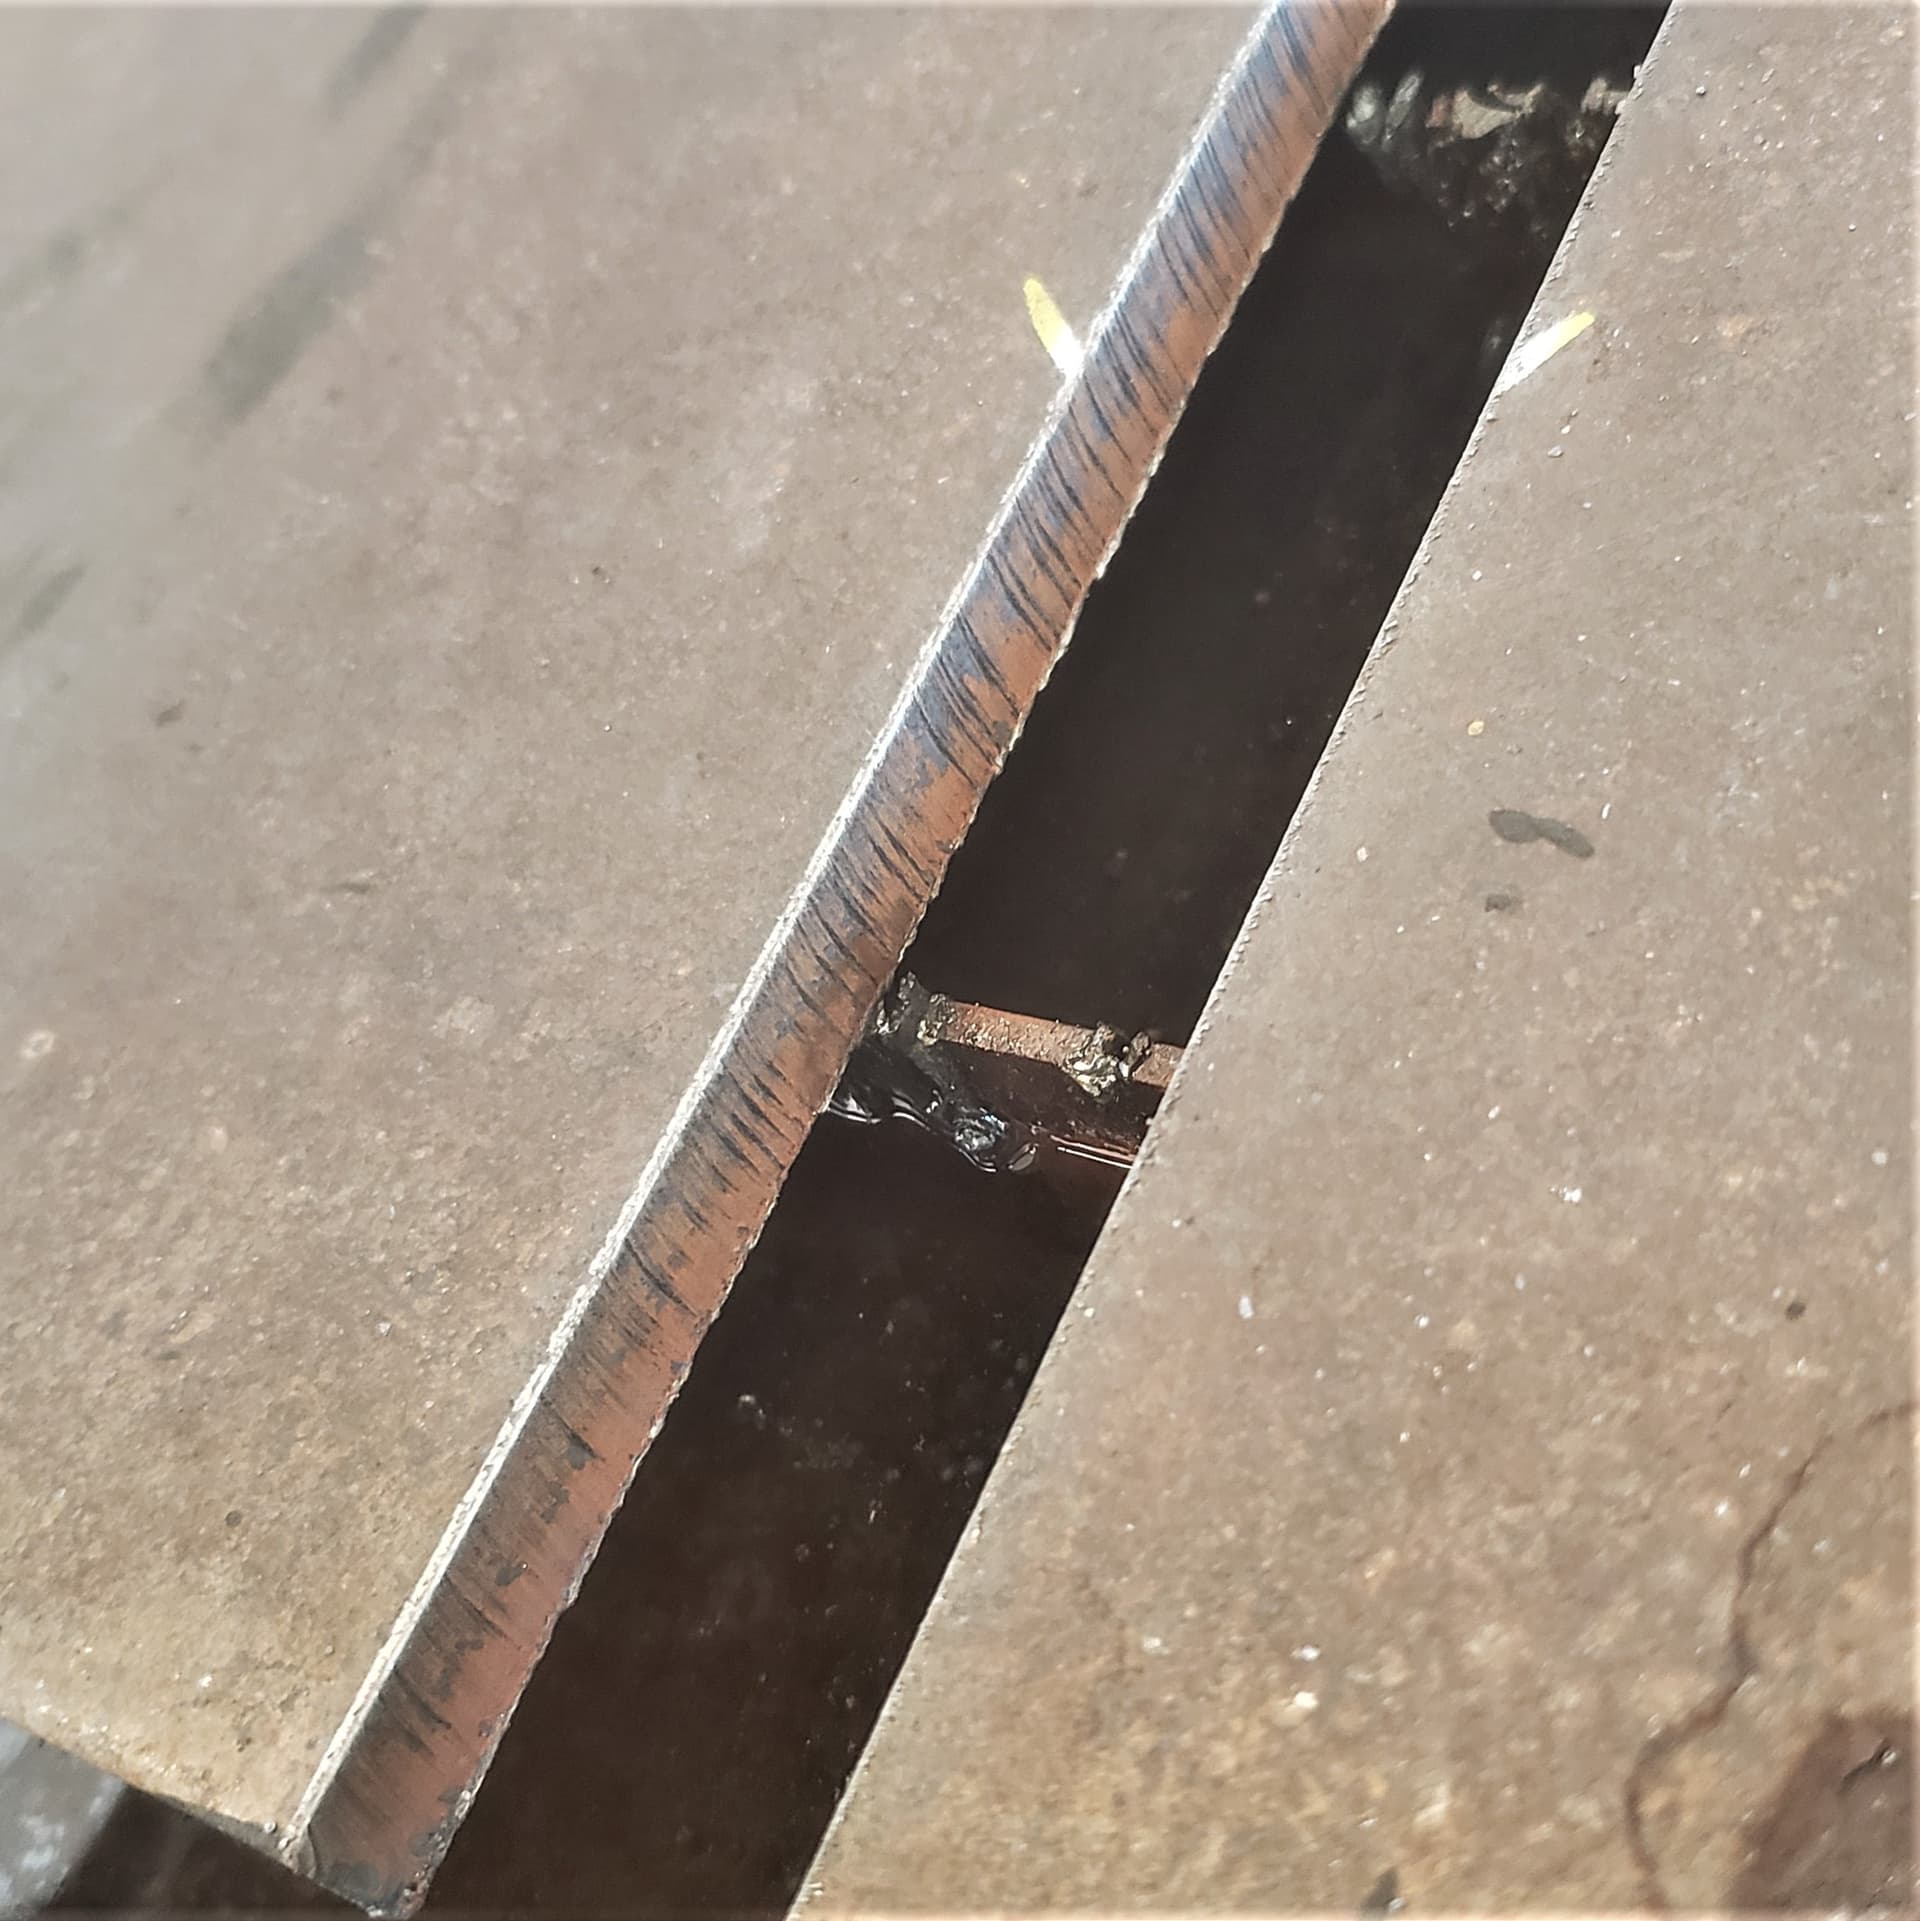
Also, is it normal to have a bunch of slag where the pierce starts? I understand this is at the limit for this torch… what’s the collective experience out there on these really thick pierces? I set my pierce delay to 1.3/1.5/1.4 just to test it…
Would clean material help this situation?
Thanks!
–REDFAB
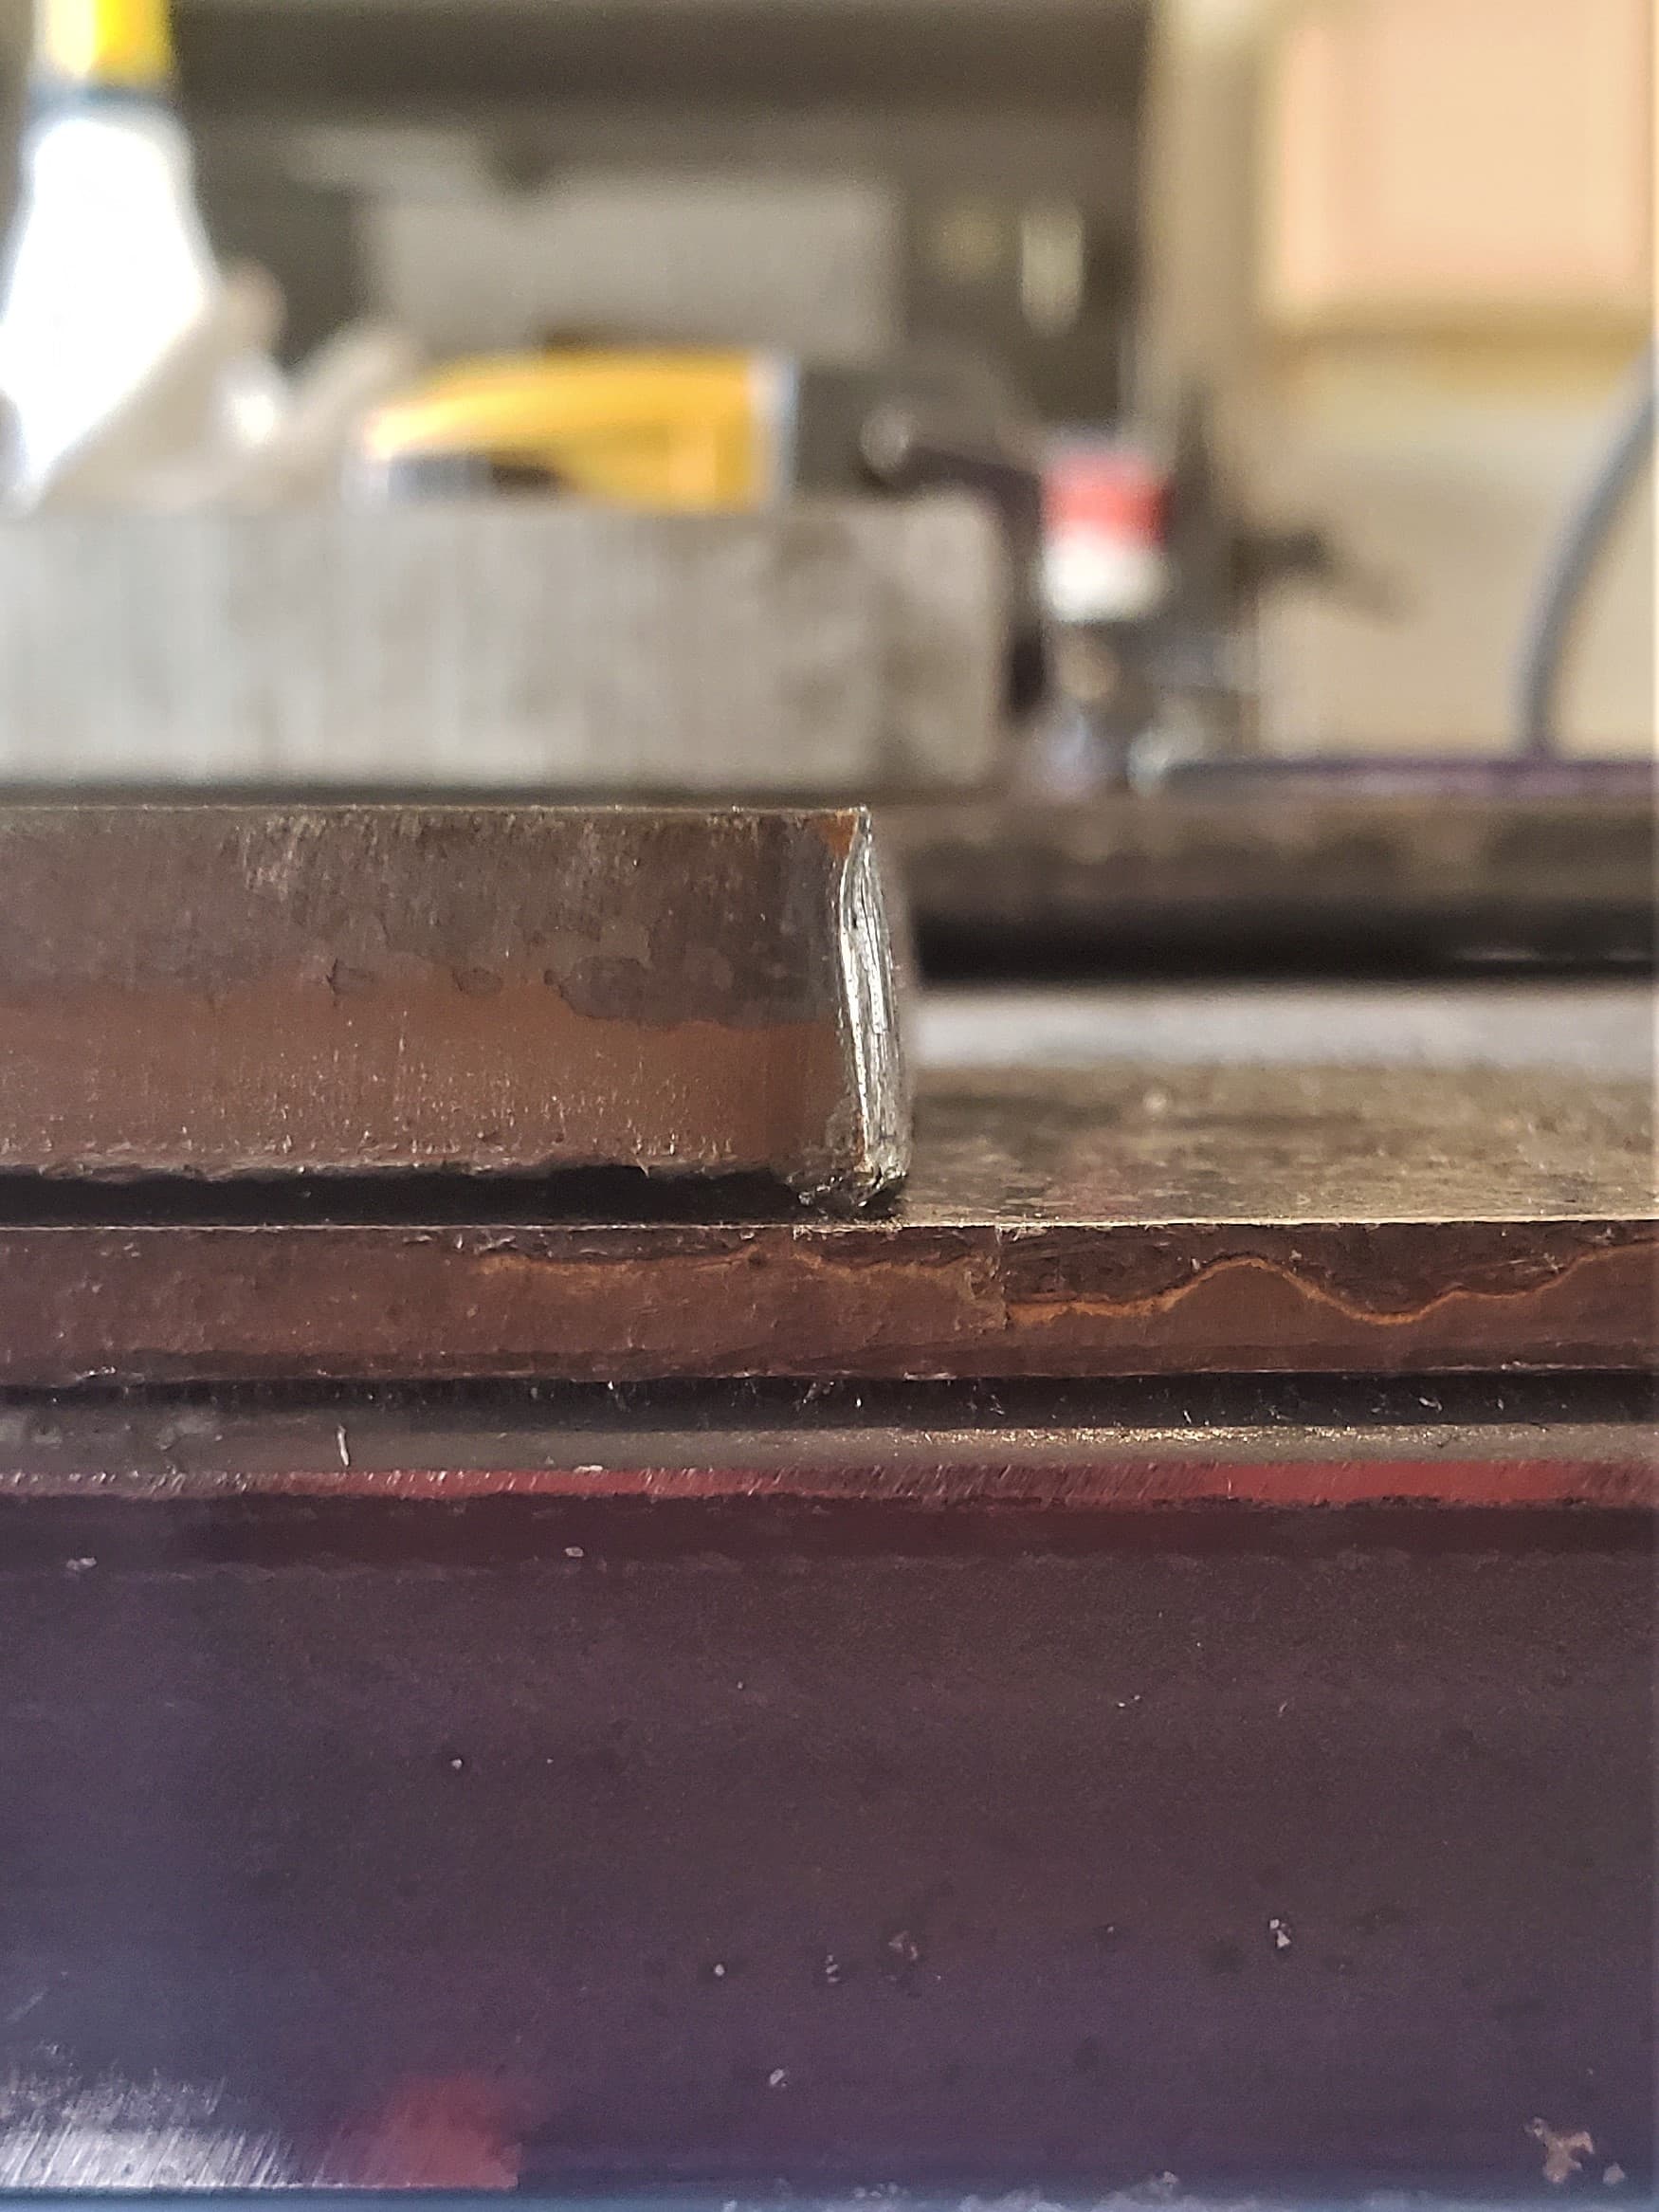
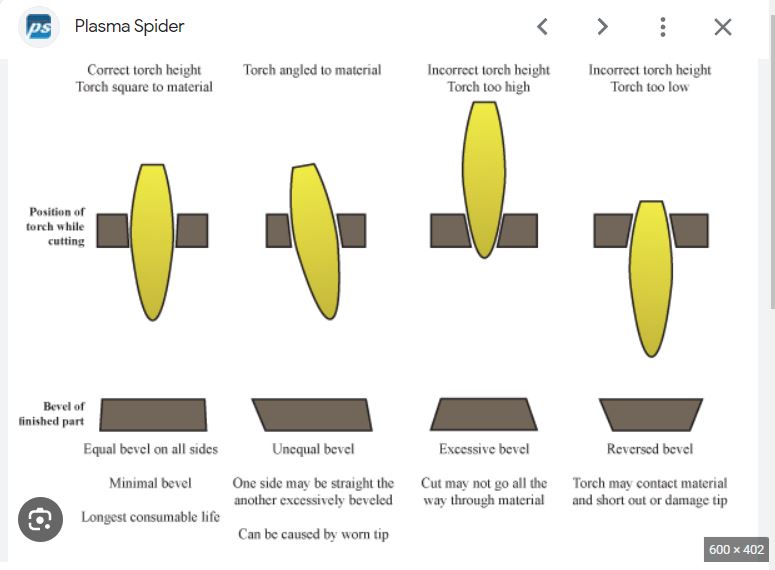
Ipm around 25 would clean up the slag. Make sure your water pan is full. Slow torch speed will blow water out from under stock and you could burn your pan. Notice a little bit of bevel. Make sure you are setting torch height to. 06 . This all depends on many things type of torch, tip size and machine performance. Give it a try if you have any scrap leftover.
@Bigdaddy2166 Thanks for the link… ill look into what may cause that angularity.
I’ve always had some angularity with my cuts… Not sure whats causing the inconsistancy. Time to troubleshoot.
I am curious if you ever found figured out all the settings for 3/8 steel. I am having issues and finding all sorts of speeds and I am having issues with mine having a very angular cut. Mainly interested in the linking profile in fusion for the leads and the post properties you had set. I am having trouble figuring out why mines not cutting straight.
first thing to check is your torch height…get some feeler gauges and pause a cut after a couple of inches and measure the actual torch height from the metal…
Most bevel issues are from incorrect torch height.
Just because you set 0.06 in the CAM software does not mean it is 0.06…mine after measured is set to 0.042…
Thanks for the tip. I am brand new to all this and still trying to learn it all. I was looking for the settings to make sure I could eliminate some of that. I have found charts on the forums but they are all over the place and I wanted someones settings for fusion that had a razerweld cut45 and that has cut 3/8 so I could have a good place to start. I tried cutting test blanks and that is an expensive cut each time to tweak. But from your diagram I think I might of blew my tip out have to order replacement and Id rather not do it again testing. Another question since you said I needed to use feeler gauges, I have the THC and set the software to .06, will I have to run something measure it and then adjust the .06 up or down to make it match a number. Sorry again very new and still learning.
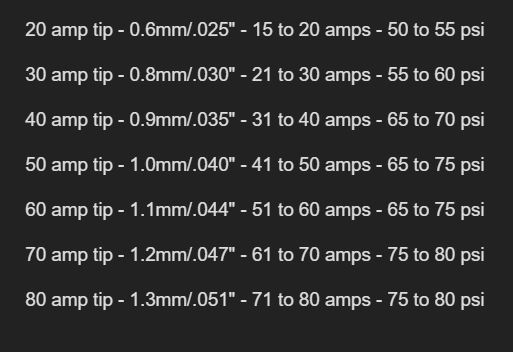
first…what size of tip (nozzel size) are you using to try and cut 3/8"
here is a chart found here on the forum for using the right size of tip for amps used…
if you are using to small a tip you will blow it out fast and end up with bevels.
NEXT
I also have THC…BUT with all equipment to software connections there needs to be some calibration…
then do a 6" cut in the metal, and at around 5" hit the space bar and pause the program…when the air stops and the metal is cool use the feeler gauges to measure the height of the torch to the metal…if you measure 0.80 then you are too high and you need to set your cut height to 0.040.
this sill lower the torch to 0.06 approximately to get a better cut.
since you have feeler gauges you can also do the same cut procedure buit instead of measuring the height you measure the width of the cut you made…this is called the KERF…you enter this into the software…
so you will have cutting tools for different nozzel sizes giving different KERF widths…
most of the time your cut height wil be the same value once ou measure it and use that adjustment…but it does not hurt to check once and a while…
hope this helps to start
Your THC maintains the height set by the IHS. How it does that is it takes a voltage reading in the first seconds of the cut after the ihs has set the height. The THC uses that reading to maintain the initial height by lowering and raising the torch to maintain the voltage it read.
In addition to the testing suggested by toolboy you could also run a short code that runs the ihs sequence and stops. @Phillipw and @ds690 both have code they have made available if you search the forum. I believe @ChelanJim has used both of them. The IHS sets the height that you have programmed into your code… but it is dependent on the backlash and spring back values you input in the post process sheet. Since you are cutting 3/8 material the spring back will be 0. You need to test the actual backlash for your machine as it will vary. Lots of good info here on the forum about setting and testing the height. @ChelanJim has posted his process on here.
Thank you both of you for your help thus far. Answer some of your questions the nozzle doesn’t have any markings but it’s the stock razorweld cut 45 so I am gonna go with 1mm from what I found. I inspected my nozzle from all the cuts I’ve done and the hole looked fine but the tip looked rough, so I replaced it. I do not want to destroy this nozzle the same way is there any way you all can look at my settings and tell me if they should be fine to test the height with the feelers. Feed rates I am not sure I’ve read anywhere from 12-26ipm help on that would be nice.
Lead in radius .06
Lead in sweep 90•
Lead in distance .15
Pierce clearance .055
Post process
Cut height .06
His spring back .02
Pierce delay 1.3
Pierce height .125
Retract 1
Again just double checking nothings crazy off so I don’t destroy another nozzle before I check the height. And once I figure out my machines height would that translate across every thickness, I would assume yes but want to double check.
I will also find and read about the spring back. Like I said I am new to this and appreciate the help getting started correctly.
Your lead-ins can be shorter if you wish, but are fine. Change your Pierce Clearance to 0. (The value is added to your lead in / out.)
For 3/8" I would adjust your Post Settings as follows:
Cut Height (really should measure, but this is a guess) - .04
IHS Spring Back - 0.00 (Fusion will add an additional .02. This places your Cut Height at .06)
Pierce Delay - 1.5 (Adjust as you see results.)
Pierce Height - .13 (Again the .02 is added providing .15 Pierce Height.)
Retract - 1 is fine.
RW45 at 40-45 amp with std (1mm) consumables. I prefer to cut at 18ipm for 3/8"
This post is probably what @72Pony is referencing. Just finding out the cut height is part of it. Reacting to how IHS is interpreting your situation/setup is the other part.
Thanks again for all the patience, life happened so took longer to get to test it. I put spring back to 0 and tested at .06 cut height and I was waaaay high. Adjusted it and down to .035 setting wise and cut good. Not sure why but where the Pierce starts and ends to cut my test square out there is a hump, which I know goes away from this post but figured you might be able to tell me why. If it’s a Pierce delay issue or something else.
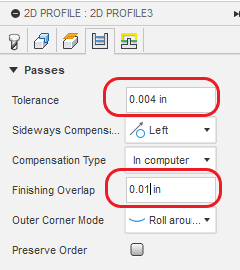
I get that sometimes. The thought is that by adding more “Finishing Overlap” you can burn that away.
In this example, I used 0.01. I would try 0.05 or larger and see if it improves.
Glad to see you tried the cut height testing. It really makes a difference when the cut height is where it is suppose to be.
Edit: You could also try to slow down your lead-in/lead-out to give the plasma stream time to cut on that sweep. That might burn the bump away.
Totally agree. I felt like rolling up in a ball and crying for the first two weeks.
But now, I look for things to make. I have made a number of things that I never realized I could do and they are very practical. Prior to having this CNC Plasma, I am not really sure what I would have done in a few of those instances; probably tried to find a pre-made ‘something’ or send the item back.
Now I am working on making light boxes to mount on my utility trailer and dump trailer. I found a box that was heavy duty enough but they wanted $34 each and I need at least four of them. Not sure if the lights I want to buy would fit. No worries when you are the fabricator!