hey guys. just wanted to rack your brains for a second. working on my new limit switch mounts and ran into something im pretty sure is tool deflection but im not certain.
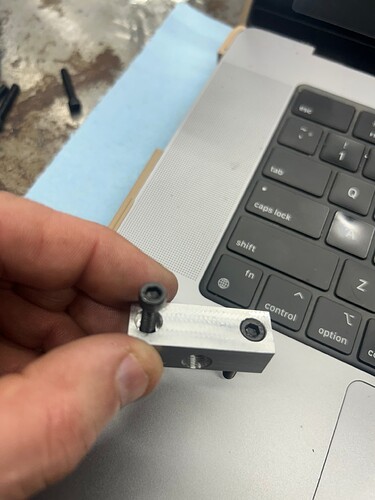
thats a 10/24 SCS that im using to fasten down the mounts for my new switches (wasnt waiting on LS to fix this issue).
I had the counterbore programmed for .266 (the head measures .266 , I know, opptomisitc)
first part was finished and the cap wouldn’t fit which is fine. I ended up having to open it up in the program to .280 to get it to set inside the counterbore. but it only gauge pins to .270. and it isn’t round at all. its tight on two sides. thats what im not sure about it being tool deflection. if it were tool deflection at least it should be kind of round?
forgot to mention the end mill is a brand new 2F solid carbide with 1/2" flute length from McMaster
I did get some lakeshore in the mail wasnt sure if switching them would make a difference
any idea?

