I’ve been syphoning the water out of my table after use but that got old after the 2nd time, also the rust is annoying so plasma fluid of some sort was in my future. I wanted to do an under table tank but after months of searching for a used one I found nothing under $450 so i kinda gave up. This 100 gallon leg tank appeared on marketplace and I snatched it up for $100. Of course it didn’t fit under the table so where would it go? My shop has lots of used pallet racking as shelves, work benches, etc. including one very tall one for more long term storage that is around the corner from the table.
The goal was a simple system using 1" PEX and my plan developed around putting the tank about 14’ above the floor and using a single pump to move it up to the tank and gravity to fill the tray. I used 4 bar sink drains, a plastic tote as a sump, a sump pump float switch and a Harbor Freight transfer pump. That plus a few valves, check valves, testing, some small leak fixing and it’s time to order some SterlingCool!!!
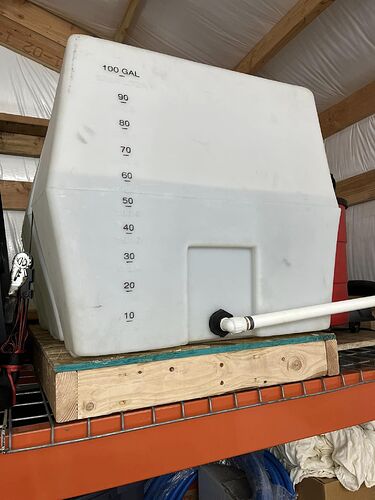
The tank is strapped to the shelving and of course the shelving is bolted to the floor. A single 1" line runs up to the tank to fill and drain it. Graduations are molded into the tank but I had to Sharpie them for visibility from the ground.
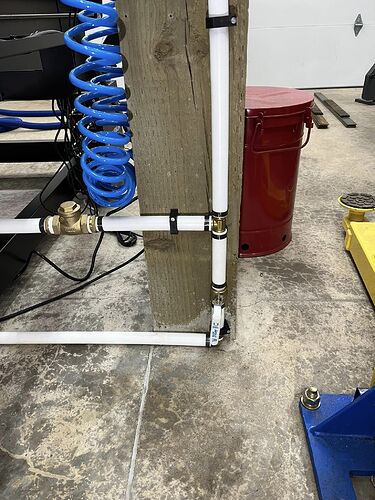
The tank line comes down from it’s 25ft run, the check valve is where the pump flow comes from and the bottom valve leads to the tray filler. I will be adding a valve later today with a garden hose fitting to be able to easily drain (or fill) the system.
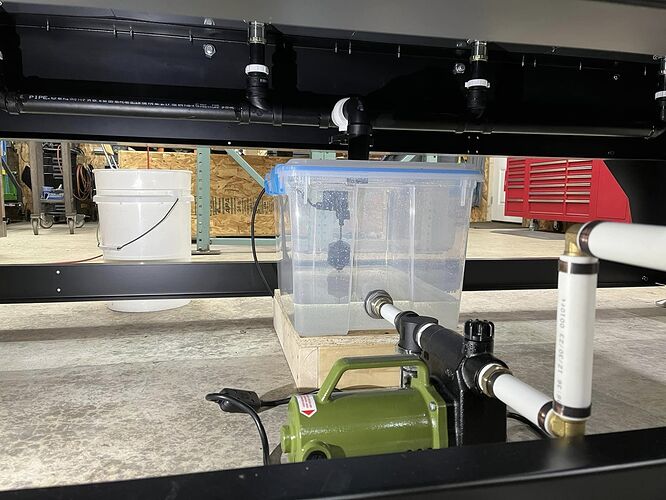
The 4 drains are connected as standard sink drains with a single ball valve to drain them. Having them connected together all the time allows the tray to fill faster, once fluid hits the drain in the first section it flows through the drains to help fill the others faster. This drains the tank in about 2 minutes and the float switch only cycles once. I will be running scotch bright pads in the drains and purposely left just under 2" in the sump for any debris to settle before being pumped up to the tank.
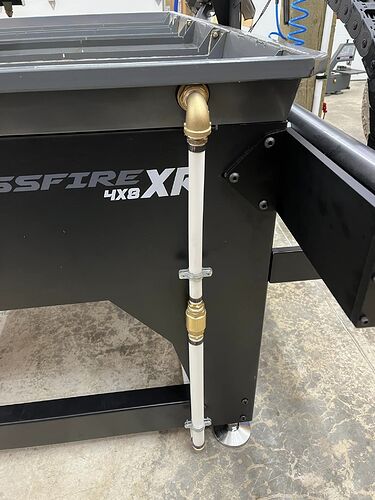
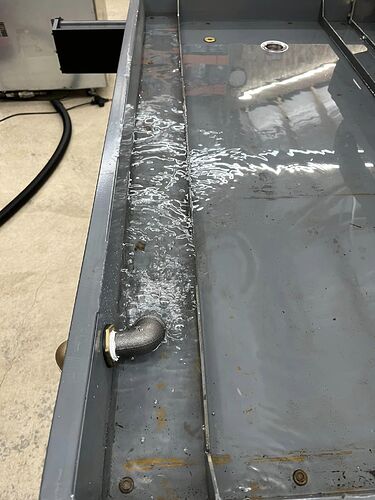
The filler is 1" reduced to 3/4" through a spring loaded check valve and through the side of the tray to an elbow fitting to direct the flow to the side. As the filler will be under the level of fluid the check valve prevents any siphoning if I left the valves in the wrong position.
Fluid (testing with plain water first) flows nicely into the first tray and spreads to the others quickly. With the valves in the right position it takes 5 or so minutes to fill it up from the tank.
