Not at home that I know of. Send Support a note.
Although a sixteenth doesn’t sound too far out. They’lll get you a new one. It helps that you’ll be able to tell them you’ve done those steps already.
I didn’t see if you tried it yet. but after realigning everything. Lube the lead screw, pay extra attention to the 2-3" prior to the binding point. I had some little sticks near the ends like you and some lube on the screw and rails fixed me up!
That’s usually my first recommendation but he said he oiled it as one of his first troubleshooting steps.
Taking it out & flipping it over is much harder so I save that for last ![]()
Thanks Fellas,
I did go ahead and flip and reinstall the screw. The machine ran through the break-in sequence a few times, but the screw does not run true . After the third run through it stalled on the end opposite the original problem. Langmuir answered my support email in about a NY minute and the new screw and nut are on the way.
Your help is much appreciated.
Randy
4 Likes
Continuing the discussion from Y Axis Leadscrew Issue/Binding Near Max Travel - SOLVED:
I finally assembled my table and had the same problem with the hangups.
First I lubed with synthetic oil to no avail.
Then I read this thread and decided to remove the Y axis screw and check how the nut felt in the area it was hanging. Couldn’t tell anything, it seemed tight everywhere.
I then swapped ends and reinstalled it to see if it would hang on the other end. I also coated it with lithium grease.
Upon reassembly I have been able to run the break in program twice with no stops.
I will run it several more times to test before I call it good.
Thanks for all the info in this thread.
So I ran the break in program several more times last night and after three successful runs it started hanging again. Some times it would make a few successful passes but this morning it won’t make any passes, it hangs every time. @langmuir-daniel
How do the lead nuts feel when you install them? They should be very easy to turn by hand.
The short screw is fine but the long one (y-axis) is very stiff to move. I had to hold the shaft with pliers to turn the nut by hand when I flipped the shaft.
When you threaded the nut on did you pull back on the white collar so the nut’s “fingers” were able to spread apart?
The collar is spring loaded and will press against those fingers unless you pull it back so they’ll be forced against the collar by the threads and not be able to open up around them.
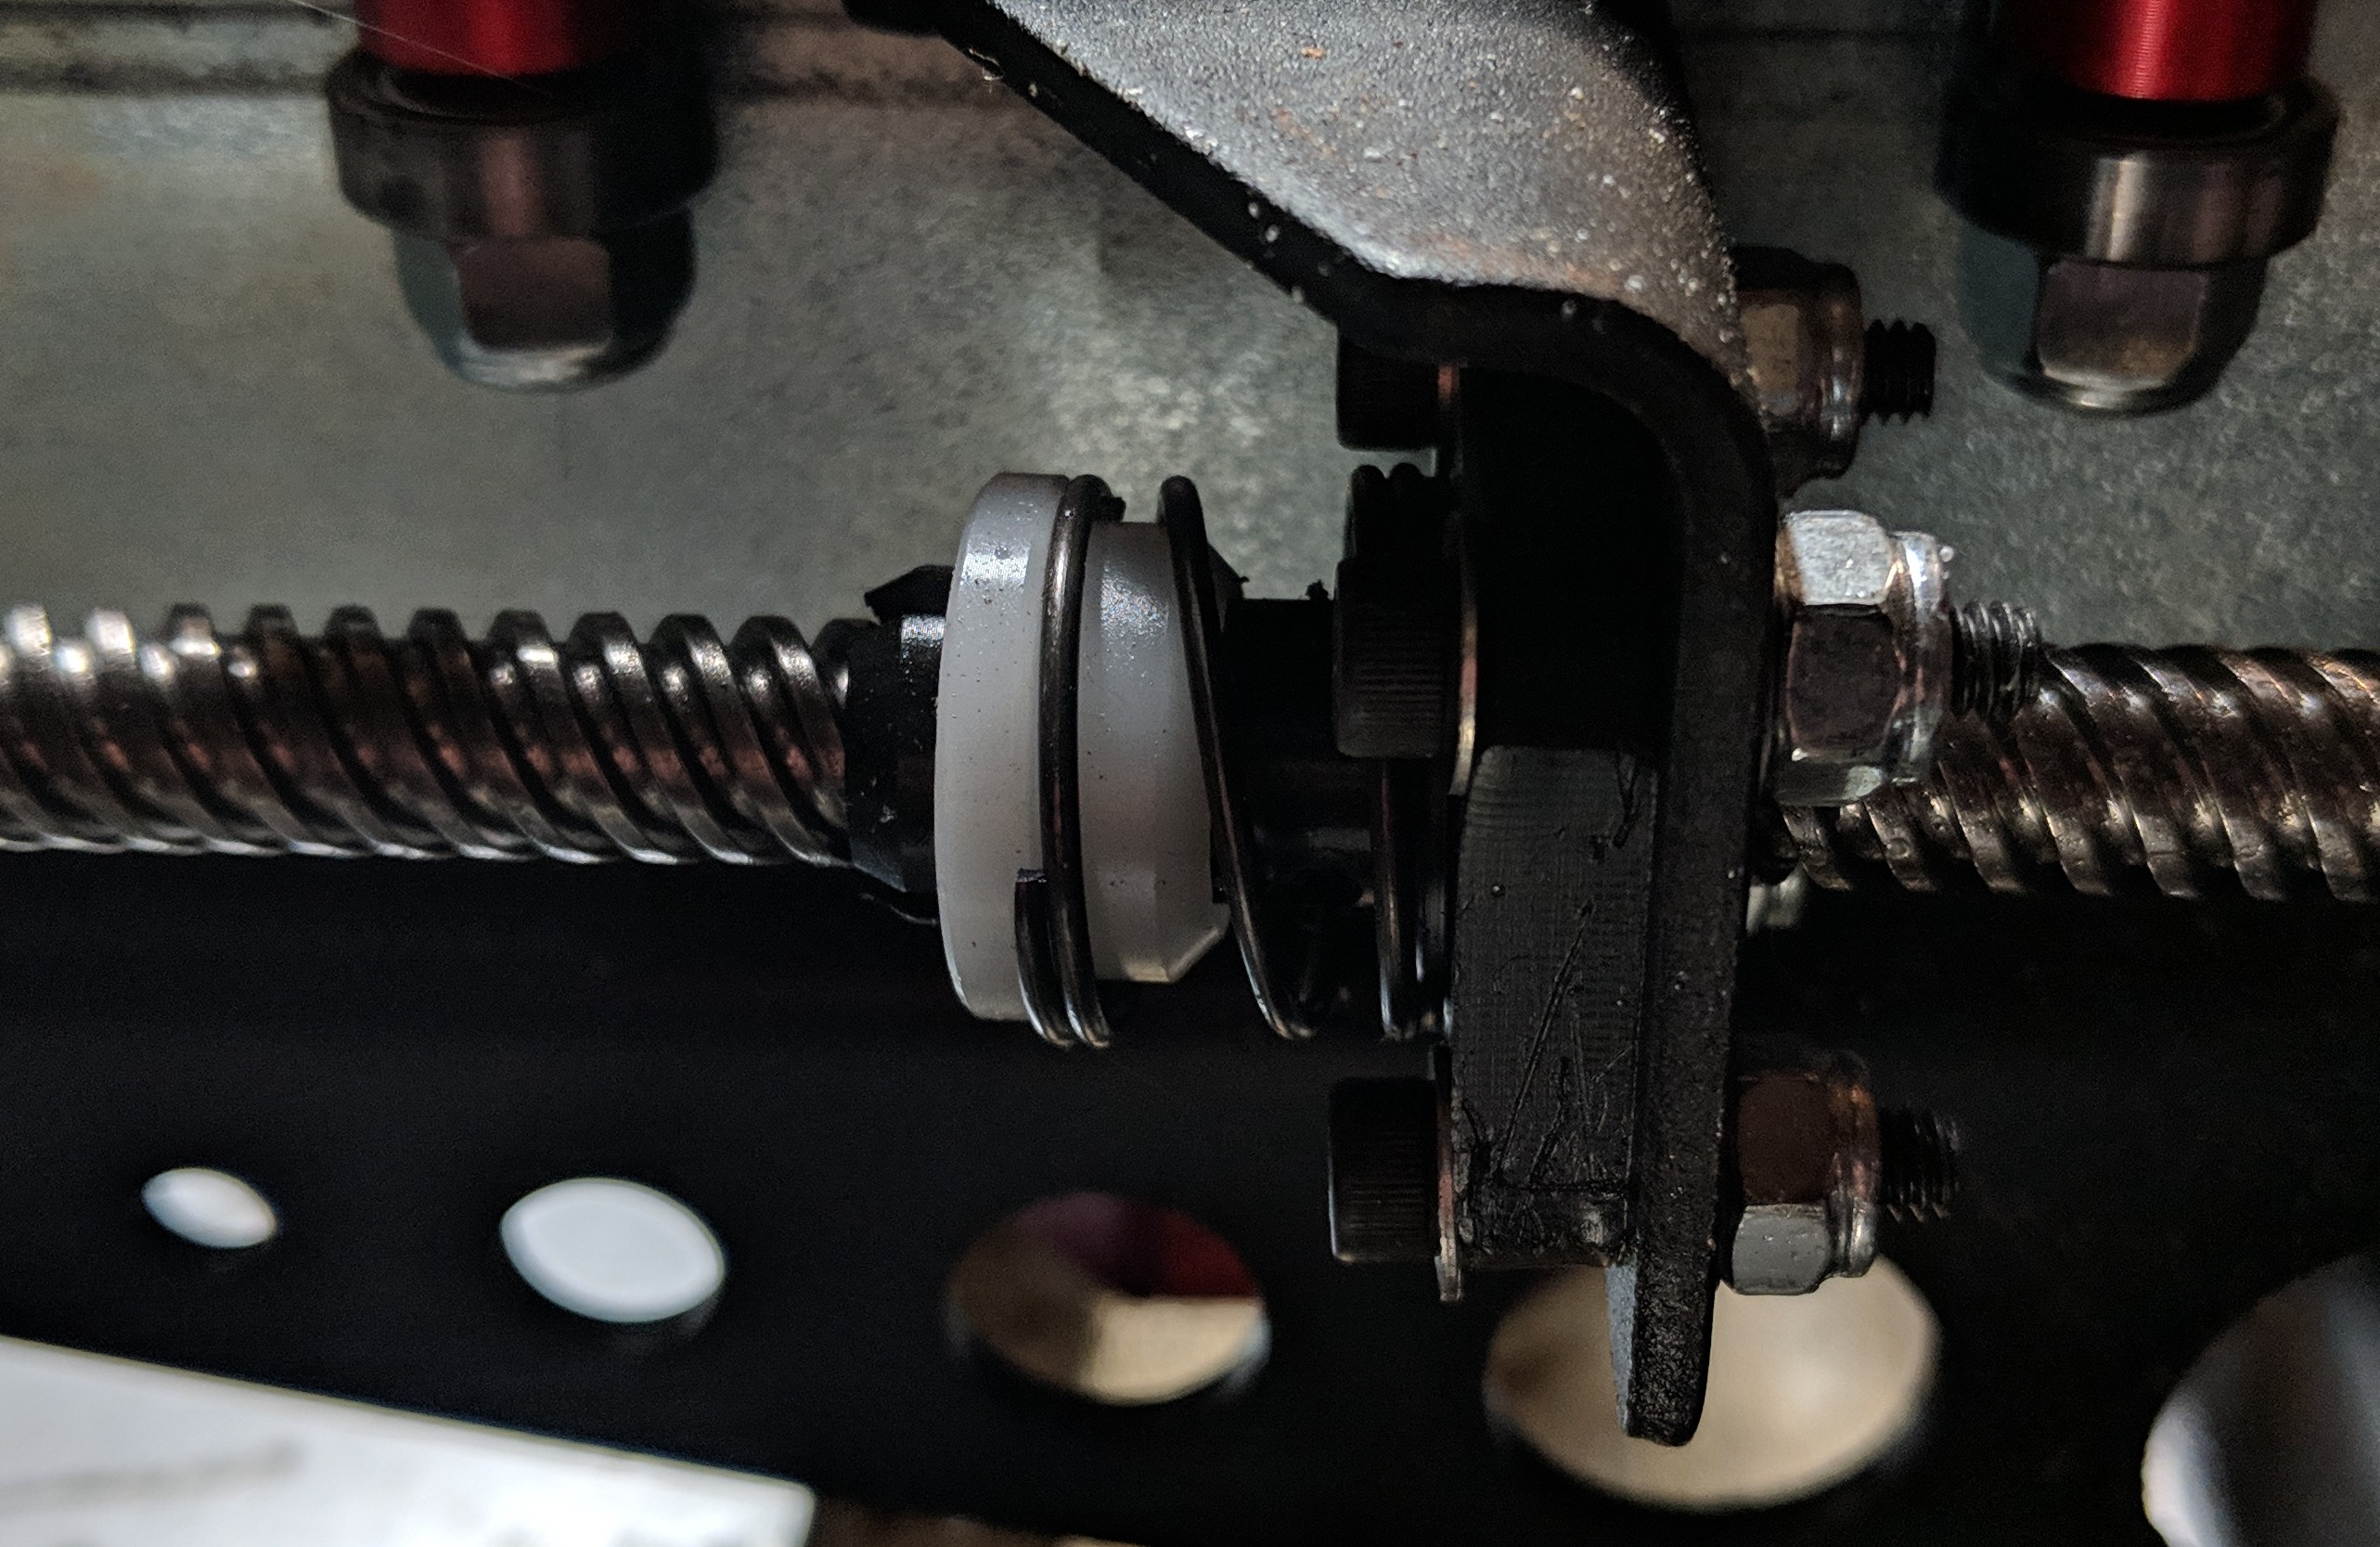
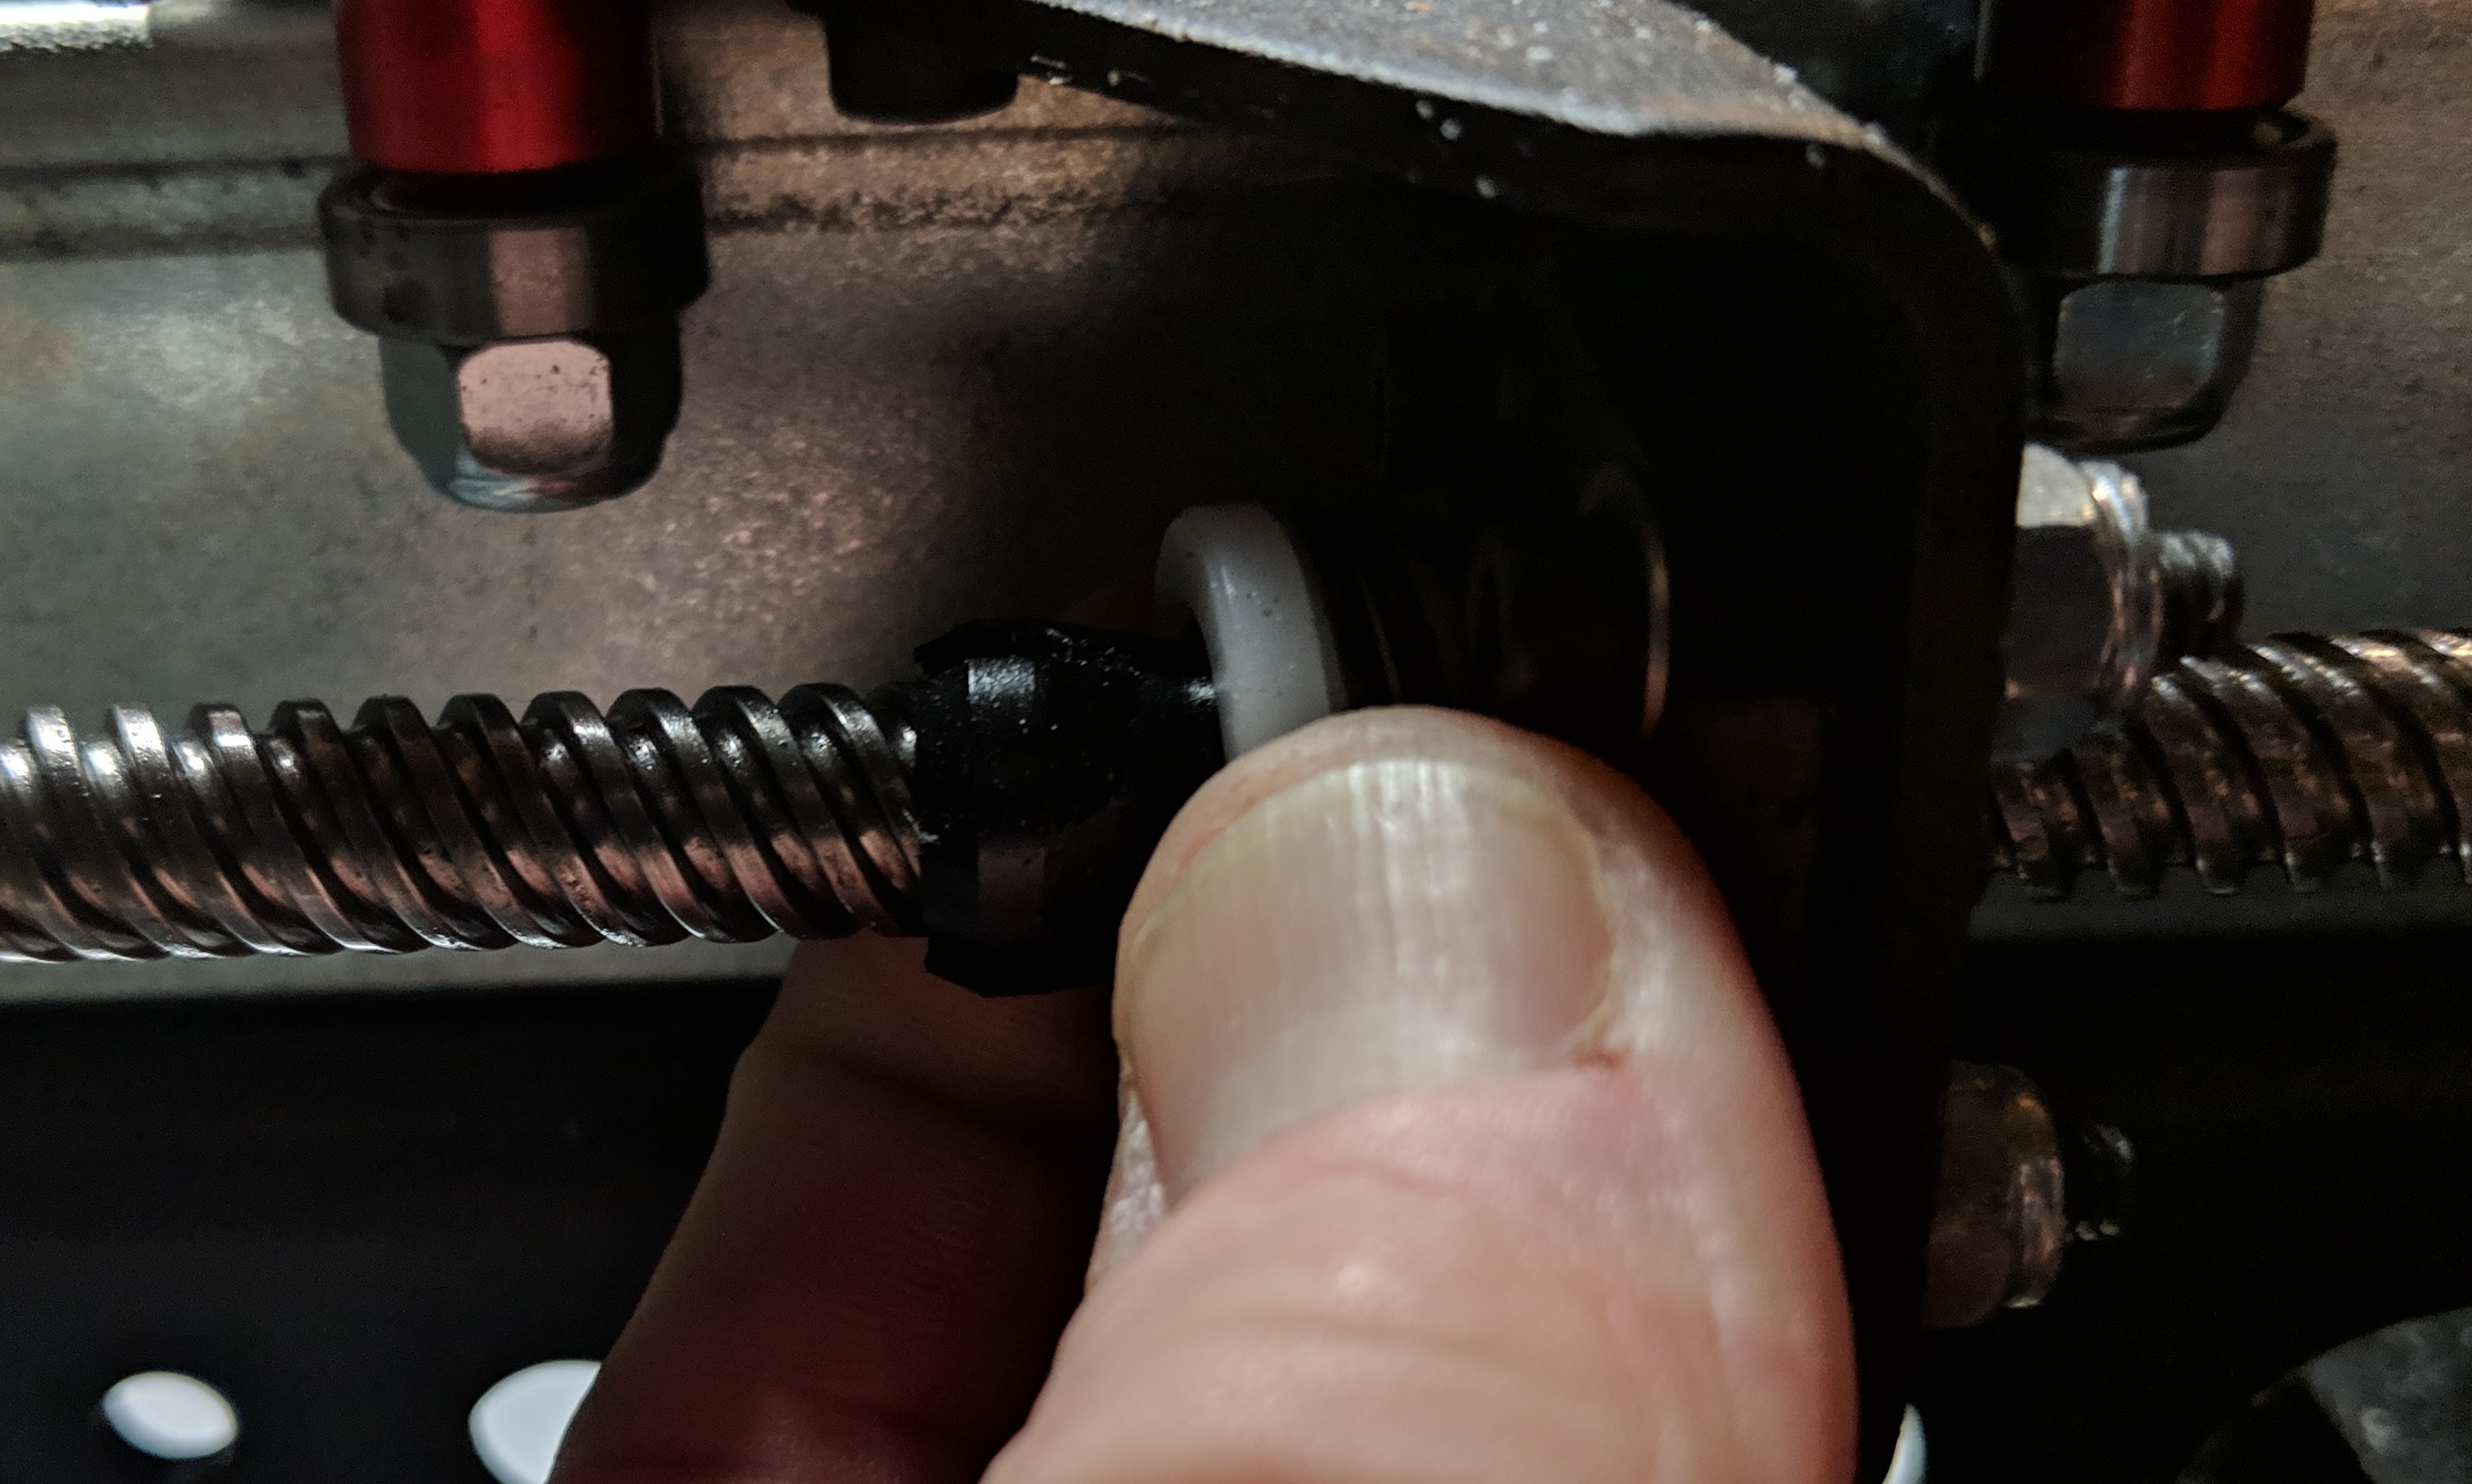
Here are a couple of pictures of it installed on the lead screw since I don’t have one off the machine. It shows the fingers & collar though. You want to pull the collar back when you start threading it in. After the first couple of inches you can let go and the collar will spring up but won’t go to the end of the fingers so it won’t keep them from being able to grip the threads but not be too tight to move easily.
Once you do it, it’s obvious how it works. Just not easy to explain ![]()
1 Like
I did but it was still quite stiff.
How are the threads on the nut? Are they all chewed up?
I had the same problem when I first set mine up and used the pliers method to thread it in (major PITA) until I discovered that the collar was too far up & over the shoulder of the black fingers.
I’ll have to disassemble it again to see that. I also have had the motor coupler come loose several times.
I found before I put the setscrews in the couplers I wanted to turn it around the lead screw so I was able to make sure the setscrew was positioned so it would have the raised part of the thread to rest on vs getting wedged in between the threads. Tighten the setscrews down really well. Don’t be timid.
a drop of blue loctight doesn’t hurt on the set screws either.
I use green. If I don’t know that it’s going work as installed I’ll tighten by hand, test and the put the green loc-tite on. Blue (& red) has to go on the threads before assembly. Green is like blue but goes on after assembly and seeps into the thread gap.
That’s where loctite’s colors get fun. Because they also have a green that is used to hole bearings in place. if you don’t heat it to 400+f you’ll never get it broken lose after it sets 
I use the green bearing stuff…so I don’t keep the other green in the shop. Way easier to not have mistakes that way. My Help is all unskilled (mostly my GF’s kids hanging out…young!).
1 Like
I removed the screw again and cleaned all the lubricant off and noticed the white collar on the nut had the spring backwards and the white collar was not square. I cleaned the follower threads and reversed the spring. Looks better. re-lubricated the shaft and follower with lithium grease again. Reassembled and began the break-in test 8 times with no problems except the collet coming loose. Used blue locktite and it is not coming loose any more.
Now I have to learn to create parts and cut… soooo much to learn.
1 Like
That’s why I don’t keep red in my shop. Same need to heat to break it loose. I cross my fingers and rely on torque values to make sure things that need it stay without it.
I have the wicking green but not the bearing green so I’m safe. But if you use knockoffs of loctite they don’t always match the colors (I have someone’s whose red is loctite’s blue).
Hi, i believe you need a new lead nut. Can you send an email to support@langmuirsystems.com letting them know and one of the staff will get it sent out on Monday!
1 Like
Hi…Ensure both the side screws that push the Y pivot metal gib against the steel way are both have equivalent weight or sums. You shouldnt need to contact the lower screws underneith ever that could likewise wreck the gib territory.
Ensure before you fix the two 10-32 end plate screws to the seat projecting that the projecting is right forward (where the lead screw nut is nearest to the end plate). This way the leadscrew will be arranged waterway right through the movement. If not you could have leadscrew official in the nut in light of the fact that the leadscrew could be at a point from slop when you fix the screws.