Its actually quite easy.
just buy a 15W laser off of ebay. (like this https://www.ebay.com/itm/15W-Laser-Head-Engraving-Module-w-TTL-450nm-Blu-ray-Wood-Marking-Cutting-Tool/183757888176? )
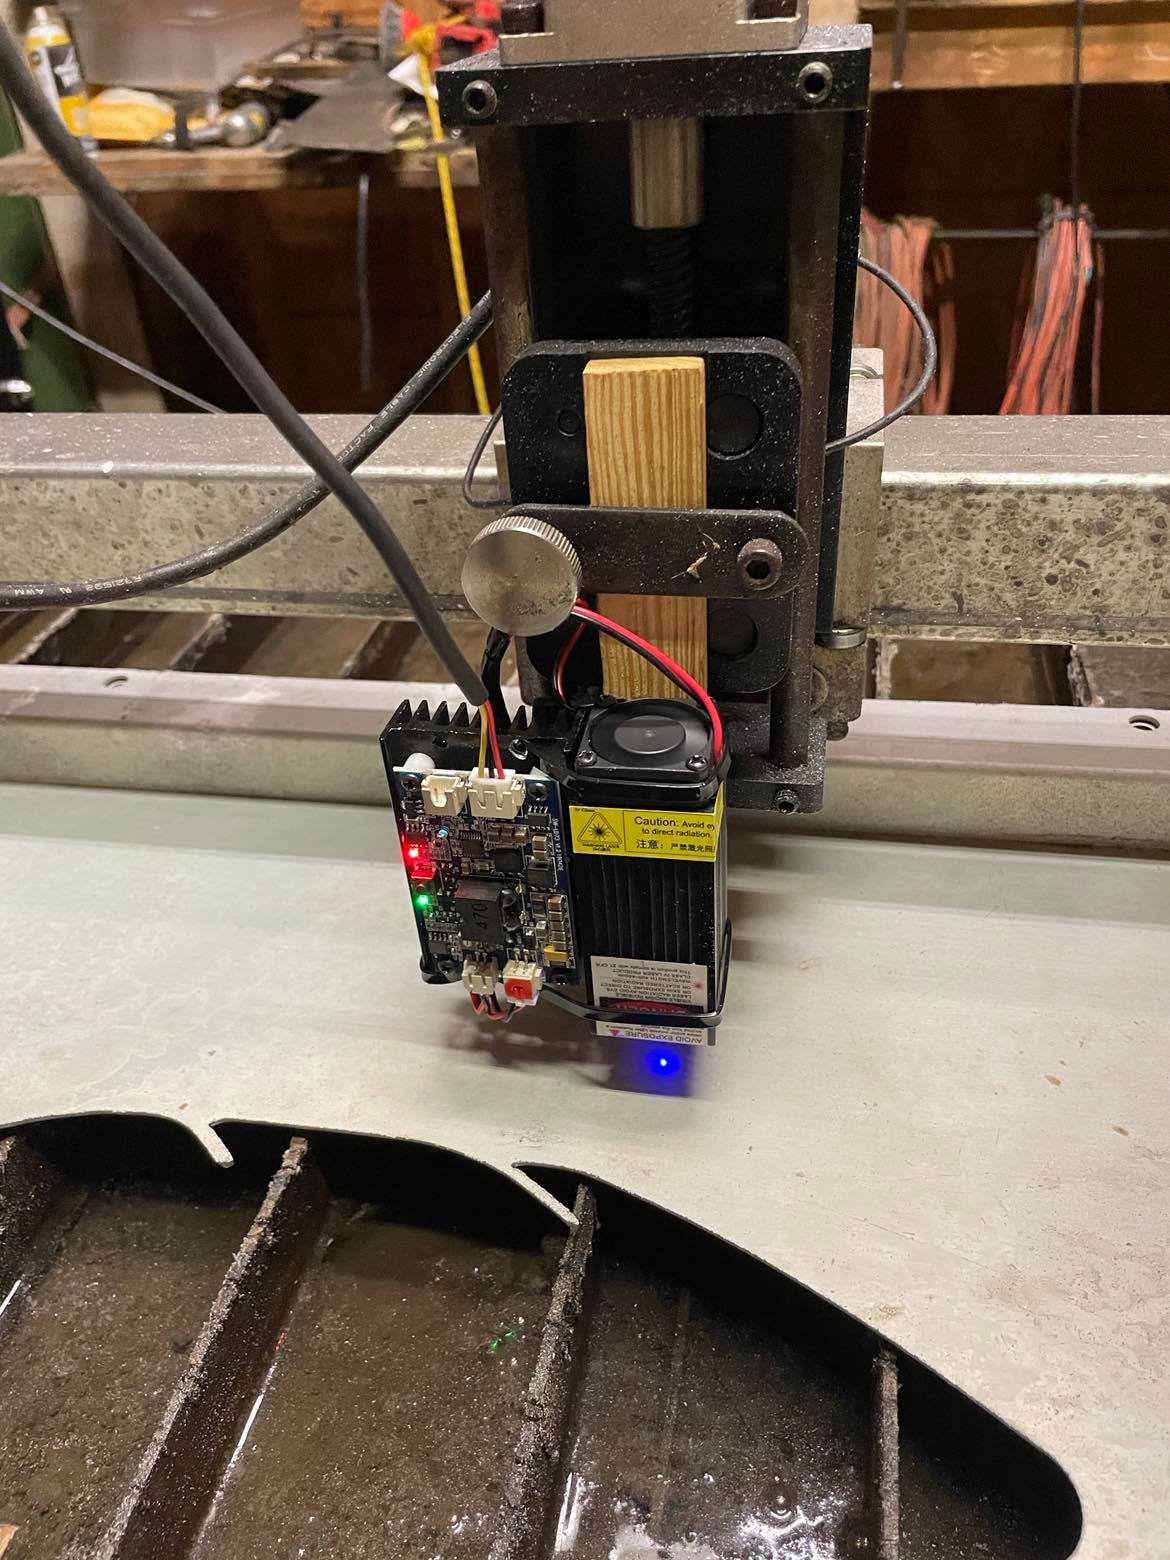
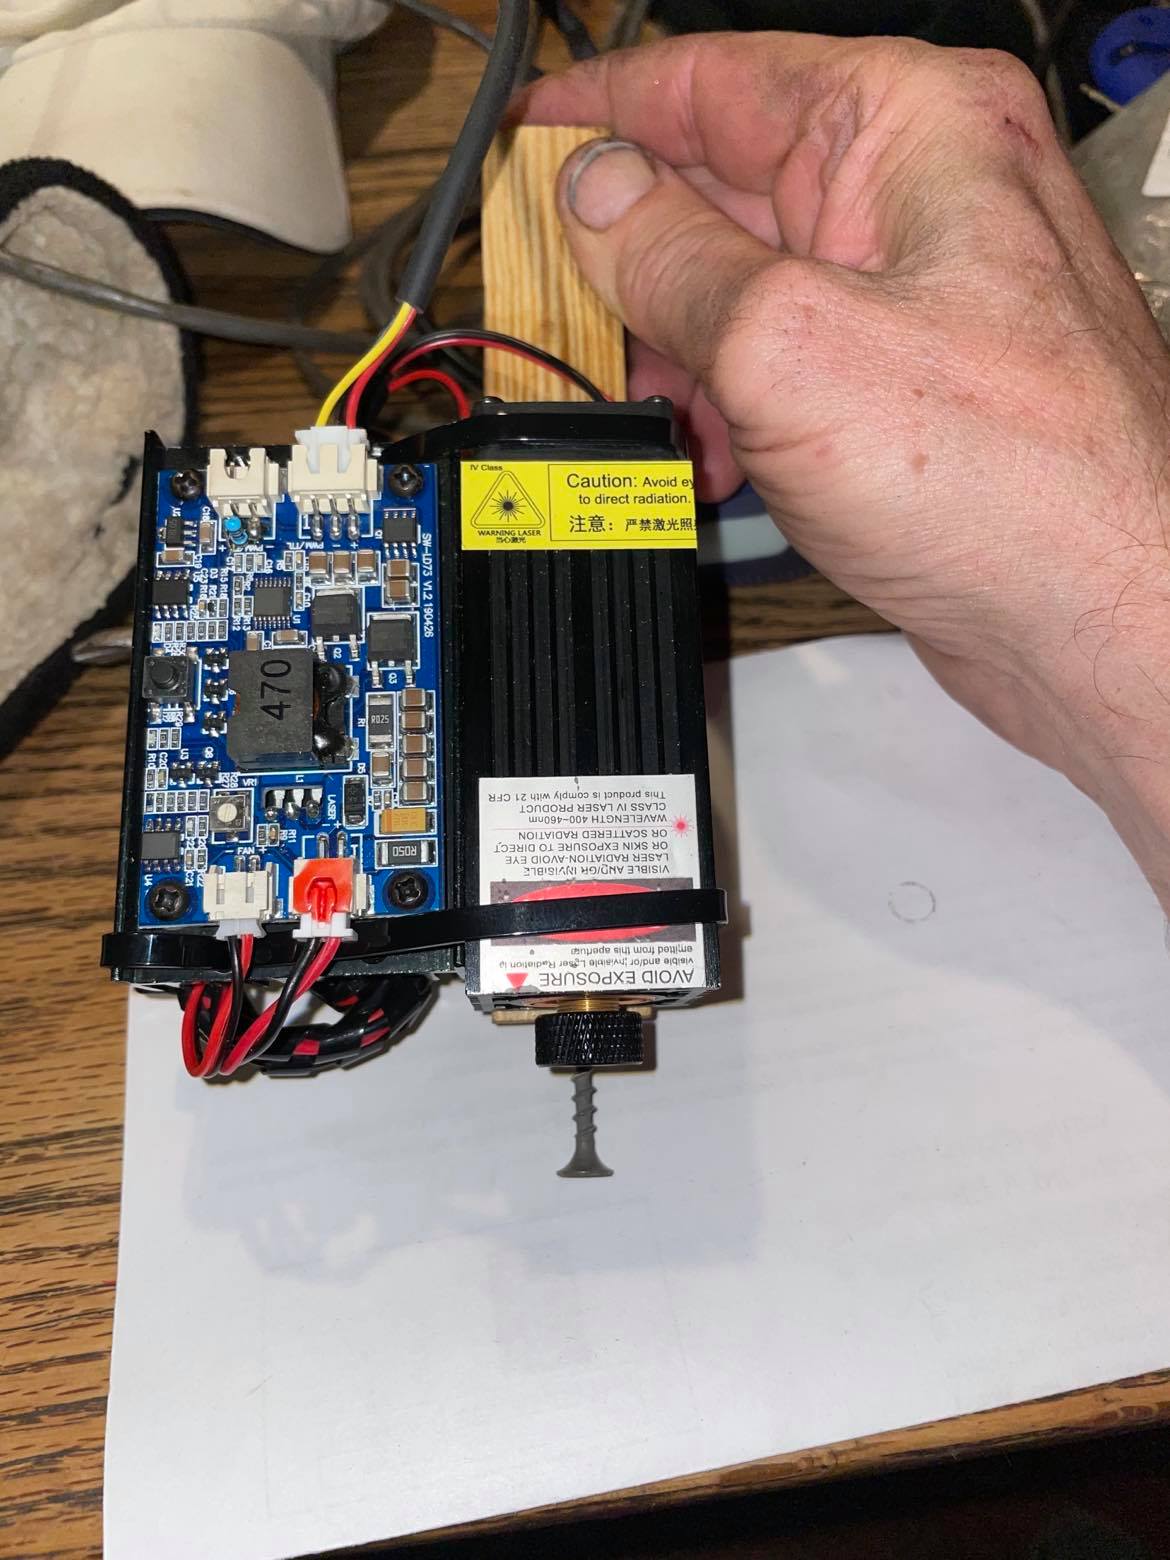
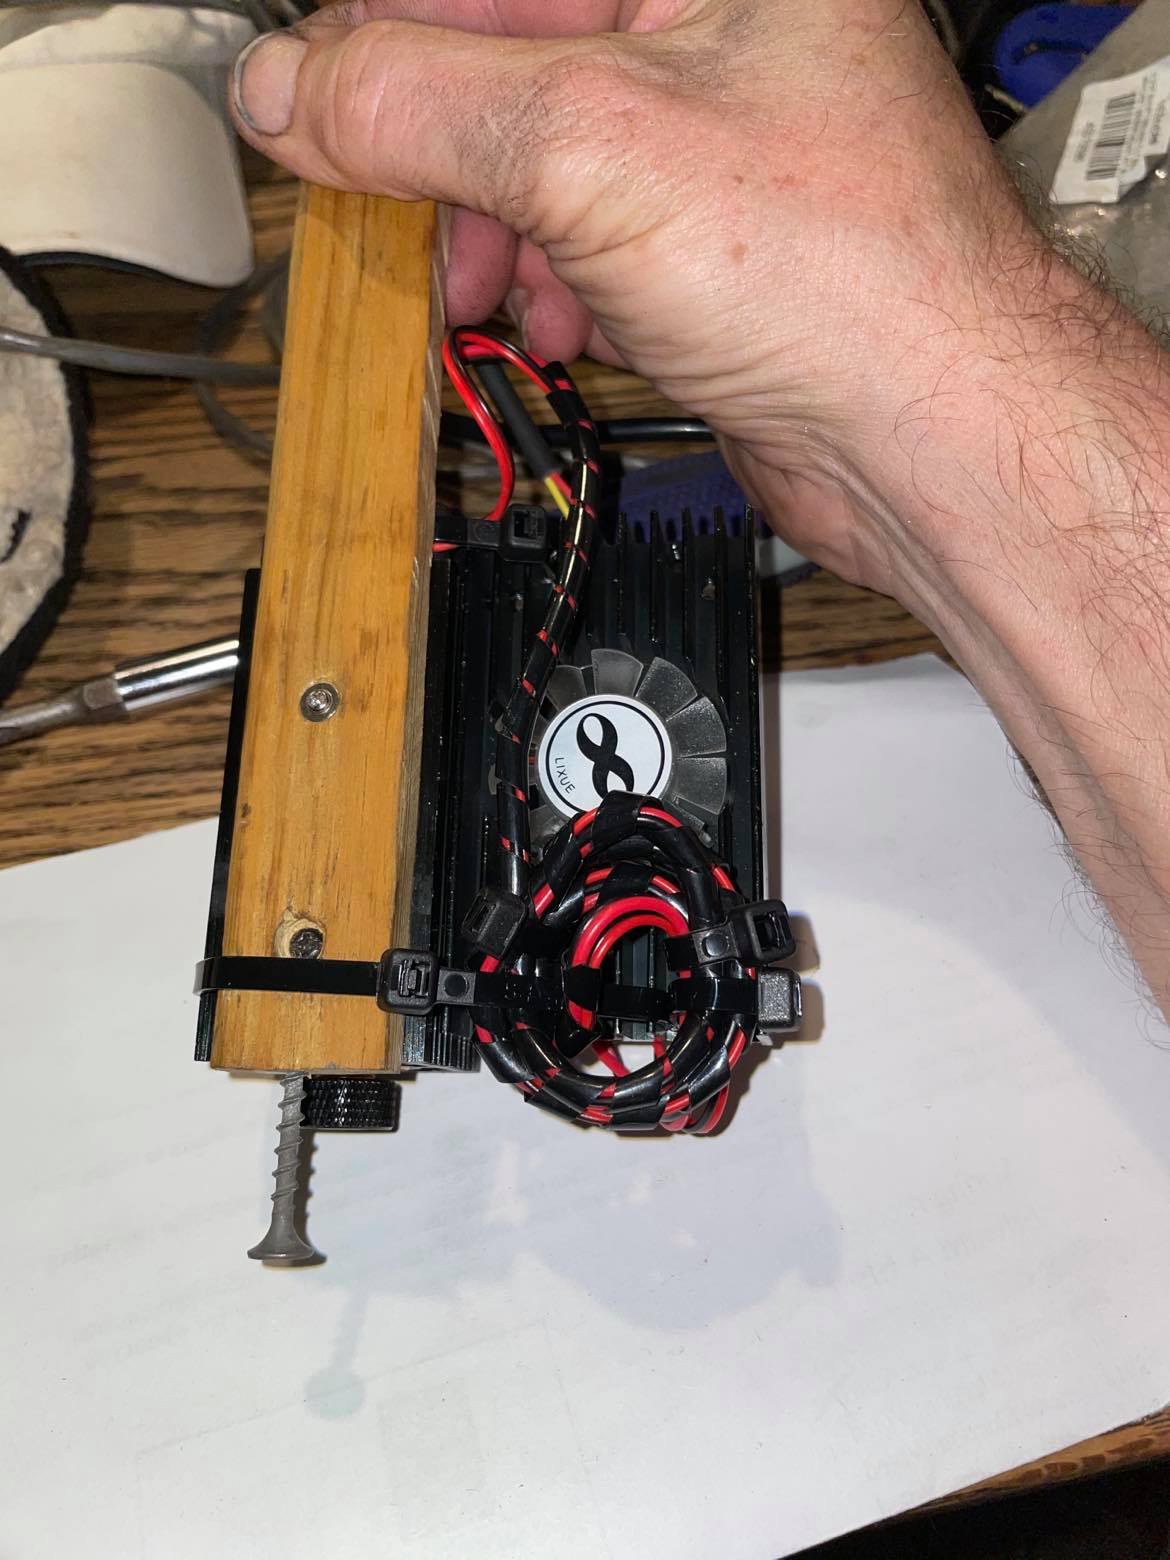
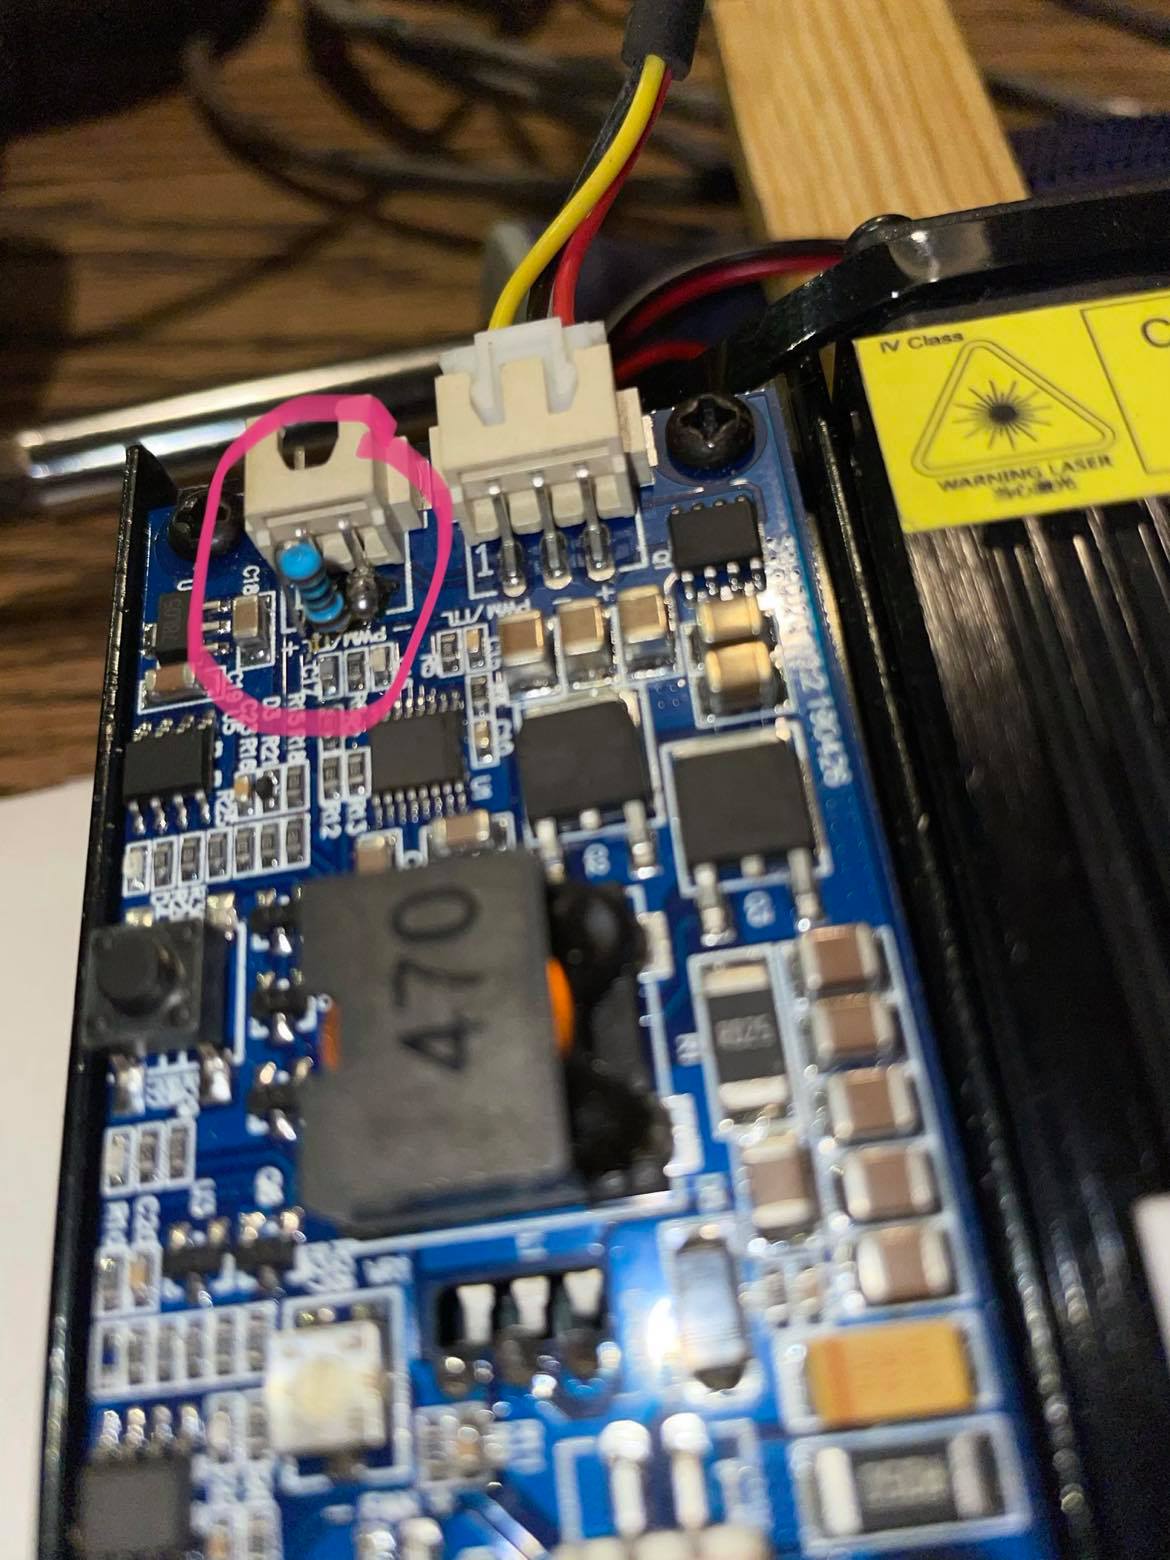
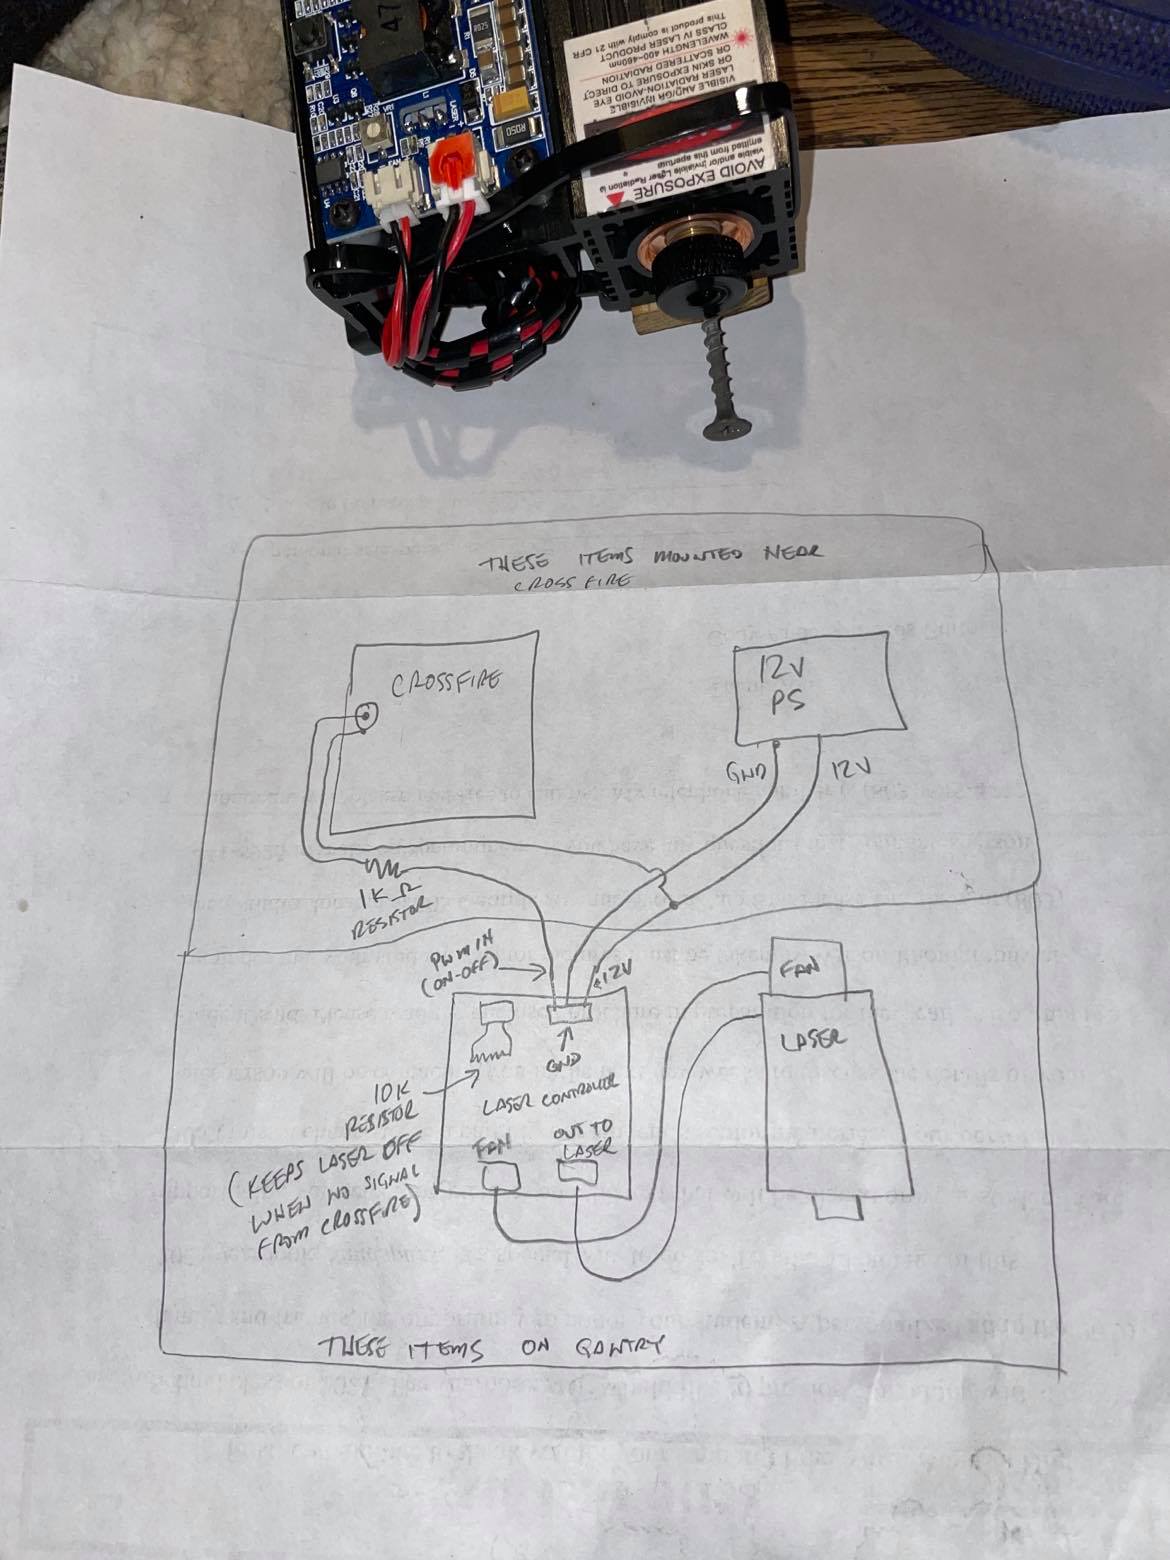
And then hook it up like this:
Questions?
Its actually quite easy.
just buy a 15W laser off of ebay. (like this https://www.ebay.com/itm/15W-Laser-Head-Engraving-Module-w-TTL-450nm-Blu-ray-Wood-Marking-Cutting-Tool/183757888176? )
And then hook it up like this:
Questions?
Sure, what are you cutting and what is the speed?
BTW, that effective use of a drywall screw continues to add to the wealth of Innovation. Congrats. ![]()
Dude…ya kill me with your humor…
But this mod looks so cool
Freaking lasers!

well show us a video or end result…
OK. I will make a vid!
I can cut thick paper at 100in/min (like file folder paper) I mostly am using it to create stencils, but I have also used it to cut out gasket material… had to take a couple passes, but works great!
It also might work marking metal parts that you have or will cut,
You do have to be careful though as the beam can be reflected back up to the unit and cause heat issues.
But with only 15 watts it may not be a problem.
You can apply a little paint to the part and burn it off for a temporary mark.
And de-focusing the beam can also keep the heat from concentrating
looks interesting. Friend does copper fountains and looking for a way to put veining on leaves (etch). Is the laser controlled by Mach3 or Firecontrol or do you have to turn on and off manually?
It’s worth a try, especially on clearing off color on anodized aluminum, but my experiments with Dry Moly and Cermark both required relatively high power from my 40W laser. Maybe if run slow enough it will work, but the heat is necessary to fuse the surface treatment to the metal.
Another possibility is using the bi-color laminated acrylic material made for making engraved signs. Here the lower power might be an advantage.
Here is a short vid of a failed attempt… lol
but to answer someone’s Q, the crossfire turns the laser on and off.
Looking cool
Yes this is very interesting. It would be cool to see what some of the finished items look like that you are cutting out. Keep up the good work.
One thing I found after being inspired with this project is that the power rating on these modules are for the Input power requirements, not the optical power output. This is not a dig on the project itself, which I like very much, but just an FYI to anyone thinking about doing this.
I was looking at a Laser module rated at 30W and, unfortunately, discovered that it really only output 7.5W of optical power which is about 19% of my existing laser. Still, for engraving and cutting thin materials, it would be useful and give me a bigger bed to work with.
that’s what i would be thinking of using it for. engraving or etching instead of buying a whole separate laser engraver.
Reasonable thinking. The next thing to determine is the depth of focus on the beam. This is actually pretty easy to determine. You engrave a line on a sloped object like white chipboard and draw tics every Xmm where the Xmm is equal to 1/sin(slope_angle), where 1 is 1mm. Then you look at the resulting image and see how many tics (and where they are) are in focus. This will tell you the proper focal point and how usefully large it is.
The shallower the depth of focus, the flatter your gantry needs to be over the area you want to cover.
He’s probably got a 40W CO2 laser. They’re pretty common. You can get one for about $350 (okay if you’re handy with electronics and can tinker) to $3000 (ready to run with safety devices and onshore support) to 25,000+ (commercial operations grade use).
Doesn’t everybody???
Only some of us ![]()
Serial “ooo…cool tool” people ![]()
Only Laser i have is on a 44 Mag.