The crossfire Pro is my first machine and my first exposure to this world of plasma cutting machines.
I have (what I think) successfully set up my table and was able to perform one simple cut (a rectangle). After this initial cut though I have been running into an issue that I have not yet been able to figure out with google and forum searches. At first, I was having an issue where the torch was not firing. It would continue through the job at the correct height and (I’m pretty sure) with air but no torch. I was able to manually fire it, but of course that is not ideal.
Trying to troubleshoot that issue a new one has come up… The torch now goes to the starting point of the job, goes to the correct height, and fires but does not move. It stays at the starting point for a good 5 seconds then quits (I’ve stopped it multiple times now). Everything moves fine for the dry run, but when I hit play without dry run that’s when it doesn’t move after getting to the starting point. Is it something with THC Control?
Any help on this would be greatly appreciated. I will continue to search through the forum, google, and some beginner YouTube videos to see what I may be missing. Odd that I was able to get a good cut on my first try, but now it starts to act up.
I am using SheetCam to generate the code for FireControl.
Also if there is anyone you recommend (video wise or forum) for beginner tips/tutorials I would love to research more into this to get a solid foundation for this machine.
The torch is likely losing voltage as all the metal is burned away so the torch turns off automatically. But that is not your problem, as you have already figured out. It sounds like there is EMI (Electronic Magnetic Interference).
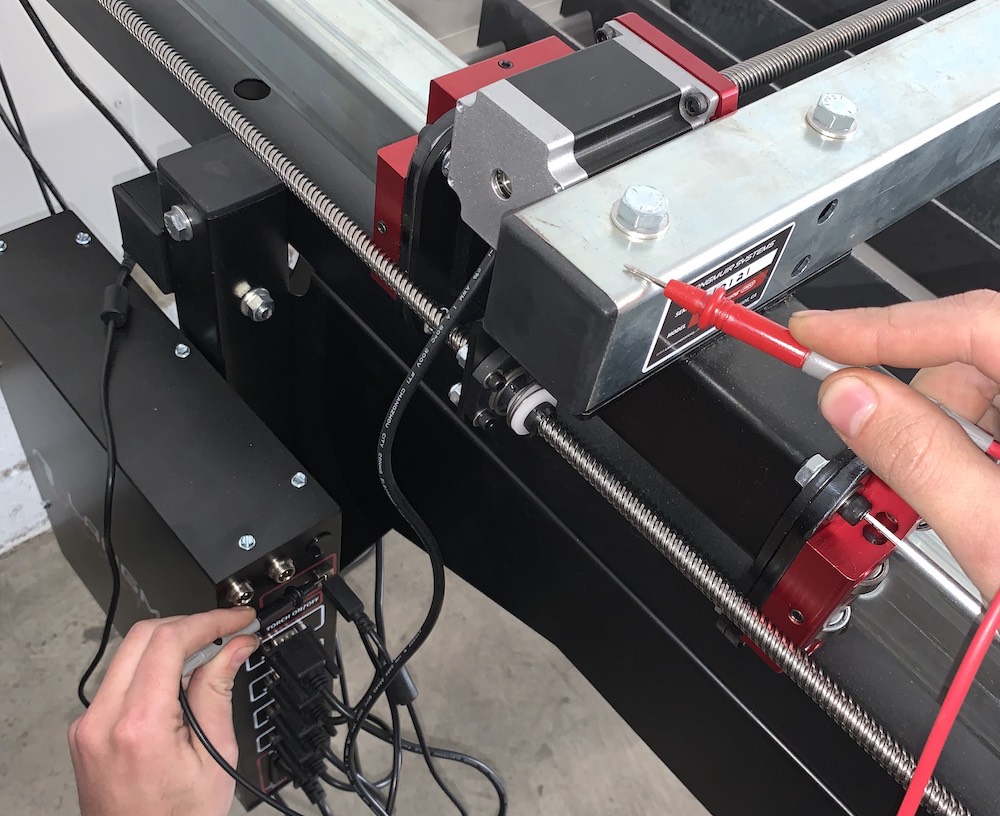
If able, post some photos of your setup. We want to see how the cables are laid out.
In particular:
No coils of wires or cables crossing (USB cable to enclosure, THC cable to enclosure from VIM box, Cutter work lead and/or Torch cable.
Check to make sure the USB is a good connection on the computer and enclosure. Measure connectivity between the collar of the USB/Printer port on the enclosure and the enclosure itself (there should be none). Try a different cable (use the cable that came from Langmuir).
Put chokes on the USB cable
Is your laptop running on low batteries or with the adapter plugged in with a ground plug (you don’t want it to have the ground plug) (Phillip beat me to it!!!)
You may certainly have been correct. I went back to make sure cables/wires were not touching each other the best I could (especially anything high voltage) and ran it once and it worked perfectly. Any suggestions on how to manage wires/cables better? It most certainly doesn’t look clean. I can post a photo or two later.
I don’t know if there is a neat, orderly way to do it. At least I haven’t found one. Some people mount the plasma cutter on the wall. I think in some cases that helps to limit the cables you are stepping over.
If your laptop charger has a ground plug you want to run on battery when cutting. You can get feedback through it to your laptop causing issues.
One cable to watch make sure the usb stays as far away from the torch cable as possible. Mine gets remotely close it will get the EMI gremlins very upset every time.
So I spoke too soon. It only wanted to do one cut. Went to try another and it would not fire once it got to position. Assuming same type of issue? Electrical interference somewhere?
Attached on the images of the current setup. The cables by the box is a mess. Not positive how to organize them all without touching and have them all connect.
Since I’m a new user I can only post one picture Hopefully this gives some insight and I can post other photos later if needed (and allowed).
I did try to run it with the laptop not plugged in. Took the power cord out and removed it entirely to see if that may be the issue. Sadly, still no luck.
That sounds like a separate issue. What cutter are you using?
You want to make sure that you have adequate air supply. I would bump up the air to 75 or 80 psi to the back of the machine. If Hypertherm, bump up to 95 psi (Hypertherm will regulate what it needs automatically).
Increase the pierce delay. You are currently at 0.5 seconds. Try 0.6 and then 0.7 seconds.
If your cutter is a RazorCut then I might blame the internal regulator. You can adjust it (search for how to adjust) or it can be bypassed/replaced.
I don’t want to jinx myself but it seems like this was the issue! I had it set a little too low then at around 65psi. bumped it up to 80psi and everything has been working as expected. No issues and I’ve cut 4 things out at different times. Thank you for the help!
It is great to see a supportive community for these machines.