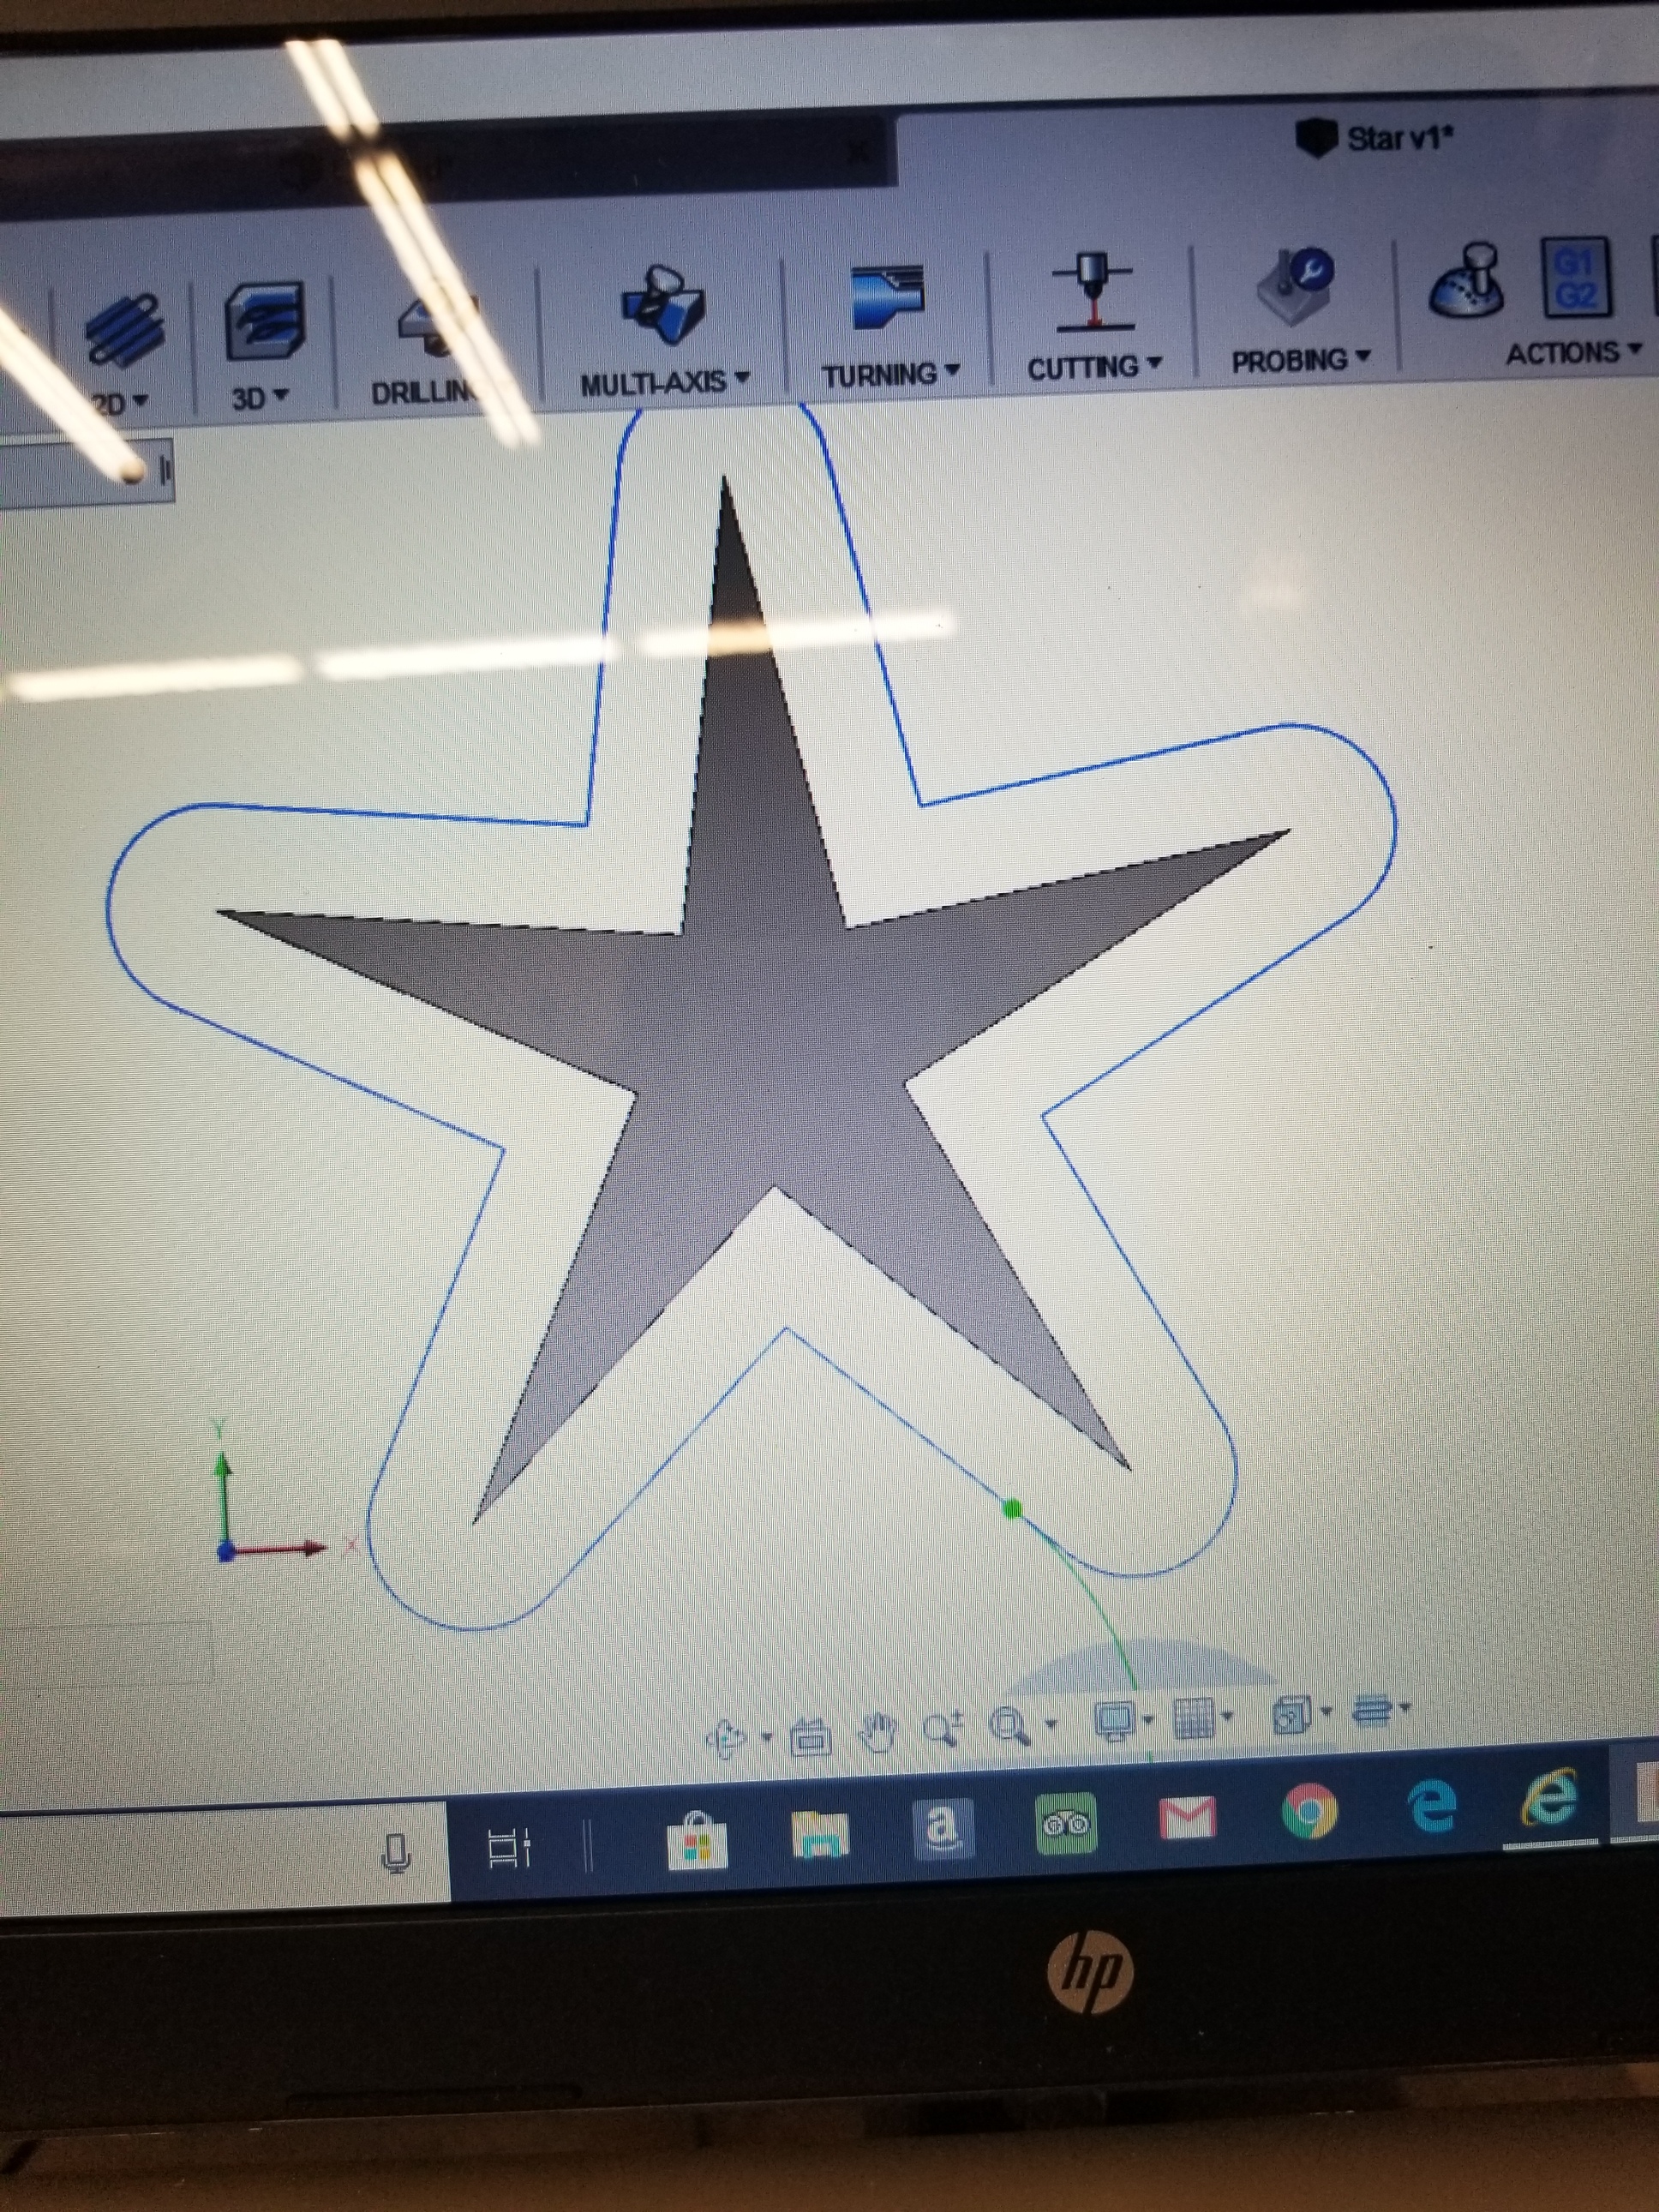
Why when I try to cut out a star ,the tool path takes me around the star ,rounds off all of my star points
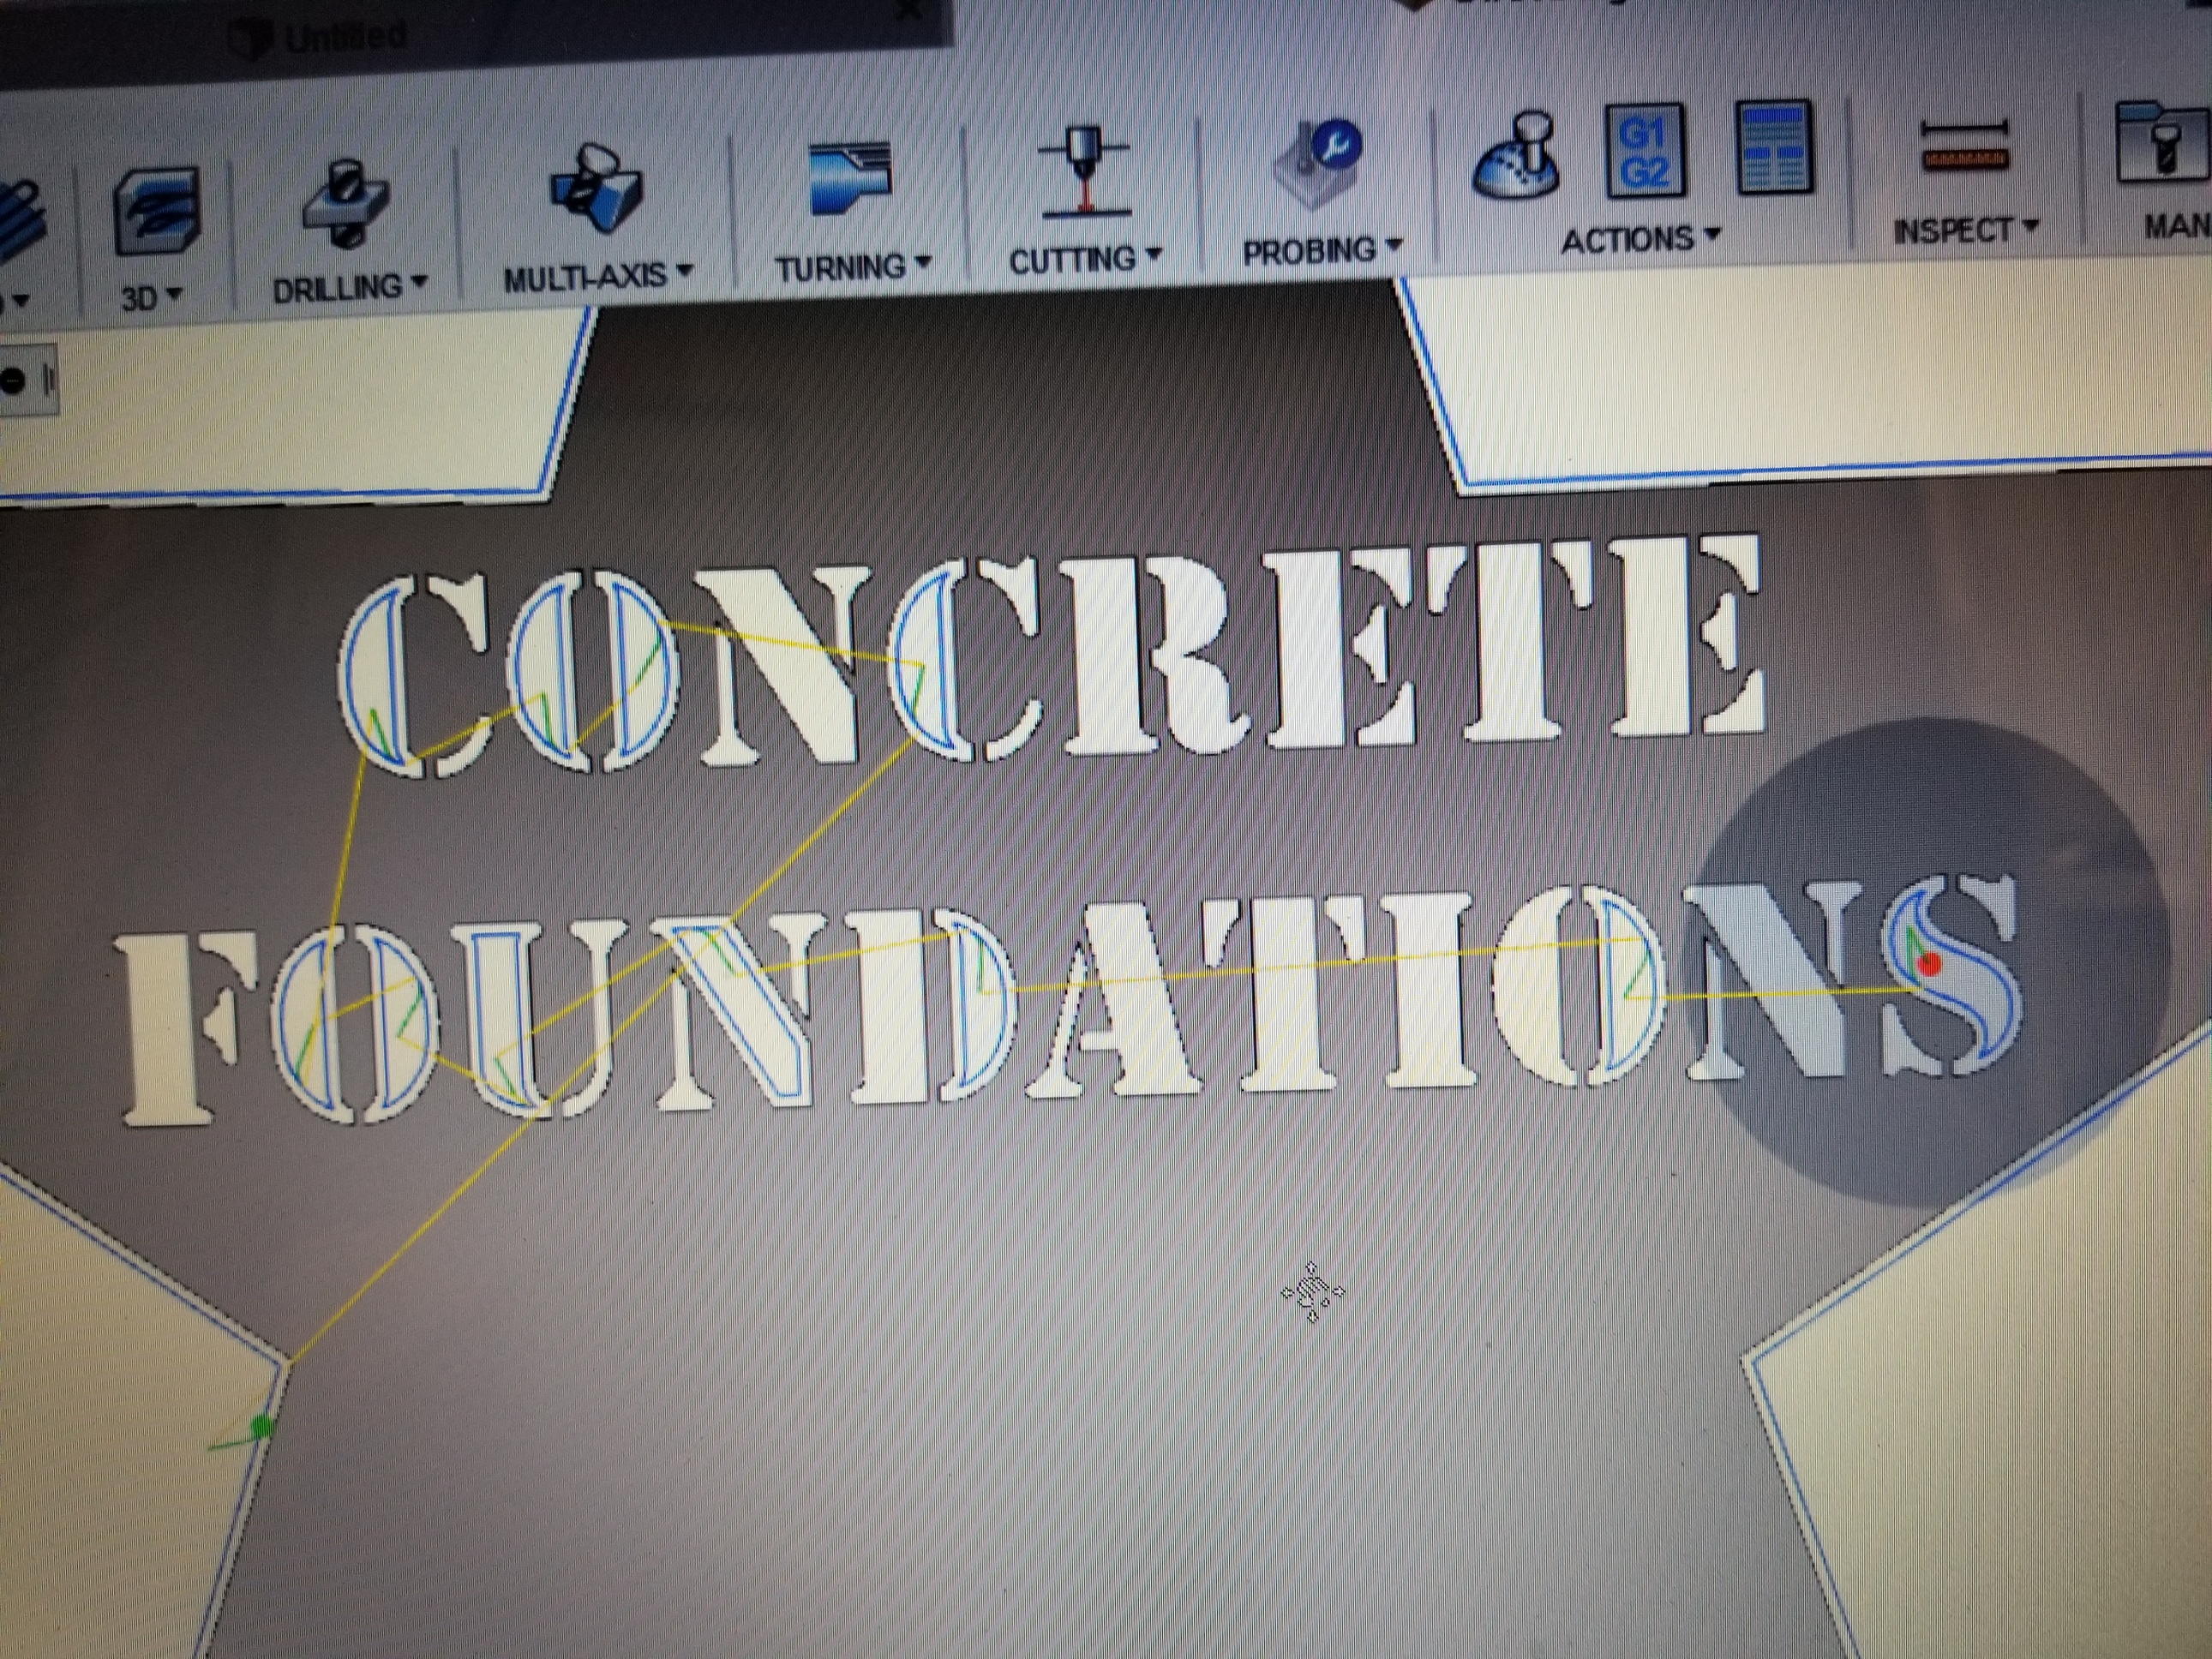
Also how comes when I try to cut out text ,the tool path ends up cutting out all the stenciled letters instead of tracing them out ?what might I be doing wrong
Someone much smarter will be along soon, but…
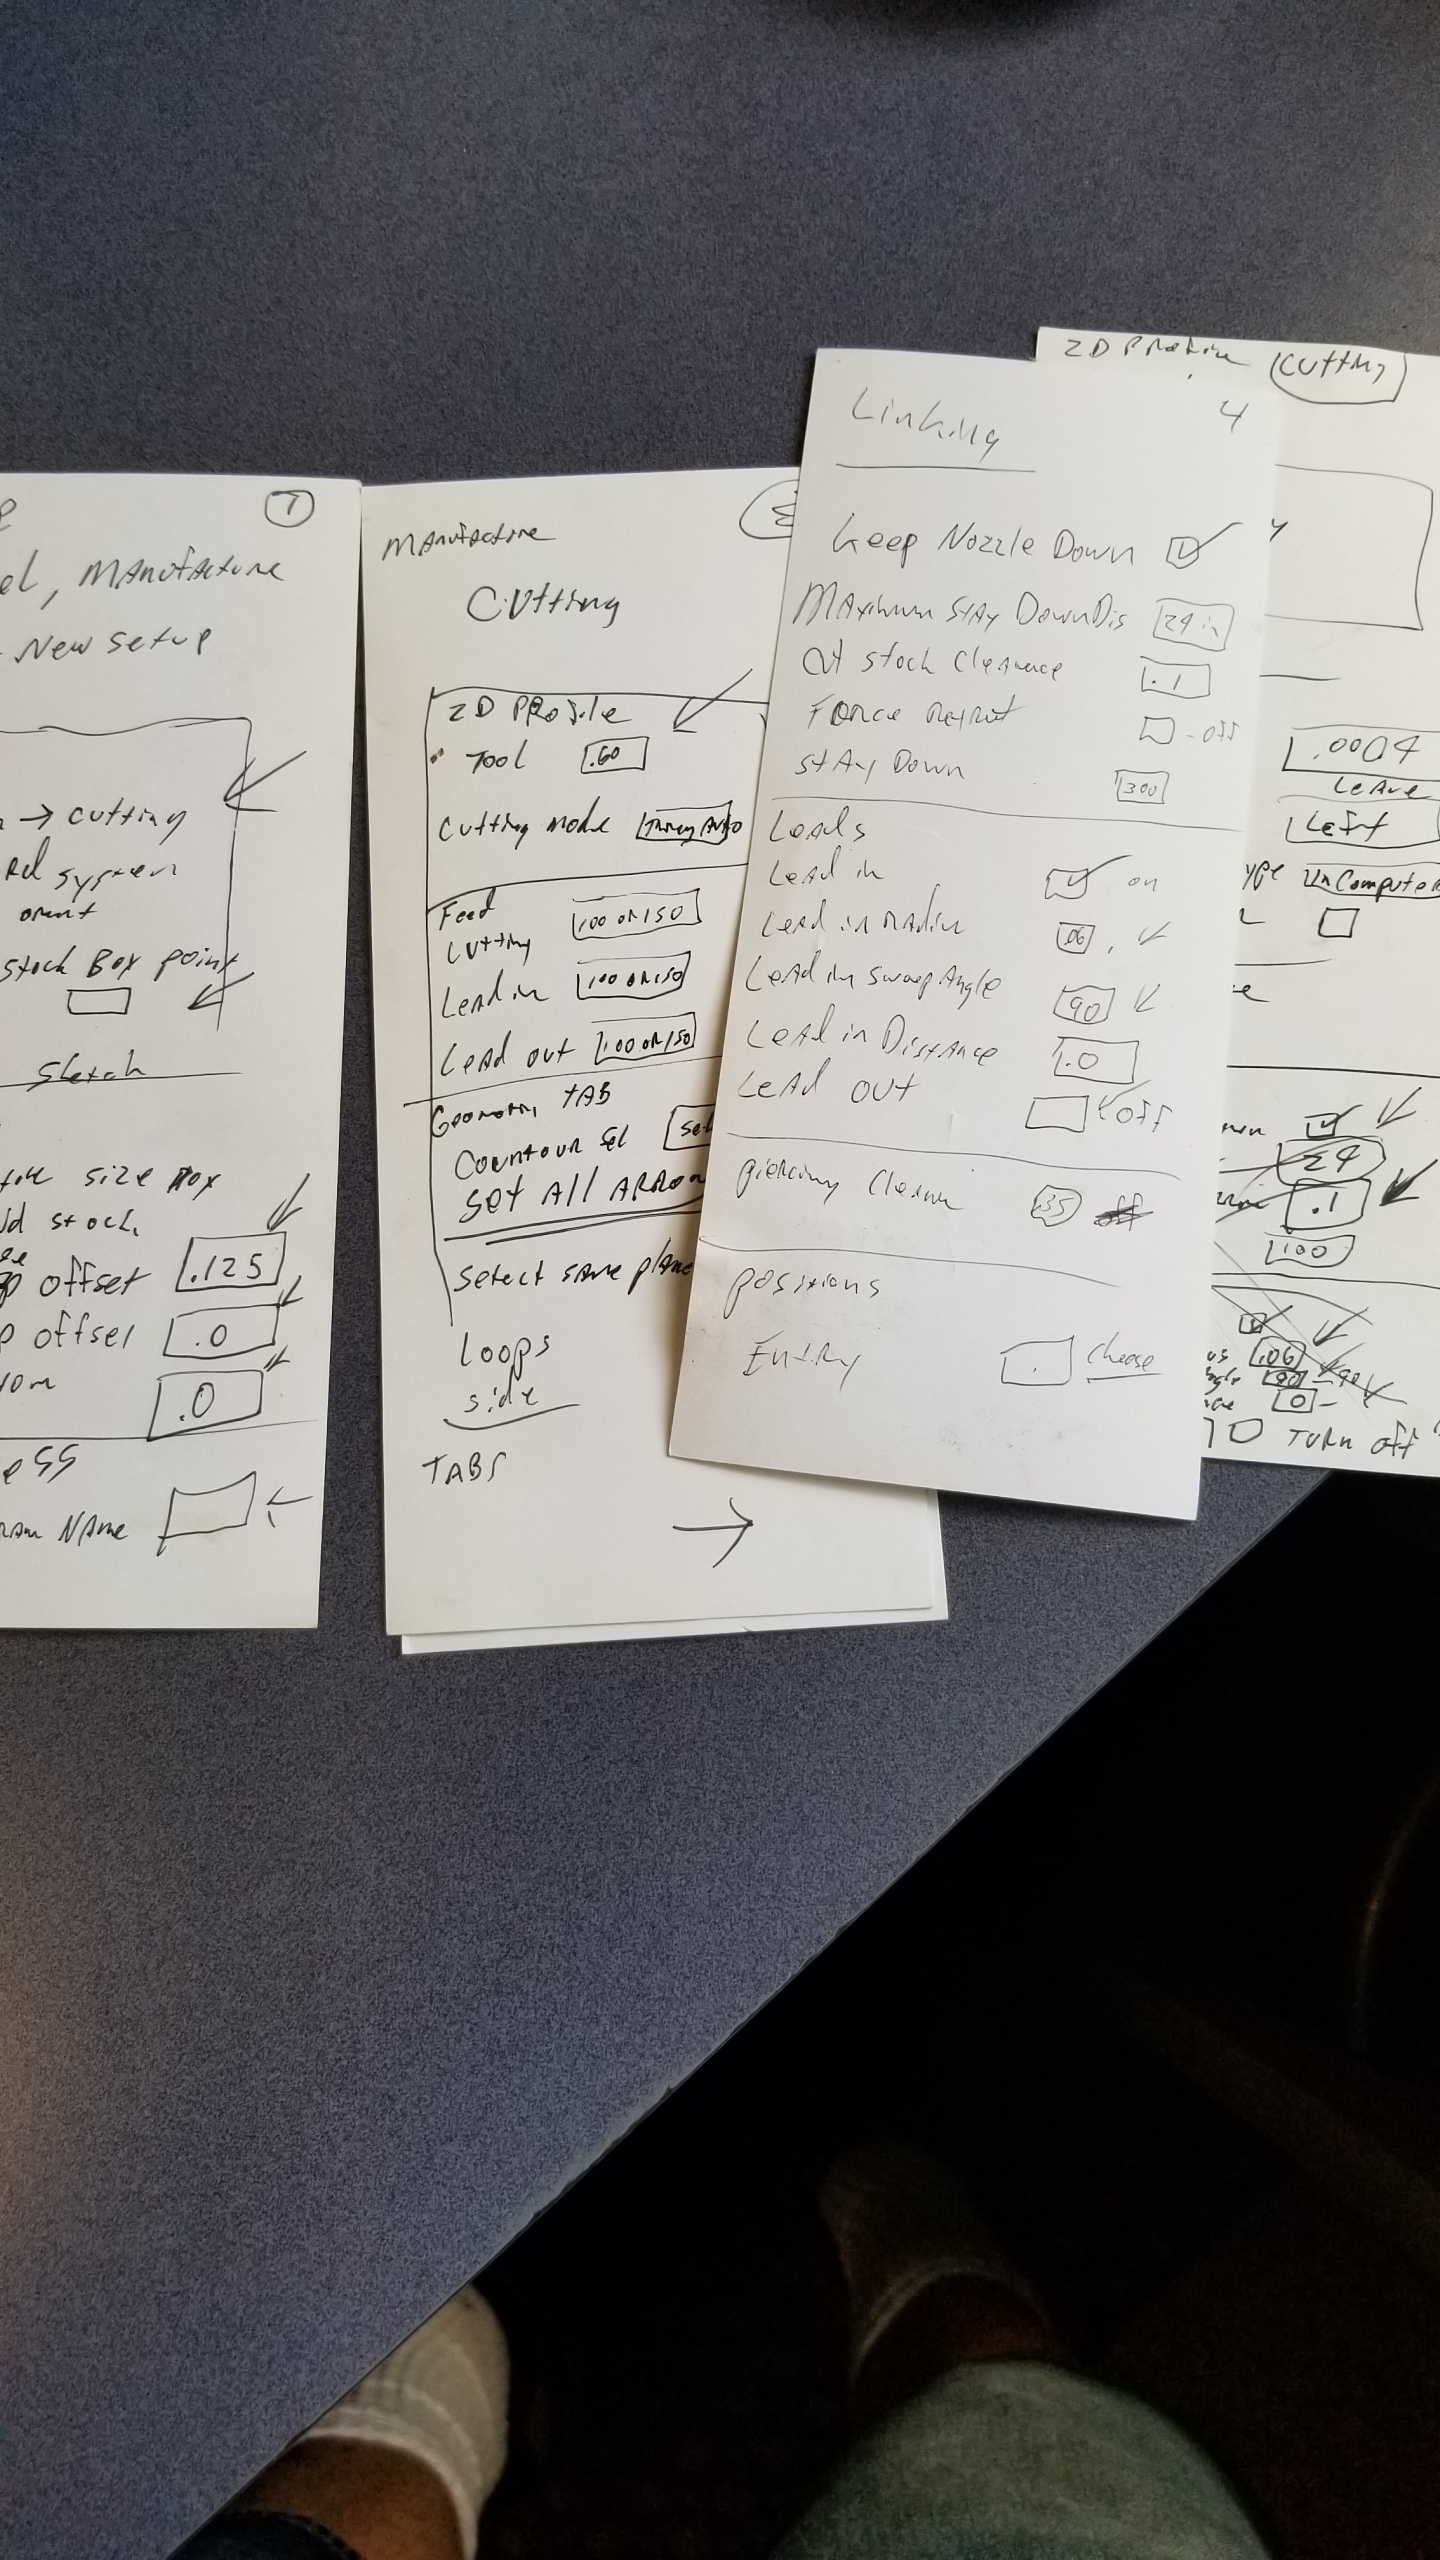
You have some of the settings messed up, stock clearance or something, make yourself a cheat sheet, go through the tool path video, use your stop play feature and make a cheat sheet for every option.
This way you can get them right everytime. There is too much to remember.
Your are choosing the wrong profile on your text, it thinks you want to save one thing but you want to save something different.
Man that’s what I do ,just like u have ,and more but I could be doing something wrong ,this is driving me crazy ,different thing on every project always different thing
Attach the file and I can take a look at it.
dxf or svg
Star is pretty straight forward so it’s got to be something in your CAM setup
Well if your goal is to get the star in the middle as the end result, the path that the program made is fine. The reason why the program rounds the corner is because the kerf of the plasma is a circle so the most efficient path around the corner is an arc.

These images are from one of my projects and it does the same thing so when you visualize it with the kerf of the path visible, it makes sense. The offset on your example seems quite exaggerated though, can you give me the size of your star and the kerf you have set? Also, can you give me an image of what the program gives you for the text?
I’m not sure exactly what’s going on with your tool path, could you sent this as a .dxf to support@langmuirsystems.com so I can take a look?
As for cutting text, check out this thread and let me know if it answers your questions:
http://forum.langmuirsystems.com/t/cutting-and-editing-text-in-fusion-360
1 Like
Meck what can I do to make this work as u notice most of the toolpath contour arrow are not in the place they are supposed to be ? If I click on them they go further away

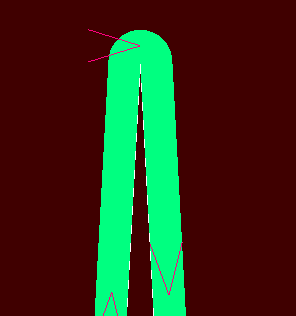
Here is my simulation on this project ,after I just did the contour for the 10th time ,this software is not to user friendly,so what am I doing wrong or is it the software?
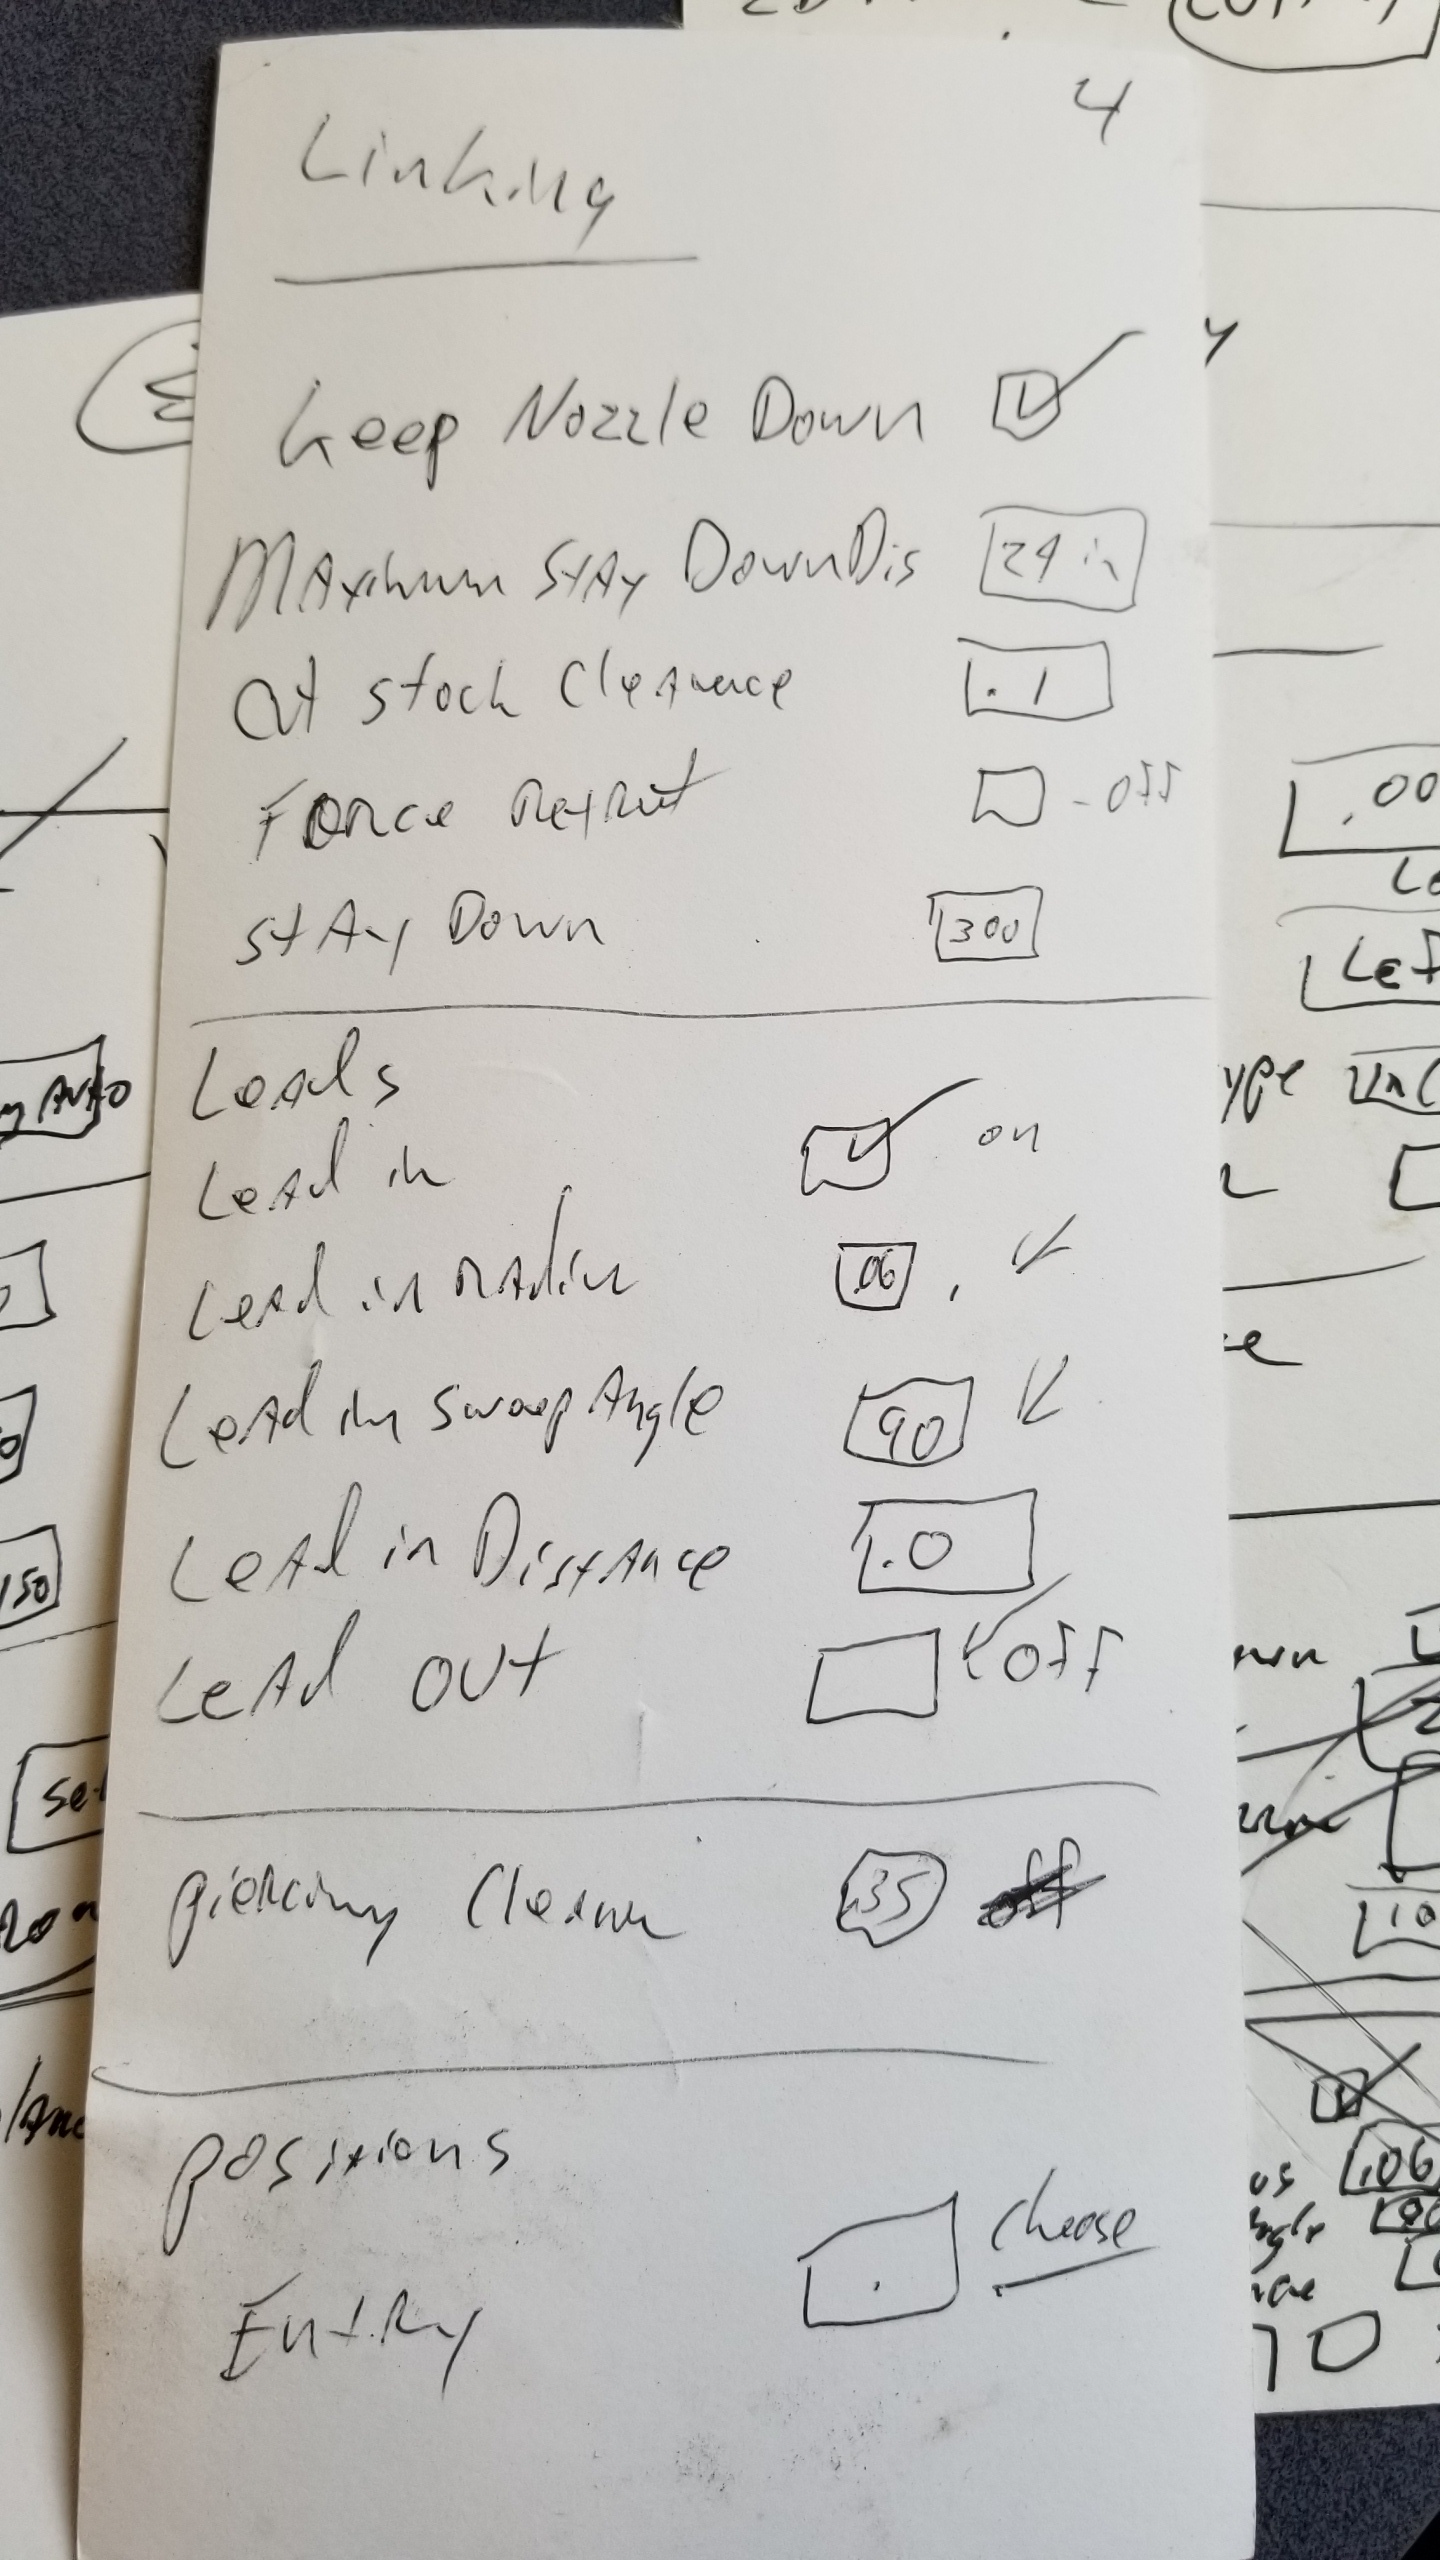
lead ins are too long. the little green lines. they have to be able to fit inside the contour somewhere. Thats likely why is skipped parts of the cut
I usually set my lead-in values to about twice the kerf or something like .1 or .12". I also prefer to use an arc instead of a right angle for the entry - 60 degrees is a good start. That keeps the torch moving smoothly vs having to make a sharp turn when it hits the path to cut.
thanks Javlin , I am using .06 for mylead in now , so u think it might be best to use a arc instead of angle bud?
I haven’t thoroughly tested this for myself…langmuir says 90 which I thought was odd because what James says makes sense about it with the seeep being smoother with an angle. I think on my thicker parts when I use 60° I get a little triangle where the the 60° lead out sweep is and I thought it might be because the lead out is cutting across where it was already cut, and the arc is deflected into the void, but I havent specifically tested this theory to see whats causing it
What do you use for lead-in radius?
I learn things on here all the time. I have been just eliminating the lead-in all together and I don’t like that it’s visible where it started&ended.
I don’t usually bother with a lead-out.
That depends on how much room you have in the cutout part - sometimes you have to come straight at it but most times I stick with a lower angle like 60 degrees. I think Langmuir’s was a suggestion/example for the part they were cutting in the video.
I think .125 - I’ll check when I get home.
That works for thinner stuff because the pierce is quick. For thicker stuff you won’t get the full pierce before the torch moves along the line. The spot it makes when it establishes the arc & starts the lead-in should be on the scrap - make sure you’re setting the toolpath for that side so the extra little hole & lead-in cut are on the scrap piece, not the part you’re keeping.
10/4 James thanks bud