Love your shop…ugh…non…homo…
Would love to have that much room!!!
great setup, so what kinda animals you got?
Kind of a reverse A.M.A. thread…what kind of tacos you like 
Love your shop…ugh…non…homo…
Would love to have that much room!!!
great setup, so what kinda animals you got?
Kind of a reverse A.M.A. thread…what kind of tacos you like
The joists/rafters above your table aren’t going to interfere with your forklift as you move work to your table are they?
Bahahah. Forklift. I’m working out of a two car garage and I have a full time day job. This is a very improvised “shop”.
I still need to add my fold away beams for the little loft I made to support the outside corner.
Any sheet I have delivered will only be 16 or 10 gauge. That’s the heaviest that I’ve had so far. The guy helped me slide it onto my welding table then push it up the driveway. I’ll probably be picking up the heavier stuff straight from the supplier. I’ll back the trailer into the garage and cut it to a manageable size on the trailer then slide it onto the table.
I wrangled my 3x6 1/2 steel table top onto my welding table from my trailer with jack stands and cribbing. The loft you see is barely bigger than what’s in the picture.
I have two schnauzers and a doodle, and probably Fish tacos. Lol
Honestly, I wish I had a goat shack.
Did some measuring today. With my table height, and trailer height, as long as I build a little stand of some sort to toss in the trailer, I can back into my garage and slide a 4x10 sheet straight to the table. I run with the table up against the wall, so I can’t pass it all though, just the extra foot or so. Looks like as long as I plan what I’m cutting and put the lightest sheets on top, I’m good to go.
This will be perfect for the 3/8 AR500 since I know exactly what I’m cutting out of it and can just chew through both sheets the same day.
Just sharing the idea of using the trailer to load material, as well as my excitement for a problem solved.
Sounds like a plan, just wrestling 4ft x 4ft 14 gage is moar of a beotch than I thought it would be, anything heavier will def. Need to be in the 3ft x 4ft range, my compressor “wall” is in the way.
And fish  are great…as well as any other a taco is but a vessel for happiness
I realized after I posted that it will be damn hard to slide the material, so I’ll left each piece with cribbing and lay some pipe sections down to roll it off. Should be fun. I’ll have to bribe my buddy with more targets.
I was thinking about that while lifting 12g 48x40 onto my table. Thinking about a 2500# HF Badlands 120v winch to hang from the ceiling in front of the table. I can then snatch them up out of the cart I am building, and lay them on table with a little sideways push, and ease down.
Hope it will simplify guage changes… ![]()
I forgot they had a 120v one. That’s a good idea!
Been cutting a lot! A few fire pits, some target stands in preparation for the AR500. Got my electronics all moved out from under the table. I had no idea how bad everything would splash once you start cutting near the edges.
Also extended my air compressor intake so it’s no longer taking in the dust and fumes from cutting since it’s so close to my table and under my loft. Now it just sticks through the loft floor and sits under a shelf out of the way.
Not great placement for the compressor but I truly have no other option if I want to use my garage as a shop.
Cool! Nice design!
Where will you use it?
How many segments did you have?
What method did you use to align each section?
Easy there Robert Muller.
Lol
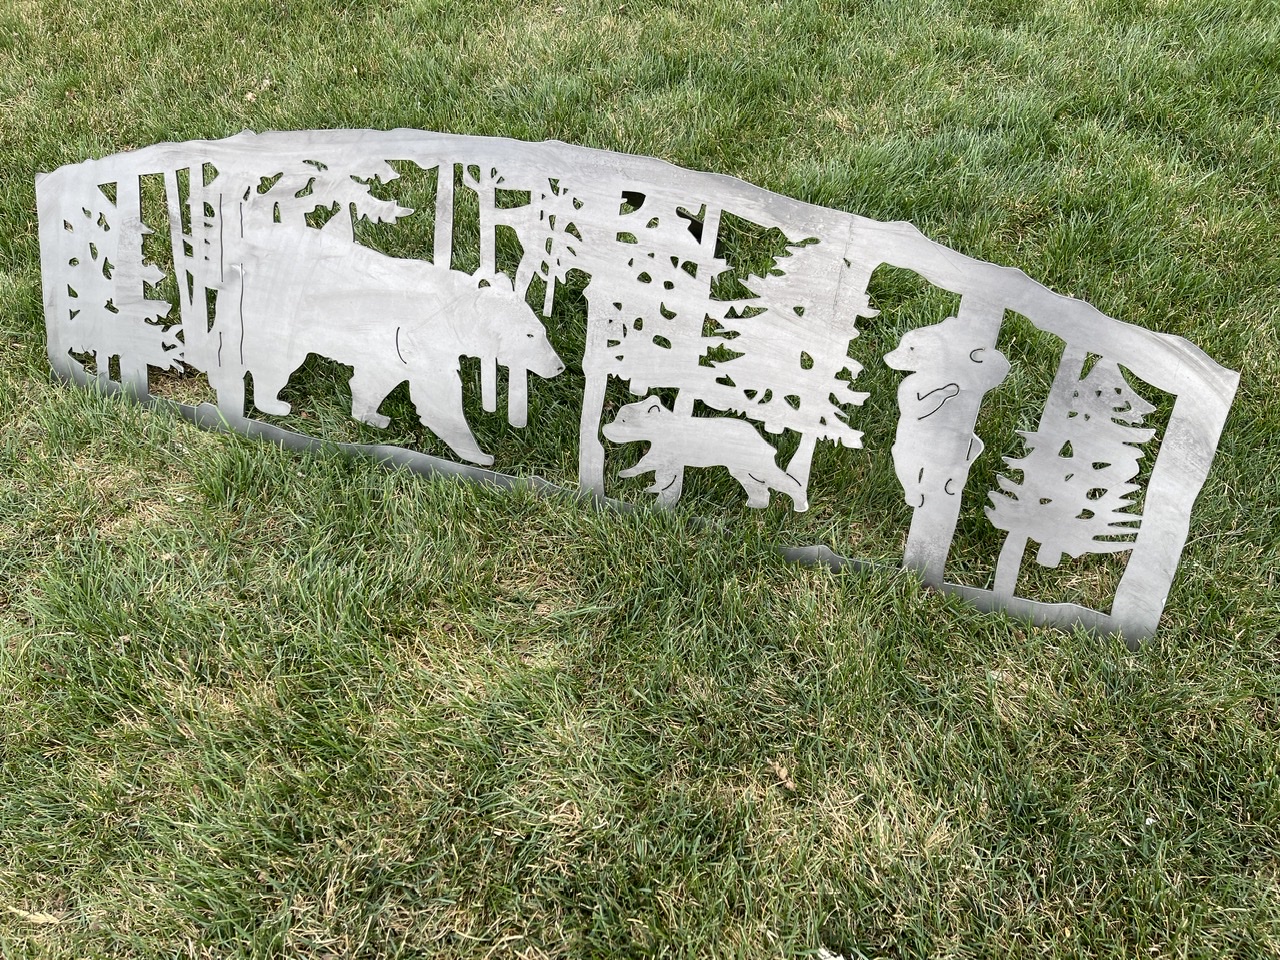
It’s going to be on top of someone’s gate, they wanted one for each side. The “customer” is a handyman that does side projects for people. Perfect customer for me, I can design and cut and not worry about the install.
It’s 5 feet, so just two segments.
I googled how to do this, read for 4 minutes then had this idea pop in my head. Added a 2x2 angle bar to the left side of the machine then spaced out another inch with square tubing. I picked a spot as close to center as possible in the design that had the fewest lines to connect. I then drew a line down that spot, then broke all the paths I also added lines on the outermost edges so that when I imported into sheetcam they would automatically line up since they were all the same overall size. I did two separate program files in sheetcam. All the connecting lines were now open contours on their respective halves. After the first half cut, slid material up, checked via dry run, looked right then hit cut. Didn’t brace it properly and the sheet pulled up a bit throwing off the index, but you can’t tell unless you look at an angle to see where I sanded. Maybe an easier way to do this, but this is what made sense for me.
Nice! 
WOW!
I AM IMPRESSED!
Planning that must have taken quite a few beers!
Great job, kudos to your PD for presenting such an emphatic statement.
Thanks! I learned a ton on this. Like using a wide angle lens to take a photo, then referencing measurements on screen that were taken in person…… is not good. But I’ve worked out a system to be able to reproduce this in the future much easier. It was a lot of fun to figure it all out.
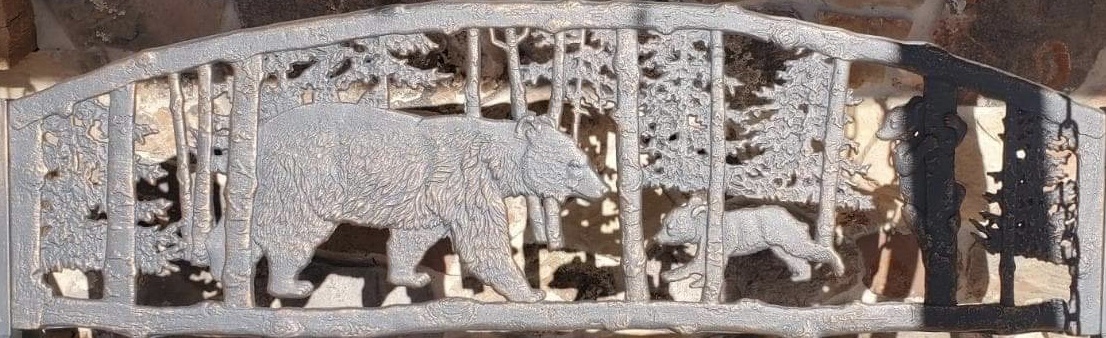
Very nice! How are you getting that finish are you just sanding through the mill scale in some areas and leaving it in others then clear coating or are you painting it then sanding off some paint? I love the look!
I didn’t look close enough before responding ![]()
It is a nice way of going about it. p&o with a light sand and a clear coat can look great.
I buy hot and cold rolled 16 gauge. I then sand through the mill scale just a bit. I finish it with odies oil. A clear coat makes it too shiny to me. Odies keeps it looking natural.
Why make stuff out of metal when no one can tell it’s metal? Plus I hate painting. Lol