Hi I’m look for a wiring diagram with in the stepper motor plug so i can make a rotary cutter.
Thank you tom
Hi I’m look for a wiring diagram with in the stepper motor plug so i can make a rotary cutter.
Thank you tom
When I built mine, I just took off the cover of the control box and looked at what pins of the D-9 connector were connected to the stepper motor driver A+ A- B+ B-
I used something like this for the rotary:
https://www.amazon.com/Reducer-Center-Tailstock-Indexing-Stepper/dp/B0B5CY22G7/ref=sr_1_6?crid=78D83BCTVVA0&keywords=stepper+rotary+axis+100+mm&qid=1684766441&sprefix=stepper+rotary+axis+100+mm%2Caps%2C98&sr=8-6&ufe=app_do%3Aamzn1.fos.2b70bf2b-6730-4ccf-ab97-eb60747b8daf
I also connected the rotary to the X - axis of of the control box with a D-9, A-B switch.
Hi, Dave do you have any picture of how you hook yours up also what type of rotary plasma cutting software program for to cut tubing . thank you
I’ll try to grab a picture this weekend…if I forget just poke me again.
I use fusion. I use a technique similar to this for tube notching Fusion 360 - Unfolding Sheet Metal Tubing - YouTube
Here are some pics:
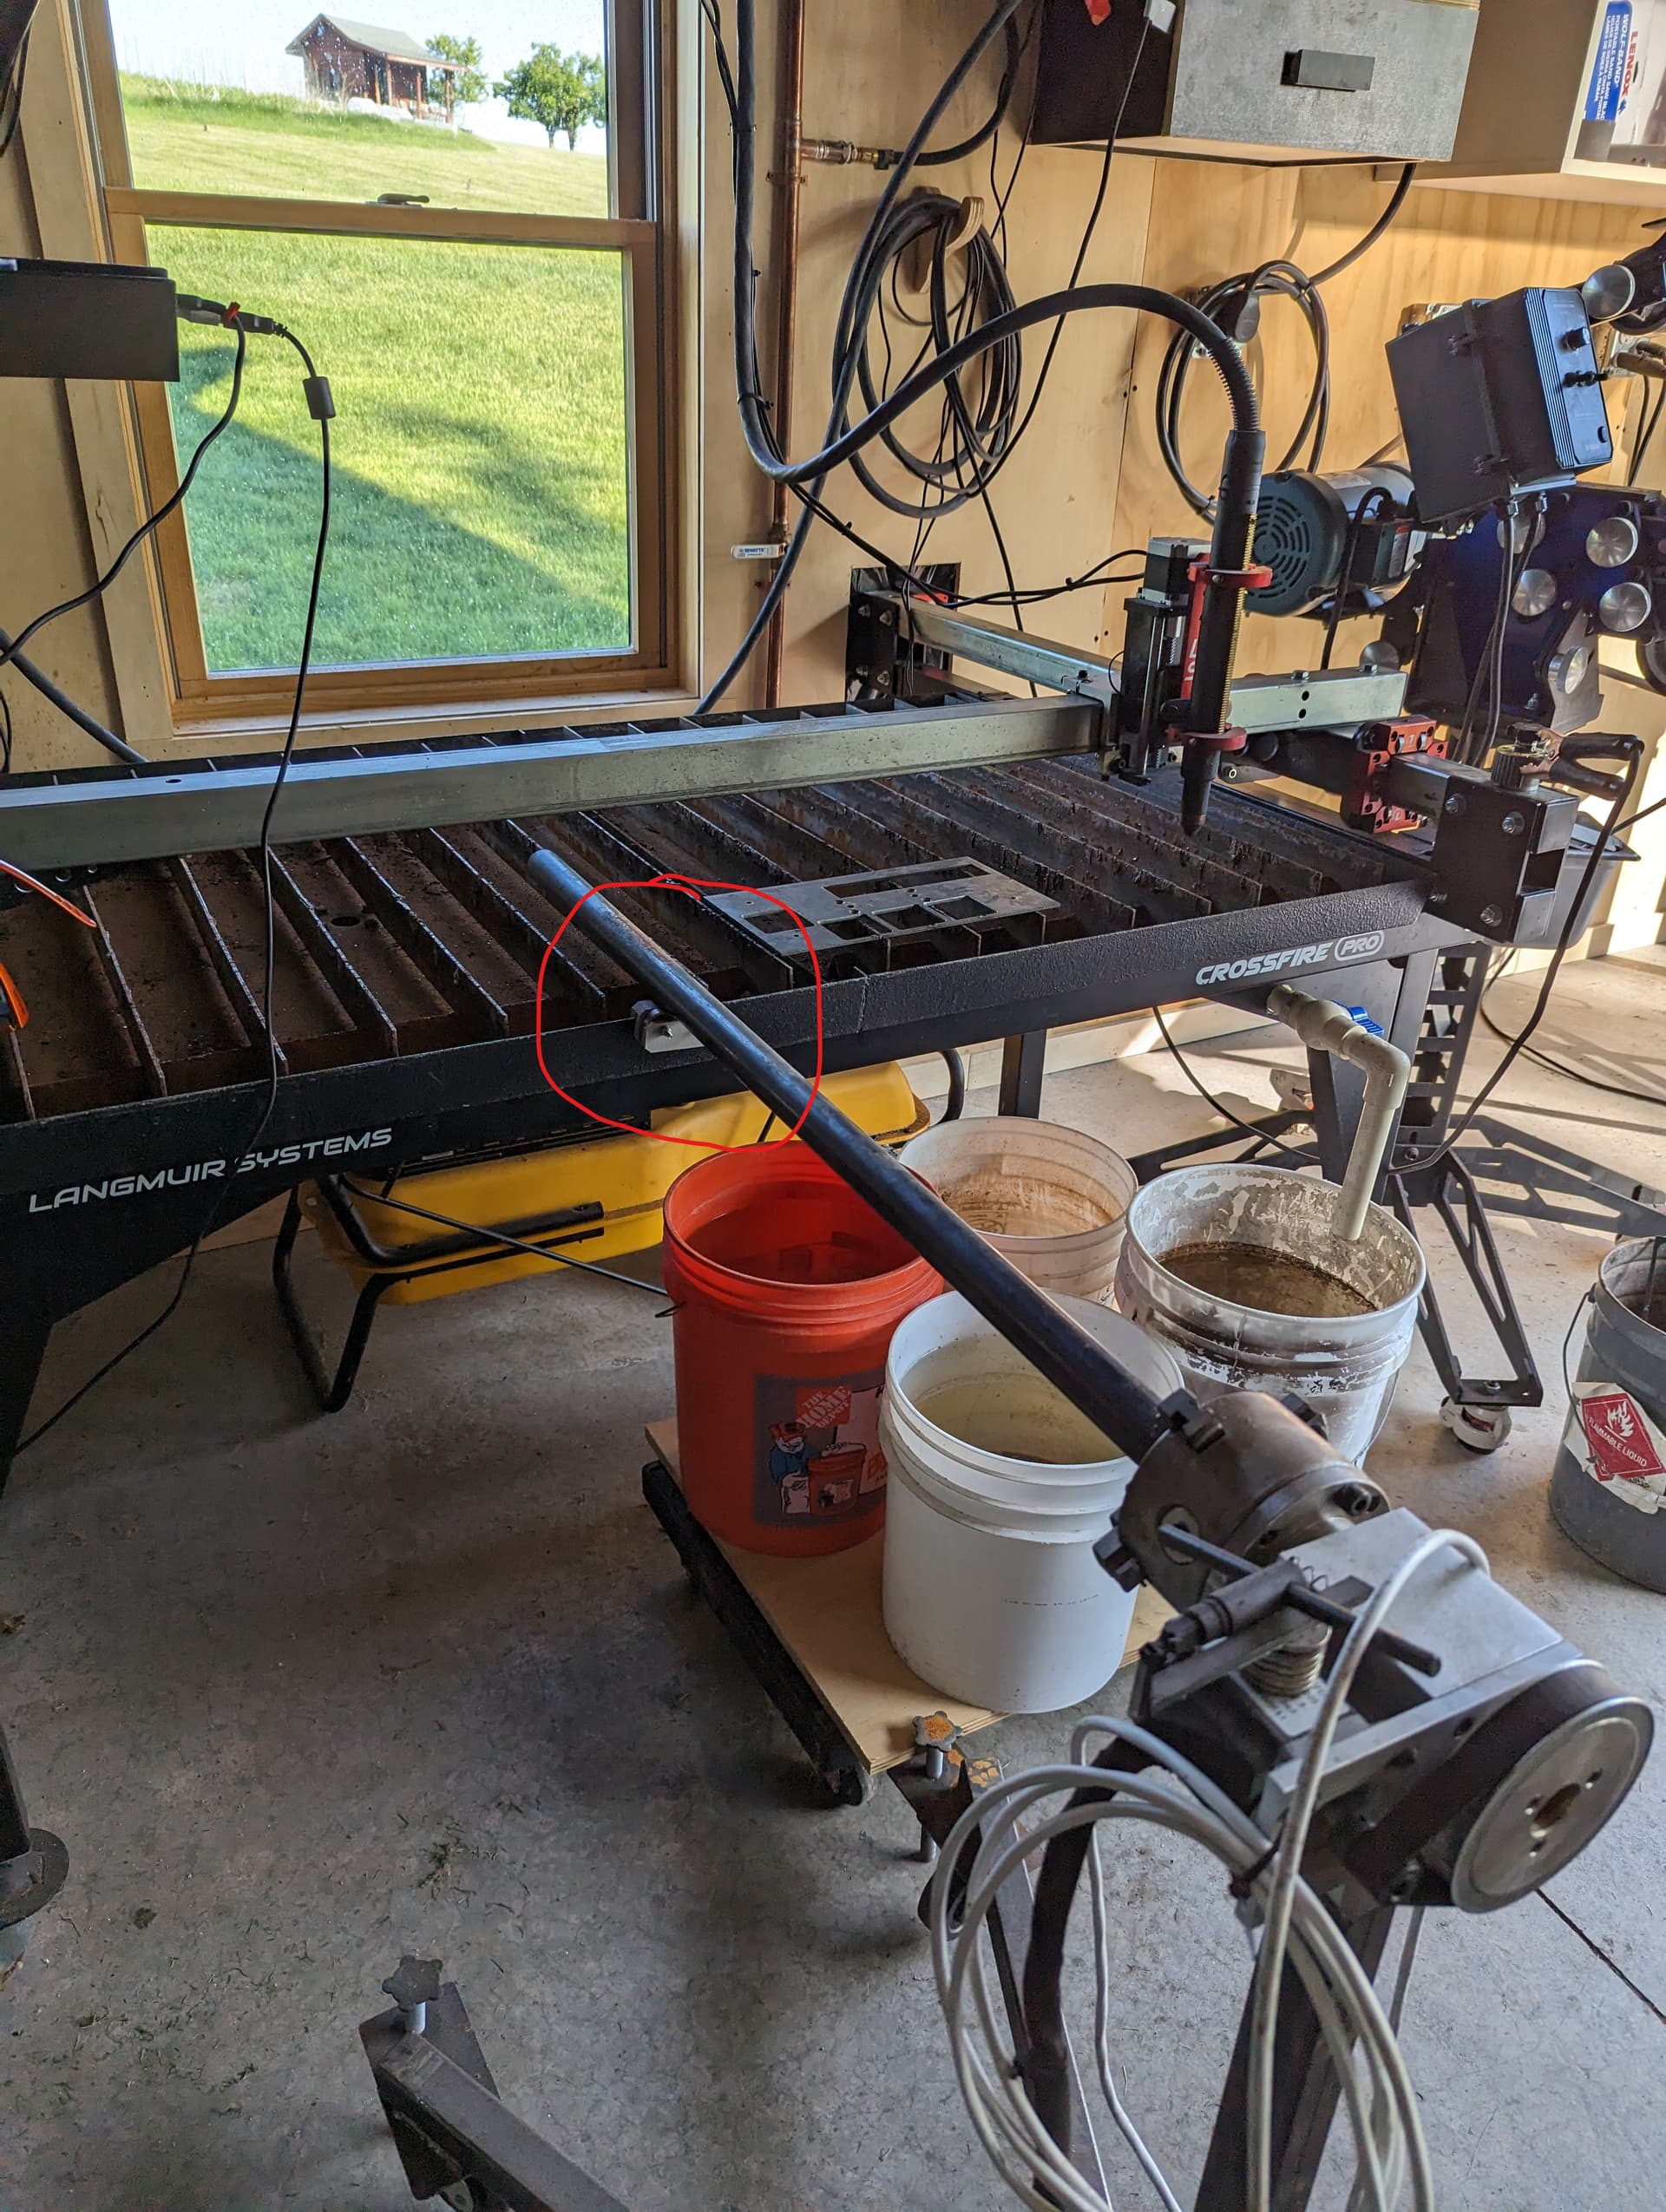
Here is my DB-9 A-B Switch Box. Recall an A-B box connects either all of A’s or B’s 9 pins to the 9 pins of the output. The red X is the A-B box velcroed to the table. The red circle shows the output connected to the X axis connector on the table controller. One A-B input goes to the X axis motor connector (that comes with the table) the other goes to the rotary’s stepper motor (I don’t have it connected in this picture as I had the rotary put aside for awhile).
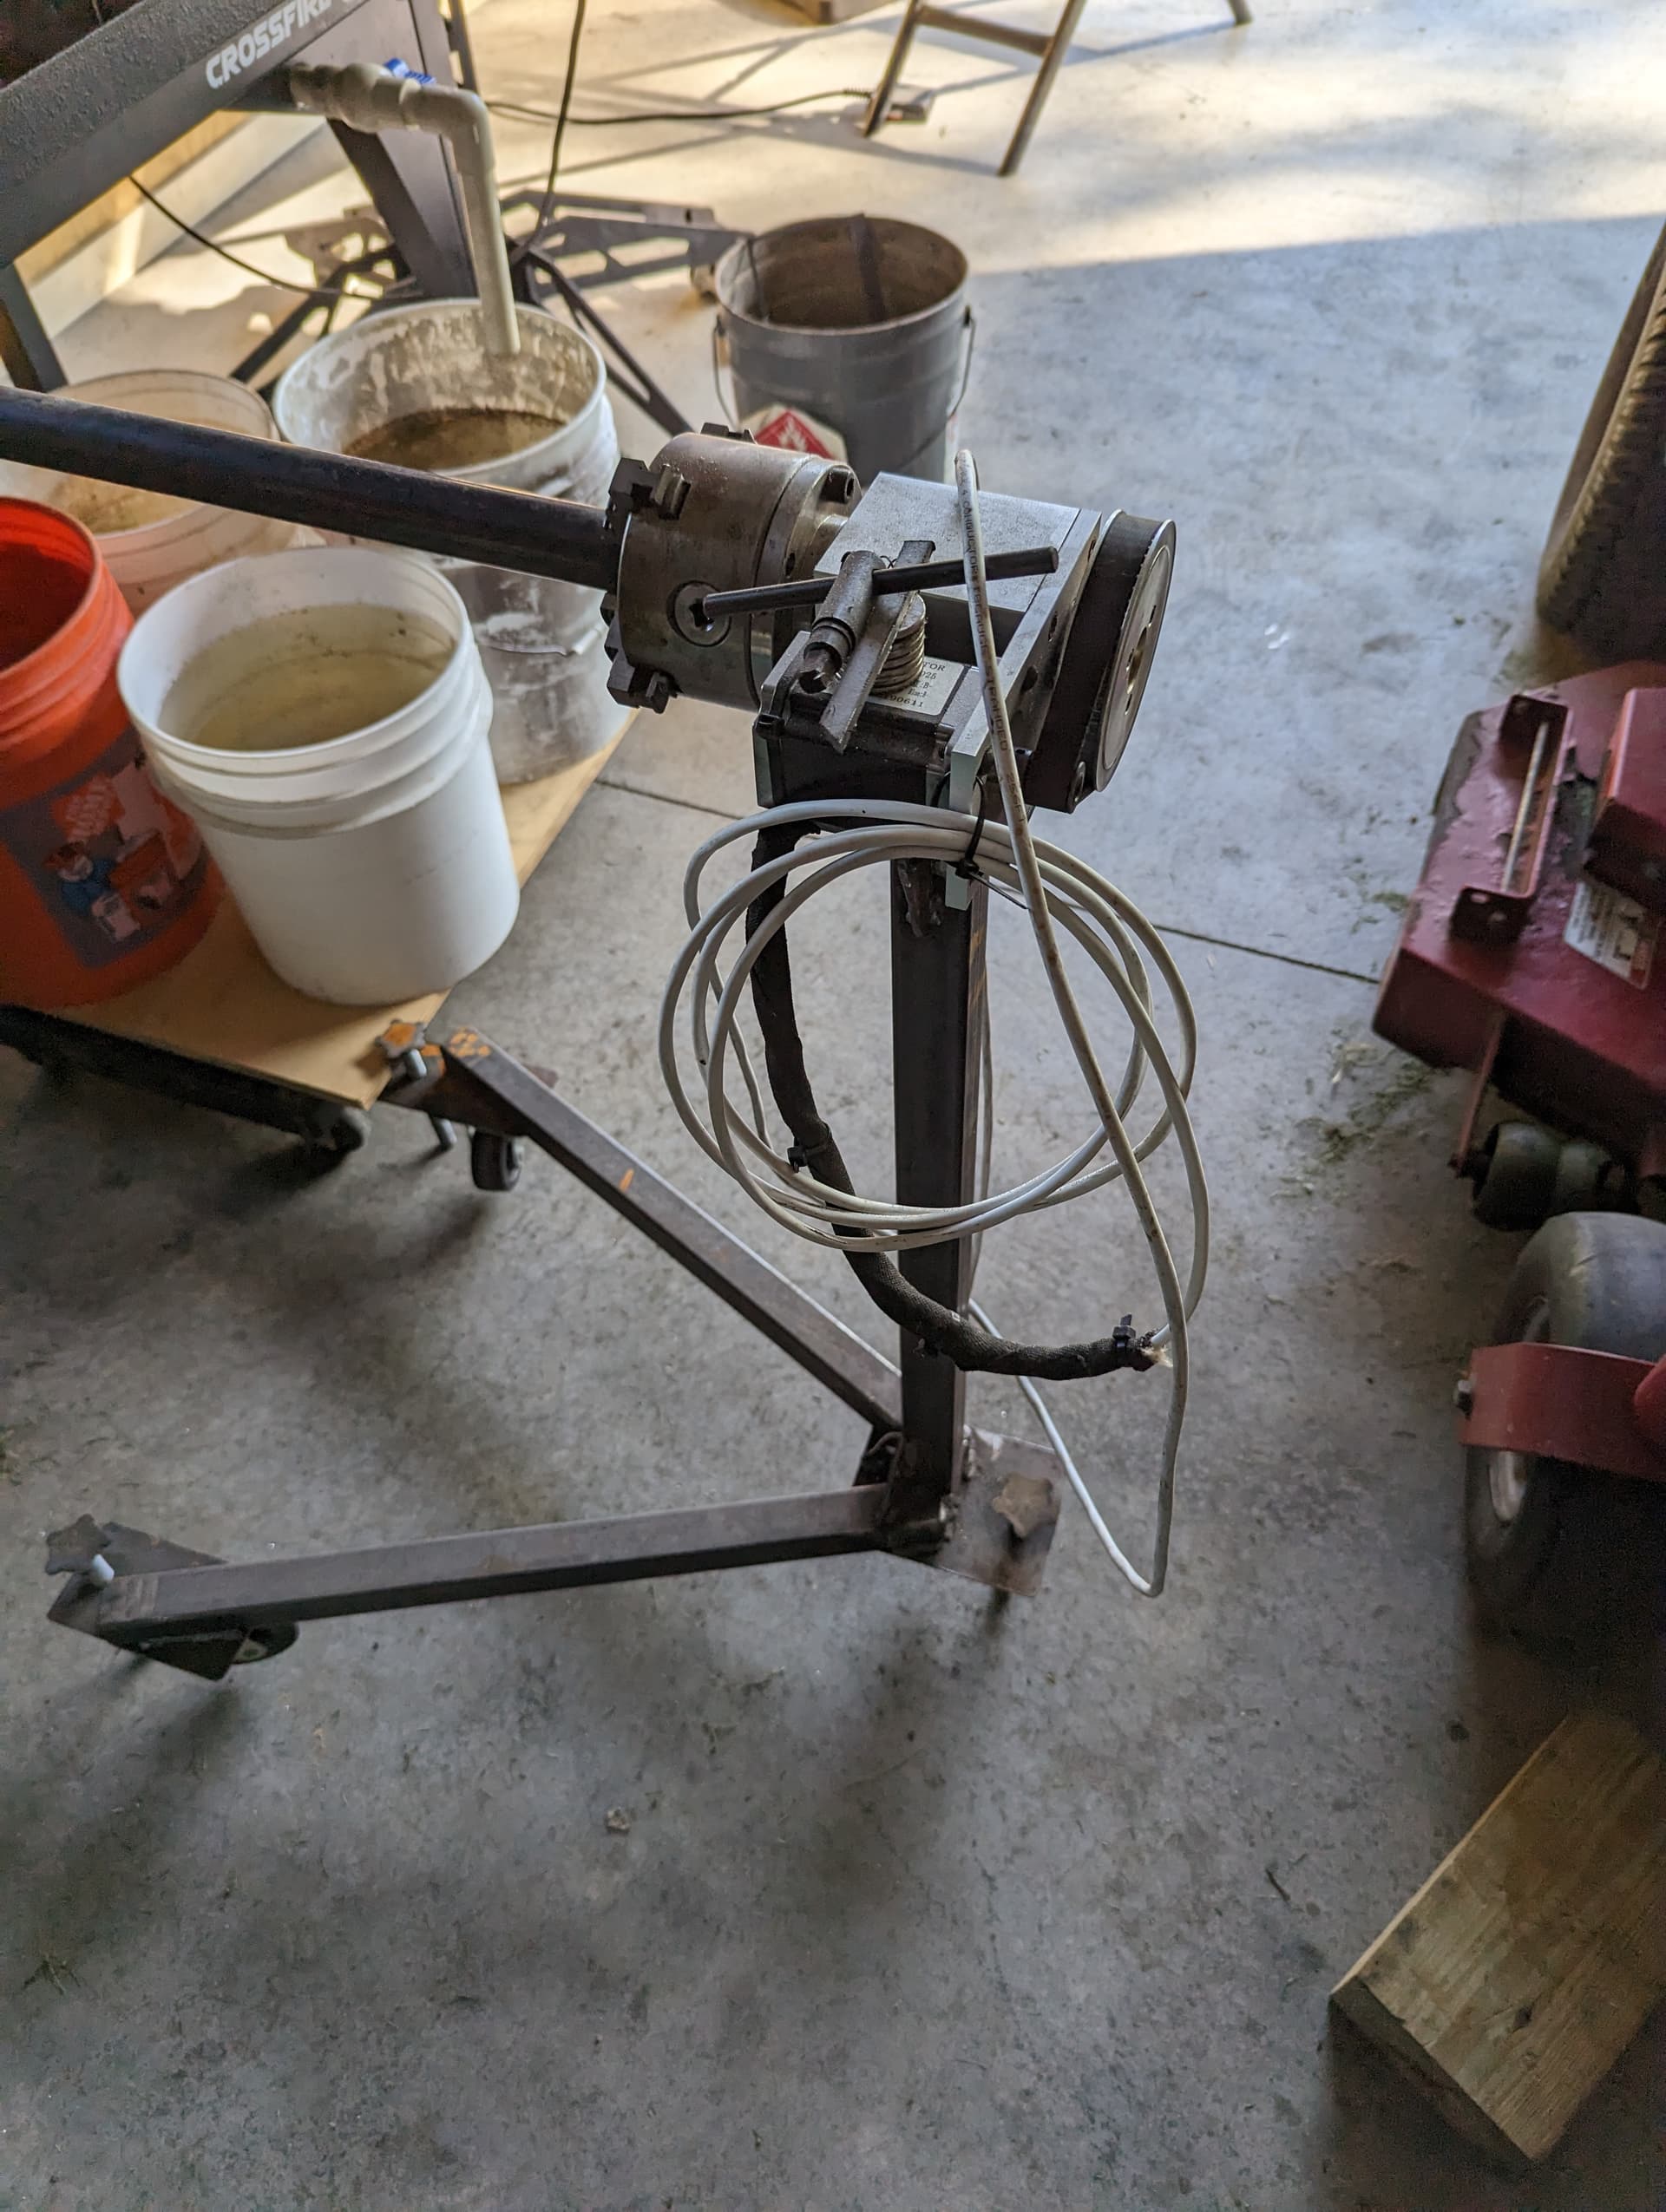
Here is one picture of my rotary and the stand. Note the red circle, this is a 3D printed part with cheap bearings to guide long pieces. Works surprisingly well.
Here is one more pic of my “quonset hut” leveling stand. I call it that because it was supposed to be a temporary prototype and of course I never changed it ![]()
Side note, you can also see big pile of magnets in the last picture on top of the rotary…One of the best tools around…I have them all over my shop…Seriously try them.
Hi, Dave thank you for the pictures nice set up I’ll be buildings mine soon .
Hey Dave what type of magnet are they ? And where did you get them.
Okay thank you one more thing , Did you buy the plug and wire or did you make one.
thank you
Excellent work. What do you think of adding not only a switch for the rotating assembly but also a feed axis? I’d like to cut full length 20’ tubes. I was thinking of using your rotary set up but then having it on a rail so it can be switched out for x axis to feed the tube in as it cuts. I’d leave it permanently set up on the far side of the table so all I need to do is bring the torch over the tube end and then switch both x and y over to activate the rotating and feed axis.
Was the rotational travel on this set up equal to the y axis ratio? Sorry, I’m trying to get my head around this.
Because you use the fusion unwrapped tube drawing does this overcome the issue of different diameter tubes needing to rotate at different speed ratios in order to match the programmed Y axis settings?
I’m definitely interested in following your design.
Hey Daniel…Ummm I am not sure I get the question but let me take a stab at it.
The diameter affects the x-distance (when it is unwrapped in fusion) as in 2 x pi x r. For example a 100 mm diameter tube needs to move about 157 mm to turn 180 degrees while and 50 mm tube needs to move about 79 mm to achieve that same 180 degrees turn.
So to make that so, I change the X steps/mm parameter in GRBL as mentioned in this thread. And what that does is calibrates the X axis.
Since the Y axis is already calibrated from Langmuir it already moves the correct distance in the Y direction for notching. And yes, as you infer, notching does require simultaneous X and Y movement.
Regarding the 20’ pipe, I haven’t used my setup for anything longer than 10’ put I think it could work. What I do is I have a 3D printed roller skate bearing device that clips on the water table and I have a crude but effective height adjustment for my rotary giving me two points of support for the tube.