No problem. Your kerf will change with thickness also when adding new tool. Took me a few months to figure it all out and nice once you get your stuff setup because it’s easy to change. Fun hobby
1 Like
Sounds like low speed dross. This is a good resource to help tune your cuts related to dross.
As Don said that’s way to slow for 16ga. In fact you should be at least double that for 11ga at 45 amps.
2 Likes
I use a brick chisel to knock off as much as I can when I get excessive dross. Once you get good at using one you’ll be amazed at how much you can chip off faster than grinding. I got a basic chisel from Lowes.
3 Likes
My confidence is rising.
The stock is 1/8" and I upped the speed quite a bit over yesterdays attempt. In fusion I had the speed set to 150 ipm, but in FireControl I slowed it down, varying it between 80 and 90 percent of speed.
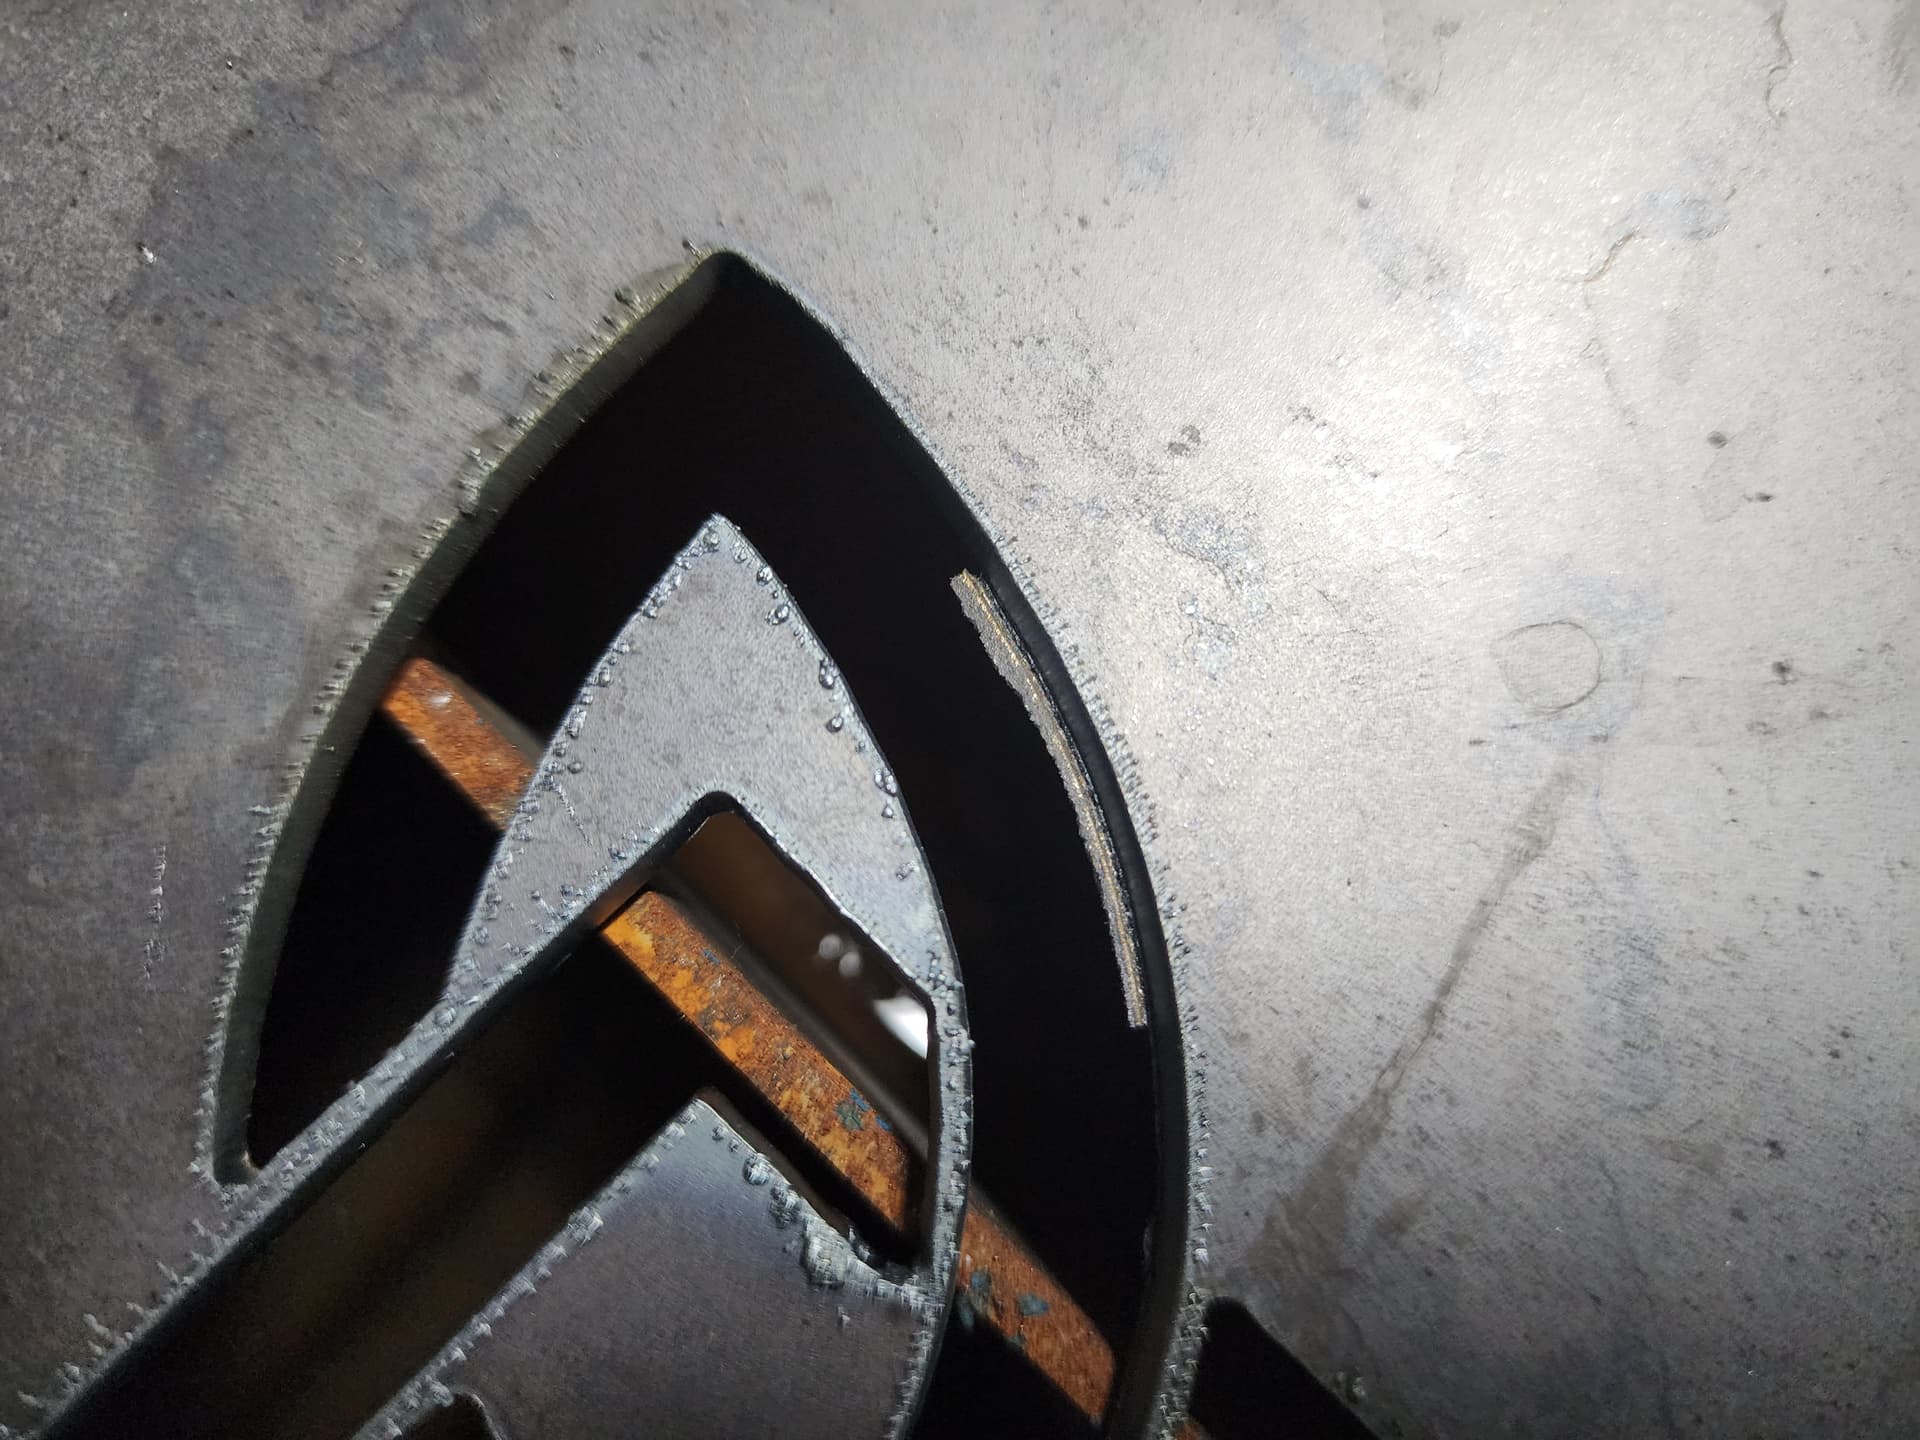
My dross was way better with a lot of it coming off with just my fingernail.

But I think I could have gone slower as there were some spots, especially in some of the curves, where it wasn’t cutting all the way through. I had feed optimization on at 65% but the radius was set at .55 inch and most of the curves in the sign were larger than that.

Fusion360 was also giving me a hard time. There was one piece of geometry it wouldn’t select no matter what I did to the lead-in/out settings. It was one of the smaller segments in the right side corner art. Which made no sense as it was a mirror of the left side and it had no problem selecting the left side. I finally deleted that segment and re-mirrored it. Then Fusion had no problem selecting all of the geometry, even with me using a small radiused lead-in and lead-out. Go figure. I’m about ready to just drop the $150 on Sheetcam just for these more artsy projects.
Oh, and I learned an important (duh) lesson. Make sure I have needle nose pliers or a magnetic wand handy to grab tip-ups so I’m not tempted to grab it with my fingers without thinking about HOW HOT IT IS!!! Ow…
4 Likes
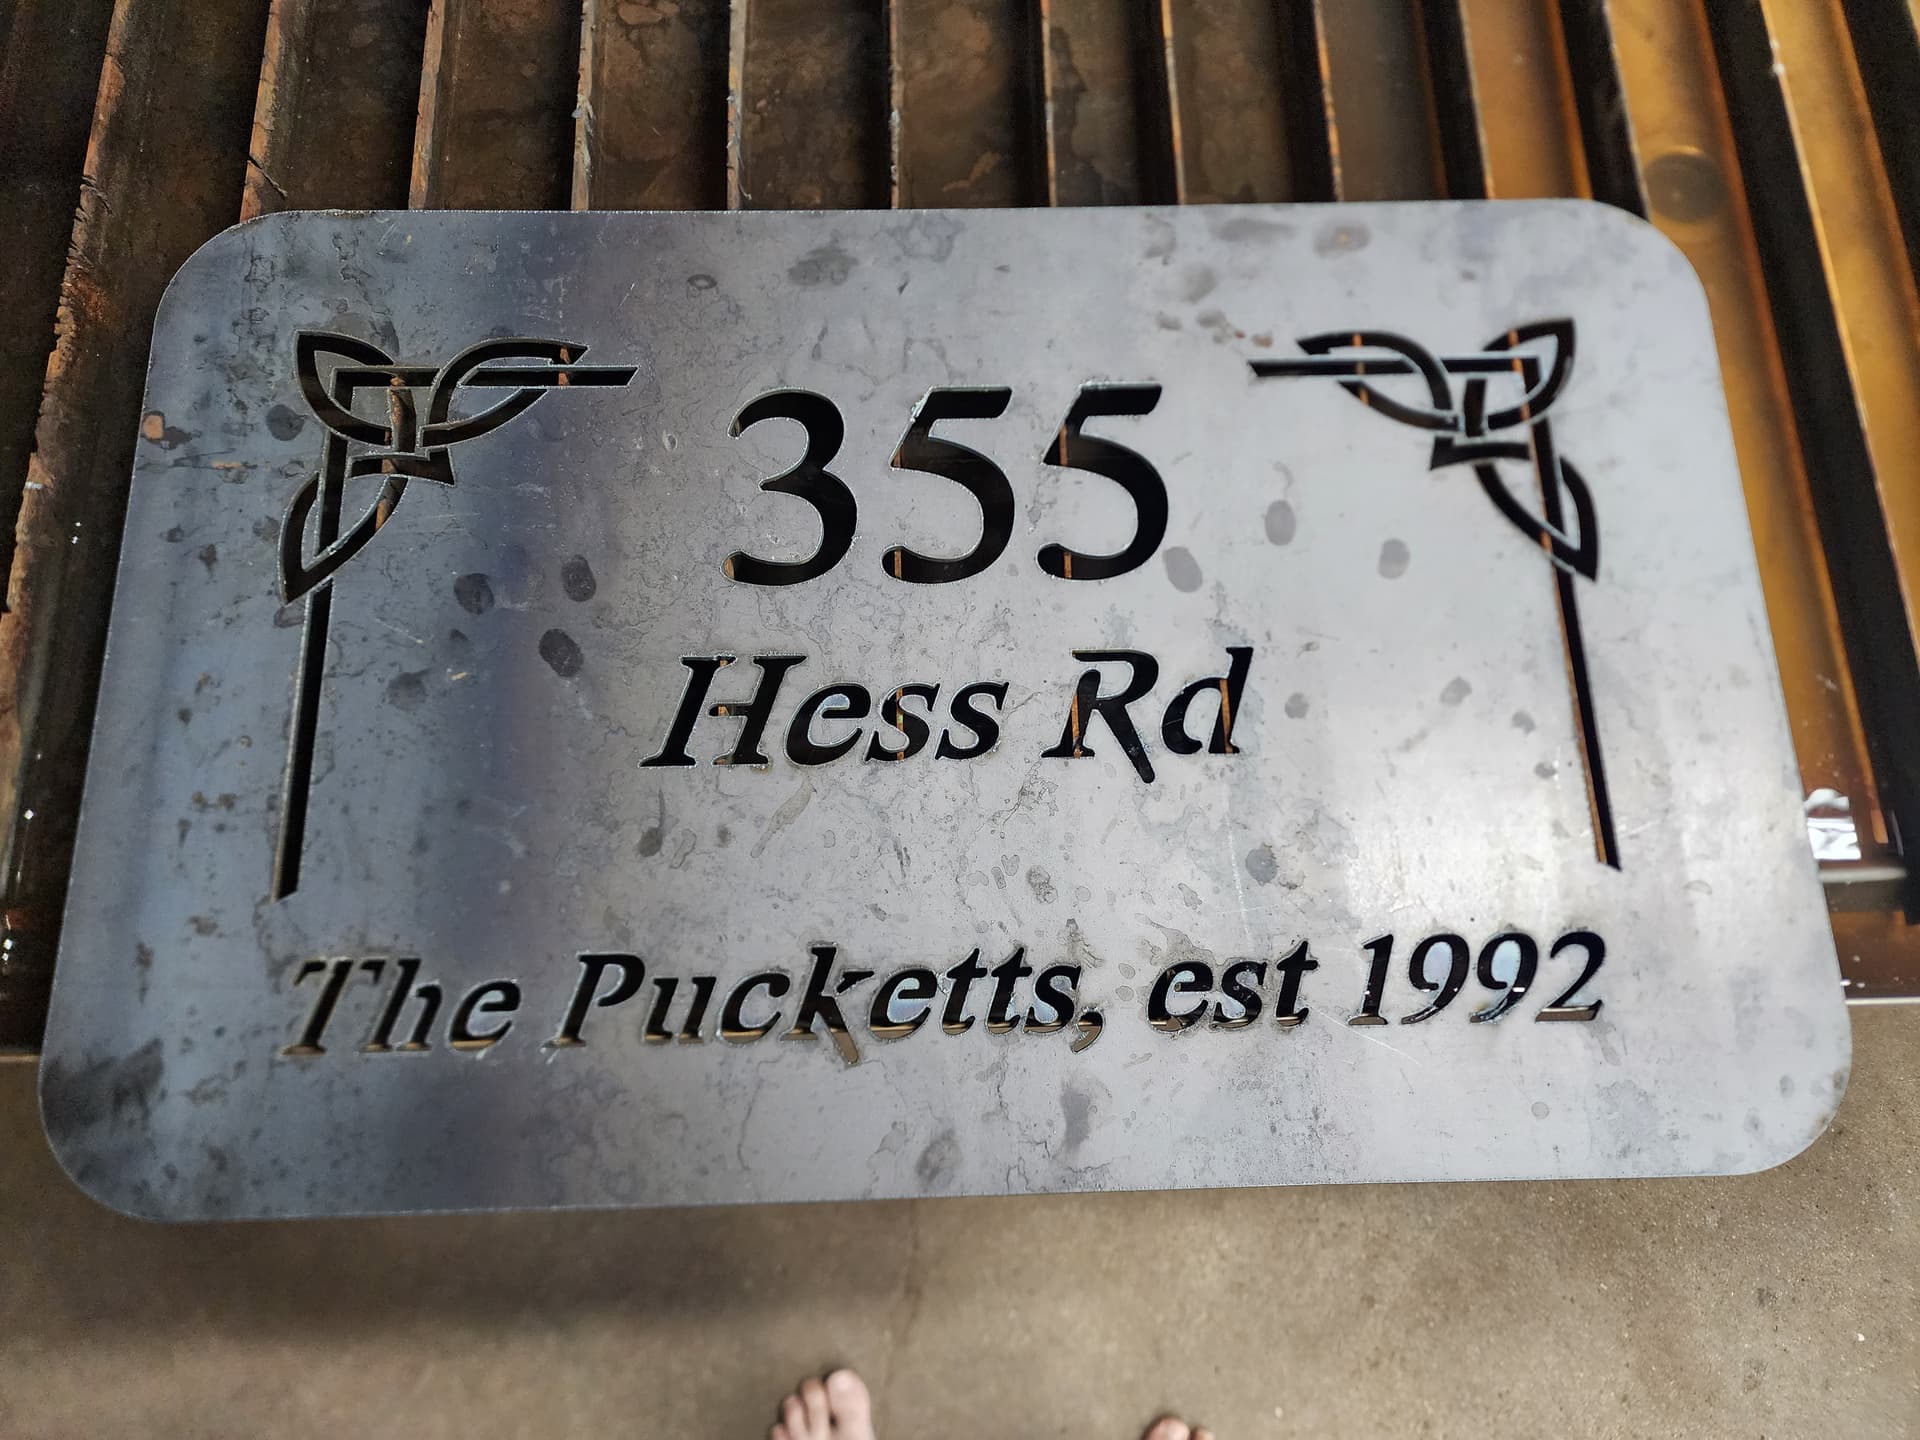
Last Sunday I cut another address sign for our neighbors and another Princess sign for my other granddaughter. Maybe 15-20 minutes of cut time. Before that I ran my desiccant beads in the oven and got them back to a nice dark blue. After 15 minutes of cutting I noticed the beads were well on the way to faded out at least half-way up the window. (The heat and humidity here in Indiana has been brutal this year.) Now keep in mind that this is a small desiccant filter from HF so I already have plans to upgrade it, but this really brought home that I need a much more robust dryer ahead of the desiccant.
First, my current setup.

Starting on the right a filter/water separator then my oh-so-small desiccant filter, then a motorgard m60 to a 3/8 inch whip to a regulator filter to another 3/8 inch whip to my Titanium 45 plasma cutter. I feed it with my 3/8 inch hose reel line from my compressor that’s behind me in the picture on the other side of my 2 car garage. All of the quick connect fittings in my system are High-flow fittings.
Now, let me introduce you to my poor-man’s refrigerated air dryer, construction still in progress.


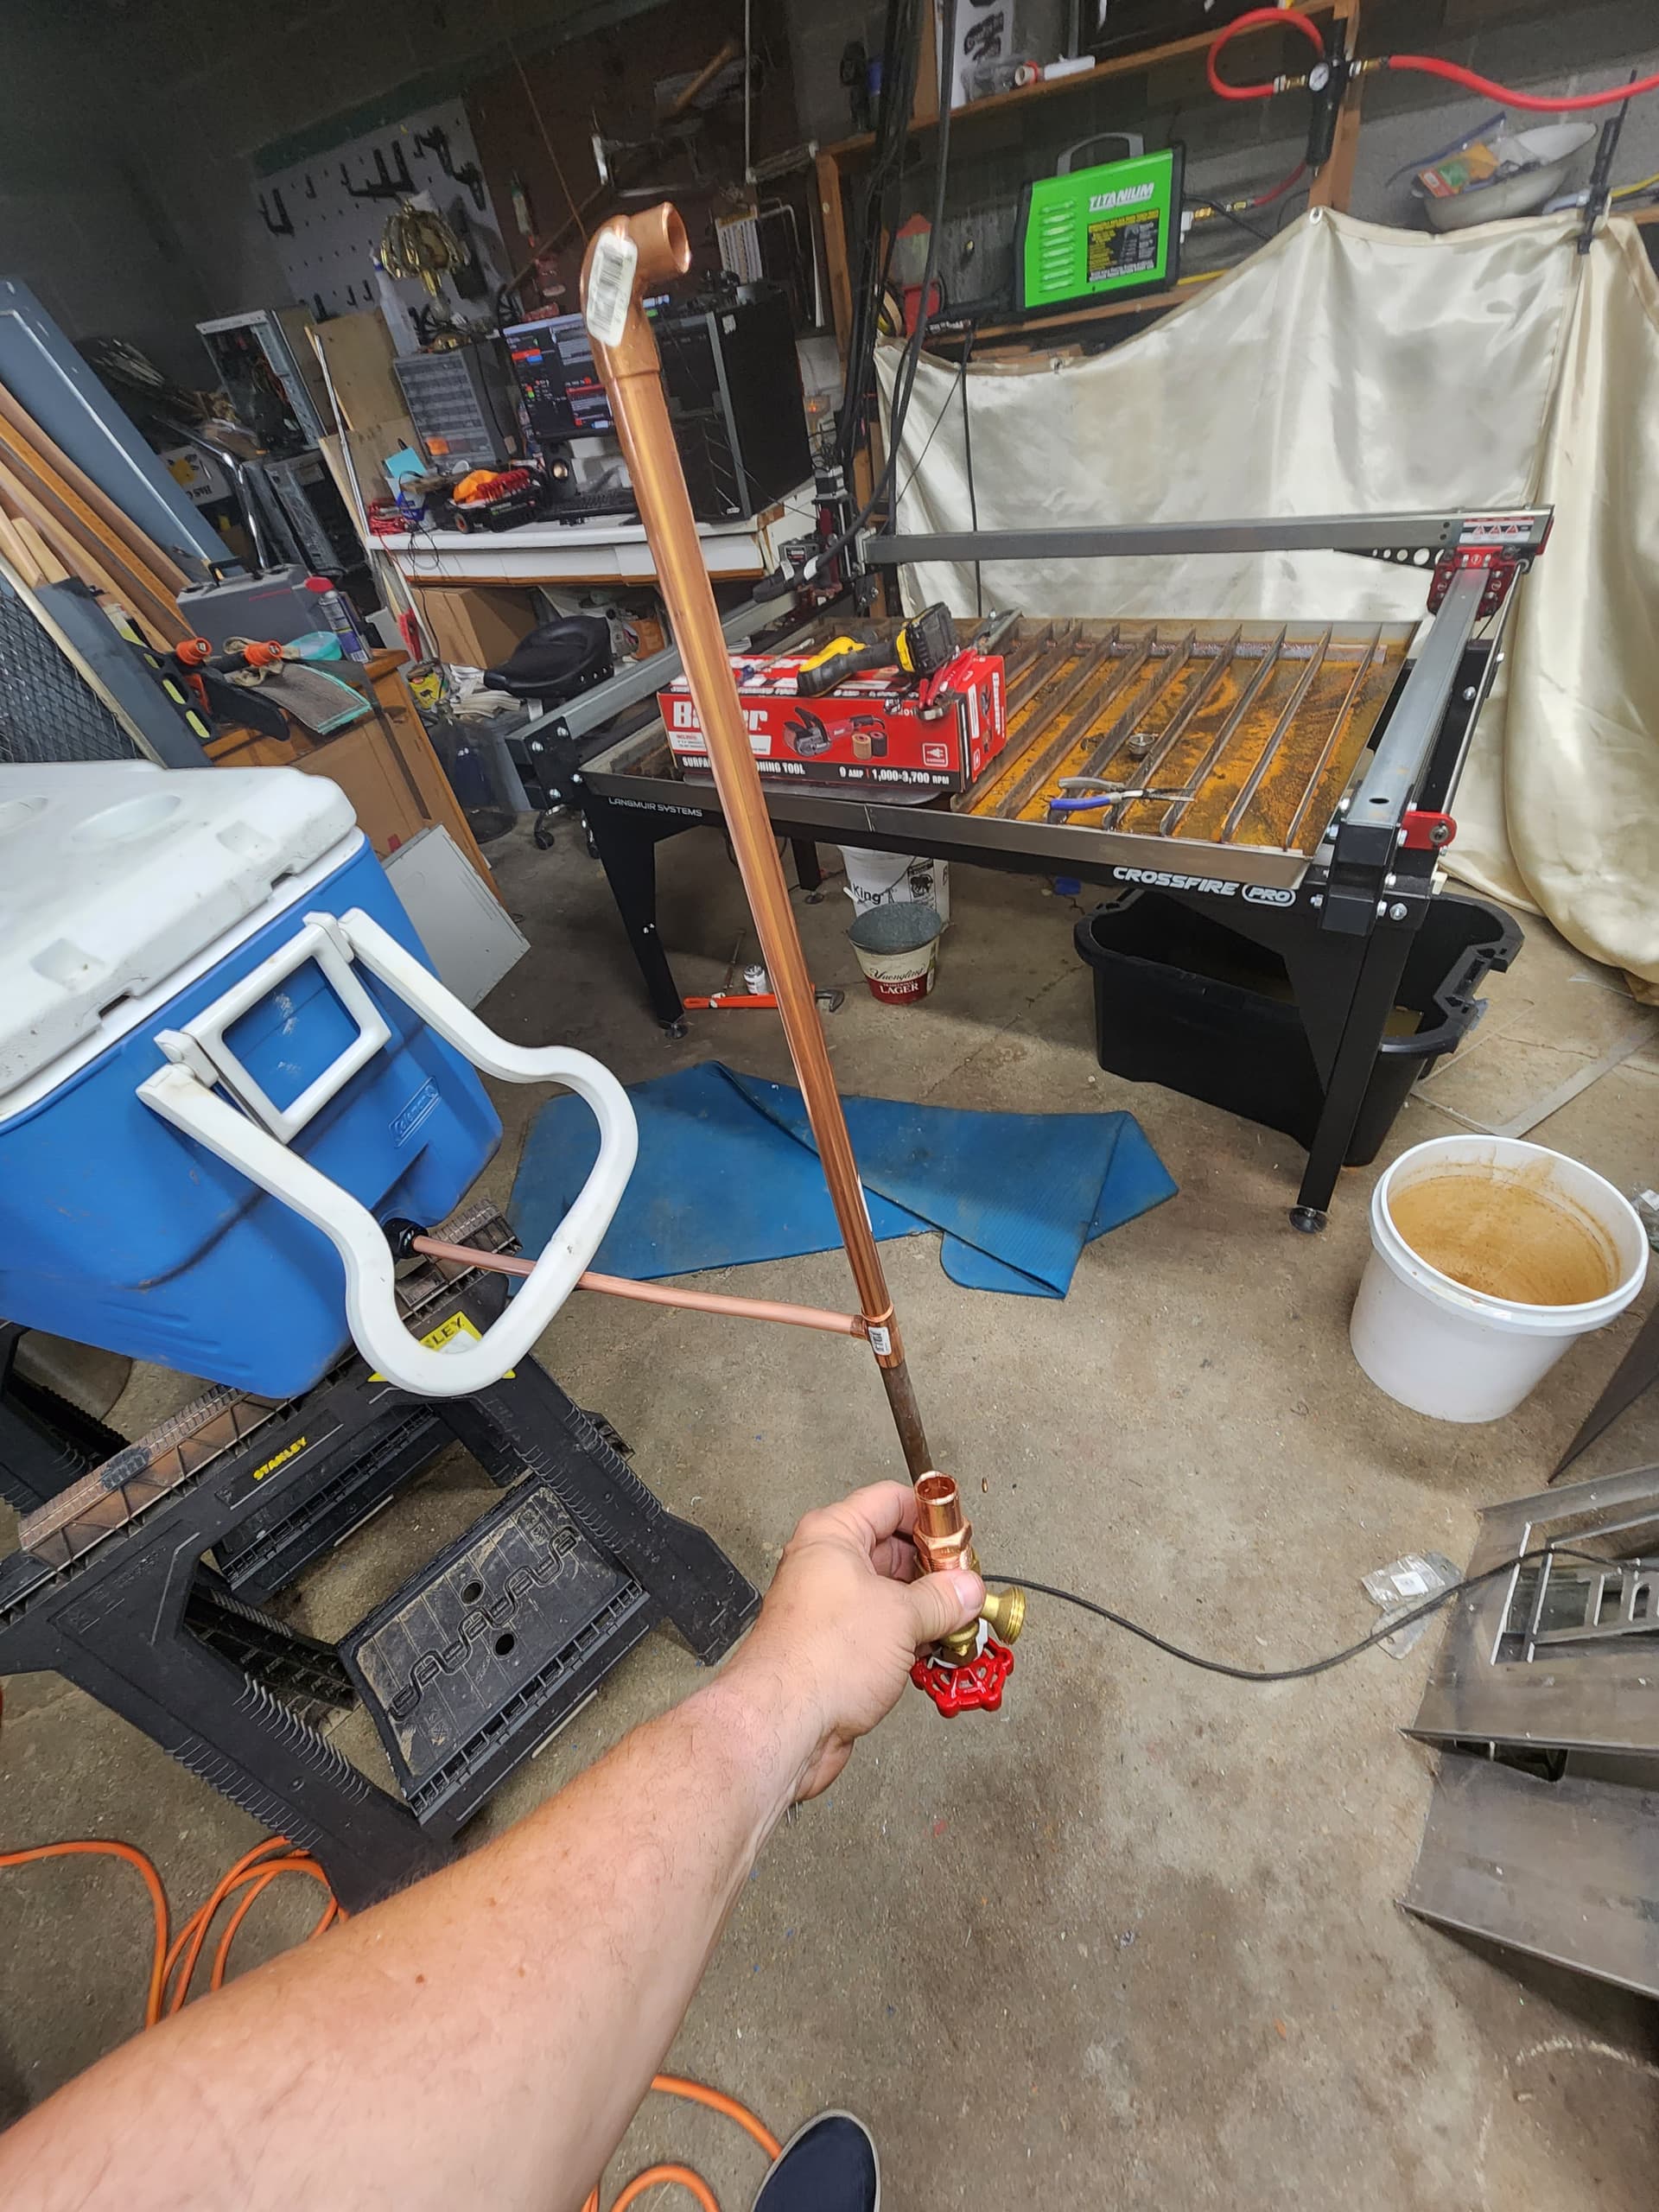
There is 20 feet of 1/2 inch copper coiled up inside the cooler (ok, really more like 18 feet with the stickout on both ends). The outlet goes to a 3/4x3/4x1/2 tee with about a foot of 3/4 copper on the down leg to a drain valve, then about 2 feet of 3/4 going up to a 3/4x1/2 90 to eventually connect up to my current setup (probably with another 3/8 whip). I’ll fill the inside of the cooler with a bag or two of ice and fill part way with water just to keep the surface contact area on the coils up as much as possible. It’s going to be placed temporarily on my welding table near my current filter setup, if it works as well as I hope I’ll figure out a more permanent placement.
Right now I’ve got to run and get a few more pieces before I can get it hooked up and running, but hopefully by tomorrow I can give it it’s inaugural run.
Edit: I originally said that my air line whips were 1/2 inch, I’ve corrected it to 3/8 inch.
2 Likes
I would have kept the original water drain (that ice will melt) and taken the output port higher up on the side. I might even try dry ice in a setup like that.
Also autodrain rather than a spigot valve.
Still it’s up there with the other innovative approaches to the problem. Congratulations! ![]()
2 Likes
Thanks for the input!
The reason I sacrificed this cooler was because the drain leaked. I’ll probably siphon the excess out. I’ve got a battery powered siphon I use to fill my kerosene heater, might pick up a second one for water and fix it with a longer hose.
I considered the dry ice, but regular bag ice is more readily available here, plus I like the larger water to copper surface area contact. I’ve never used dry ice so I’m assuming you would just stack it in the cooler dry thus only having mostly air to copper contact. I don’t think that would be as efficient, but I could be wrong.
I can see the appeal of an Autodrain, but this is a hobby for now, so Autodrain ($$$$) vs boiler drain ($), my labor is cheap and it keeps me in hands-on mode.
2 Likes
Evansville can concur! ![]()
1 Like