@jamesdhatch once again, I am deeply in your debt! I was gonna buy you a beer, now it is a case of beer!
fyi, Im 68, retired, and thought this would be a fun hobby, I had no idea what I was in for. Ive used Visio, other drawing tools before, and thought this would be easy, draw a picture, process it, cut it, especially what I thought was a simple part.
I think all your hard work will not only help me, but the other “rookies” who come along as naive as I was.
@langmuir, take note of @jamesdhatch has done here, you need to use it, make more customers happy !
Now, Illl spend the afternoon studying this and hopefully show my perfect cut in a few hours.
You are in the majority, not the minoraty. If everyone here was honest … I bet atleast %75 thought it was going to be a very simple thing to do. I had zero experience in anything to do with this. Im still learning everytime i use it. Have seen and heard of a few crossfires selling because someone found out it wasnt what they expected. ( meaning the learning of all the software and the actual cutting ) Jamesdhatch is the MAN. He has helped me as well as probably most of this forum figure something out. He should get hired as the Forum service tech. Dont give up, when you get it all figured out its alot of fun and you can make some real cool things.
I’m not that far behind you but I got the table for the same reason. I have been playing with laser engravers/cutters for a number of years, added CNC routers (Shopbot) to the skill set and then figured I’d love to be able to do in steel what I was doing in wood & plastic and such. The designs are actually pretty easy to switch between machines.
The drawing part is actually the toughest thing for me (I’m not artistic at all). But the design to cut part isn’t bad once you get the hang of it and it doesn’t take tons of time. You can find lots of decent designs on FireShare. You can also get some pretty incredible stuff on plasmaspider.com (you’ll need to spend $20/yr on a membership donation to download the files you’ll find there). Lots of CNC plasma help there too.
Once you have the process down, I’d recommend checking out YouTube for Inkscape tutorials and download a copy of Inkscape (it’s free). That will give you the ability to start modifying designs. Also, I like the SVG format better for designs (Inkscape can read & save both DXF and SVG). It’s a cleaner format and easier to fix than DXF. DXF is a “lowest common denominator” file type for the CAD/CAM market but SVG has left it behind in terms of functionality and the tools most folks use can also use SVG files. Fusion is great for 3D design but that’s another step up and it’s not always easy for people to think 3D in a 2D medium like a computer screen.
BTW. @langmuir-daniel knows there are a bunch of us helping out here in the forum - it’s why they have it. I think all of us who contribute a bit are happy to do it knowing it leaves them a bit more time to work on machines & software like FireControl
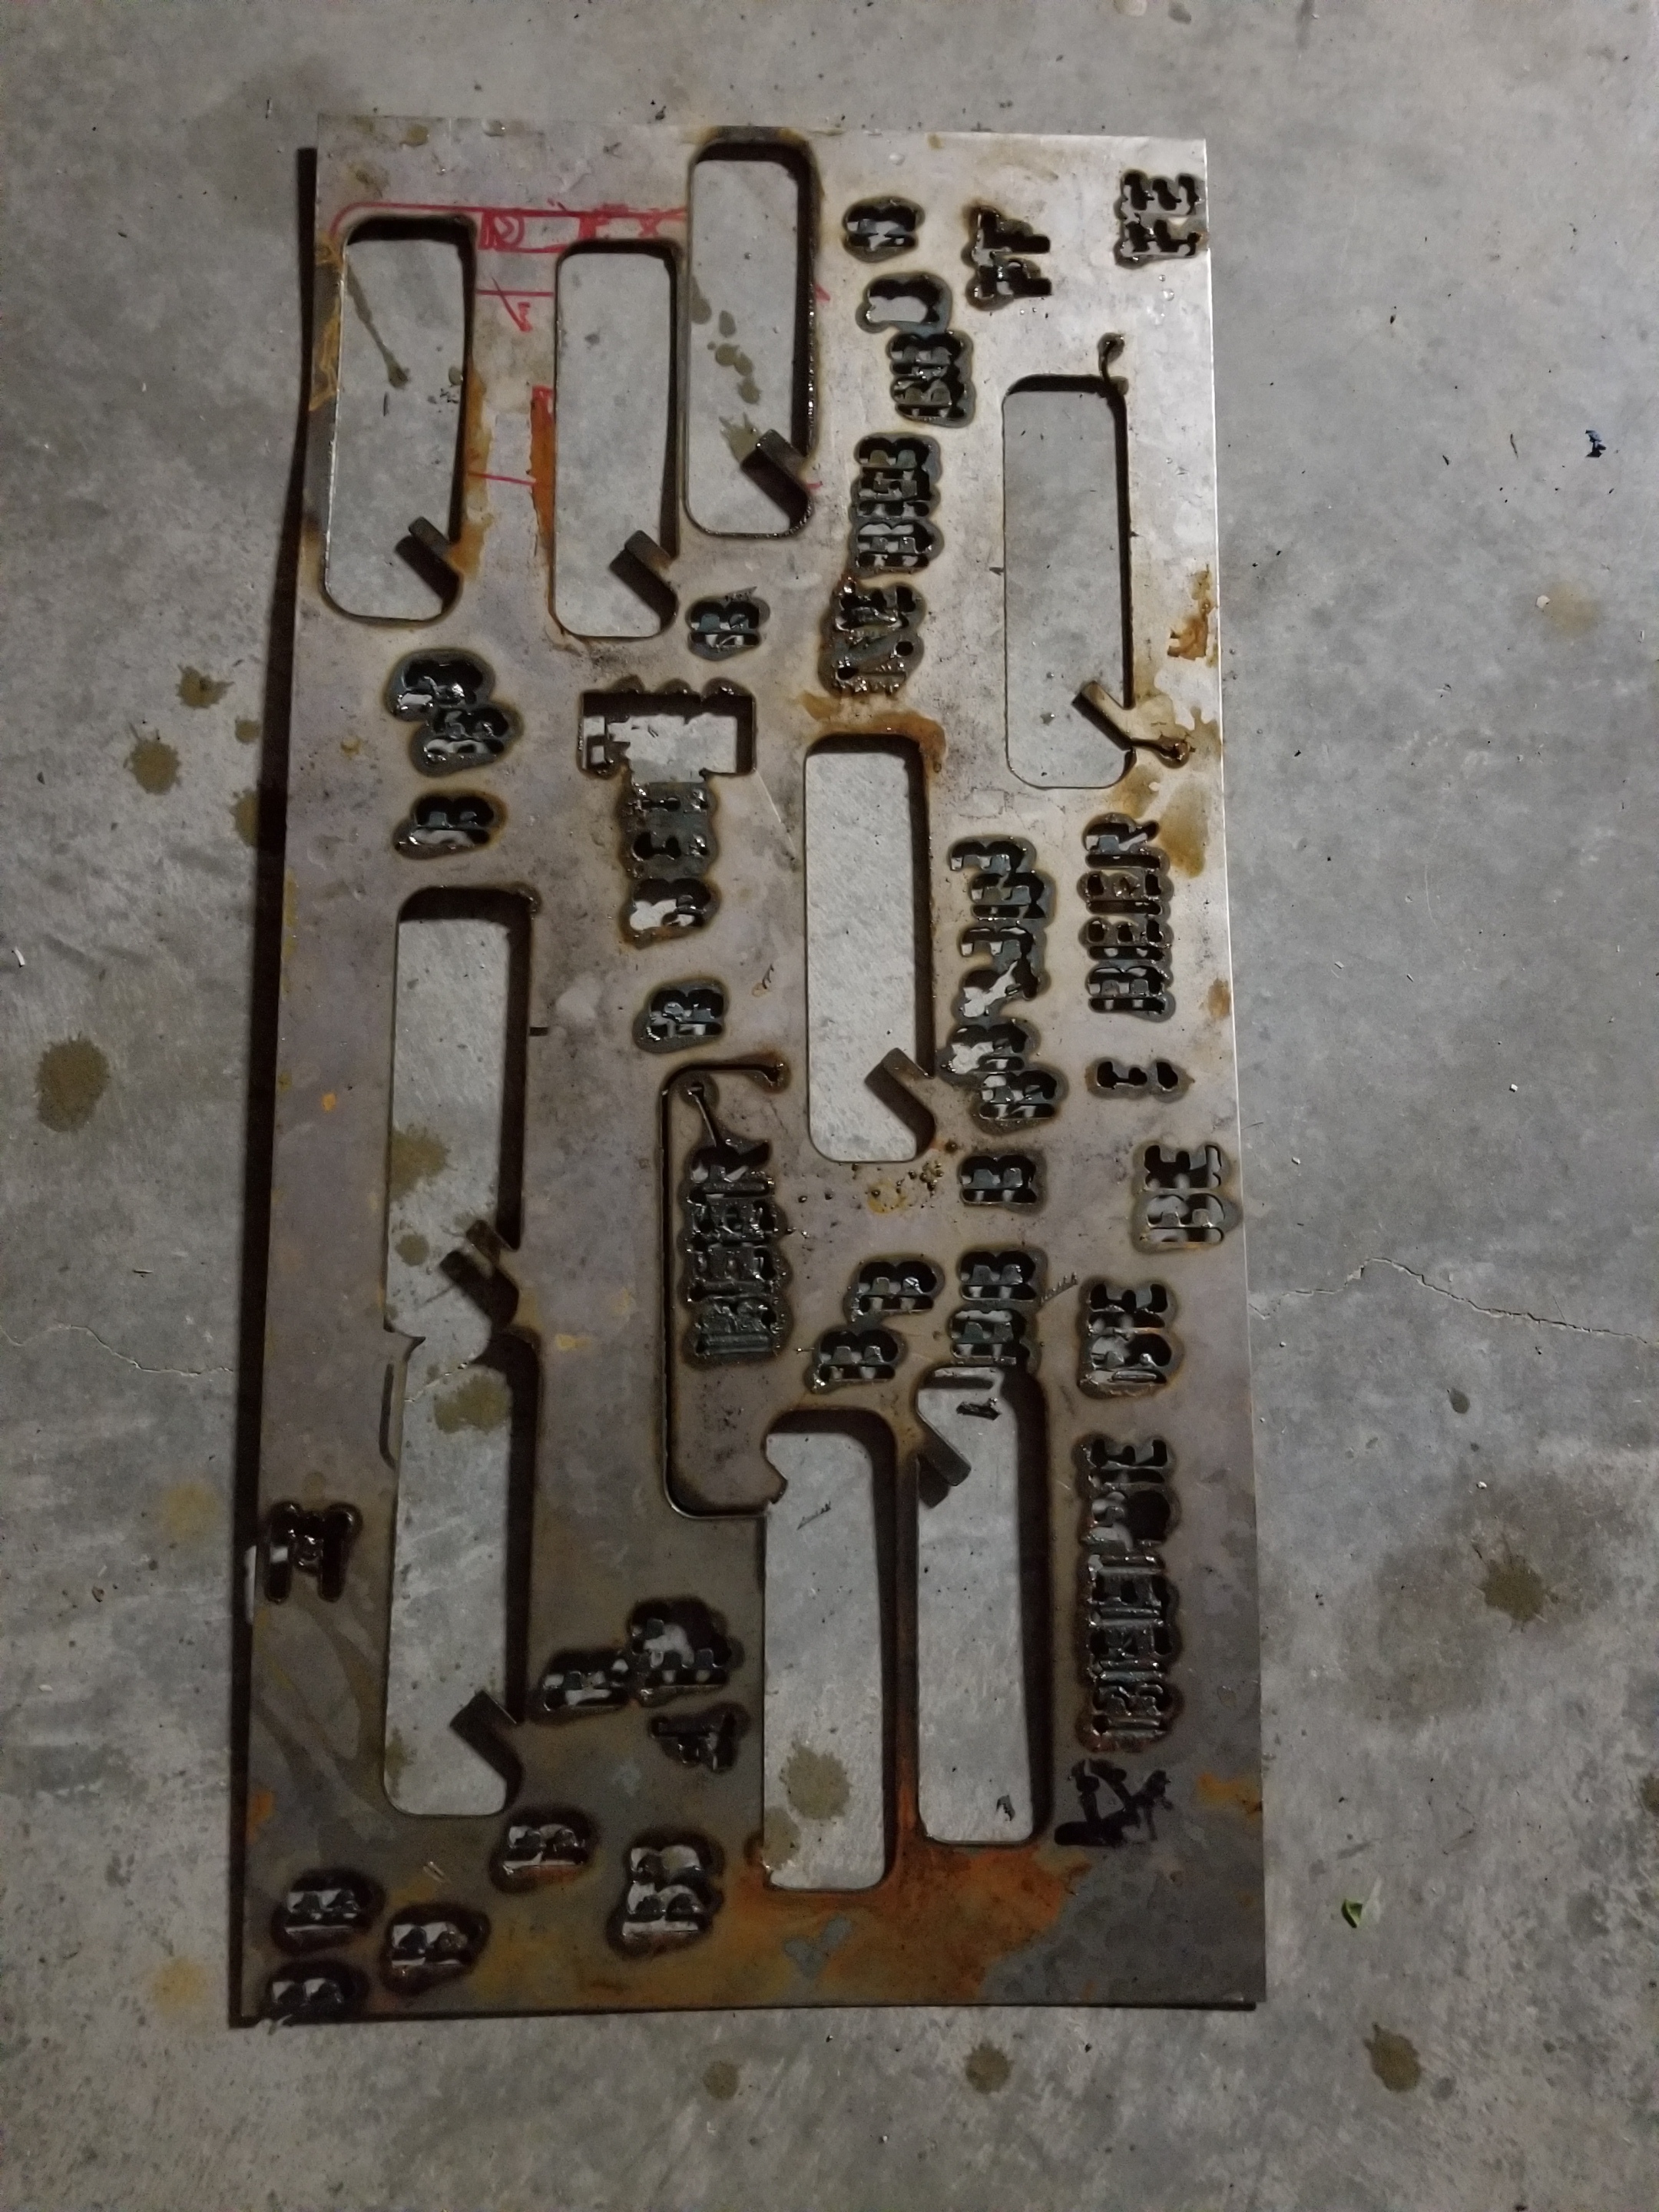
I cleaned this one up with sandpaper {had sharpe marks on it}
Now if I can the “divots” off the bottom of the letters, will be perfect. Seems to holding the torch on too long when finishing the cut.
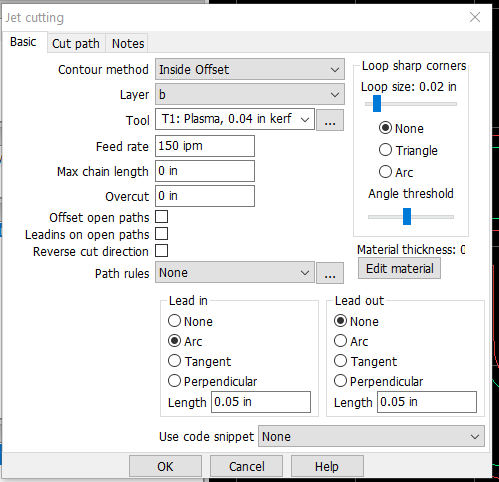
Is that the end of the cut or the start? If it’s the end, try adding a lead-out (I didn’t suggest it above because mine usually goes off fast). Use the same Arc & distance value as the lead-in.
If it’s the start of the cut then check your lead-in setting is correct. Also check your pierce time, you might want to reduce it.
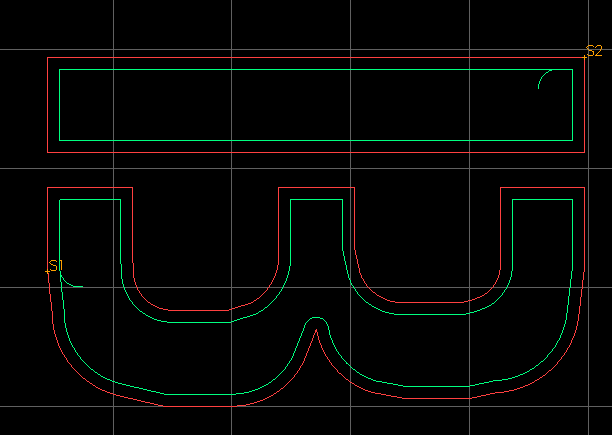
Can you post a picture of the paths like this one? It shows the tails of the lead-in. I’m thinking you might also try a Tangent lead-in instead of the Arc.
End of the cut, I was watching it fire for what I thought was too long. The pooling around it also made me think it was getting too hot at the end.
I’ll redo in the morning, and since I’m running out of metal till Monday, I’m only cutting letters in the next few runs, until they come out right.
I’ll post in the morning.
Todays results, I’m just doing the one letter, B, to sort this out.
The cut across the B is new, only happens sometimes… Ill work on that later.
Notice the blow out on the long part of the B, too hot ? I’m running at 33 amps.
Still have the divots at bottom, same as start points.
I added arc out and tangent on other runs, did not see a difference, but can add and run again.
Hi, I am just currious and didnt see it in the above. maybe i missed it, But how tall are the BEER letters ? Anything smaller than 3/4 inch and my letters look like that. Too much heat in to small of an area is what gets me.
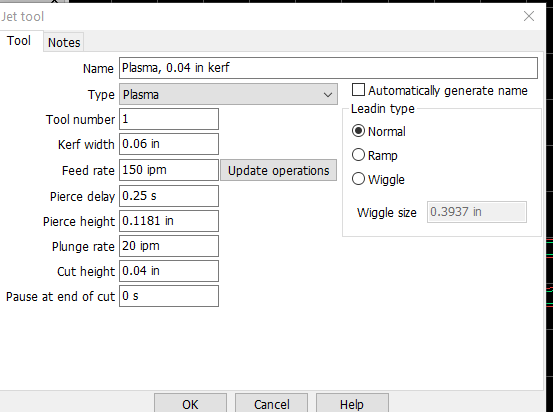
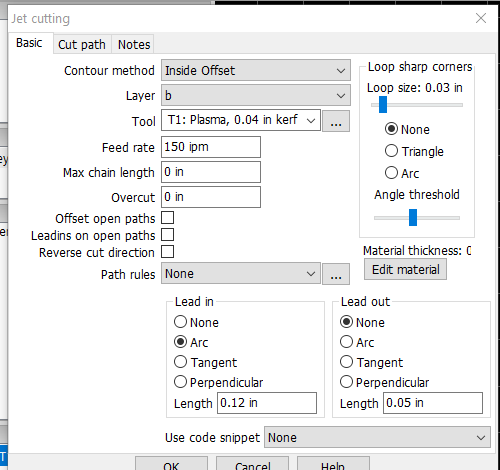
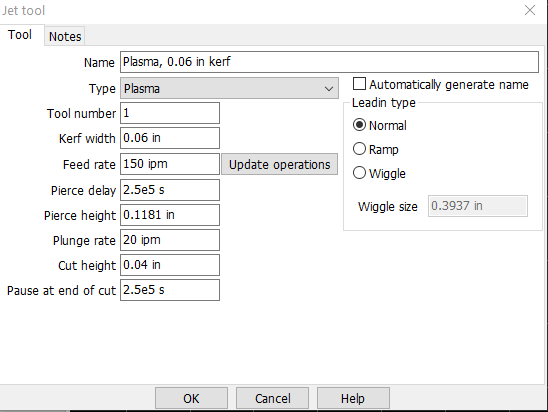
Your kerf width is too small. It’s probably more like 0.06" so your cut width is about 0.04" too large. Also, you probably need more lead in, 0.05in is too small IMO (use at least 0.1" for 33A) and your pierce delay is probably getting messed up by either SheetCam or Mach 3 or both.
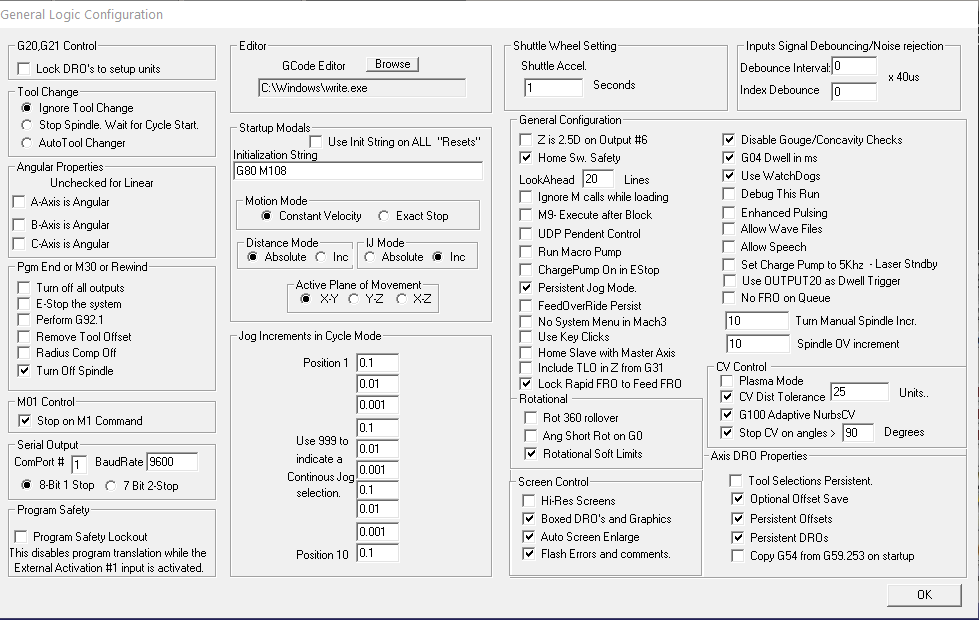
If Mach 3 is not set to Dwell in Milliseconds then it’s going to round up to 1 second at a minimum. If the dwell in Mach 3 IS set to Milliseconds then SheetCam introduces a new feature: You’ve got to set the delay in Microseconds (for some reason that only the SheetCam god can explain). Personally, I set the Mach 3 setting to use Millisecond resolution and then I would set the PierceDelay in SheetCam to about 250000 (250mS) at a minimum.
Your lead-in is wrong. See my post above. I start lead-in values at twice the kerf or in my example 0.12"
If you fix that you won’t be the blowout. Right now it’s starting the pierce inside the width of the kerf so the larger (than kerf) pierce hole is crossing the cutline.
I’m adding this to the thread, so I (and other readers in the future) know what I changed. I’m starting to make changes and forgetting why.
In Mach 3 General Config, far right col, G04 Dwell in ms was not checked. I remember reading to uncheck, so rechecking now:
So in Sheetcam tool:
Set kerf width to .06
Set pierce delay to .25s (think this is 250ms}?
and changed leadin to .12
I need to go back and start over after I try with these changes and re-read and fix after this one, I think I’m trying things and messing myself up. ( Unless this one comes out perfect and I aint touching nothing!)
I’ve been playing with Inkscape, so starting to do some design now.
Guess the good news of being “socially isolated” is lots of time to work on this.
No, if you’ve set your Dwell resolution to Milliseconds you need to specify “Pierce delay” AND Pause at the end of a Cut" (if you use it) to Microsecond Resolution. So, if you want a Pierce Delay of 250 Milliseconds, you need to set the Pierce Delay value to 250000. Note that SheetCam will convert this to E notation so it will become: “2.5e5 ms”. When you produce your .tap file look at the code. Right after the M3 code you SHOULD see “G4 P250”
Learn to read G-Code, the skill will save you a lot of material! DAMHIKT!
@TomWS Actually, downloaded G Code reference day b4 yesterday b4 @jamesdhatch showed me operations… I was really getting desperate!
As an old 360 Assembly language programmer, understood the G code better than the menus. Reminded me of GDDM document language before MS Word was invented. Sorry, starting to go stir crazy…