Hello all, what setting will I have to change to prevent this hole from appearing on my fine cuts? dwell time maybe? also I have noticed the torch stays lit while its retracting itself up. Thanks in advance,
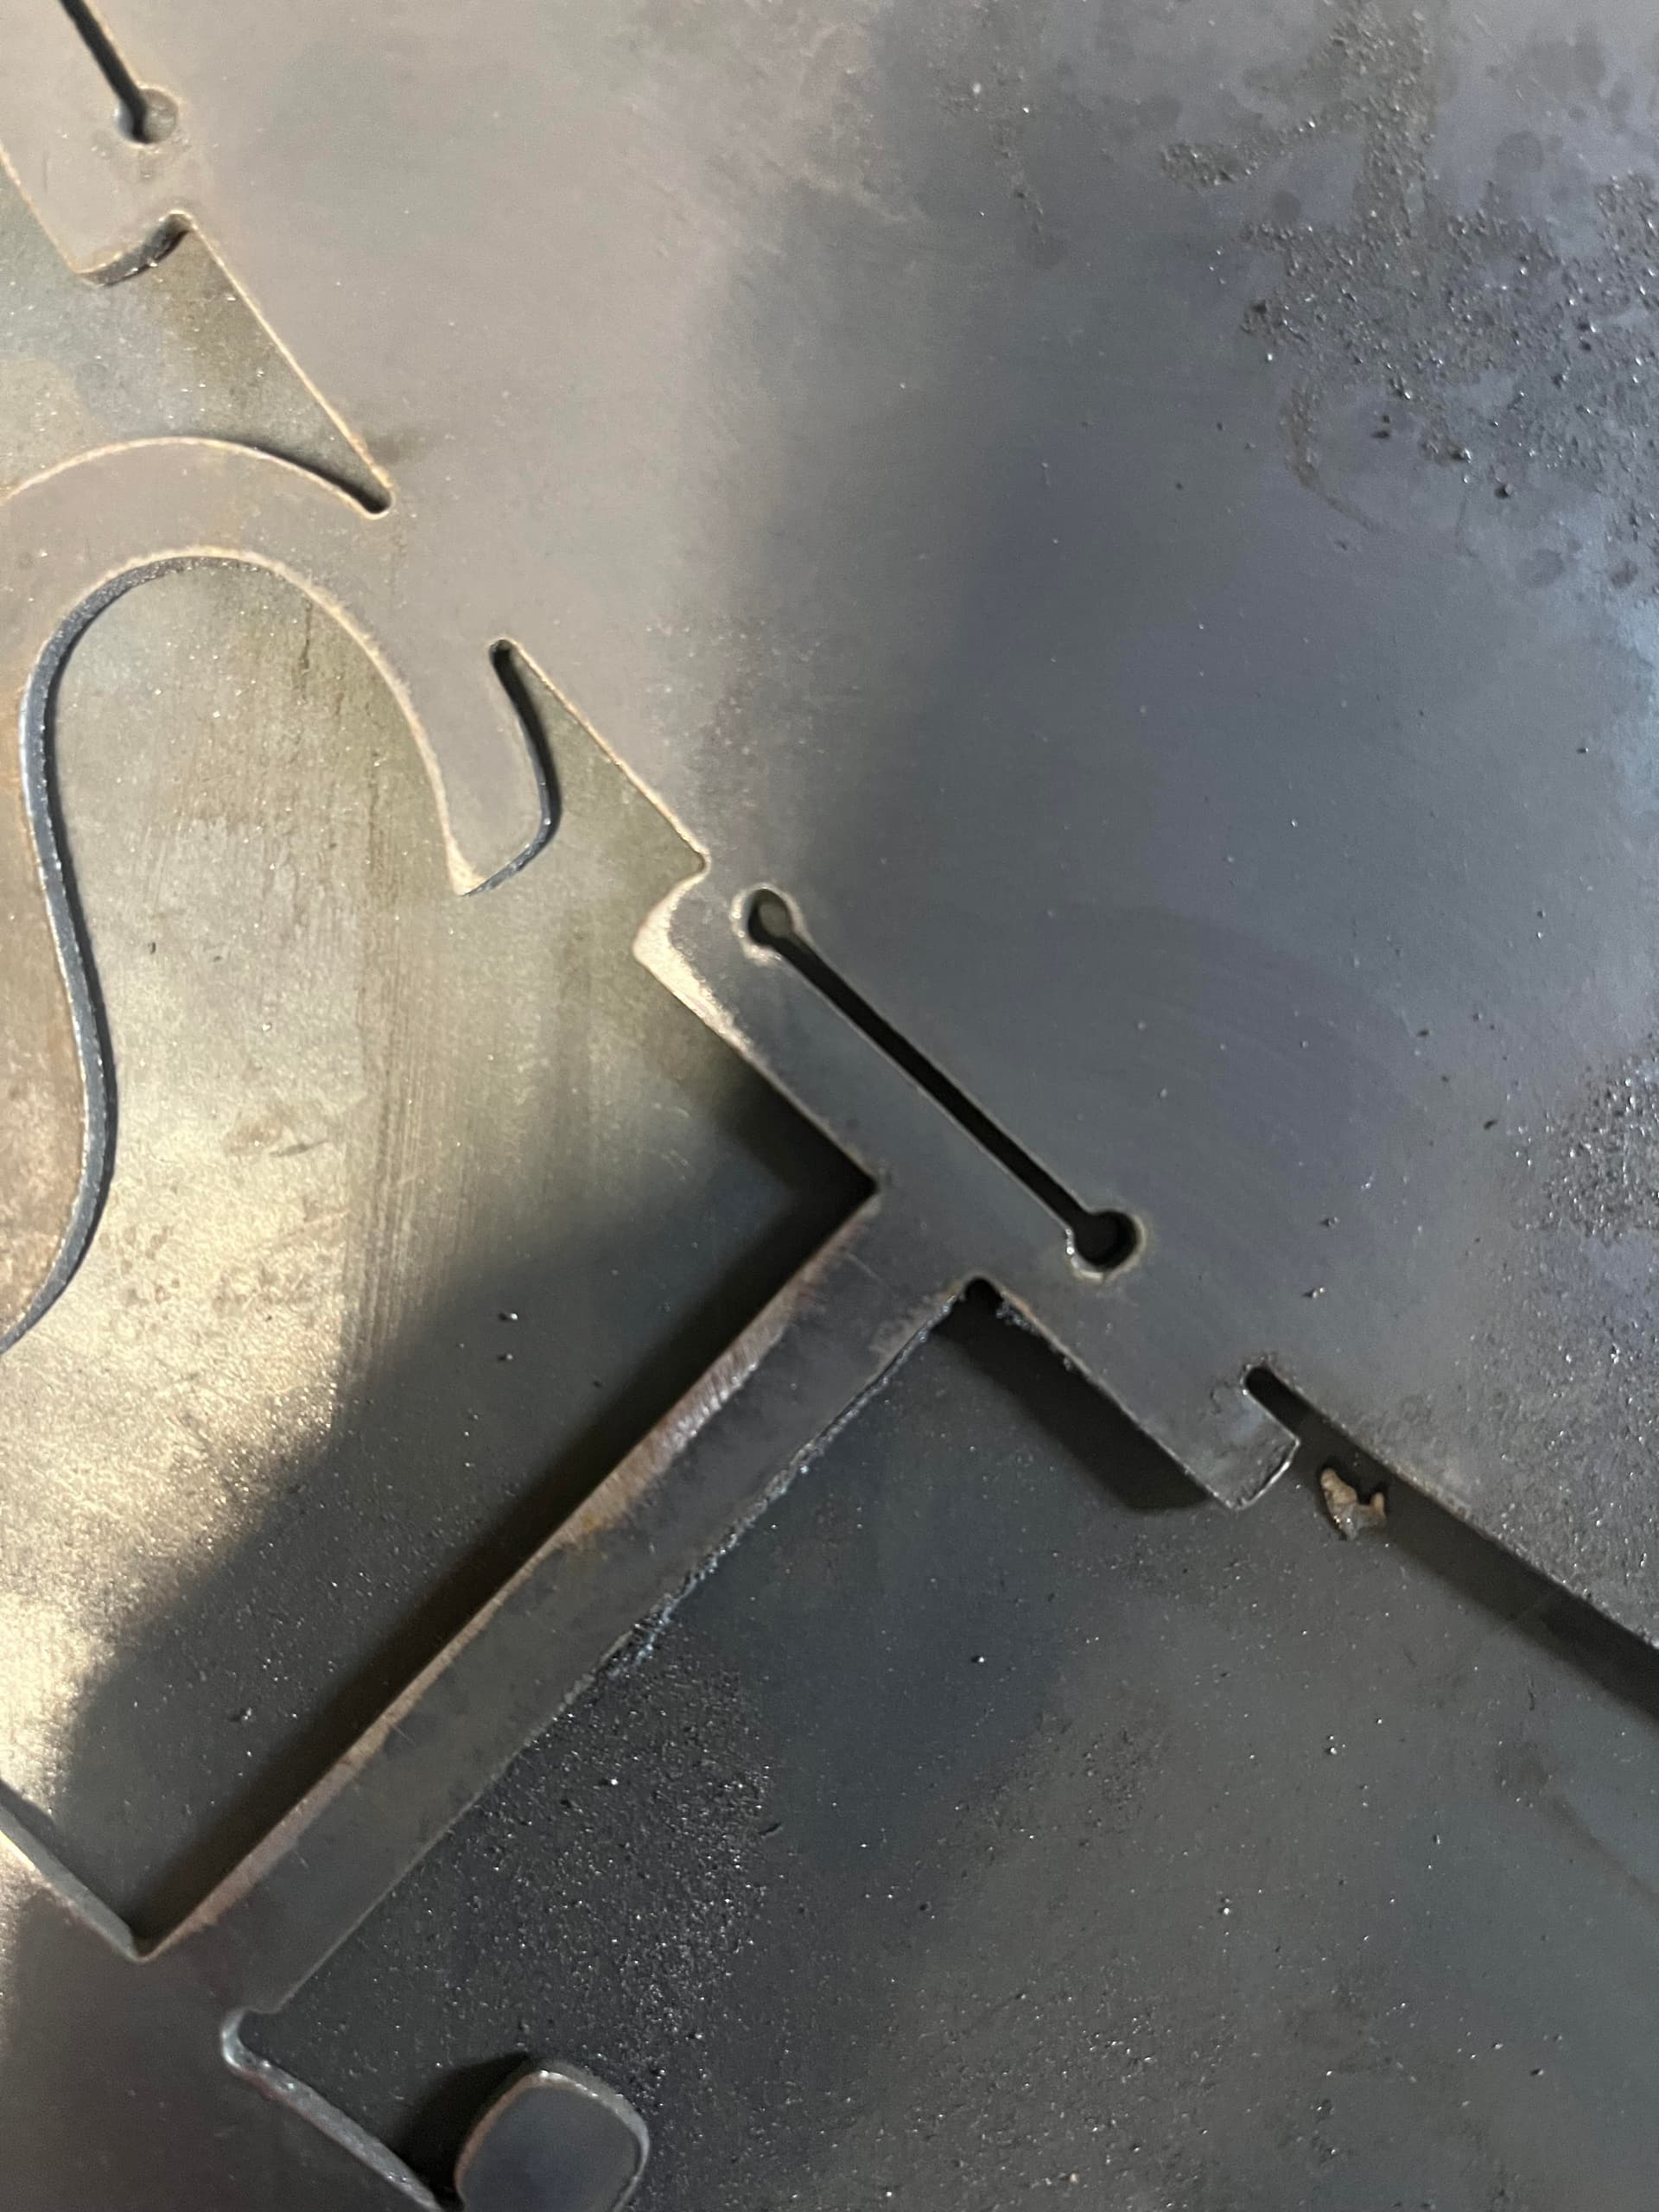
If you don’t want that line, double check your DXF or SVG file that you are importing into Sheetcam. It looks like you may have some hidden geometry. That looks like the original arc/circle that was there before you combined the font.
If you want the line but not the large circles at the end, maybe shorten your pierce delay and make sure you don’t have any delay set for the end of the cut.
Can you post the Sheetcam output file, TAP or NC?
1 Like
Also looking at the bottom of the letter, your lead-ins maybe need to be a little longer. I notice the pierce hole is visible.
1 Like
The pierce hole at the start is unavoidable. You can minimize it by reducing the pierce delay as much as possible. It will always be larger on the first pierce, since Firecontrol makes the first delay longer for some reason.
The hole at the end is not normal and the torch should be off before it retracts. There is no setting for that and the torch off command comes before the retract command, so it should be off. That is a plasma cutter issue.
I’m just guessing here, but is this a Titanium plasma cutter?
2 Likes
It does appear that you are having a considerable burn out of material wherever you start.
Perhaps @ds690 suggestion will work: “reduce the pierce delay.”
I had a few other thoughts:
- For the single lines, you don’t really want a lead-in or lead-out. Do you have either at these points?
- You could increase your Pierce height lessening some of the burn effects on the initial plunge.
1 Like
that is the remainder of the circle above the “T”…
I like to go into my CAD software and remove thos odd lines…the T looks like a T without the line.
Tried all of them and unfortunately it’s still having considerable burn out probably worse than before
Found this thread after a search and hoping to get some more input from the group.
I have a Razorcut 45 with my XPro and I’m finding it to cut inconsistent.
Visible pierce holes due to the torch being lit while it retracts.
I made a nice butterfly for my wife and every cut out had a visible pierce hole and some cuts incomplete because the Z is traveling up while the arc is still going. you can see that in the holes in the wings that didn’t complete.
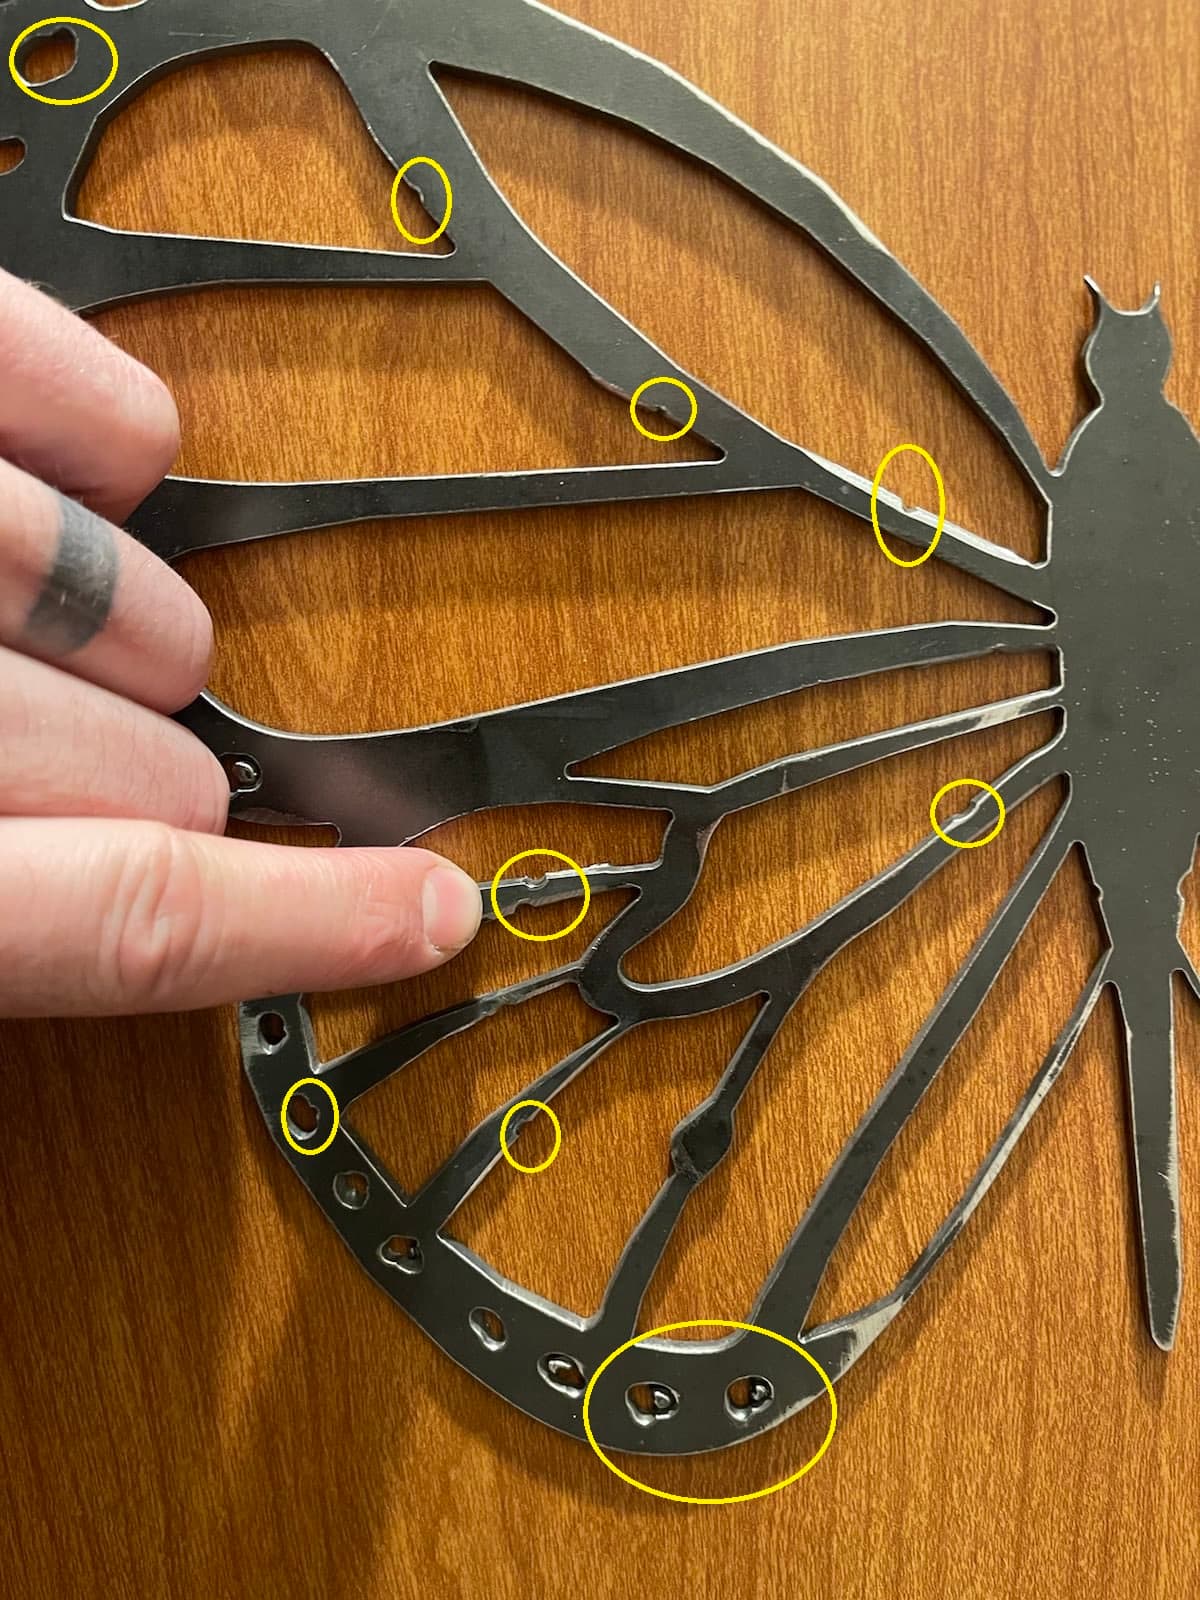
It creates a ramp vs a cut. I have no idea how to control this in sheetcam or firecontrol. Some times the torch is a quarter inch above the sheet and the torch is still firing.
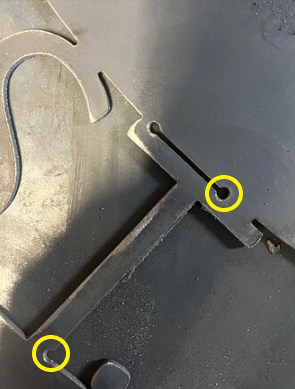
I just cut a 44 x 32 address sign for a friend and sure as

I can confirm on this one these are the starts because I told sheetcam where to start on the letters.
These are the settings in Sheetcam I used for both of these projects.

Let me know if I’m not providing enough information and I’ll gladly try to fill in the blanks. I would really like to get my cuts looking better because this tool is super handy and fun.
To long of a pierce delays, to short of a lead in, no lead out while cutting slow can make it do that.
Not sure why it is lazy about stopping firing unless you have the 2t 4t switch wrong.
Are you sure your kerf is .04?
2 Likes
Thanks for the reply @Phillipw I am not sure my kerf is .04. Do you just cut a straight line then measure the gap?
What should the 2t 4t switch be set to? It’s not a consistent issue which really sucks.
I have had guys on here tell me to not use a lead out on signs as it turns out better. ![]()
1 Like
You want the machine in 2t. Look in your manual for a illustration of the button I can’t remember right off.
If you are using standard consumable I would guess kerf is closer to .06. if it was me I would do a small square with a hole in it. Cut it out and measure the difference.
As for lead outs I almost always use them. You have to find what works for you. Without a lead out and a torch not shutting off it could make a divot like that. That is my opinion.
I usually try to shoot for a .2 lead in and out. Longer on thicker material. When I run into leads not fitting I put that in another layer and adjust.
Make a small test piece so you don’t waste material and change one thing at a time. That way you know the cause. It may help someone else later. Changing multiple things at a time we never know the true cause.
2 Likes
looks like it was set to 4T ![]() Must have bumped it at some point setting the machine up or changing air line stuff. I’ll run some test cuts this afternoon.
Must have bumped it at some point setting the machine up or changing air line stuff. I’ll run some test cuts this afternoon.
2 Likes
Cuts on the test piece turned out pretty good Kerf is .04 -ish
Going to try a more complex part later today. Thanks again.
3 Likes