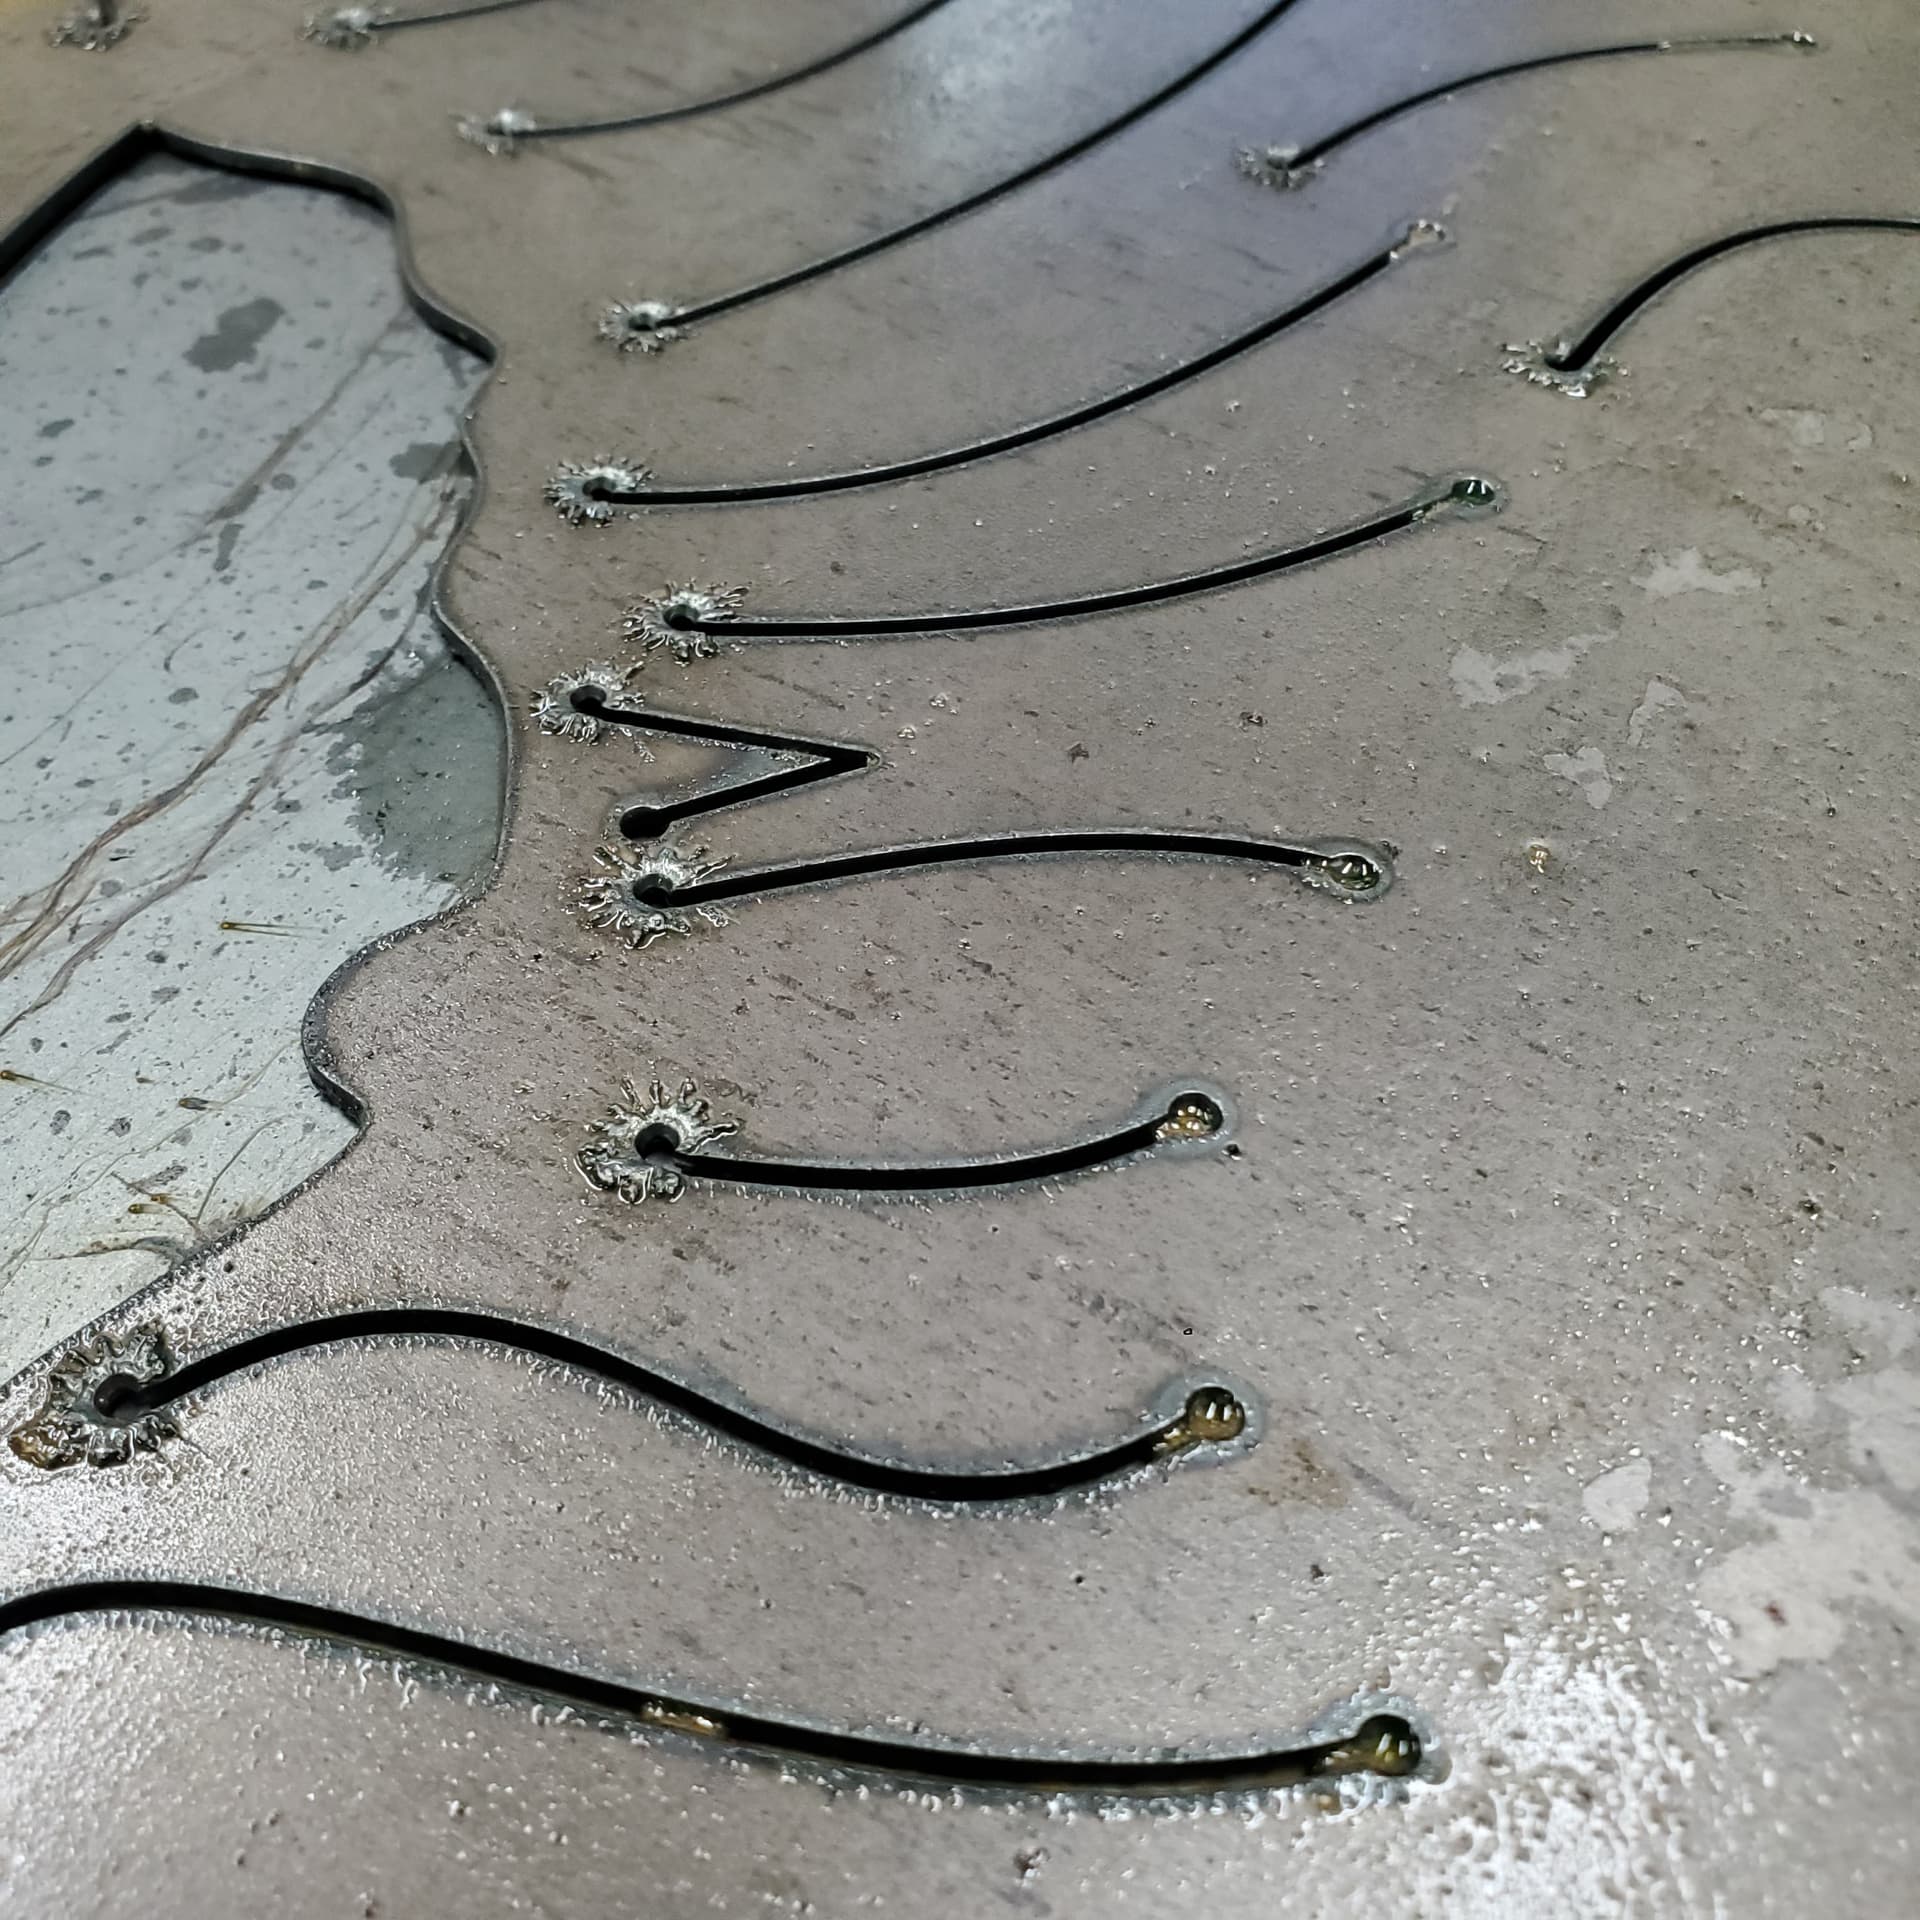
Curious all your takes on this photo of my Cut 45 making its pieces. Is this pretty normal? I just put new consumables in. Its cutting pretty nice and for most part has ever since i got it and of course i replace consumables as needed. But seems this spatter is pretty much par for the course every time i use it.
Much of my projects are i guess you might say “scalpting”… so many cuts that are merely just cuts without actually dropping cutouts. So i find myself doing quite a bit of grinding afterwards to get this spatter off. Not typically a huge deal i guess but some pieces especially on very thin metal that last step of all the grinding introduces just enough heat to warp the sheetmetal.
You should change your pierce clearance to zero to prevent the pierce location from being offset from the line. It’s also interesting to see that it is stopping with the torch still burning and creating that hole at the end of the cut. My line cuts don’t have that hole at the end, but I’m not using a Razorweld machine.
In any event, grinding with a flap disc is not needed to remove that pierce splatter from the top face. A wire cup mounted in a grinder should easily remove that without causing damage or excessive heat.
These were cut from Fusion in 16ga mild steel, 180 ipm, .6 pierce time, center comp, smoothing .0004 (default), no lead in / out. RazorCut @ 45A w/ lightly used consumables.
In my opinion, Pierce Clearance should always be set to 0 as it adds to the lead-in.
Material is 16 ga.
Amps 28
Speed 70 ipm
No lead in/lead out on any of the single cut only unless i forget to unselect them… i only have been selecting those features when dropping cutouts.
I had thought the pierce clearance was the height the torch was off the steel… vs an offset. I dont believe ive changed that setting at all. Its currently set to 0.0087402 in. What would be the point of pierce clearance when theres the lead in feature? All my line cuts (without a piece dropping out) i selected under Passes the sideways compensation to center. So that certainly explains why the pierce is always off that tiny bit. Another lesson learned thank you! I guess i figured the only burning point deviation would be when you set your kerf width… my kerf width is set to 0.07874 in. I dont recall at the moment if that was a default setting or if i changed it based on what i looked up on the Razorweld or if i just measured the width of the cuts.
Interesting point too made about that cut ends where the hole is burned out wider. Ive noticed that but never questioned if that was an error that could be corrected or if that’s just the nature of making cuts like this without using a lead in or lead out within a piece that could simply drop out.
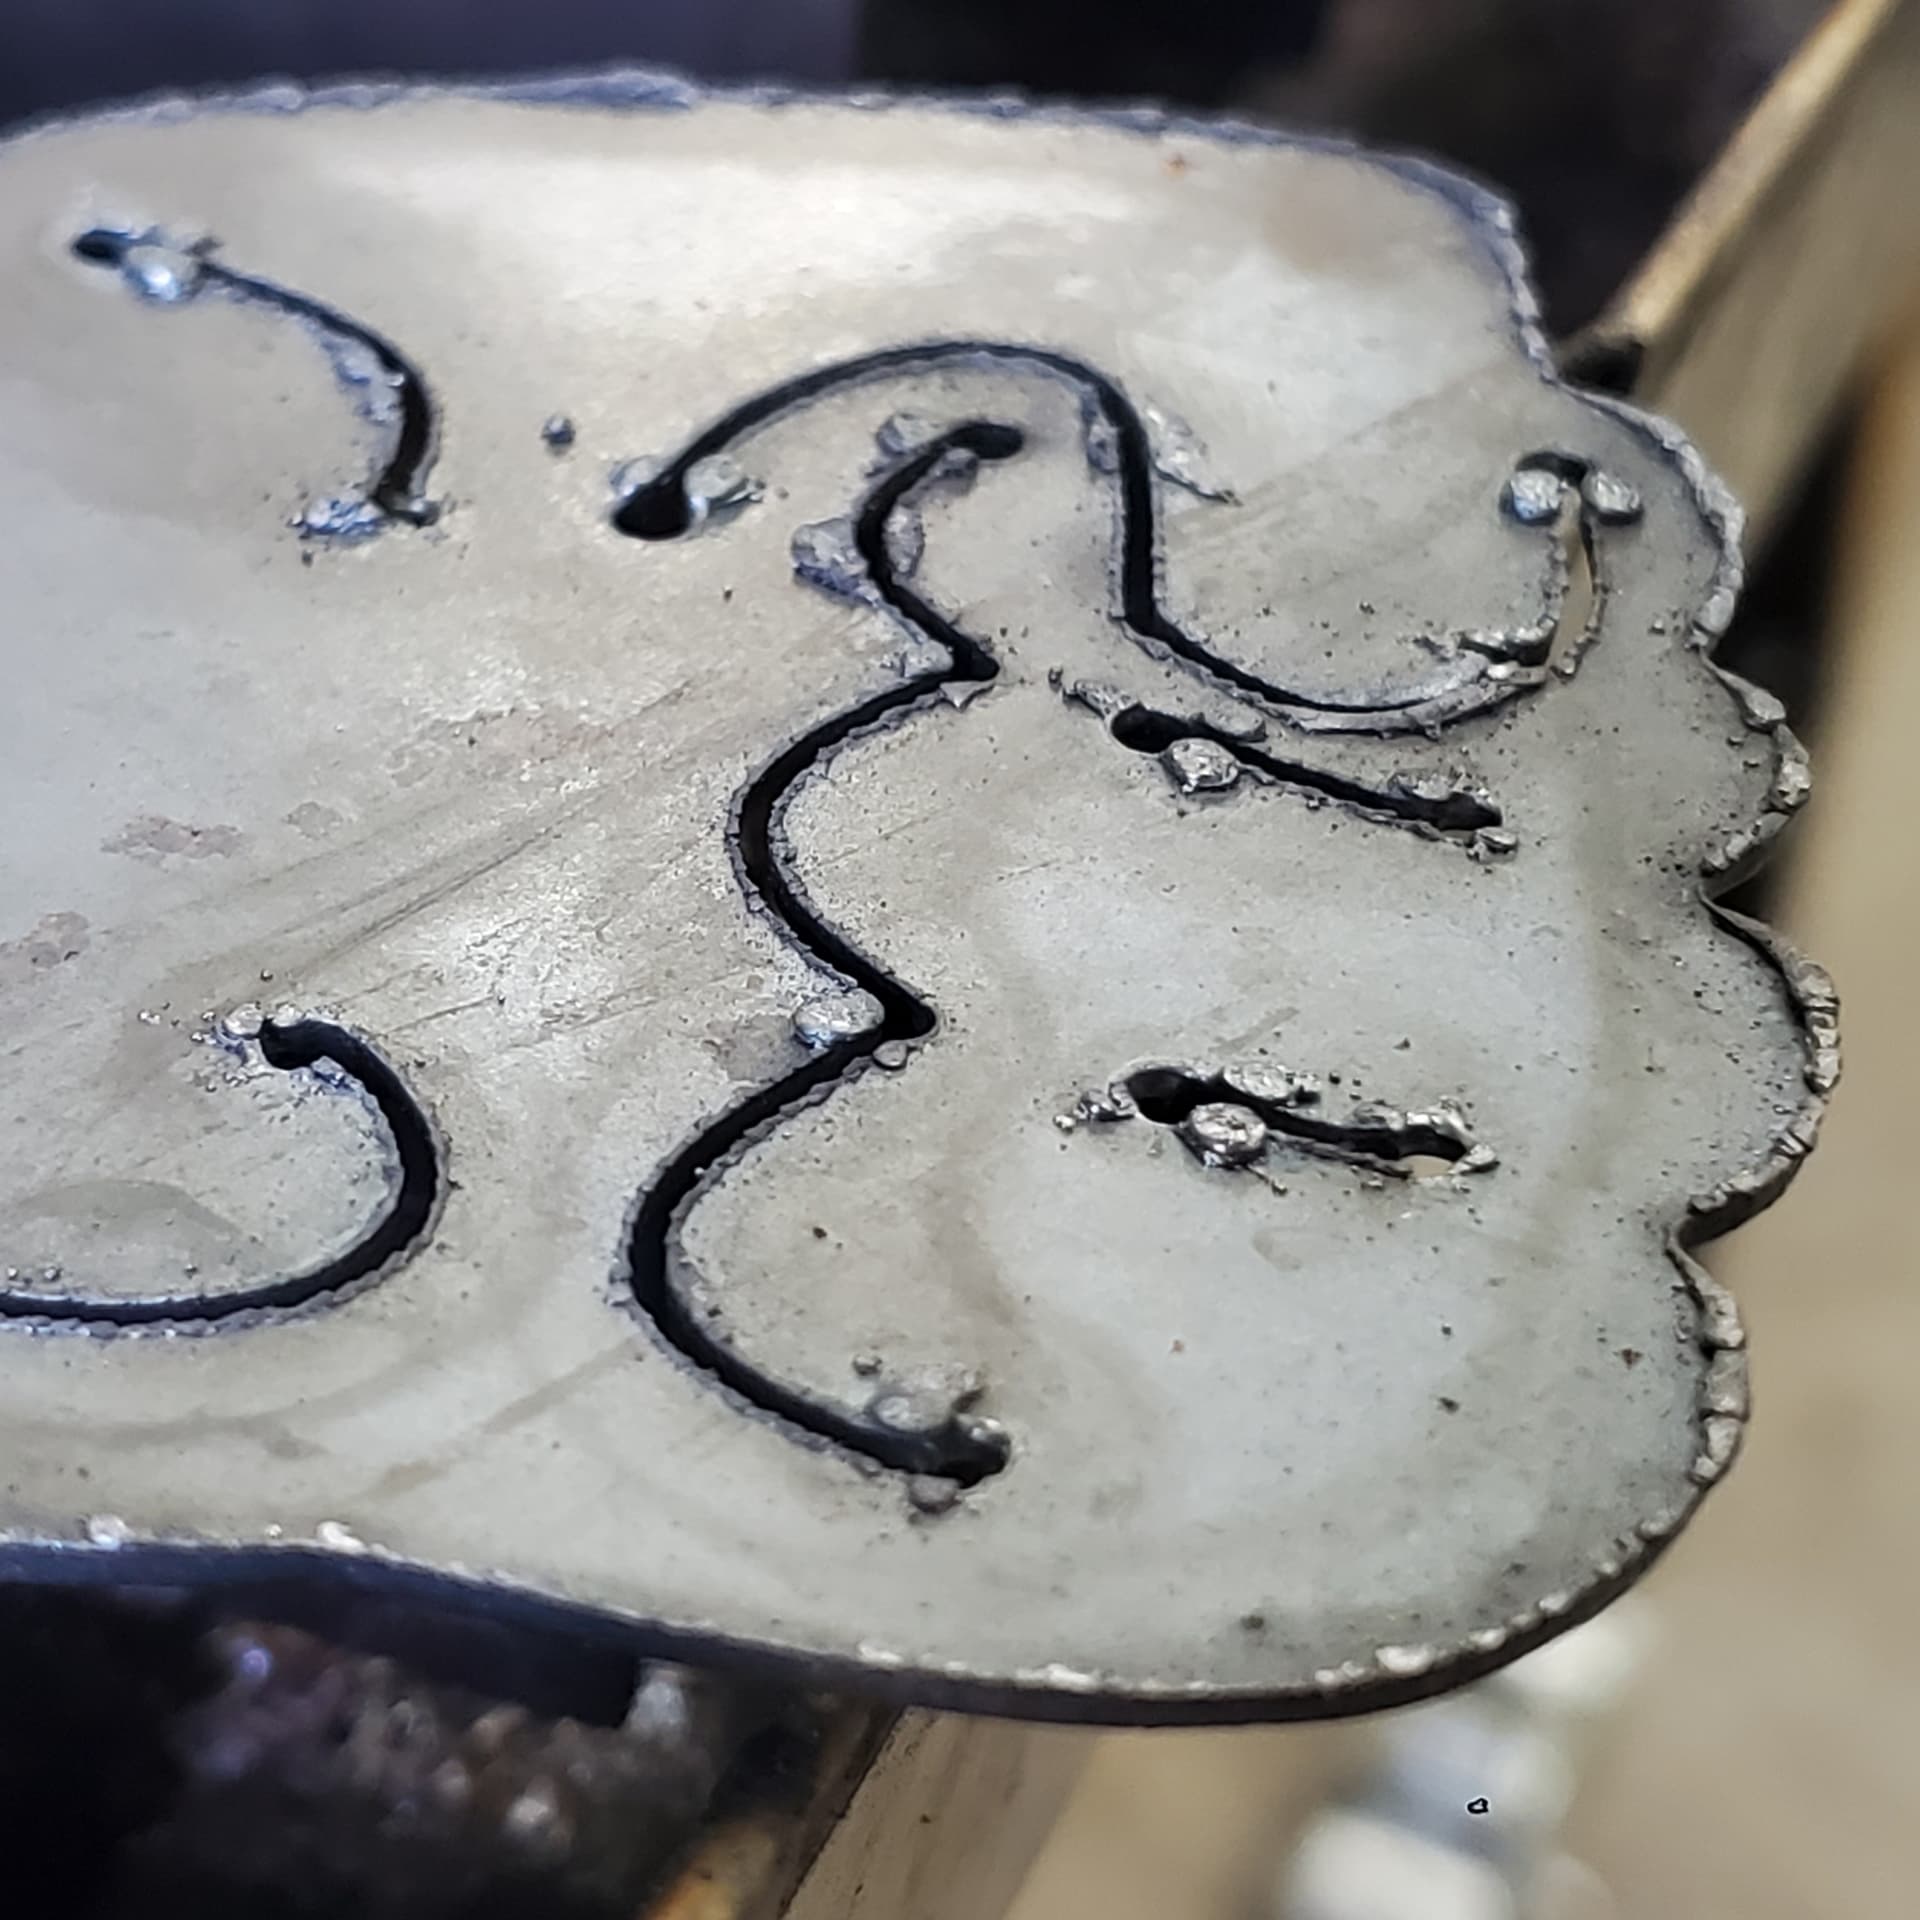
Also i should had added another photo of the back of the cut material. Seems like alot of dros so i end up having to spend time to grind it off… thats really where the warpage comes from on the thinner materials. Ill upload another photo.
Thanks again for all the tips and any thoughts too!
Also im not sure where to set the torch height when cutting. Ive got the automatic torch height and retract so i dont manually set anything with the height.
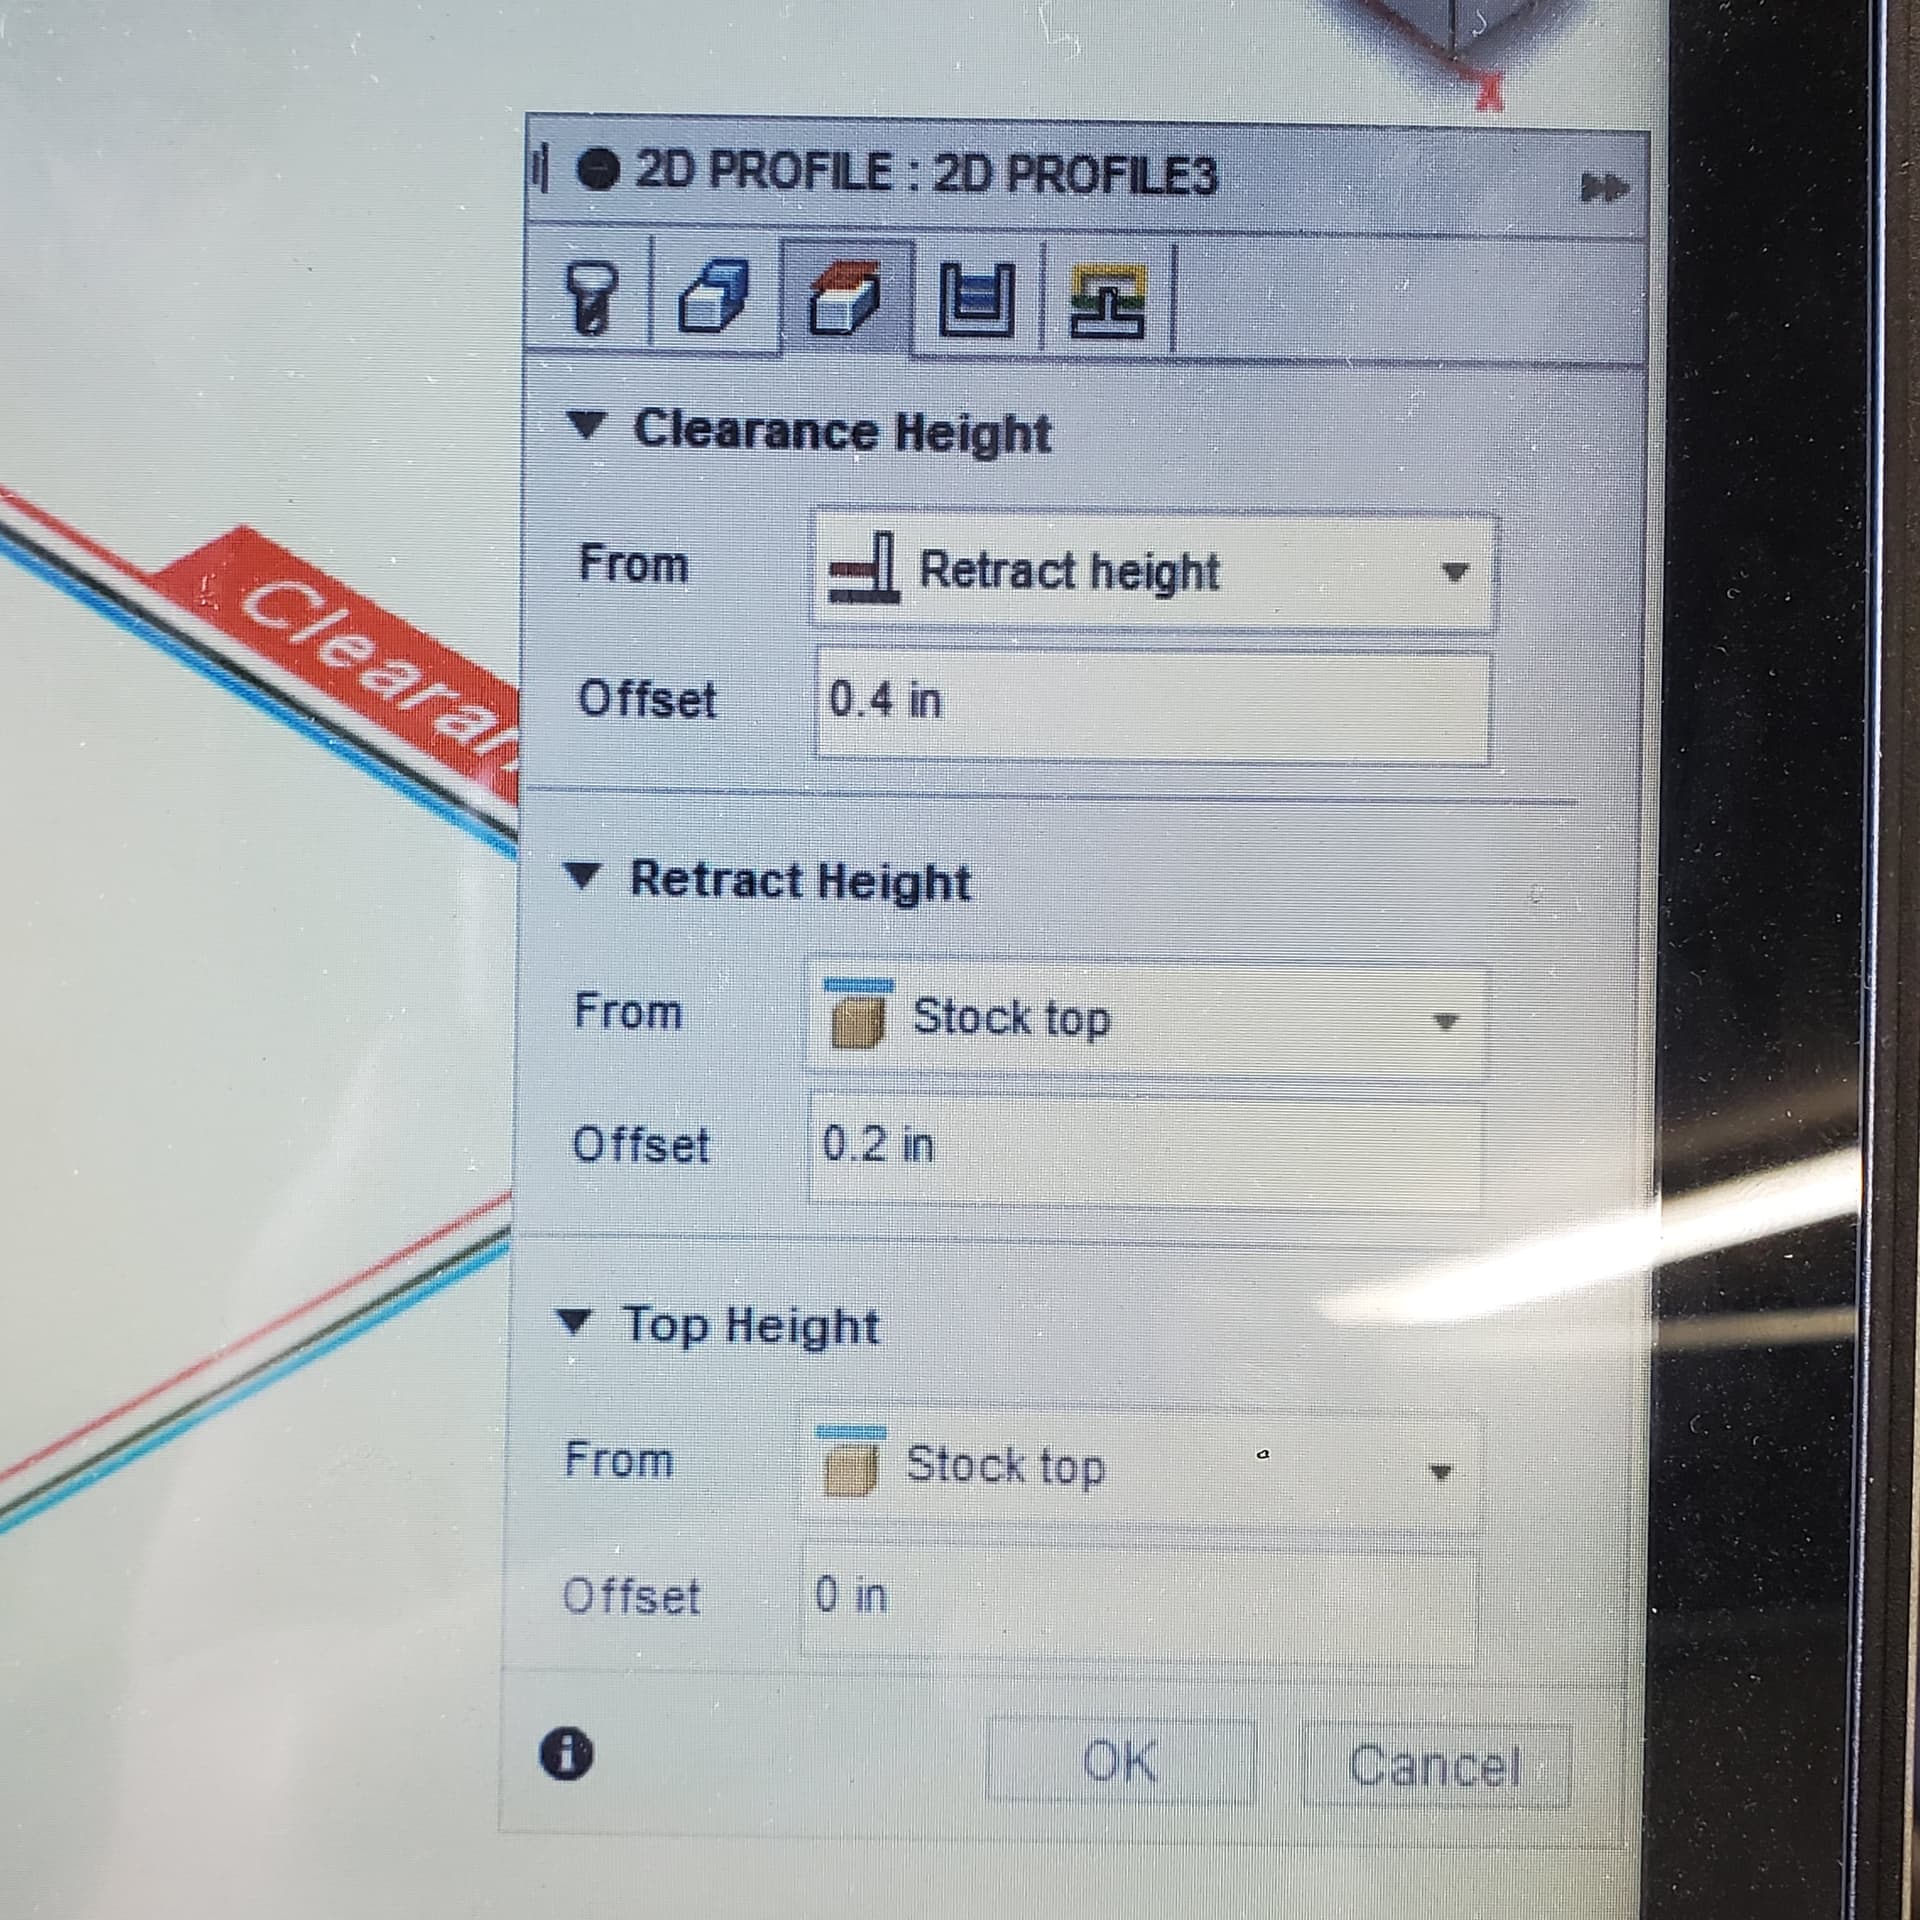
I haven’t changed any of these settings… this is all default settings in this photo…
Another question too… typically im only torching 16 guage. But i have burned 20 as the lightest and occasionally 10 guage.
Is it possible to set up my same plasma cutter under the torch libraries but have some defaults for various guages built into each one? So say im burning 16 guage when i go into manufacture and set up a toolpath and select the tool i can select a plasma cutter with some defaults already set up for whatever guage im burning? … cause i find myself forgetting to change things such as the cut speed and not catching it until im already burning…
The Torch height control does not set your cut height for you. You must set the pierce height and cut height in your CAM setup. I duct use Fusion, but I’m pretty sure those settings in your picture aren’t used by Firecontrol. There should be another screen that has the pierce height and cut height settings.
The only thing the THC does is read the voltage from the plasma cutter and use that voltage to adjust the height up or down to maintain a target voltage.
That target voltage is determined in one of two ways.
With smart voltage enabled, it takes a reading during the first .25" of cutting and uses that for the target voltage.
You can set a nominal voltage in Firecontrol and the THC will use that voltage to keep the Torch at a height that results in that voltage, regardless of your set cut height.
In Fusion, the pierce / cut height and pierce delay are set in the post processor window. Keep in mind, Fusion will add .02" to your heights. Not sure why, but setting spring back to 0.00" and reducing your pierce / cut heights by .02" will be close to correct.
As far as configuring different tools for different materials, absolutely! We currently have tool defaults for 20 ga thru 3/8". Create your own tool library in Fusion (say Cut45) and copy / paste the existing tool, then edit. You’ll still have to manually enter pierce delay and cut heights in the post processor window. I would suggest running your RazorCut45 at 45A, as thats the settings for the nozzle. (Lower amperage may improve things, but I’ve yet to set it.) As far as speeds / feeds - We took the Hypertherm 45 chart and reduced it 66%. It provides a good starting place to adjust as needed.
@ds690 is correct there are machining operations not cutting operations. I recommend you watch the Langmuir tutorials for fusion. And @TinWhisperer videos.
@Simsworx is correct torch and pierce height are set in the post processing tab.
Pierce clearance is the reason for the slight lead in you are experiencing. Set that to zero as others have suggested. Pierce clearance is also a machining operation but fire control does accept its value and input it into the code. Think and mill tool that needs to approach the cut from the side.