I’ve been having this problem for about 8 months, where after 50-60 pierces the cut45 will stop stop piercing. I searched the forums and originally thought it was bad air causing my consumables to degrade prematurely, but I have since upgraded both my compressor and added an inline air dryer and the problem has persisted. I then thought it was a software bug where it was having my torch pierce too high or low, but I’ve measured and checked and I’m in the happy medium zone there as well. Then I thought maybe it’s a loose work clamp connection somewhere but that’s good too. At this point I have no idea what’s wrong, it’s like the plasma cutter won’t fire the main arc, only the pilot arc even on clean steel and I’m about ready to throw it in the bin and find a better machine. I’m running all razor weld consumables, and the last time I changed them out I got 69 pierces and 7 minutes of cut time before it stopped working. Anyone else come across this? Thank you.
First off: Welcome to the forum.
Second: Sorry you are having this problem but a bit more information would be helpful.
I know you won’t be able to post any photos yet:
You won’t be able to upload any photos/files until you have posted about a dozen times (I just made that number up…don’t know the actual number). And starting a topic doesn’t count. So post a few more times on this thread and some others, then you will see that you can upload a file. And, initially, it will only allow one file per post.
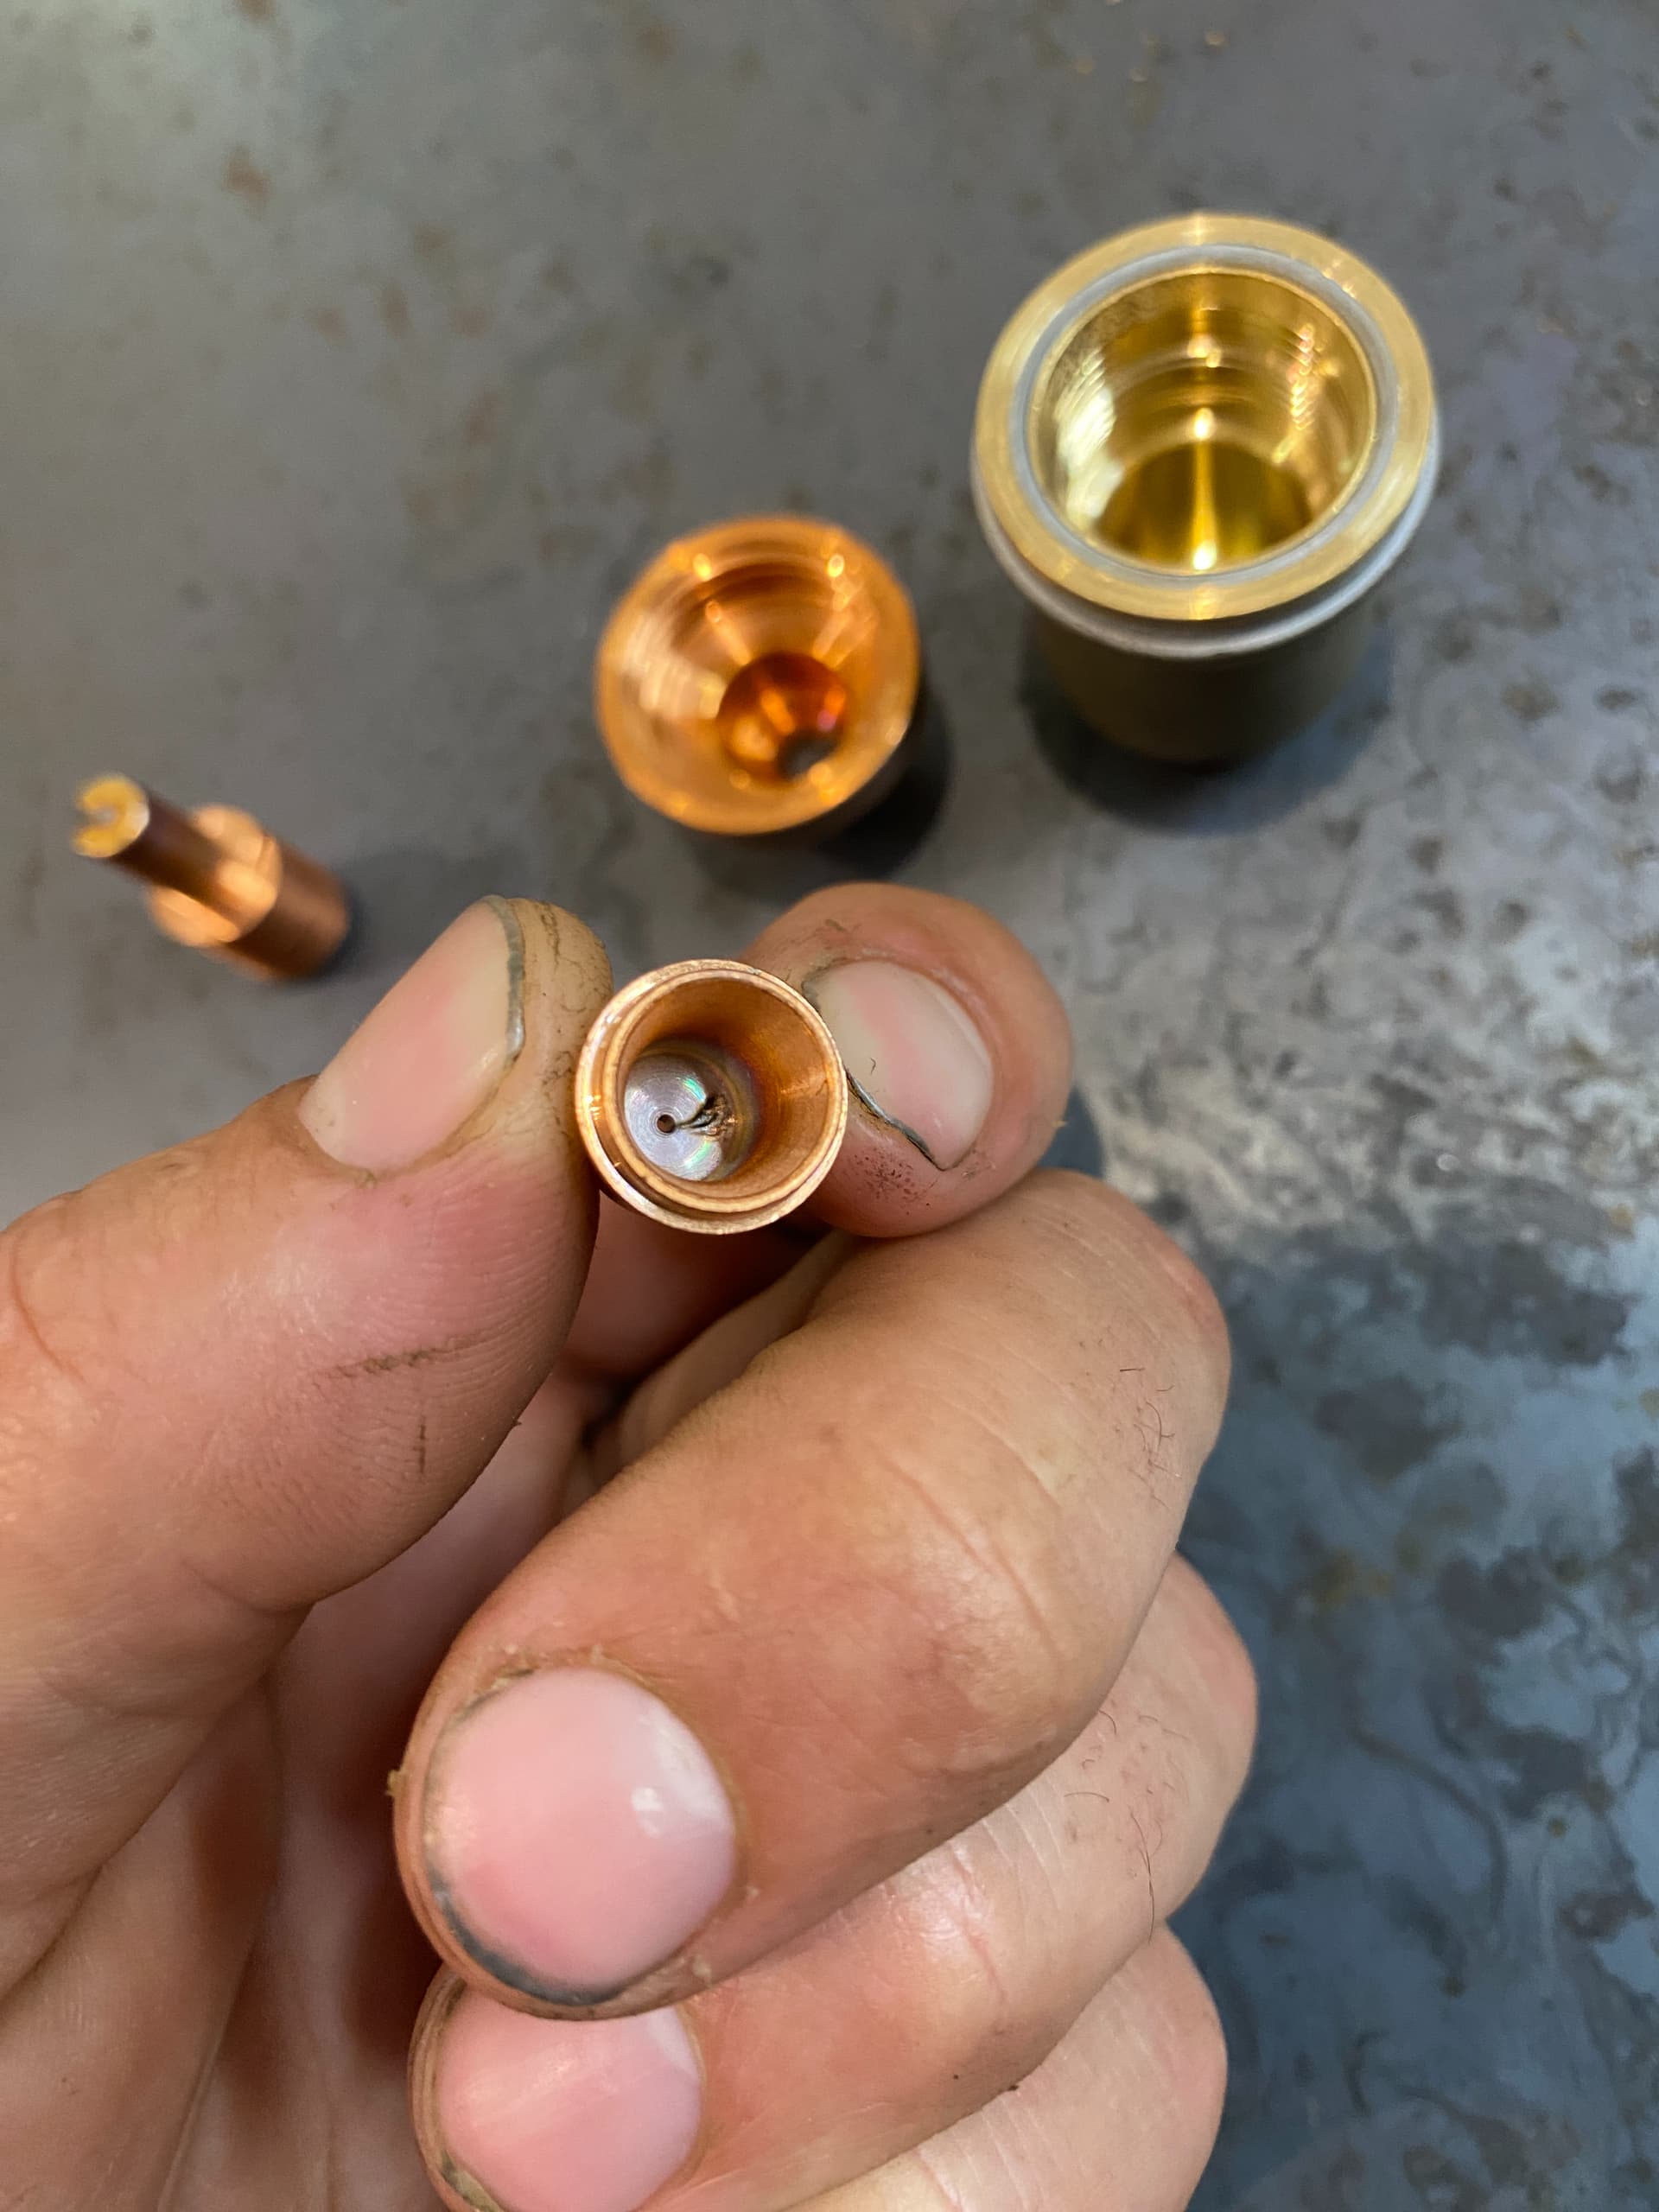
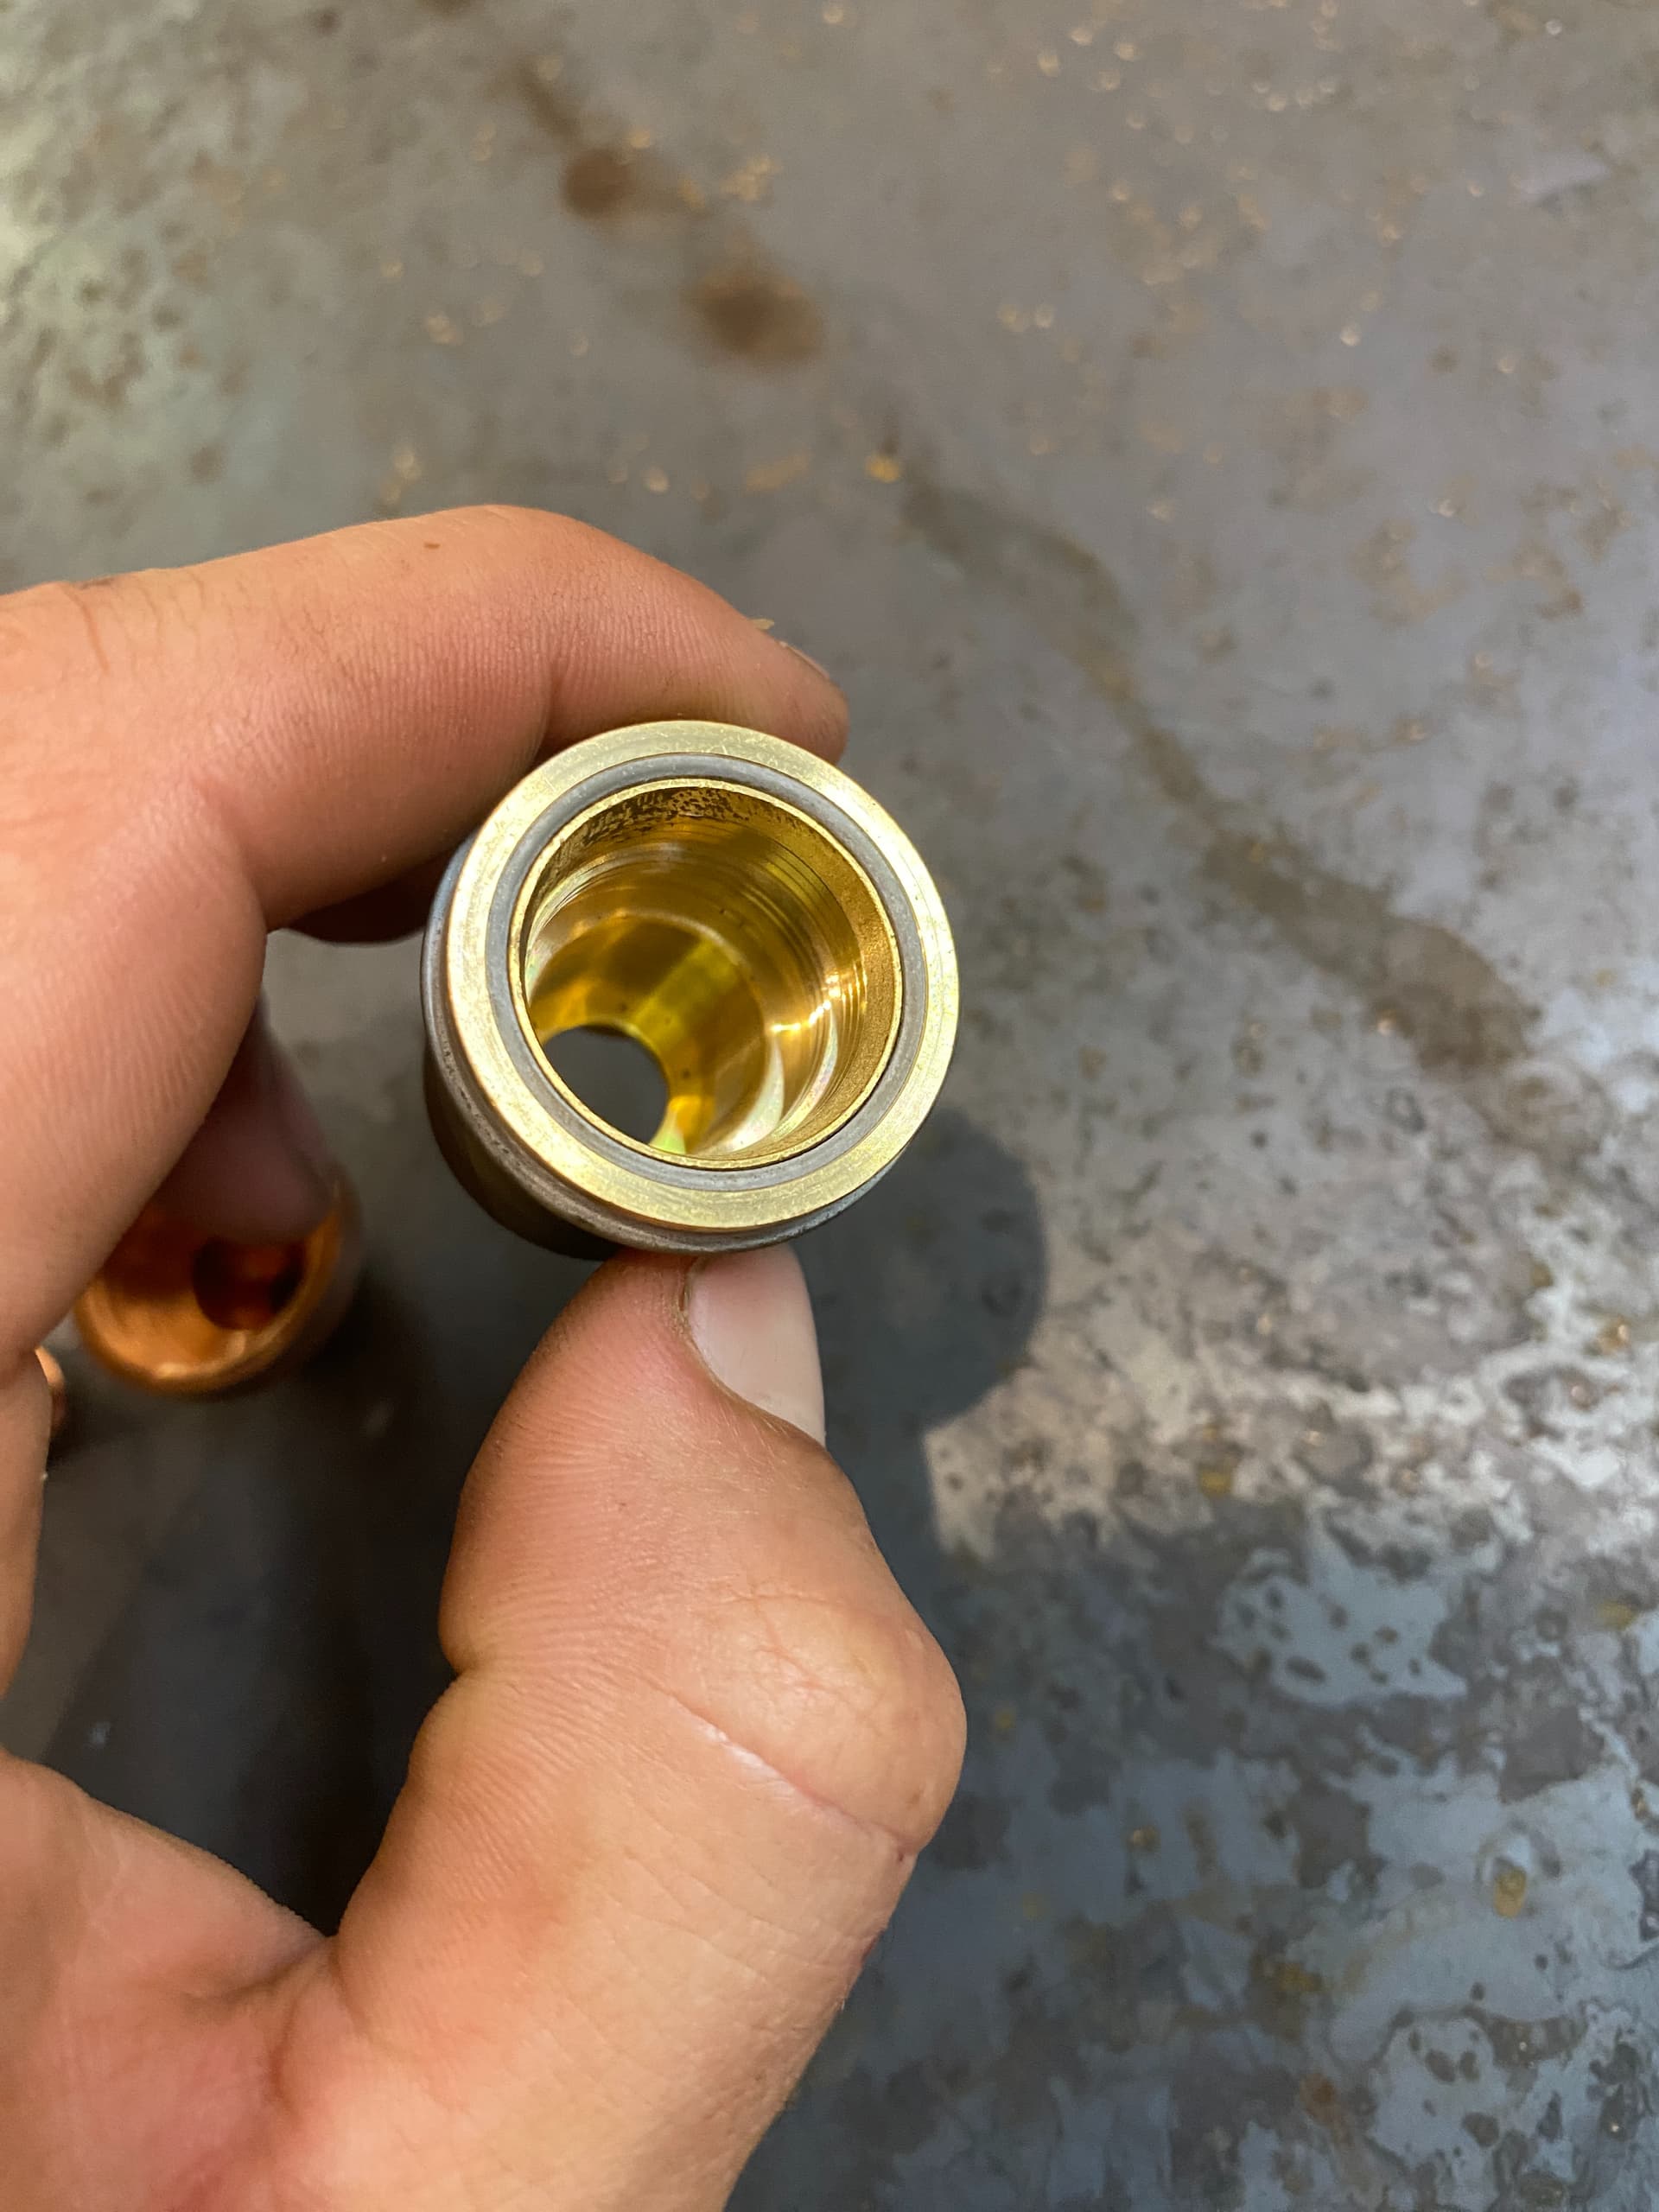
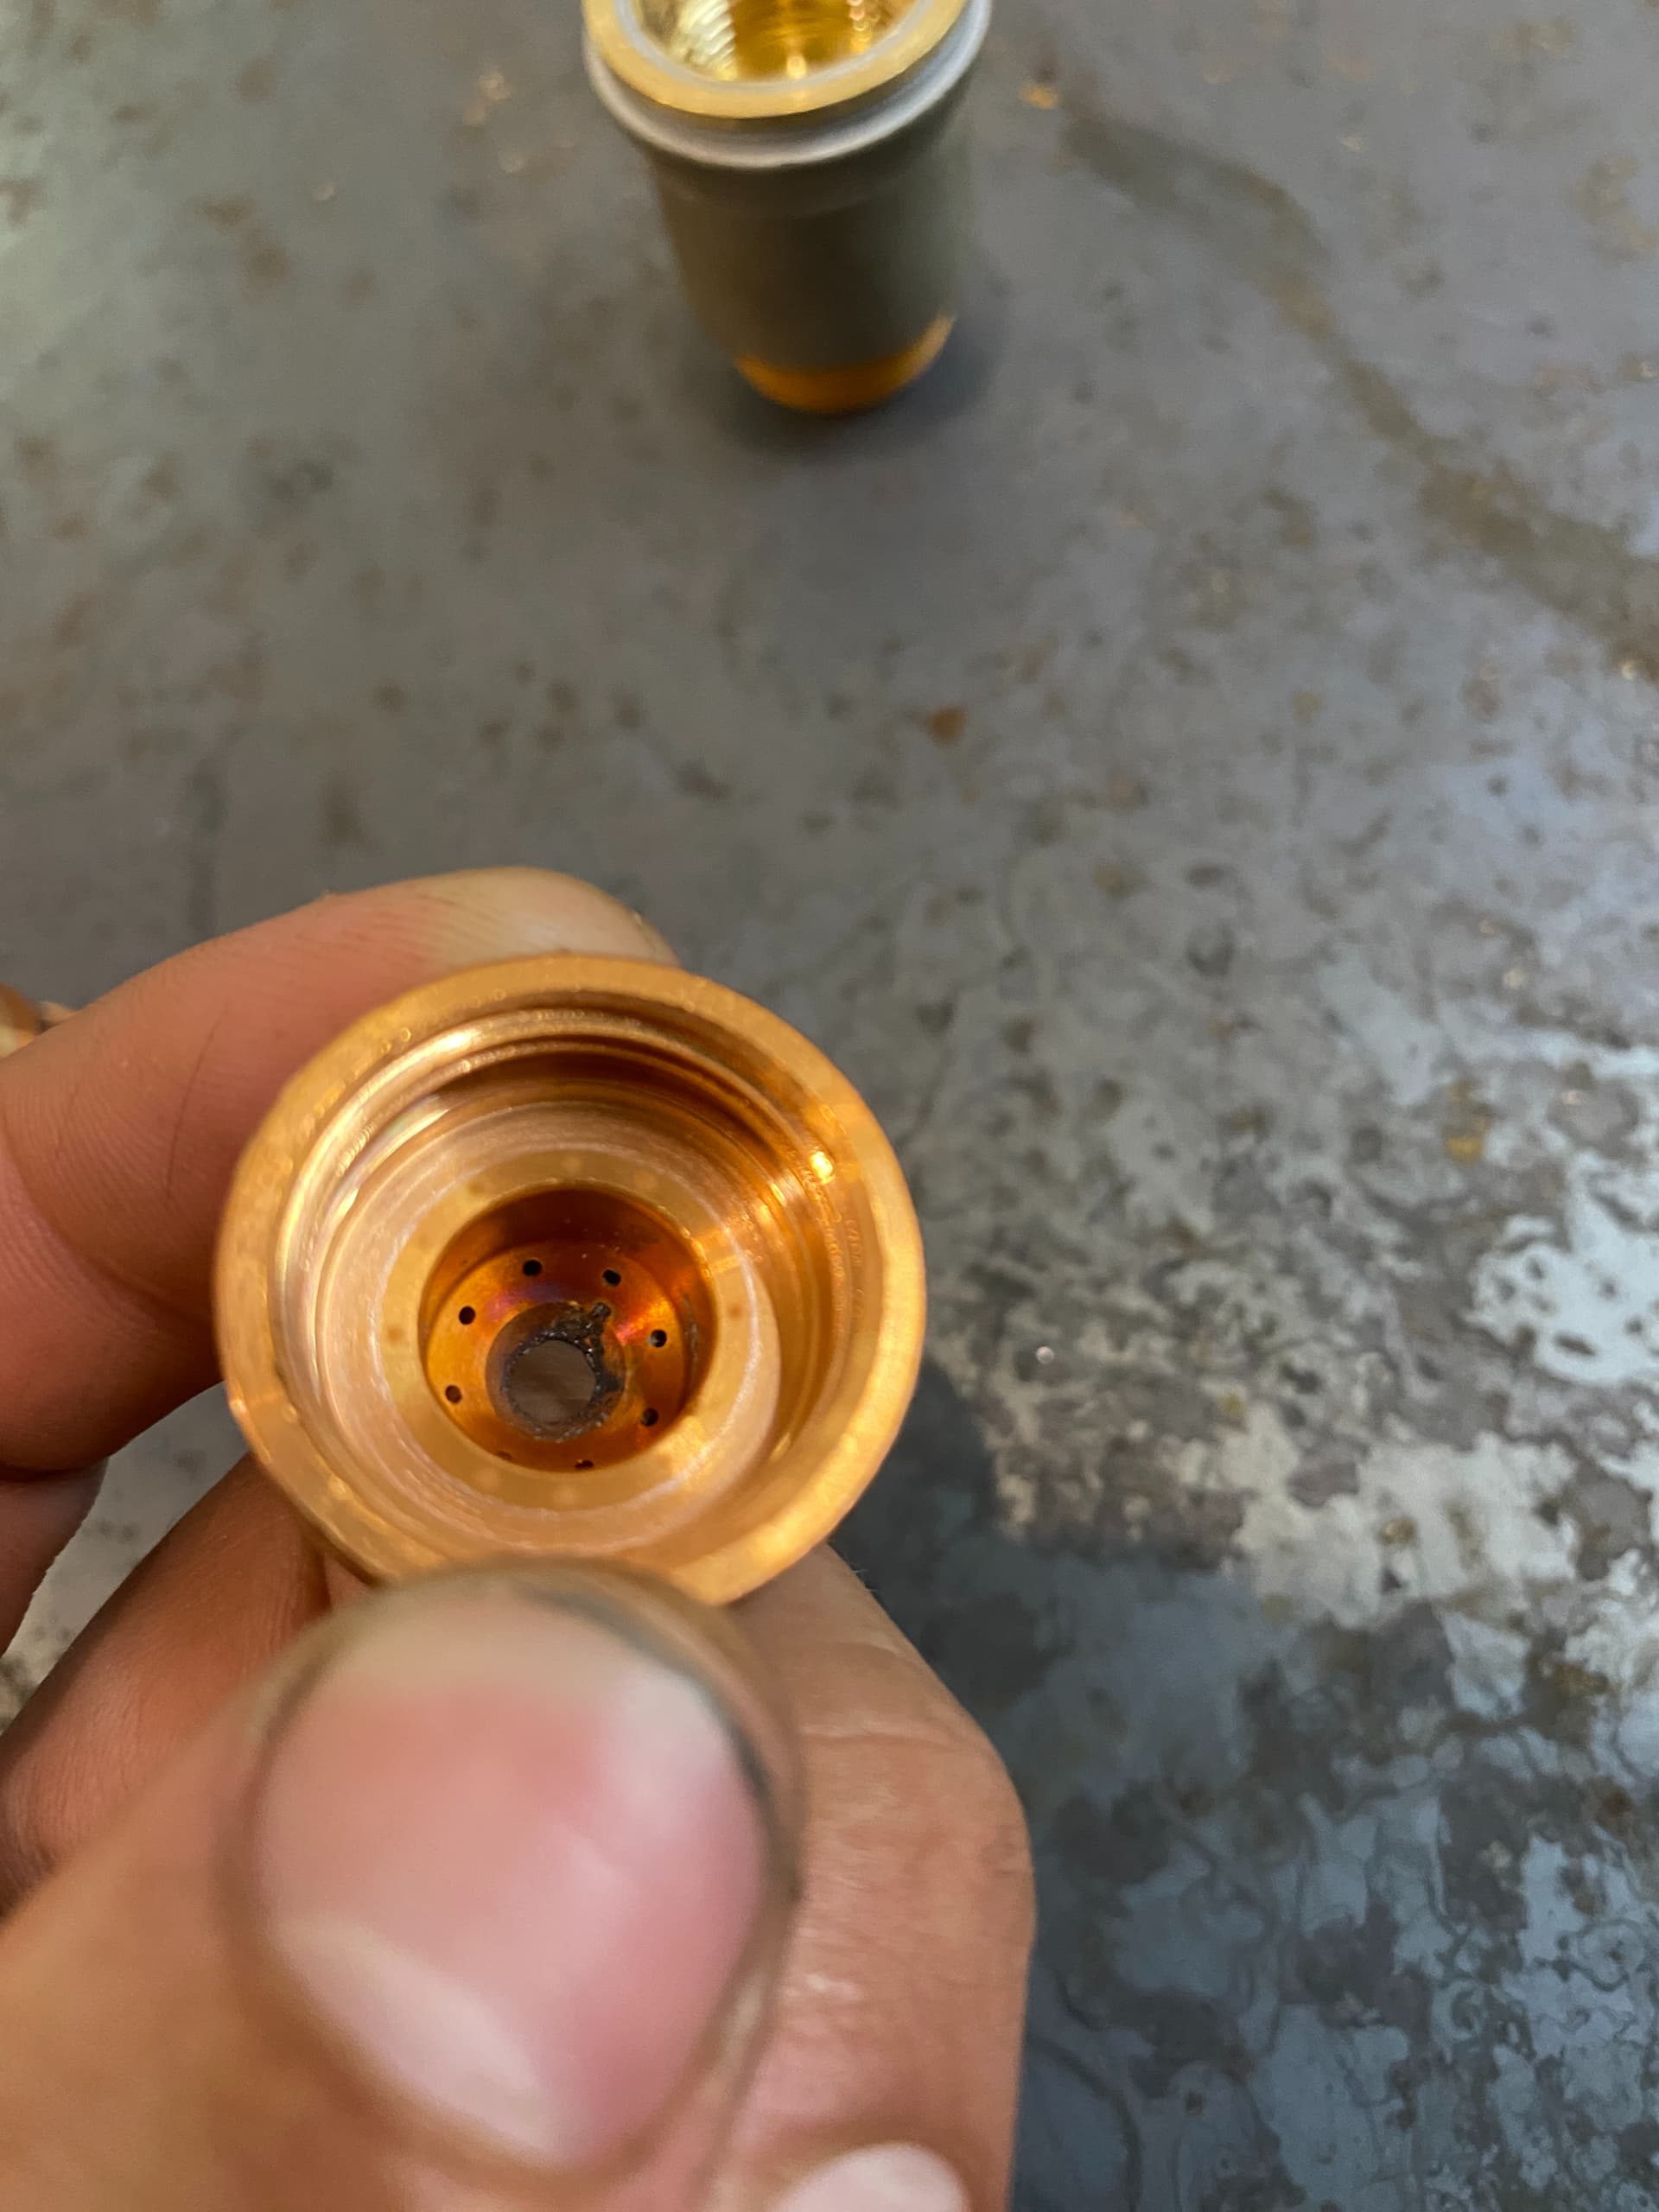
But when you are able to post, a look at your electrode, shield and nozzle (inside and outside) would be very helptul.
I don’t have Razorweld but lots of folks do so they will weigh in.
There are lots of things that destroy the consumables early: piercing too low, cut height too low, moisture in the air.
I know you said you have checked the pierce and cut heights: what are the numbers that you got?
Are you using THC? If your cut height is too high, there will be a constant amount of extra plasma eating away at the consumables.
If the pierces are without sufficient lead-in or too low, the initial blast burns up the nozzle and thus the effectiveness of the consumables.
What is the cut quality: dross, bevel. If you have a bevel, this can be another indication of incorrect cut height.
You said you have an air dryer. Are you saying a refrigerator air dryer? Do you have a filter after the dryer? What kind?
And do you have a desiccant filter with a motorguard or similar filter after the desiccant filter. Since the beads can break off, they are known to fly thru the system and into the plasma stream destroying consumables.
Thanks for the welcome! I’ll work on being able to post some photos of the requested, but I can answer most of your questions right now.
Pierce/Cut heights: Set in fusion as 0.12 and 0.0625 respectively. Measured 0.11 and 0.0625 using feeler gauges off a plate. (spring back set to 0.020 in fusion)
THC: I am using torch height control, and mostly cutting 16ga and thicker. The only changes I’ve made from default on the THC is increasing the reactivity so it could follow larger deformations of the material.
Cut quality: Little to no dross on all of the cuts, except for small features like holes <0.25" which I usually avoid anyways. The bevel used to be extremely noticeable on thicker materials (as well as dross), but since upgrading my air systems and confirming the IHS values its very hard to detect. Only a slight bevel noticed on 0.25" though I haven’t cut thicker since all the mentioned changes.
Air quality: Yes I am running a refrigerated air dryer. Its an ingersoll rand model that I got it from work because we upgraded to a larger one. After the dryer there is a water seperator/regulator to set the air line pressure (105 psi) and just before the cutter I am running a motorguard M60 filter.
I did some more reading on the forums and thought it might be a set pressure on the cutter, because my gauge was reading 60 psi before firing. I dial the plasma cutter pressure up beyond 75 psi like is recommended, but haven’t had a chance to thoroughly test it.
I’ll keep you posted, and try to get some pictures uploaded soon. Thanks!
This concerns me a little. You’re saying you have 0.12 pierce height and 0.0625 cut height entered in the post processor in Fusion, with the spring back set to 0.02. And these values produce a measured cut height of 0.11 and a measured cut height of 0.0625?
The reason I’m concerned is Fusion will add the spring back value plus an additional 0.02" to all your values. Your pierce height should be approximately 0.16" on stiff material. Your cut height would be at 0.1025, which I think is too high. Note - If you actually are getting spring back when the intial probe occurs, what I’ve said doesn’t apply.
The nozzle looks bad both the size of the opening as well as the scarring inside. This nozzle would have a tough job of focusing the plasma stream to cut efficiently.
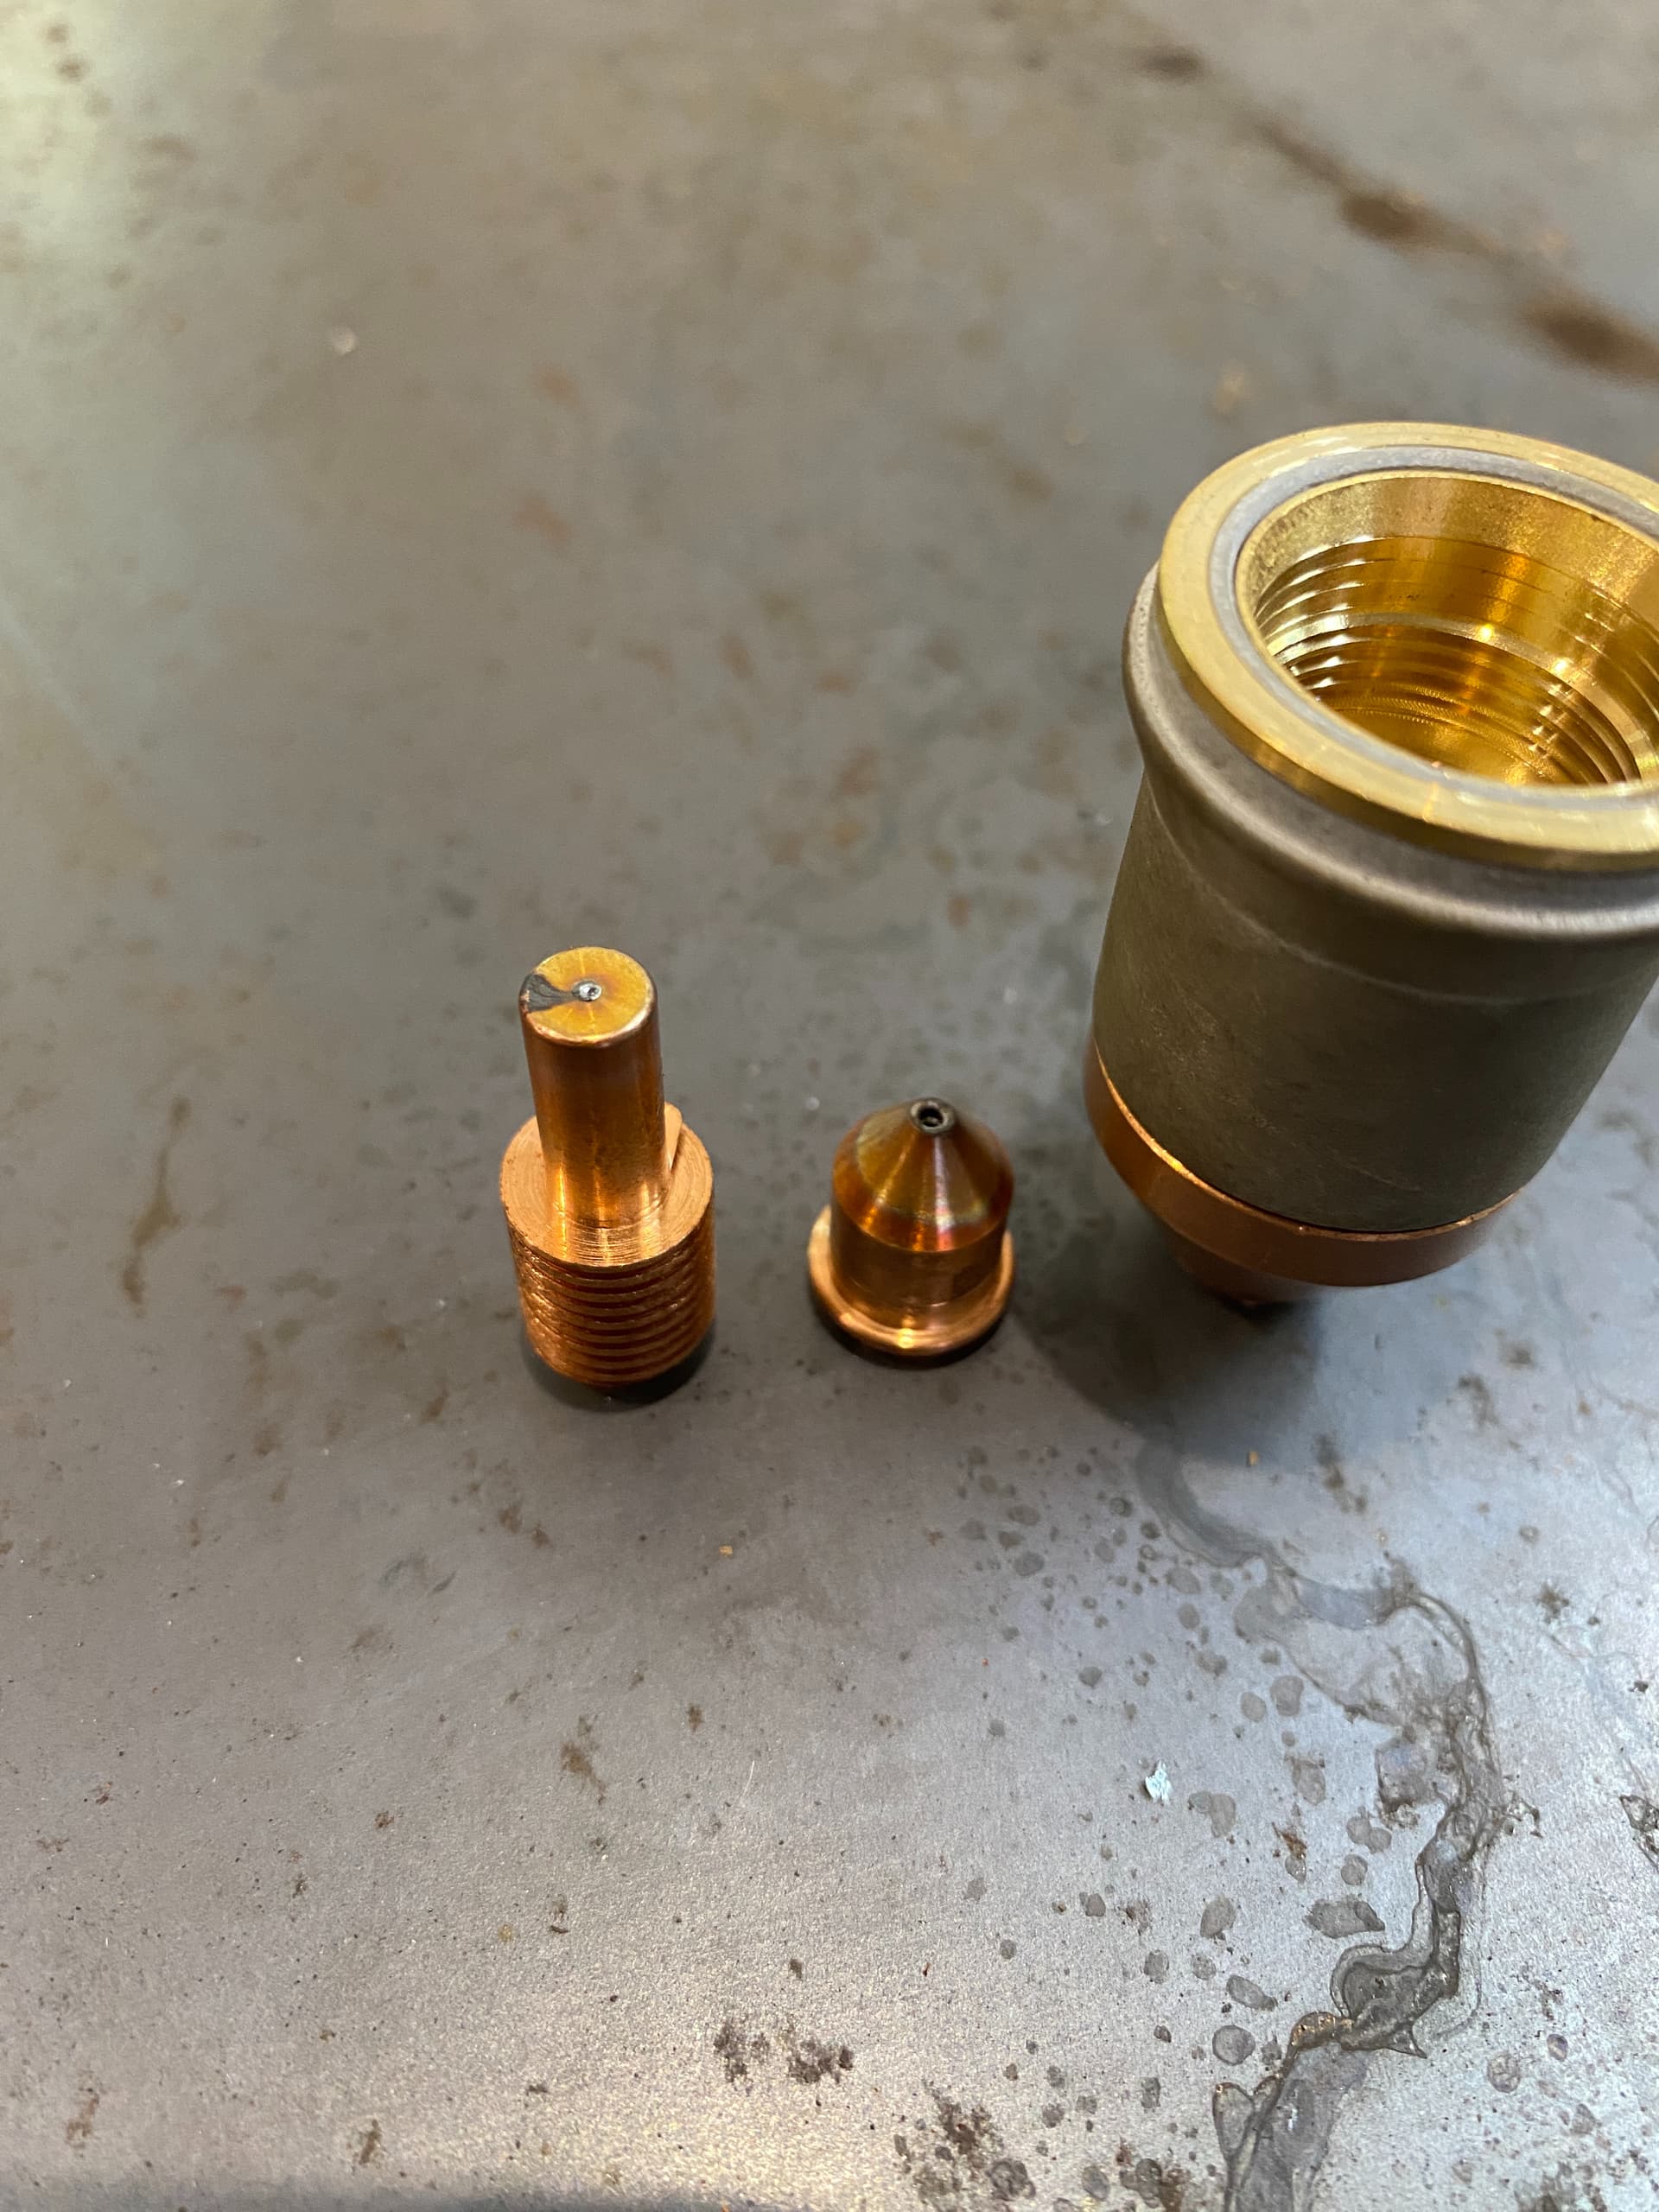
And the electrode is going. The consensus is 1mm depth. You are a better judge than me since you have it there. It looks like there is a tunnel into the electrode which would indicate that the hafnium is spent.
Explanation on Google search:
Hafnium is a good absorber of neutrons and is used to make control rods, such as those found in nuclear submarines . It also has a very high melting point and because of this is used in plasma welding torches. Hafnium has been successfully alloyed with several metals including iron, titanium and niobium.
Basically, it is the material that makes it possible to reach the 10 to 20,000 degrees F that the plasma stream makes to cut the metal. Once the Hafnium is gone, you will probably see a green color coming from the torch. That is not a good sign, seeing green, and could potentially spell doom for your torch. The green color indicates that the Hafnium is gone and now the stream is burning up the rest of the electrode that has a high copper content. Things will get hot enough to destroy the torch and all of the consumables.
Jim is right but a little technical…
on the tip of your electrode is a little spot and it is the material called Hafnium
in your first picture you are holding an electrode and that little divot is the Hafnium…
and when it runs out from use it will change color or blow out the tip completely and look like a crater in the end of the electrode.
I will frame that and cherish that for as long as I will remember
Question for Nick: I see that you were able to post multiple pictures and in less than 10 posts. Is that correct? That is helpful for me to know what to tell others (new members) when they are not able to post files/pics.
The hafnium in most electrodes is about a 1/16" round and 1/8" deep. It will get between 3500 and 4000 degrees when you are cutting. The only thing that keeps it from melting the electrode is the air swirling by the electrode at 20,000 fps. This is why you are told to replace the electrode when the pit in the middle is about 1/16" deep.
Thanks for explanation Jim! You are correct, I made this initial posting, replied to you and posted a question on one other forum (projects) when I got the email saying I was bumped up to a new trust level.