Going through the CAM process instructions for the first time. My Tool Library screen looks very different from what is in the video. Unless someone has better information I will make the assumption shown in the attached image.
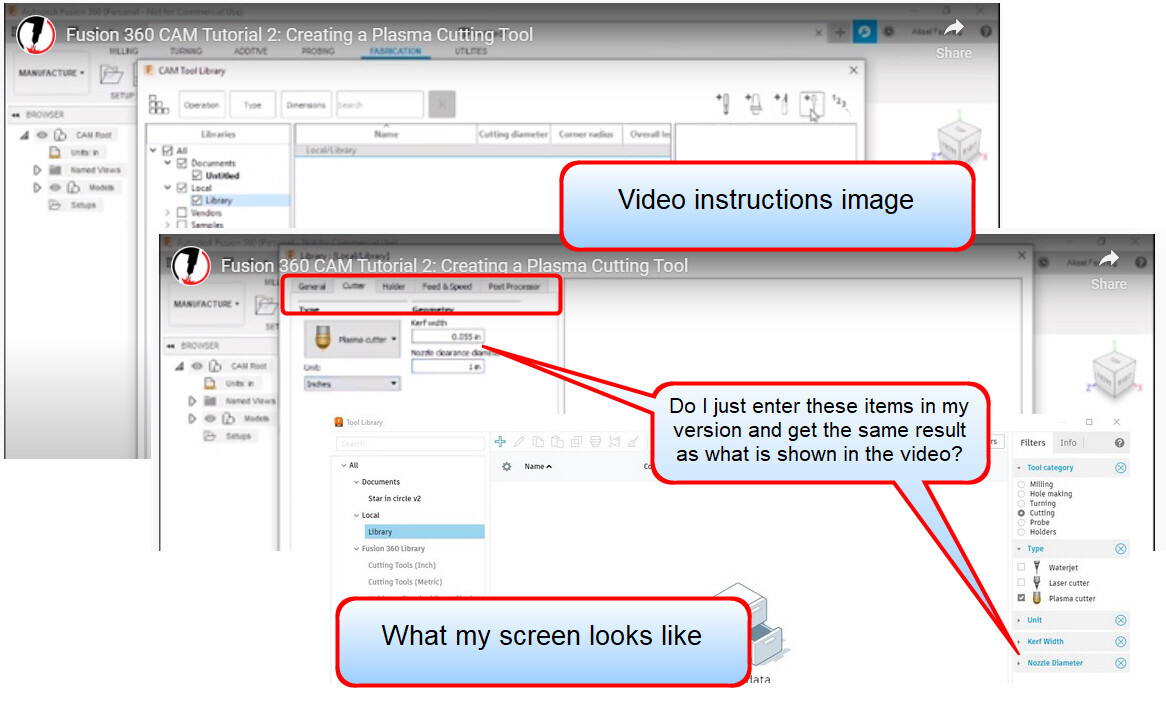
Yes. That video really needs to be revisited. The only values that are really important for the tool is:
“cutting”, “Plasma”, “kerf width”, cut speed, lead in speed. Enter values based on your cutter and the chart that came with it.
For nozzle diameter: they had “1 inch” for clearance but it is not necessary and Tin states that it messes up the visualization of the simulation if you pick “1 inch” so just make it the same as the “kerf width.”
Putting in the volts, air pressure, etc is a waste of time because it does not flow to FireControl.
All of these other parameters will be entered when you get to the Post Processor.
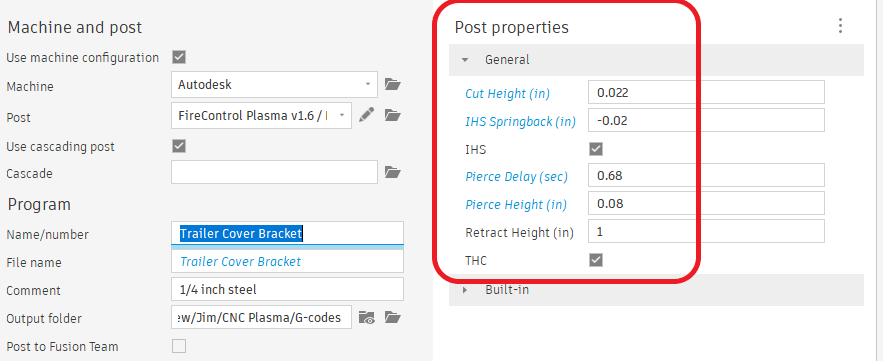
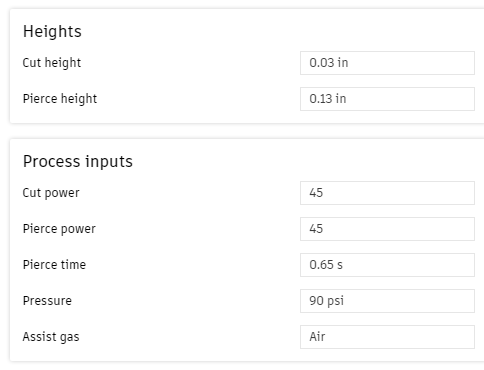
Don’t use my numbers in the red box that have blue headings. Use the more typical:
Cut height: 0.060
IHS Springback: 0.02 or maybe 0.04
Pierce Delay: 0.5 seconds (be prepared to increase this number)
Pierch height: 0.15 inches
4 Likes
Thanks. I used to teach Autodesk Inventor so the CAD part is pretty easy, but CNC cutting is totally new.
2 Likes
I saw one of Tin’s recent videos and he went thru “making a tool” and he still fills in all the values just in case Fusion and Langmuir make the values useful.
For new users, the less busy work, the better.
1 Like
I’m gonna have to try gradually increasing my pierce height. I assume it’s better for consumables and probably lowers risk of any cut surface dross.
I normally only go .07" for 16-18 gauge and bump it up a bit more for thicker stuff. I’ve always worried I won’t cut through and since I’ve had so much trouble with FireControl freezing, I am afraid I’ll ruin a piece of metal.
My cut height is same as yours.
1 Like
Most recommend 2.5x the cut height: Pierce height to cut height.
2 Likes
I did a little further reading and many websites quote that the pierce height should be 1/8" or 0.125 inches. And I found several that said it should be 2x the cut height so with 0.060 would get you to 0.120.
I think you would be good if you were somewhere closer to the 2x cut height. I know I have often used 2x cut height and have not had any issues (that I could tell).
1 Like
And if you look closely at the hypertherm cut charts overabout 5/16 they move from 250% that Pierce height to 400%.
I think this is to help the life expectancy to consumables.
2 Likes
The video guides were created a few years ago. Since then, Autodesk has released some updates to Fusion 360 that have changed the UI.
We like releasing guides in video format as it seems to be easier for beginners to follow along with, but they takes a lot of resources to produce, so it’s difficult to keep the video guides completely updated as changes are made to Fusion 360.
We’re currently working on a guide for Fusion 360 that is text-based with photos, which can more easily be edited and changed to remain completely up-to-date with changes to the UI.
Apologies for the confusion!
2 Likes
No worries. I understand.
I think the situation with the “tools” is that many of the YouTubers will say they are doing a “beginning” series on Fusion 360 and will then gloss over the tools by saying “You will need to get that information elsewhere.” So kudos for Langmuir having a video covering it.
I have tried to capture and explain things with still images but it can get overwhelming to try and visually show everything you want to convey. You find yourself questioning: Do I show what happens when I click each successive button for creating a circle.
Can I show the last menu like this:
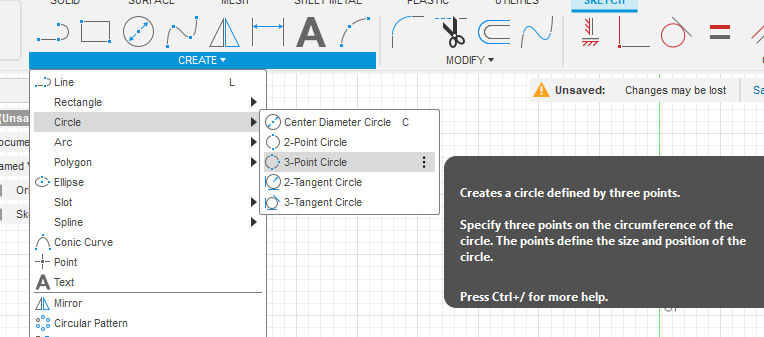
Or do I need to show the menu choice just before that moment:
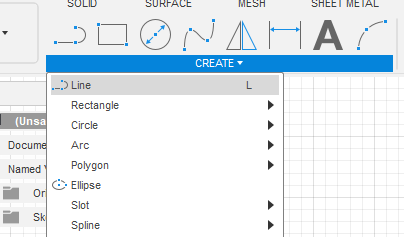
No. I think what Langmuir has done is excellent. Perhaps a disclaimer that Fusion 360 has had subsequent updates so the images/menu choices might look differently.
Note: It would be nice if there was a bit of an explanation of what choices are needed in the tools and that some of the information in “tools” does not flow over to manufacturing nor post processing and therefore not to the cutter. Things like all of these:
That was really confusing to me when I first started. That is where watching a lot of Tin’s videos helped that to sink in.
Not complaining…just explaining from my perspective of a previous newbie to a rank novice.
2 Likes