Now that I have my CrossFire controller able to handle full table sized cuts with THC control (see Finally completed my CrossFire mods - #11 by TomWS), I can begin contemplating some of the large projects that got me into this in the first place!
My first ‘real’ project is a 66" long yard art that I’ve been planning since before I even ordered the CF, however, not wanting to waste 12 square feet of steel if I don’t have a good indexing process, I scaled back to a manageable project that would test out the basic elements of indexing cuts (the process of cutting an object larger than the table size using multiple aligned cuts) with something that would be fun for the yard, but not cumbersome or as wasteful if the process didn’t work out perfectly.
I’ve been making various yard art that my granddaughter enjoys when she comes to visit (bunnies, squirrels, turtles, etc) and she loves to visit nearby farms and see the sheep. So, an almost life-sized sheep seemed to be a good plan.
I wanted to keep the stock material size to 24x24, following my general WIHOH** material selection process, but wanted to maximize the finished product’s size. I found a good SVG of a Sheep, loaded it into Inkscape and, with a bit of scaling, rotation, etc, managed to jockey it around so it literally filled the 24x24 inch space:
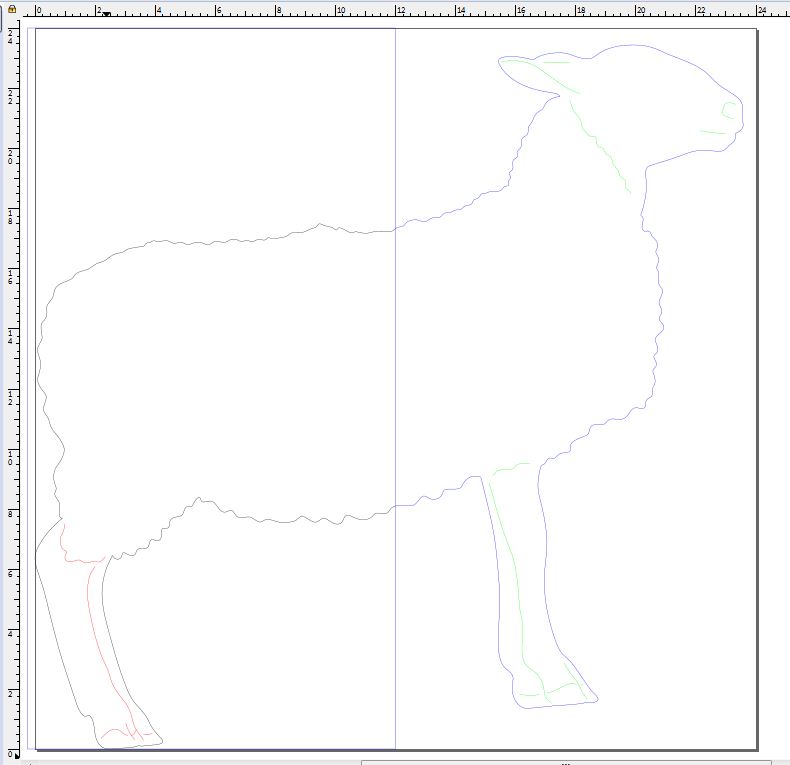
The various paths in the drawing are the different cut layers, but the first thing to notice is the vertical line in the middle of the image. This is my indexing line. Since this sheet can ALMOST be cut on a CF (if I limited to 23 inches in Y), I could have placed the indexing line practically anywhere. However, to make life easy, I chose the 12" line. Note that the box is 12.25" wide as I wanted to provide a 0.25" border on the left side and left about the same on the right and top positions - I didn’t want to cut past the edges of the stock.
With the indexing box in position, I could edit the main outline path and break the top and bottom of the outline near the indexing box and make two paths out of it. I then made each path: Left Outline, Rear Legs & Wool, Right Outline, Front Legs, Wool and Head each on their own layer with their own unique color.
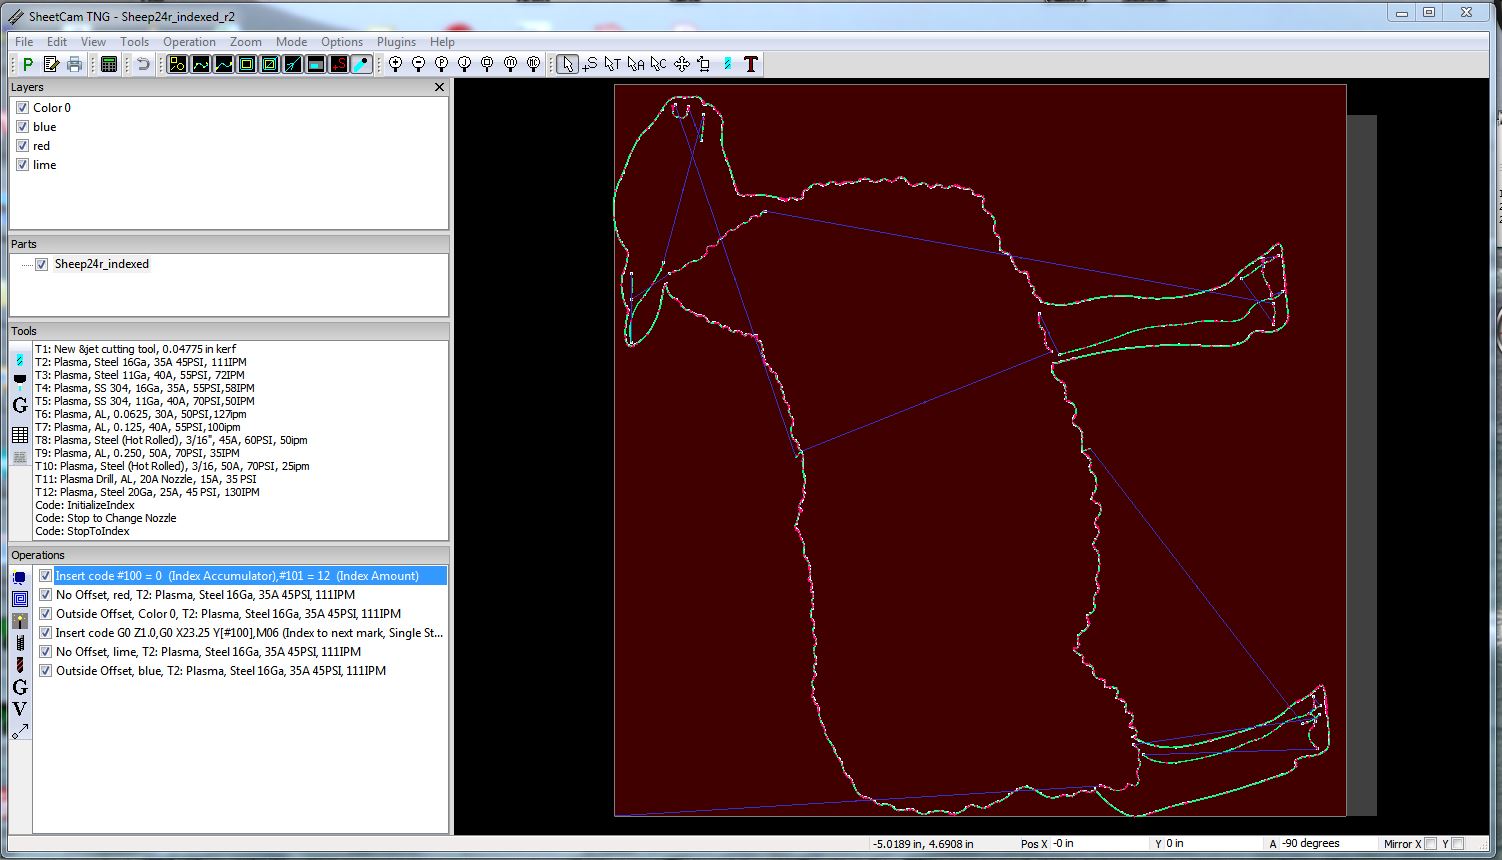
I then loaded this into SheetCam, rotated -90 degrees to put the long end in Y direction, and, as you can see set up 6 operations for the job. The first simply initializes two variables, ‘Index Accumulator’ and ‘Index Amount’. The ‘Index Accumulator’ is set to 0, the ‘Index Amount’ is set to the 12" of my index window. The next operation cuts all my inside cuts (Wool, internal leg cuts), then the ‘left’ outline is cut.
The next operation is where I move the Y axis back to the first index mark, stop the G-Code execution (M06 Tool Change) so I can reposition the sheet to the new index mark (that I had scribed into the steel). Once aligned, I press start and the very next thing is offsetting the Y axis to the new reference value (12" in this case) and cutting resumes. Obviously this is a bit more complexity than necessary for this single index, but, as I said earlier, I have jobs that will have 3 or more sections, so I wanted to prove the coding.
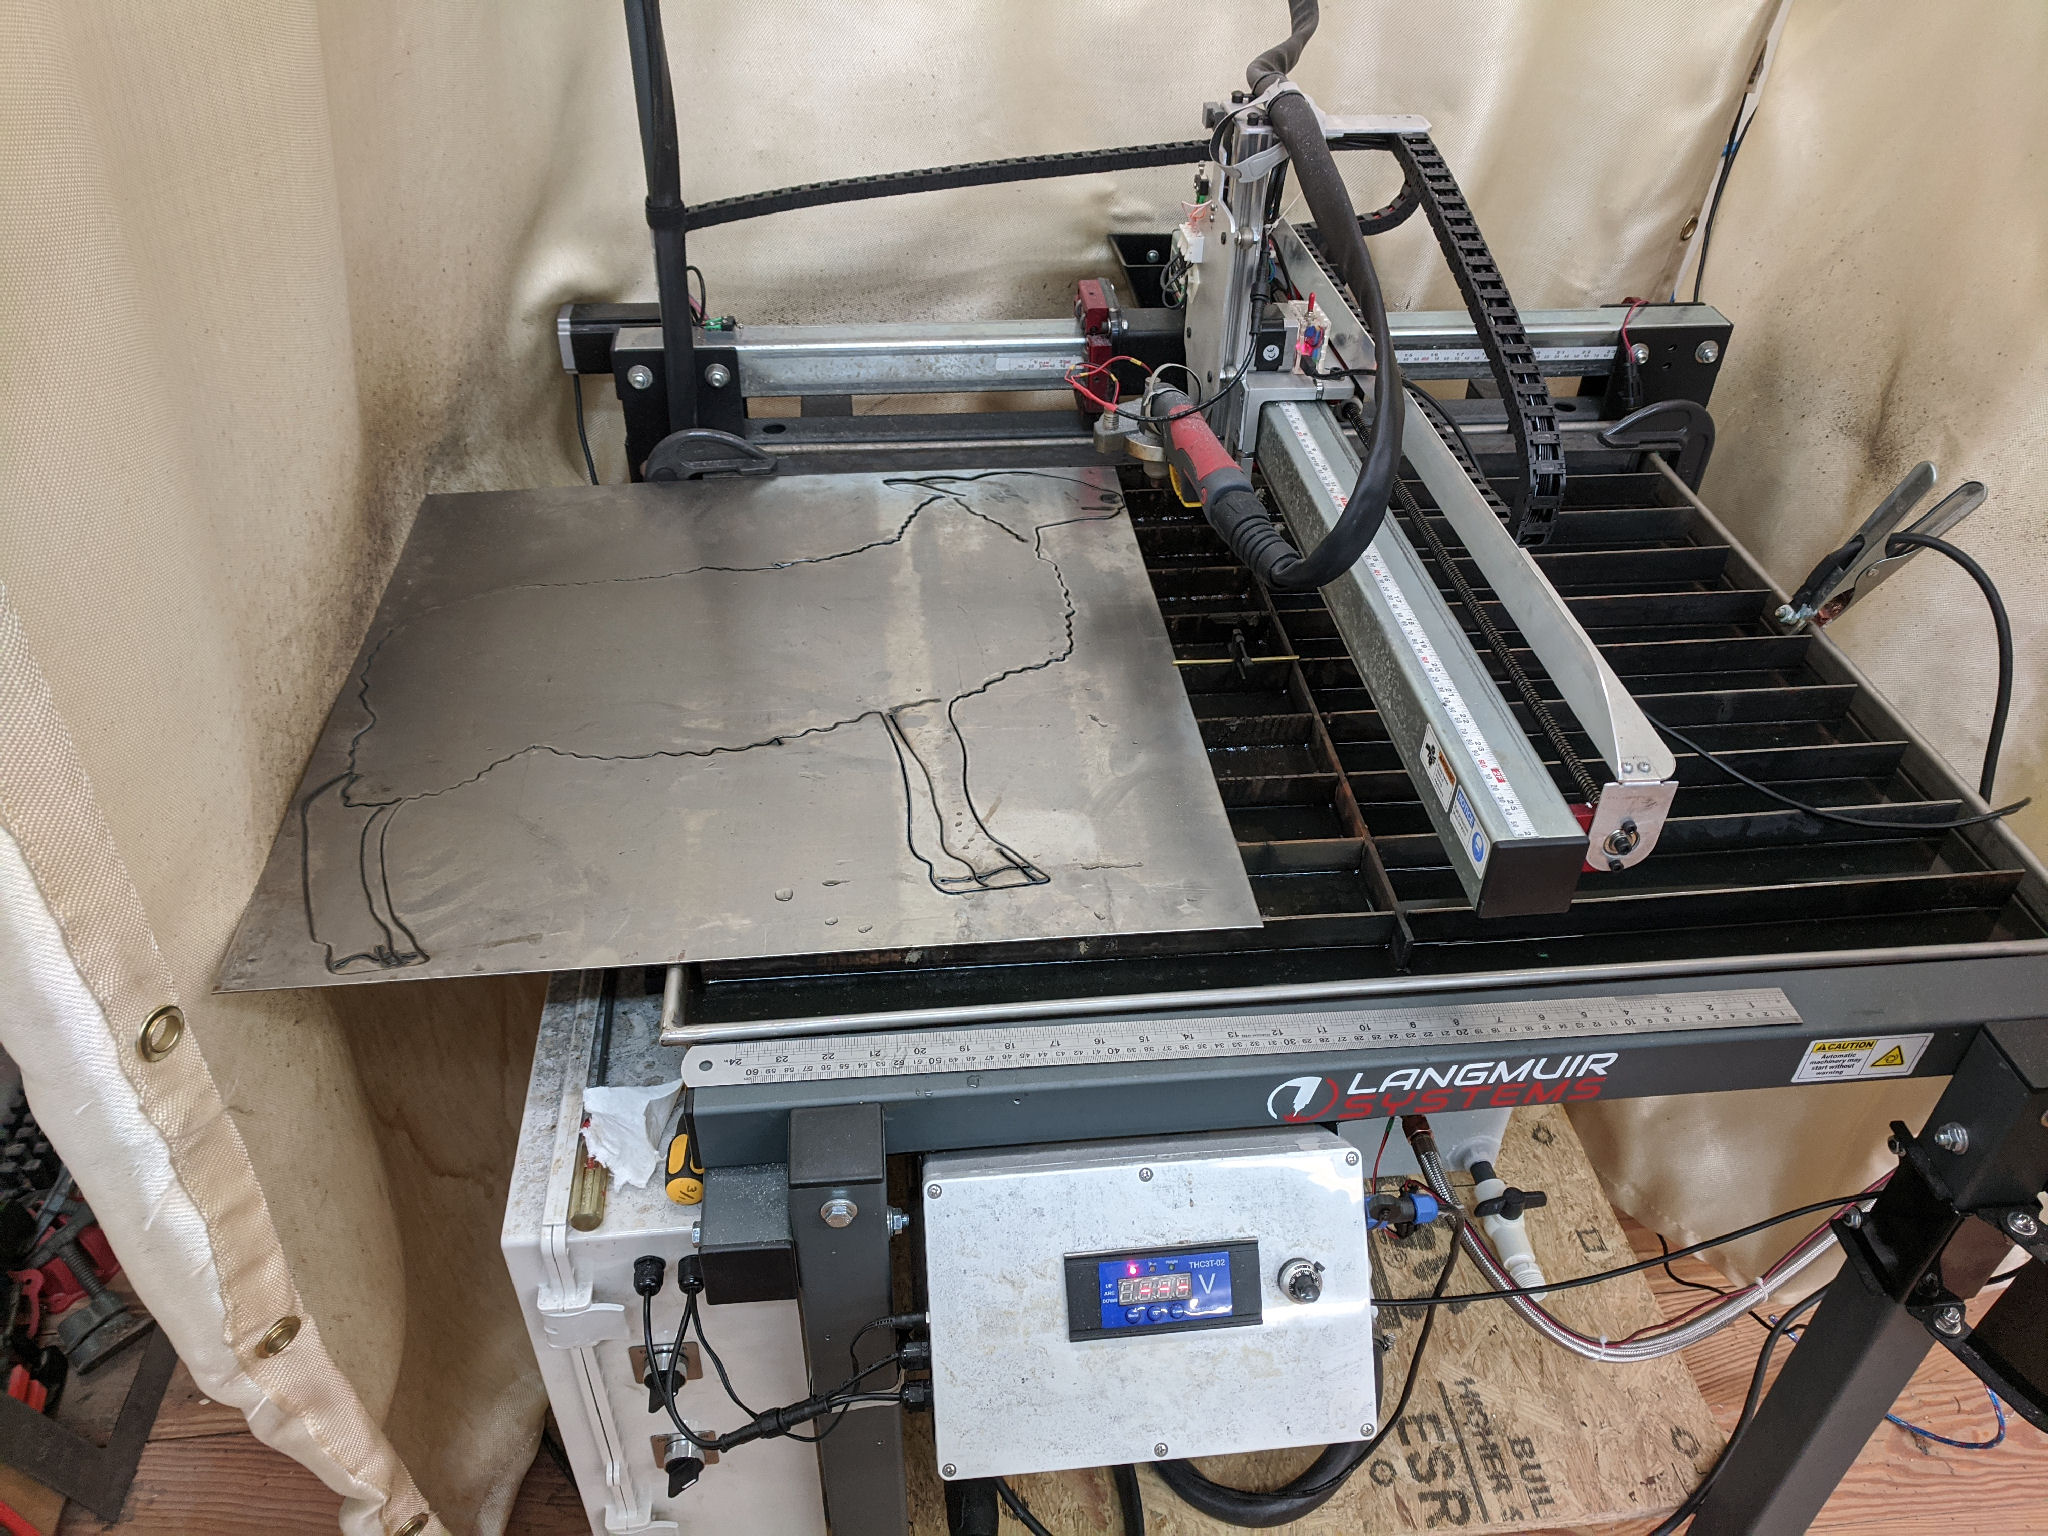
So, after the cutting was done, here is the work on the table:
How did the indexing line up? Here are the two joints:
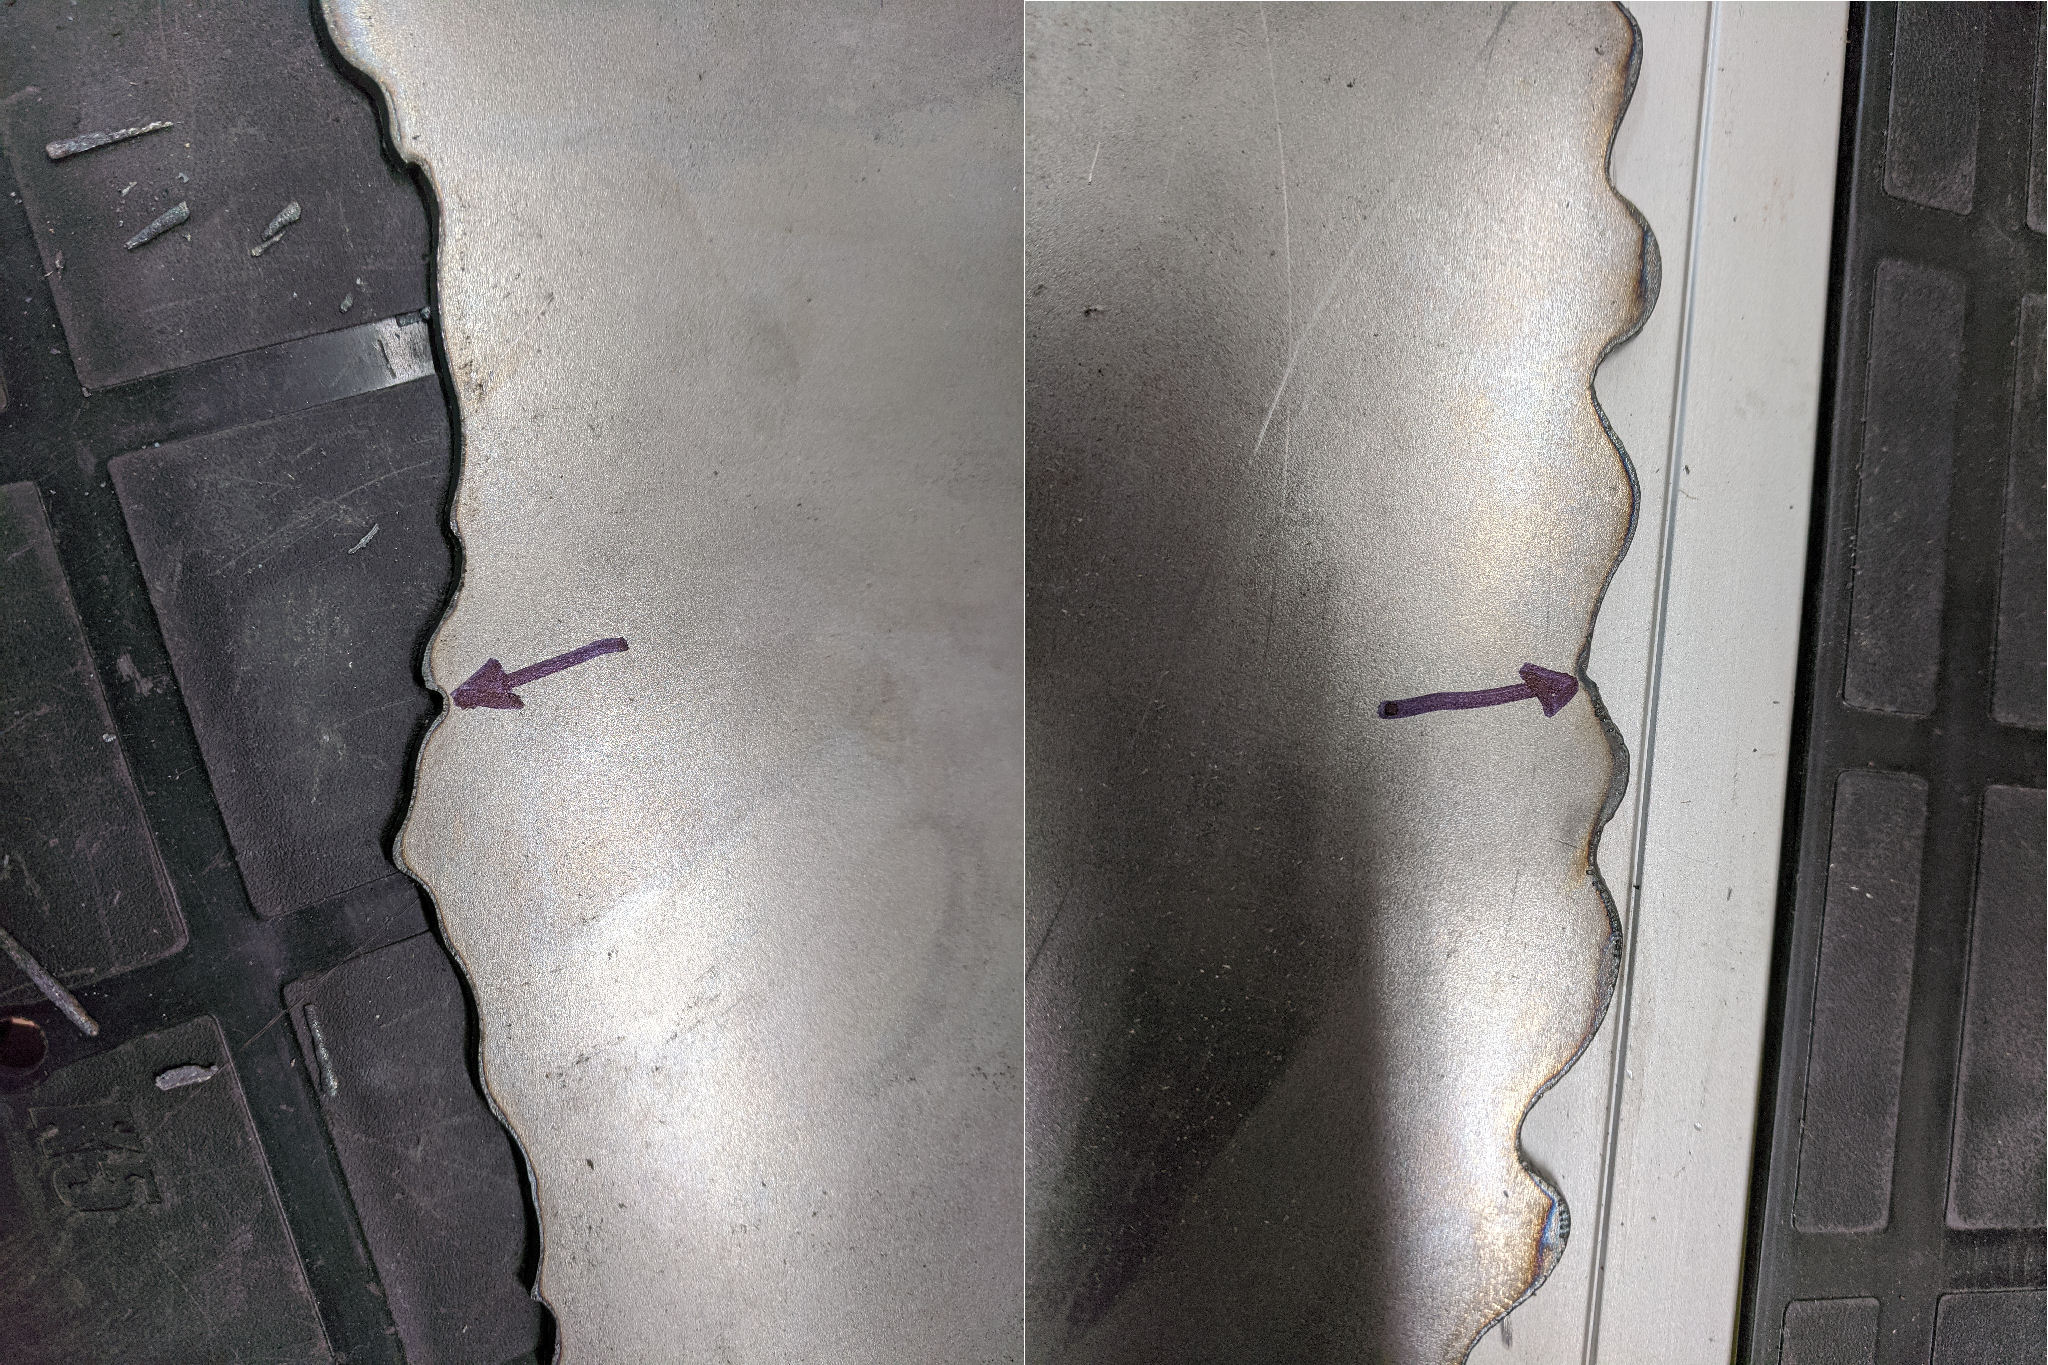
All in all, I’d say this was a successful first test. I’ll post the final sheep once the paint is dry…
** I forgot to add: WIHOH: "What I have on hand"Sheep24r_indexed_r2.zip (43.5 KB)
