Hey guys. I’ve been setting up my shop to accomodate my MR-1 and XR machines. Here is how it’s gone so far.
I recently moved to PA from OH and have been setting up my new shop. My first problem was I didn’t have any 220v power outlets. The floor of my shop is adjacent to the roof of my basement where my main is located. I added a 90 amp breaker to the main panel and ran it to the opposite side of my basement to a sub panel. The wall my sub panel is on is shared by the garage one floor up. From the sub panel, I ran three lines, one for my mill, one for the plasma, and one for the welders. I may add one more for my lathe as well down the road.
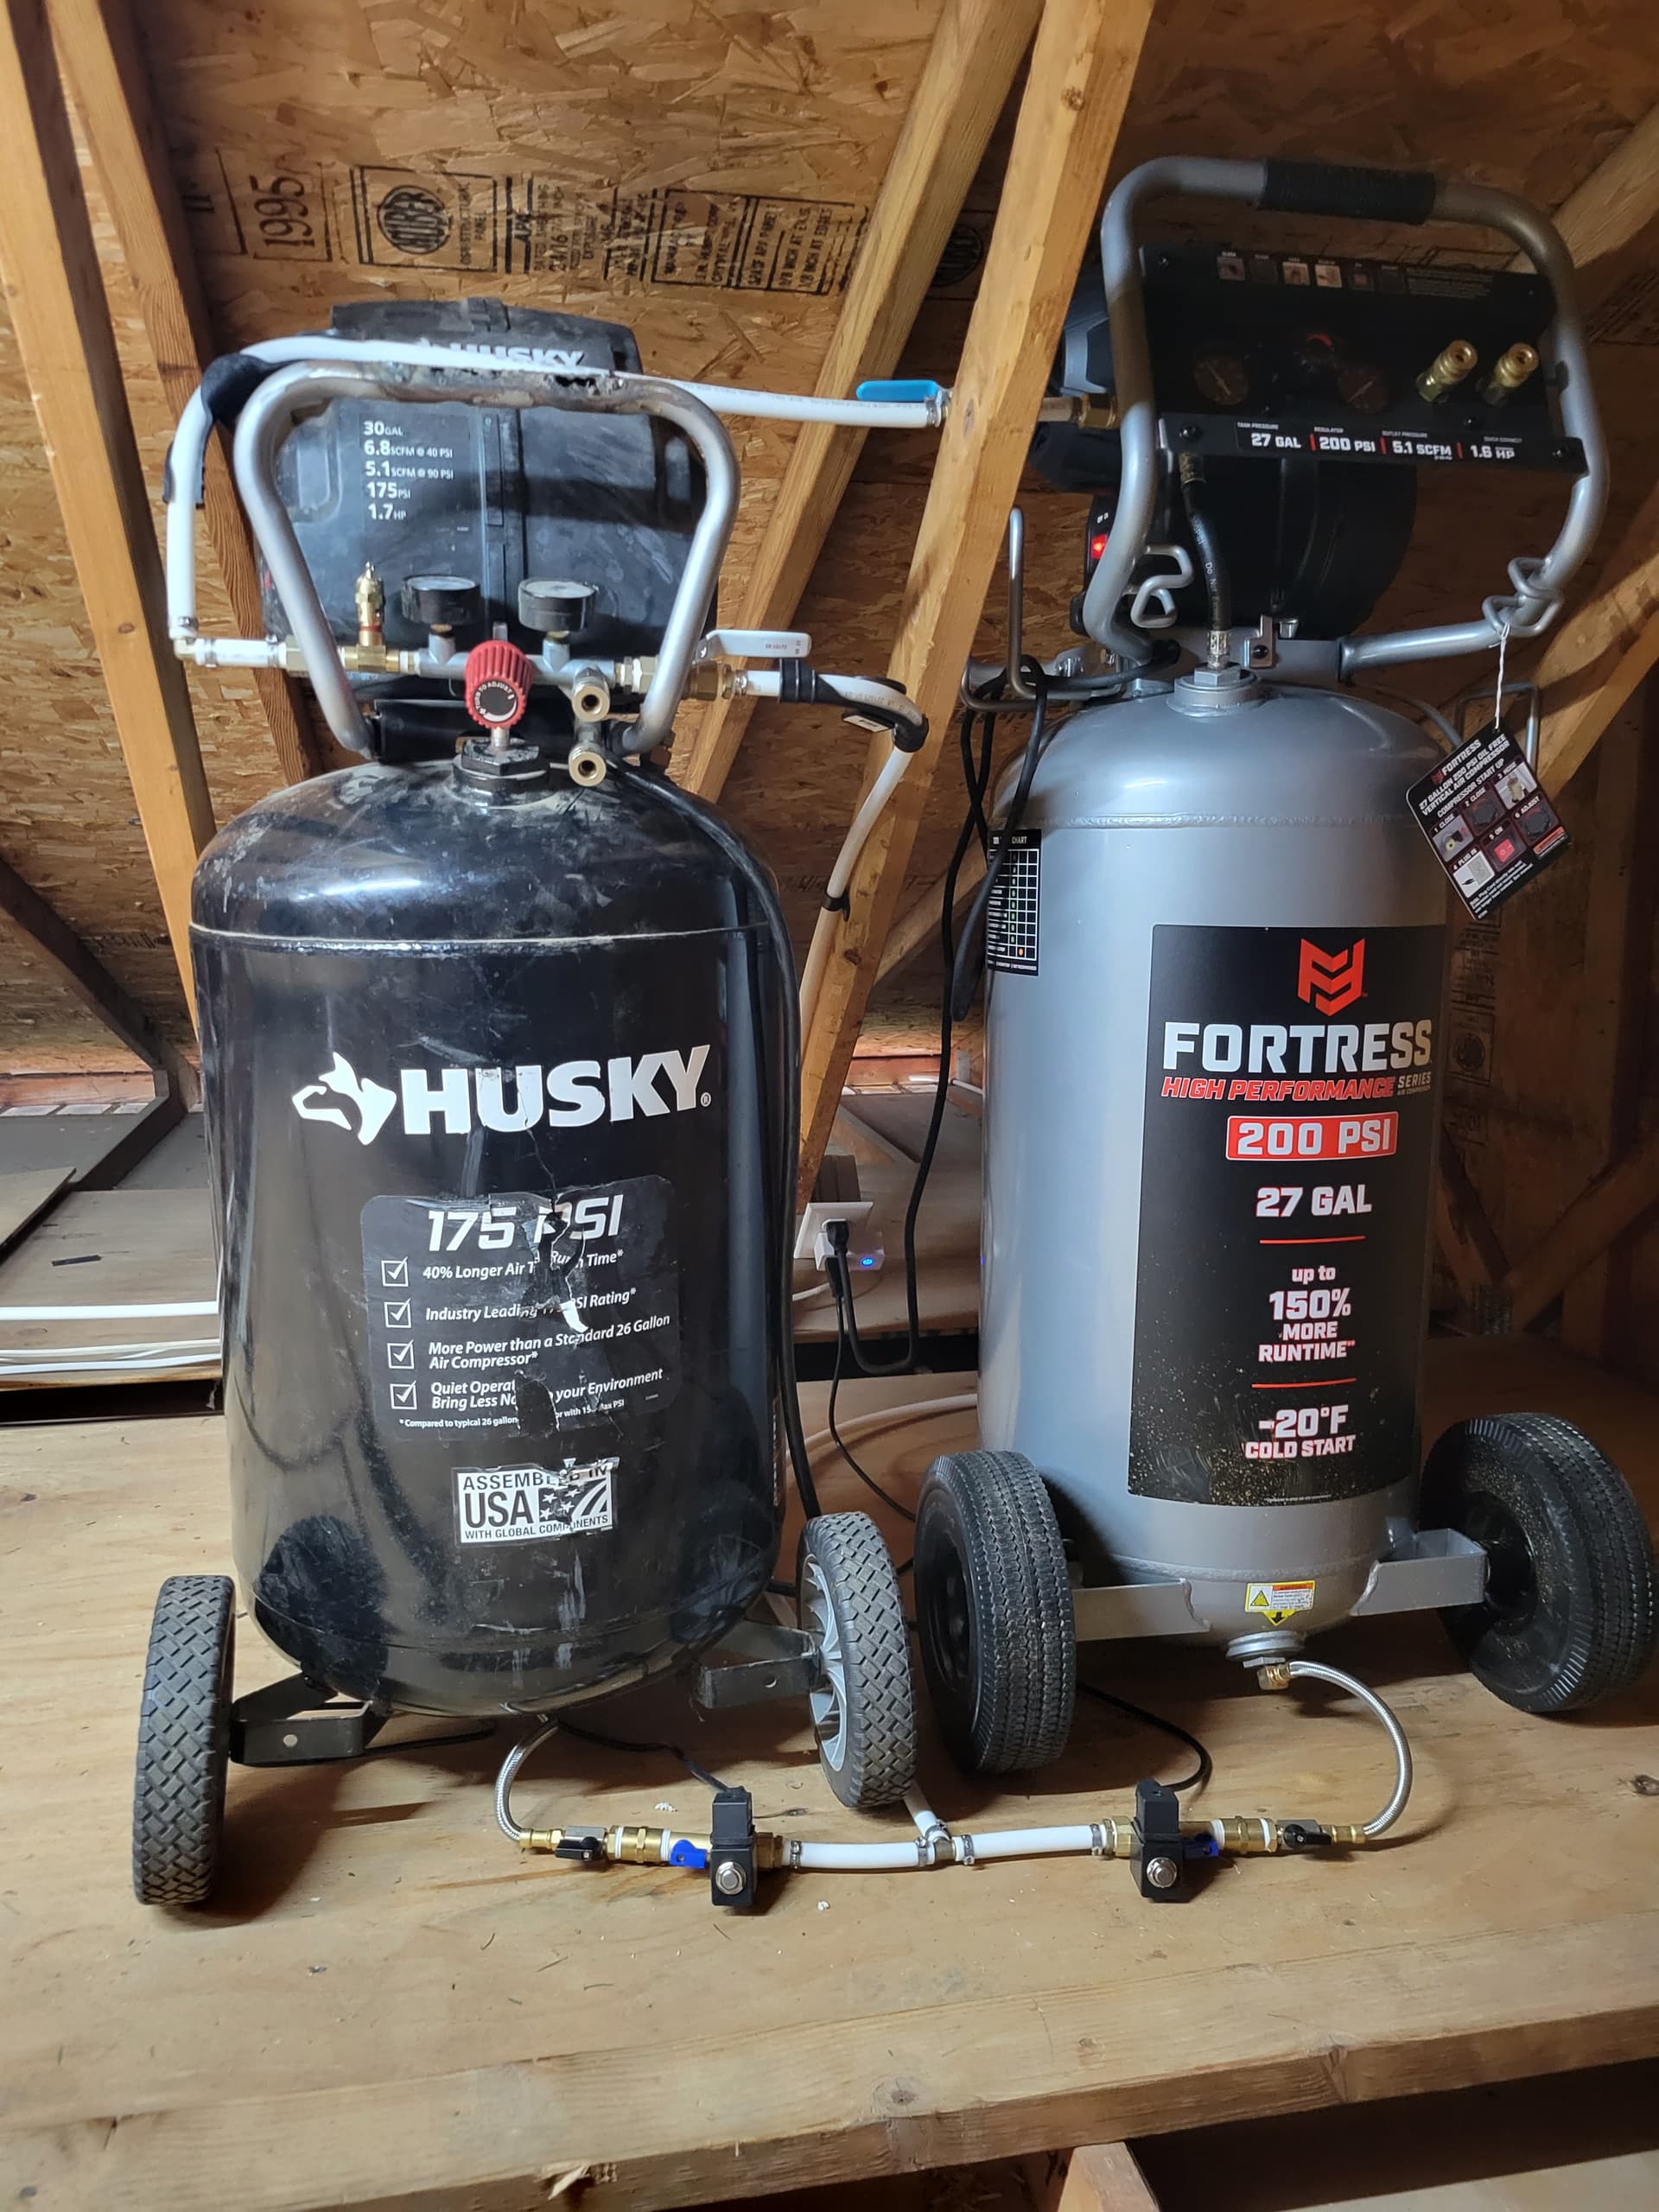
I’m working out of a 900sqft garage so space to fit the XR and MR-1 is tight along with my CNC router, lathe, welders, wood working tools, and mechanics tools. To help save some space, I remotely located 2 air compressors into my shop attic. I would have gone with a single 220v 2 stage compressor but I couldn’t get one into my attic access. To compensate, I used my old 30 gal Husky 175 psi tank and plumbed it in parallel with a new 27 gal Fortress 200 psi tank from Harbor Freight. To power the tanks, I wired them each into a dedicated 15amp circuit.
Due to the location, I wanted to avoid having to climb into my attic to drain the condensation buildup from the tanks. To solve this problem, I decided to hook an automatic drain solenoid valve to each tank. The valves came with a timer that had a 1-45 sec stage and a 1-45 min interval. For my application, this just wouldn’t work or I’d constantly be priming the compressor. So, I removed the inline timer and plugged the 110v plug into a wifi controlled outlet which I then programmed to purge for 60 seconds at noon every day. The 175 psi compressor had a 200 psi pressure relief valve that I switched for a 225 psi valve to match the 200 psi tank. I plumbed the air outlet using 1/2 PEX (sue me for using plastic) into the roof of my shop. Now, I just leave them alone and let them work.
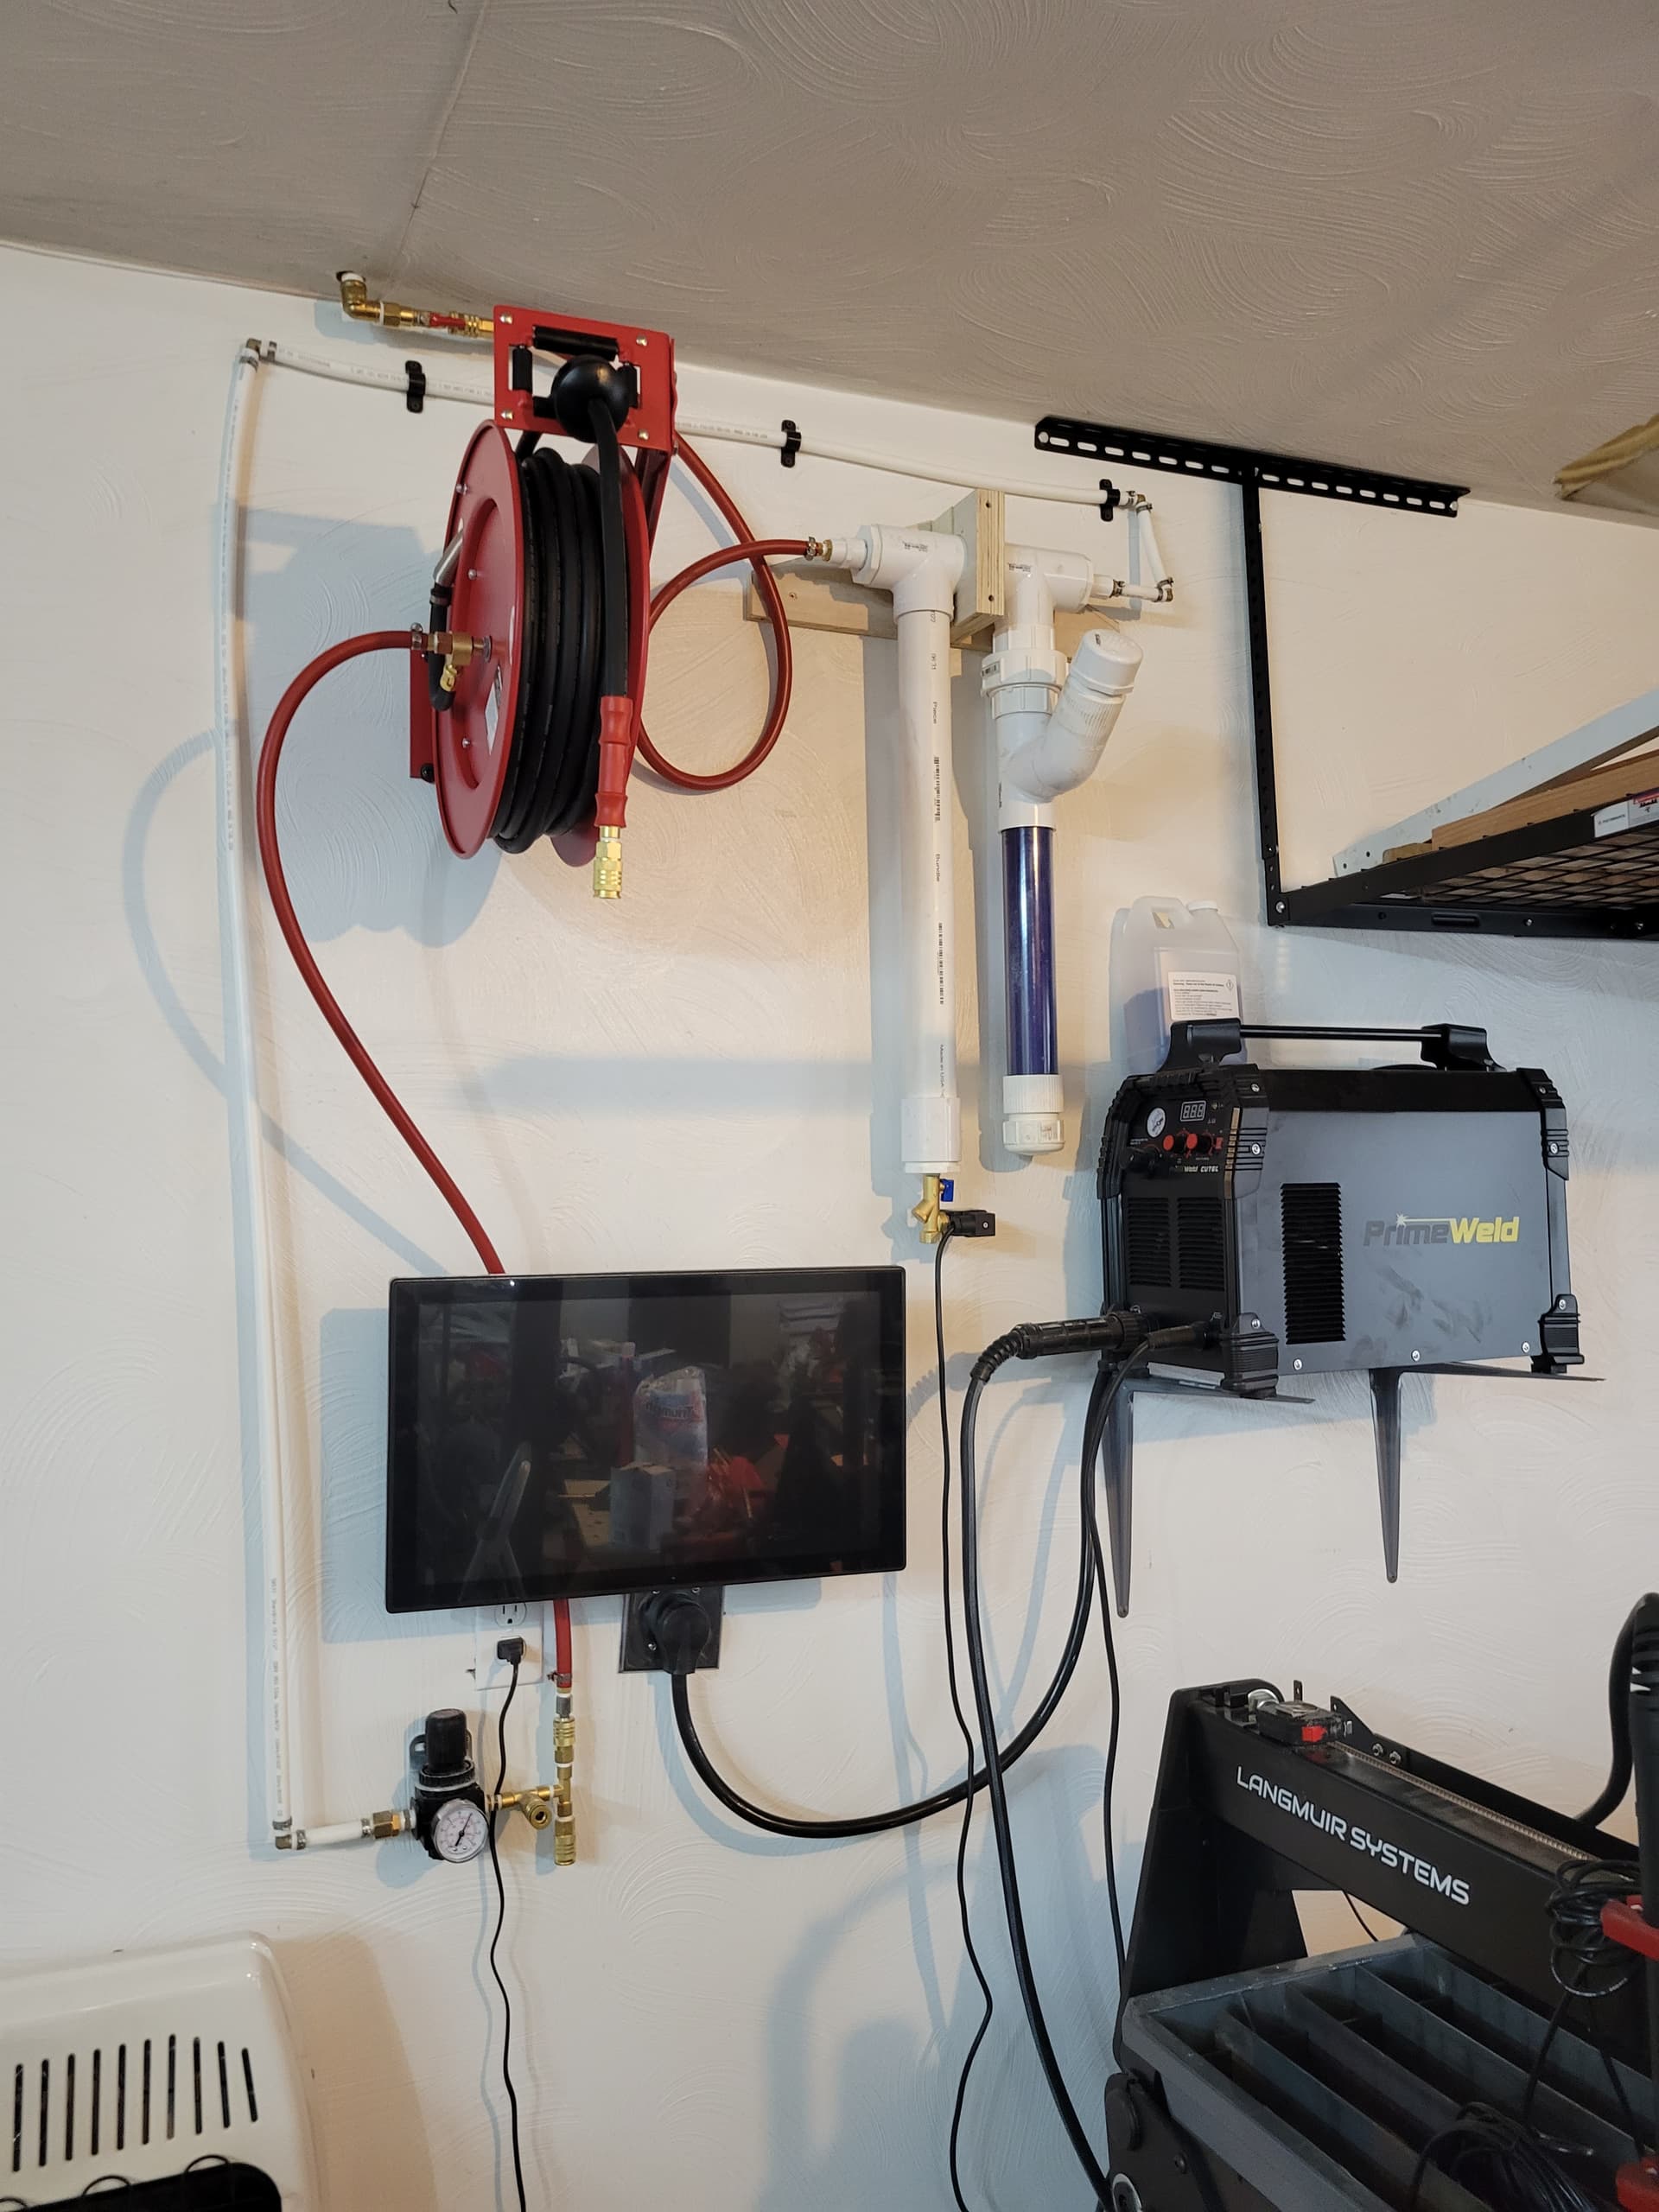
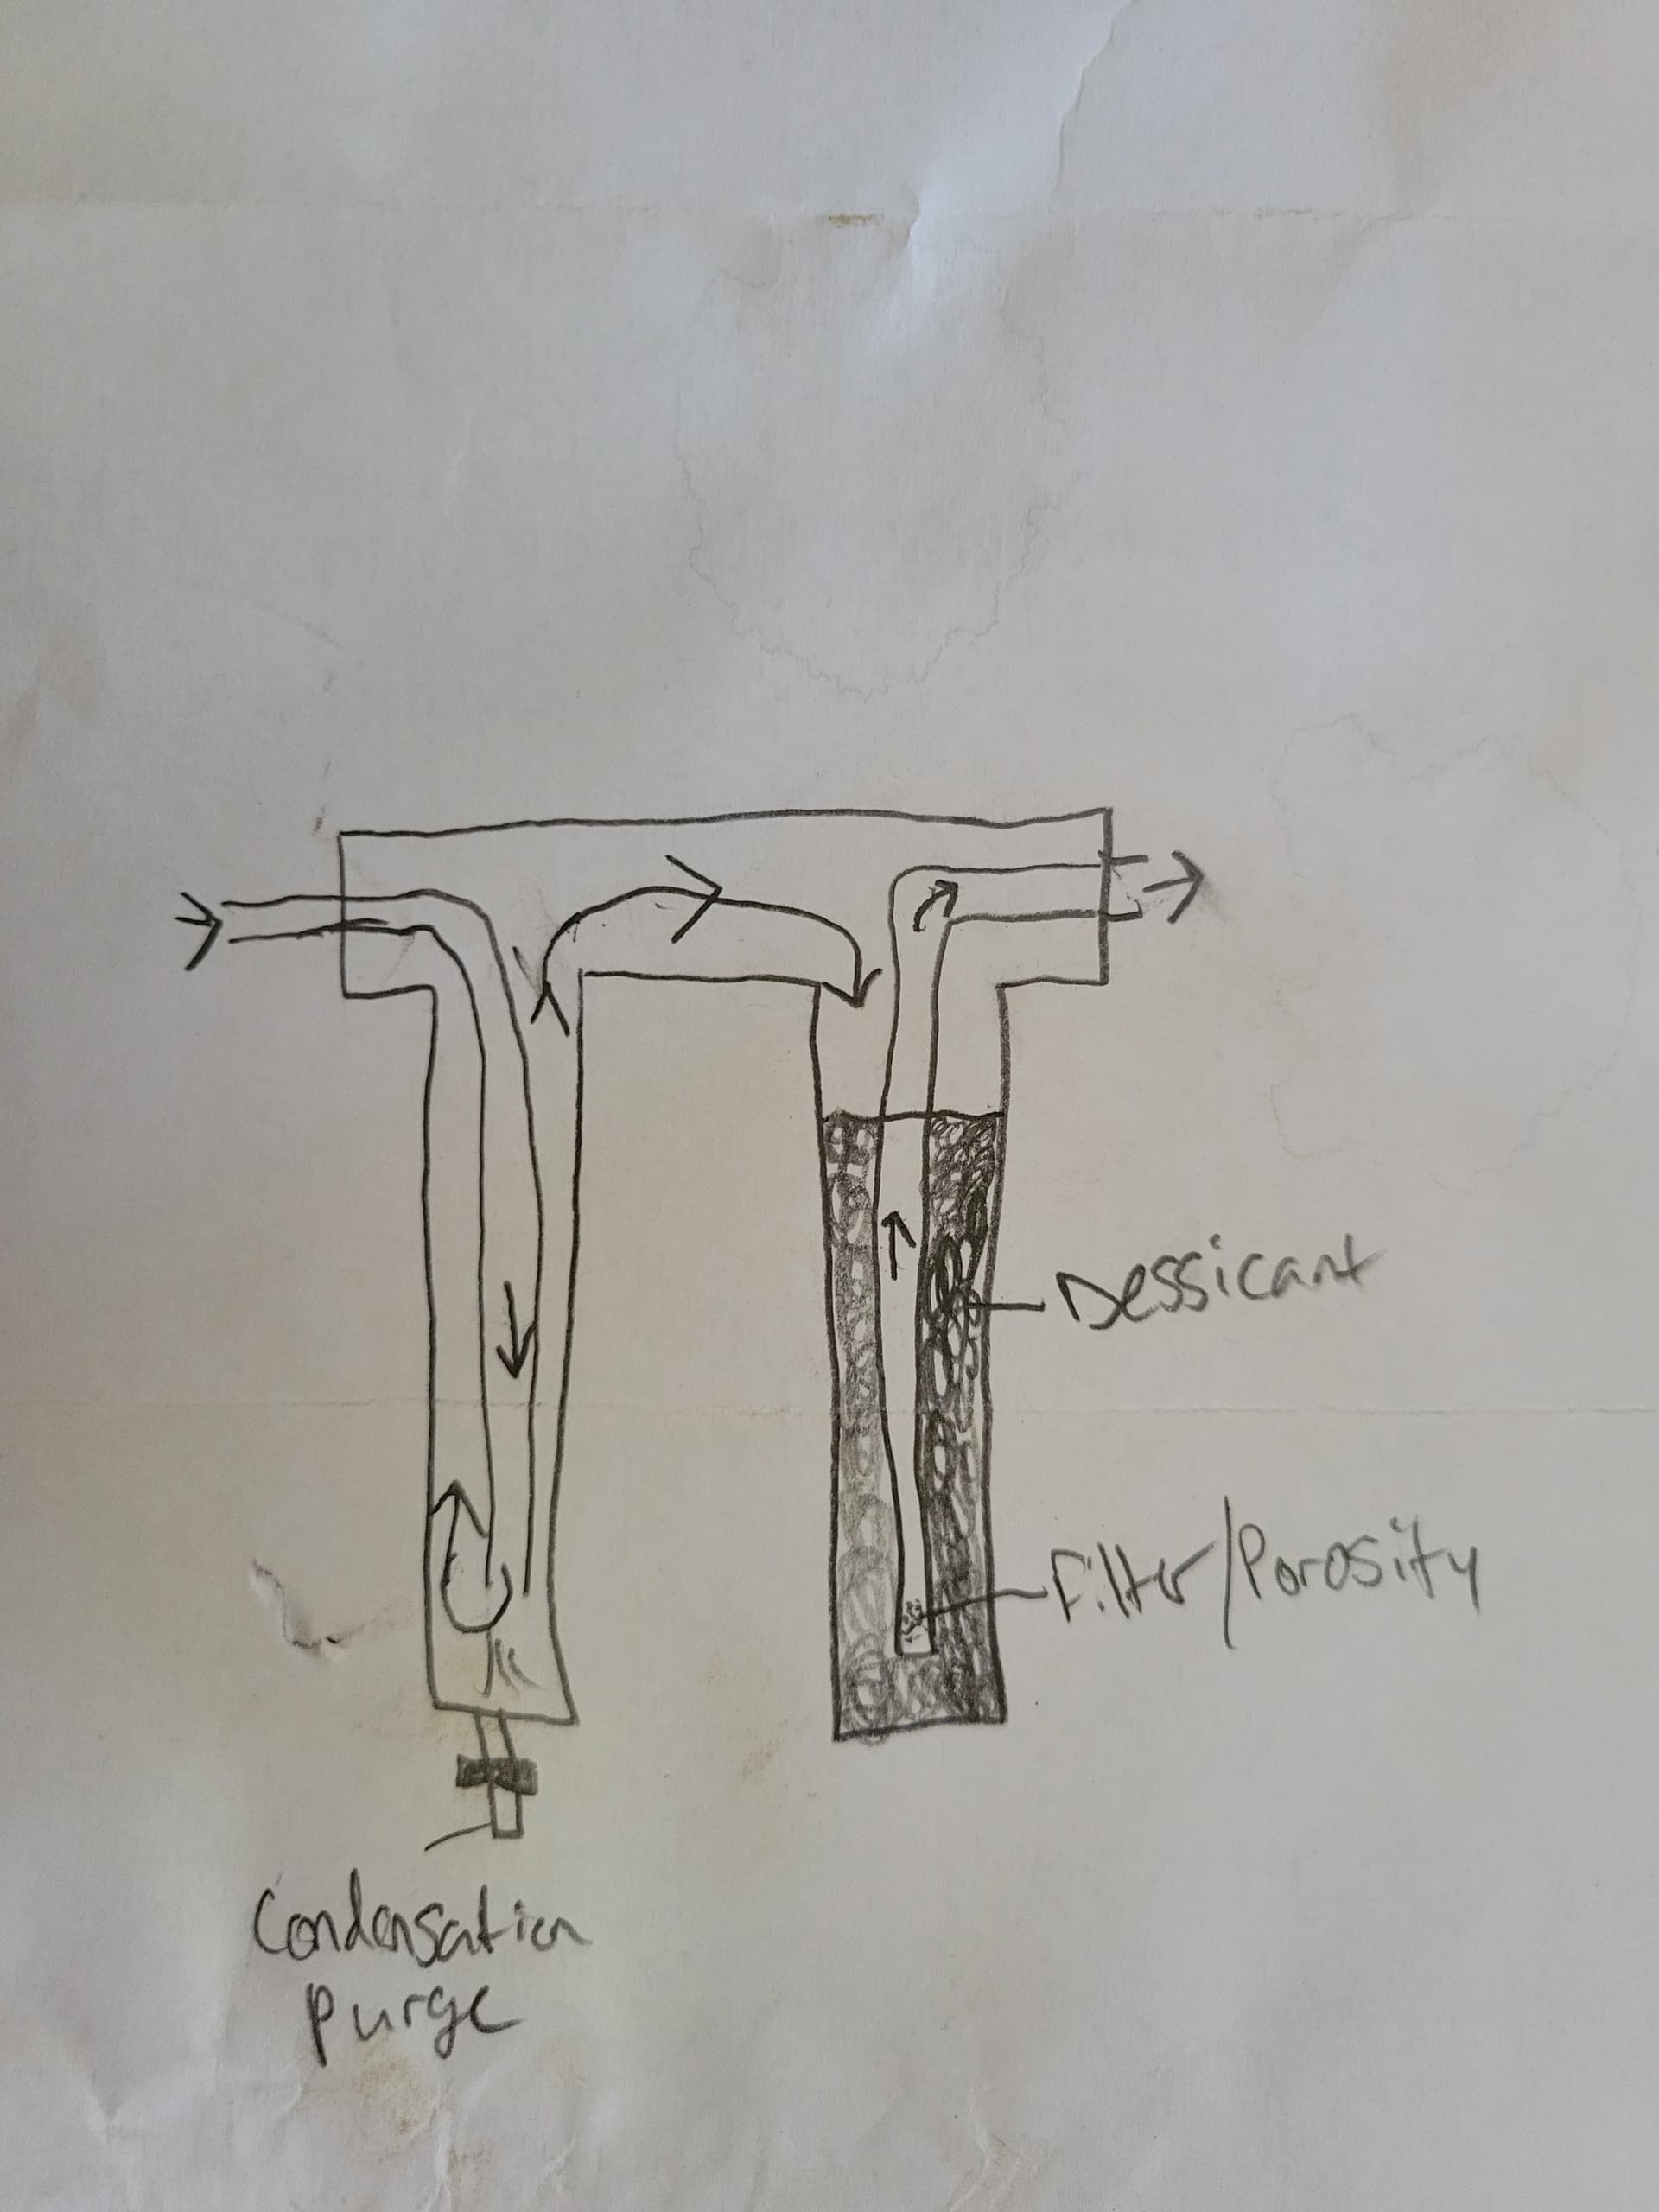
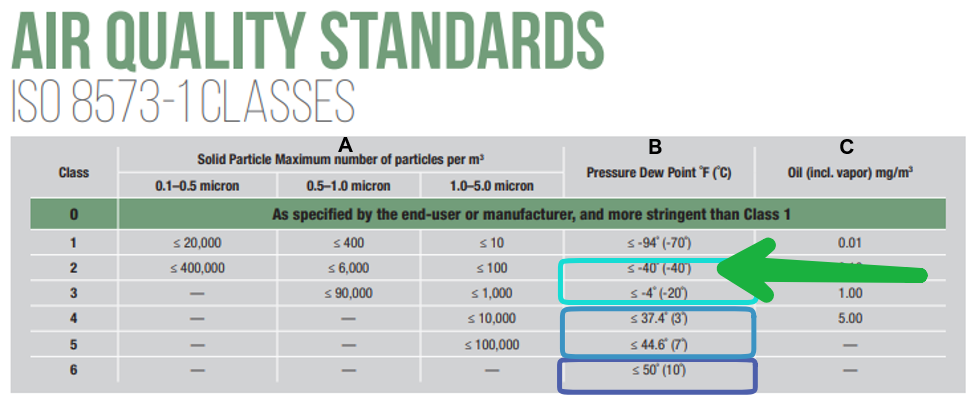
After the air entered my shop, I still needed to dry it before it entered the Cut60. As previously stated, I’m broke. So, I scoured the interwebs looking for poor engineering student solutions until I found some videos by a 14 year old girl named Hannah explaining how she made an inline dessicant air dryer for her sand blaster using 2" PVC. Intrigued, I decided to modify her design slightly using my experience of owning a pool company to make it more maintenance friendly and threw it together. It works perfectly and now that I have a proof of concept, I plan to make one out of alumunum in the shop to replace this one as it is a ticking time bomb (literally) with age as the temperatue and UV will exponentially degrade the plastic until it blows up.
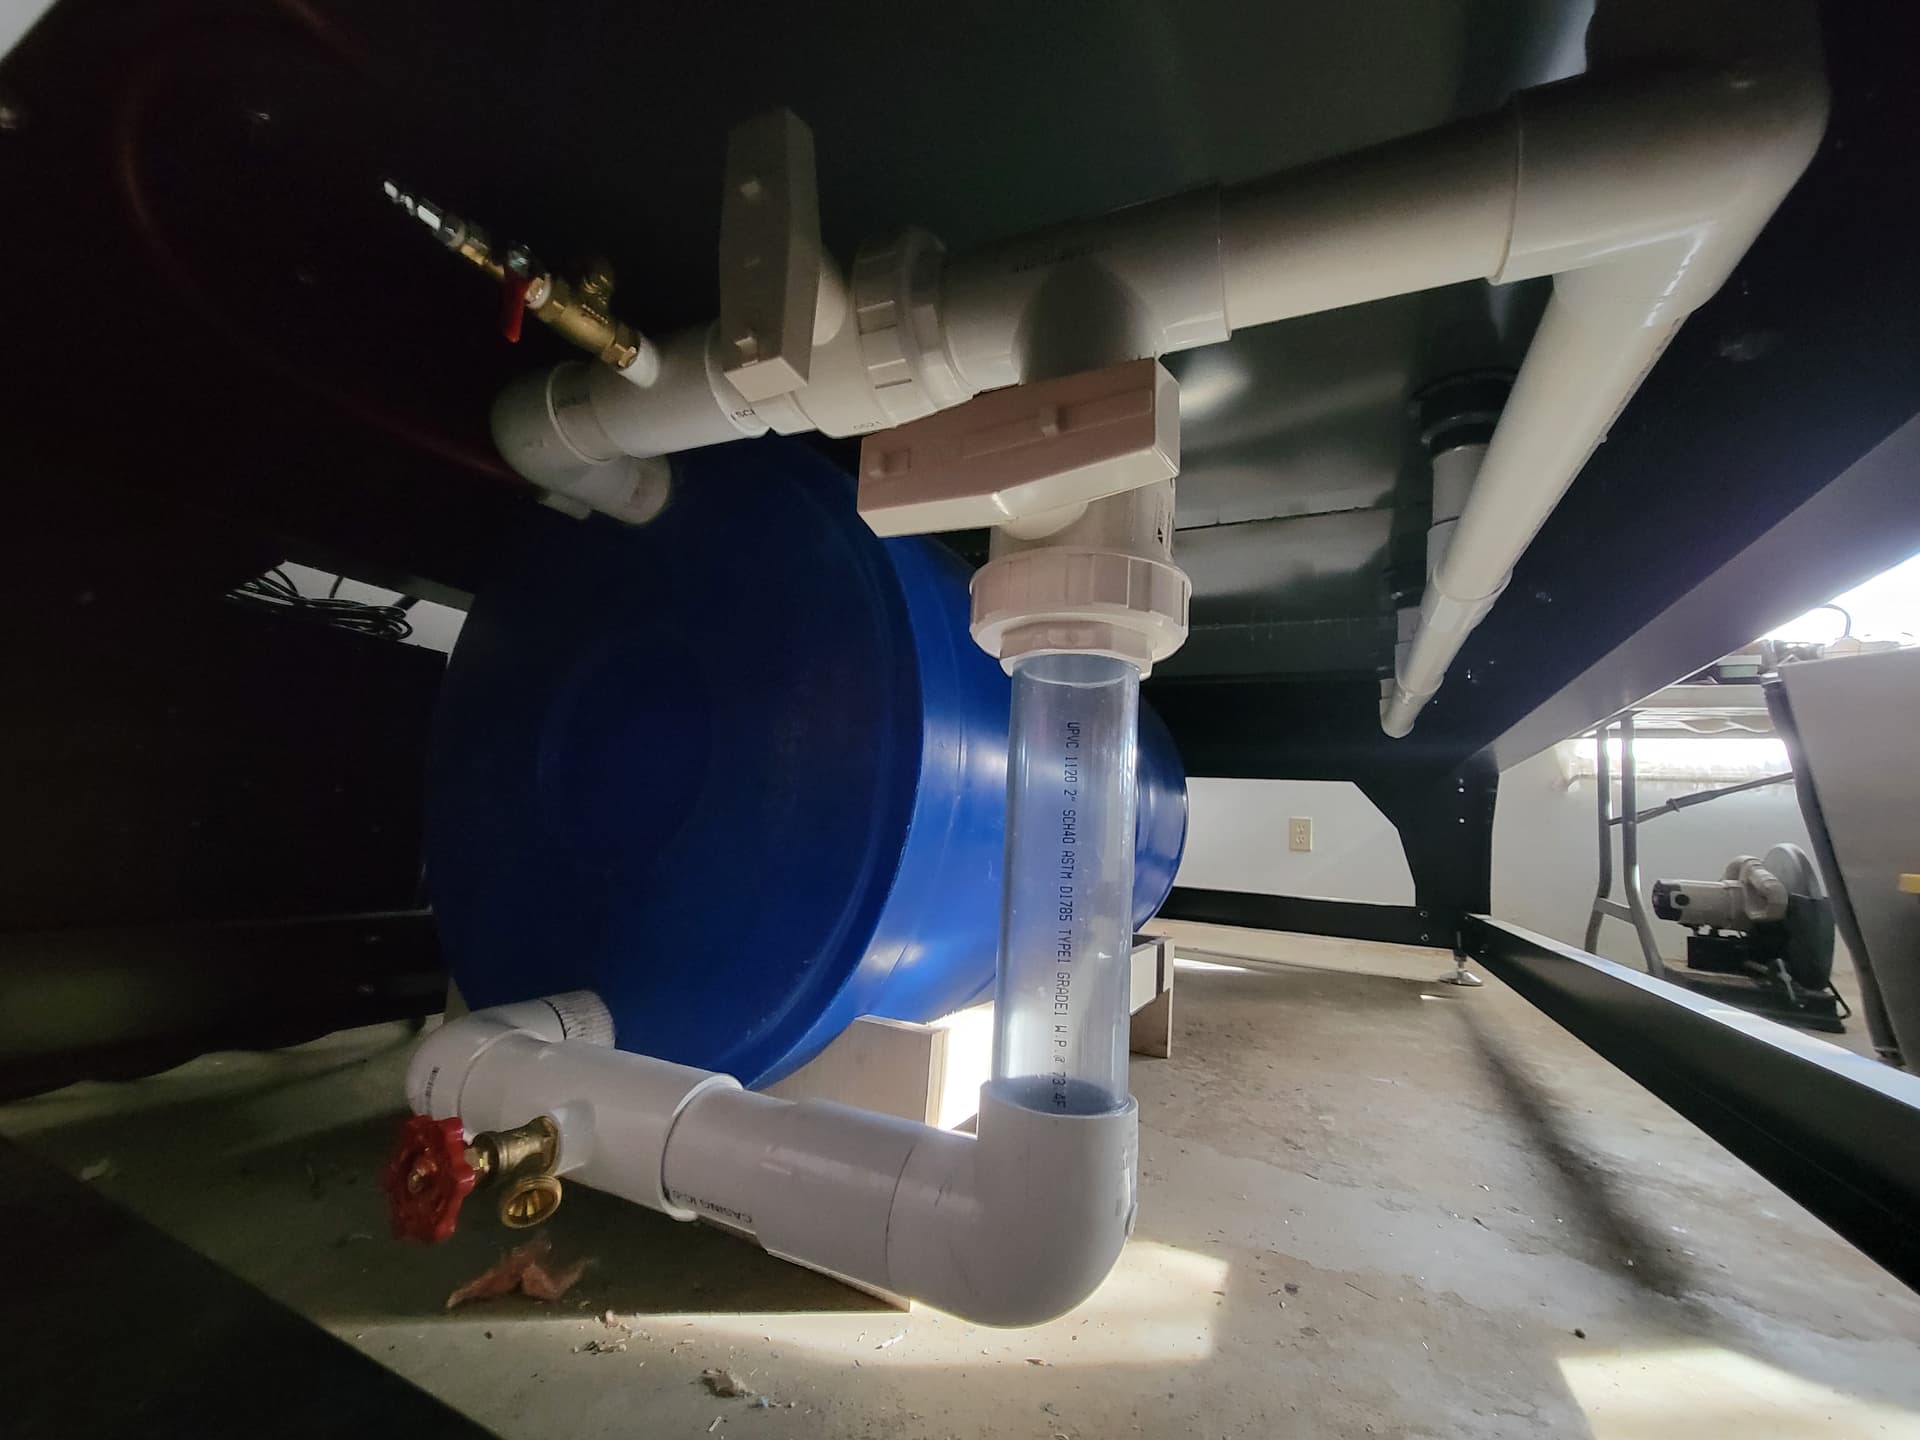
As for water and coolant, I didn’t want to lose so much money each time I drained the bed for maintenance. In comes the 65 gal recycling tank. I bought a used 65 gal food grade tank locally and plumbed it using 2" PVC. I cut holes using a hole saw and threaded in a male adapter into the hole with some solvent glue. I climbed inside (wearing a respirator) and threaded on a 2" conduit locking ring onto the inside of the barrel just in case. The inlet for the barel is at the top. Prior to the water entering the barel, I put a valve to control the flow direction. On the outlet, I put a hose bib followed by a valve. The hose bib allows me to connect a normal garden hose to the system in case I need to drain it. I also put an air line with a one way valve between the top valve and the tank inlet. With the bottom valve closed, the top valve open, and an air relief port opened, the water from the bed is drained into the tank. With the top valve closed, the bottom valve open, and the air relief shut, the air line can be hooked up to the top air inlet port to displace the water from the tank back into the table.
Let me know if you have any questions. I’ll work on adding more pictures as I go. (I’m still a new user and it will only allow me to embed one image per post)
Stephen