The machine uses an included angle. So a 180 degree bend is a normal unbent and flat part. Then it bends inwards towards 135, then 90, then past 90 to 45.
The machine program still struggles to make a 170+ angle, but what you can do for the 172.4 degree angle you are trying to make is to set is to a 169.4 degree angle and add in a “OVERBENT 3 degrees” calibration.
From what I can tell, the clamped position is when the punch tip is level with the top of the bottom die. So, if I have .125” material with a .025” clearance, the machine shows .150” distance to go before it considers the material clamped, driving the material down into the die before the bend even begins. Meaning, the thicker the material, the larger the minimum bend is.
Am I understanding this correctly?
It sure would be nice if: Right next to the clearance distance window, there was a clamp position window instead of using the material thickness.
Then I could have a .025” clearance, and then just a light .010” clamp position into the material, allowing me to easily make these shallow bends.
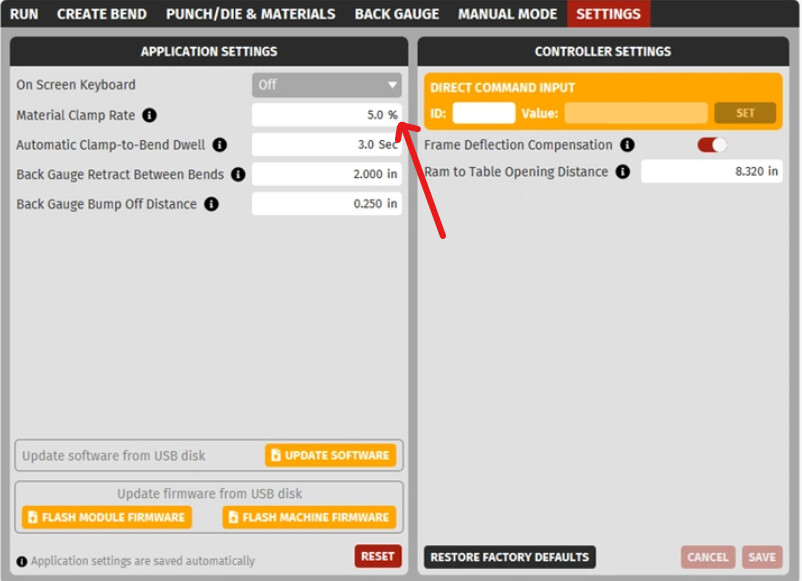
Actually the clamp position is very slightly below the point where the tip of the punch and the material touches. You can adjust how tightly it squeezes the part in the settings tab. “MATERIAL CLAMP RATE”. A 0% clamp rate will have the punch just barely touch the material. The 5% clamp rate will push the material into a slight elastic bend. A significantly higher clamp rate might actually deform the material before even executing the bend operation.
For your example, the 0.150” number is way to high for that to just be a clamping error. I think that is likely a bad calibration or misinput.
Some Height Inputs to check to better find out what is going wrong with your machine:
Measure your Ram to Table Opening Distance
Bring the ram down to "Y =-3.000” using the MOVE TO (Safety Button Operated) command in the Manual Mode tab.
Measure the opening distance between the lowest surface on the ram (the upper slab of metal) with the highest surface on the table (the lower slab of metal) using a caliper and add your machine position (+3.000") to get your total ram to table opening distance.
This value can be fixed in the settings tab under the ‘Ram-to-table Opening Distance’ entry.
Place the punch in the machine and use the calipers to verify that the ram-to-tip-of-punch height is correct.
Place the die in the machine and verify the table-to-top-of-die height is correct using calipers. If you are using a 4-way die holder, make sure you are using one of the “+riser” options.
Run your program to the safety point before you move to clamp it. Measure the ram to table distance at that point with calipers and see if that is correct given your known true ram to table opening height.