Got ya, can you tell me what i need to do now to get it to fire?
Hi Mike,
I opened a support ticket and went through the troubleshooting guide. I had the proper voltage at all test points and, after plugging everything back in, I tried the file again. Huzzah! No more lost arc voltage. Sometimes, despite everything being plugged in correctly, unplugging and replugging fixes it.
1 Like
@keith1 great to hear it!
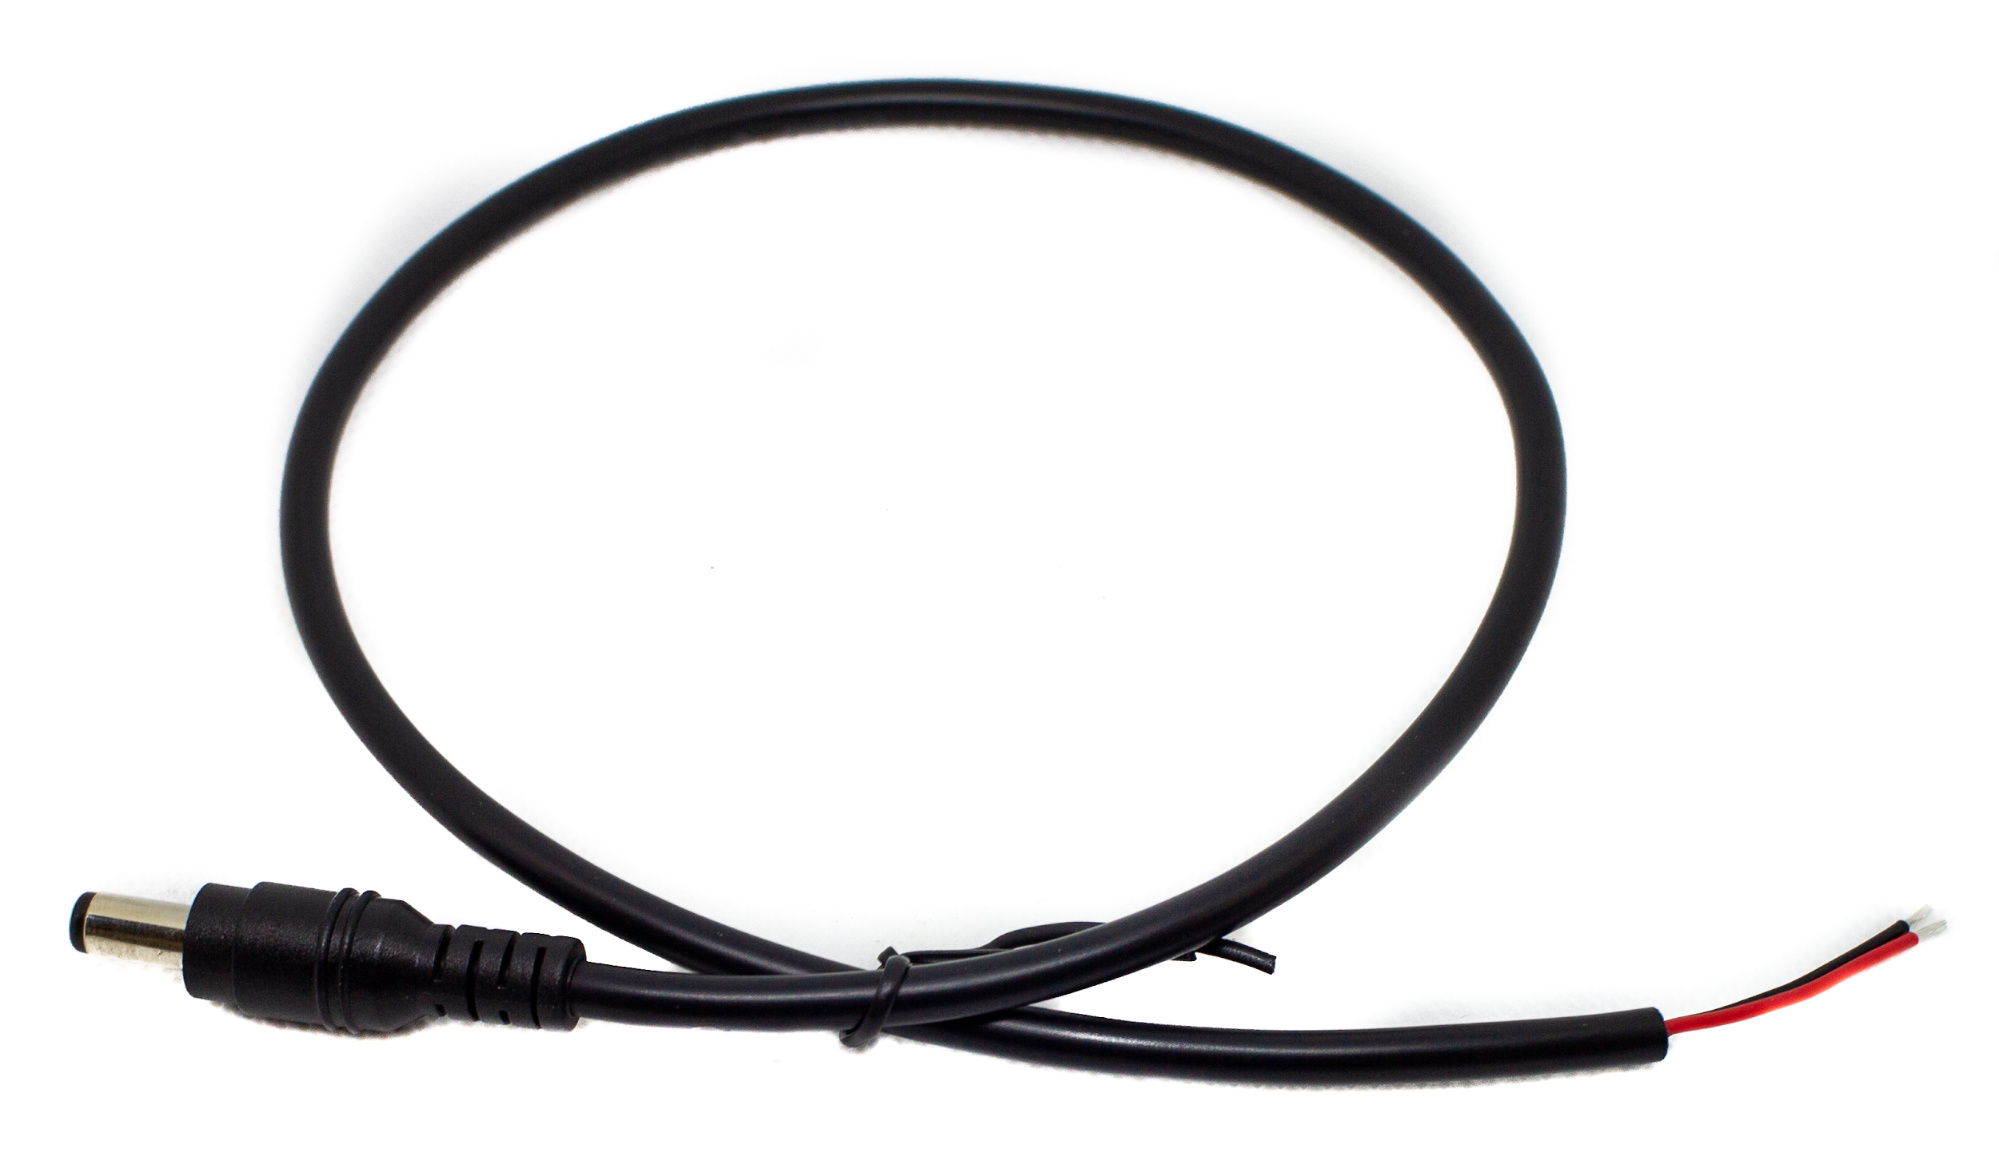
@punksab2000 Please locate the torch firing cable. It is the one that has a barell jack on one end and the other end has two red plastic blade connectors. Normally this cable is used with the supplied snap-on t-tap connectors but since you have a CNC port you can just solder to those pins instead. Remove the red blade connectors and connect one wire to pin 1 on your port and the other to pin 2 (it doesn’t matter which is which). The barrel jack end connects to the Torch On/Off port.
Also just a note to make sure that your relay is fully plugged into your MCB inside your box; fire the torch manually in FireControl with your cutter off and make sure that you can hear the relay clicking on and off inside the box.
@oqueriza Please follow our troubleshooting guide here: LS-THC Arc Voltage Troubleshooting Guide
Will do. I got the torch firing cable. But pin 1 and 2 per the picture i showed it tapped to divided per the picture i posted with the reply and going into the vmi box and then to the main control box, and everything you said looked good. So i should take the torch firing cable and put it on pin 1 and 2 and then the divided cable to pins 4 and 6 from the picture of my plasma?
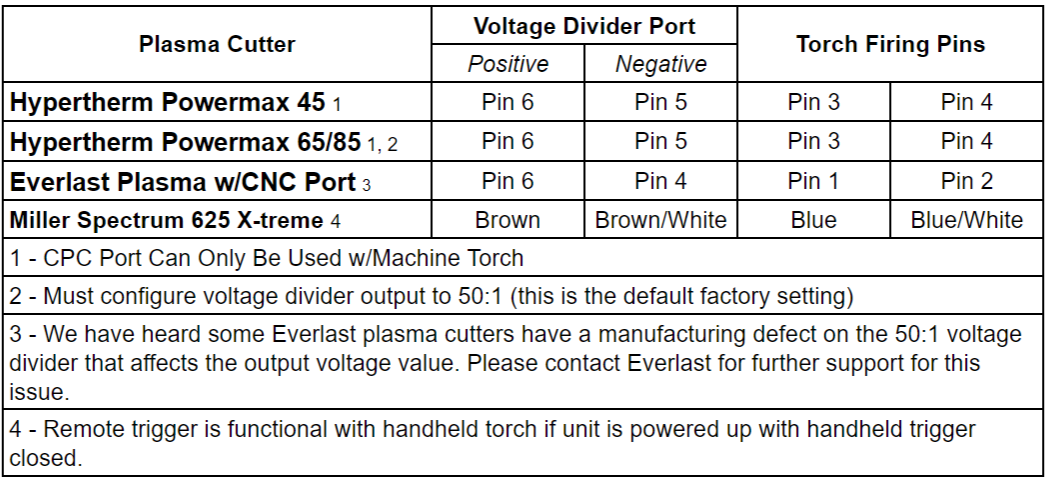
This table below should help you. Plug the voltage divider plug into the DIV INPUT socket on the VIM box. Plug the torch firing plug into the Torch ON/OFF port on the electronics box. For the THC port you need to use the Divided Voltage Input Pigtail Cable (the one shown below). Connect the red wire to pin 4 and the black wire to pin 6.
Ok thanks, Thats what i just figured out also. Going to do it all in the morning. Thanks again!!! This is why I went with ya’ll. So far I am over happy at the support and the build of the table. Again thanks for helping me and getting me up to speed!!
1 Like
No problem and good luck! Looking forward to seeing some cut parts soon 
1 Like
Ended up using the raw voltage and it works great now.
1 Like
Well… not so much. It came back. I stopped, rebooted EVERYTHING, unplugged and checked voltages, plugged everything back in, but this time it didn’t fix itself. sheesh!
What voltage are you seeing when its cutting?
We resolved it in an email thread but, the big culprit was apparently, the internal regulator in the RW. It was set to 70 psi and dropped to 60 psi when cutting, killing the torch. We bumped it up to 82psi and it only dropped to 80 during a cut and now it’s all good.
oh LOL, no idea why but i thought that the last post you made was this morning. Just now seeing that you posted that on April 12… time to get more coffee.
It seems to ALWAYS be time for that! 
Did you have to make any other modifications to rw45 or just raise air regulator?
I’m having same issue i think. Loosing arc voltage in program and my rw45 drops 10 psi to 60 when a cut starts and goes for about 3 sec and then looses the arc
Just the regulator. Now, this was after ensuring that I had sufficient volume from the compressor and very dry clean air. But once all those requirements were met, just bumping the reg up did the trick.
Keith, Im having the same issues now, how did you bump up the air regulator and where in the heck is it lol.
Thanks
Inside the cover. RW support assured me that merely opening up and raising the pressure setpoint to that would not violate the warranty. (Assuming we are moderately skilled with a phillips screwdriver)
hahah ok and what and where are we supposed to use our dandy screwdriver with parental supervision.