I thought the same thing until I broke down and bought one. Now it’s used three times a week in my shop. I don’t know why I waited so long.
1 Like
Print it on its side. Use the appropriate filament (ASA or ABS).
1 Like
Where there is a “will” there might be a “way.”
What Tim says is very true. I am new to 3D printing and things that don’t need to be so strong will come out much stronger than necessary and then those things that need the strength, sometimes fail my enthusiasm.
Printing something like this on its side, would definitely be the way to go. The layers would give the strength in the long direction.
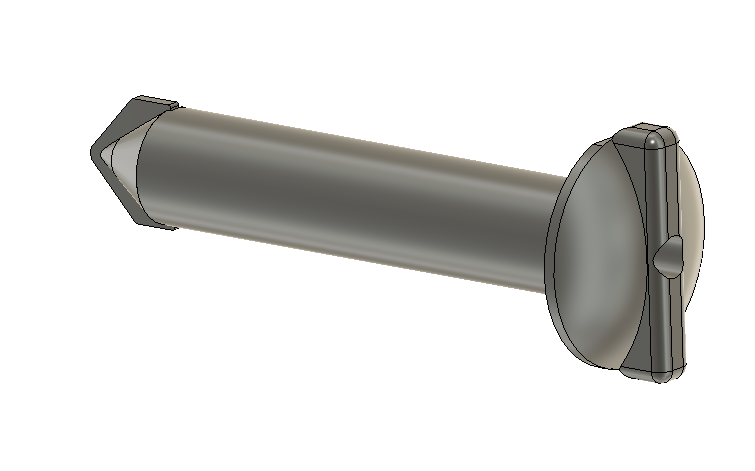
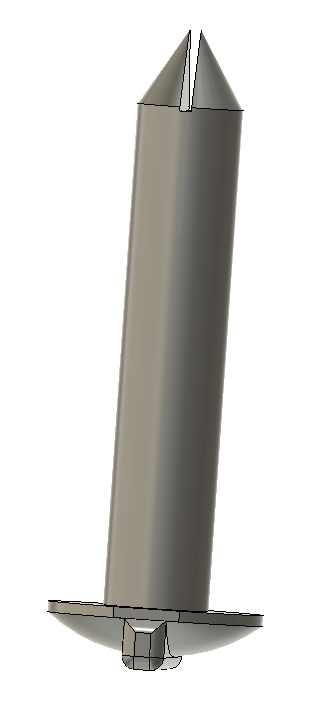
If you used something like ASA CF or NYLON and then glue a metal pin down the middle it might just do the trick.
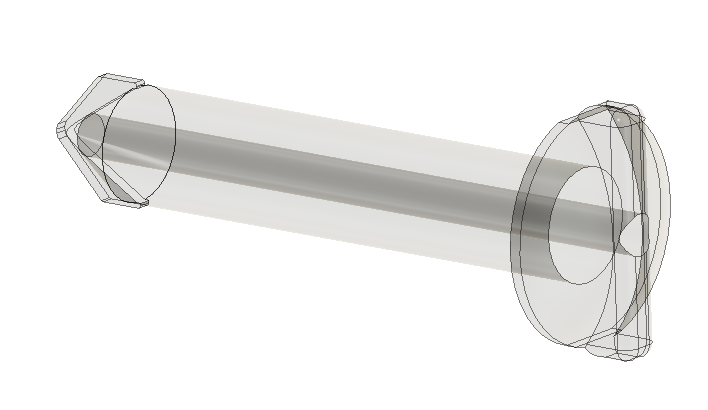
I have not printed with Nylon but I have printed with ASA and ASA CF. Both are very strong but a 1/4 inch thick piece of ASA will not hold up to repeated shooting with a high powered air soft rifle (firing at about 350 ft/sec). At 15 feet, it will survive one hit but after at 3 to 5th hit, it will break. So shock loading on it seems to be tough.
So it might not work if you are expecting it to hold like 20 or 30 pounds with lots of vibration.
It is a fun notion and perhaps others might weigh in on this problem.
2 Likes
What about this idea?
The locking wings of the fastener is cut out of metal: hence plasma cut:
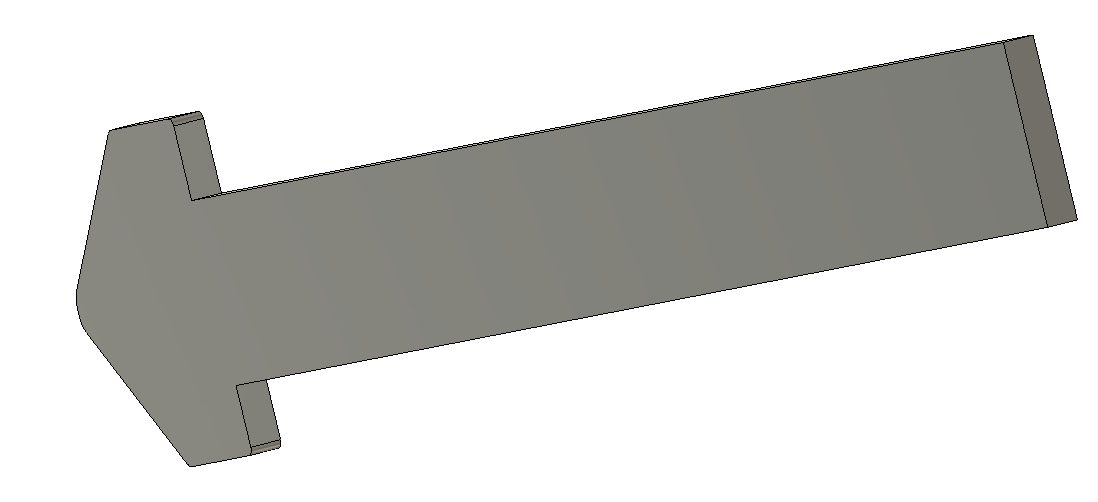
It fits into the slot that can be made since we have 3D printers. This shape hole would really need to be formed by the print to orient vertically.
Now you combine the pieces and you have the strength you need and the fit that is required…perhaps.
3 Likes
done a lot of reading in last couple days and talked myself of jumping into the 3D printing world right now. money better spent elsewhere and seems to be more time than I have to commit. it does appear it would be a doable task if I had the equipment and a bit of knowledge already. Gonna just make them from metal or see if someone on etsy could printer them. I appreciate all the input.
I have 2 x SLS printers. If you can send me a cad file (step, stl etc) I will print them free. I can do them in PP. I have some parts to print next week so I can include these in the build chamber.
6 Likes
Along with Craig’s offer, I would be willing to share my file or fine tune it for you if you gave me more precise dimensions.
I charge nothing for the design…just fun for me.
7 Likes
Seems foolish to pass up a kind offer like this and ChelanJims. I have sent him some dimensions to work through. As I told him, I do not expect a free ride but am grateful for the assistance.
1 Like
If you would like to pay it forward I know Jim likes Home Made Cookies
3 Likes
I could make a ton of cookies in my powder coat oven. Probably in better hands for my daughters to make them. They have been practicing for 4-H.
2 Likes
they may taste a little funny though, and come with extra “sprinkles”
Craig, your SLS printer is making me very jealous. I just watched this promotional video:

2 Likes
Printed a set of pulleys for a friend today.
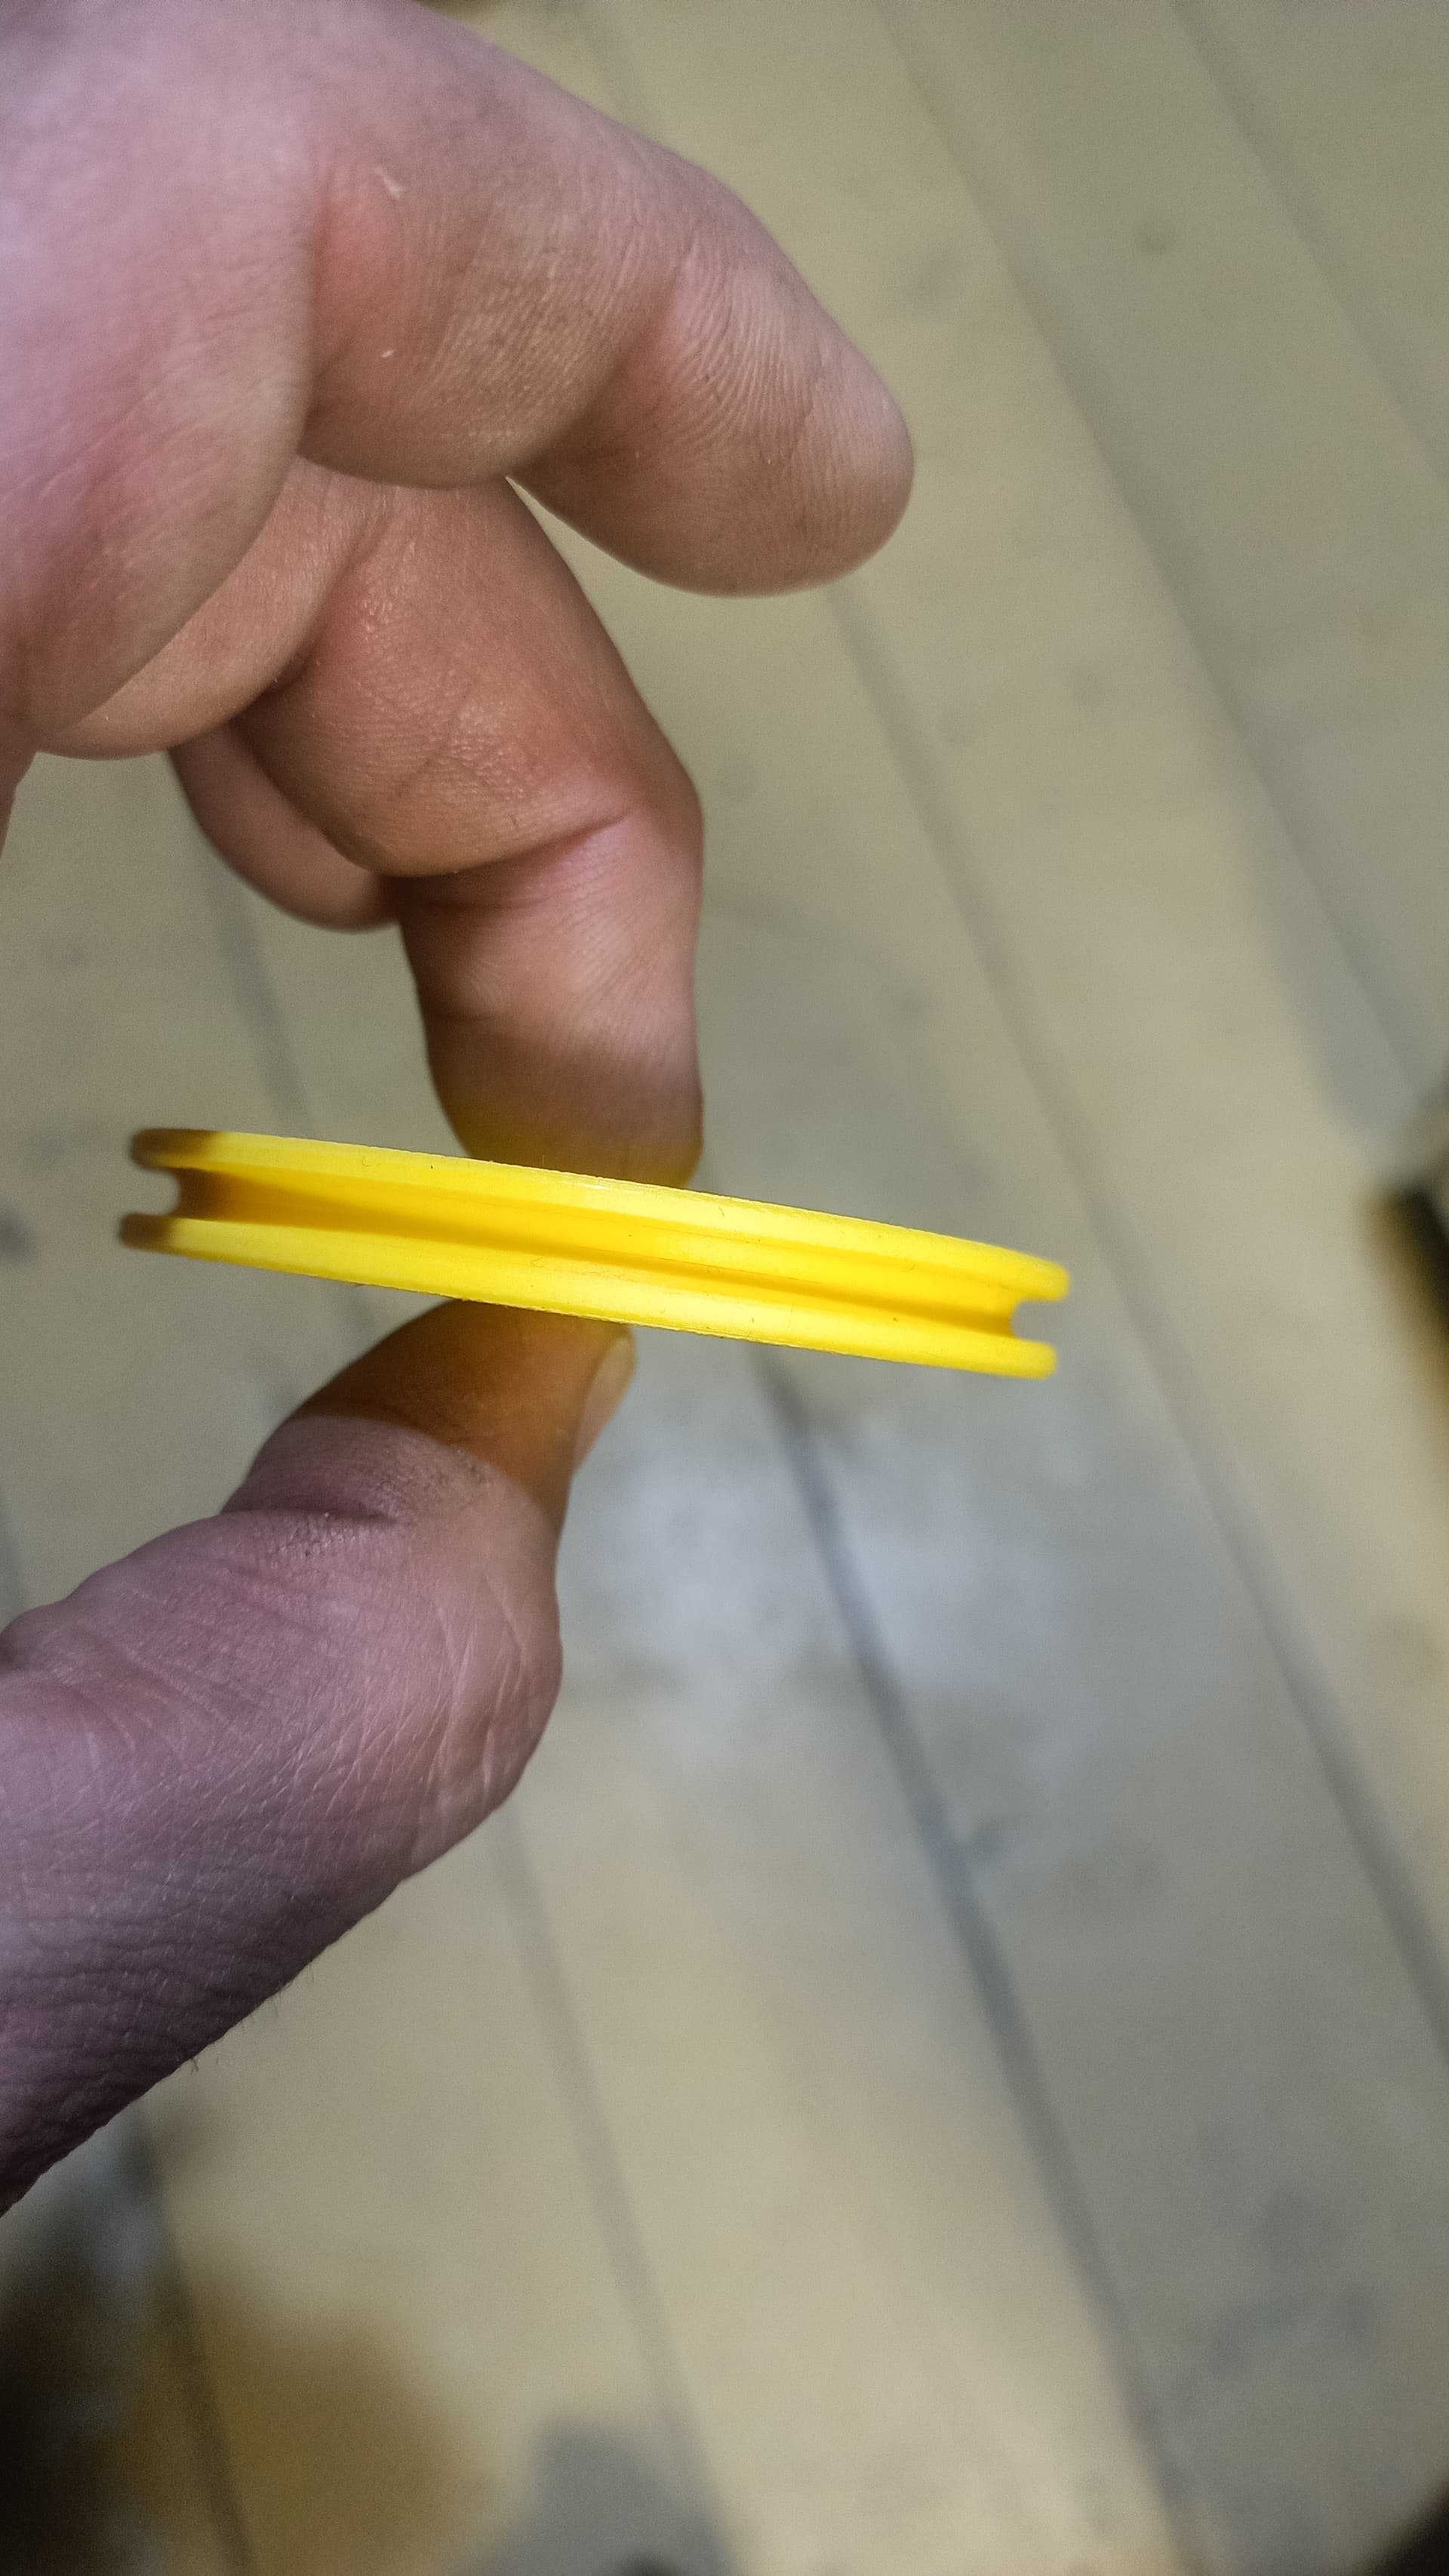

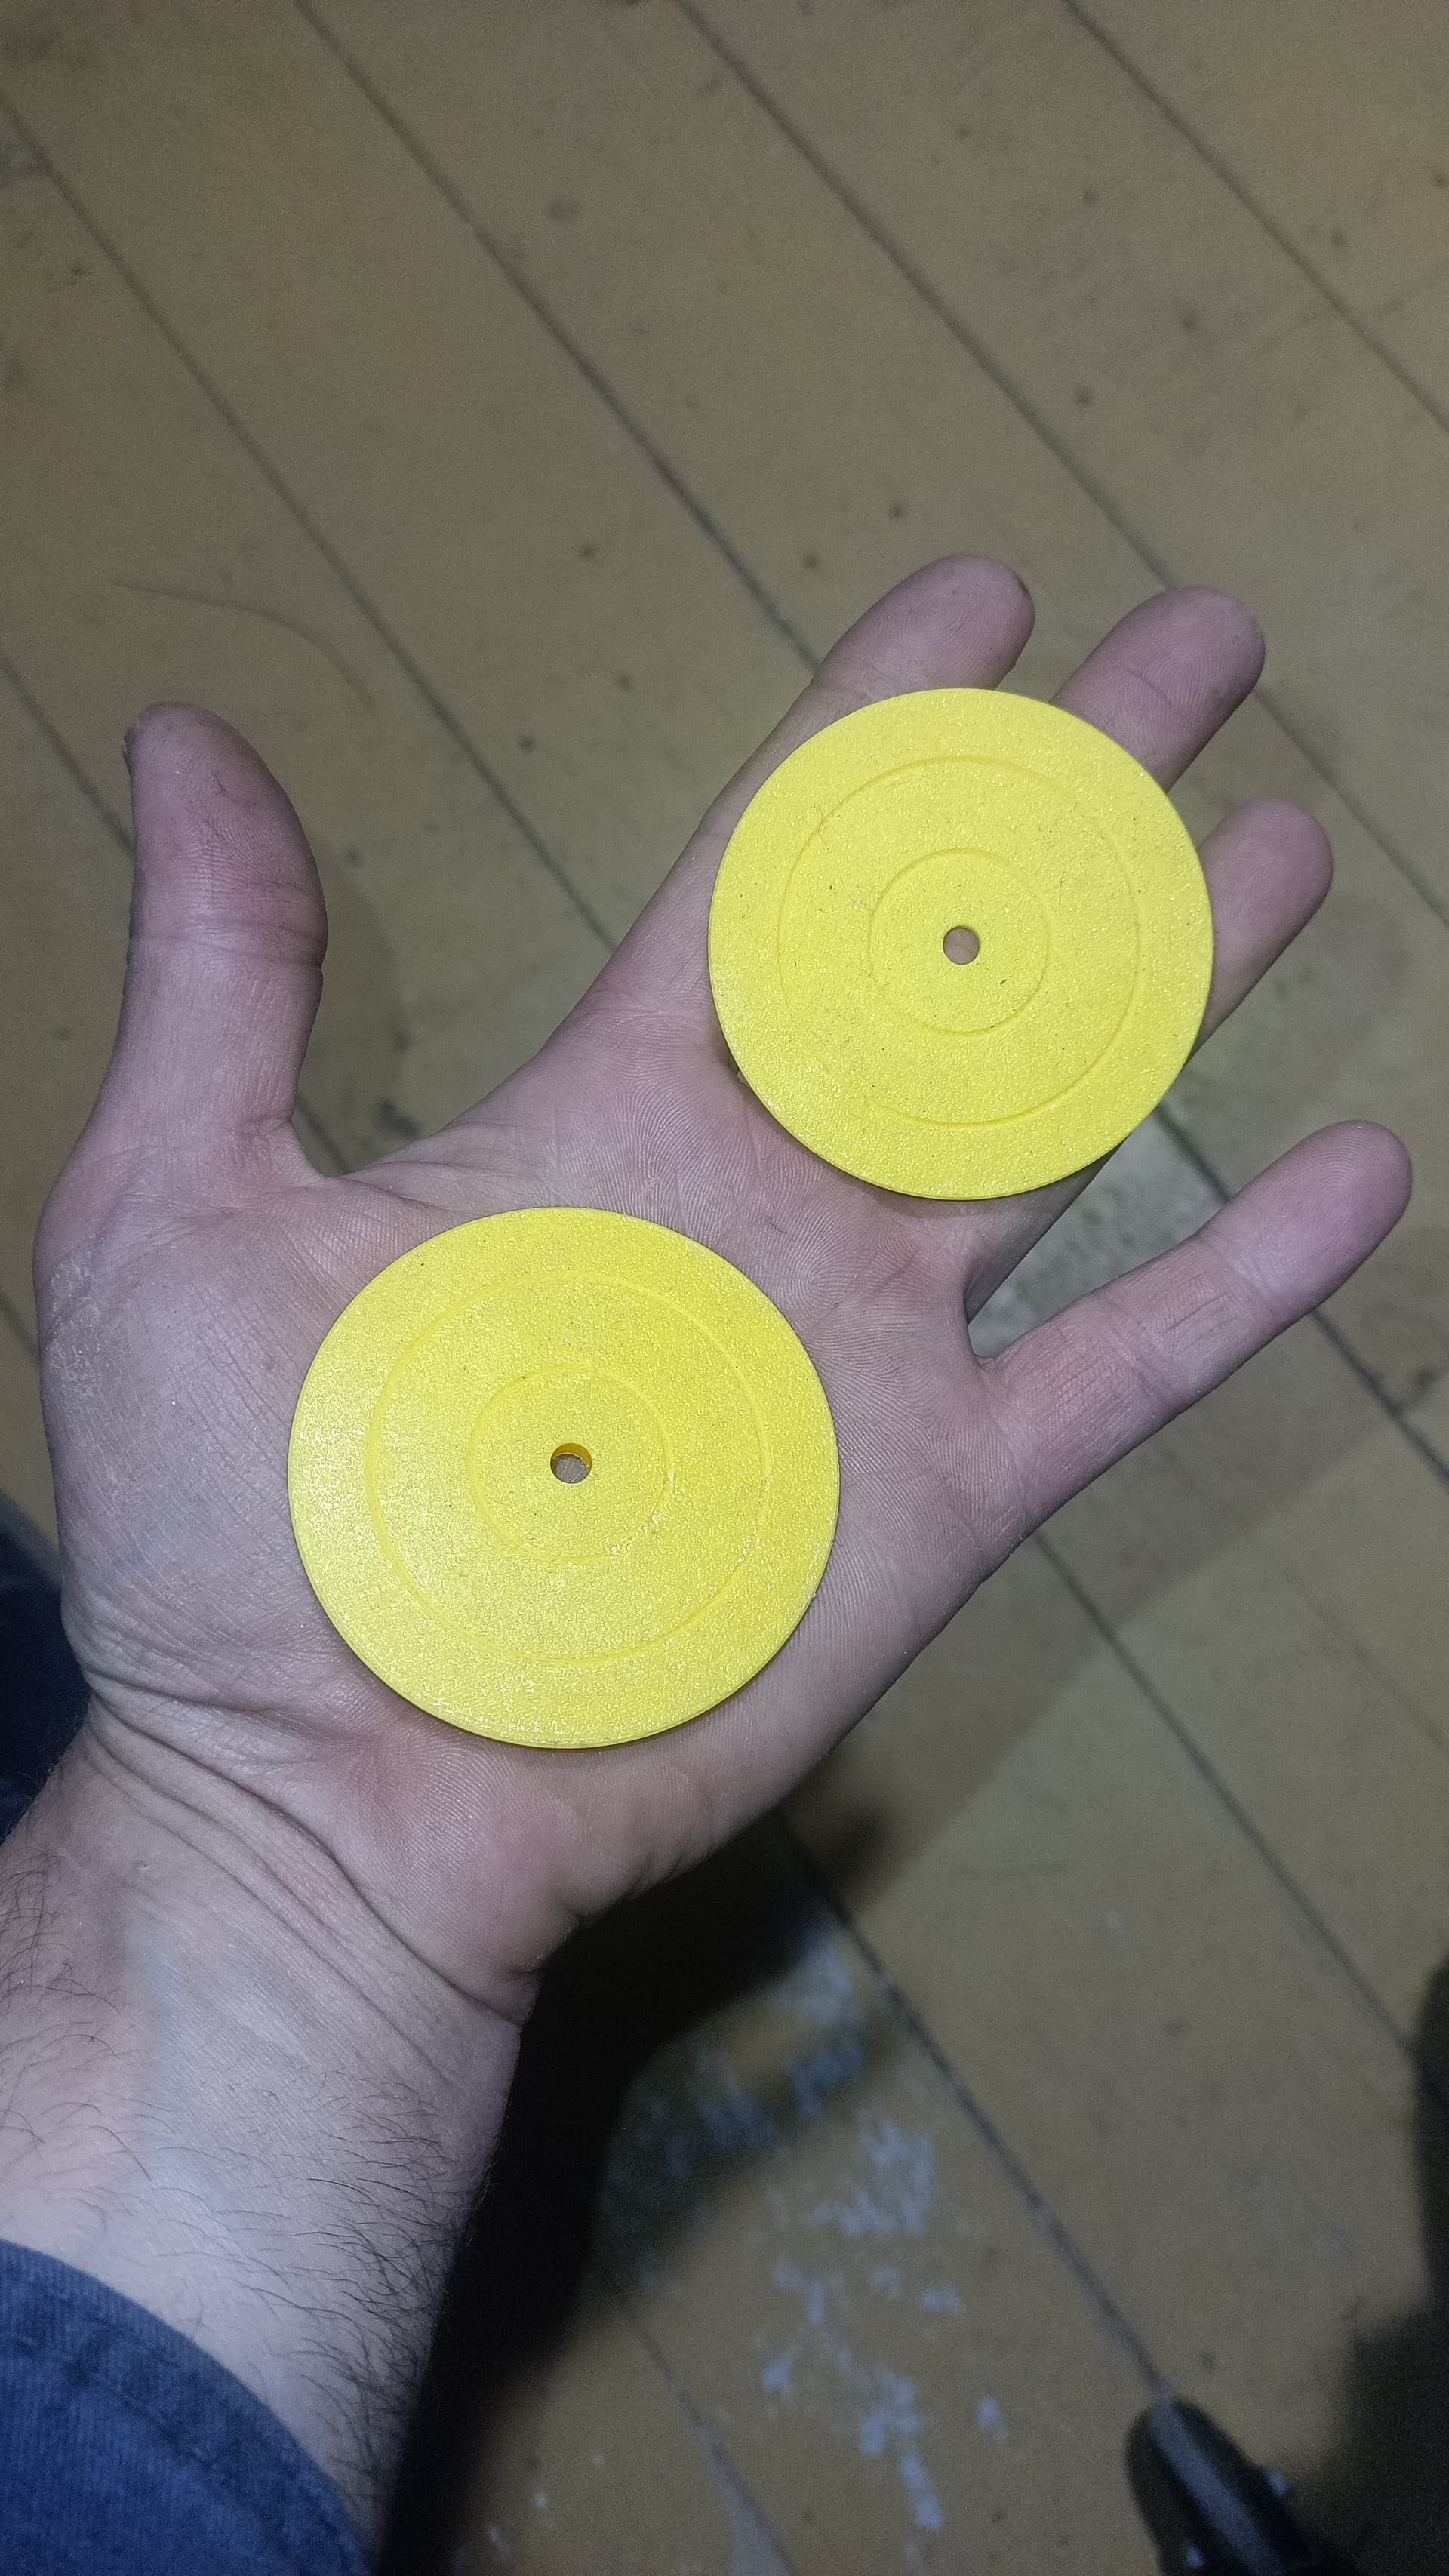
The original model that I was sent was a single piece and it made it hard to print with the narrow channel and keep the groove smooth. I split the drawing up into two pieces with a bit of a keyway lock. Glued them together and they seem like they’ll work very well


5 Likes
Very, very clever. When I first looked without reading I said “Now how did you do that!?”
2 Likes
Thanks Jim, One of the neat things about SLS is the lack of supports as the powder is the support material.
Take Marty’s pin for example, I could print 172 at once, It would take about 24hrs to print the entire build camber. This how I’m able to help Marty and anyone on the forum. If I’m printing a part for a client and its a big part, I’m able to place smaller parts inside, print time is no different as its based on layer height.
7 Likes
Hey folks, I hope you don’t mind me sharing something with you all. Less about “learning” 3D printing and more learning what to do with 3D printing…
So, I’ve been 3D printing for a little less time than I have been CNC plasma cutting. Basically a couple of years. For me, it seemed a natural progression after downloading and learning Fusion. And of course there was that machine torch holder that @ds690 sent me for my Crossfire Pro table when I was having all of my troubles. Seeing that part really got my creative wheels turning. Now, I’m not sure if I’ve said it on here, but I think I prefer the 3D printing process; it’s a little less fume-y than CNC plasma, anyway. ![]()
Much more recently however, I have been exploring this whole idea of designing and “distributing” my designs…for free. That just seemed counter-intuitive to me at first, but after being asked for one of my automotive designs over on the Vintage Ford Mustang forum, I went to the Bambu FB group and asked about sharing files via MakerWorld. Believe it or not, there were a couple of respondents who claimed they had actually outright purchased the new H2D with MakerWorld points alone!?
So, I uploaded that TIG torch fab table mount, and got like…four downloads. And then I actually came up with a GOOD idea.
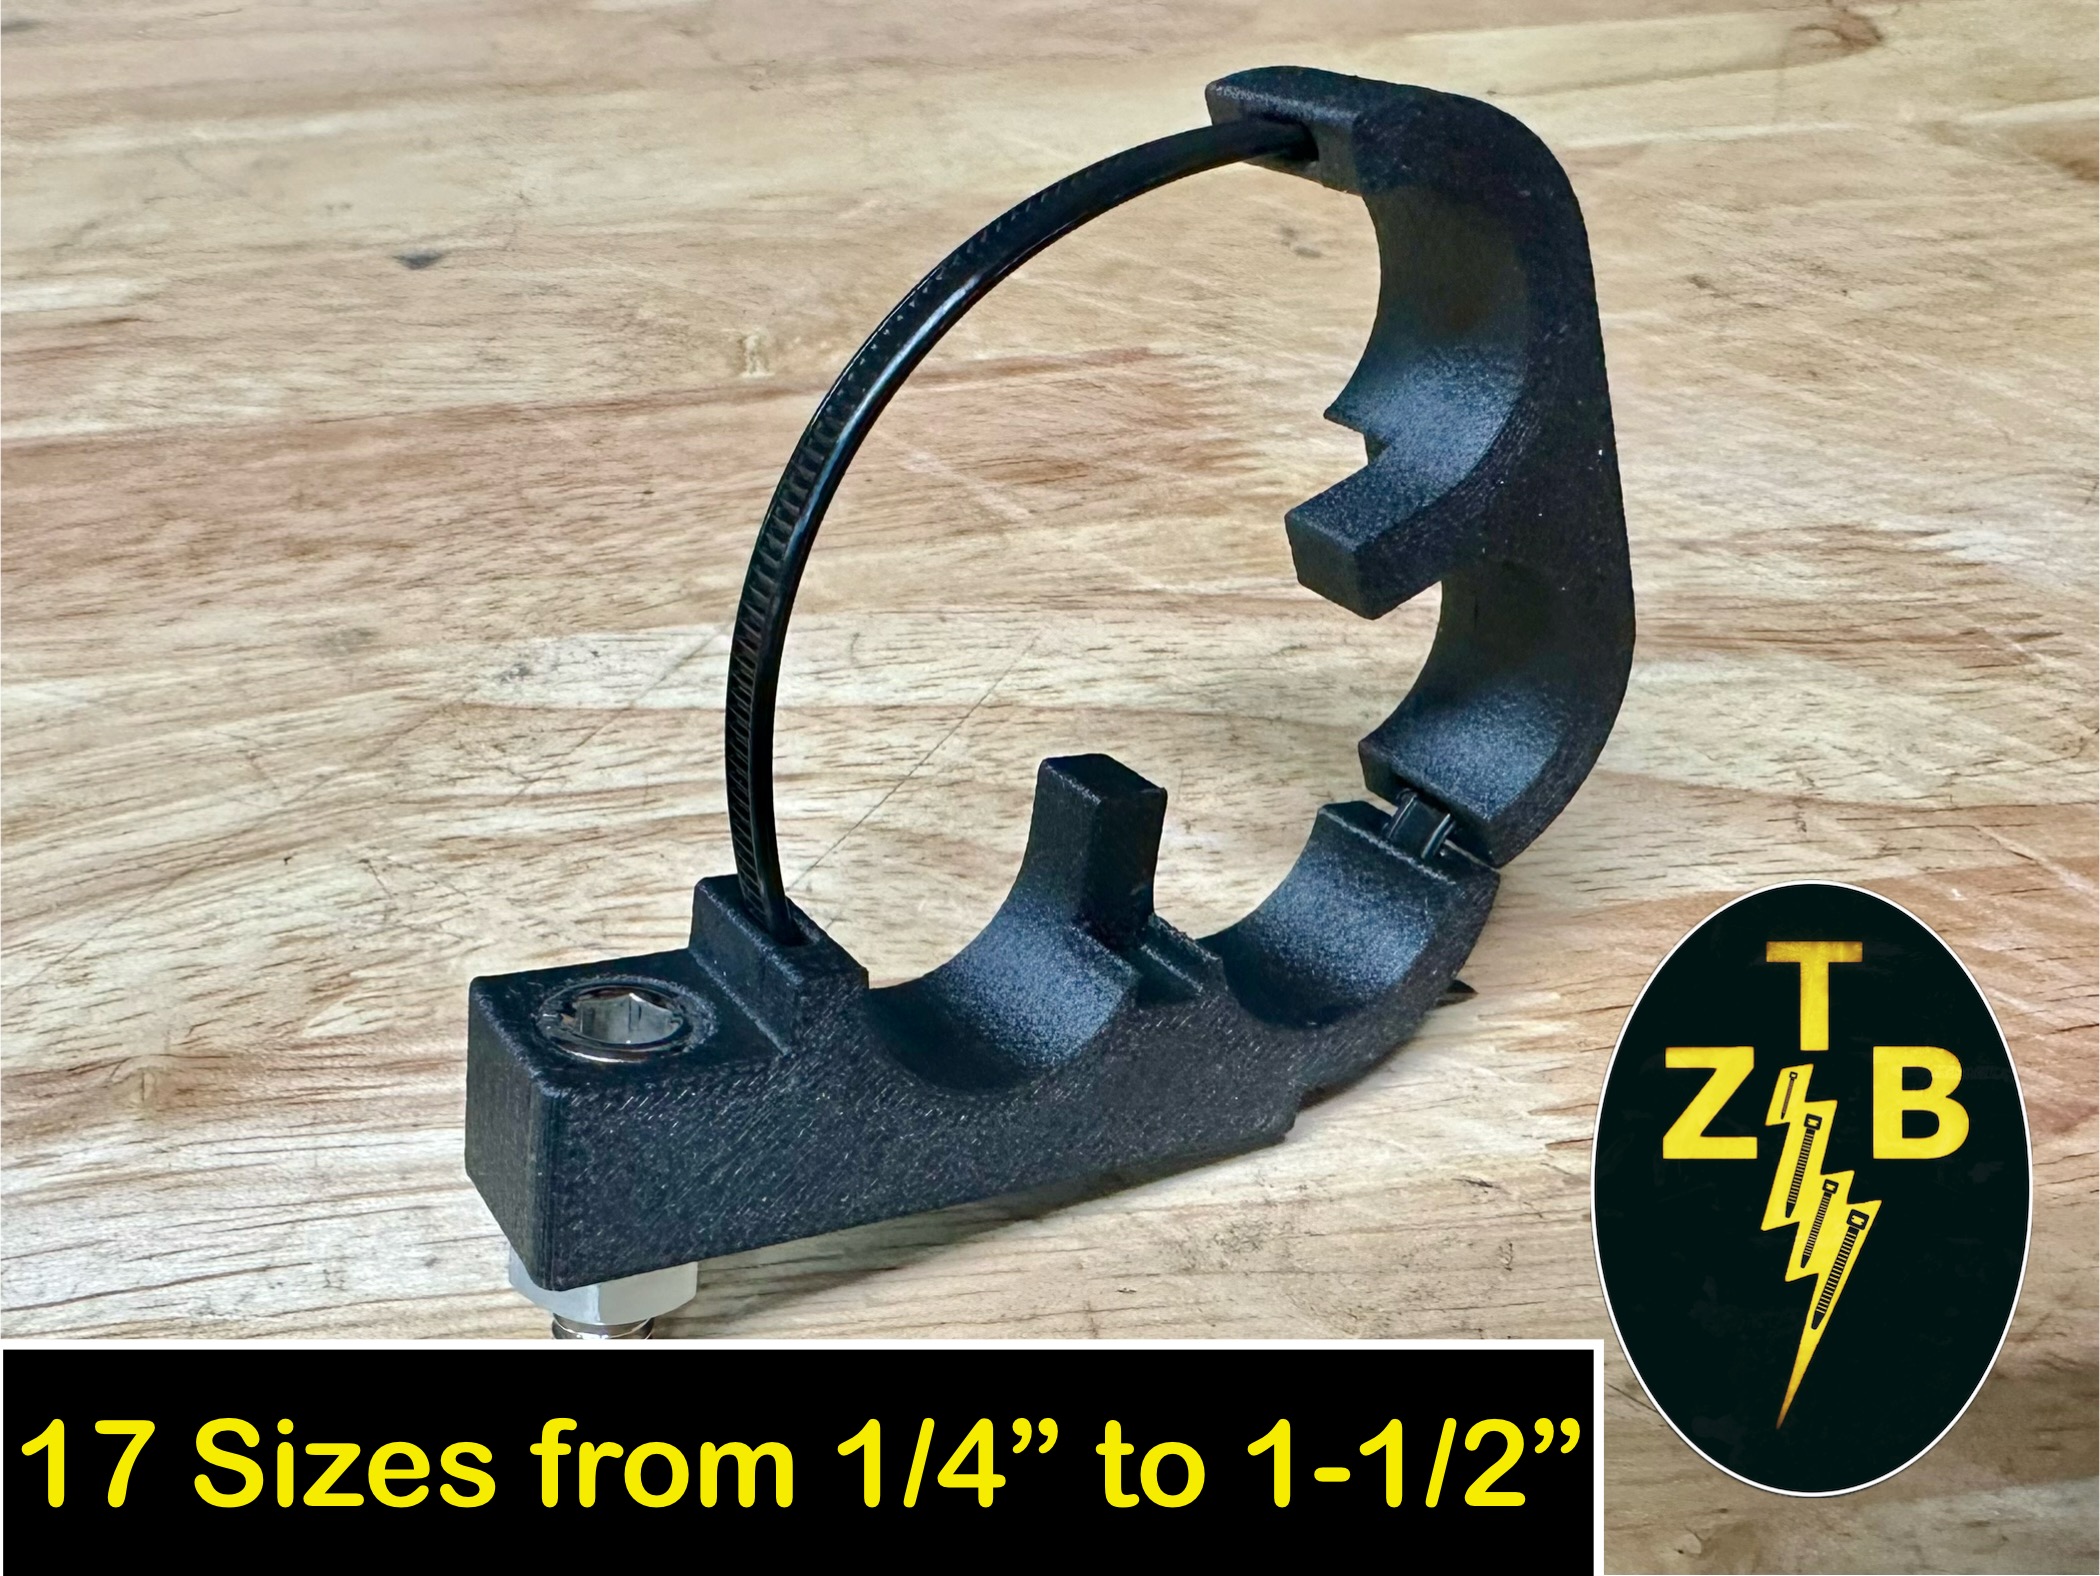
So, I call this thing the “Zip-Tie Buddy”. It’s a stupid simple little interlocking two-piece cable (or hose, or…) clamp, available with or without a built in mounting tab, that secures in place with a single zip-tie. It provides firm clamping AND separation of your work, and I modeled it parametrically so that I could crank them out in any sizes and/or combinations that people wanted to have.
And the “Zip-Tie Buddy” is actually kind of taking off; I’ve had a couple hundred downloads in the first week, which already puts me about 1% of the way towards my free H2D! ![]()
Anyway, there are a bunch of different versions of “Zip-Tie Buddy” available to download on my MakerWorld account, and I’m in the process of making several more versions right now. I can see literally limitless applications for these things, and I figured you guys, who ALL deal with a fair bit of cable management, might appreciate them. All I ask, if you dig this design, is that you share it with someone else.
You can find them here:
https://makerworld.com/@cjhudson87
Thank you for listening to my novella.
![]()
8 Likes
Very nice Casey. Thanks.
I love my Bambu printers. I certainly can’t say that the 3D printer has replaced my need for my plasma table. But, like you, I find all sorts of things that I can problem solve and flesh out the design with the 3D modeling and printing.
Right now I am making 3D printed versions of Jack stands for my trailers. They want $30 to $50 for theirs and they are plastic. I have not done a stress test on them so I might be fooling myself.
2 Likes
as simple as it gets 3D project.
Chamfers were added.
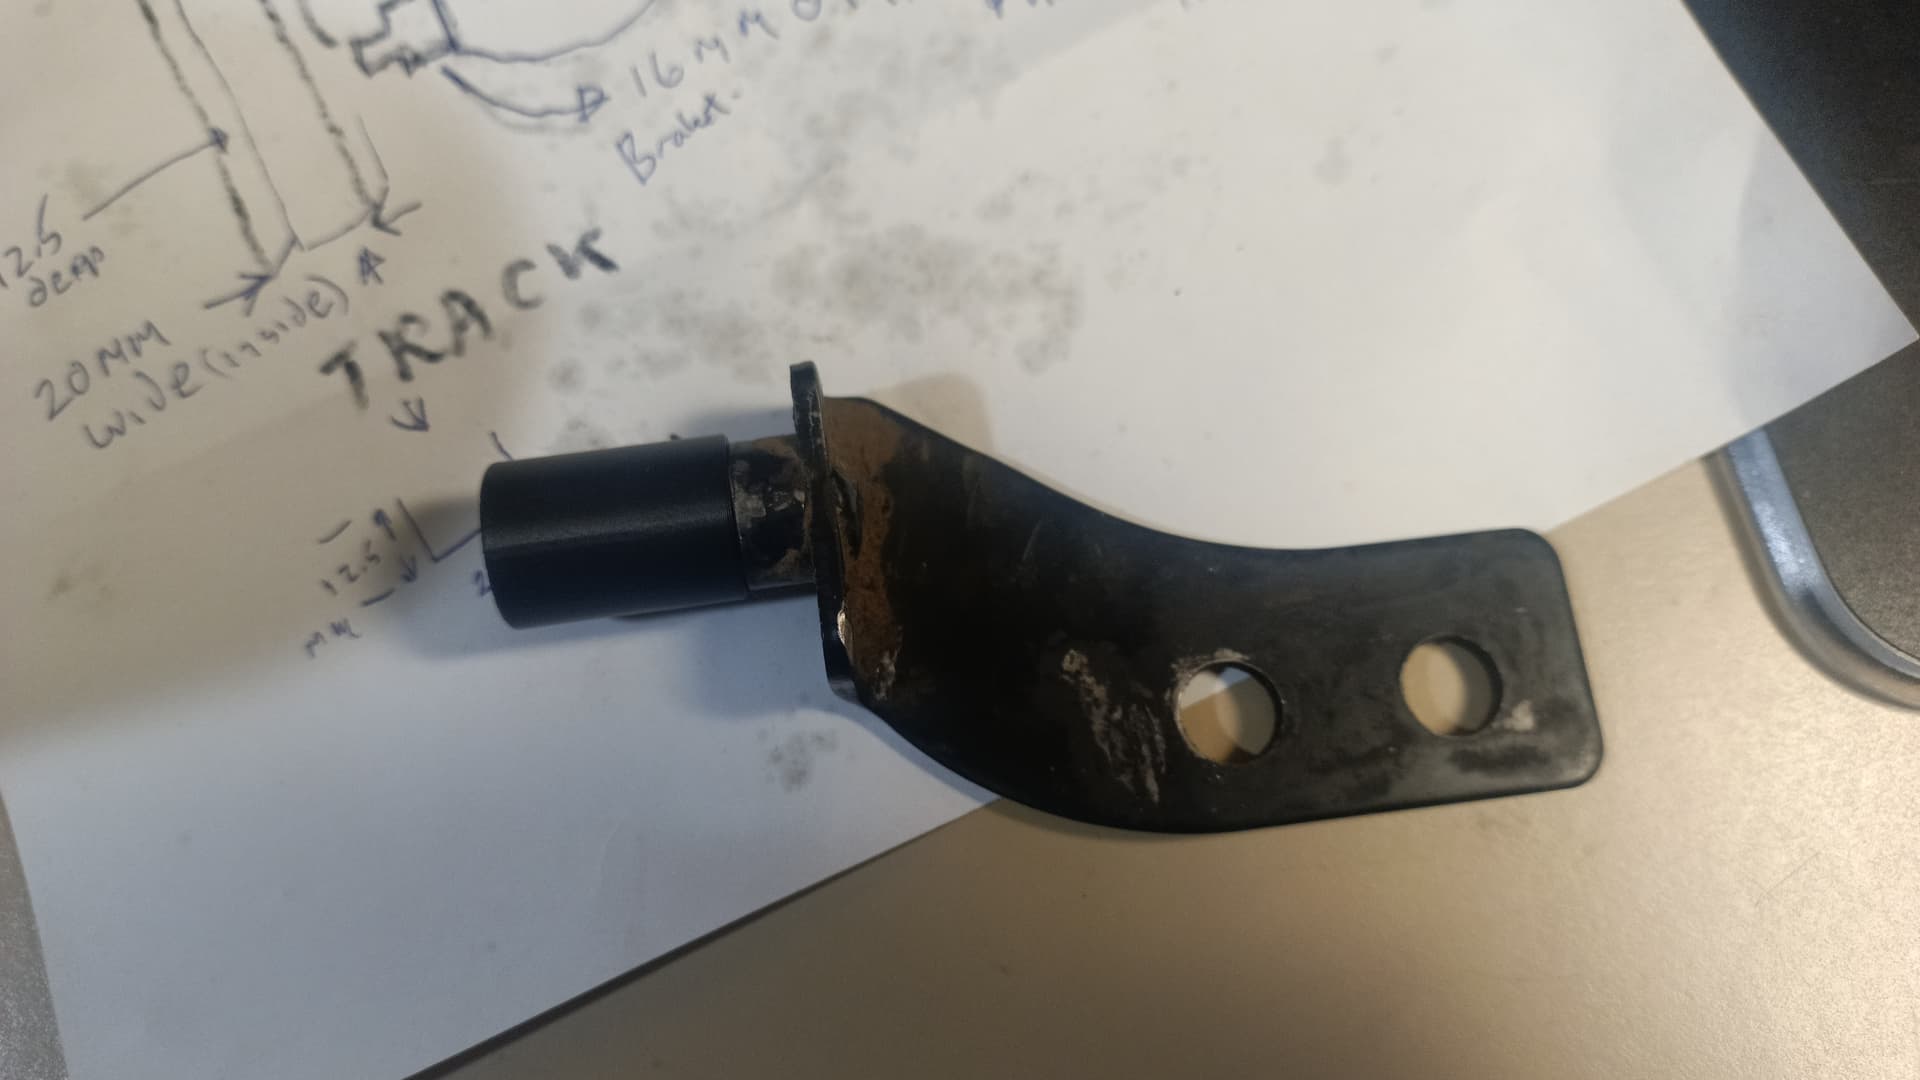
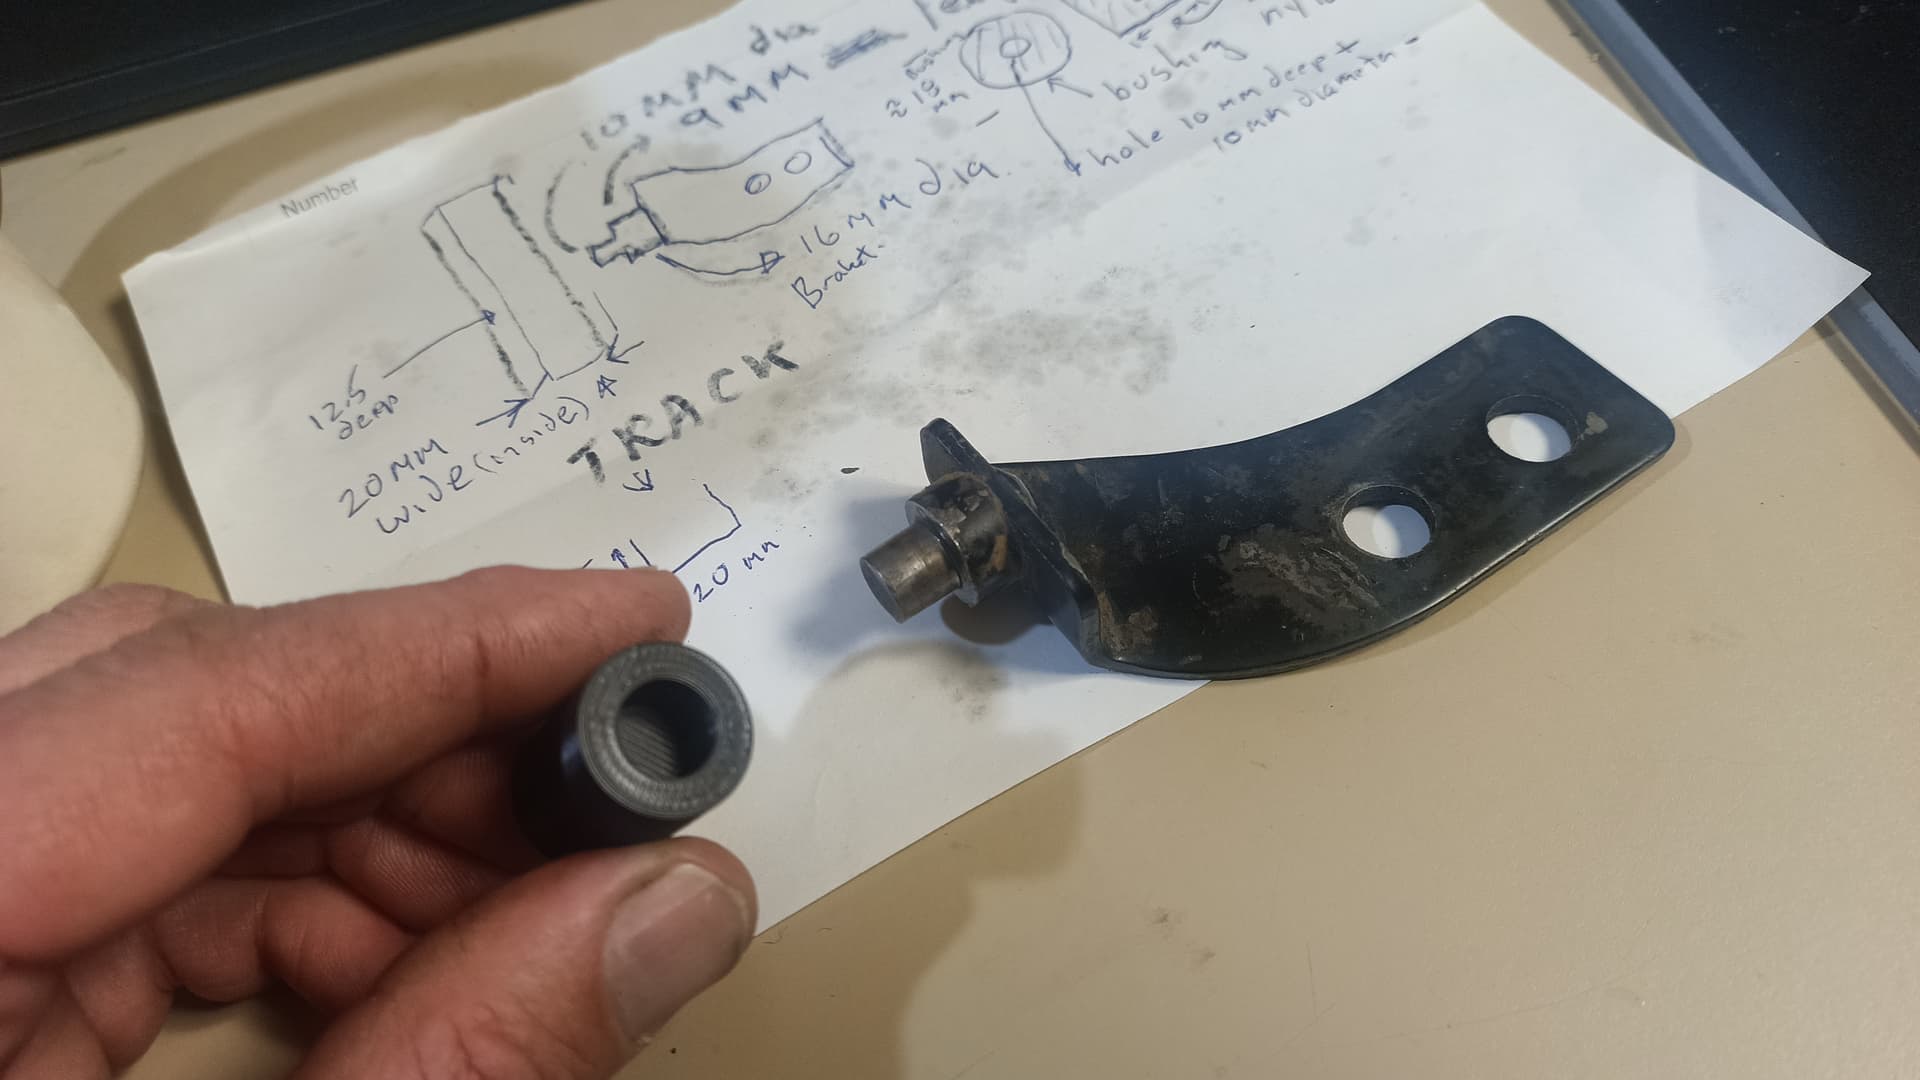
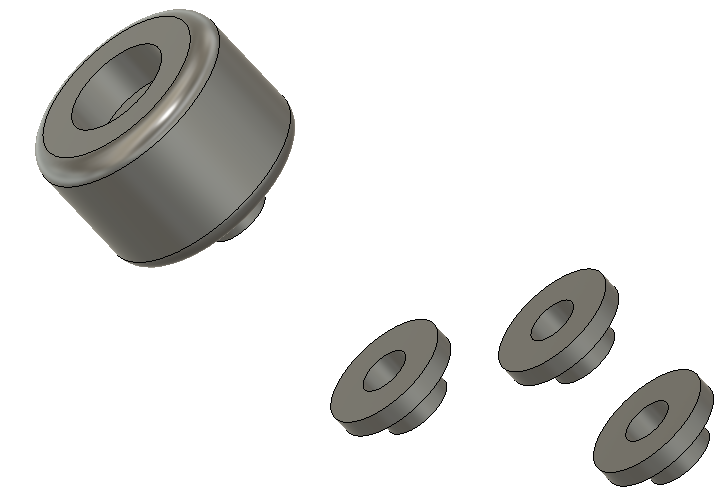
A replacement bushing for the roller on a mini excavator window bracket.
Printed at 100% infill.
I thought about doing it at ABS but we’ll see how long the PETG lasts
Quite set of measurements was dropped off with the bracket ![]()
3 Likes
Perfect example of how the 3D printer proves useful.
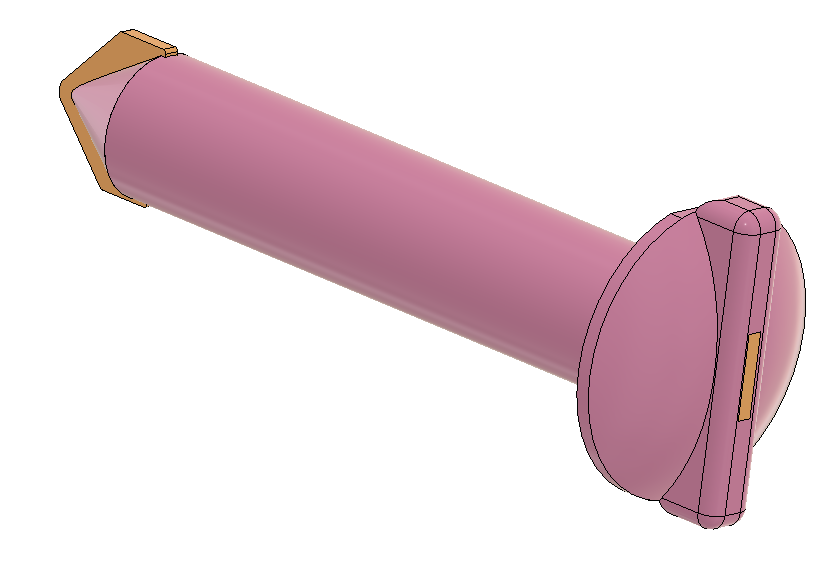
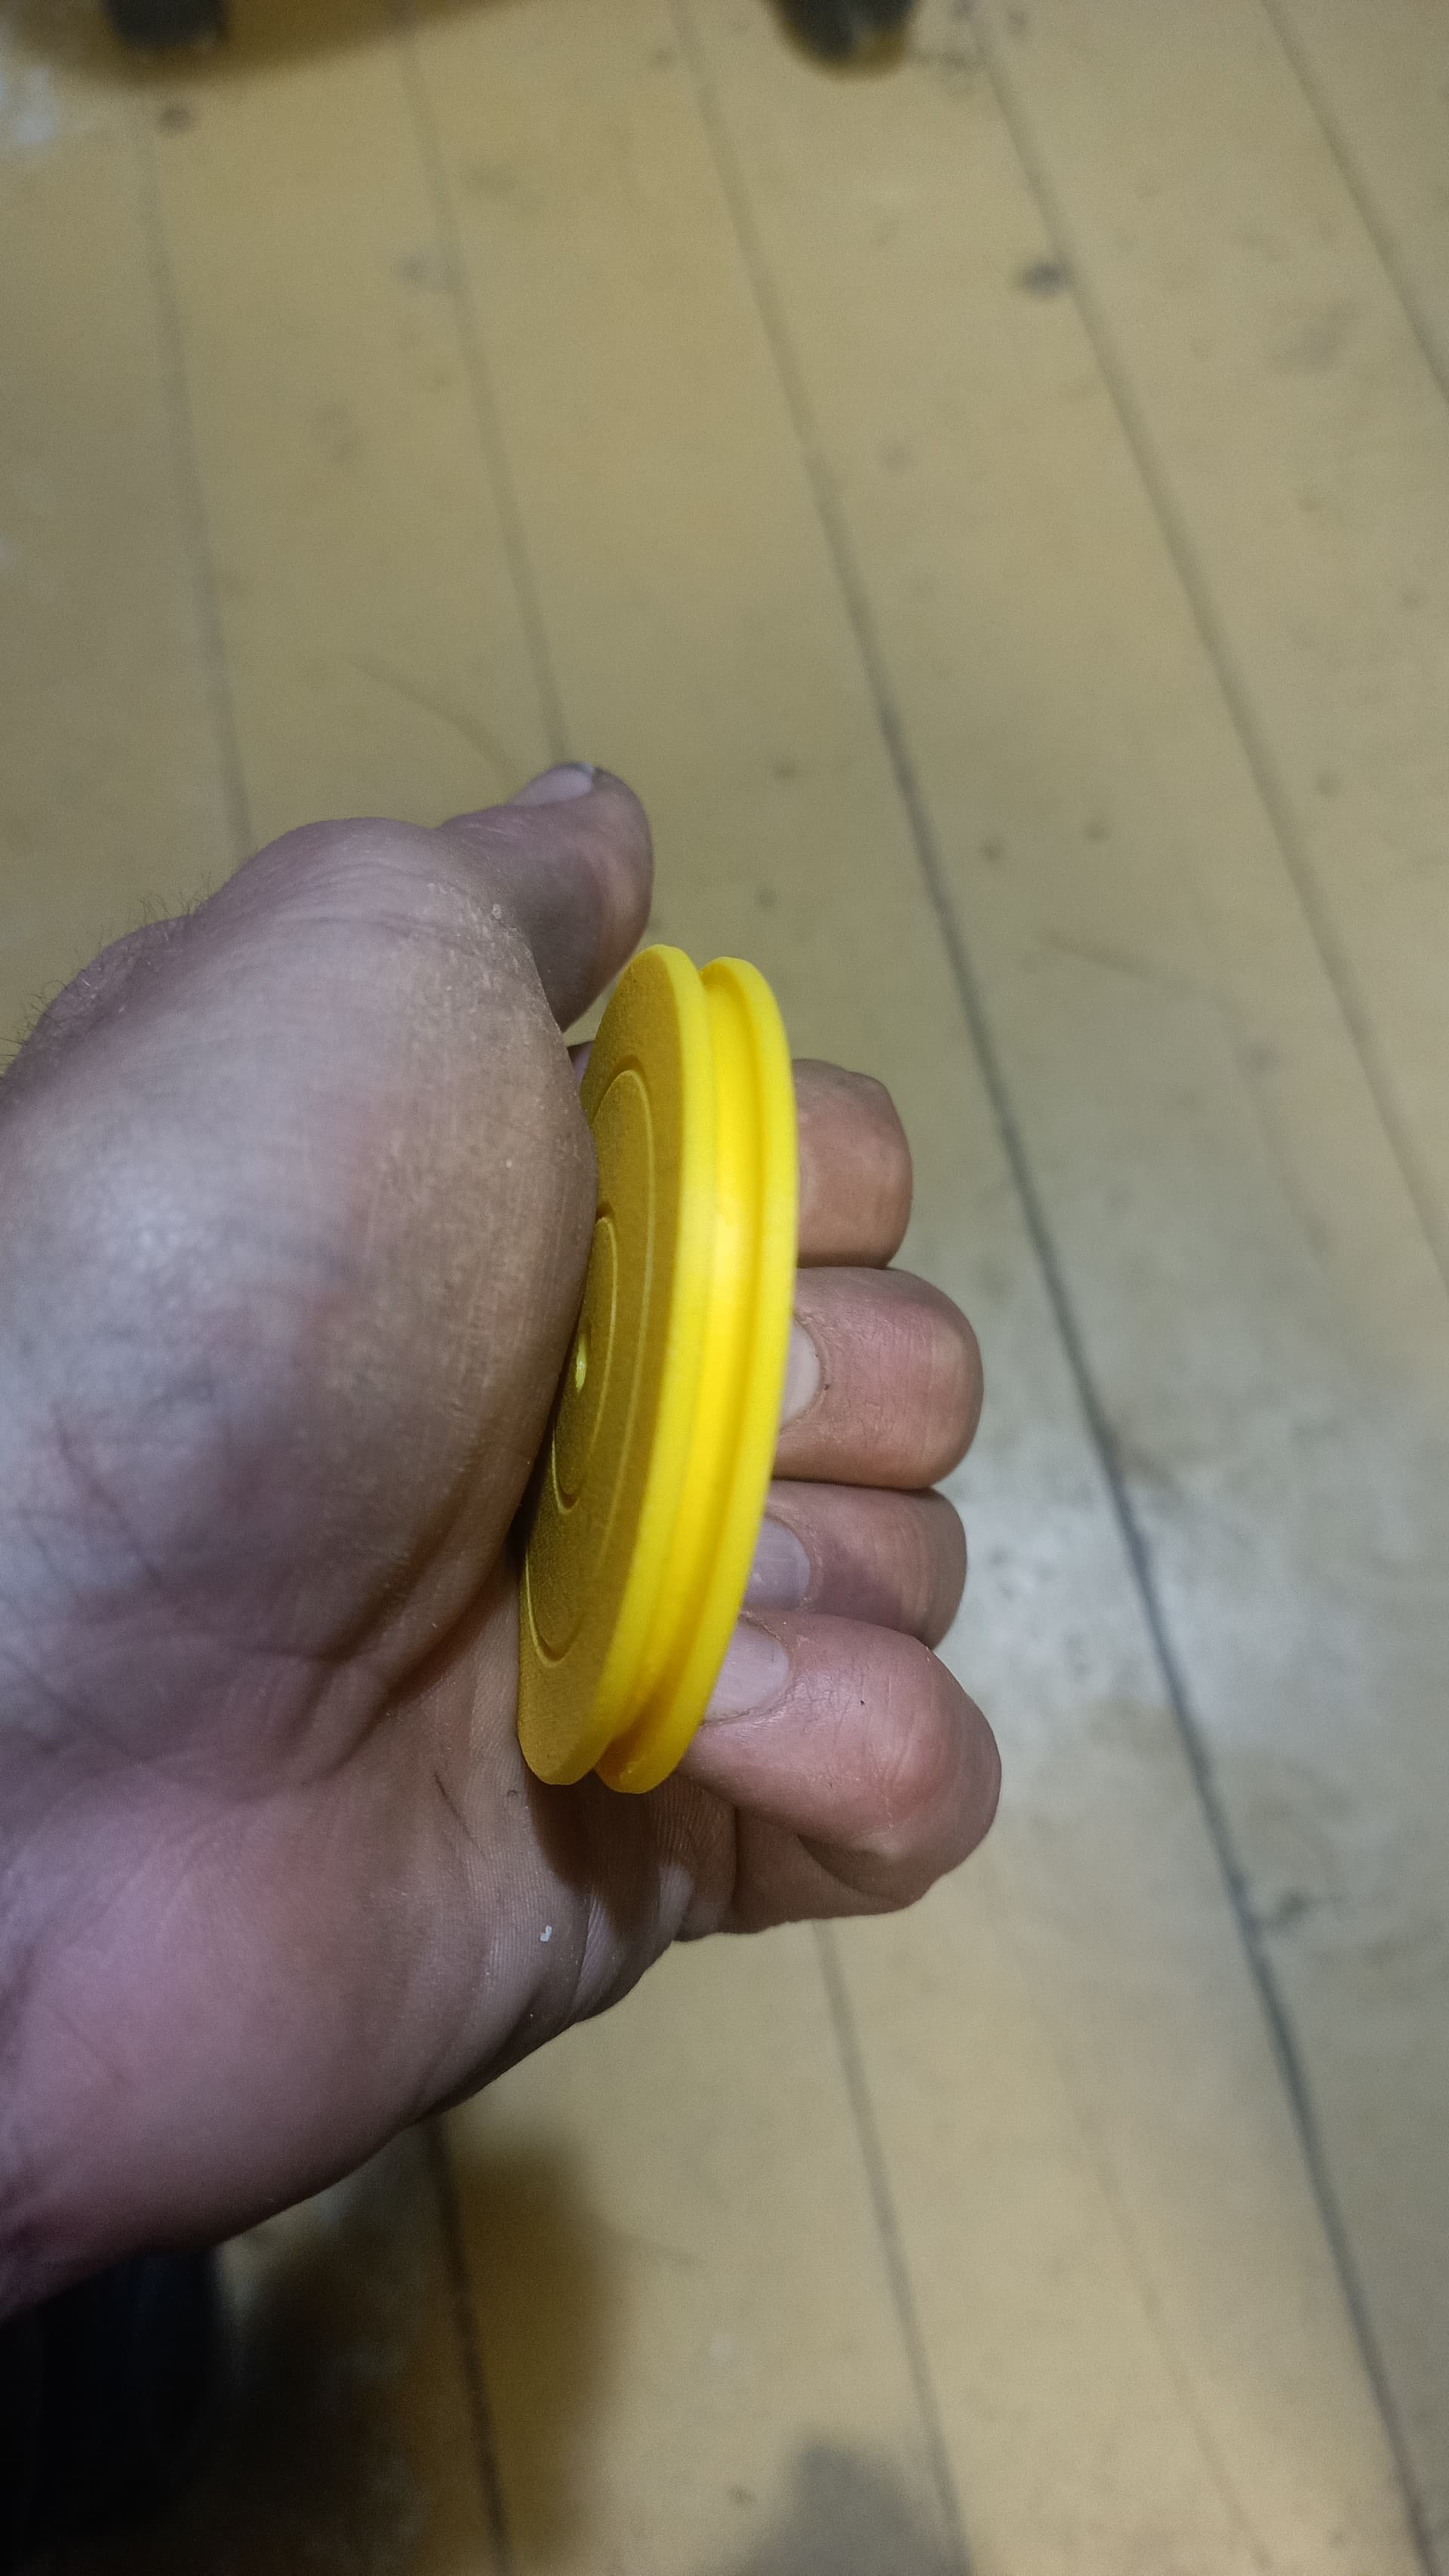
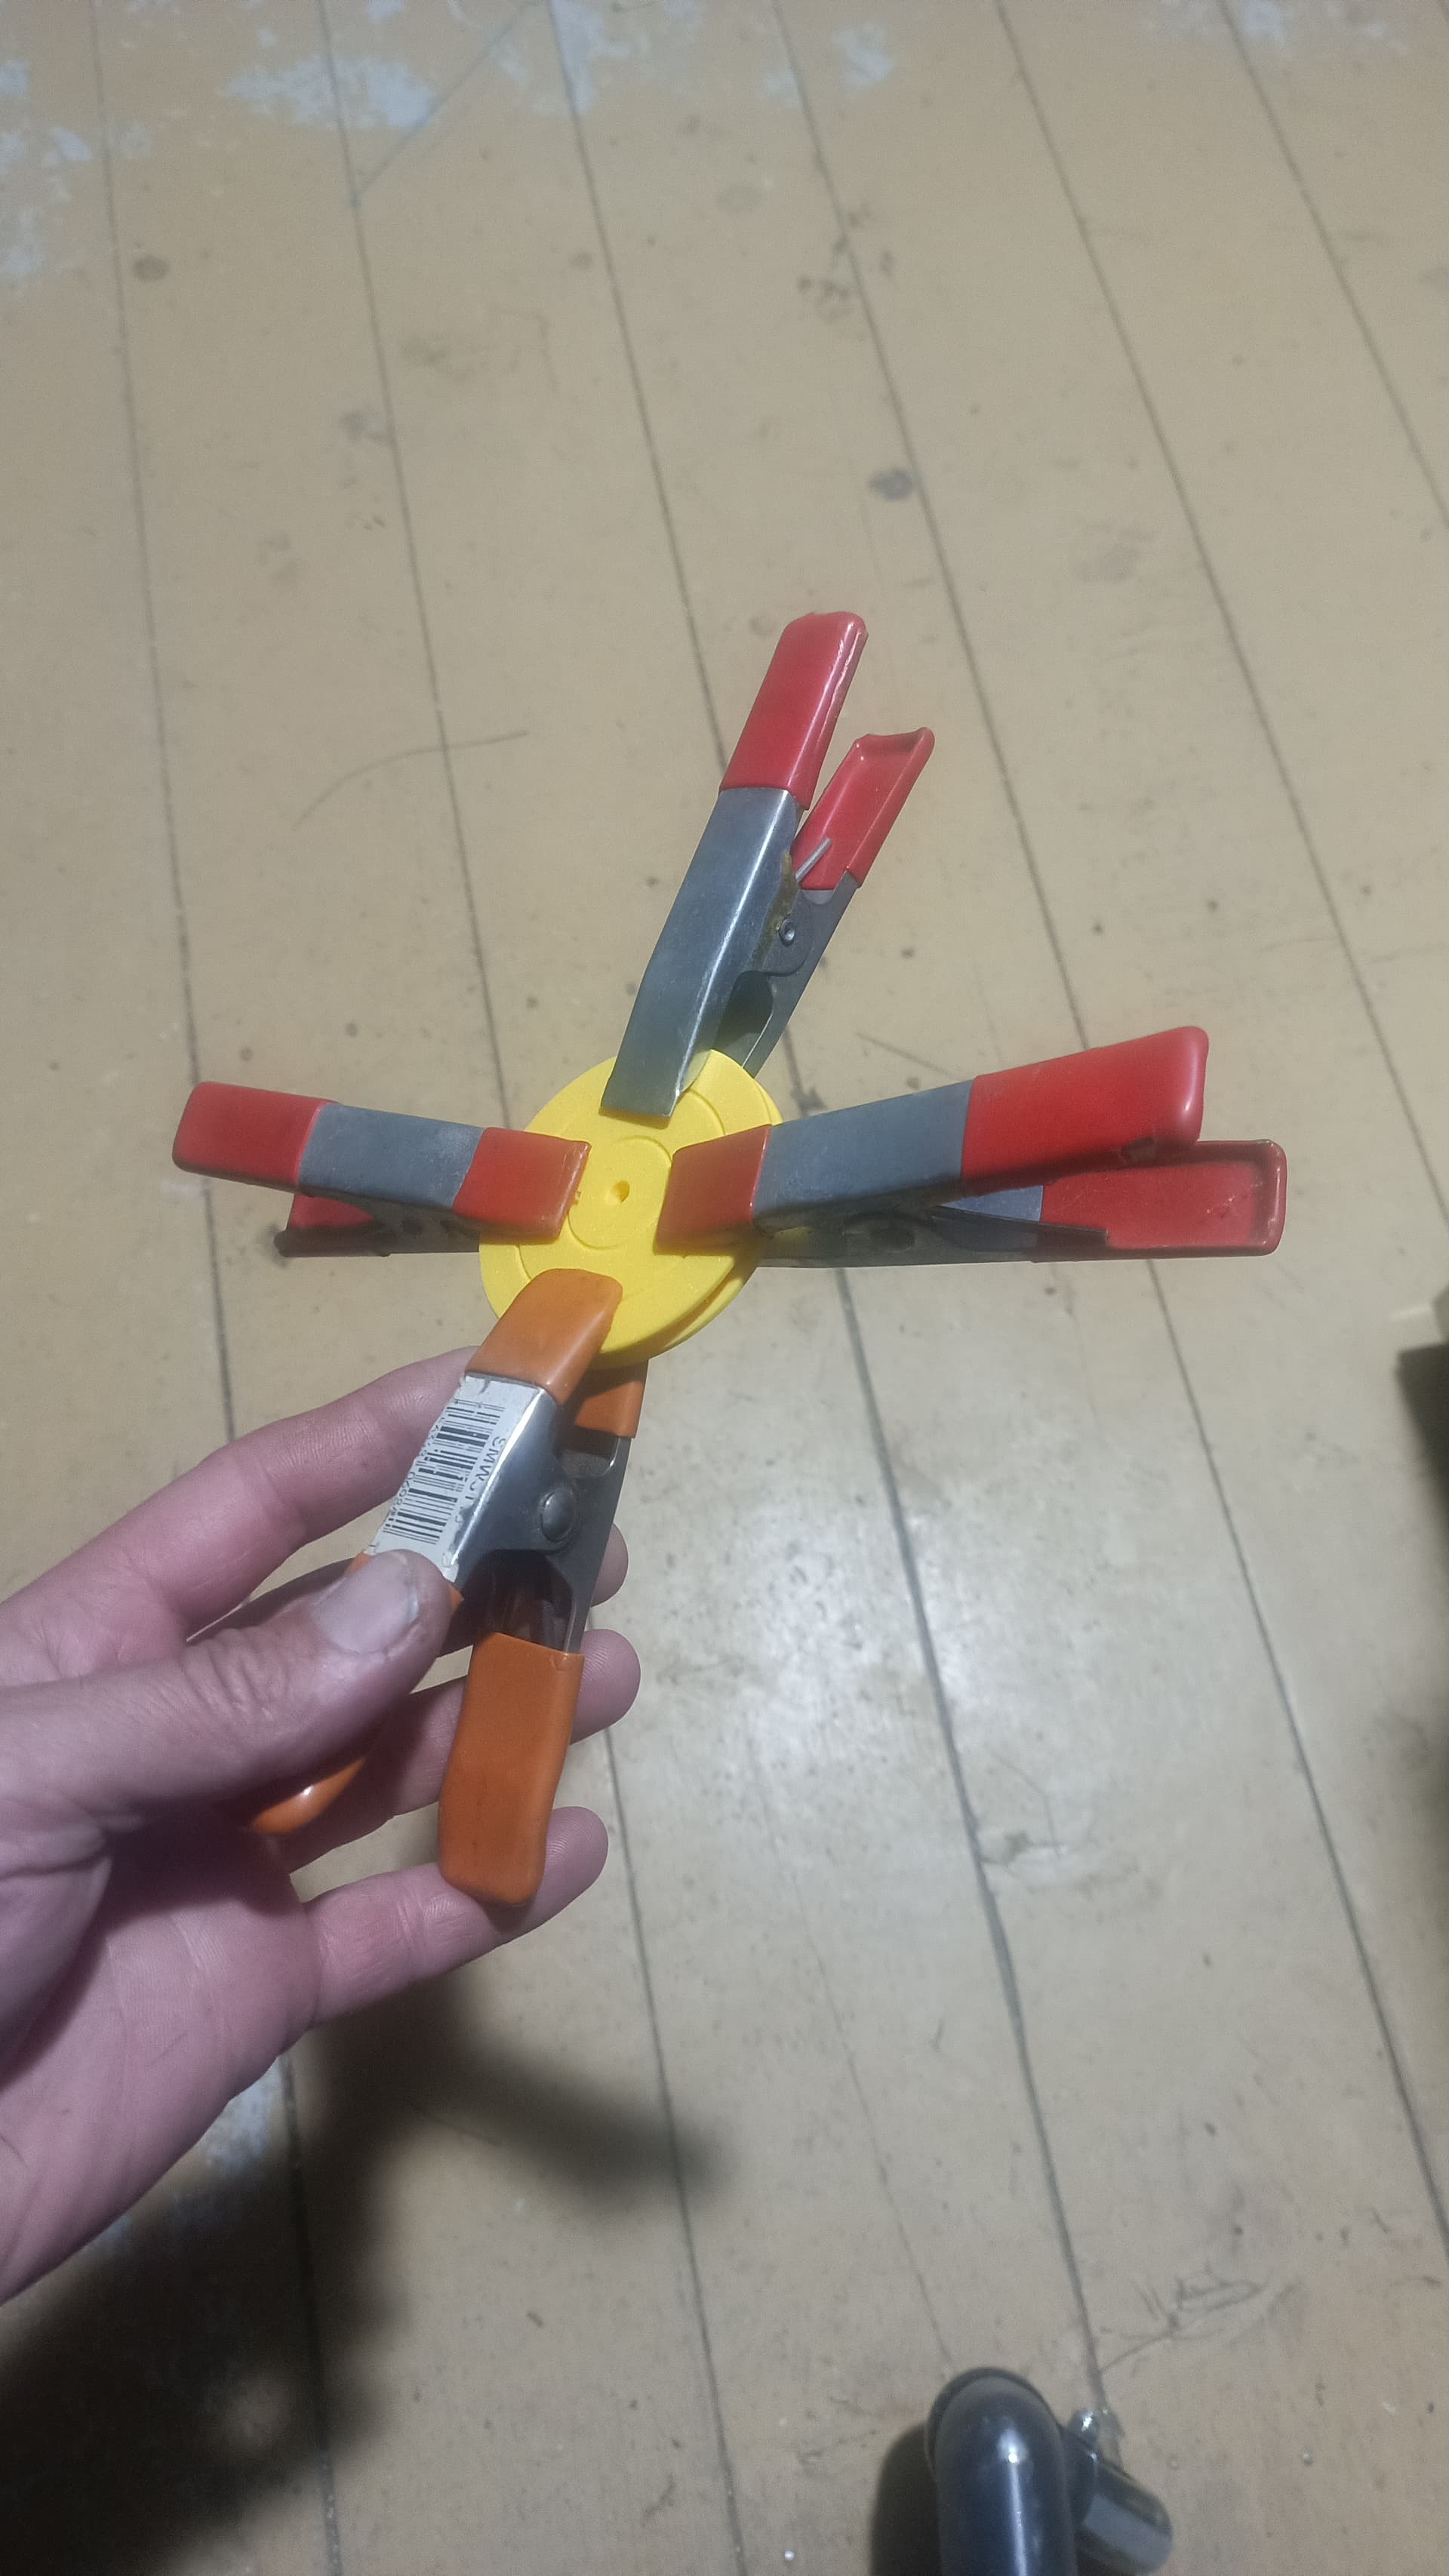
I don’t have any real-life photos but this was a knob I printed, with various adapters, to replace a missing window knob on the dump truck I drive about 12 days a year at my daughter’s business (during their busy times of the year). I replaced that knob 16 months ago and it is still working great. Everyone that drives that truck has thanked me for fixing it.
Since I was not sure of the fit, I printed multiple knobs with adapter bushings.
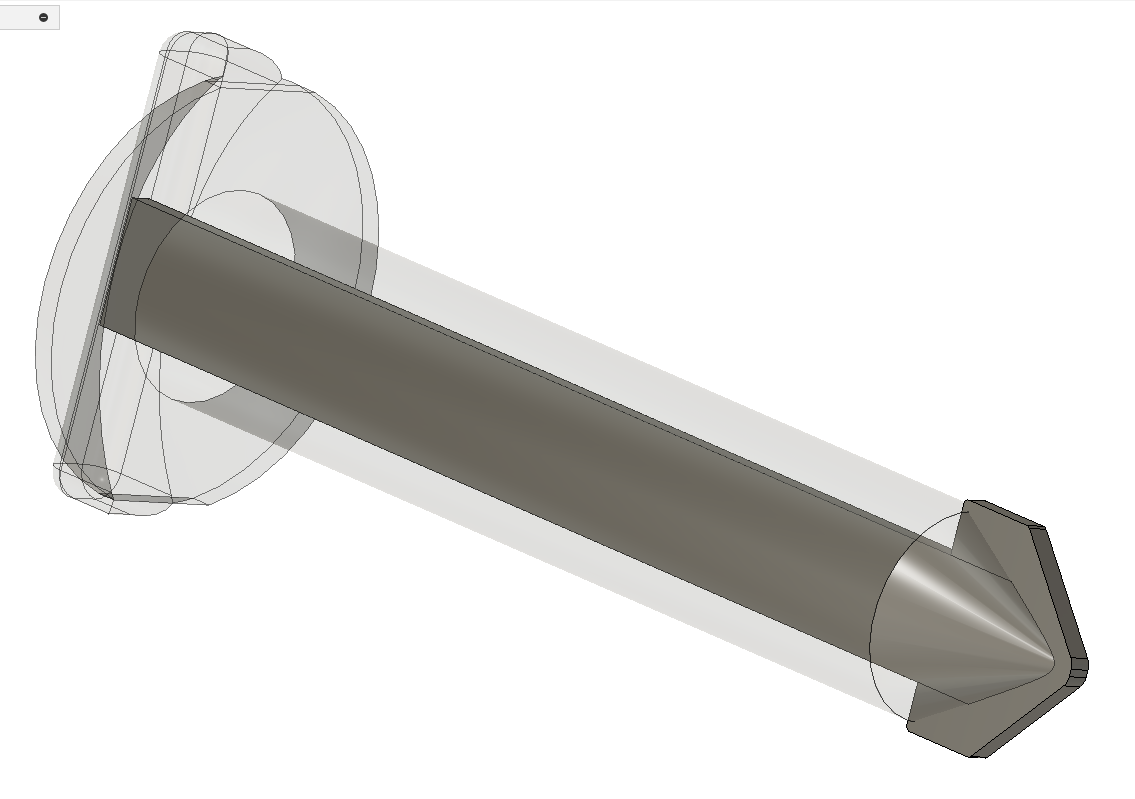
The knob was secured with one of these bolts. Again, I was not sure of the length that I needed so I took the entire assortment:

2 Likes
Good Idea Man, I just helped you out a bit. Thanks for sharing!
3 Likes