Lead In Gouge (solved)

Greetings everyone,

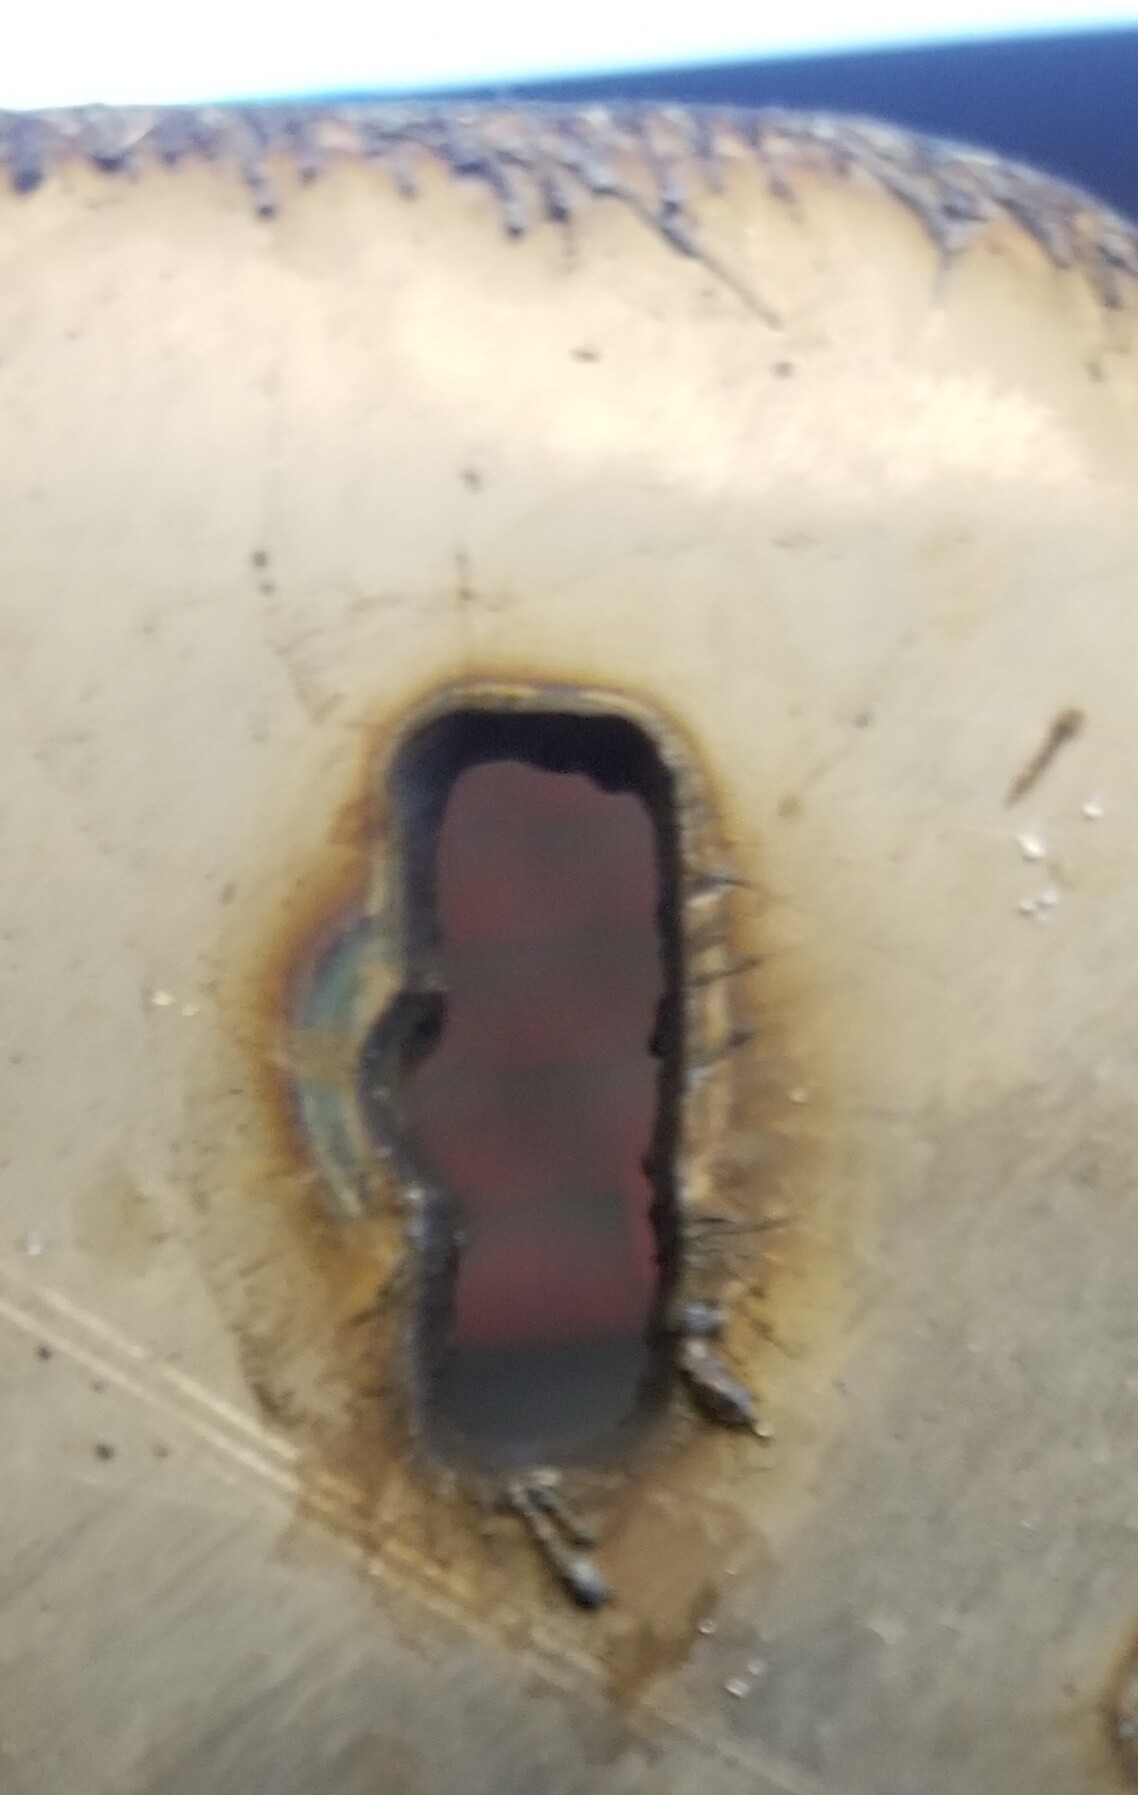
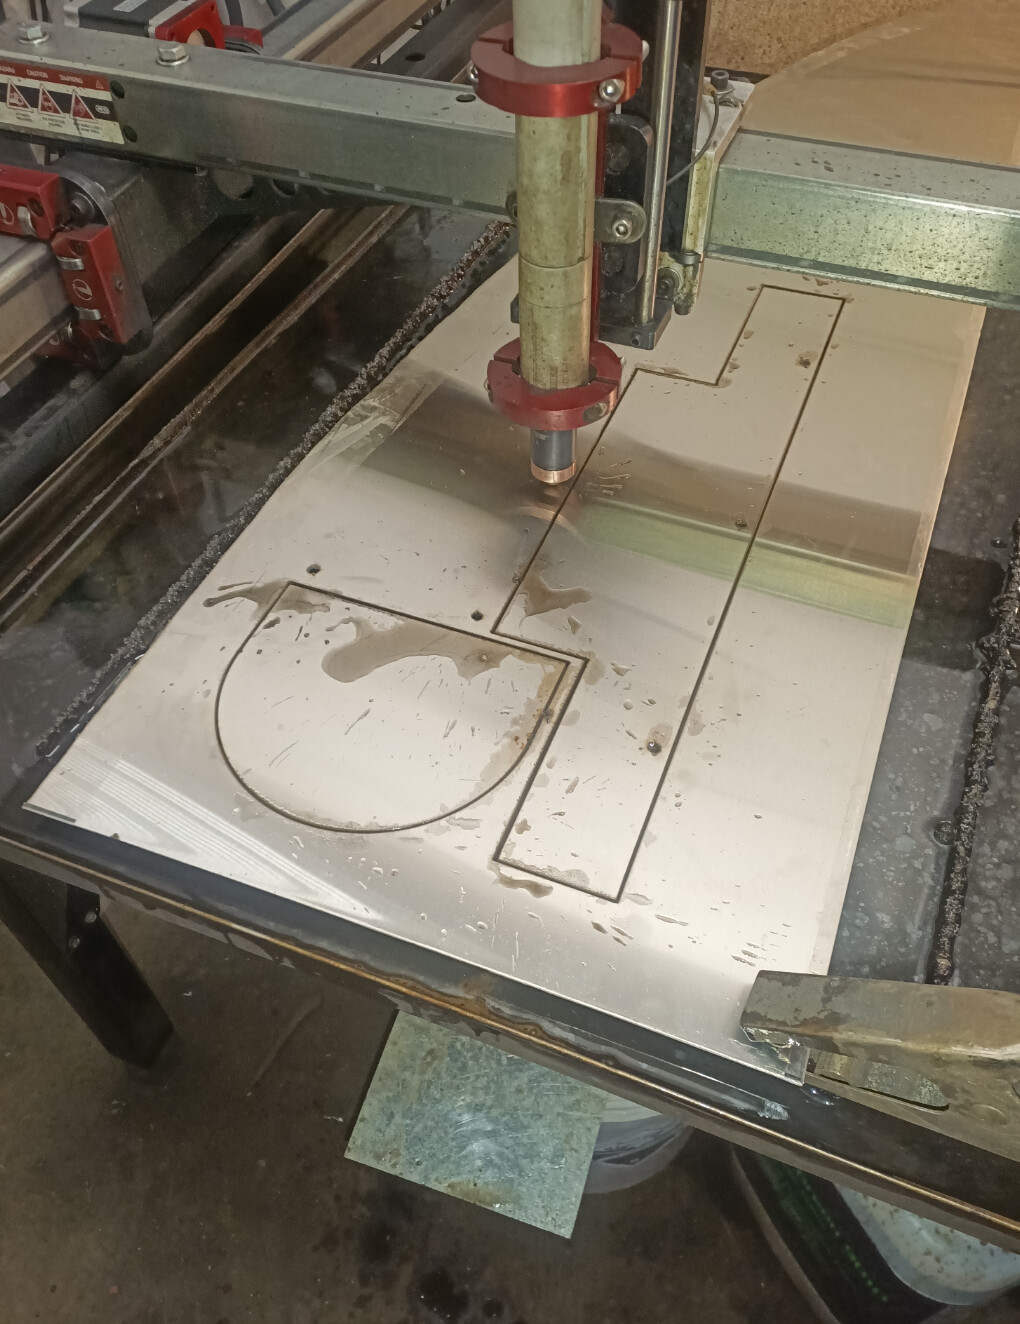
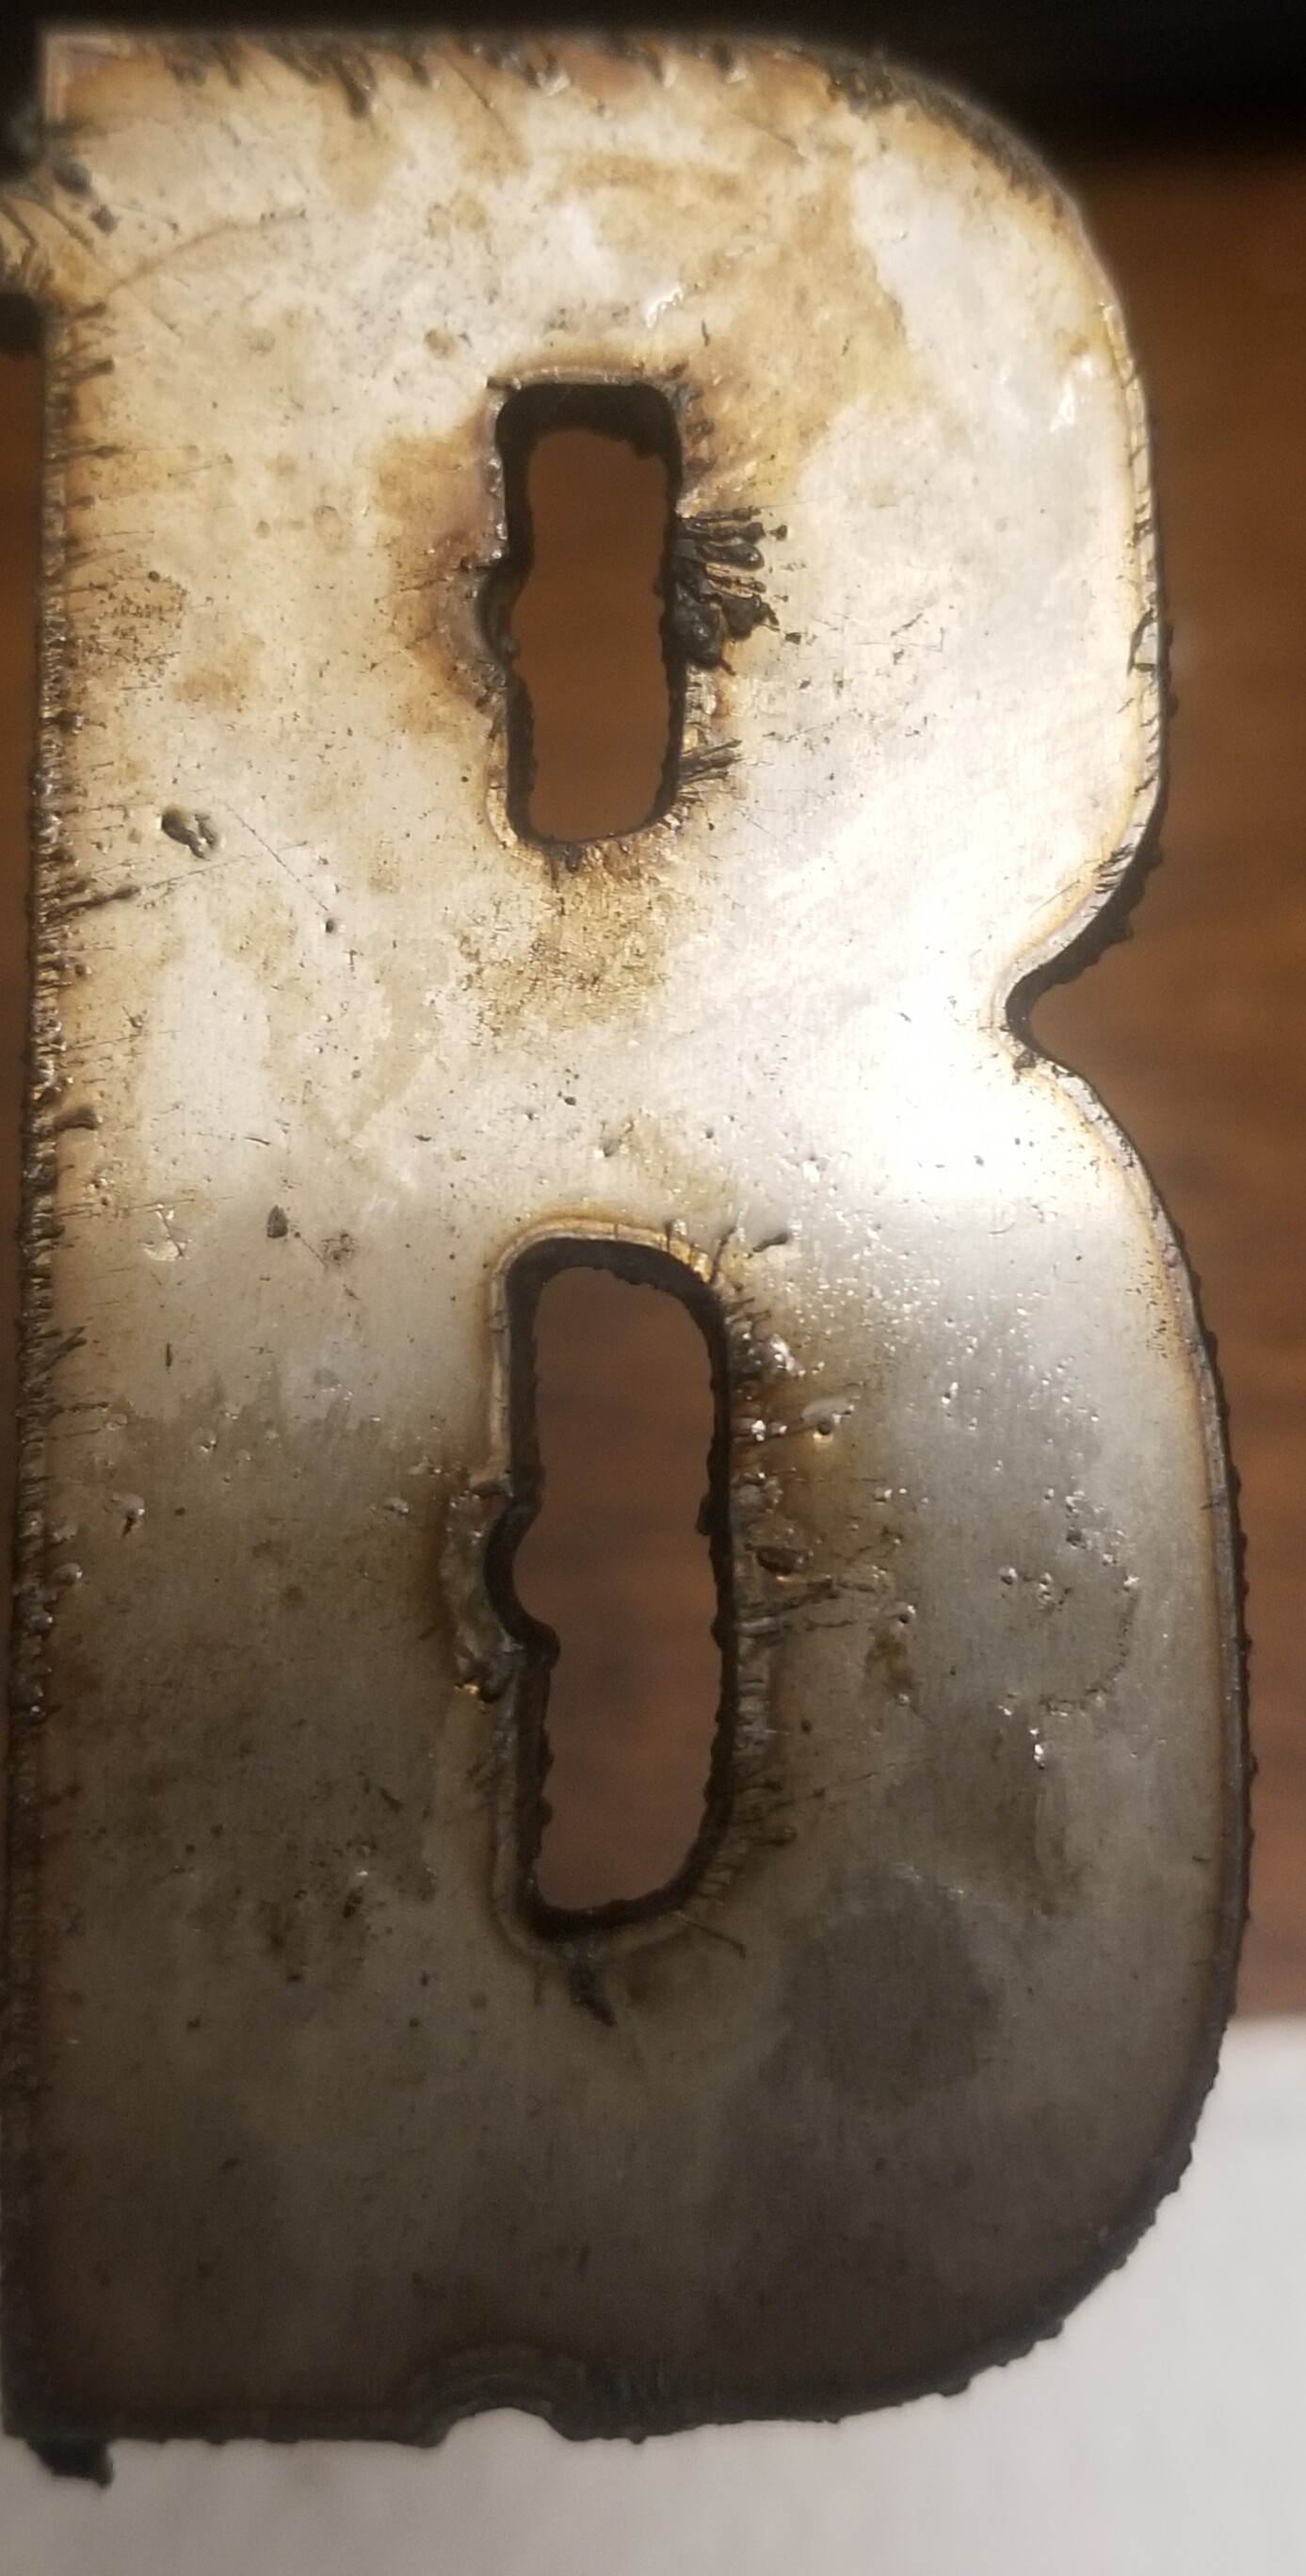
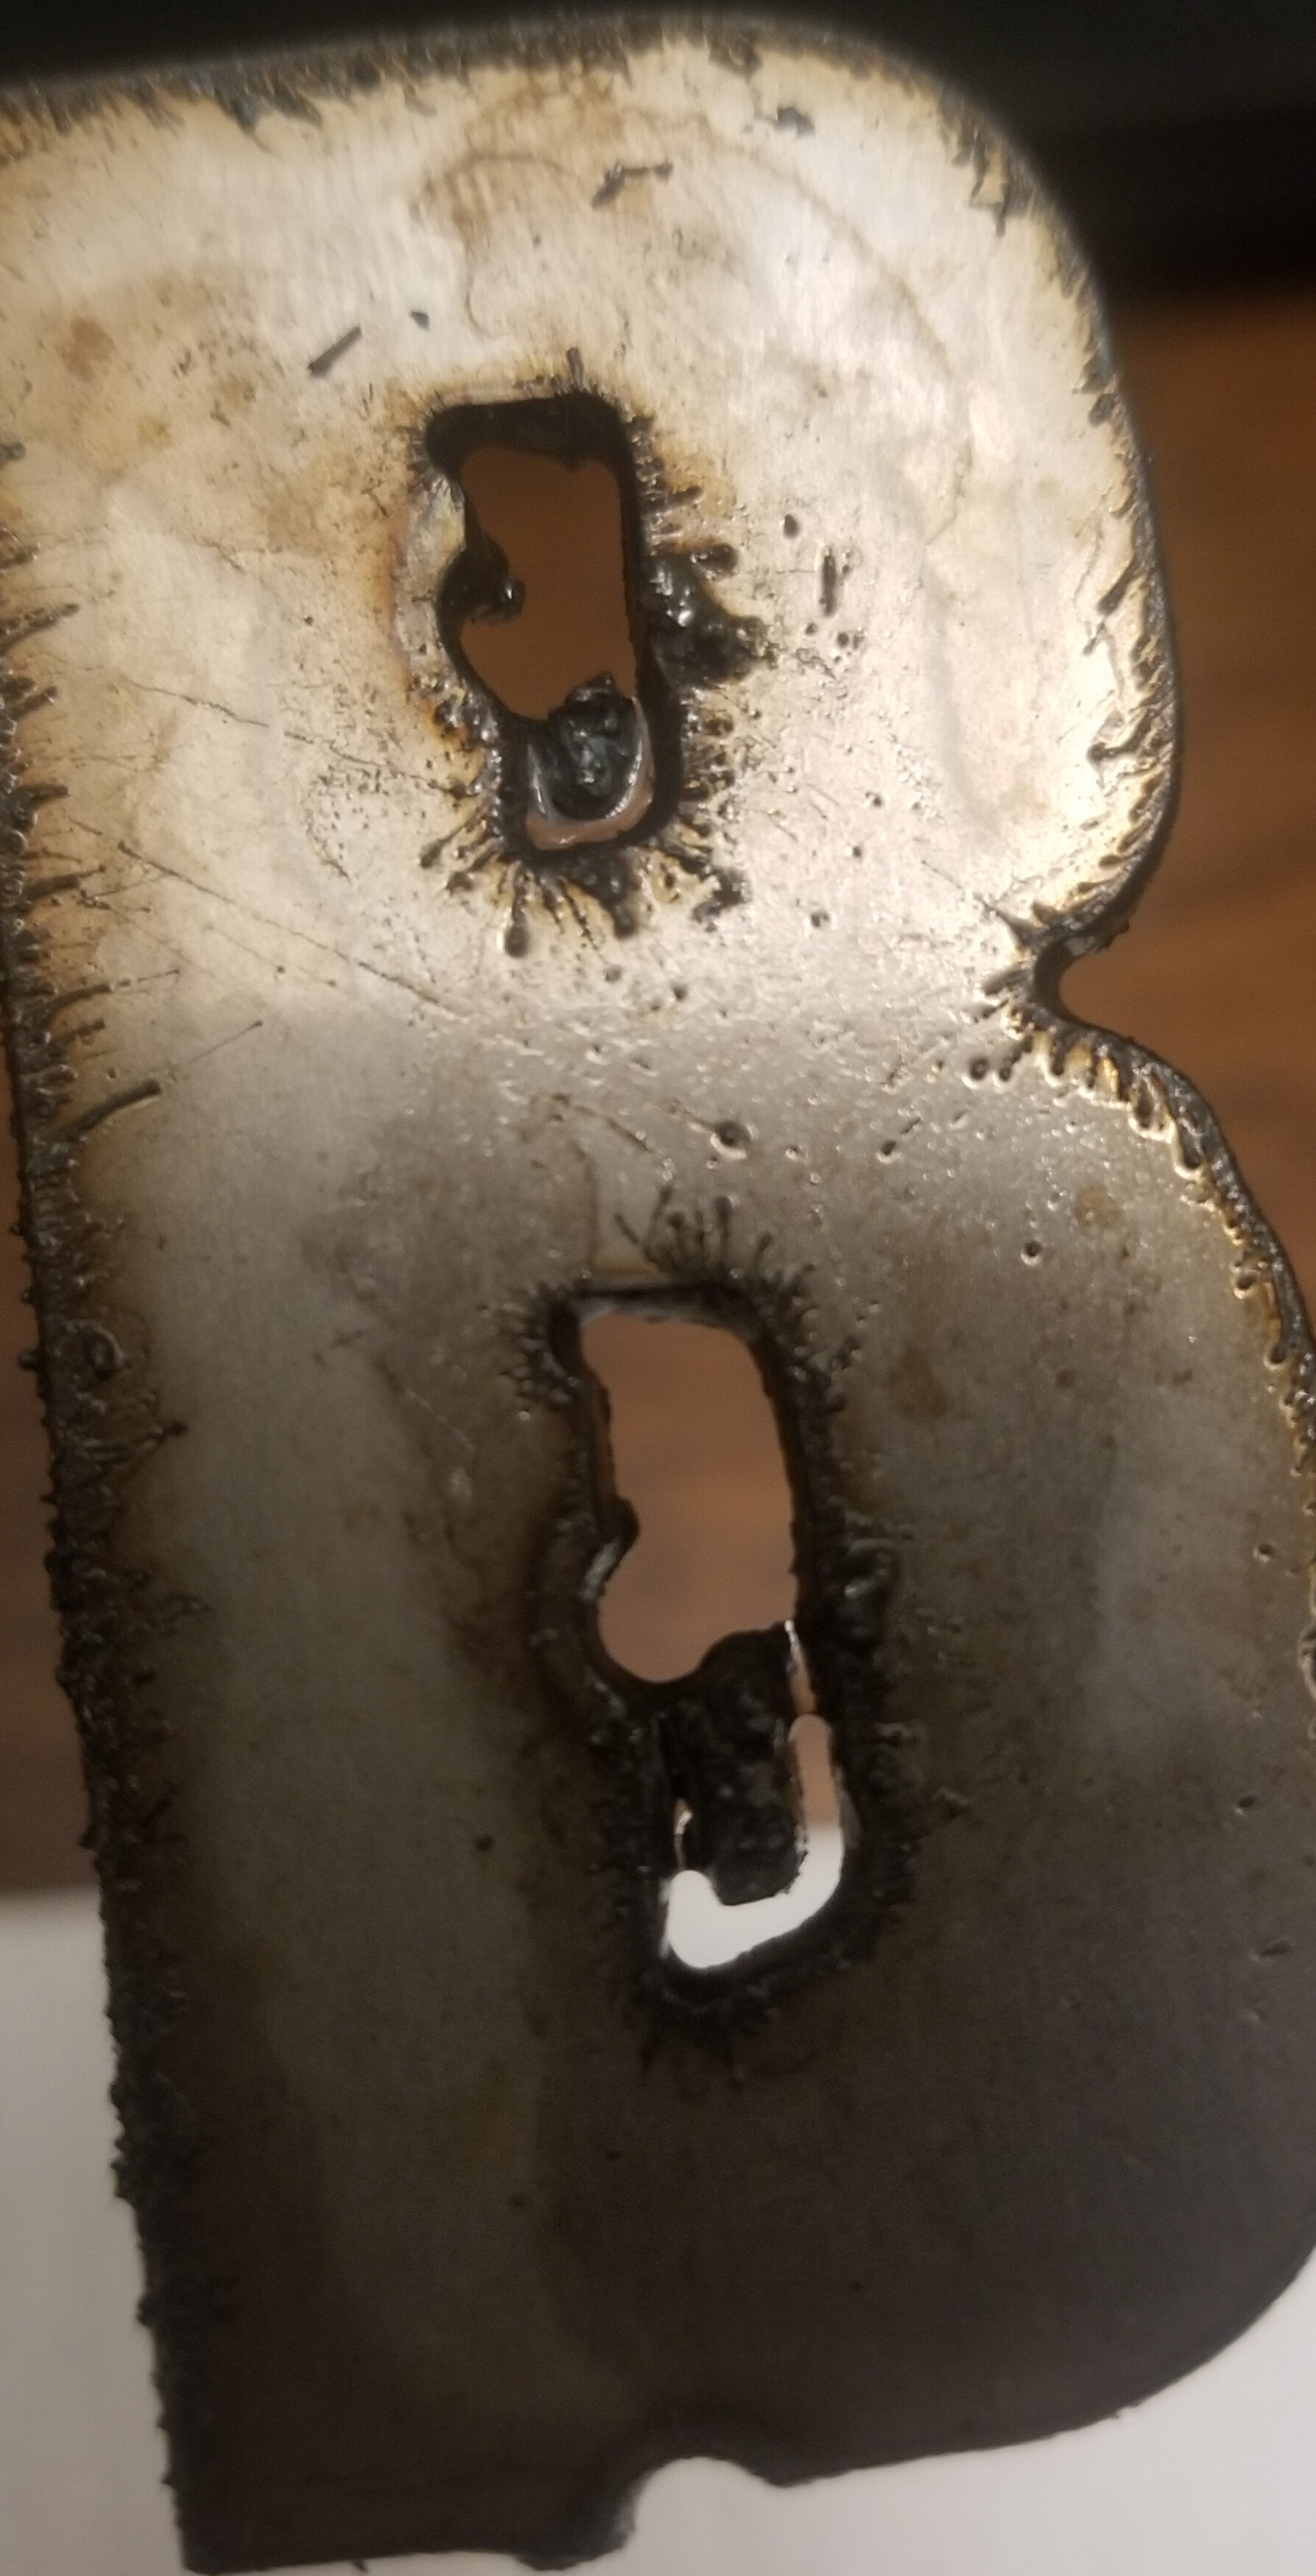
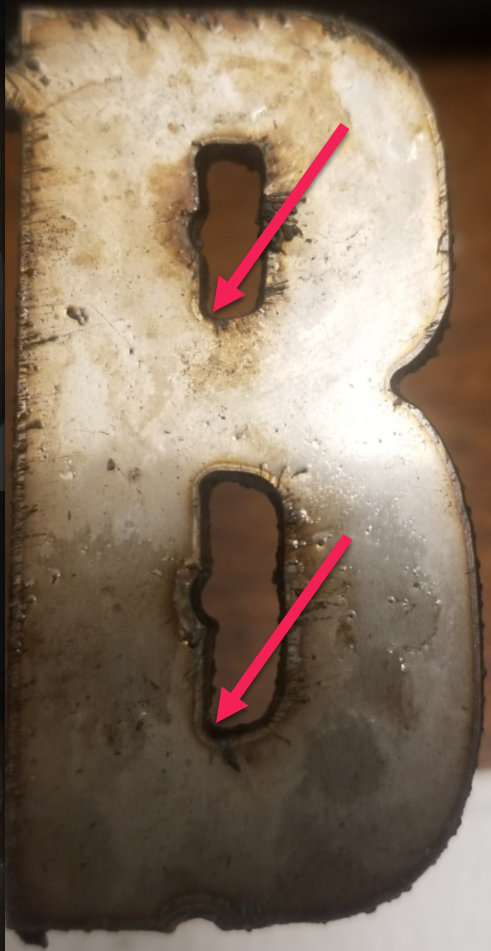
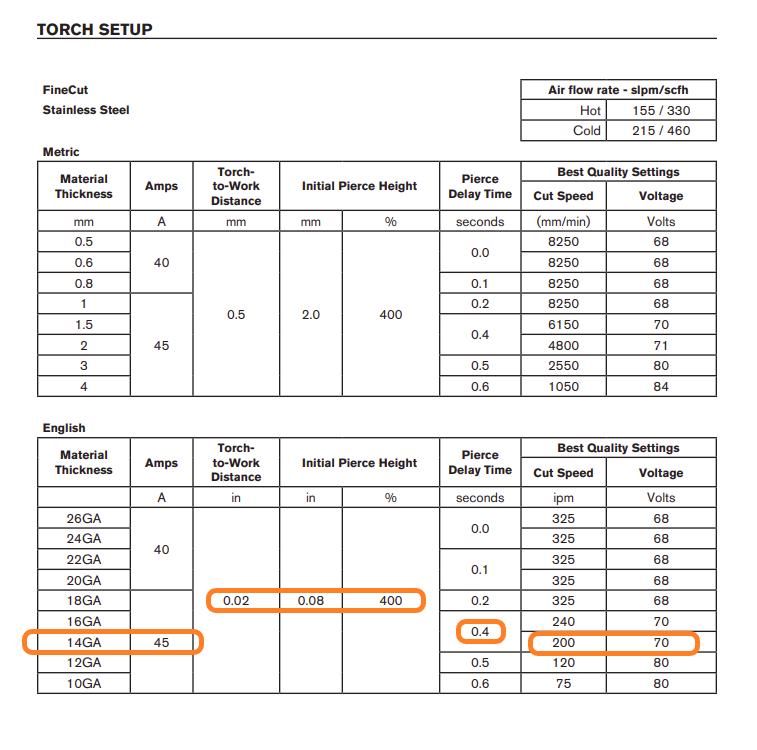
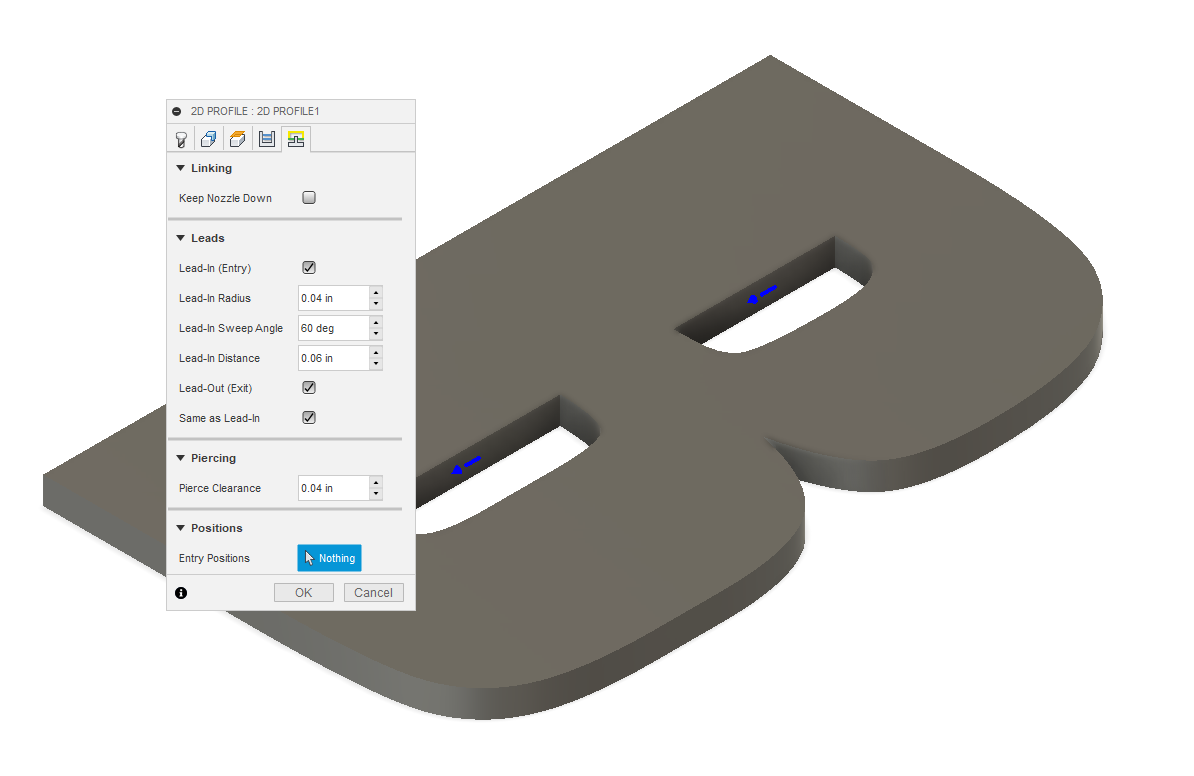
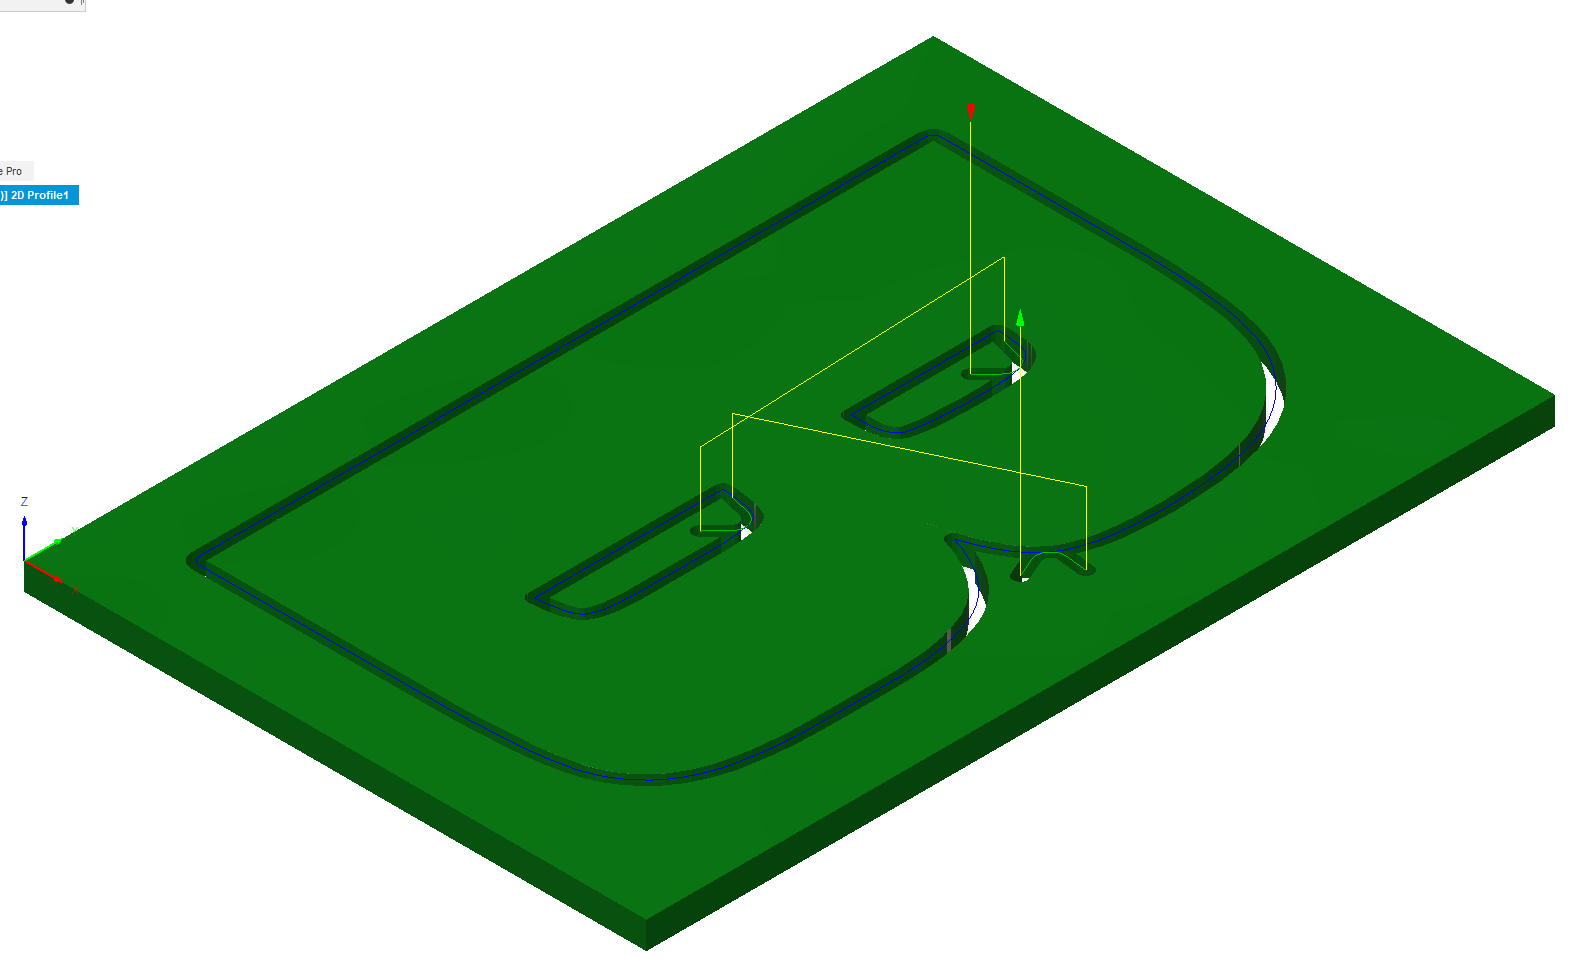
I just began making my first signs and I find that the lead in entry points seem to be blown out in the designs more. I have adjusted the lead in distance, angle, and speed with no luck. I am cutting 14 ga (.075) 304 stainless. I would like to try reducing the pierce delay but anytime I try to go below .5 seconds the table claims to start moving before the torch has fired. I have a razorweld razorcut 45 and am running at 35 amps at about 75ipm. The image below shows what I am talking about. The hole is about 3/16 wide (.1875) for reference. What parameters do you guys recommend altering? or am I simply expecting too nice of a cut from a plasma?

Thank you guys so much!

most cutters won’t start cutting under .5 pierce delay. what’s your lead in set to? looks like it’s right on the line

I believe it is set at .075 at a 60-degree angle with no radius.

thats really thin. try .15 or .2. you should see the start point more on the inside if not all the way inside the cut part.

2 Likes

Alright sounds good, thank you so much!

Unfortunately, the lead in gouge is still there. Do you have any other suggestions?

can you post a pic?

I would change your torch height to .02 and pierce height to .08. this will reduce your kerf width.

stainless cuts totally different then mild steel.

also try 45amps and 150 ipm+

stainless keeps heat localized, move as fast as possible.

also try no lead out .

I used fusion360 too and can line cut with a small pierce mark with setting close to this.

IMG_20211021_074435
IMG_20211021_074437

1 Like

also set your delay to .5 then reduce it in firecontrol as low as it will go before it cuts out

l am also i am using a hypertherm plasma


The holes are .21 in this case

1 Like

Here is running it at
35amps
80ipm
.12 lead in distance
45 degree lead in angle
no lead in radius
.063 cut height
.15 pierce height
.5 pierce delay

This is at
45amps
150ipm
.075 lead in distance
45 degree lead in angle
.02 cut height
.08 peirce height
.5 peirce delay

These were both cut using the original razorweld consumables so that may be a contributing factor (practically new though).

Thank you for your help and suggestions!

1 Like

Try adding a lead-in radius of 0.05 - 0.10" that will let it sweep in rather than needing to slow & make an abrupt change in direction. Change the angle to 90 degrees.

2 Likes

you can also try changing your initial entry to the corner like this. sometimes hides it better.

3 Likes

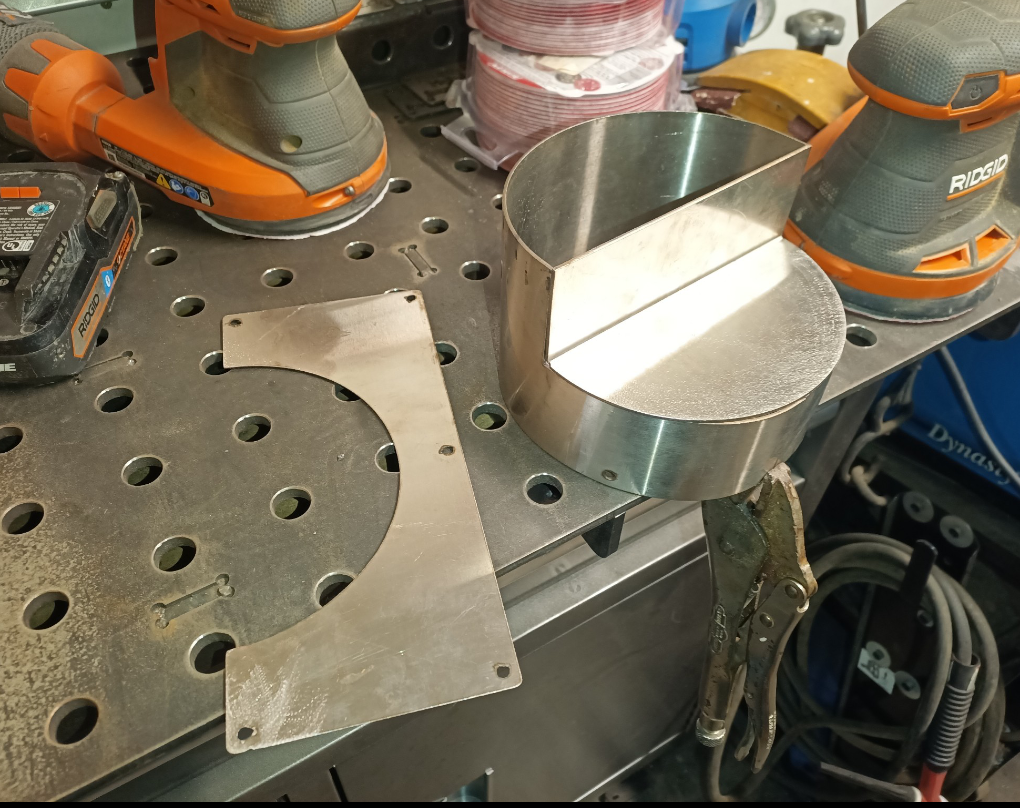
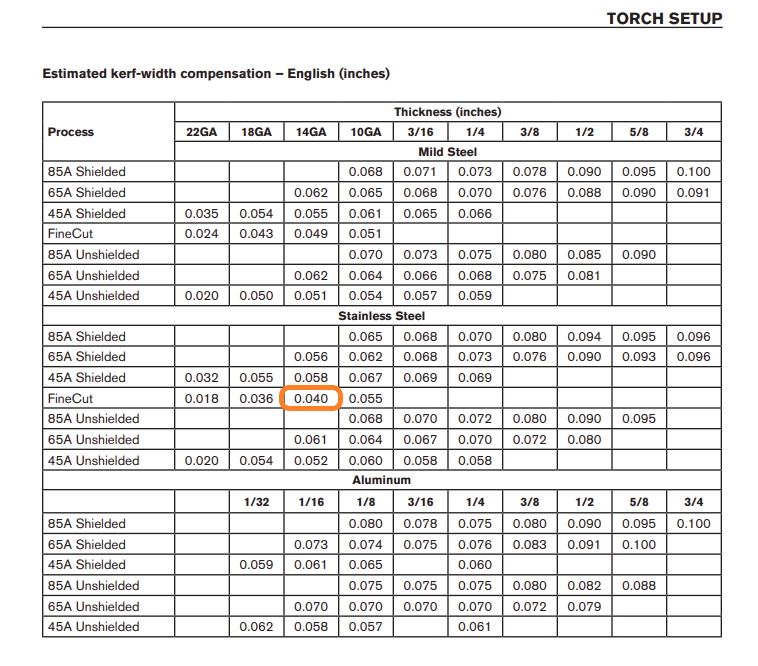
What are the overall dimensions of the item you are cutting? I’m not totally sure of it from reading your posts. Is the 3/16 you say the inside of that cut or is it what’s being left from the pierce point? You may be trying to cut too small of a detail with consumables that have too large of a kerf. But you should still be able to get that lead in to start in the middle of the path. Cutting small details takes a lot of compensation either in the design or the cam proceeds.


These are Powermax 85 charts.I use these setting with good results but obviously they don’t work well for razer weld 45 looking at the pictures above.

I am not sure of what font your using but I used impact and 2" height here.
the inside hole ins 3/16 wide

I have stainless to run Sunday so I am going try theses settings.


I added a lead out because to seems to not finish the cut with the razerweld.

you are clamping the ground on the material right?

1 Like

I had the ground clamped to the drain but ill move it to the workpiece. Ill try running these settings after work today.

Thanks for the suggestions!

The letter is 2.25in tall and 1.063 wide and the overall width of the hole when finished cutting is 3/16 in. I’ll have to try getting different consumables.

Thanks for the insight!

Sounds good, do I keep the lead in entry speed the same as the rest of the cut?

Thanks for the help!

I would try running those first two settings again after making this change.