It's been awhile. Post those projects!

Made this for a colleague/friend for his retirement and moving into a new beach house. 14 ga stainless, metal cast blue paint. Center is set back with a 3-d printed spacer ring to give it some depth.

Installation update:
Made this is stainless and provided for water drainage so that it could be mounted outside. He said he liked it so well he wanted to hang it inside so he could look at it more often. Oh well, there are worse problems to have. :slight_smile:

8 Likes

Just got the crossfire built and up and running. Made a computer table for it… will post that after the paint dries. It’s a modification using tabs to weld together and added a mouse table.

Here’s my first sign. Just an experiment to see how to make letters and add tabs so they will cut properly, and learn Fusion, etc. Basically just having fun!

9 Likes

That is one serious anvil!!!

With an anvil like that, I wouldn’t think you’d need a crossfire. You could just tell you’re metal, “Do what I want or you end up here!”

2 Likes

Now that’s an anvil!!! I like your sign too.

1 Like

I have made knives and swords for many decades. But I do artwork as well, and want to do kinetic sculptures… which is why I’m doing the plasma table.

Custom Dive Ladder we designed, Fabricated, and finished today

IMG_20220403_163920


IMG_20220403_163921


IMG_20220403_163856
IMG_20220403_163901
IMG_20220403_163908
IMG_20220403_163917

IMG_20220403_163916


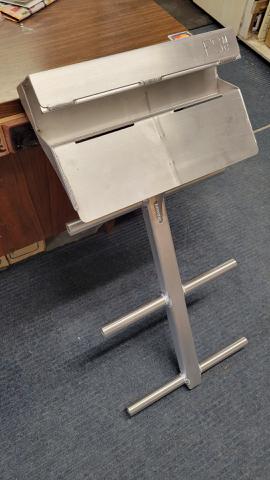
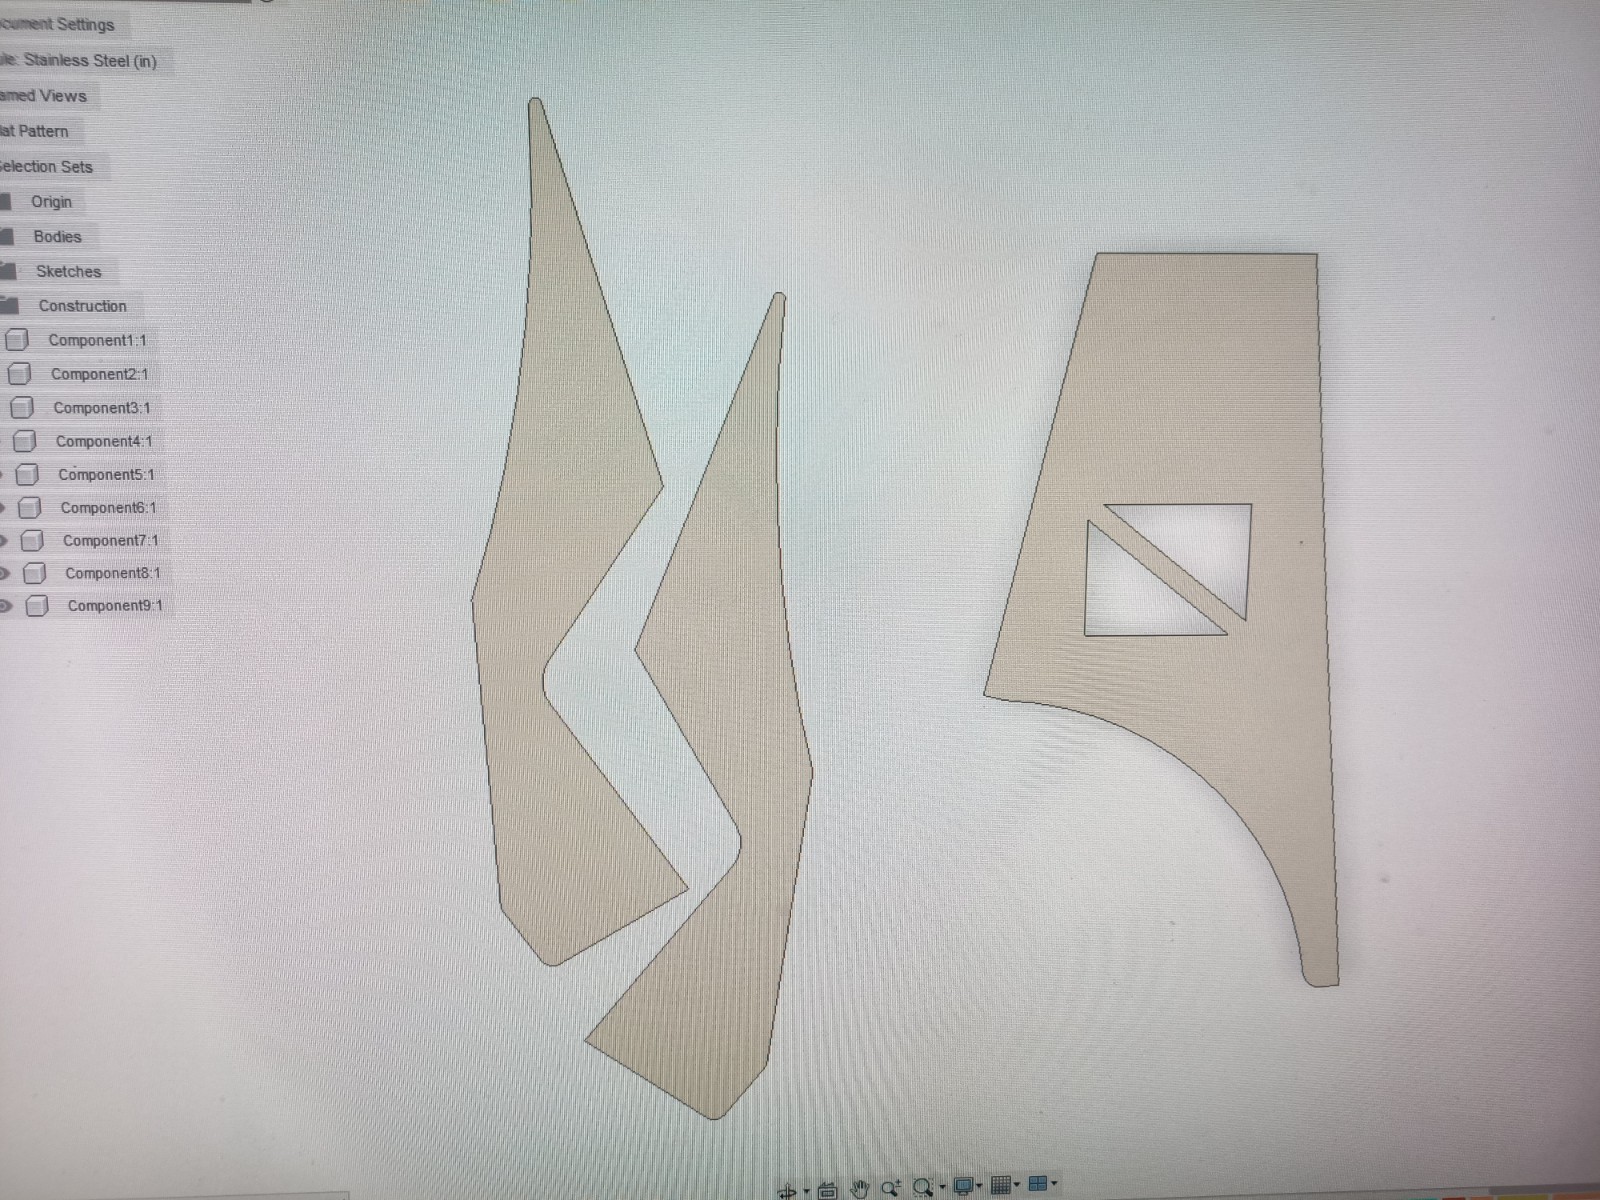
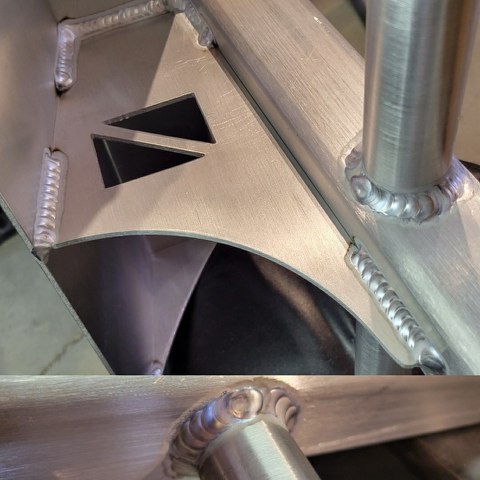
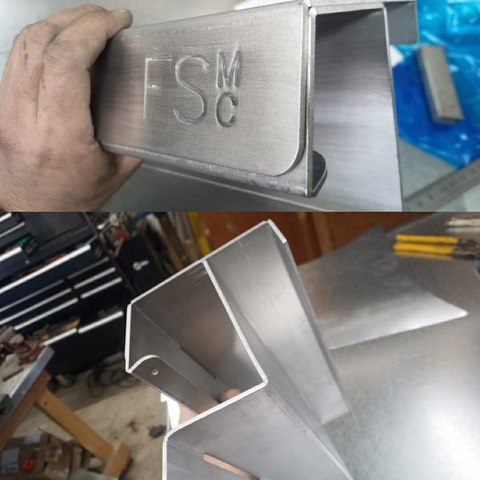
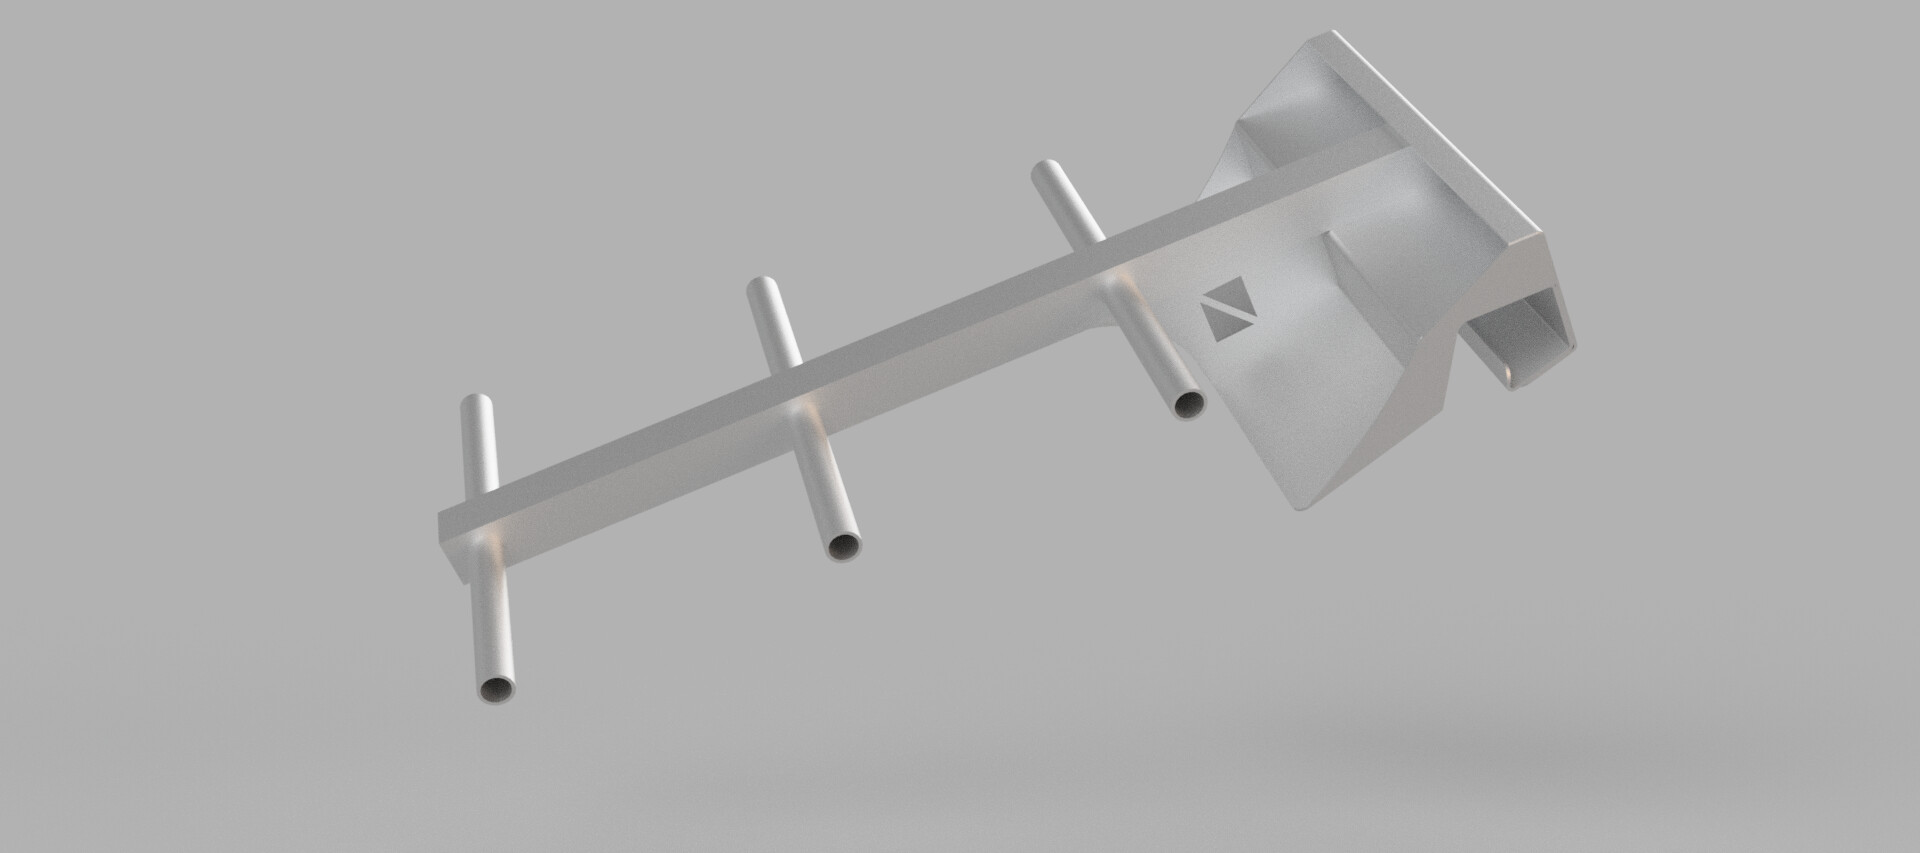
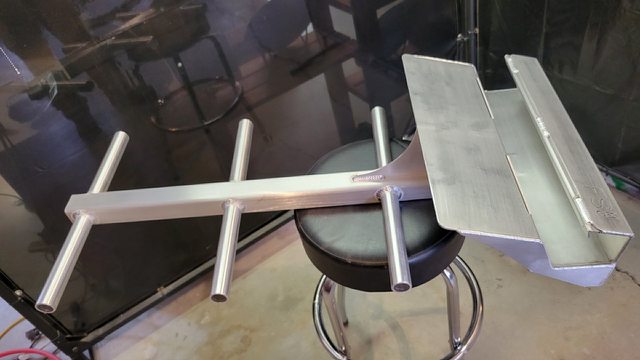
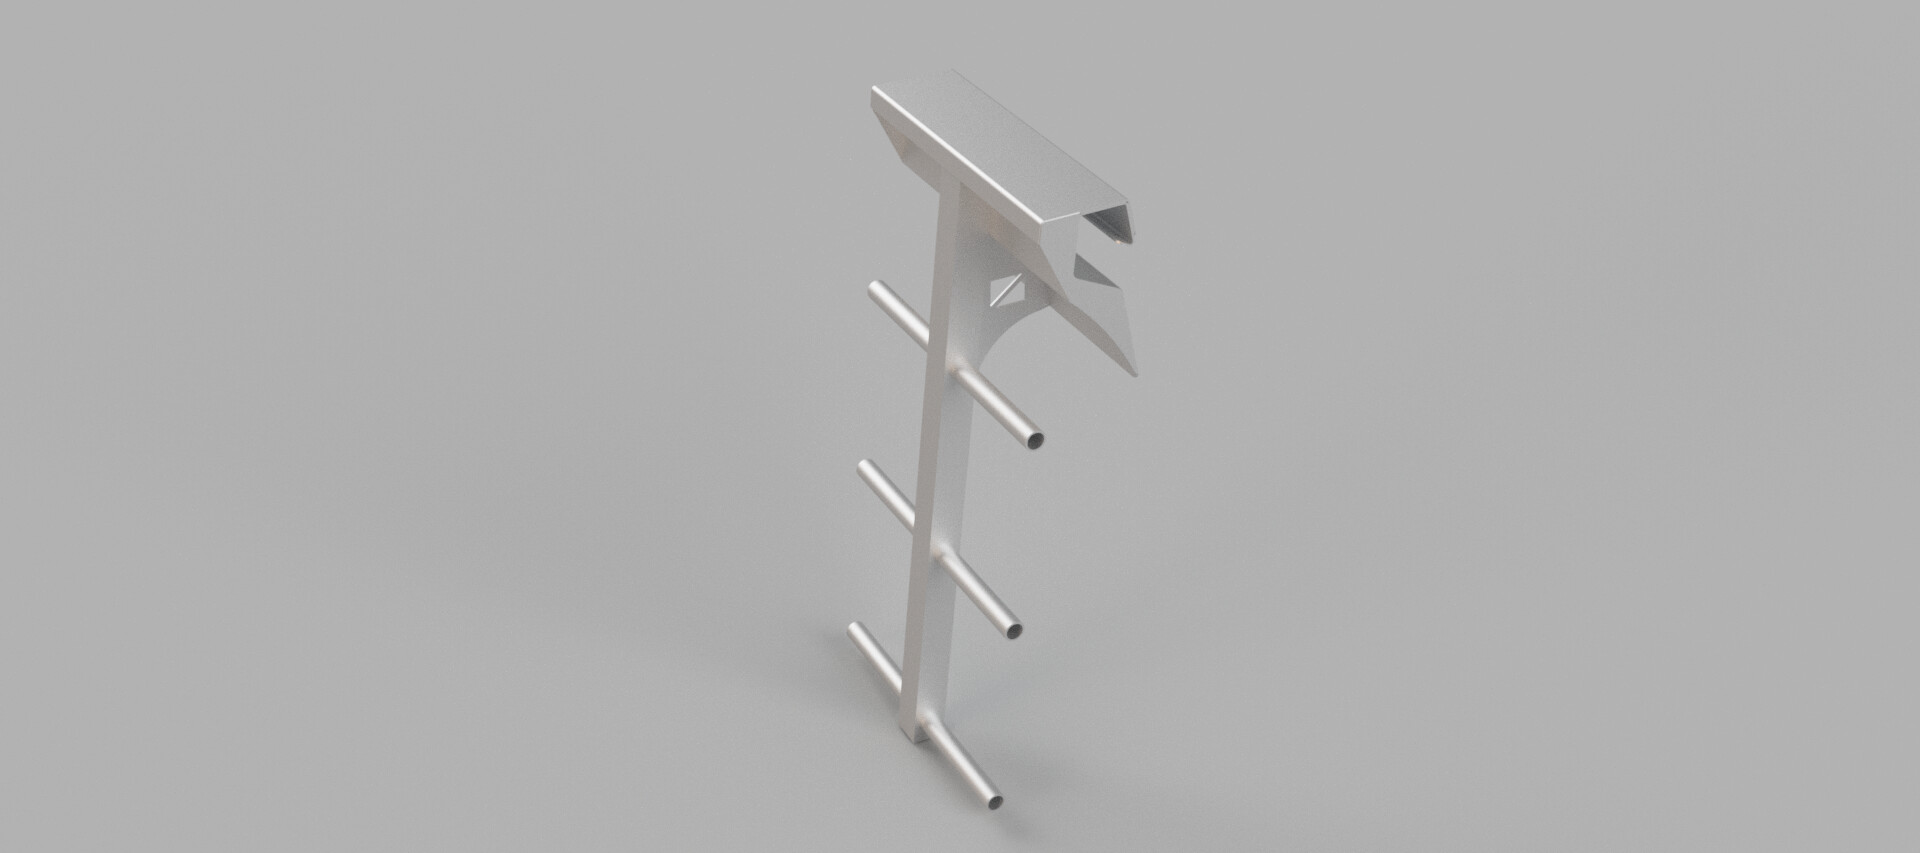
its all 1/8" aluminum.

There is one felt pad that still need to be add to the part the pushs against the hull.
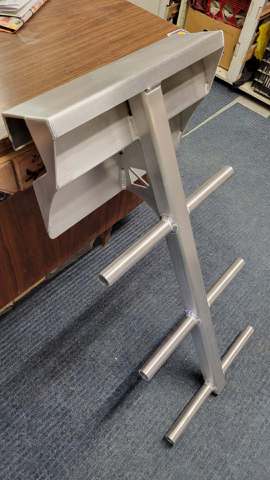
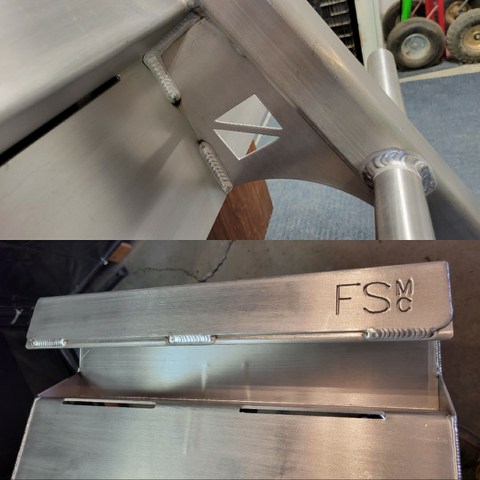
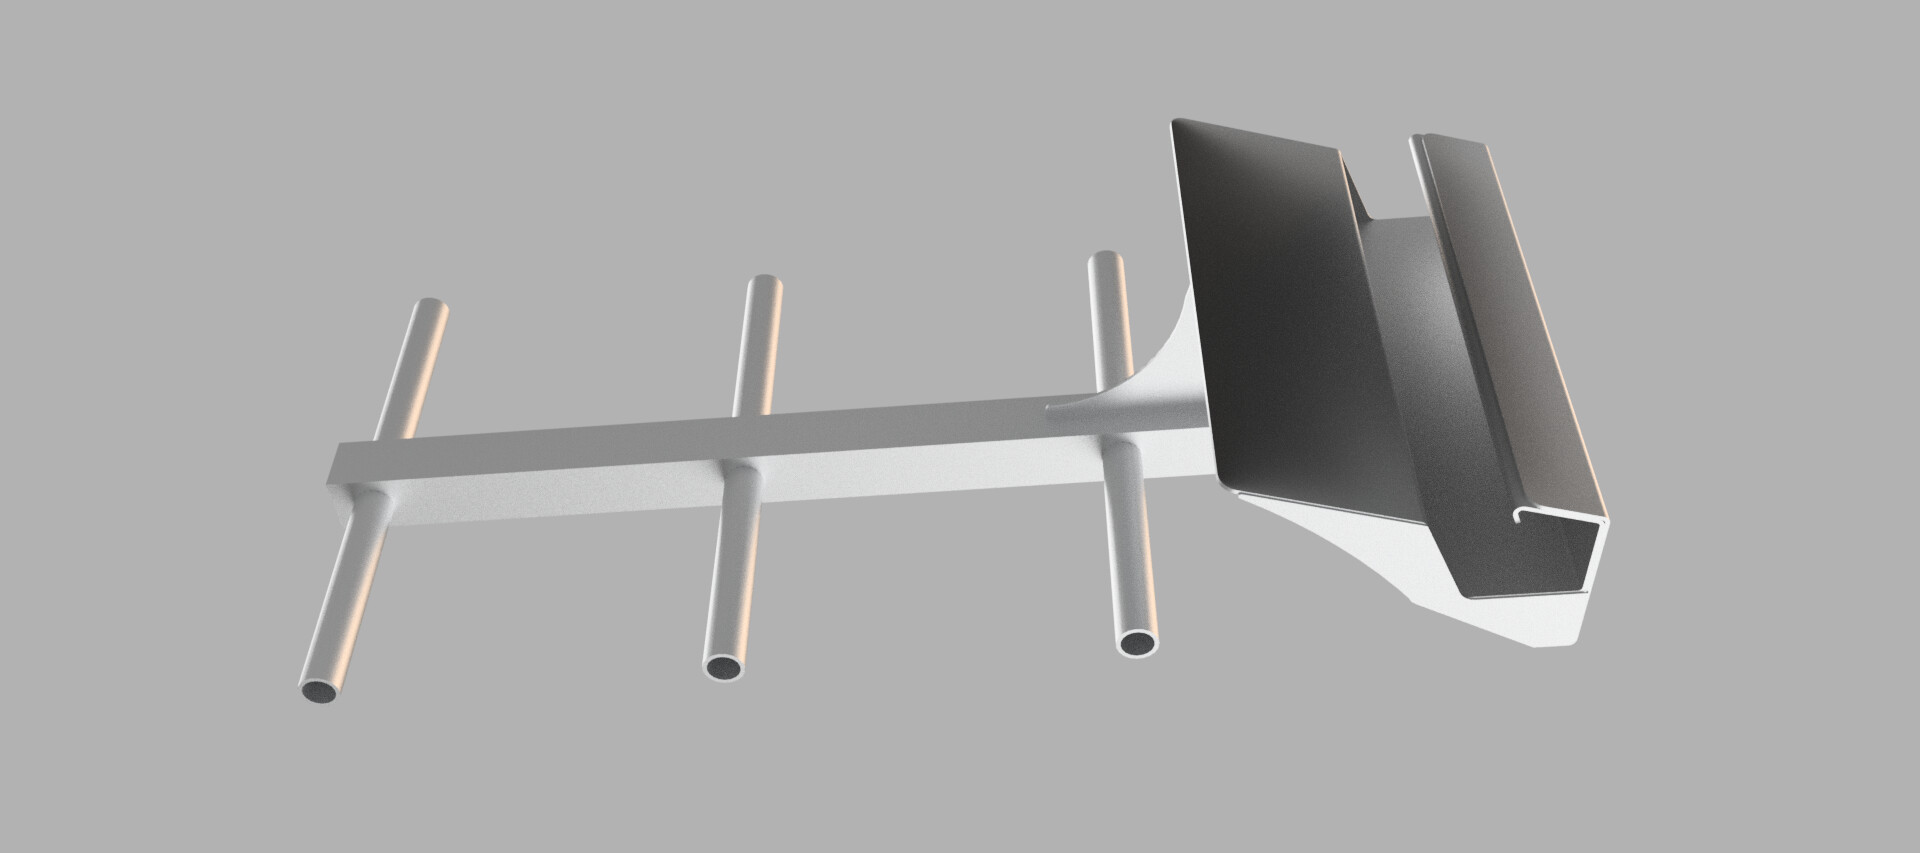
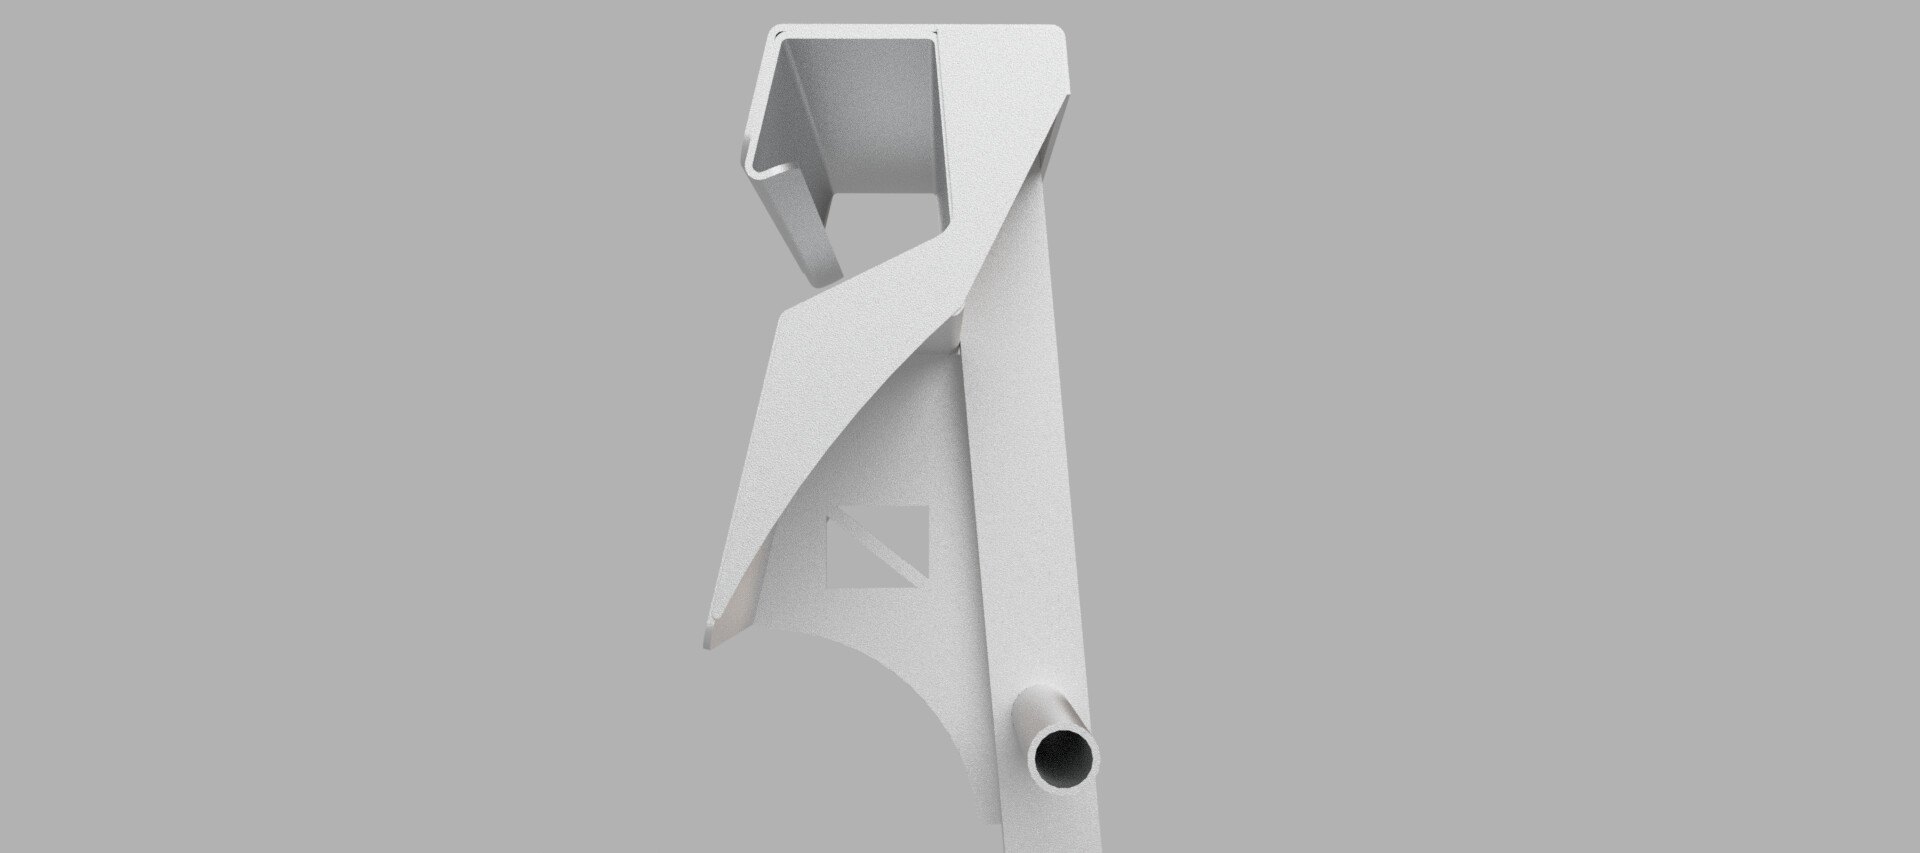
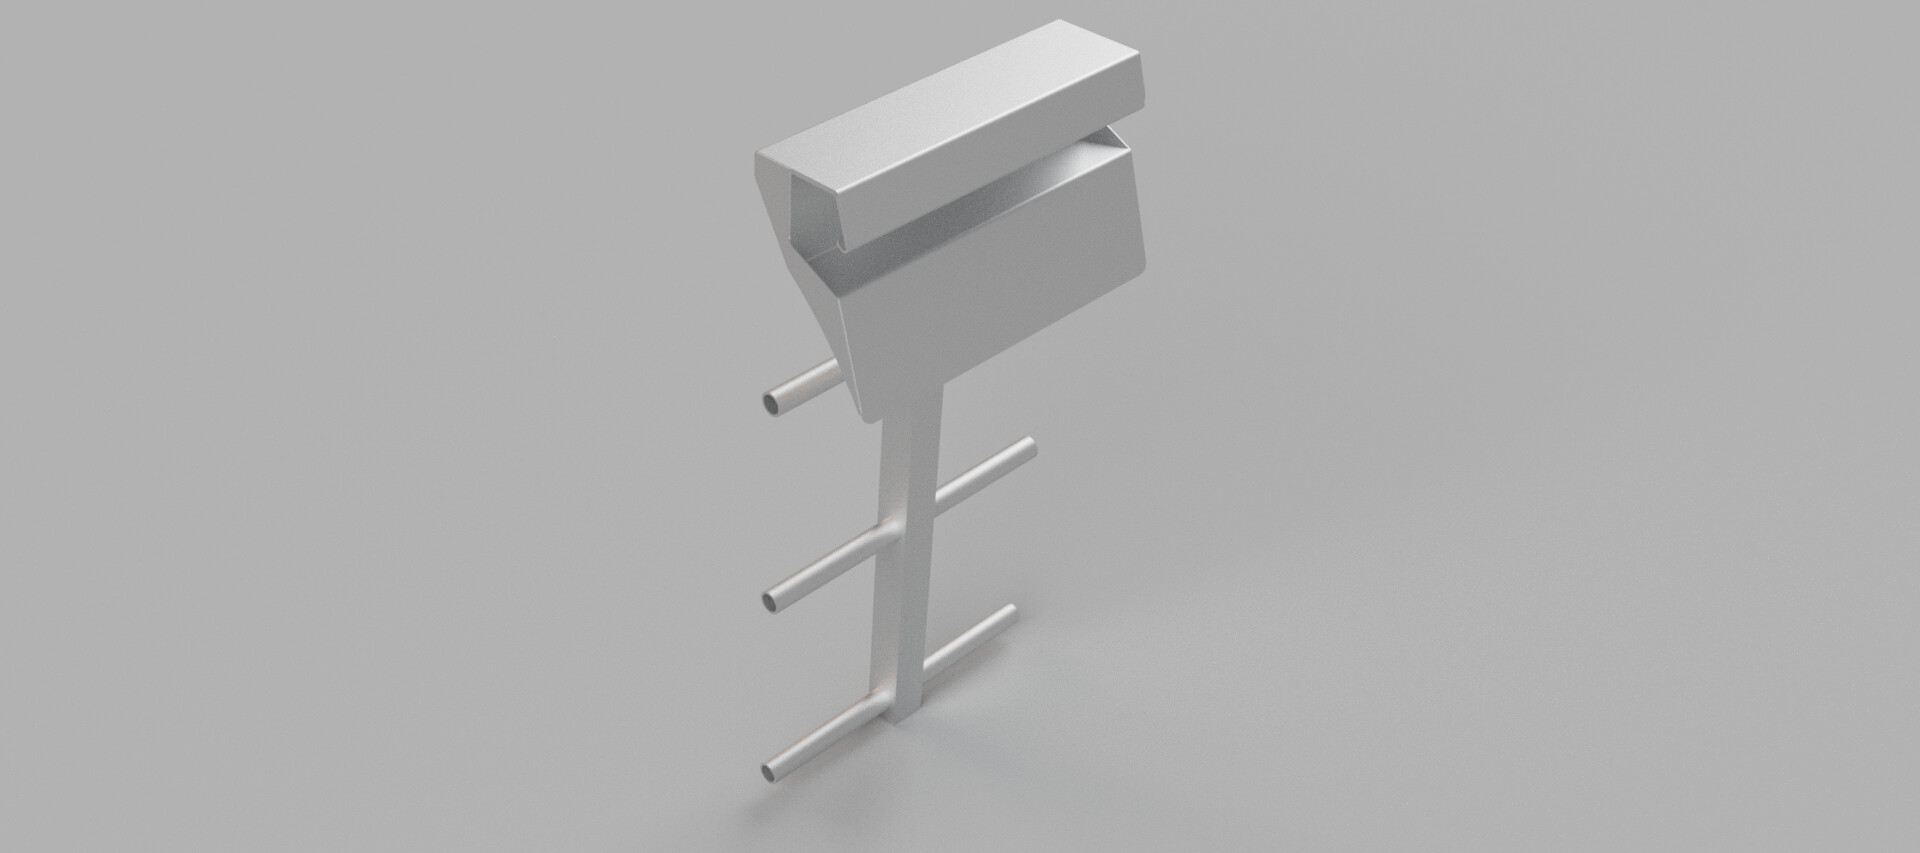
9 Likes

I was just thinking of that… I am an avid SCUBA diver…this is a nice simple design…
but the pad against the hull is a must…

looks great…

As a diver something I know happens is the rise and swell of the boat and the diver/swimmer goes up and down with the boat and often on the ladder…which means the ladder will move and shift in all directions…my first few actually fell off the boat in water swells…should there possibly be some sort of pin to prevent the ladder from coming off the side rail of the boat?.

2 Likes

Thanks @toolboy I spent quite a bit of time on the design even though it looks simple.

If it’s rocking out I can see it moving all over the place

I may have to have some sort of locking pin, I have yet to test it on the boat.

The way it it is designed to lock in: the ladder has to be parallel with the floor of the boat, then it’s pushed over the rail and spin it down 85° till it meets the hull.
It kind of snaps into place at that point.

I do have a hole for a safety wire.

I’m thinking felt will be better than rubber for that 6-in by 18 inch surface that pushes against the hull.

1 Like

I understand how it snaps into place…but if a swimmer is on the bottom rung…and the boat rocks side to side…that ladder will almost lift out of the water…then when the boat rocks back down…the ladder will be partially unsnapped…

If it ends up swinging like that I’ll have to put a pin to hold it for sure. I can see when a buoyant person is hanging on the bottom how it may lift the ladder up and away from the boat in the waves.
They’re going to use it on the 9th so I’ll get some feedback and hopefully some pictures of them in the water with it.

1 Like

Here’s a browsable 3D model of that ladder I posted above.

If you click that link just make sure you select “continue in browser” and then you don’t have to download anything.

it will look like this in your browser and can be navigated to any view, also works on your phone.

Especially with a diver holding on with an inflated BC. They will lift on the swells at a different rate than the boat lifts, causing a disconnect. It is a very cool design, I am anxious to see how well it works

1 Like

My lab’s test leads have gotten out of hand. I looked at wire racks and figured, let’s just make it. Used Fusion 360’s sheet metal tools, generated a flat dxf, used sheetcam and my XPro. Cleaned it up, used Swag Offroad Finger Brake and some glossy red spray paint.


Why didn’t you just buy one? Sure Sure, but then we wouldn’t have learned anything.

Lessons Learned.

  1. The Swag finger brake doesn’t bend really tight corners on 18 gauge.
    This requires modification to Fusion’s sheet metal rules to model accurate bend radius.
  2. Cutting parts like this on the XPro out of thin sheet metal will heat deform if you cut slowly.
    This is experience we’ll take to future projects.
  3. The trapezoidal shape the of plasma cuts results in sharp edges on side of the cut part.
    We used a file to knock these down, other the rack could damage wire insulation.

Rack is 15in wide, 3.5in slot length, .3in slot width, 21 slots

Project time, 2.5 hours

Wire_Rack_15in.dxf (17.0 KB)
wire rack 15in v13.f3d (961.6 KB)

Also on FireShare
https://www.langmuirsystems.com/fireshare/test-lead-wire-rack

5 Likes

Fresh batch of Jeep YJ tailpipe hangers. They still need a bolt welded on and a couple of small welds. These are reproductions of a discontinued Mopar part.

7 Likes

This is the “bad” one that will go up on my wall.
A gift for a musician friend. My first aluminum part. Scored some 3/16 at work because traceability had it as 1/2". This is about 18" tall. Aluminum cuts different than steel. Cut through the stenciled “D”

I assume I can make copyright as long as I don’t make money?

My painting skills need some work too.
Next project, a small painting station.

3 Likes

Nice job and a worthy addition to your wall!

So this shall be the new project, bought it yesterday and it will be in my driveway on Wednesday. I see plasma cutting aluminum diamond plate in my near future. :rofl: :rofl: :rofl: :beers:

A machine shop at home and an old Land Rover, this is going to be so much fun, it may be illegal! :grin: :grin: :grin:


The objective is to metamorphosise it into something resembling this:

6 Likes

Making a mounting plate for 2-1/2" electrical conduit pipe for my parent’s house since the conduit is pulling away the facia underneath.

Experimenting with making dies. Made some 2D CAD designs and burned some 1/4" plate for the dies. Each die is 2 contours with a spacer in the middle. Captured the lower die in the Swag flat top plate and the upper die in their finger brake.

It was easy to bend the 1/8" straps. The ears needed a minor angle tweak from spring back in a bench vice, but otherwise it all worked to plan. Small stuff like is fun to learn something different. Also very inexpensive method since I have plenty of scrap plate leftover from old projects laying around outside, most of it rusty but very usable.

IMG_6578

8 Likes

Started making some experimental stuff for the new project. The Crossfire/CUT60 works wonderful cutting aluminum diamond plate, my DIY THC works incredibly well riding over those diamonds.


2 Likes

Wow, I like that die idea very much :beers:

1 Like