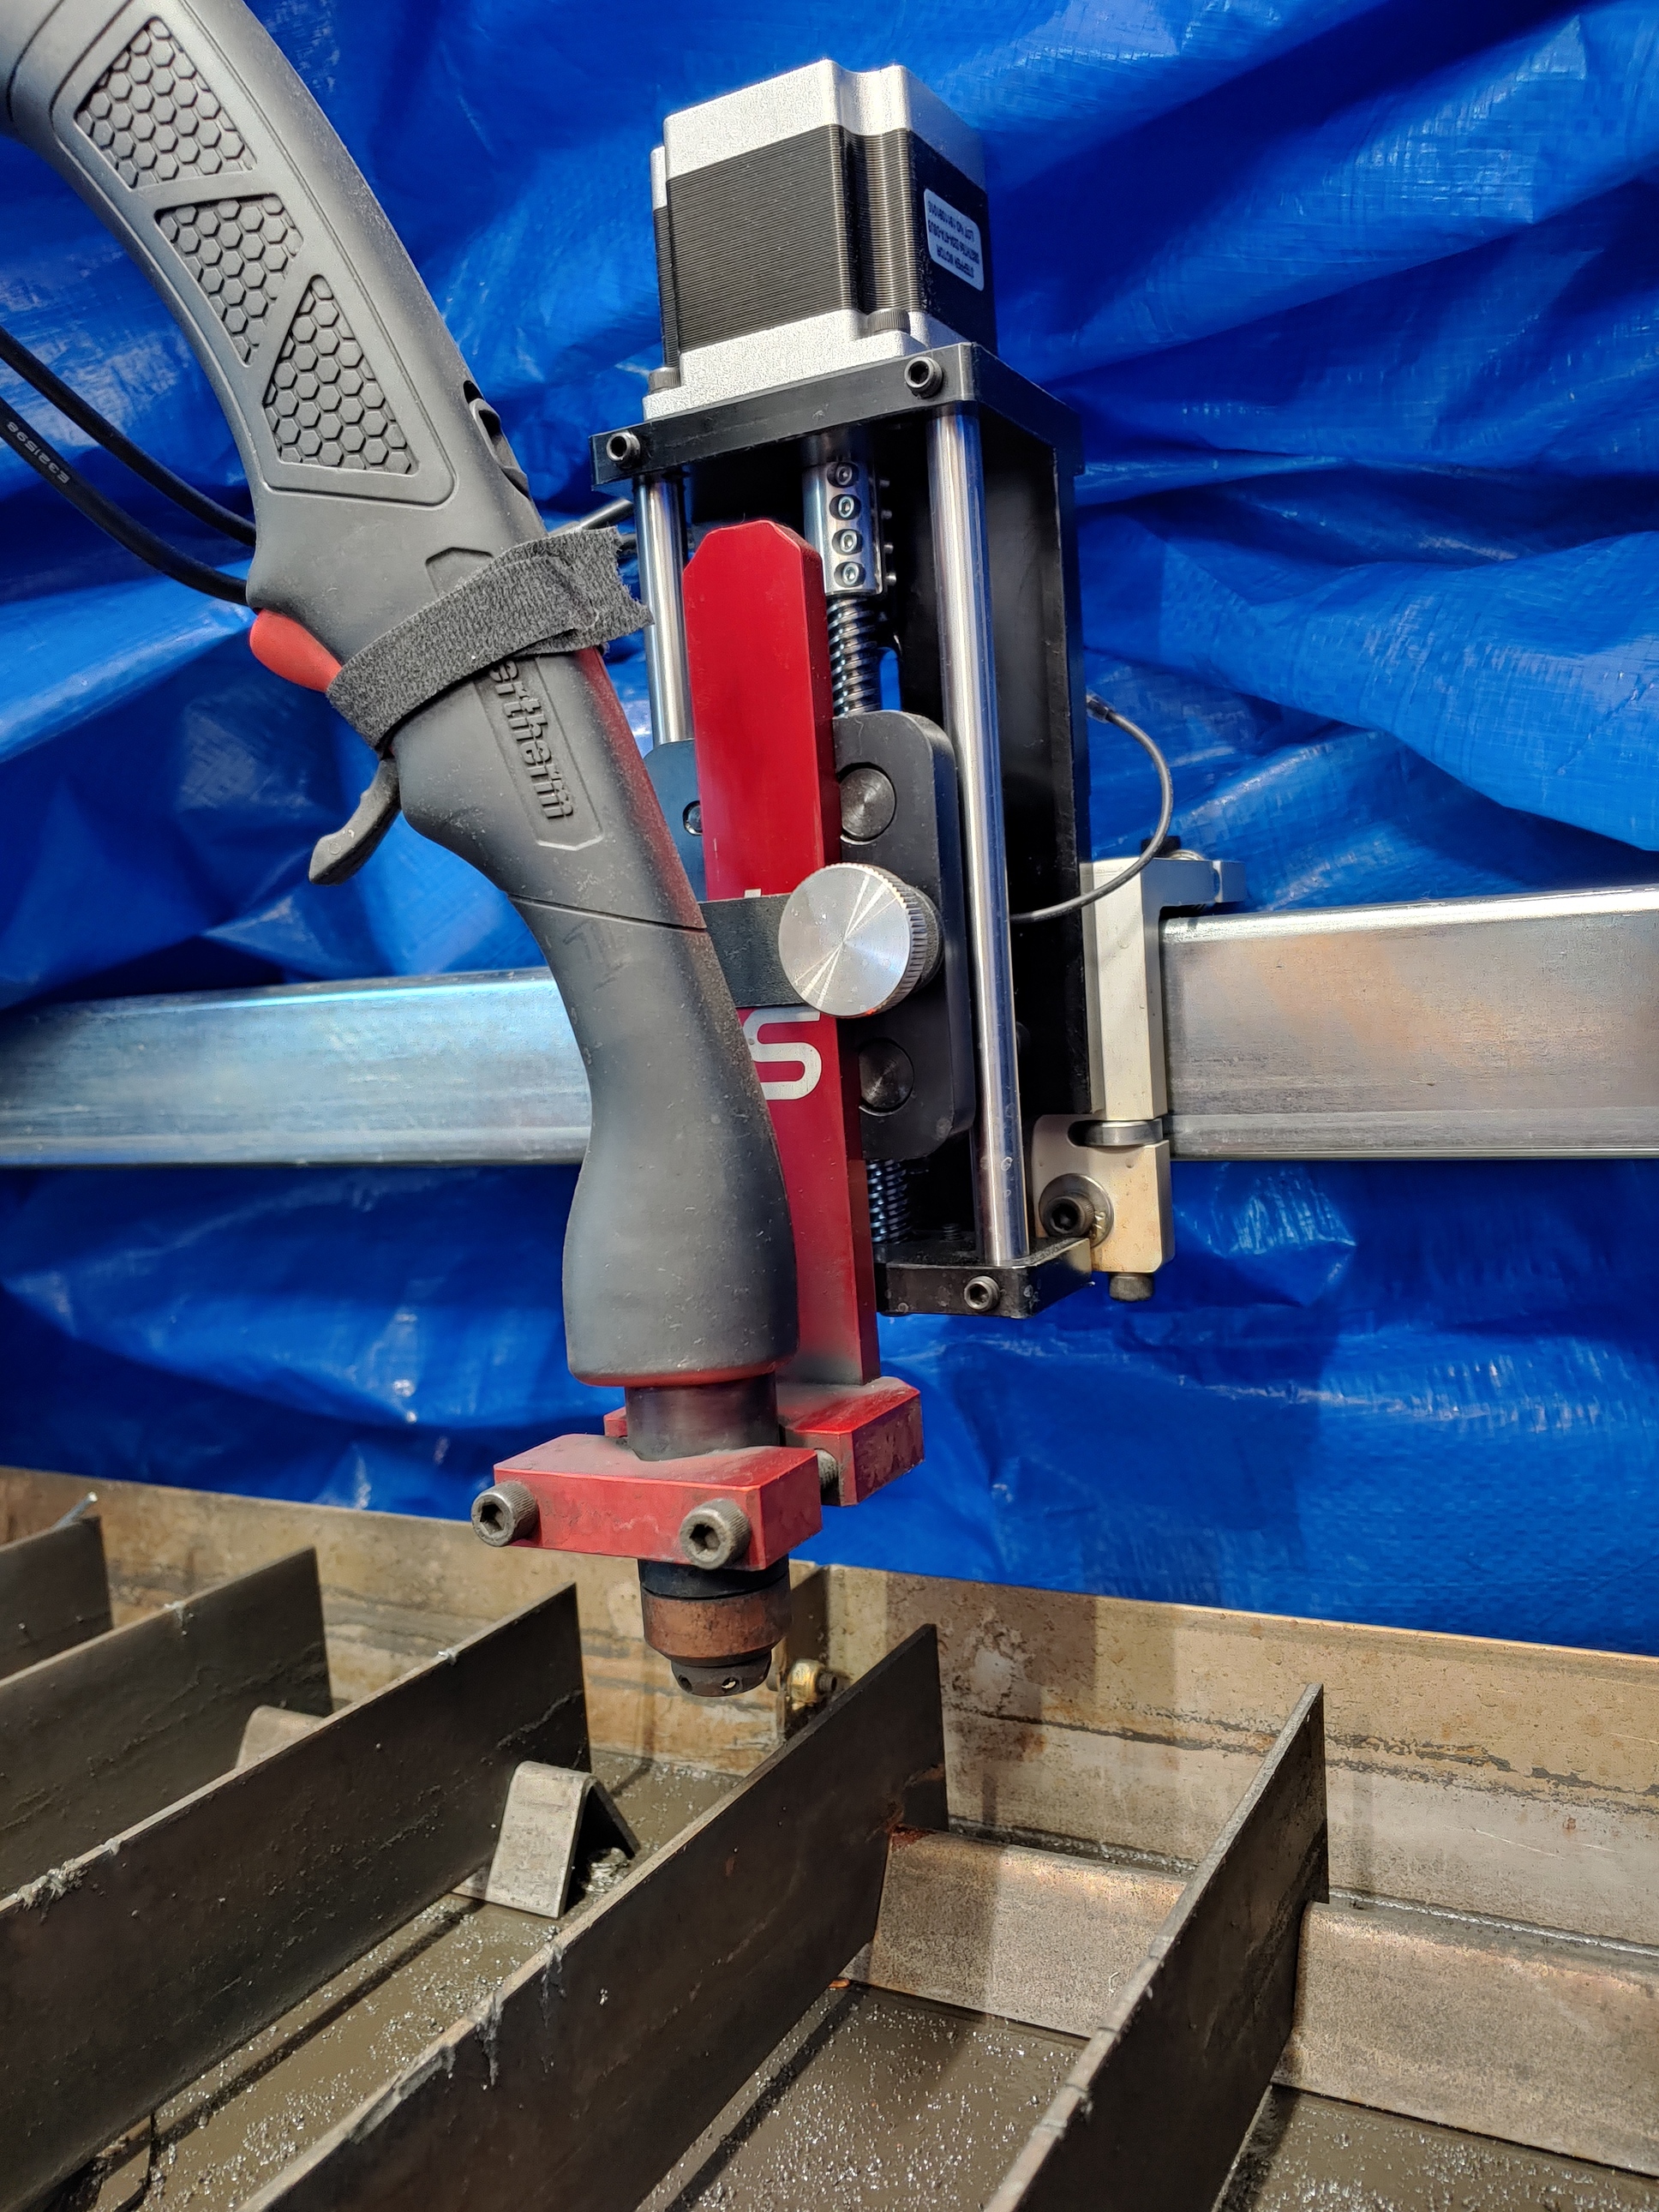
Been having some issues with my torch and cutting. Put in some new consumables and torch is not cutting like it was before the change. The only other thing that has changed is the torch mount height. For some reason I moved it down from where I had it at assembly. Where should the mount be set at? There is nothing in the assembly guide that tells the operator where to set the red torch mount. The attached picture was pulled from another post for reference.

Run the Z axis down until there is about 3/4" of travel left until it bottoms out. Then lower the red mount until the torch touches the metal and tighten the red mount.
3 Likes
Hi ds690, when you bring the torch down to touch the part, at that time you xero out the Z axis?
No. Raise the torch to around 1’" and zero there. It really doesn’t matter much, but the torch has to be above the metal when you zero it
I am not clear about the process of setting up the Z axis. What’s this about using a .060 feeler gage
under the nozzle? Whould you please go though the process of setting that up? Is the torch height
totally controlled by the THC and the program? I have a pro and THC.
If you have a powered Z axis, the initial Height Sensing system takes care of zeroing the Z axis at the top of the metal. You only need to make sure it is a safe distance above the metal to start.
The oversimplified explanation is that the G code has commands that tell the Z axis to probe downward until the torch hits the metal and trips a switch on the Z axis. Then it raises the torch until the switch closes. It uses that information to set the Z axis zero at the height of the metal. Then it uses that zero to set the pierce height and cut height at the programmed values.
The shims are for machines with no Z axis.
1 Like
Got it. Thank you for clearing that up for me. This new guy was confused for a while.
1 Like