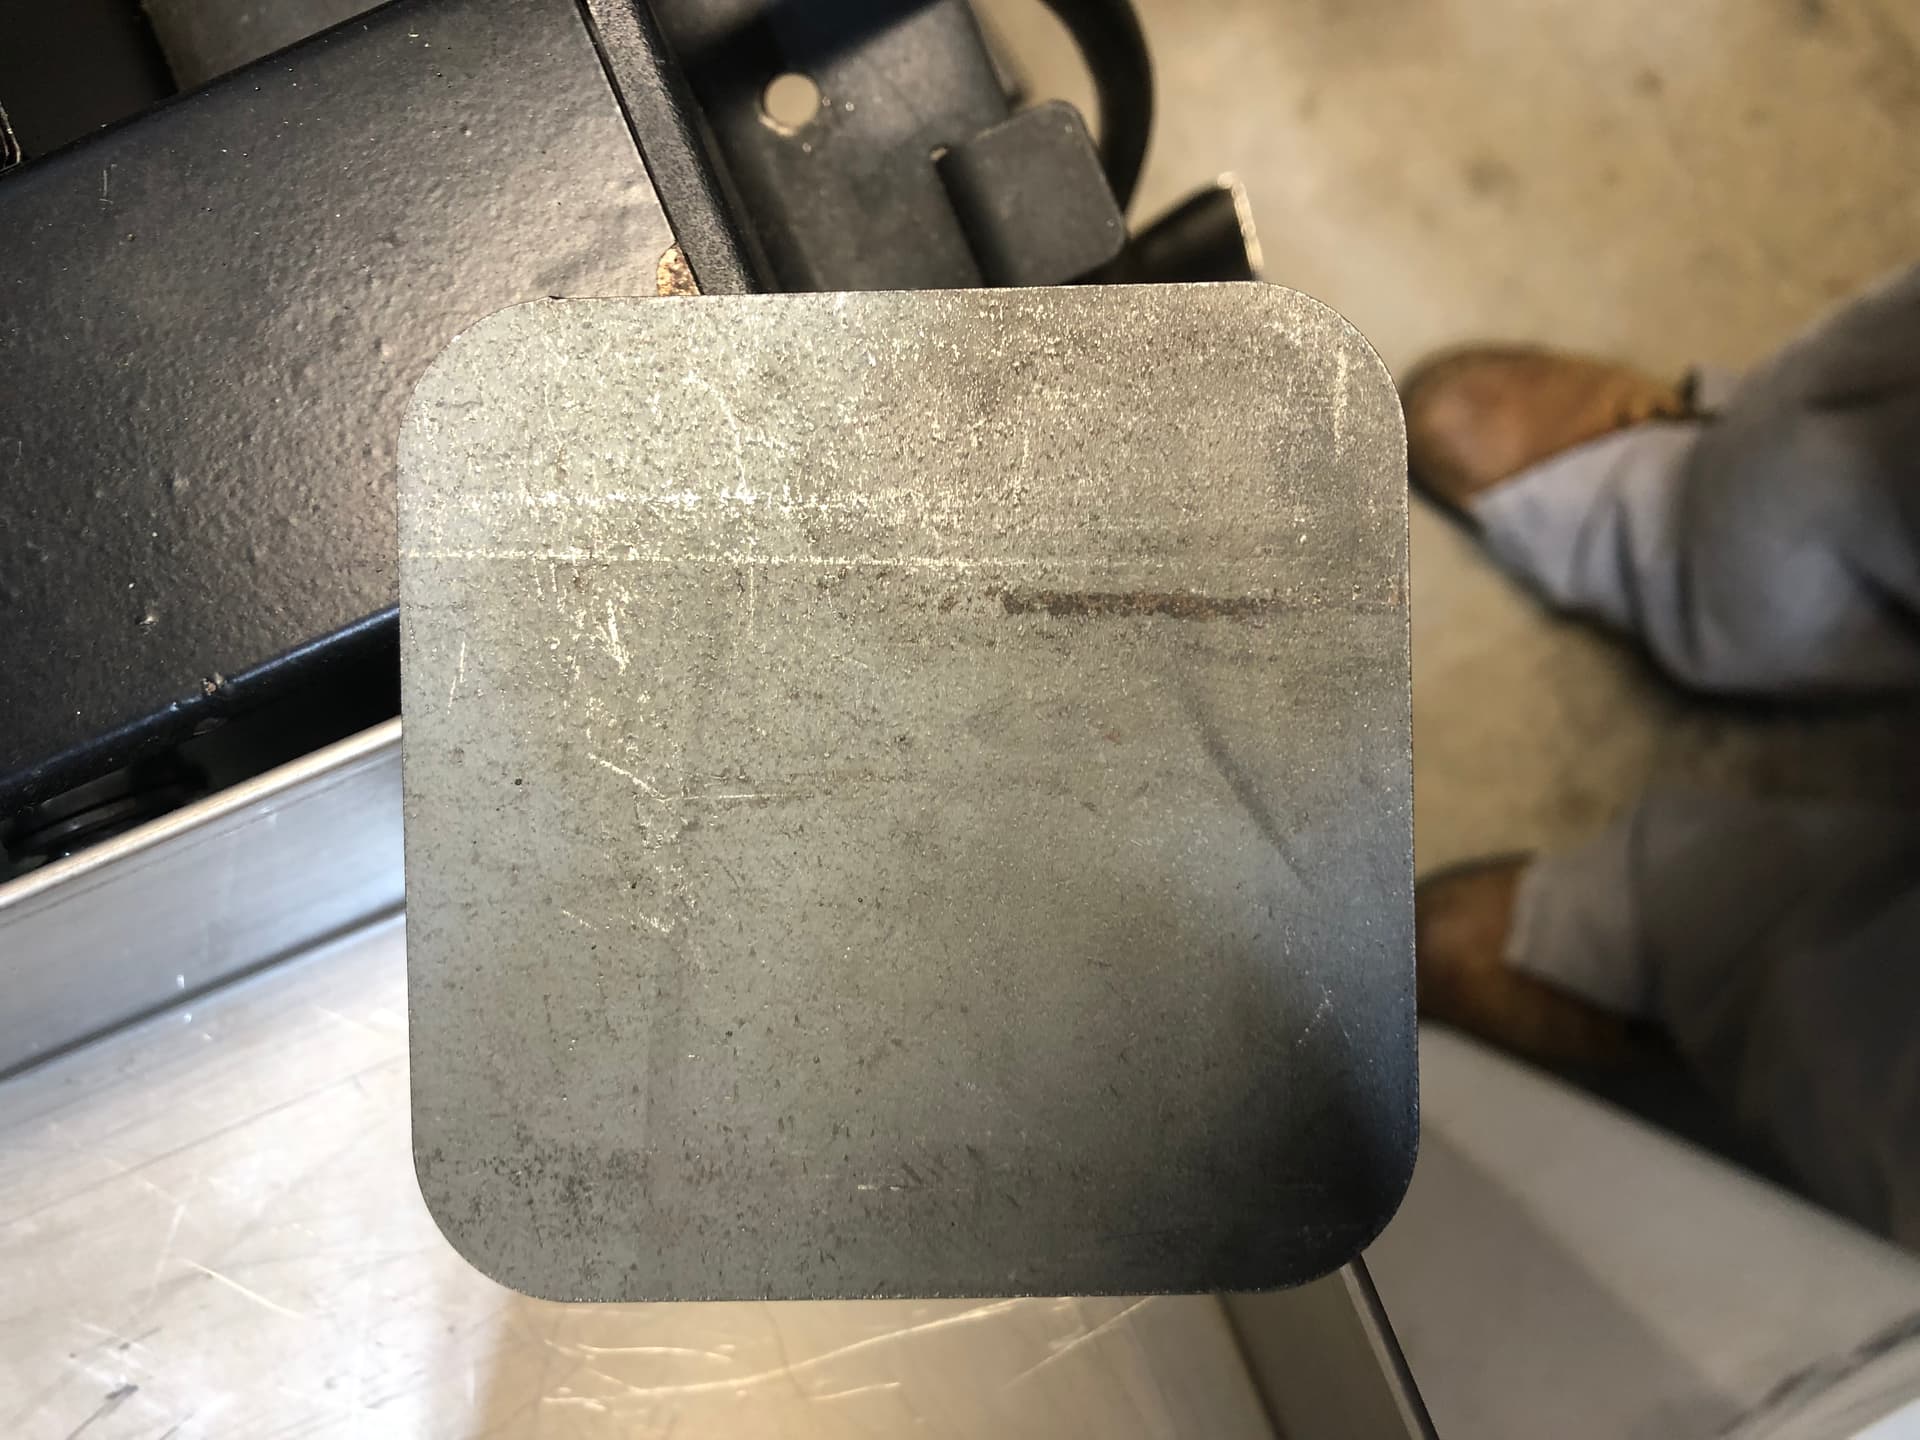
I am new to using my Crossfire and am having major problems with consistent custs. I am currently cutting hot rolled carbon that I measured 0.10 with a digital mic.
I tried running70 ipm, 0.15 pierce height, and tried a 1.0 pierce delay to see if my cuts would finish past the starts. I have also tried .5 pierce delay and did not seem to make any difference. I did have my motor coupler on the Z axis come loose and I tightened it and it seemed to be all right.
When I have a long uninterrupted cut it seems to do ok. When it does several cuts and has to adjust with z-axis sometimes it cuts and sometimes it won’t even go through the mill-scale.
I am using a Razorweld 45 and running 45 amps. I have ordered new consumables and know this may be part of my problem. The thing is I don’t understand how it could be consumables alone when some of the cuts are extremely smooth with very little dross.
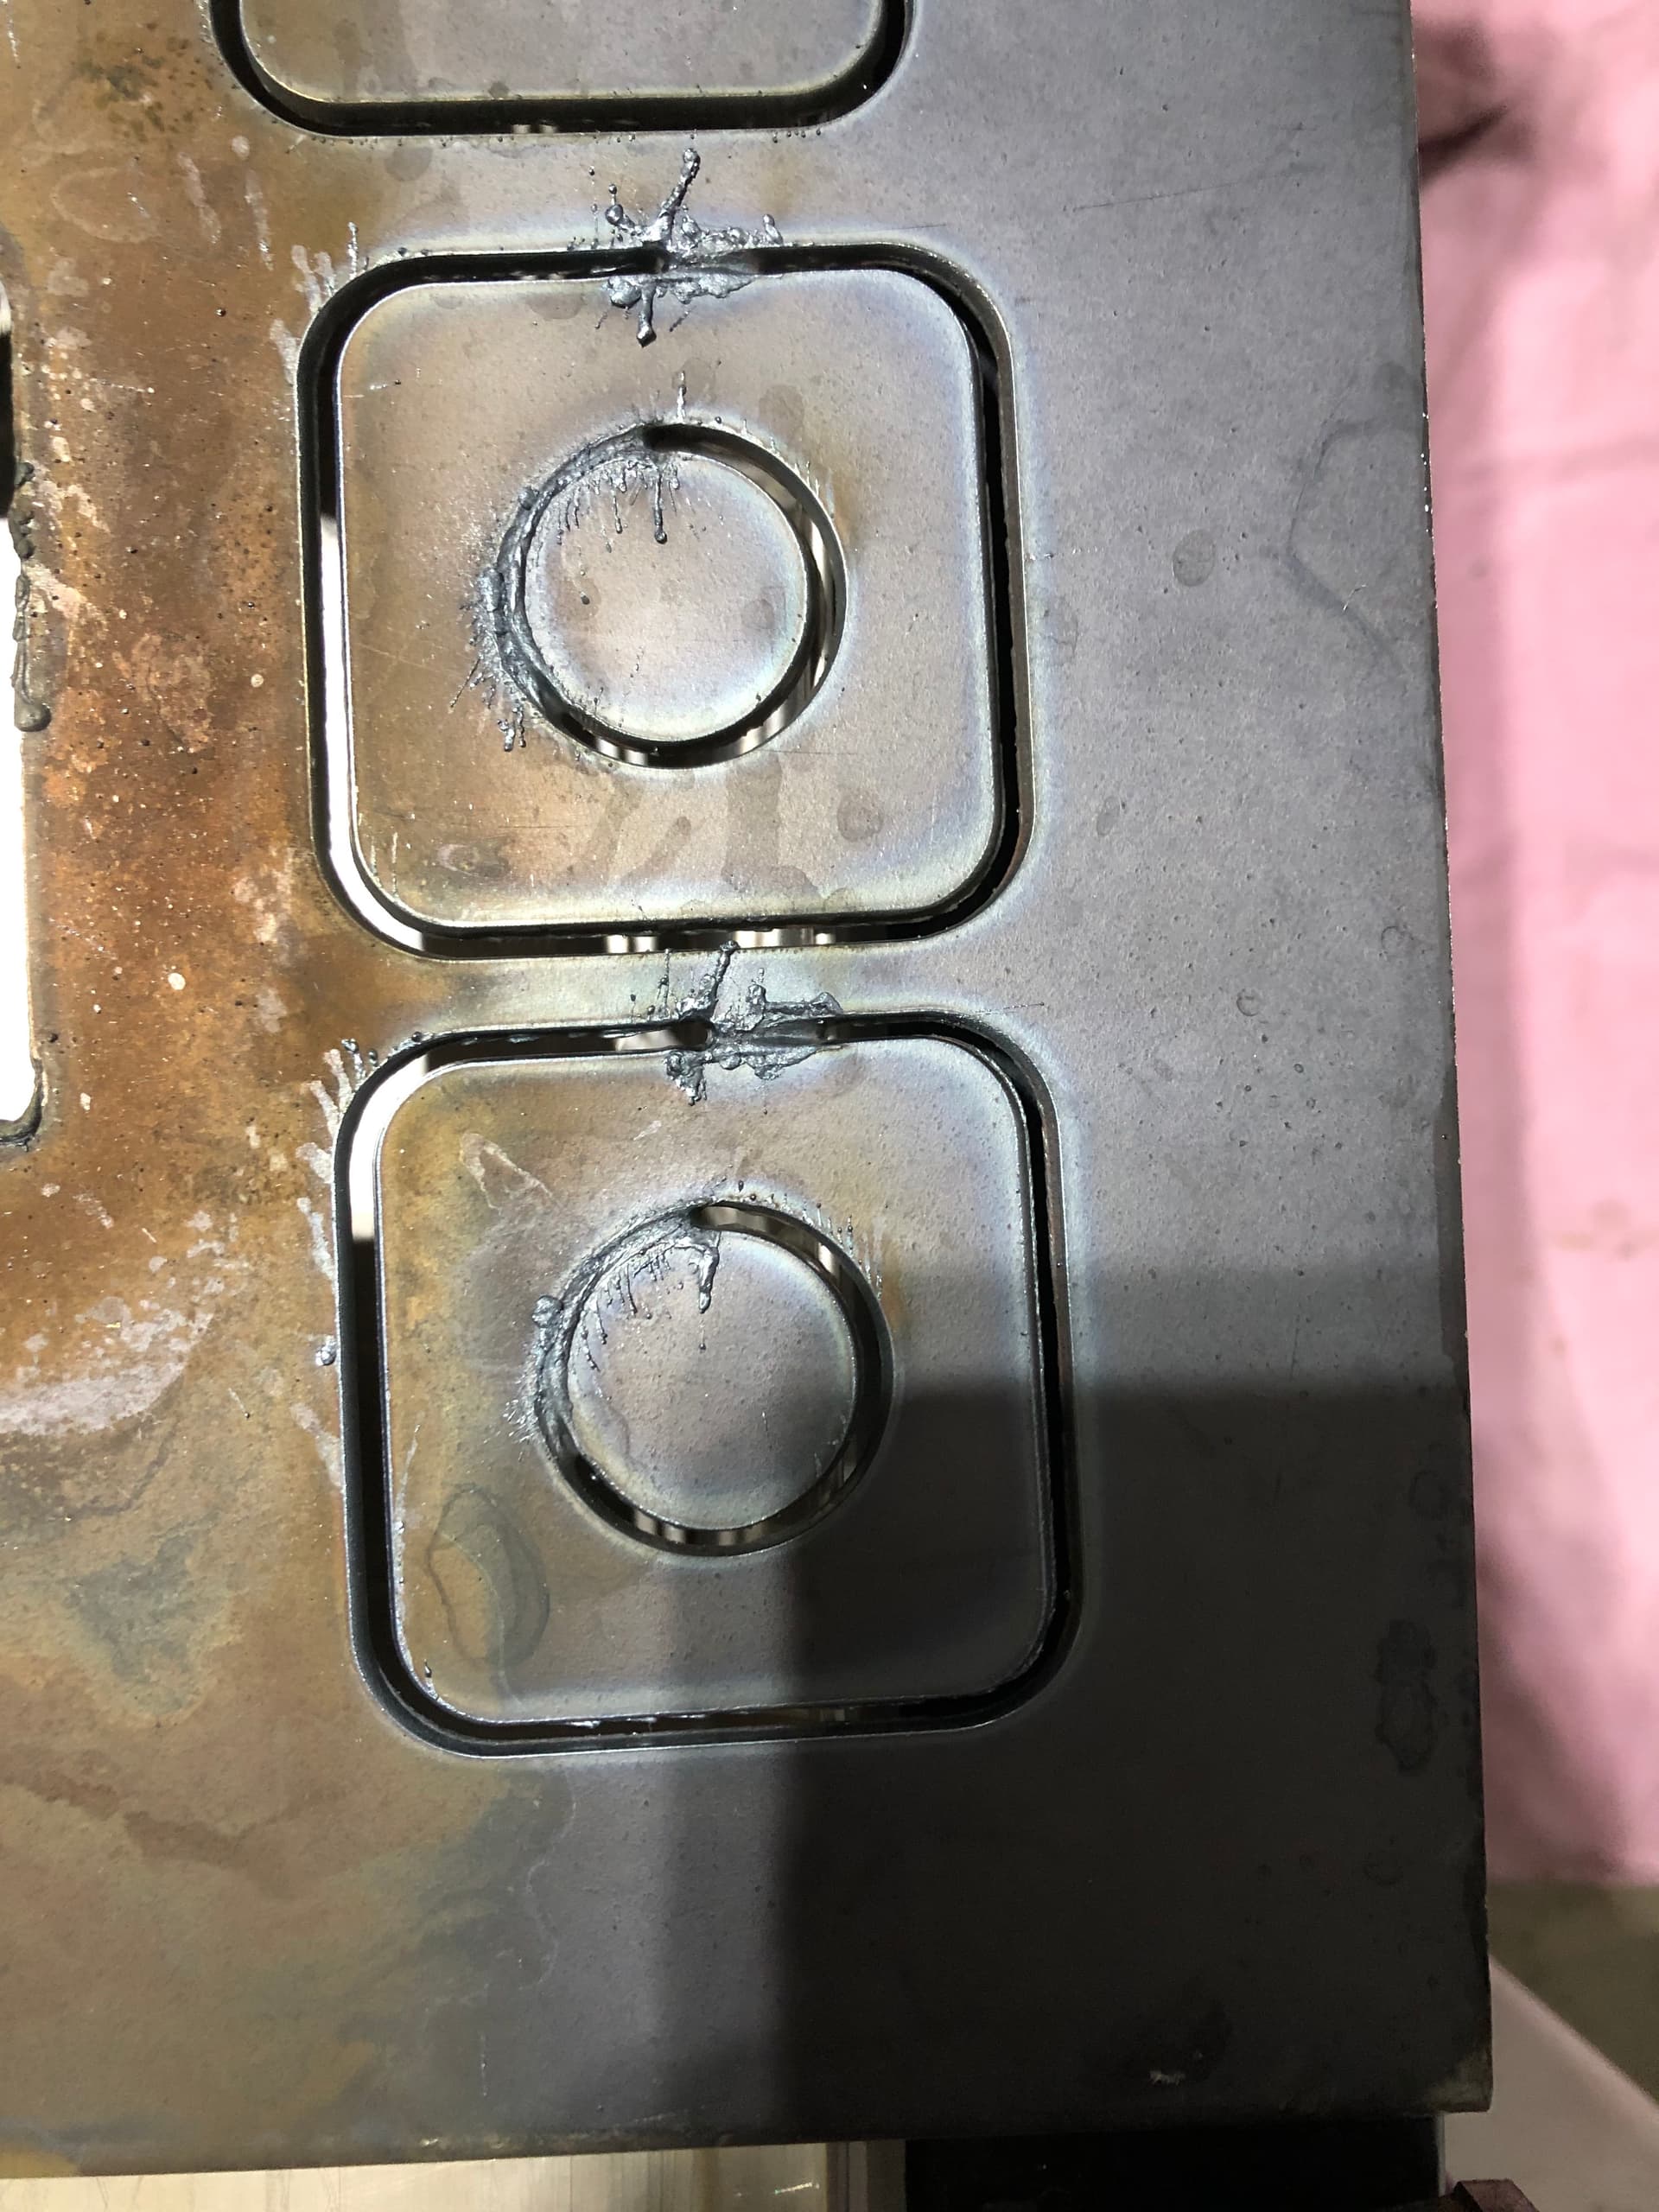
Also as a bit of advice, remove lead ins, lead outs, pierce clearance (if using Fusion), and set sideways compensation to center for your open loop cuts.
This will get rid of that burn mark that’s offset on those cut paths.
For the squares with circles, you need to implement lead ins to not create a large burn mark on your cut path.
WOW, thank you Kwikfab, that was fast! would the moisture be in my air line? I have a full filtration and dry system but haven’t checked it since I installed it.
I am using Fusion so I will romove lead ins, outs and pierce clearance. Can you tell my why I should remove pierce clearance? I understand removing lead in and out but not pierce clearance.
I should also say I was diagnosed with dementia early last year so it is more difficult for me to understand things than it used to be. Especially frustrating for a retired Mechanical Engineer.
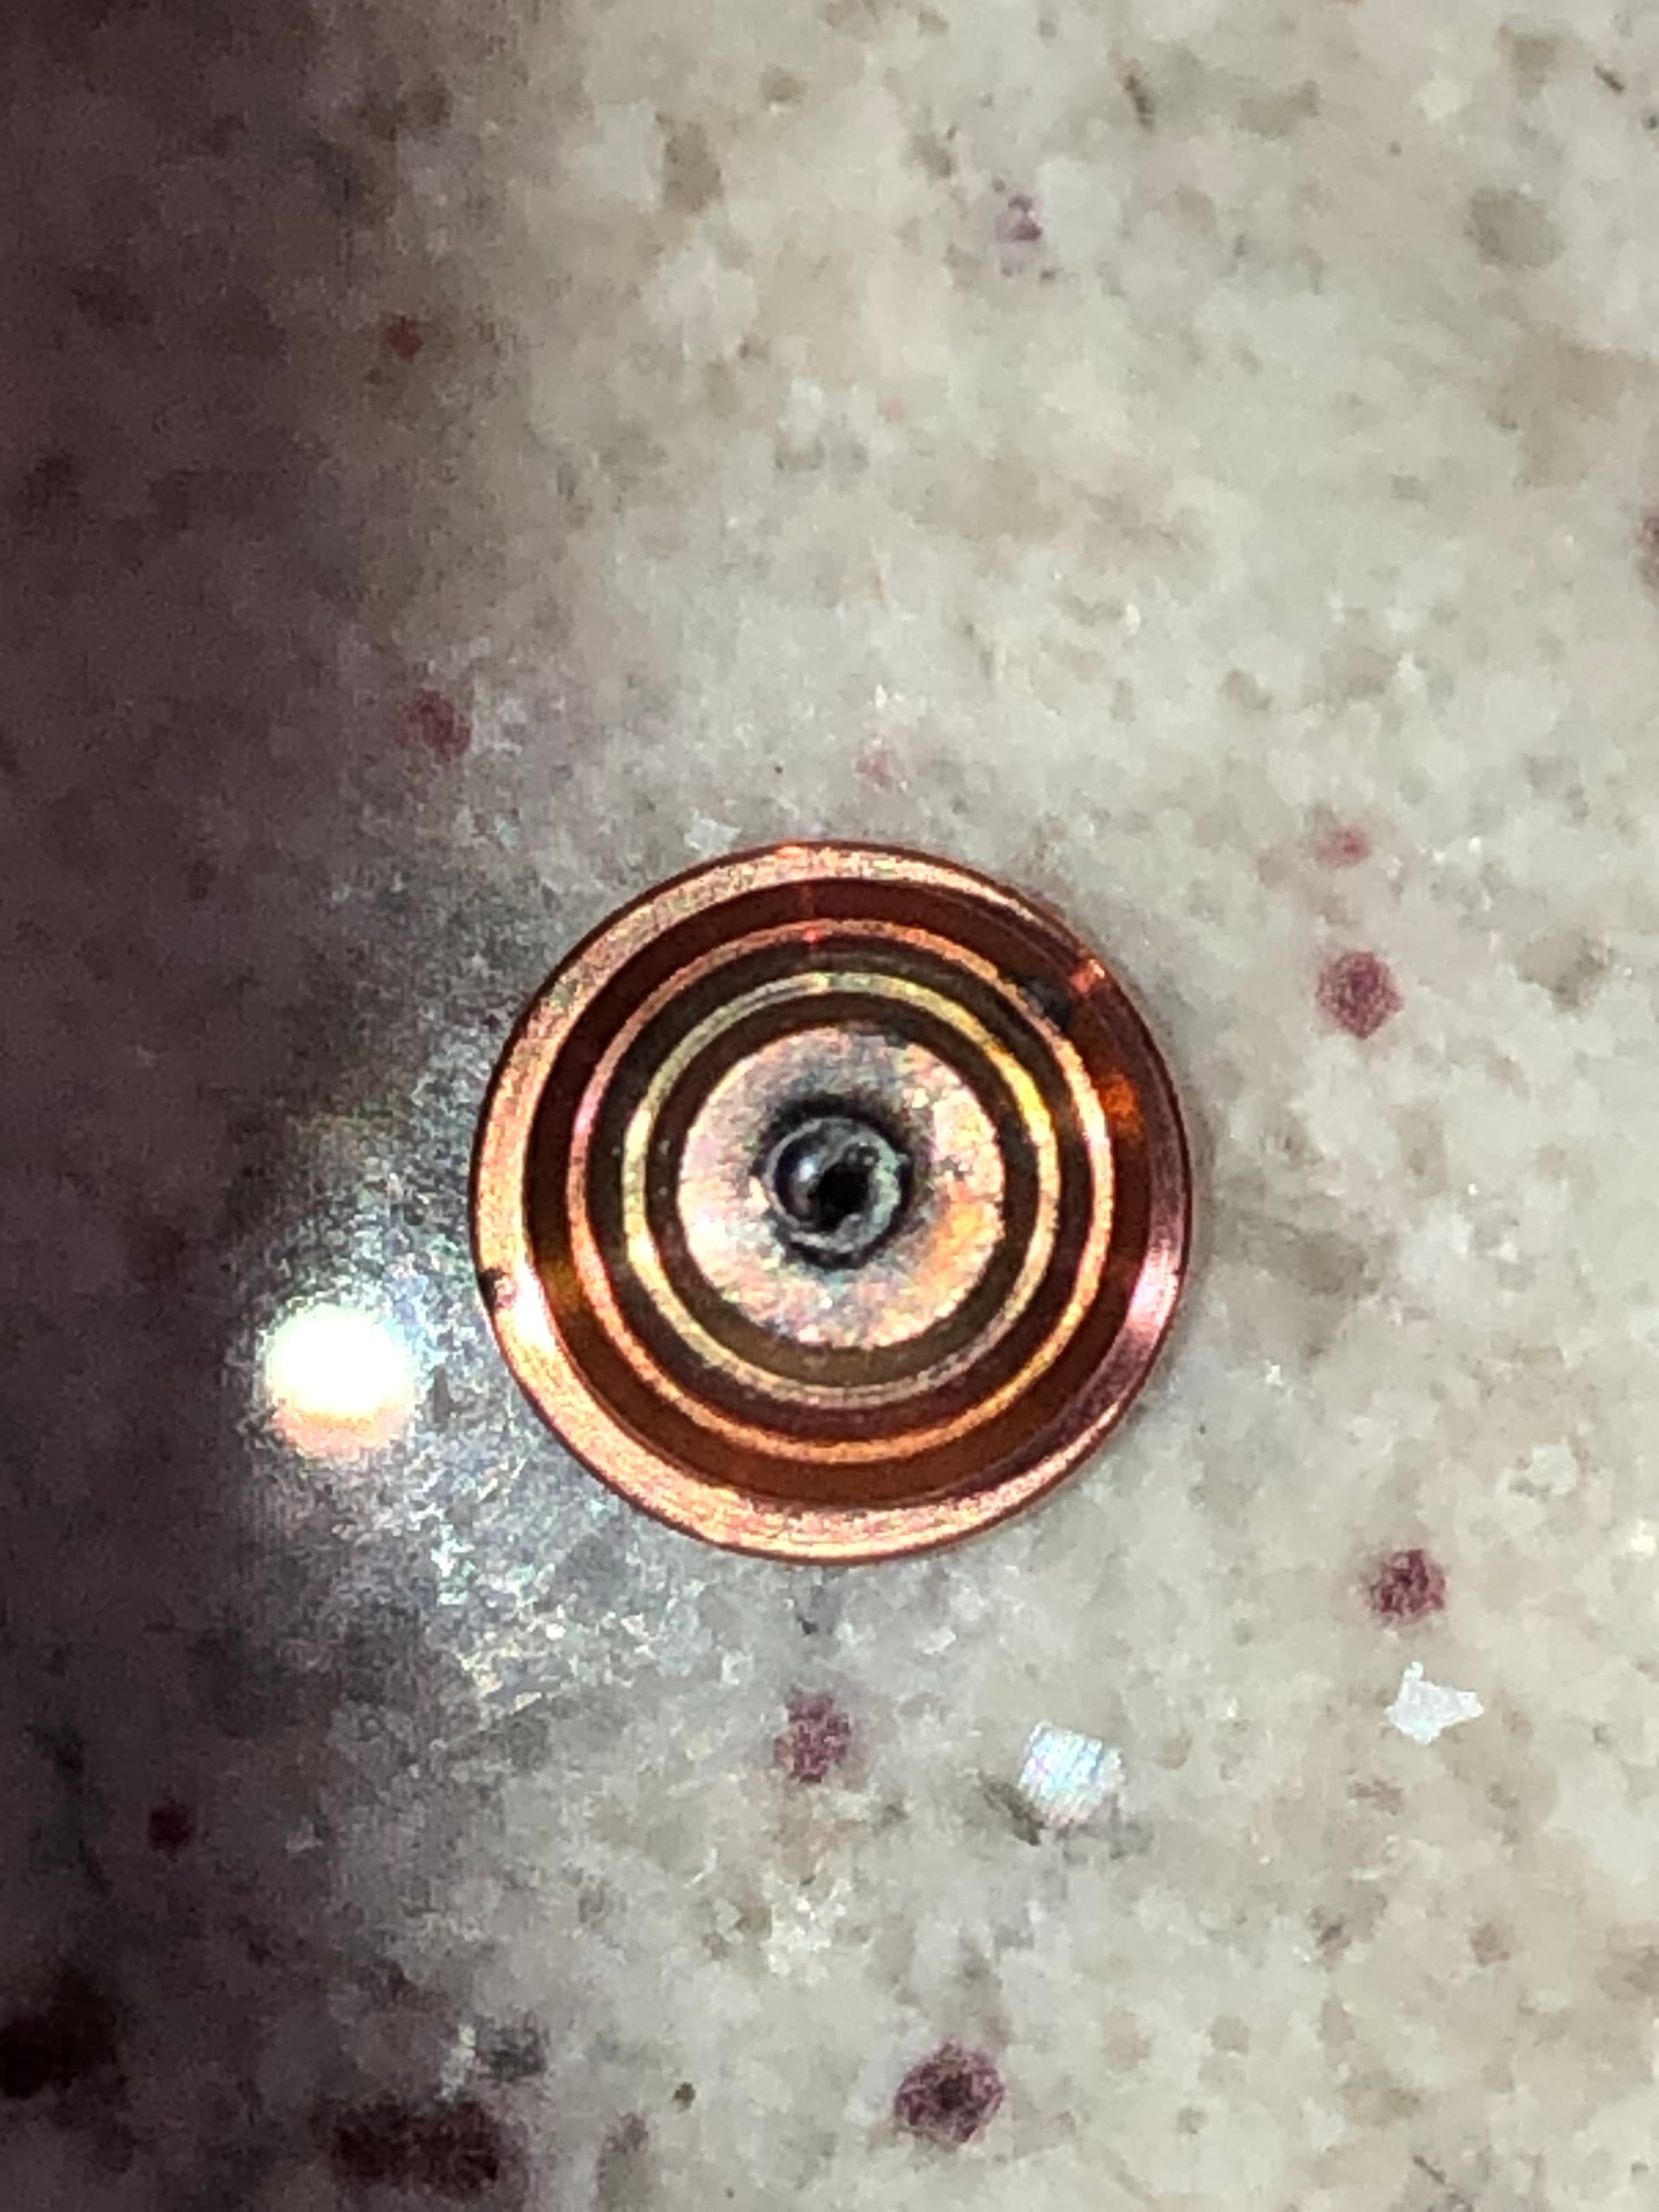
The reason why I suggested moisture being a factor is due to your electrode not looking completely worn, but showing massive swirls which is normally indicative of moisture.
Your nozzle though is worn as you can see that the orifice is no longer round. It is normal for a nozzle to wear out as you run through multiple pierces and/or long cut times. As it wears, the orifice can become a bit oblong and cause severe beveling as well as inconsistent cuts.
Moisture and incorrect pierce as well as incorrect cut heights can all quickly ruin consumable life as well.
The reason for removing pierce clearance is because Fusion adds a bit of an offset which is normally the equivalent of your kerf width. Removing it means your pierce will occur right on the cut path as intended.
I’m really sorry to hear about your diagnosis. While I suffer a lot from memory loss, it no way compares to your diagnosis. But I do find myself being able to remember stuff better by going through it over and over and over.
Feel free to save this video if it helps you to remember cutting open loops and the rules to apply.
While it makes it extremely difficult to do any troubleshooting when your consumables are compromised here is a few things to keep in mind.
Make sure that your work clamp terminal is secure into your plasma cutter, the lead and connections are in good shape and it is firmly clamped to material being cut.
You need to confirm that your z-axis is freely moving up and down. Manually run the torch up and down in fire control ( pgup and pgdn are the hotkeys) make sure it is moving freely, not binding or catching it all.
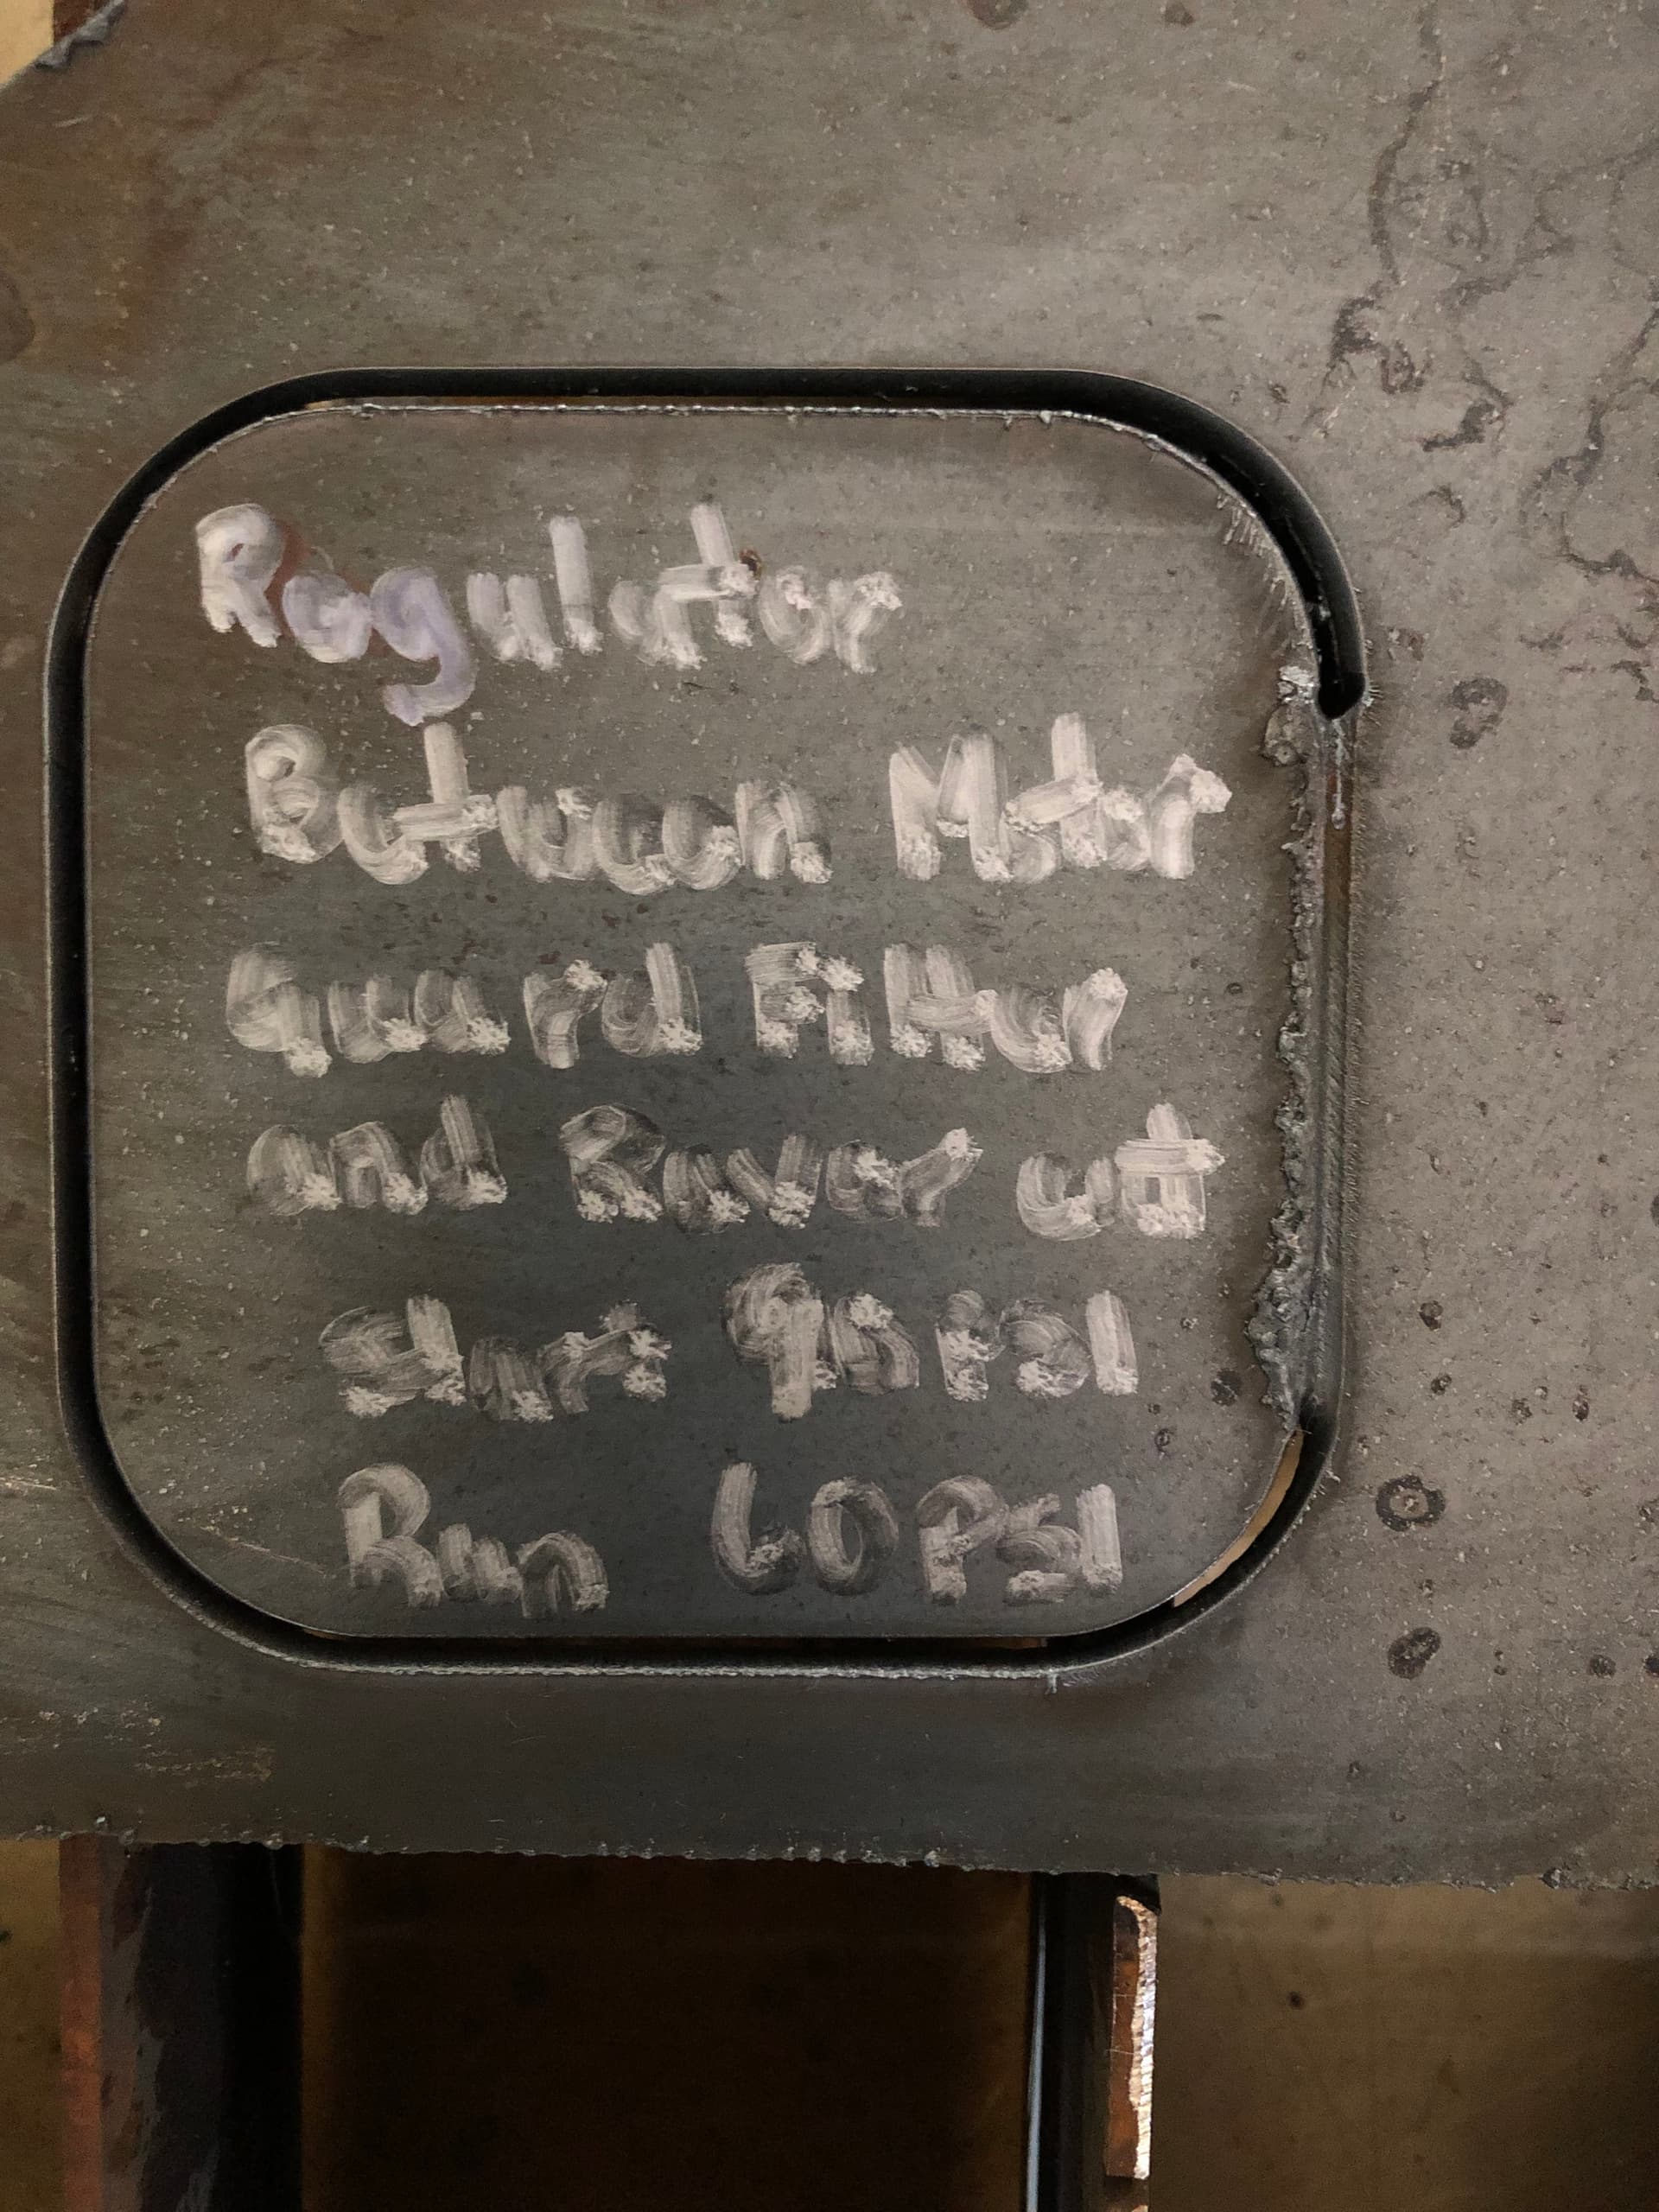
At the end of the day this is probably an air delivery issue either with the razor weld internal regulator or a overall system pressure drop issue.
One thing about this forum is everyone has there own way to do it, and they all work.
I have a hard time when people throw to much info all at once. So I will start you with some basics:
First off make sure you have your work clamp(ground) connected to the piece you are cutting, no slats or anywhere else.
You say you have air drying equipment, this is like everything else there is good and then there is not so good.
If you can take some pics of you air drying equipment or give a list of the equipment. Tell us the order that it is in, up to you cutter.
Air pressure and volume:
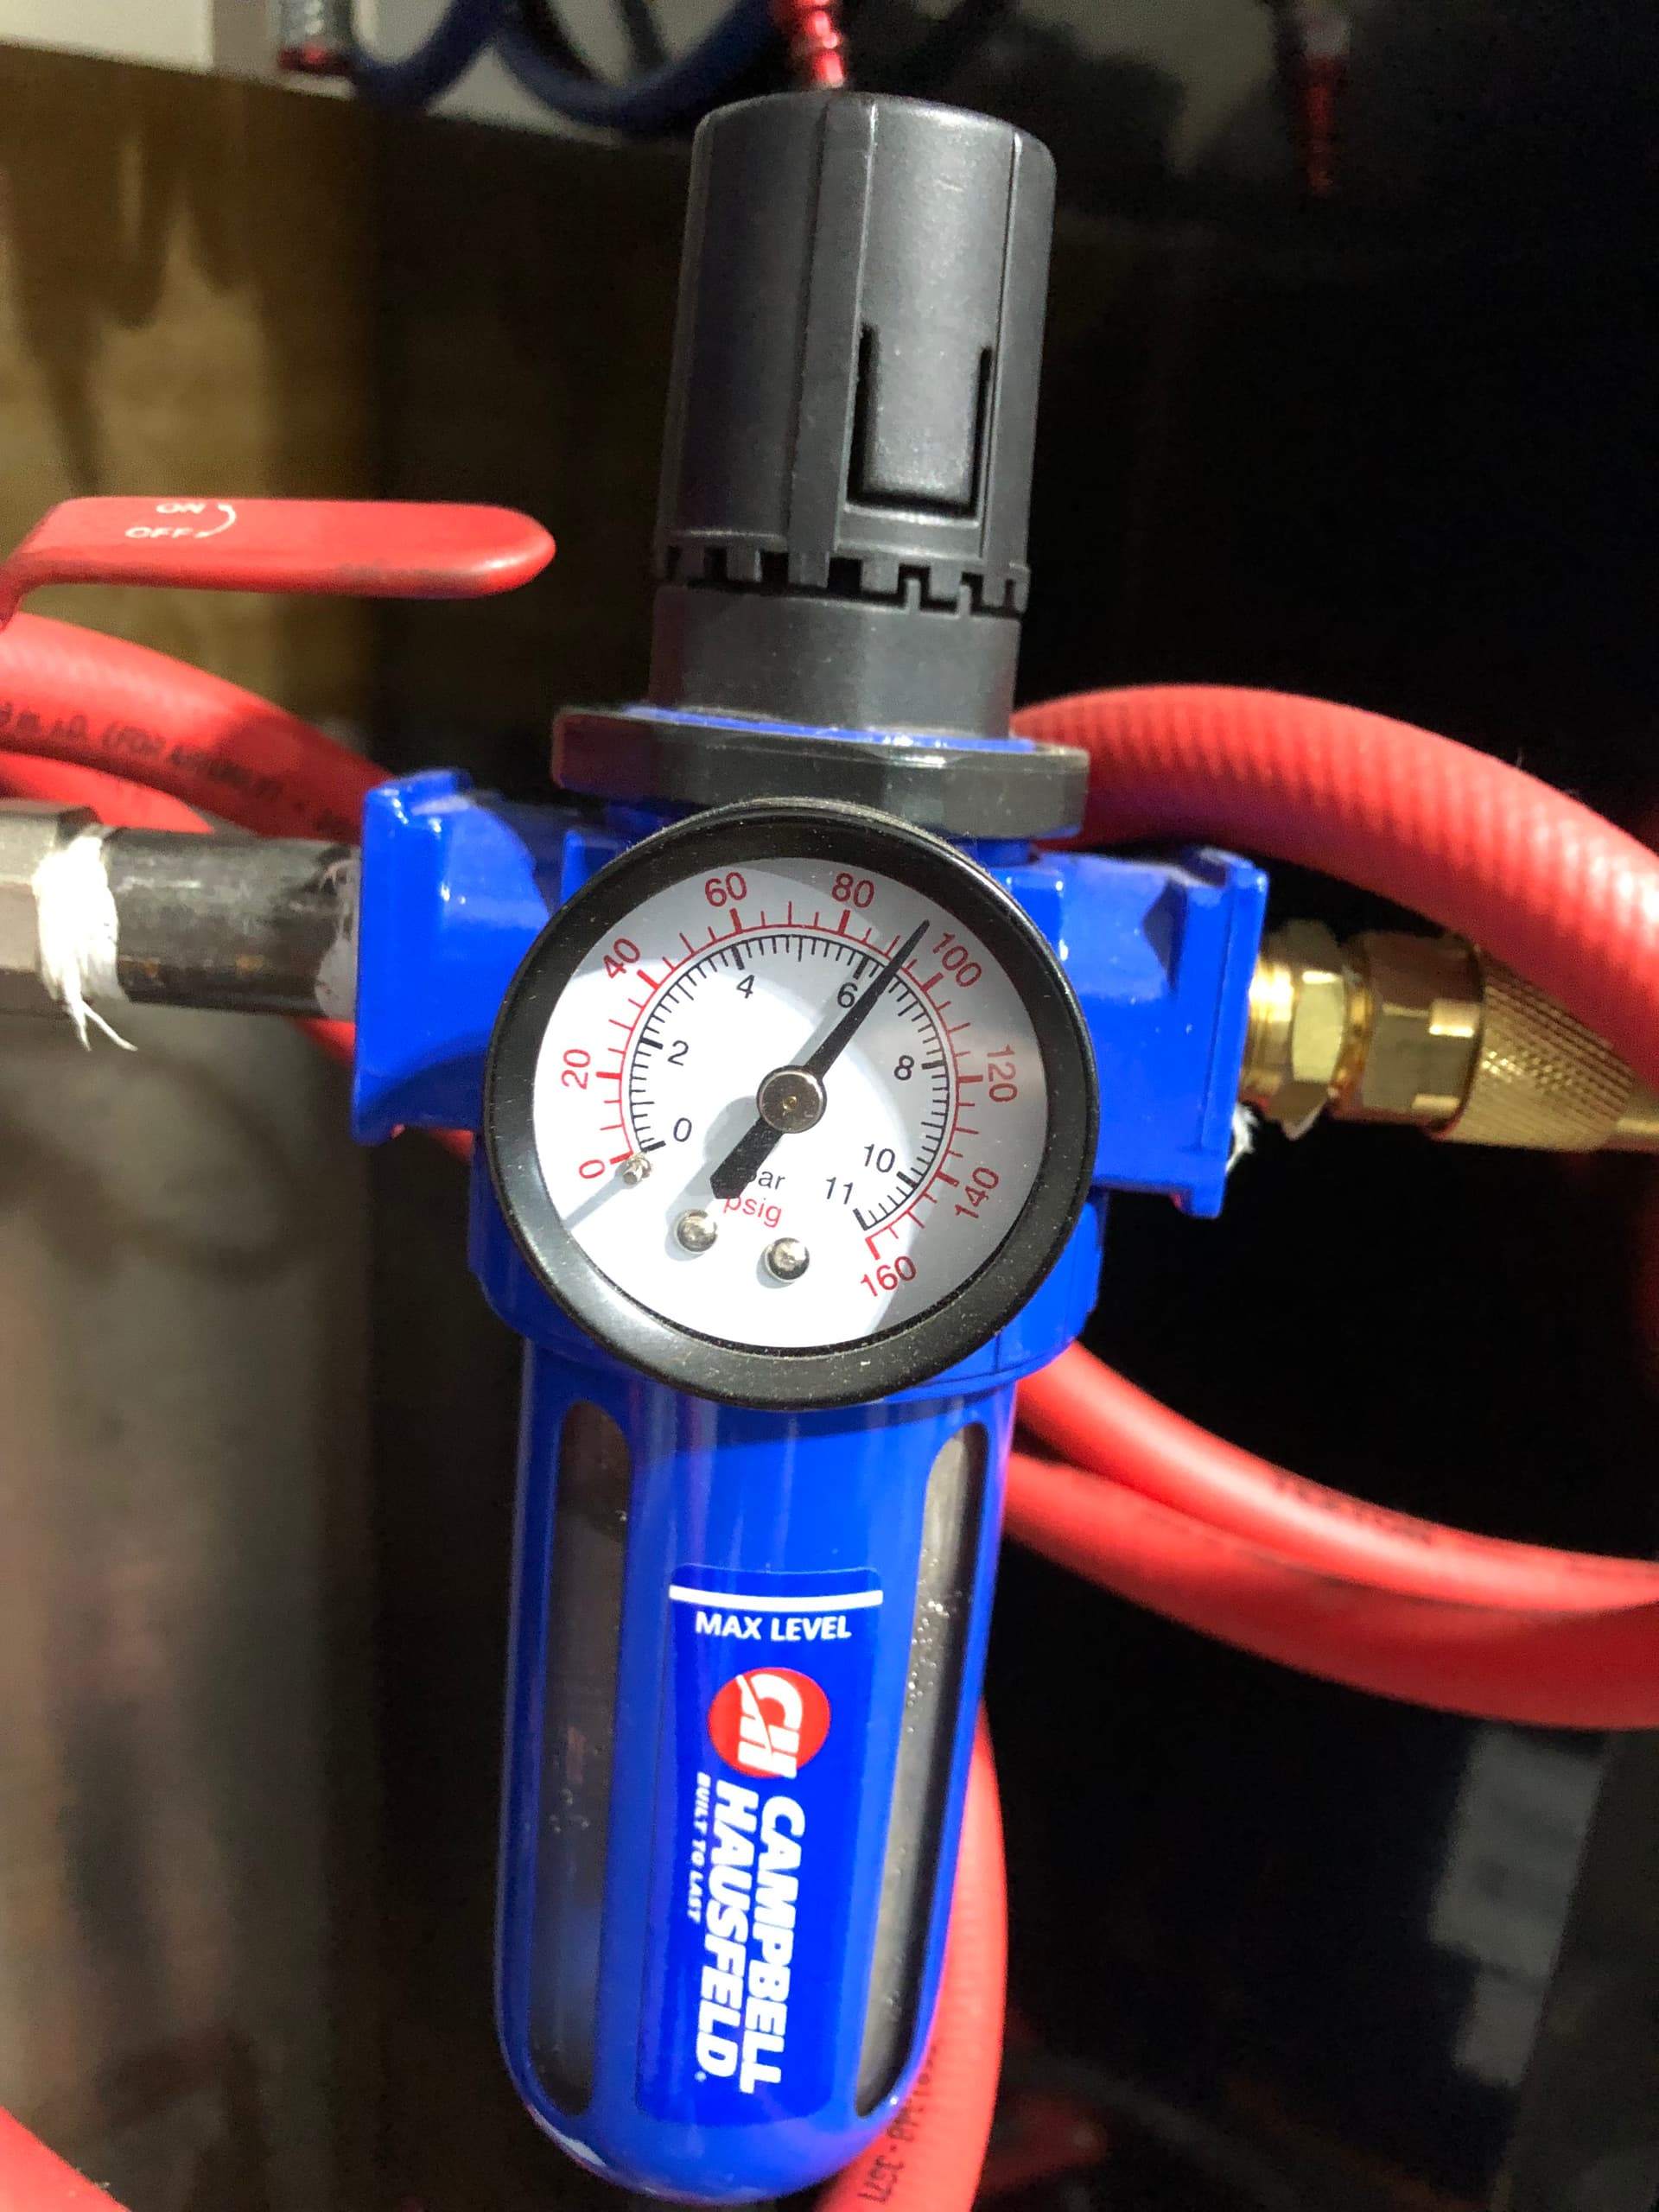
you will want to check the air pressure gauge on the front of your cutter (Razorcut 45)while its cutting and make sure you have 70psi. These machines are known for having bad or miss adjusted regulators inside. You should have at least 100-110 psi to the back of the cutter.
You talk about pierce height and delay, but nothing about cut height. make sure you cut height is .060” Just because you have the cut height correct in your software does not mean is correct at the torch.
Remember this forum can be overwhelming with all the advise you get, lots of time things get missed when people read through the posts that have been made and may give you wrong info.
There are some really really smart people on here and they are very willing to help, but some times they get frustrated if you don’t respond back quick enough or don’t do everything they tell you. Don’t let that get to you, they all mean well.
Keep asking questions and making notes, if I can do it so can you.
Thank you all for your replies. I started today with a new design on Fusion, 3’ rectangle with 70deg fillets and used all of the parameters suggested by Kwickfab.
30psi is insane pressure drop you’re going to have to figure out your system. If you’re not maintaining 70 at your machine you’re going to have issues.
60 is not enough. are you using that external regulator set or is it cranked all the way up?
to see if the cutters regulator is ok turn your external all the way up and test again. If it drops to 60 while cutting you will need to remove the cover on the cutter and turn the internal regulator all the way up. not test air flow. I think there is a button on the front of the cutter you can push for testing.
if you get close to what your external regulator is set at you are good. Leave the regulator set wide open and now get your pressure to your 70-75 mark with the external regulator.
If you did not see the pressure jump way up to almost what your external regulator was set at you will need to remove the INTERNAL regulator and re plumb the cutter or contact razor weld for a replacement. If you do remove it then you again will control the cutting pressure with the external regualtor.
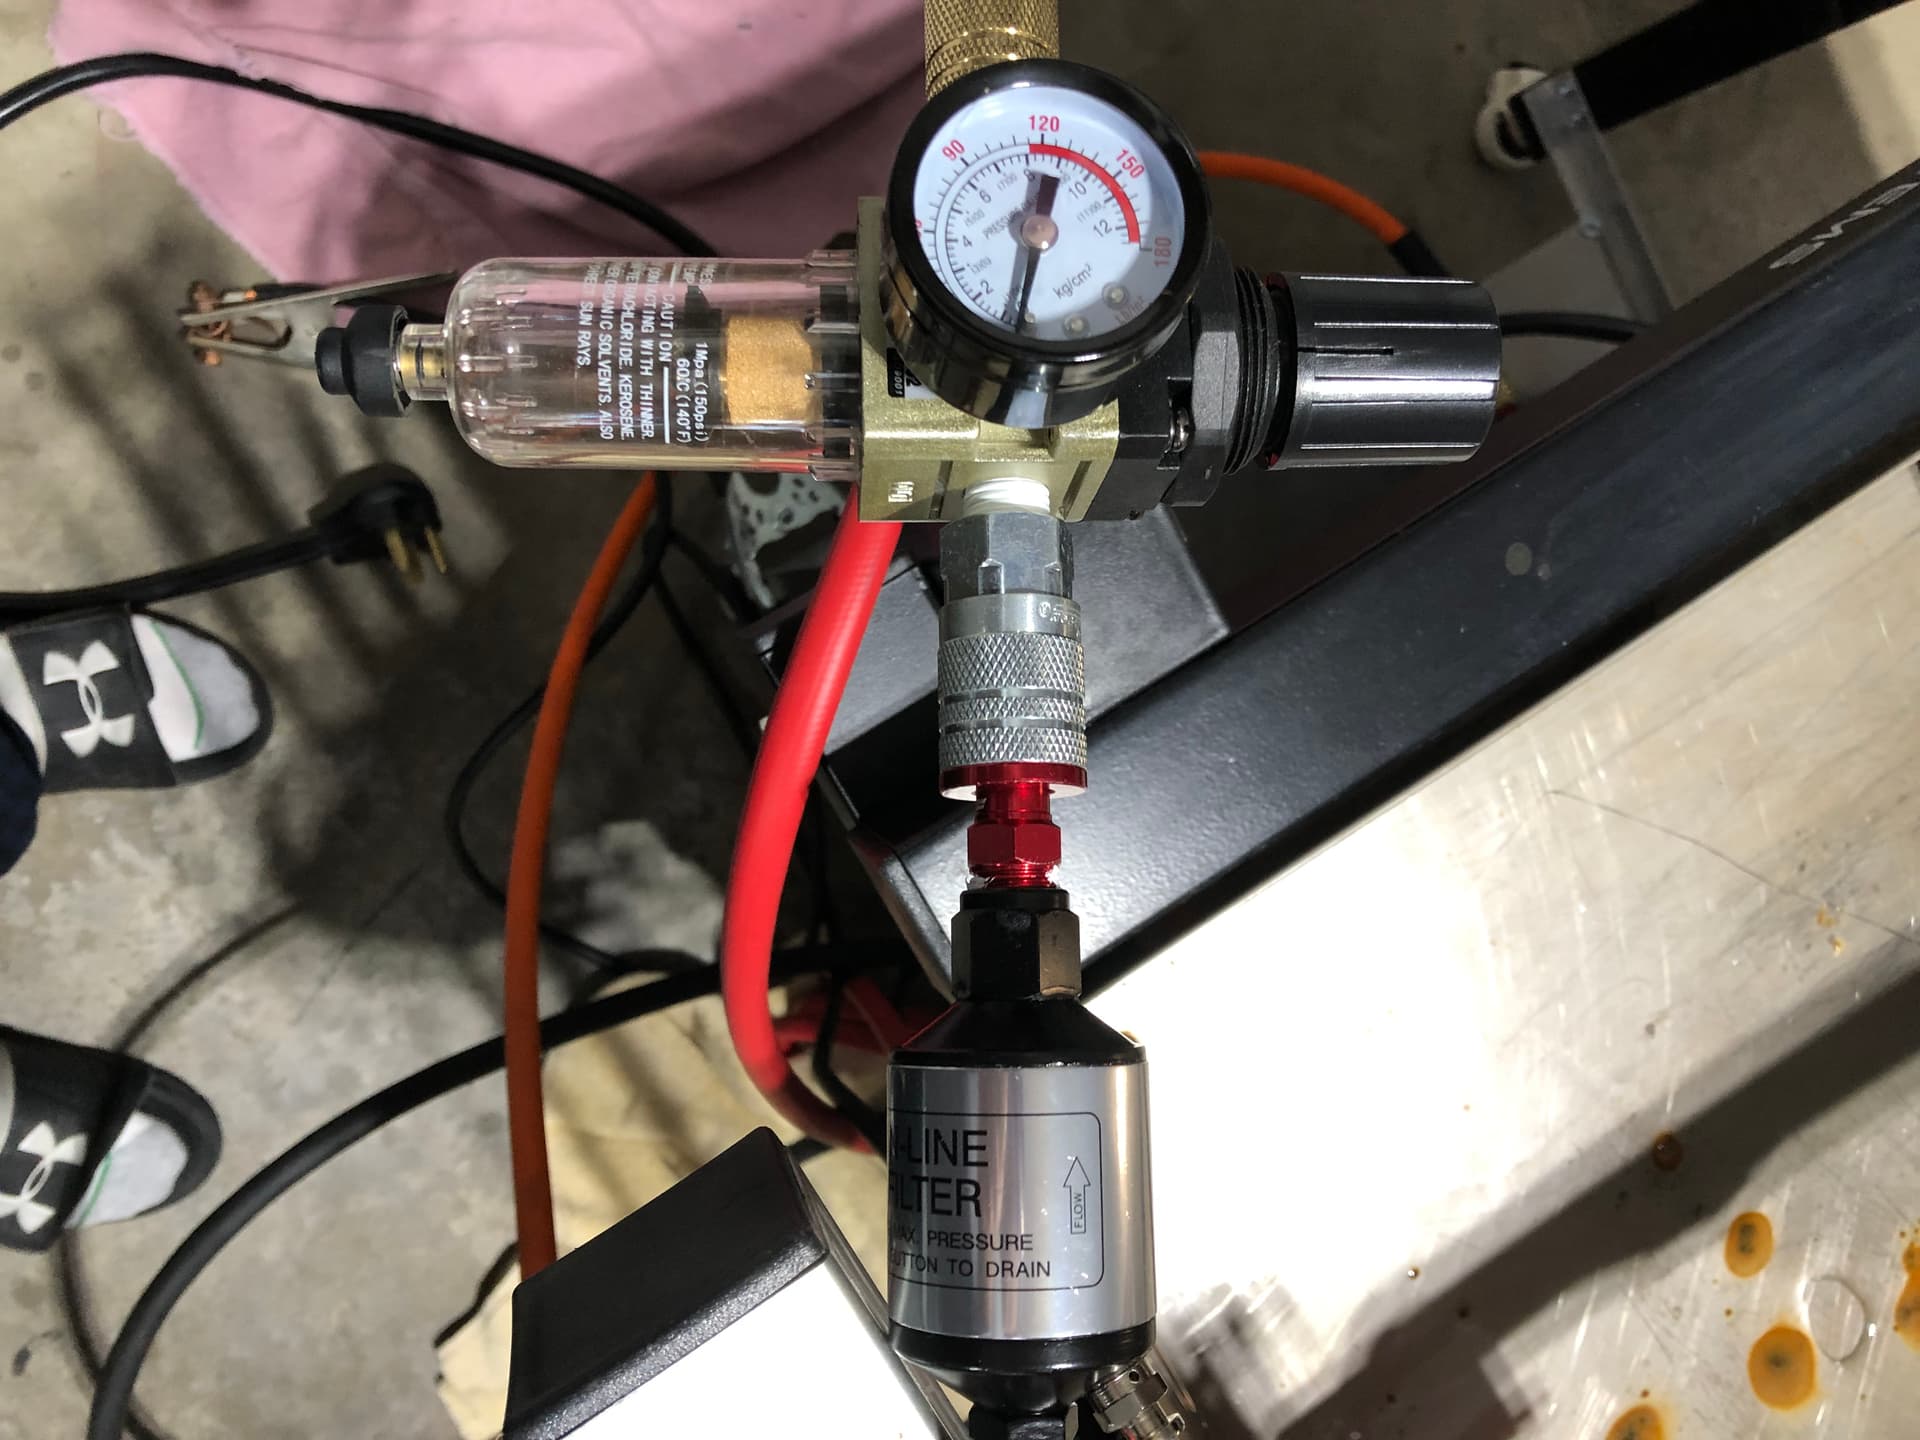
If that little filter is all you have to control moisture that’s not enough. you need a desiccant filter, if you do a search on here you will find lots of posts on dry air. with pictures.
Your Motorgard filter should be the last one before the cutter.
Make sure you have a auto drain on the bottom of your compressor tank and its set to open often enough to keep water out of the tank.
Update: Yesterday I had my wife help me open the cover and crank the internal pressure, (worried about missing steps with my dementia!). This gave me about 80psi static. When I pressed the second arrow button on the front of the machine to test dynamic I had about 70psi to 72psi.
Remember when I started I had a little less than 60psi dynamic. I tried a cut today and it was a little better but still poor quality. I am sure this is due to moisture and my extremely poor electrode which I have on order and a desiccant filter on order.
I also removed the regulator between the machine and the Motor Guard filter. With it in place I still was not getting high enough static pressure.
Luckily we found a video on Youtube showing how to remove the cover because we struggled to find the two screws in the front.
When I get the new electrodes and the desiccant filter I will give an update.
I want to thank each and every one of you. Because of my dementia I lost my ablility to drive, I require post it notes from my wife to remind me where she is and to perform some of the simplist tasks. You explaind things simply and thoroughly so that I could follow them and my wife with a degree in education could help.
This is one joy and hobby I was really looking forward to and almost gave up.I plan to make as many gifts for my children and grandchildren as I can.
If you have moisture in the system (which there is lots of indication that you do), that filter is probably past the point of helping. It is great to remove small particles and scant moisture. But, once it is wet, it is acting like a swamp cooler for your cutting operation.
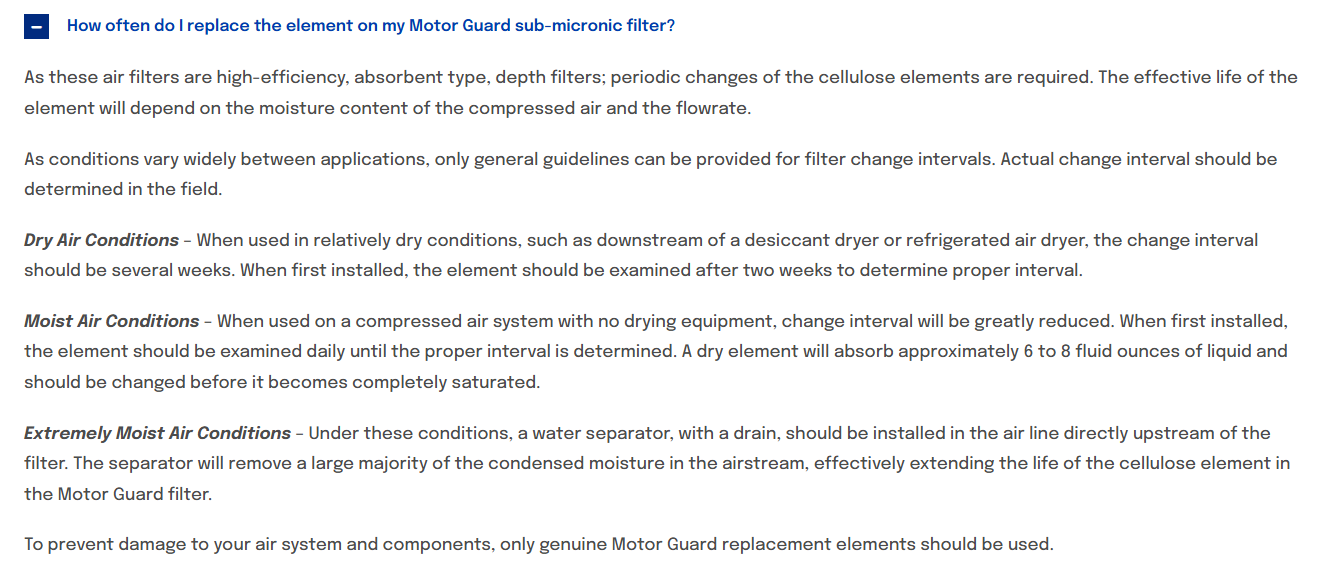
The motor guard filter is suppose to be replaced every few weeks. Here is guidance from the company:
Notice that they say to check the filter daily in wet conditions. I suppose with moisture you are looking for an increase of weight???
George (@mechanic416 ) gave a great suggestion in another thread: Put a pressure gauge before and after the MotorGuard filter and when your cutter is running, look to see if there is a pressure drop on the downhill gauge. That will give you an indication of when it should be changed.
Yesterday I was finally able to run a test after installing a desiccant filter and coalescing filter after the Motor Guard filter. I also replaced the Motor Guard filter replaced my electrode and shield. I now have 80psi static after adjusting the internal regulator in the Razorcut and 75psi dynamic. This was on 0.118 and 70ipm on sheet with tight mill scale. Here are the results and I am ecstatic. After so much frustration I think I finally have something I can work with and dial in. Again thanks so much guys this has been a lot of fun!!
I know what you mean. I ran my table for probably 6 months with the wrong cut height. I tried to be happy but would see others getting much better cuts.
Once you get it right, you finally have the little gremlin on your shoulder saying “verify’“ that all things are being considered if the cut worsens.