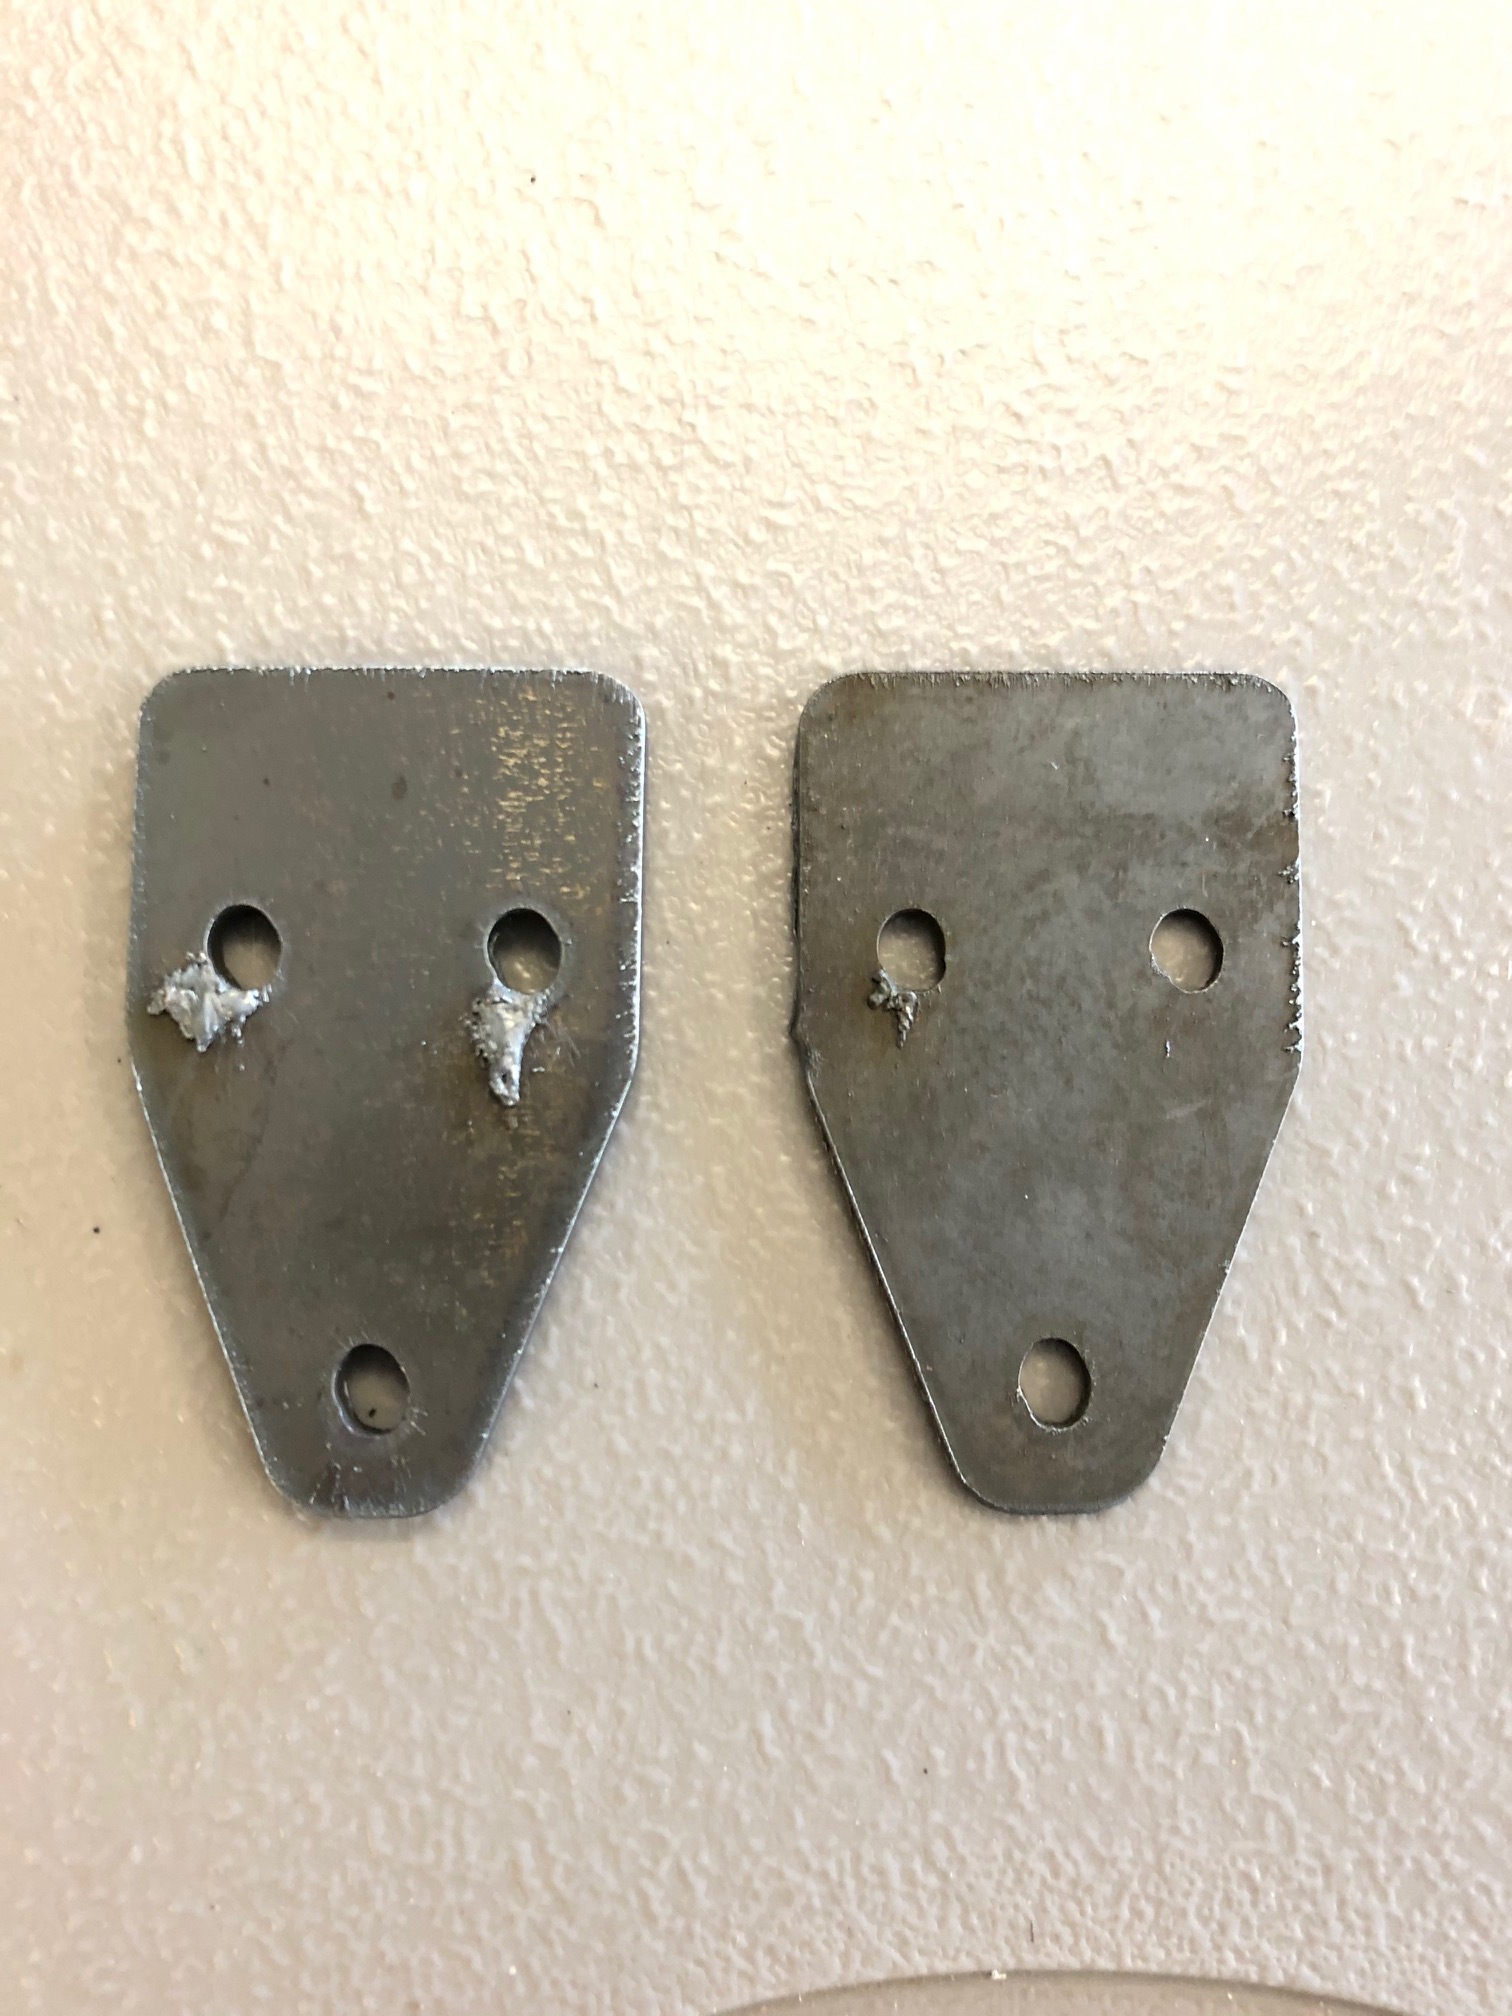
Looking for some advice on how to clean up my holes a bit. Pic below if I can get it to attach. I’ve done probably 20-30 runs trying different parameters and material thickness, and they’ve gotten noticeably better, but I’m hoping for just a bit cleaner and I’ve basically run out of things to change as far as I know. They don’t need to be perfect for these parts…they are only for screw holes. The holes are 3/16" diameter, and I’ve read that that may be at or near the minimum diameter hole I can expect to cut with a rig like this, so perhaps that may be an answer as well.
Details:
Crossfire XL w/water table
RazorCut 45 (newest gen) set at 45A and I have tried going down to 35A
1/16"…smallest shim
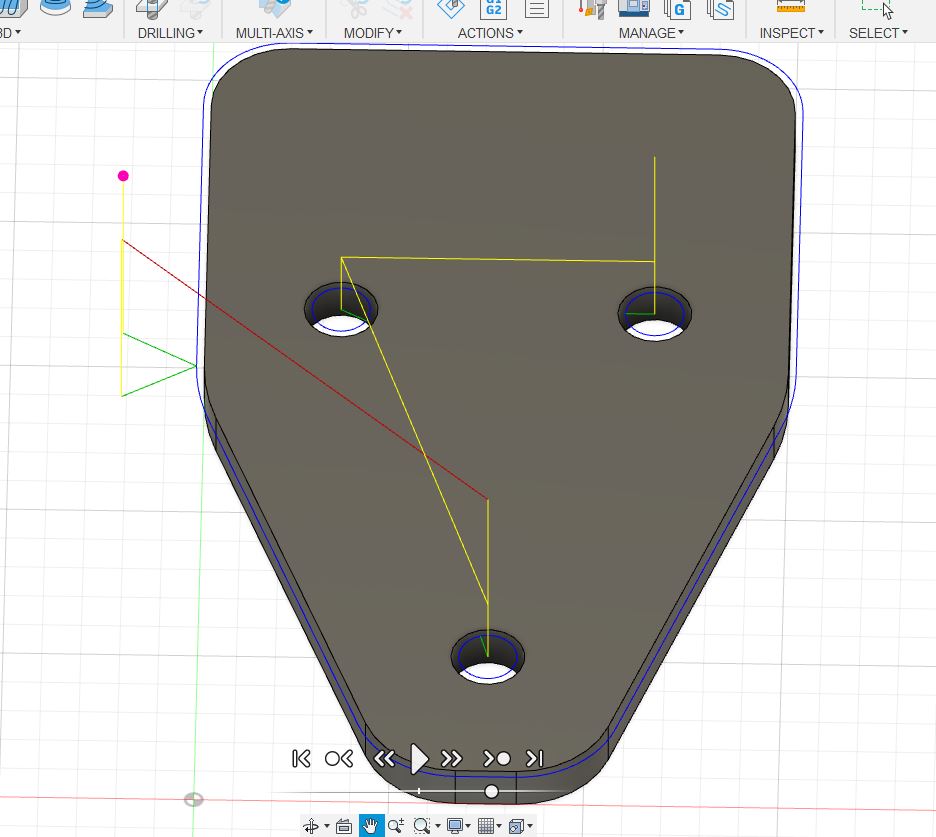
Fusion 360 and Fire Control
11 gauge and 16 gauge mild steel (16ga is on the right in pic)
Tried various feed rates from 25-100 ipm.
Tried pierce delays from 0.4 - 0.7 seconds
Eventually wised up and cut the part in two layers. Holes at 28 ipm and the perimeter at 50 ipm for 11 gauge, and 60/100 ipm for the 16 gauge. Those seemed to give the best results, even though I was expecting the ipm to be quite a bit higher, especially for the perimeter based on what I have read, but those seem to work well.
Have tried both radial (0.1in to 0.2in) and angled lead ins (60 and 90 deg) for the holes.
Typically try to pierce in the dead center of the hole with a lead in of about 0.08 in.
You’re not going to get perfect holes that small with that set up. A hypertherm with fine cut consumables would do a better job but still not perfect and a big investment when a 3/16" drill bit cost 4 bucks and makes a perfect hole.
Any hole I cut out smaller then 0.25" I just pierce and drill out unless its not a critical fit up I just cut them slightly larger and the bolt takes care of the rest.
Thanks for the info. I had thought about just piercing as you mentioned to serve as a locator and pilot for drilling, but wasn’t able to find anything in Fusion to do that. How are you doing that in Fusion? Thanks for the help.
Yeah 3/16 holes are small. I do 1/4 holes @.28 all the time on 16 gauge and they are pretty good but still have a slight deformity, even with hypertherm fine cut tips.
I’m not saying there isn’t a way to do it in fusion but I cant think of anyway to get a cut path generated like that in fusion. I do it this way because I cut out the hole thing at the same time just two different profiles in the same gcode.
Having a small dot in sheetcam it will generate the code though I found that out the hard way. I have a small 3"x3" logo I cut out to put on bigger products I make that I’ve had for years and one day I decided to open it in sheetcam made a cut path but when I went to cut it the torch was going all over the place piercing random spots before it finally cut my logo out. When I opened the file back up in fusion I seen all the little random lines I had from previous versions that I never deleted which sheetcam programmed right away.
In sheetcam you use the original hole as drawn, but use a ‘drill’ operation which only uses the exact center of the hole. You never have to make a separate ‘point’ as a target. It is quite handy.
It is a good program I just don’t use it very often and really not very familiar with all the ins and outs of it. Someday I’ll spend some time with it to get it dialed in.
Just to verify we’re troubleshooting the correct problem, on a clock face do all your holes share the same position for the lead-in?
The reason I ask, is that the exact same offset angle of all the holes could be explained by the lead-in, but also look suspiciously like backlash too.
Other than the slot-like quality of the holes, the cut seems pretty OK in the 16ga. I’d also suggest trying a perpendicular lead-in if you haven’t already. That’s 90% of what we used with big lasers, and also what I found worked best for my Crossfire Pro on smallish holes in 16ga. You’re definitely pushing the lower limits for hole size though from what all the guys with more experience in plasma than me say.
Nope, all of the lead ins come from different directions. That’s just how Fusion generated the paths. I’m guessing I can change that, but I’ll need to figure out how. I’m only on day 3 of all of this. I did take note of that and wasn’t sure if it contributed to the problem or not, but it is why I tried to get the pierce directly in the center of the hole. I did try several lead in angles (and radials), but found 90 degrees to be the best, as you had alluded to.
True. And I could be crazy, or it could be the camera angle, but the radius in the middle on the left side of the part looks like it could be higher up than the one on the right side, and that would be the same deformation caused by backlash as the holes if it turns out to be more than camera angle.
That must just be the camera angle. I inspected the parts just now and they are symmetrical. I am however getting a bit of scarring on that radius (it’s where the lead in and lead out are located). Not sure why, though.
Just a thought, but you could try piercing the holes first, then using a pause in the program, clean the slag off the area around the pierce holes (which would also allow the sheet to cool slightly). Then start the program back up to cut those holes without the pierce. You might find that a clean top surface and a little less heat are all it takes for the holes not to burn out if all the other variables are already accounted for.