When Doing a Dry Run my cross fire pro does not go to the right spot to cut that shows up on my lab top… Is this normal?? My impression was the machine moves to the cut position, then mirrors fire control …
I Did Zero in the Axes in the conner point… it seems the robot does not get the code to move properly…
In your CAM program, you chose an origin point for the drawing. Most people set that at the lower left corner of the drawing. When you zero all axis on the table, that zero point is the origin point on your drawing. If you want the part to cut at a different spot, jog the torch to that spot and hit “zero all axis” in that spot.
Did you run the right break in program? The Pro uses a different break in than the standard Crossfire.
I think you’re still not understanding how to locate your cuts on the table. You don’t do that in Sheetcam. You move the Torch to the spot where you want your origin located and hit “zero all axis” there. Firecontrol will put your drawing wherever your torch is zeroed.
The break in won’t have anything to do with your problem. Can you video or do a step by step description from load a program into fire control til hitting the start button.
Your drawing origin point is in the lower right corner. Those white cross hairs on the computer screen are where Firecontrol thinks the torch is located in relation to your drawing. You have the torch zeroed at the lower left corner of the table, but the origin of your program is at the lower right corner. As far as Firecontrol is concerned, your program is off the table to the left.
You can fix this in two ways. The first being to use the “set program origin” function in Firecontrol. Click the “set program origin” button and five green squares will appear on the drawing. One in each of the four corners and one in the center. To get the movement you are expecting, click on the box in the lower left corner to set that as the origin. With that as the origin, Firecontrol will know that the spot where the torch is zeroed is the lower left corner of the program.
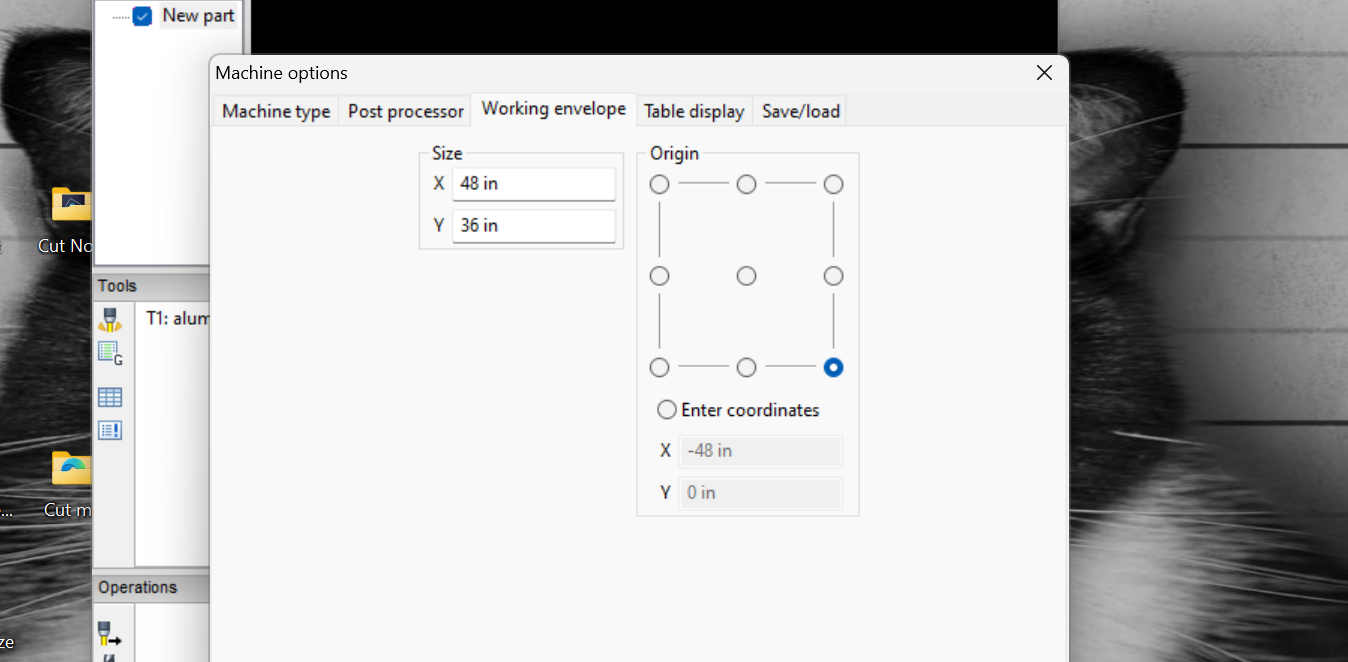
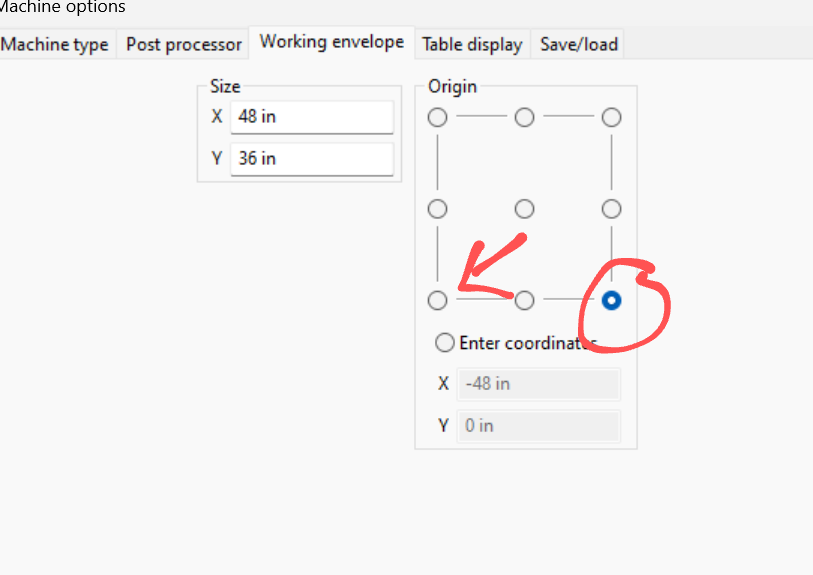
The correct way to fix this is to use the lower left corner of the drawing as the origin point in your CAM program. In Sheetcam, that is set in the “machine options” under “working envelope” and “table display”.